WorkBuddy
Download
Focus Mode
Font Size
WorkBuddy is an all-scenario desktop AI agent launched by Tencent Cloud, compatible with the QQ / WeCom ecosystems, and capable of local computer operations and multi-model switching. This document describes how to configure and use Tencent Cloud CMR in WorkBuddy.
Installing WorkBuddy
If you are using macOS, see the macOS Installation Guide to install WorkBuddy.
If you are using Windows, see the Windows Installation Guide to install WorkBuddy.
Obtaining an API Key
Attention:
After creation, make sure to copy and securely store the API Key. Once you close the success dialog, you will not be able to view the complete API Key again.
Configuring WorkBuddy
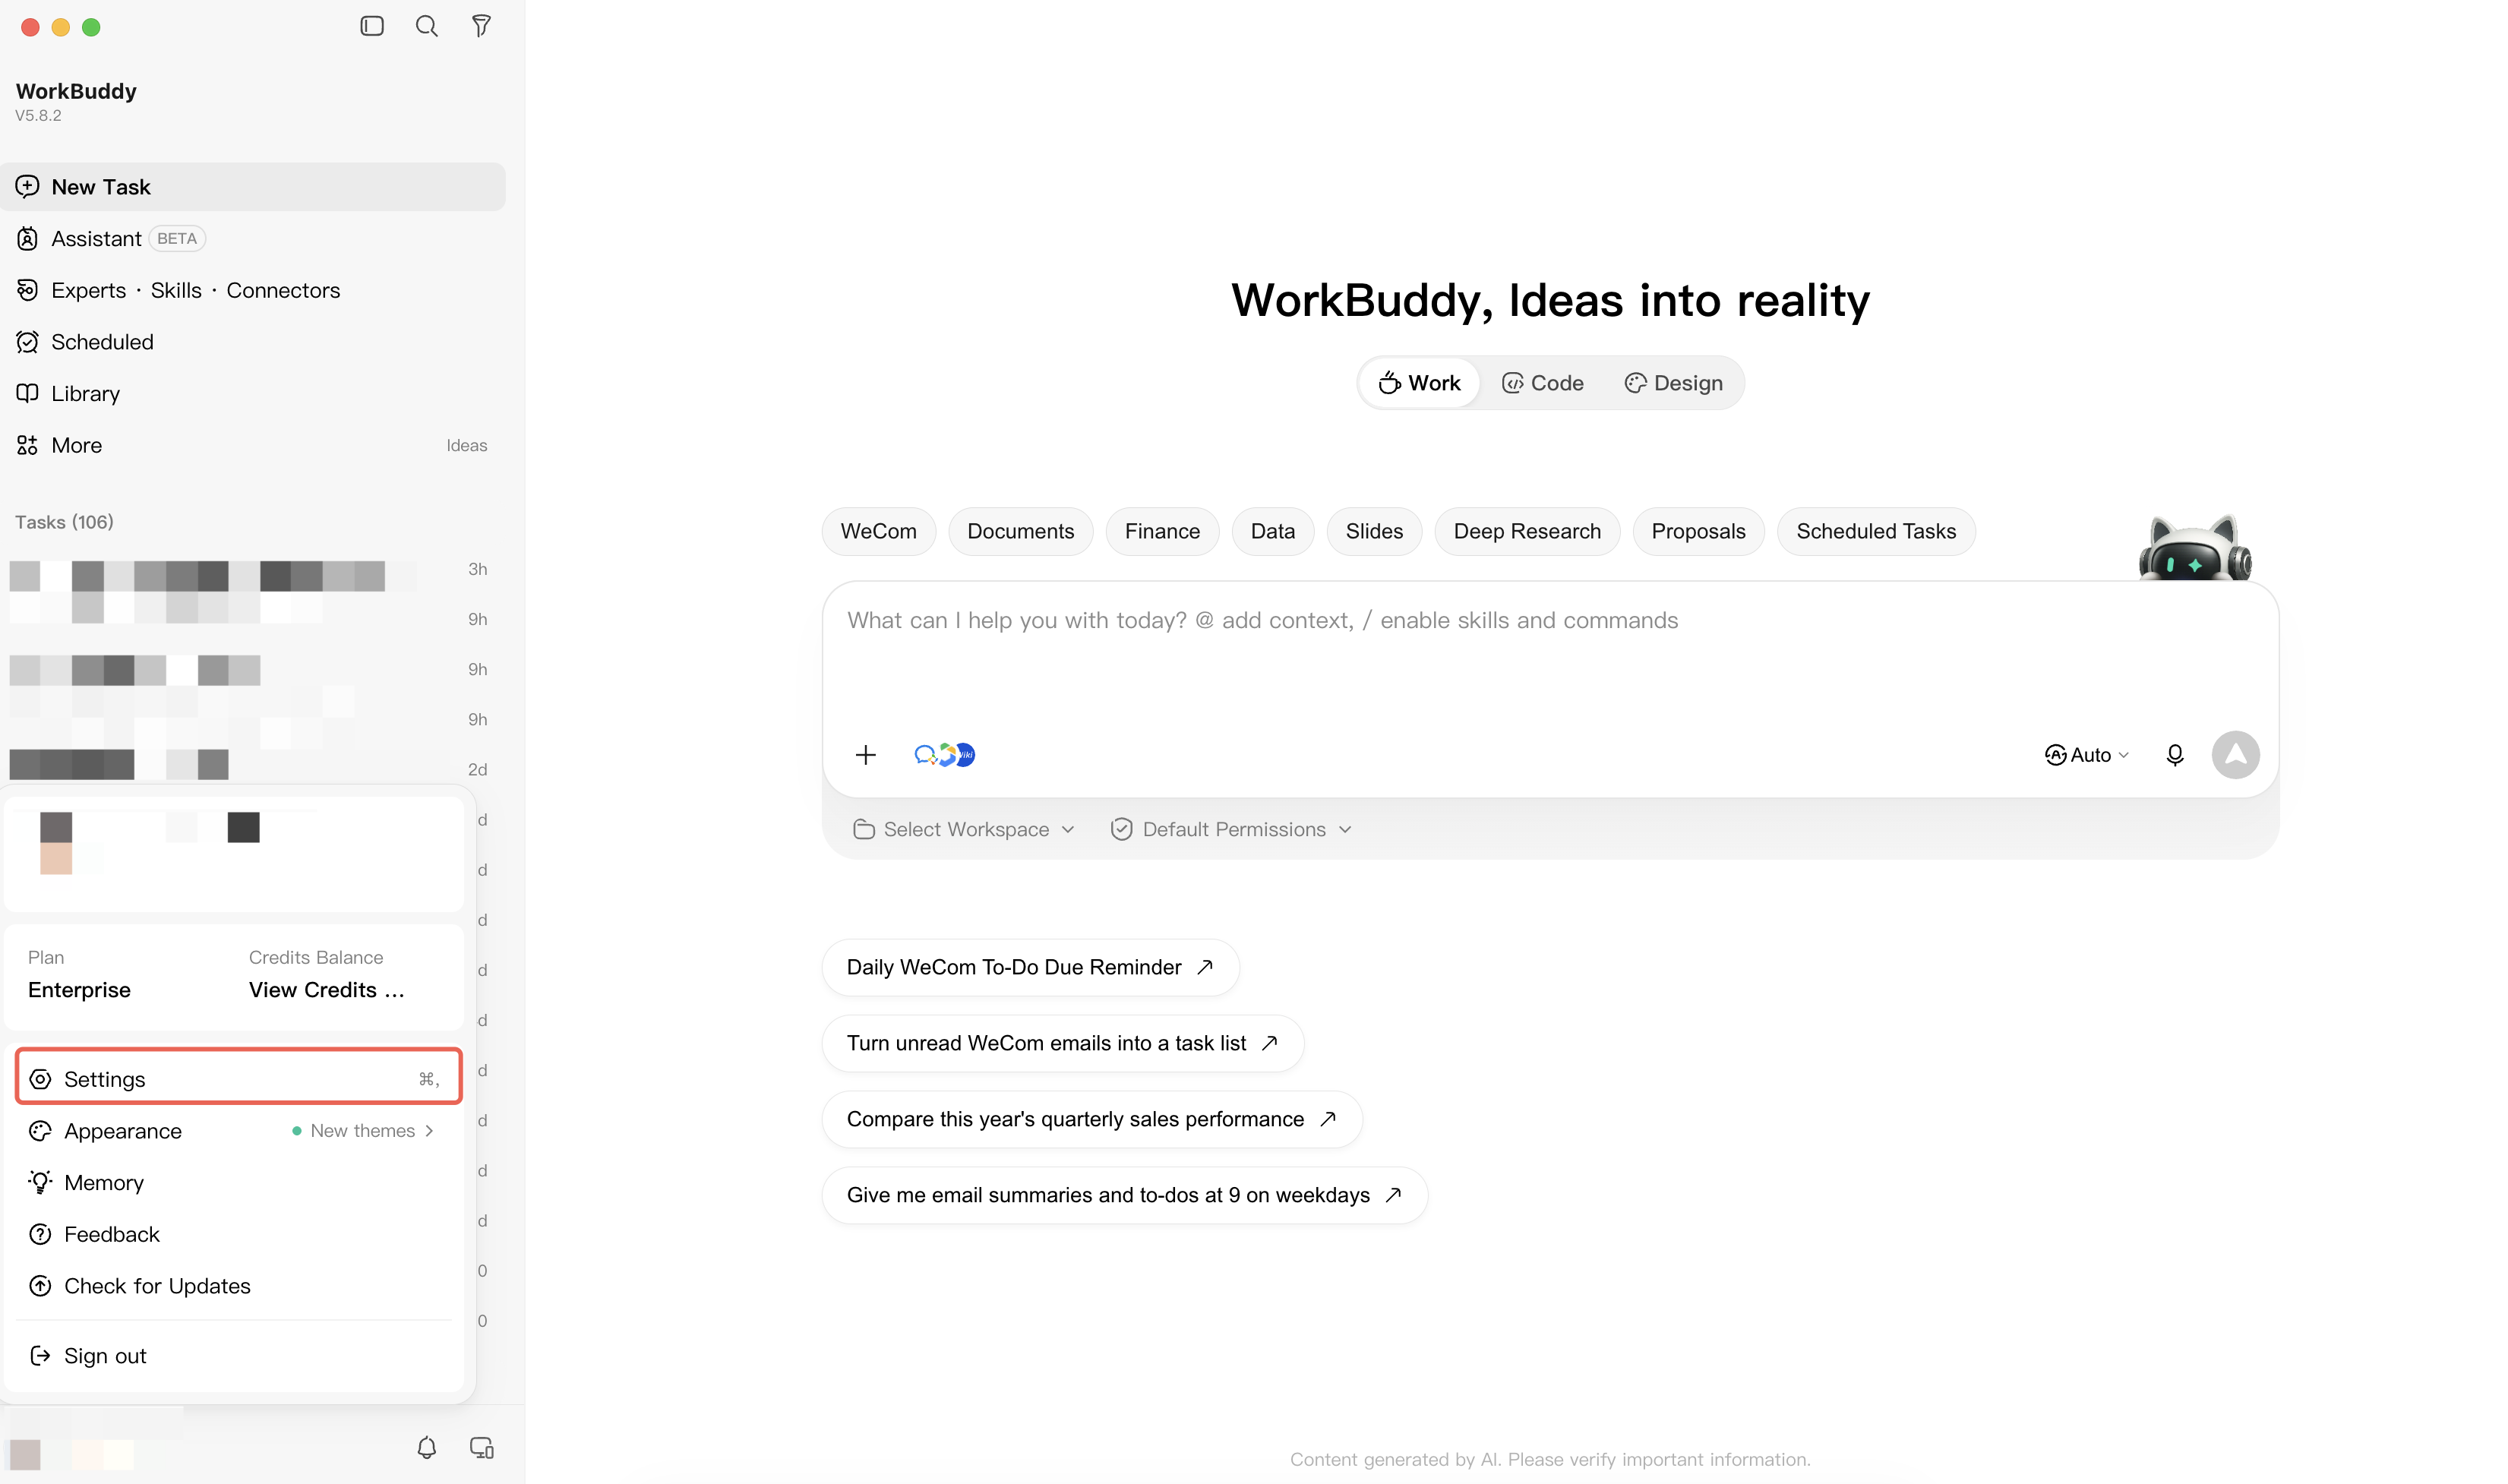
1. Launch WorkBuddy, click the account entry in the lower-left corner, and select Settings.
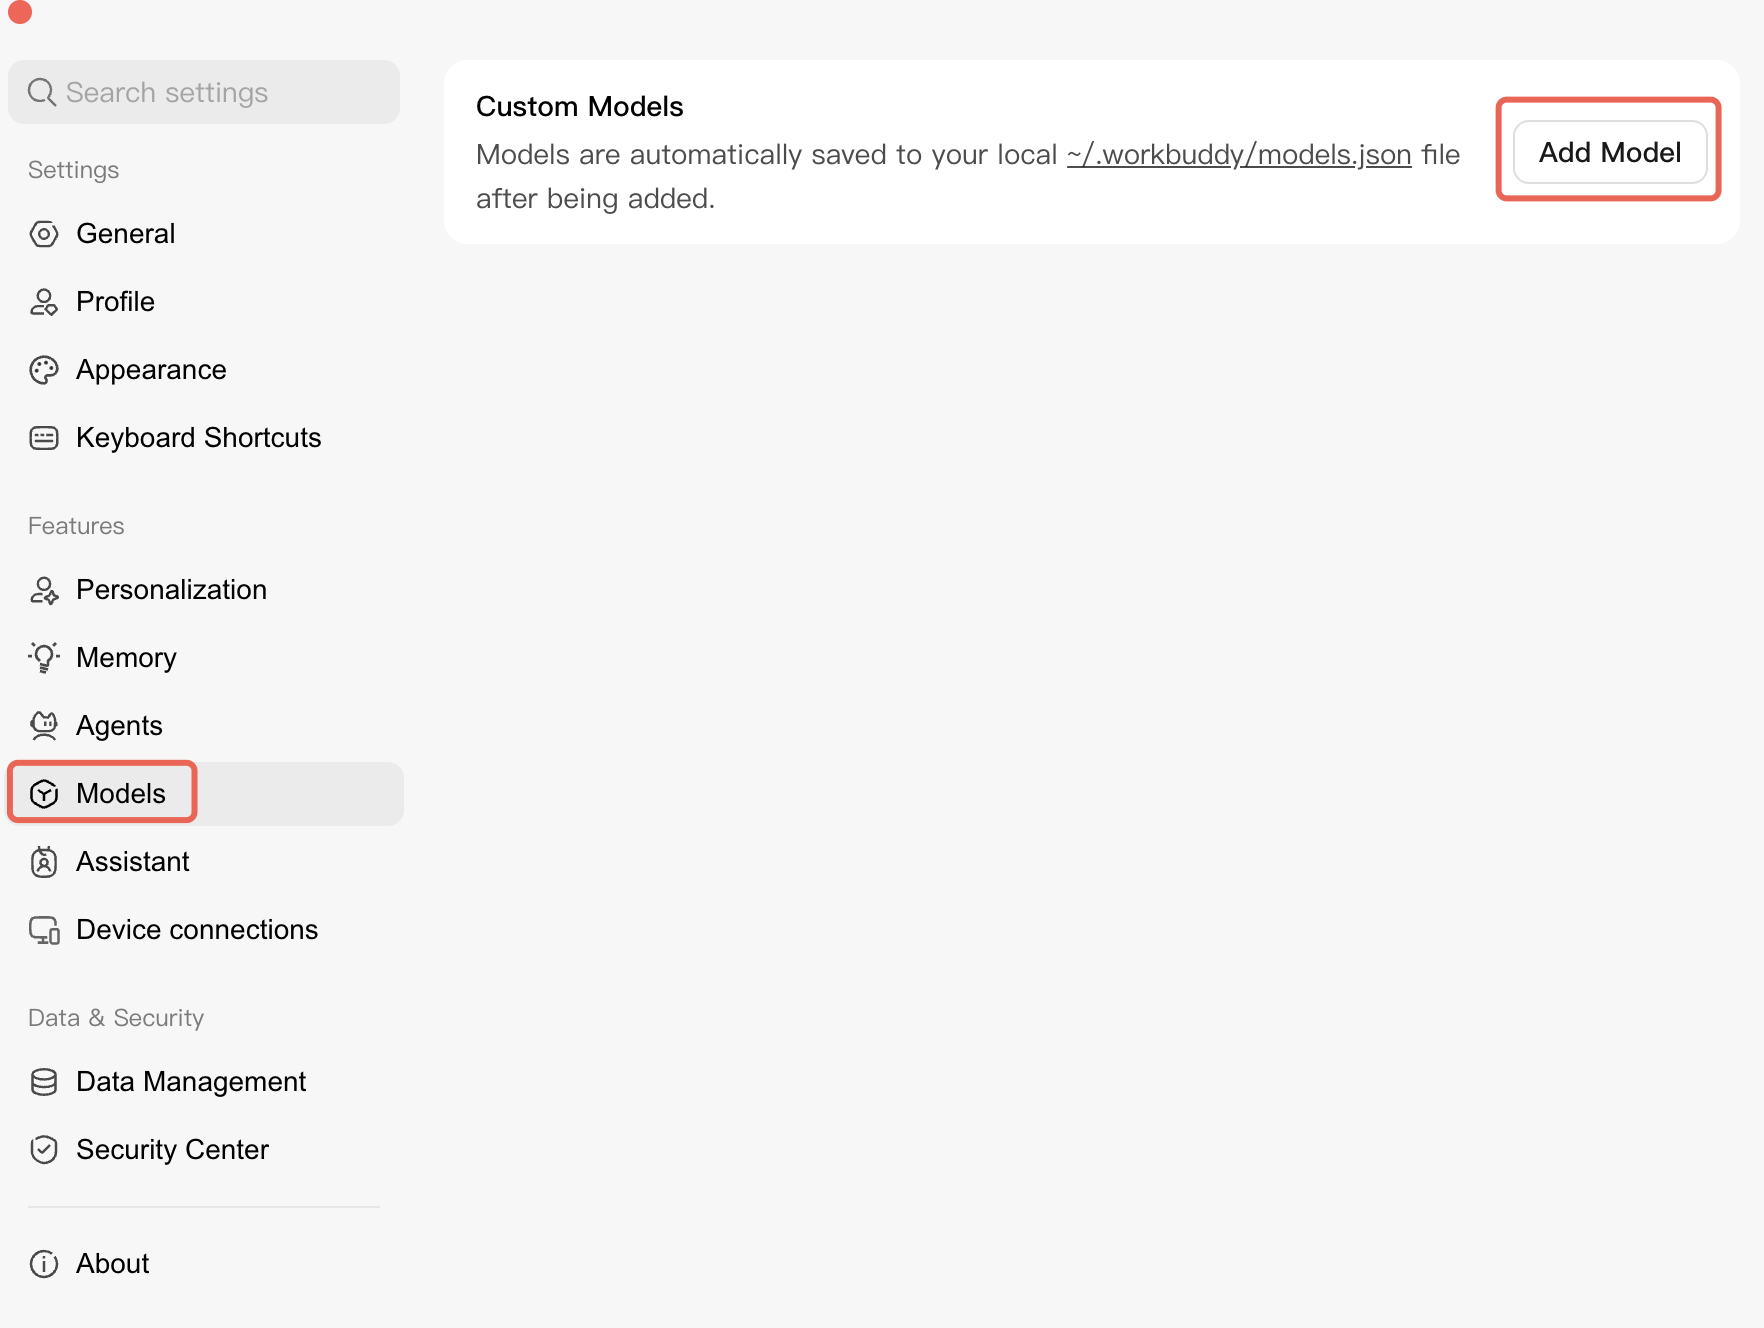
2. In the left sidebar, select Models. In the Custom Models section, click Add Model.
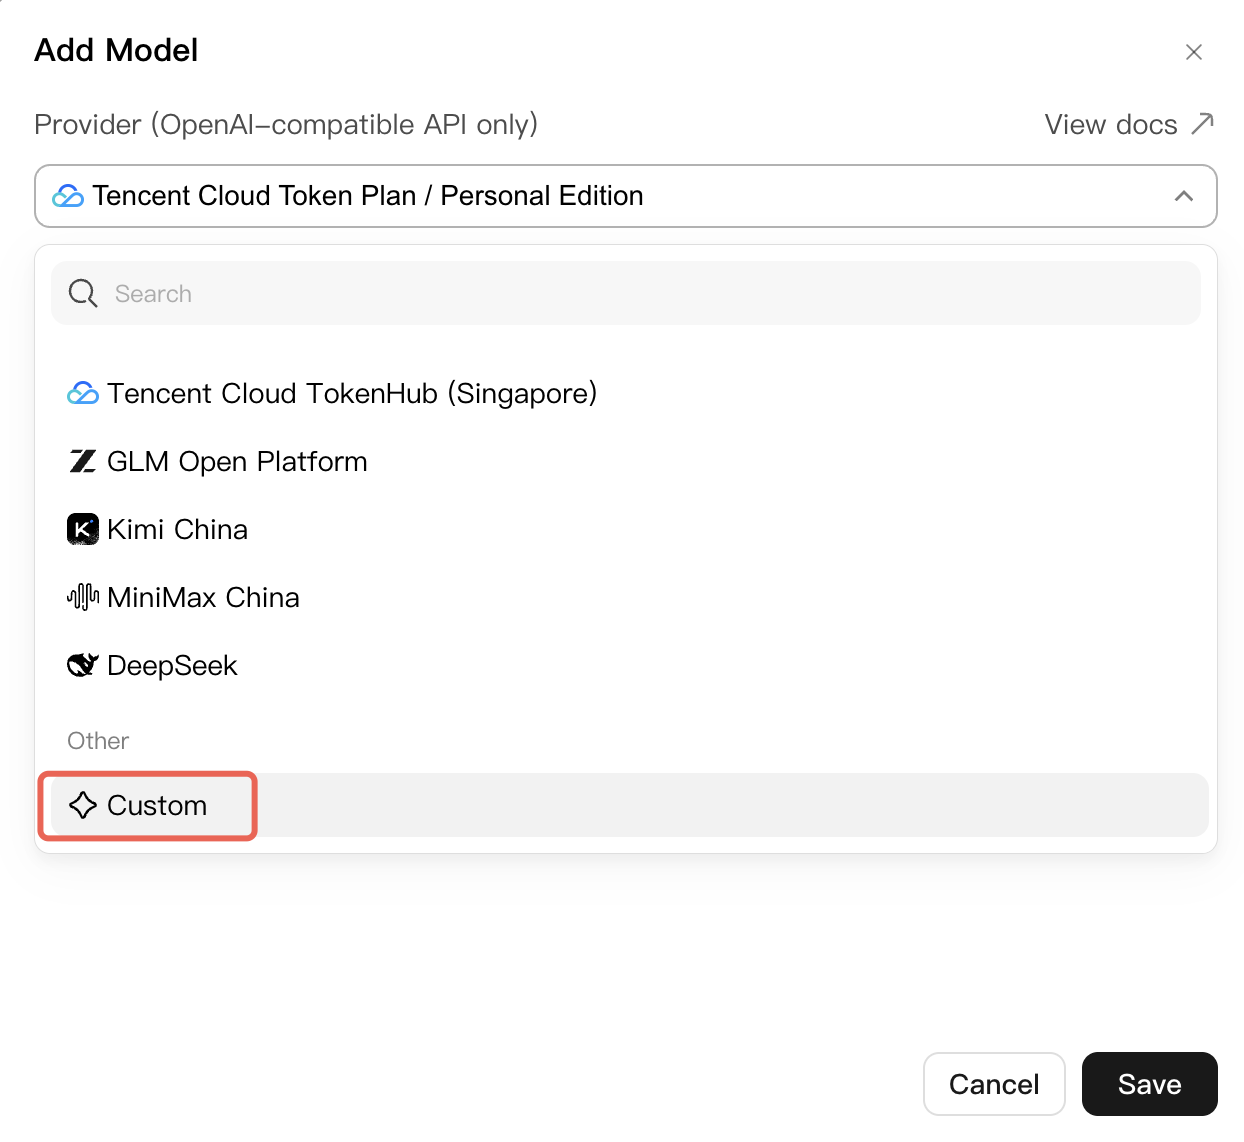
3. Configure the following information and click Save:
In the Provider dropdown, select Custom / Custom, as shown in the following figure:
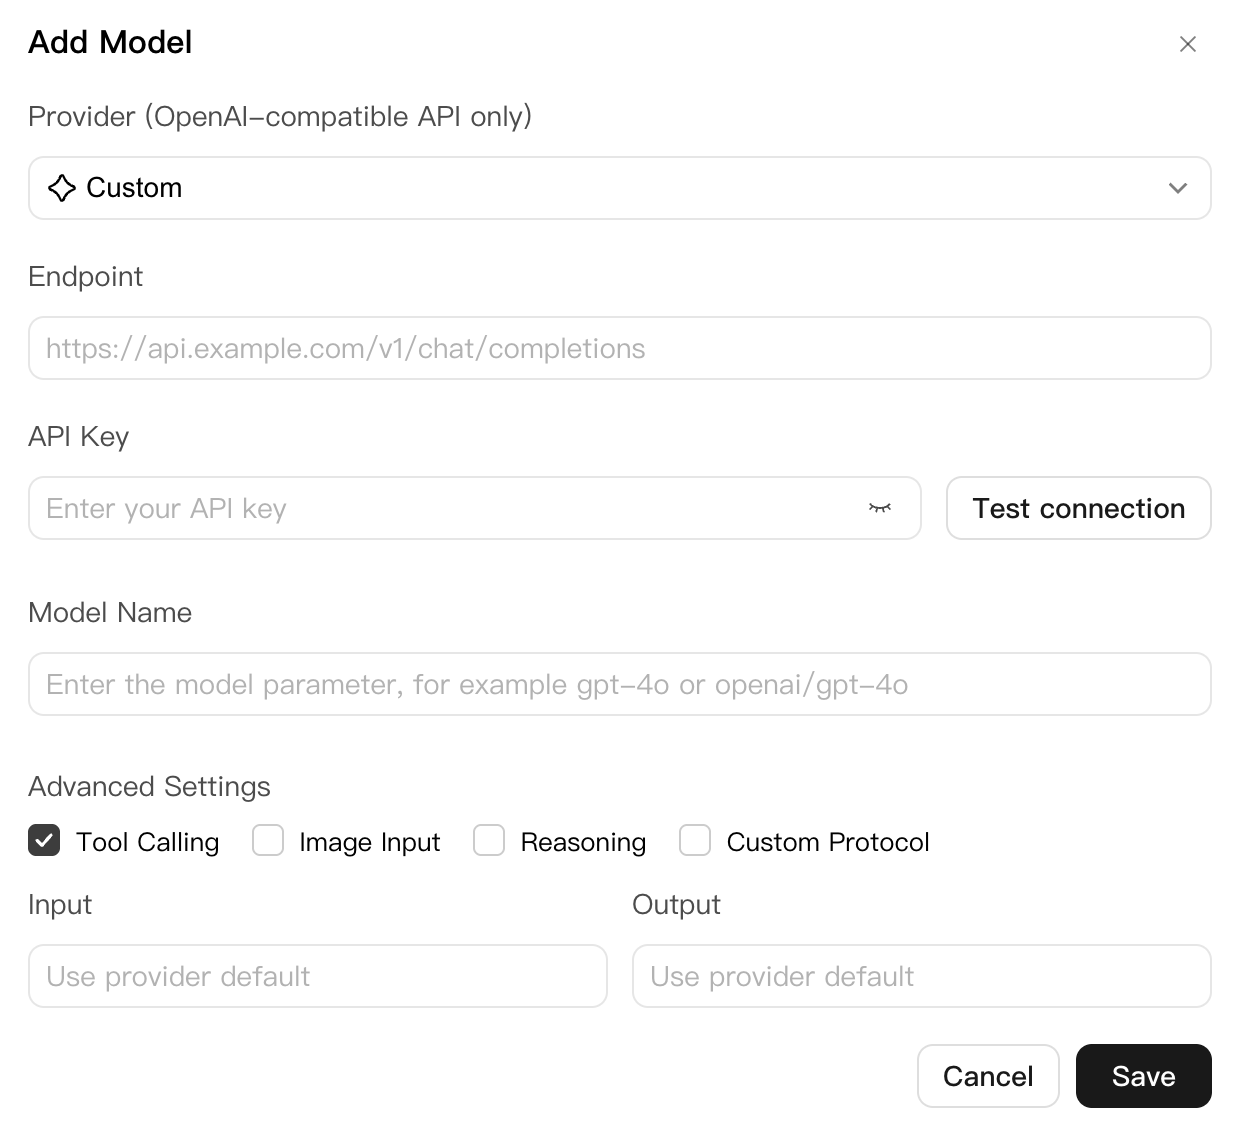
Fill in the following fields:
API endpoint: https://<user domain>/v1/chat/completions
API Key: Enter the CMR API Key you created.
Model Name: Enter the name of a model supported by the current API Key.
Advanced Tools: Optional. Use as needed.
Note:
When entering a model name, confirm the accessible scope of the current API Key. You must enter an intent route or model name available to the current API Key. Alternatively, you can set model=ModelRouter/auto, which specifies available models based on the L1 CMR policy.
4. After configuration, select the added model in the WorkBuddy model selector to start a conversation.
Help and Support
Was this page helpful?
You can also Contact sales or Submit a Ticket for help.
Help us improve! Rate your documentation experience in 5 mins.
Feedback