Configuring Prompt Management
Download
Focus Mode
Font Size
This document describes how to configure prompts, manage their versions, and associate them with user groups. After configuration is complete, user requests are centrally routed through CMR. After the platform completes billing, rate limiting, and log recording, it injects the corresponding prompts based on the prompts and rewriting policies you configured before forwarding requests to backend models, achieving unified constraint and control over enterprise-level conversation behavior.
Introduction
Prompt management provides the following core capabilities:
Centralized management: All prompts are created and maintained on a unified page, including prompt content, rewriting policies, and the maximum number of tokens.
Version management: Each change generates a version, and supports viewing history and one-click rollback.
Group-based delivery: Different business lines are associated with different prompts, and rules are isolated from each other.
Zero code: Injection and rewriting are both completed on the gateway side, and business teams do not need to release new versions.
Prerequisites
1. It is recommended to read Usage Constraints and Supported Models in advance for relevant information.
2. A CMR instance has been created. For detailed instructions, see Creating a CMR Instance.
3. A BYOK instance has been created. For detailed instructions, see Creating a BYOK Instance.
4. A CMR access key (API Key) has been created. For detailed instructions, see Creating a CMR Access Key.
5. A user group has been created. For detailed instructions, see User Group Overview.
Operation Steps
Step 1: Creating a Prompt
1. Log in to the CMR console. On the Instance Management page, click the target instance ID to go to the basic information page of the target instance.
2. Switch to the Prompt Management tab and click Create.
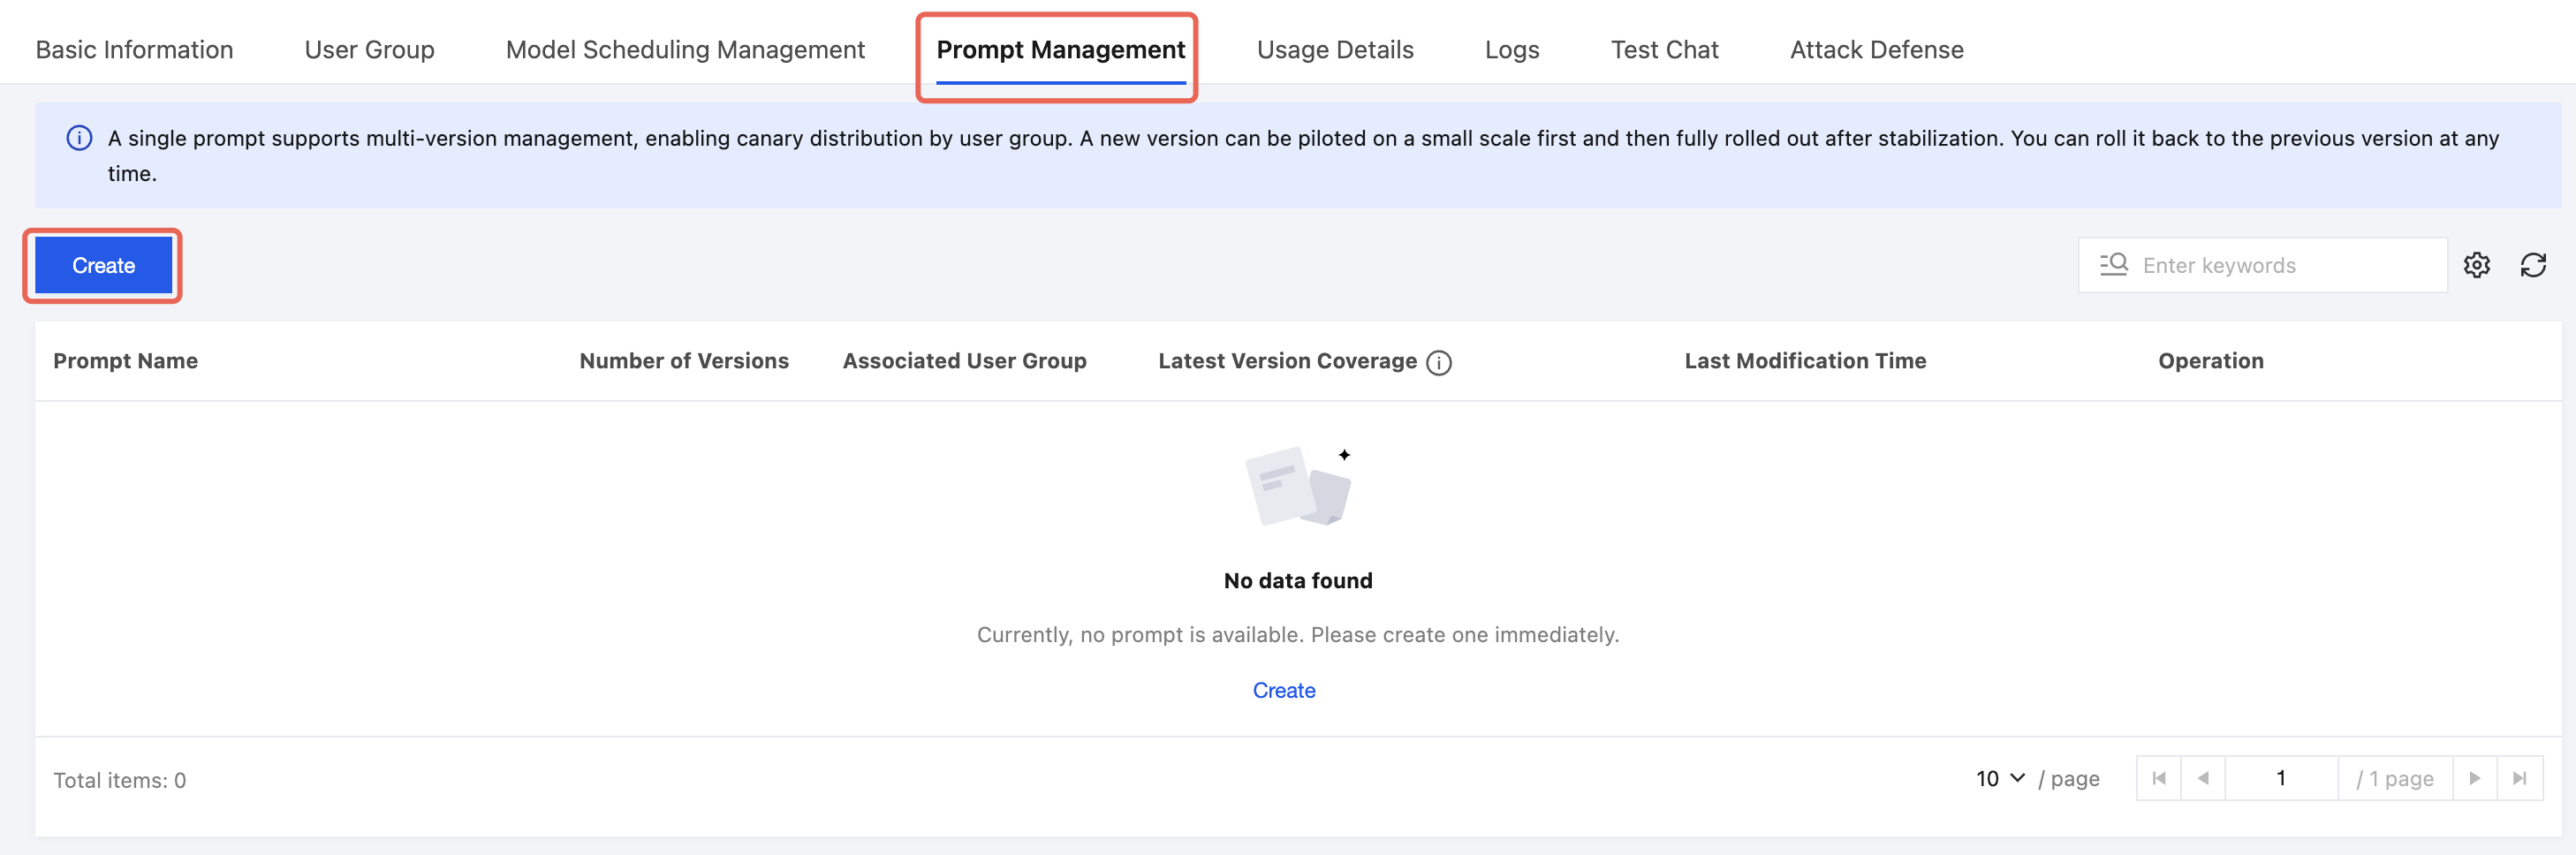
3. In the Create Prompt dialog box, configure the prompt name, prompt content, rewriting policy, maximum output tokens, and version description.
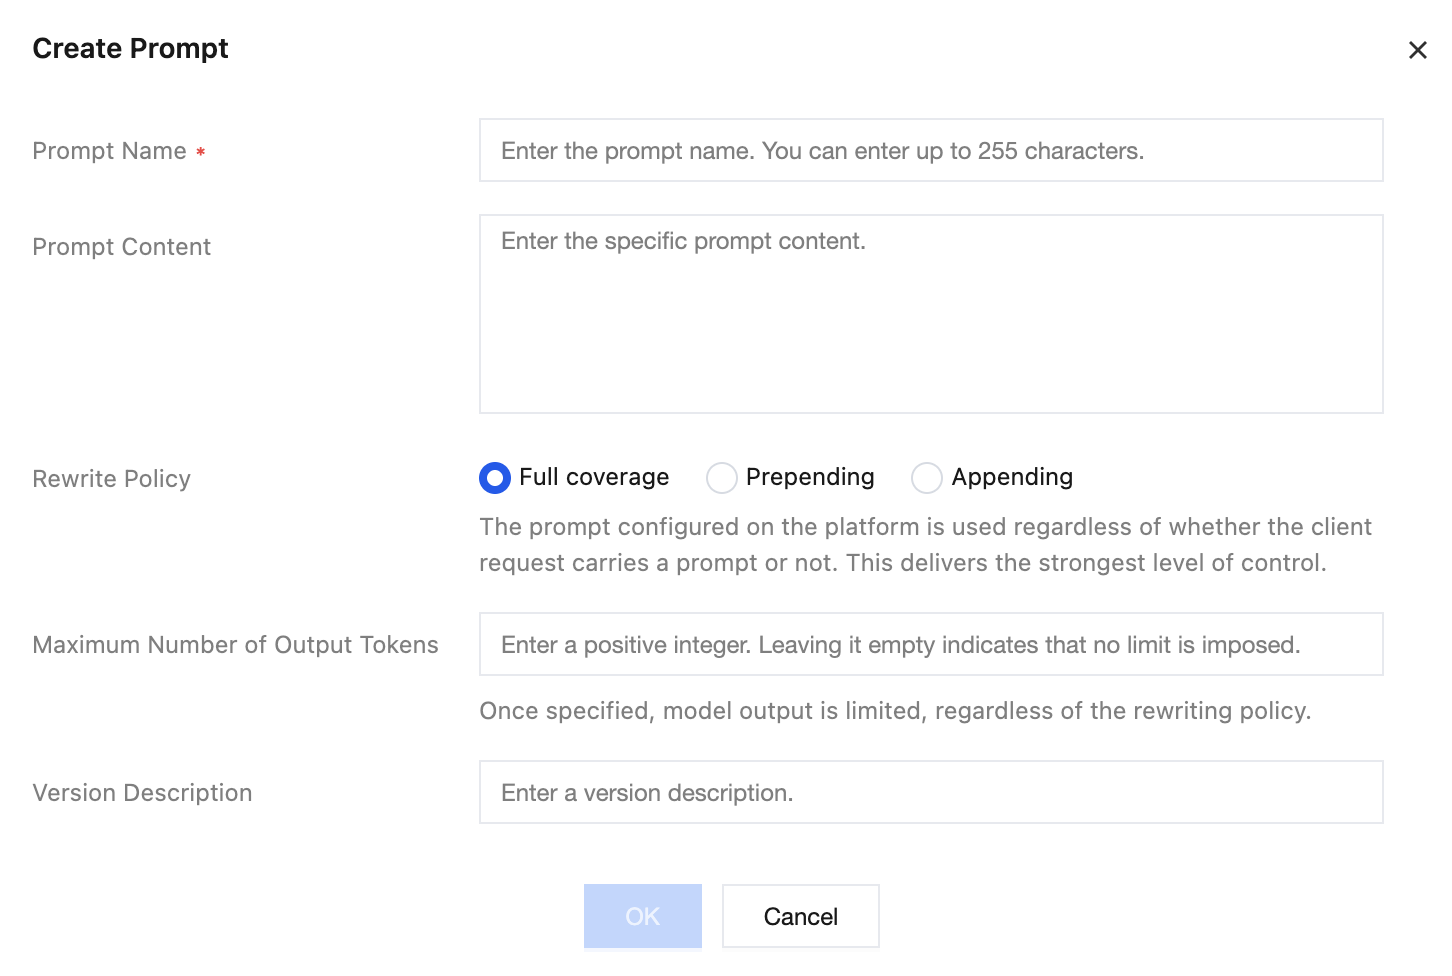
Parameter | Description |
Prompt Name | The prompt name is required and is used to distinguish the governance purposes of different prompts. |
Prompt Content | The system prompt content injected into requests is required and is used to constrain model behavior. |
Rewrite Policy | When the request already contains a client prompt, this is the merge method between the platform configuration and the client content. Three policies are supported. For details, see the description below. |
Maximum Output Tokens | Limit the maximum number of tokens occupied by this prompt to prevent an overly long prompt from crowding out the context window. |
Version Description | You can enter remarks for this creation or change as needed to facilitate version tracking. |
The rewriting policy supports the following three methods:
Rewrite Policy | Description |
Complete overwrite | Whether the client request carries its own prompt, the platform-configured prompt is used for replacement, providing strong control. |
Prepending | Append the platform-configured prompt to the beginning of the client request prompt, and both take effect together. |
Appending | Append the platform-configured prompt to the end of the client request prompt, and both take effect together. |
4. Click OK to complete the prompt creation. The system automatically generates the first version.
Step 2: Managing Prompt Versions
1. In the Prompt Management list, you can view the name, version quantity, associated user groups, version coverage, and modification time of each prompt. Click Version Management in the operations of the target prompt to expand the version list page.
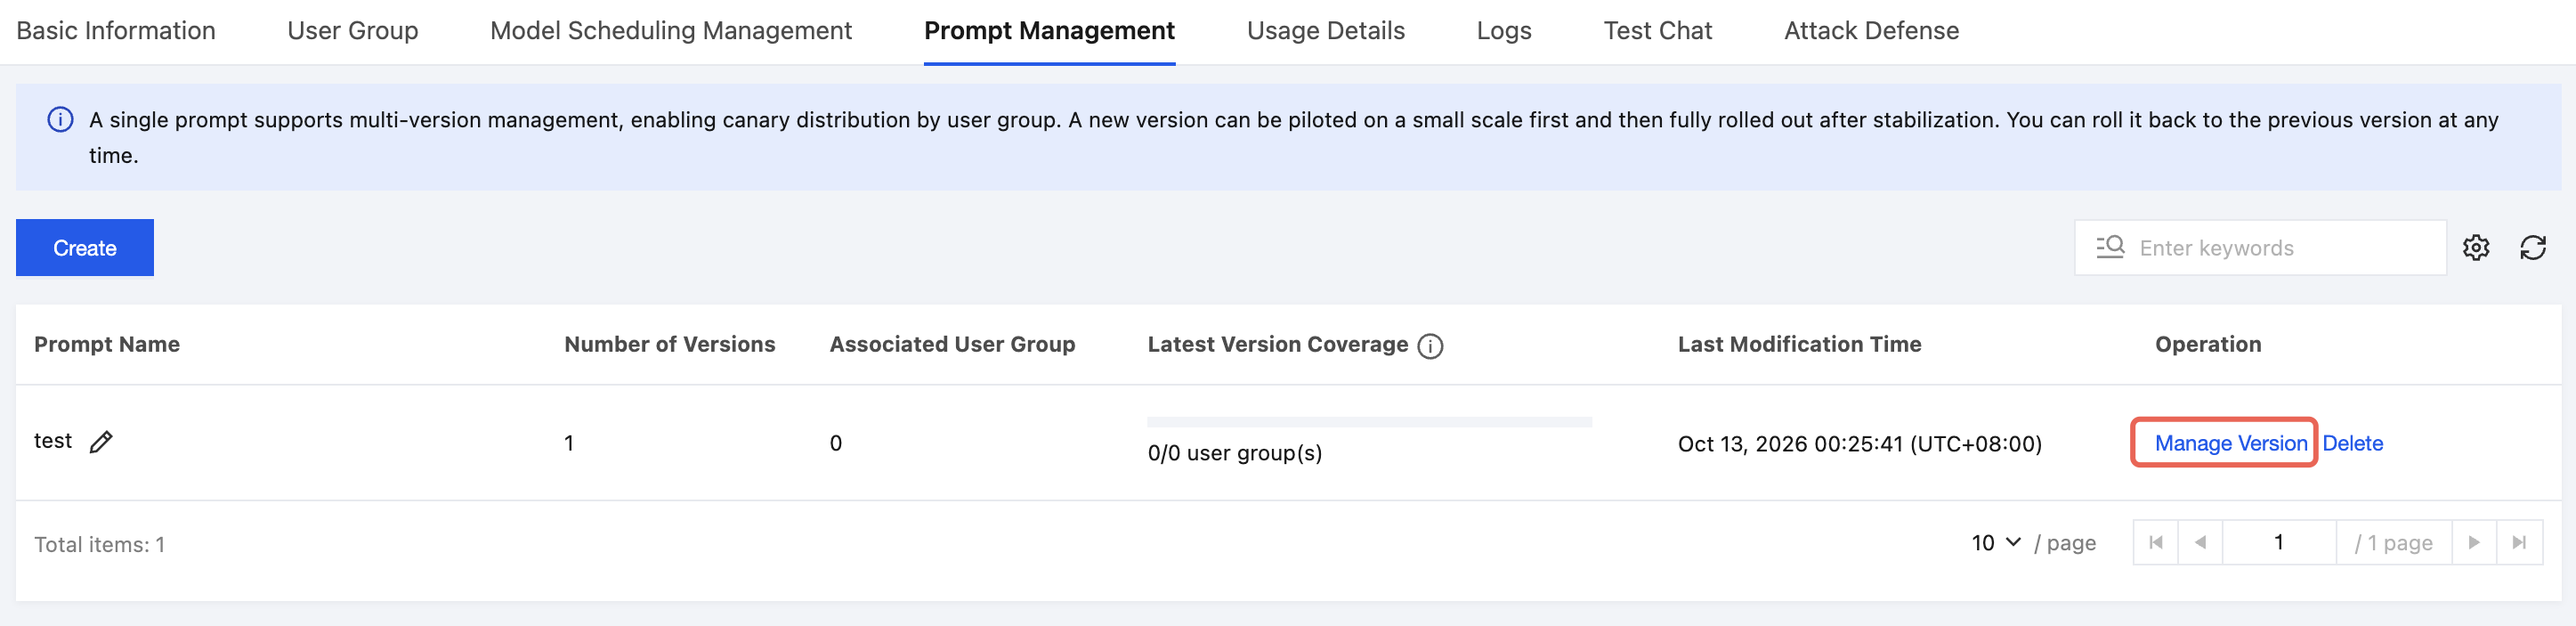
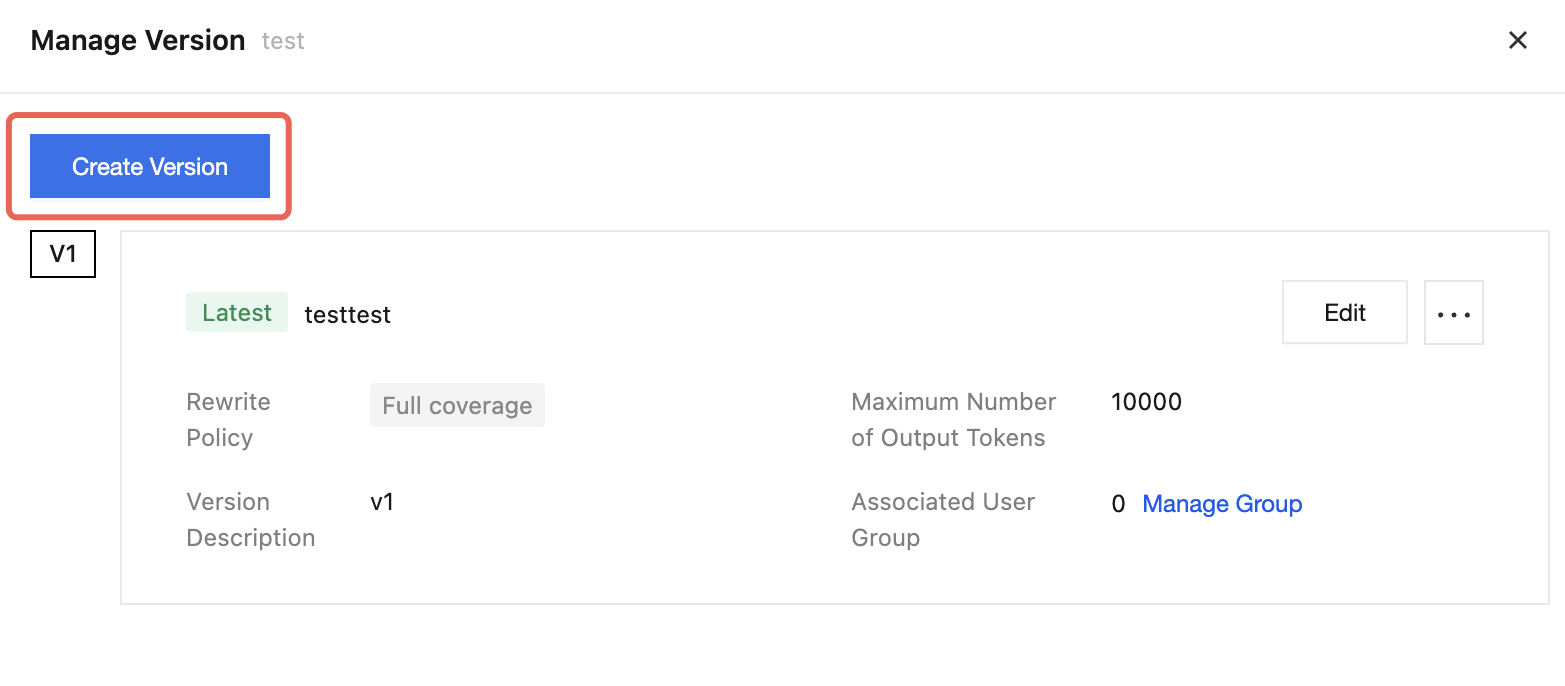
2. In the Version list, you can view the version number, prompt content, associated user groups, and operations of each version.
3. Click Edit in the operation column of the target version to modify the prompt content, rewriting policy, maximum output tokens, and version description of that version. If you modify any content other than the version description, a new version will be generated directly.
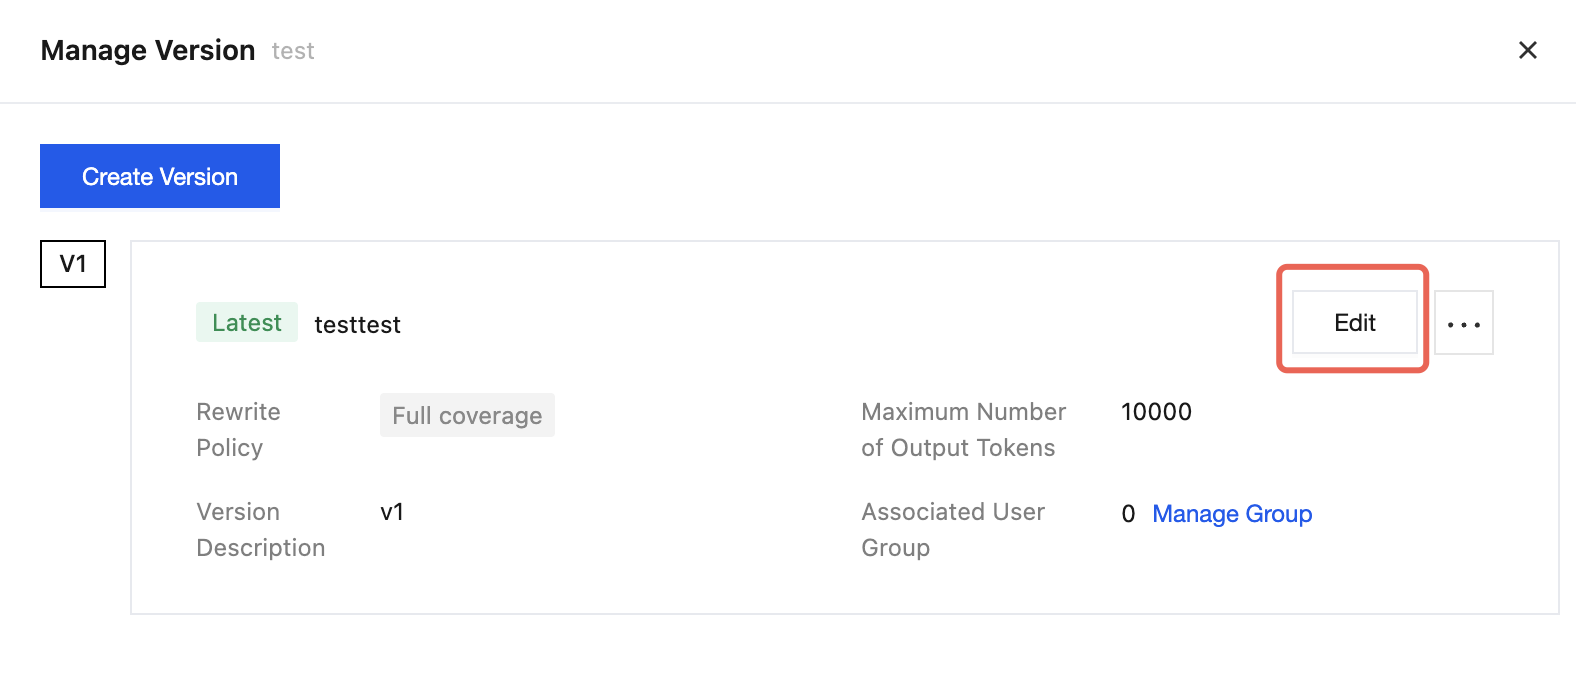
4. Click Create Version to edit the content and generate a new version, allowing you to iterate prompts without affecting the online configuration.
Note:
Gray release of prompts: You can first assign a small number of user groups to the new version for validation, and then gradually expand the associated scope after confirming that no issues exist.
One-click full release: You can click Full Release in the version operations to associate all user groups under this prompt with this version.
Historical version cleanup: If you need to delete historical prompt versions, click Delete in the version operations to remove the specified version.
Step 3: Configuring Associated User Groups
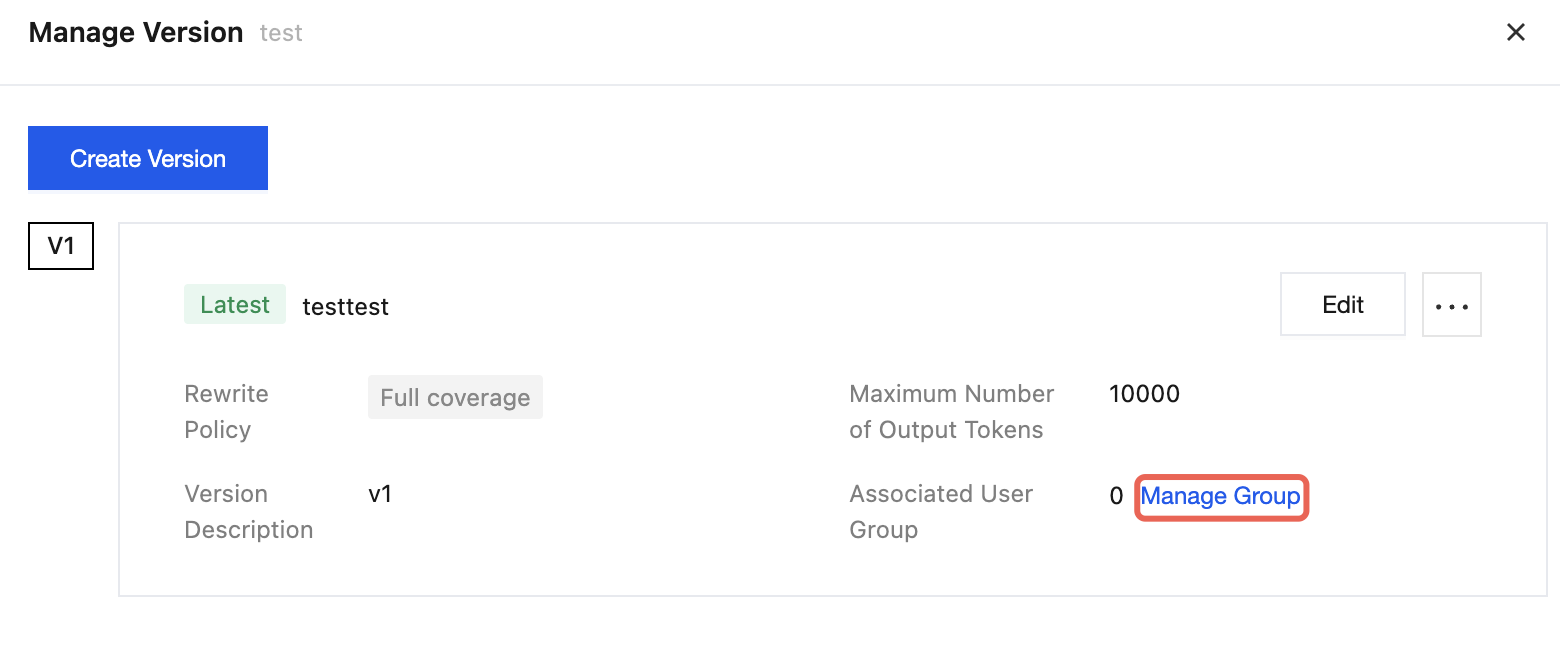
1. On the prompt version management page, click Manage Groups in the Associated User Groups column of the target version to open the user group association dialog box.
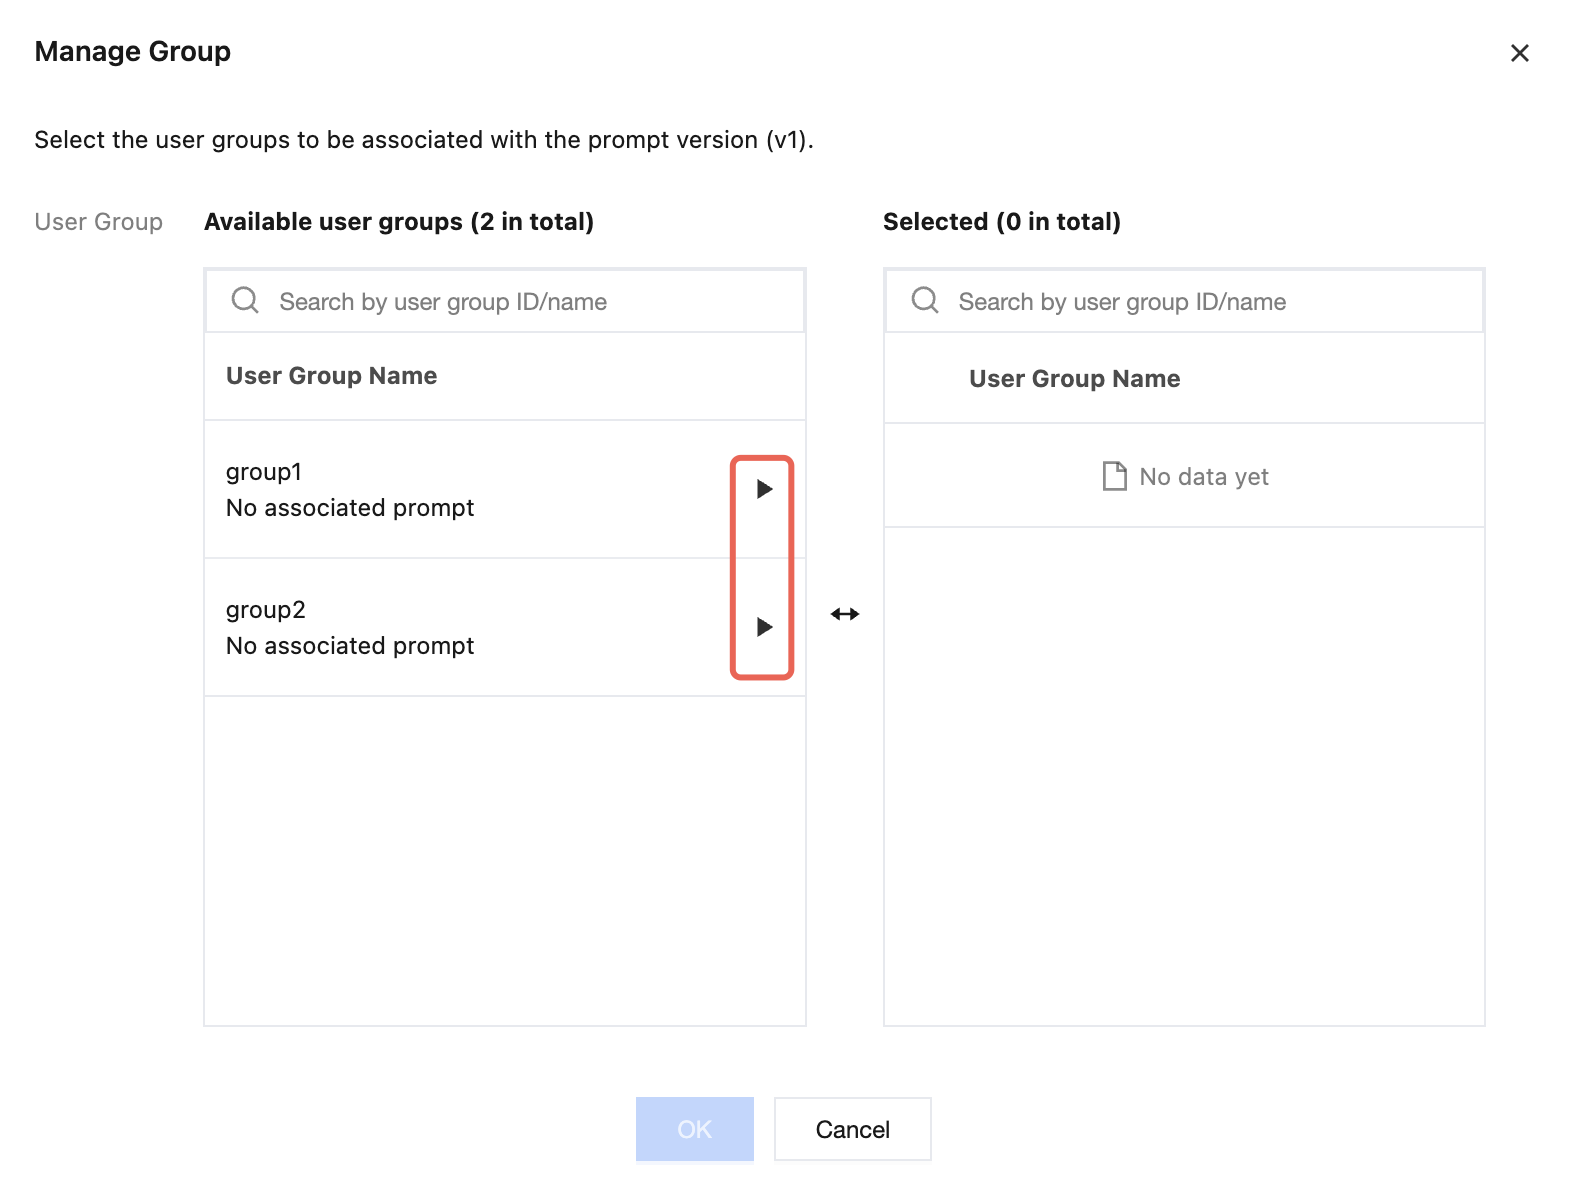
2. In the Available User Groups area on the left, select the user groups to associate, and click the move icon to add them to the Selected User Groups area on the right.
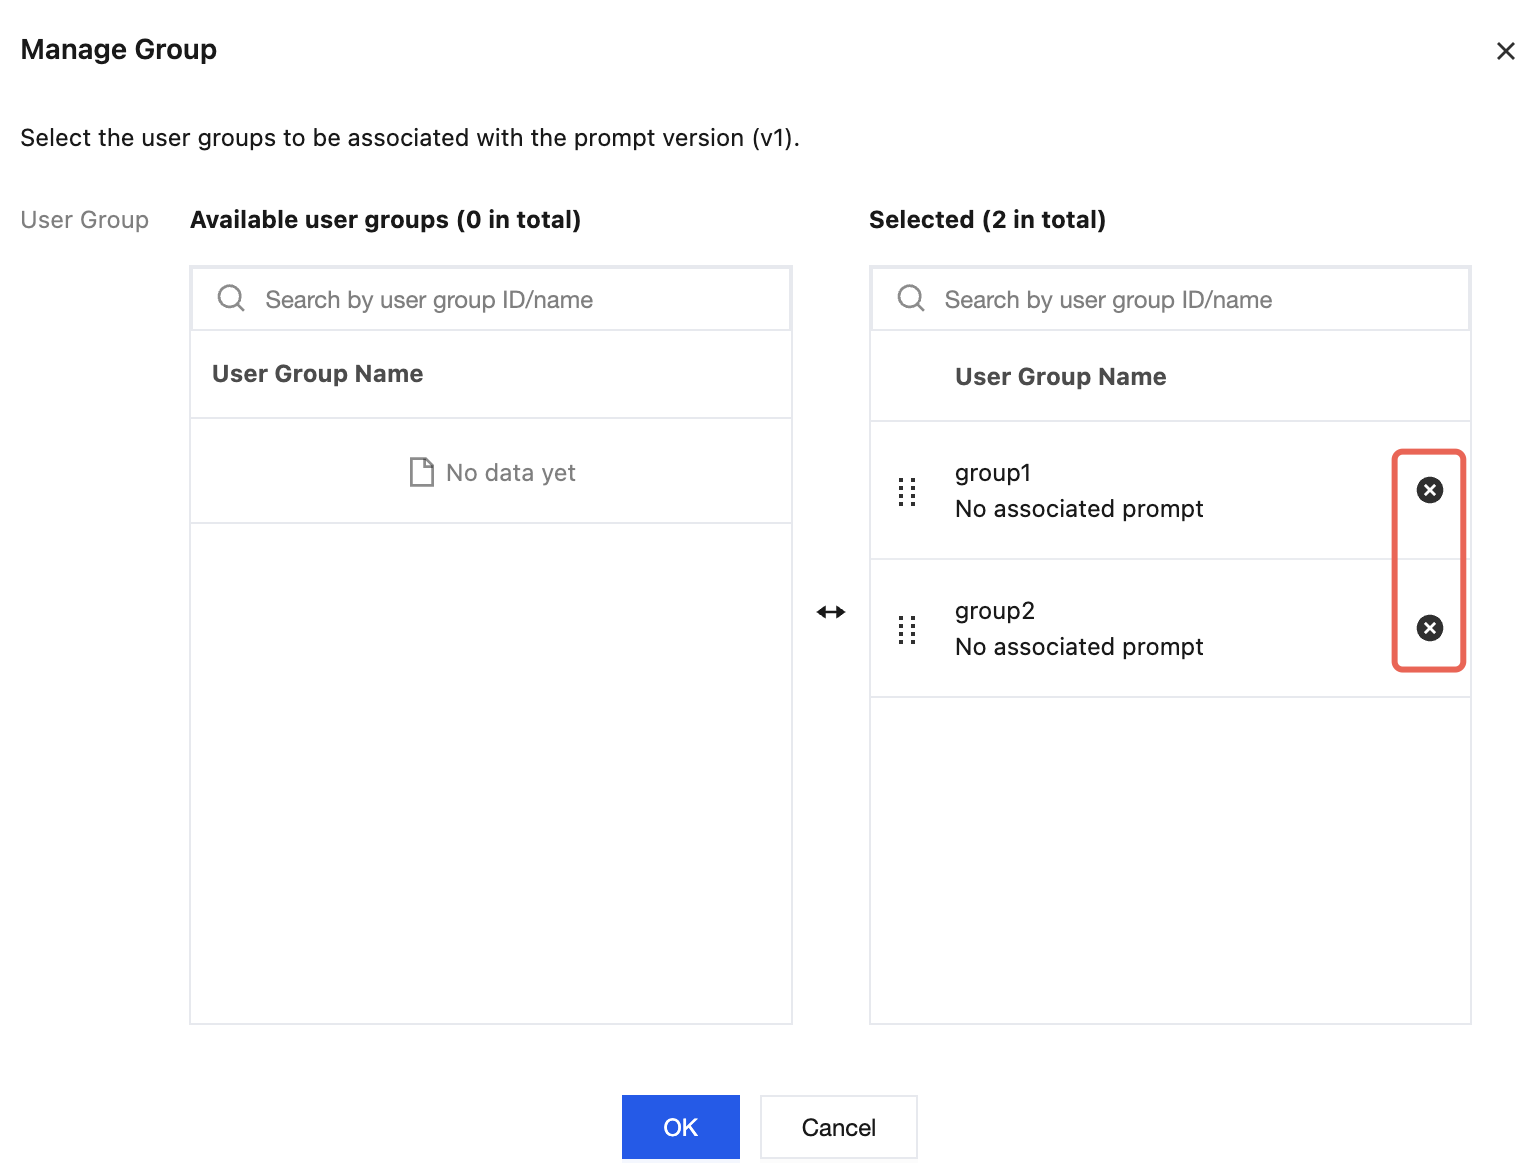
3. To disassociate user groups, select the user groups to disassociate in the selected user groups area on the right, and click the delete icon to disassociate them.
4. Click OK to complete the configuration.
Note:
When a user group is added to another version, the system automatically migrates its exclusive ownership across versions, ensuring that a user group belongs to only one version under the same prompt.
Step 4: Viewing Prompts Associated with User Groups
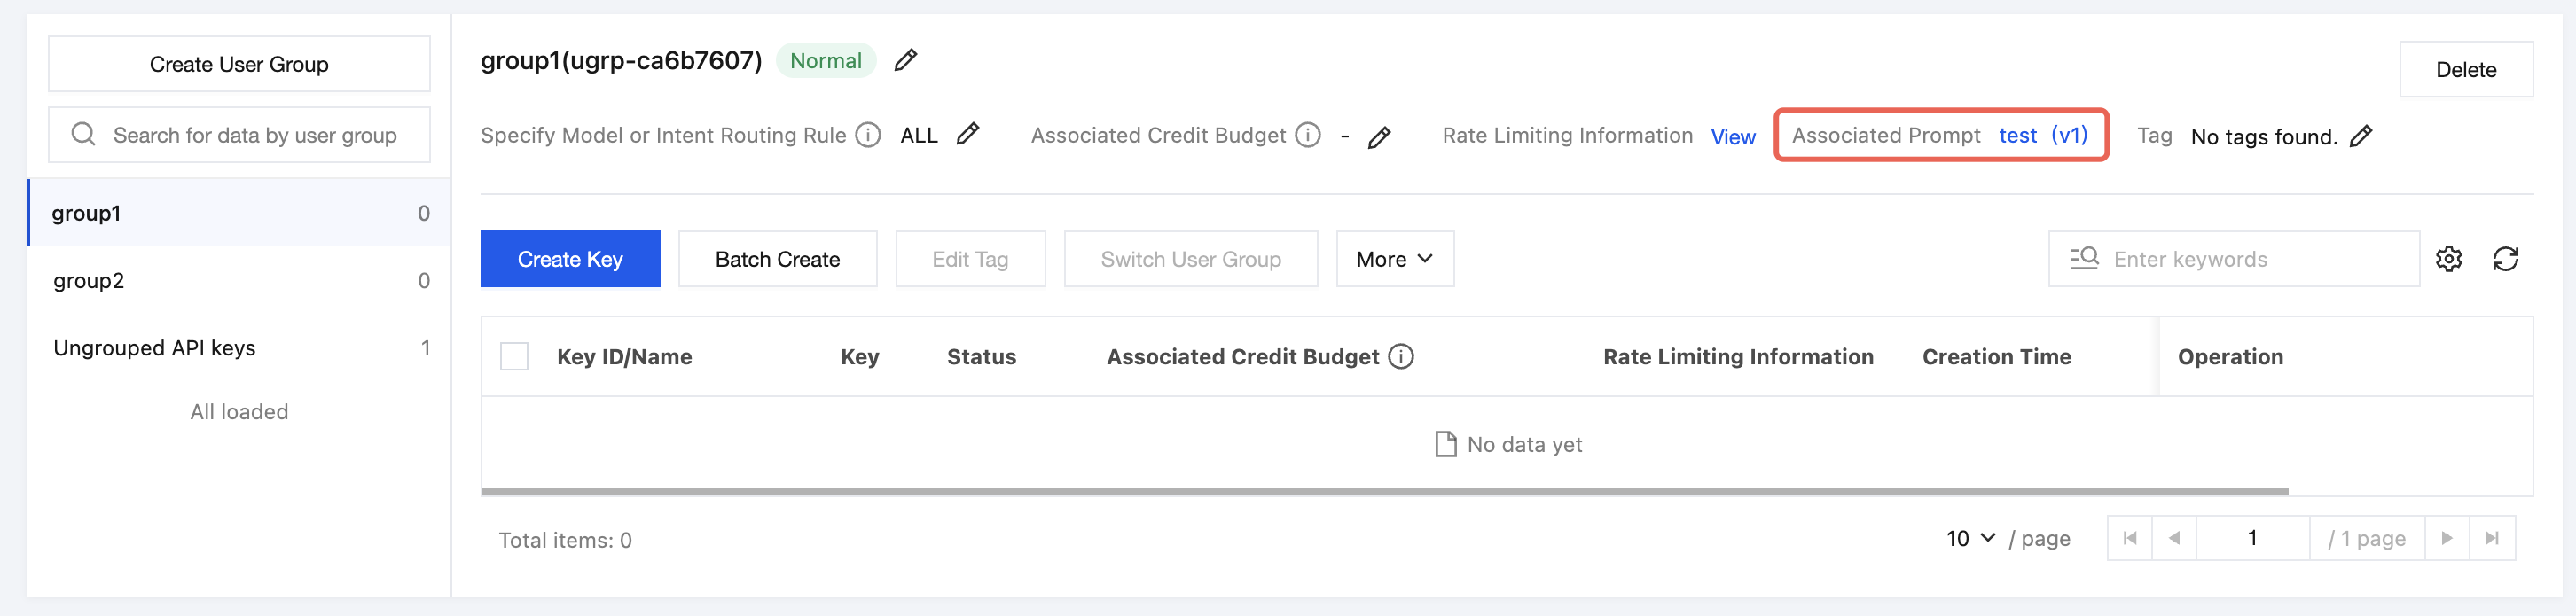
1. On the Instance Basic Information page, switch to the User Group tab, and click the target user group name on the left to go to the user group details page.
2. In the Associated Prompts area, you can directly view the names of the prompts associated with this group and their corresponding versions.
3. Click a prompt name in the Associated Prompts area to go to the corresponding prompt page for version and association management.
Step 5: Deleting a Prompt
1. On the Instance Management page, click the target instance ID to go to the target Instance Basic Information page.
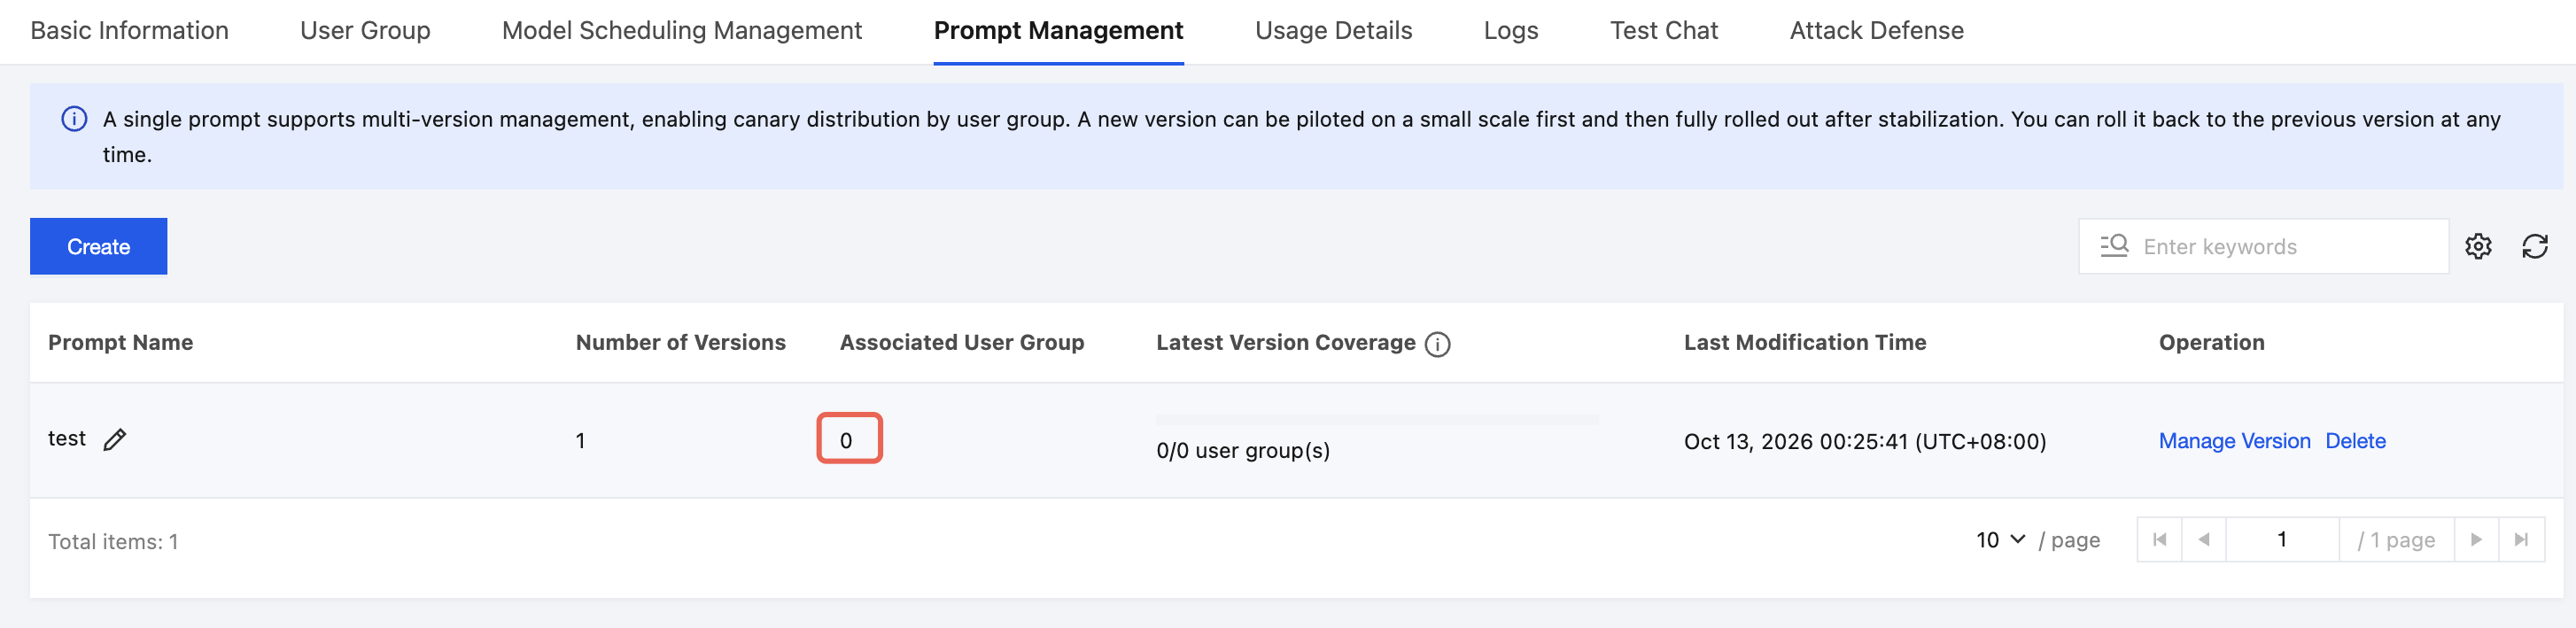
2. Switch to the Prompt Management tab, and find the prompt to delete in the prompt list.
3. Confirm that the number of user groups associated with this prompt is 0. If user groups are still associated, go to the Version Management page to remove all associations by managing user groups before deleting the prompt.
Note:
If a prompt has associated user groups, its delete button is grayed out and unavailable. You must remove all associated user groups before you can delete the prompt.
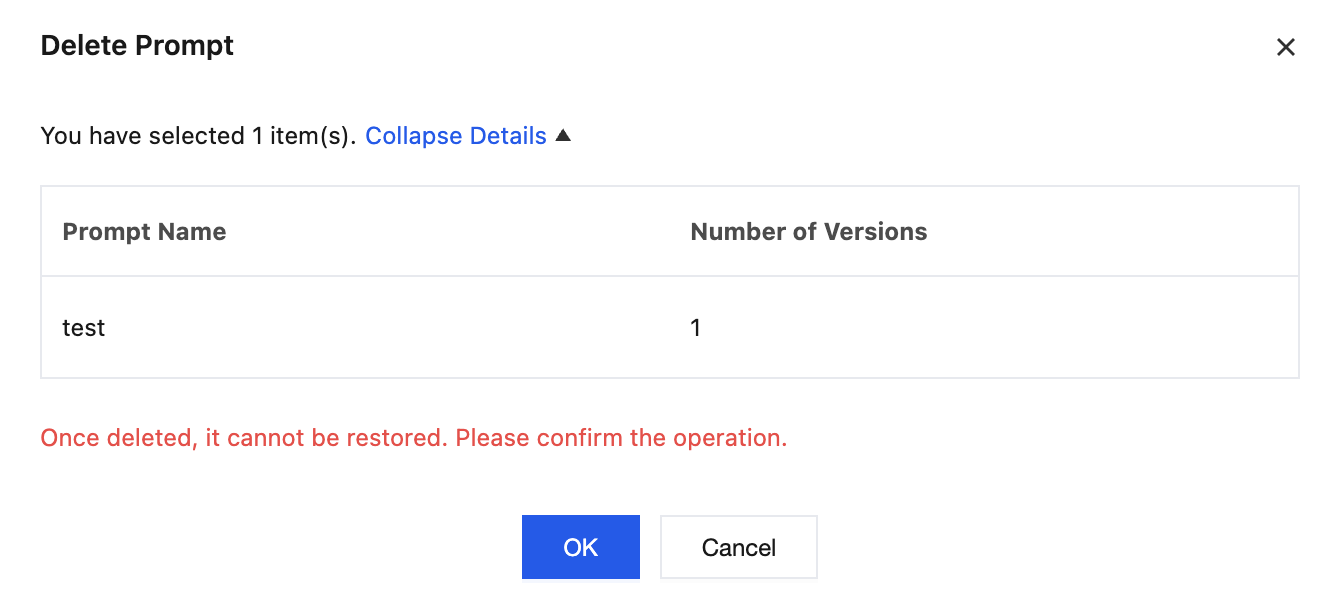
4. Click Delete in the operation column of the target prompt, and then click OK in the confirmation dialog box to complete the deletion.
Attention:
The deletion operation cannot be undone. After a prompt is deleted, all its historical versions and associated records will be cleared. Confirm that there are no business dependencies before performing the deletion.
Subsequent Operation Steps
After creation is complete, you can switch to the Chat Test tab on the instance management page to verify the configuration. For detailed operations, see Configure Chat Test.
After creation is complete, you can switch to the Usage Details tab on the instance management page to monitor Token consumption and model resource usage. For detailed operations, see View Usage Details.
Help and Support
Was this page helpful?
You can also Contact sales or Submit a Ticket for help.
Help us improve! Rate your documentation experience in 5 mins.
Feedback