Creating a CMR Access Key
Download
Focus Mode
Font Size
This document describes how to create and use a CMR access key (API Key). CMR obtains identity credentials based on the API Key to implement full-path model management and scheduling.
Introduction
The CMR product form includes two types of keys: CMR access keys and BYOK keys.
CMR access key (API Key): an identity credential used by callers to access a CMR instance. CMR authenticates requests based on the API Key and performs model access, usage metering, rate limiting, and budget control.
BYOK key: a customer-owned key held with a third-party model service provider, used by CMR to connect to original vendor models, third-party proxy models, or user-built models.
A CMR access key (API Key) is an instance-level resource. An API Key created or imported in a CMR instance can only be used to access that instance and cannot be used across instances.
A CMR instance can create multiple API keys. Newly created or imported API keys belong to the system built-in Ungrouped API Keys user group by default. You can later assign API keys to other user groups based on management requirements. For more information about user groups, see User Group Introduction.
Note:
A CMR instance, user group, and API Key can each be configured with a credit budget and rate limits. When limits are configured at multiple tiers simultaneously, the credit quota or rate limit that is reached first takes effect.
Model invocation fees incurred by BYOK models are charged by the corresponding model service provider. CMR does not charge model invocation fees again. It only charges a CMR processing fee. For details, see Billing Overview.
Prerequisites
1. It is recommended to read Usage Constraints and Supported Models in advance for relevant information.
2. A CMR instance has been created. For detailed instructions, see Creating a CMR Instance.
Operation Steps
Step 1: Creating an API Key
1. Log in to the CMR console. On the Instance Management page, click the target instance ID.
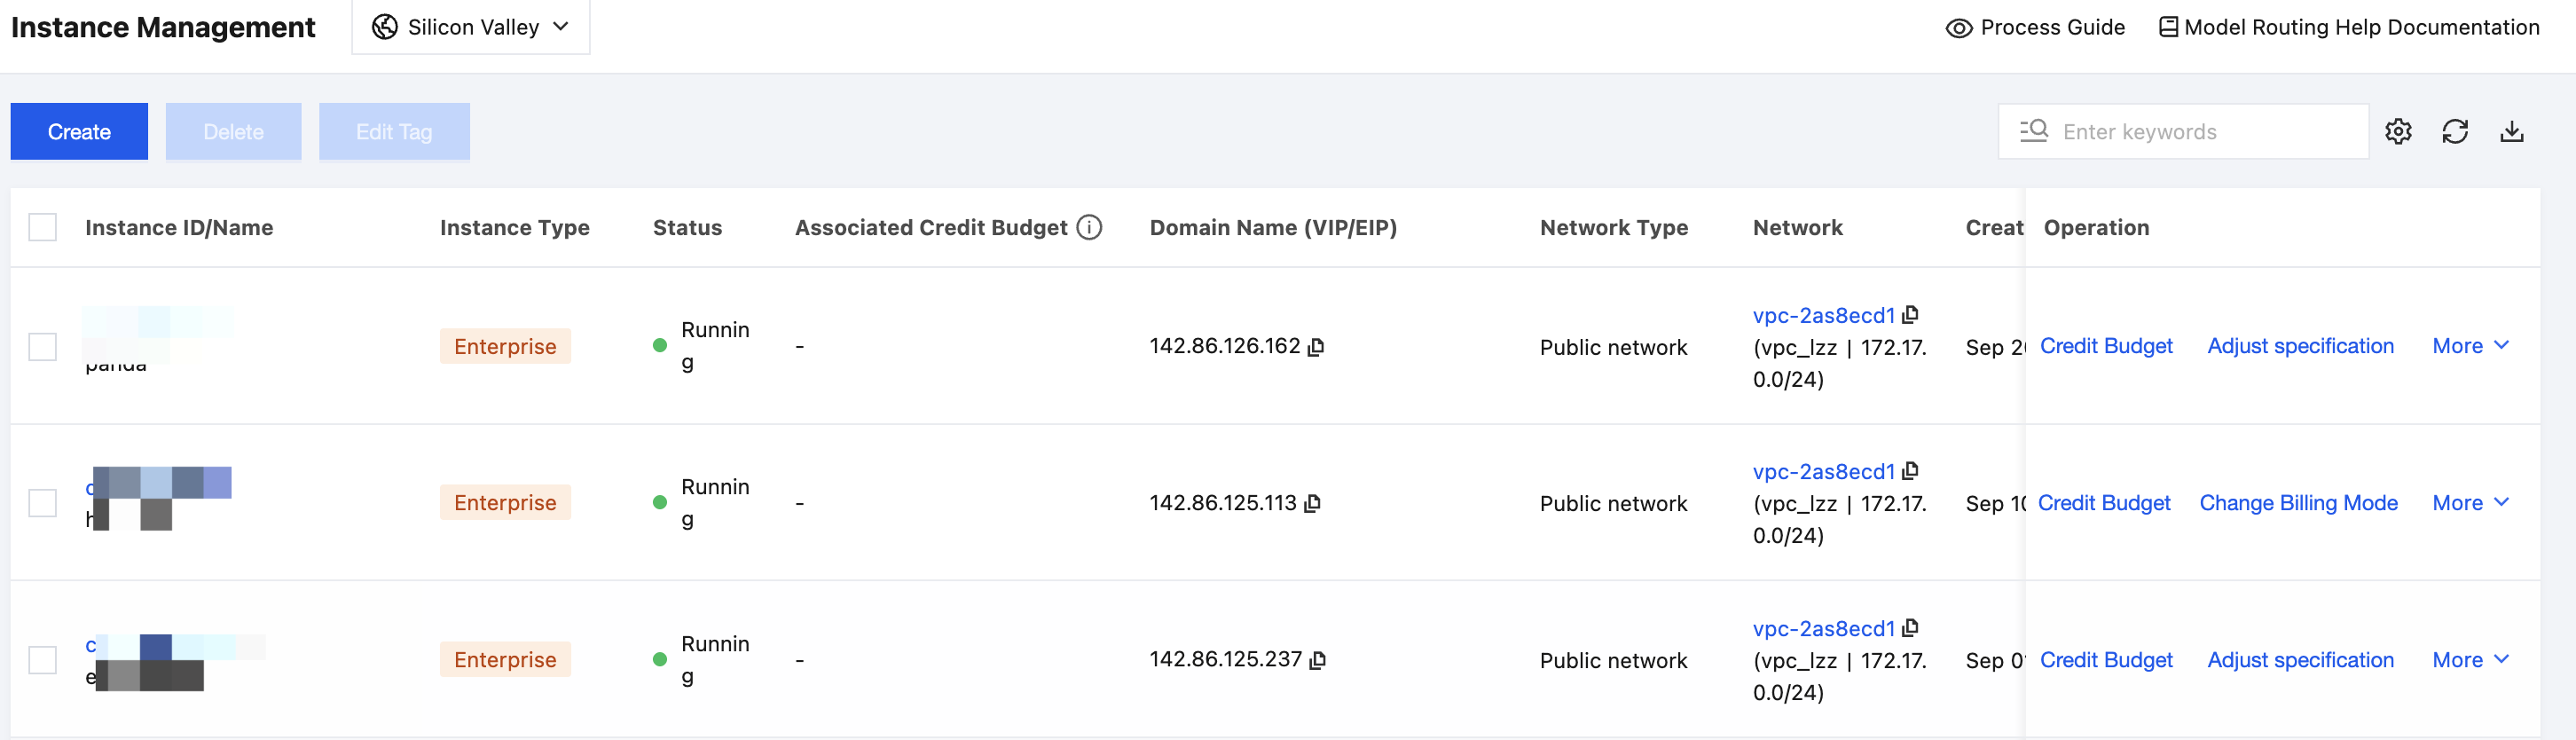
2. On the instance details page, select the User Group tab.
3. On the User Group tab, click Create Key.
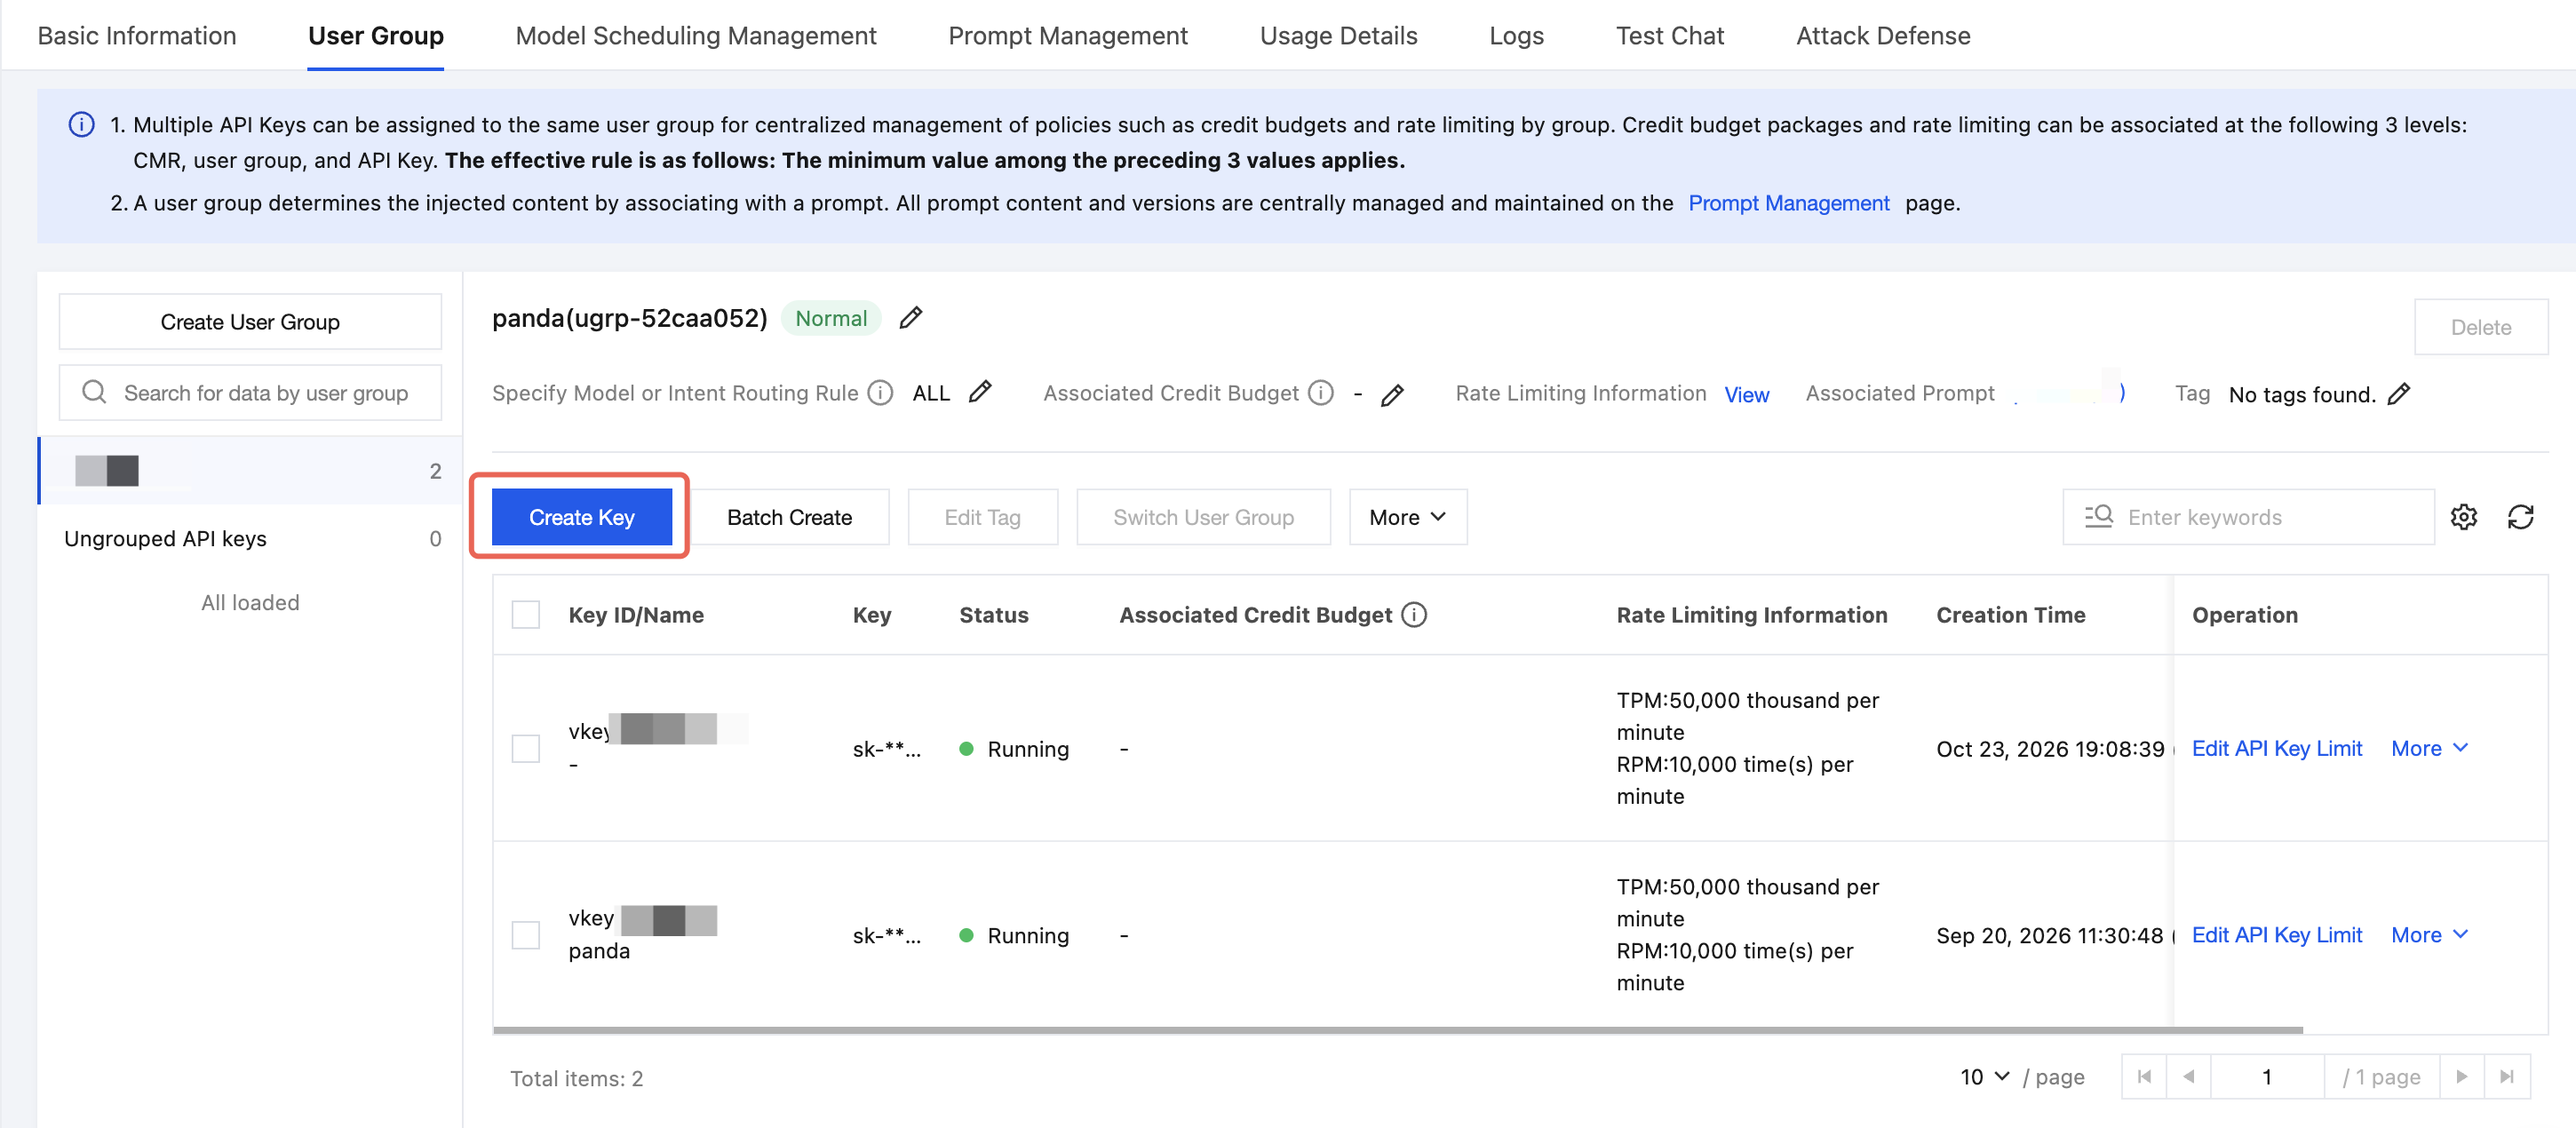
4. On the Create Key page, configure parameters such as Key Name, and click OK.
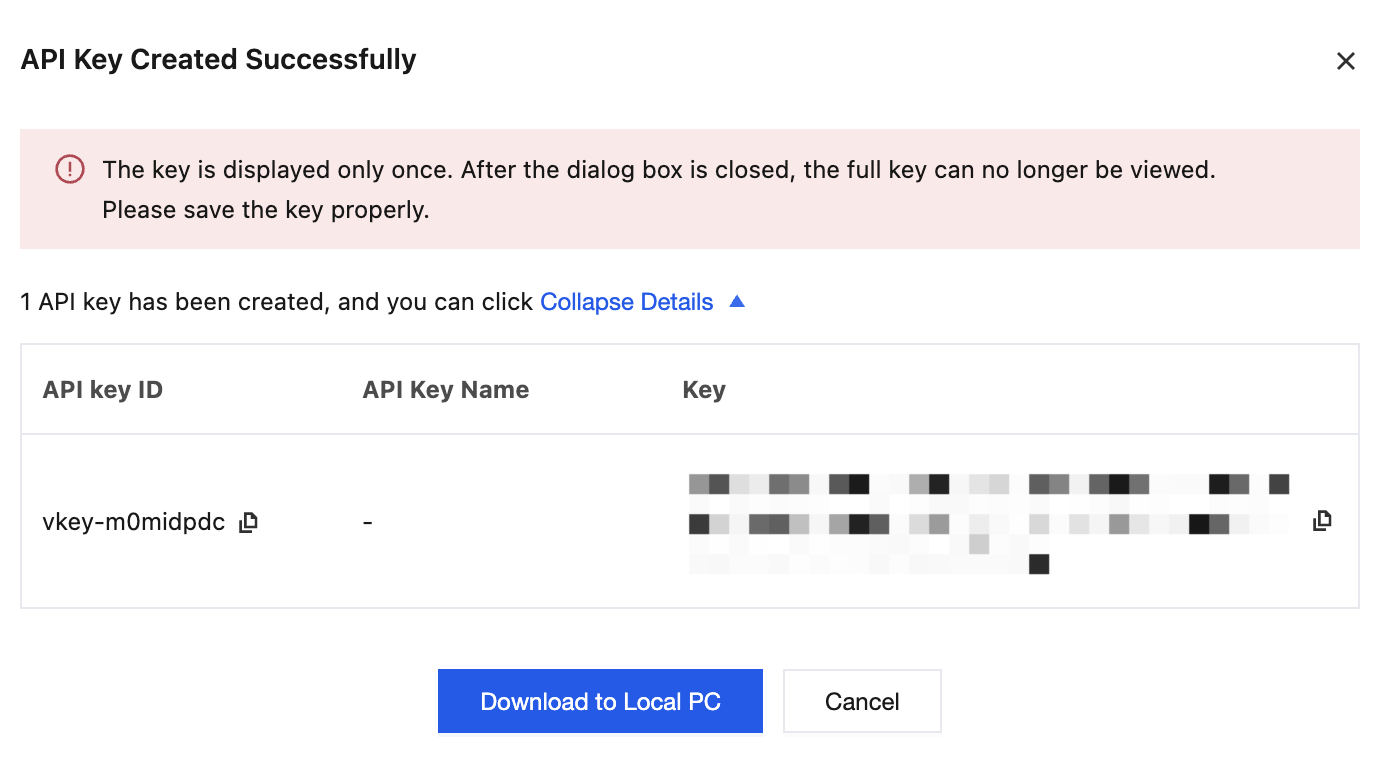
5. After the API Key is created, the API Key information is displayed in a success dialog. Keep it secure. You can also click Download Locally to save it.
Note:
1. After closing the dialog, you will not be able to view the complete Key again. Proceed with caution and keep it secure.
2. Newly created API keys are assigned to the Ungrouped API Keys user group by default. You can later assign them to other user groups based on business needs.
Step 2: Creating or Importing API Keys in Batches
1. To create keys in batches, click Batch Create Key on the User Group tab.
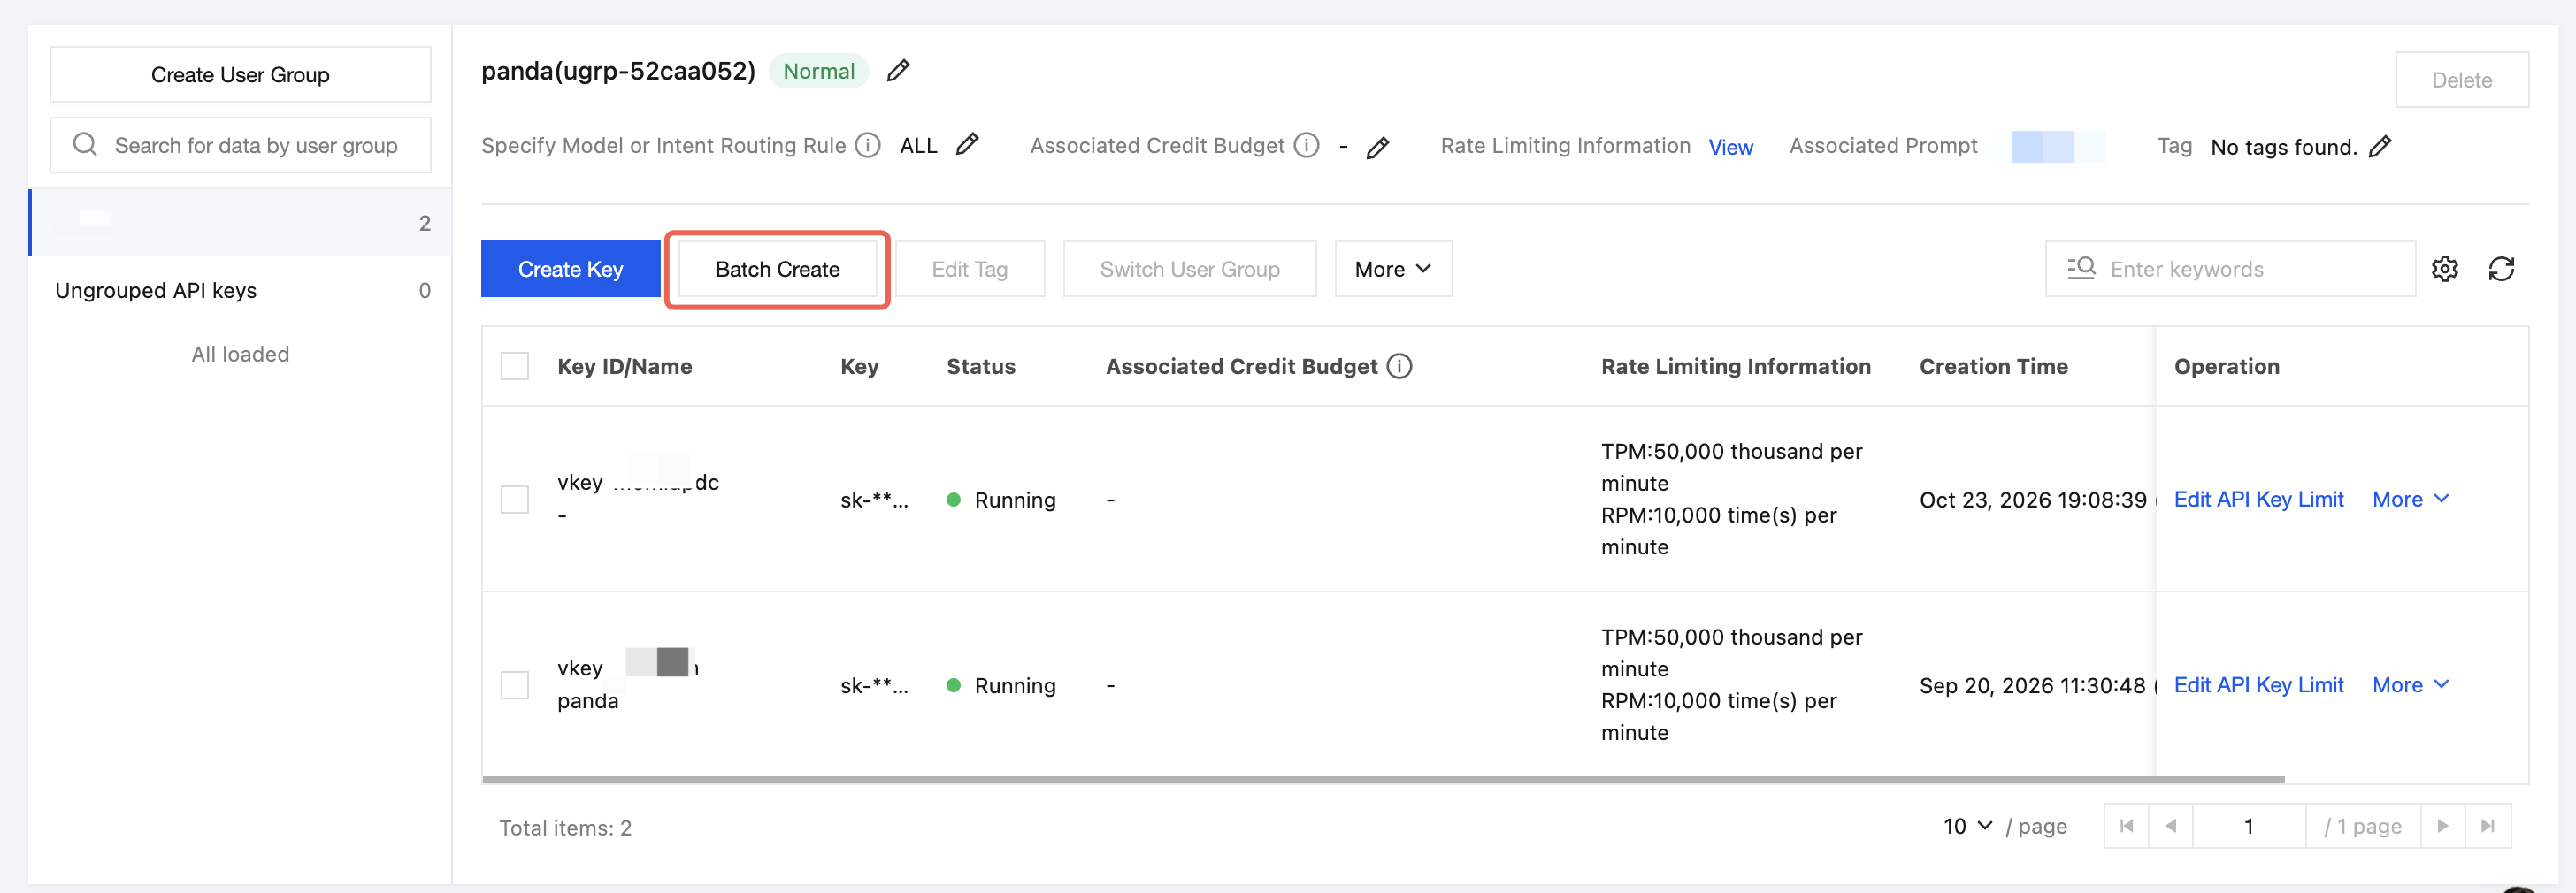
2. On the Batch Create Key page, you can select Auto Generate Key or Import Existing Key.
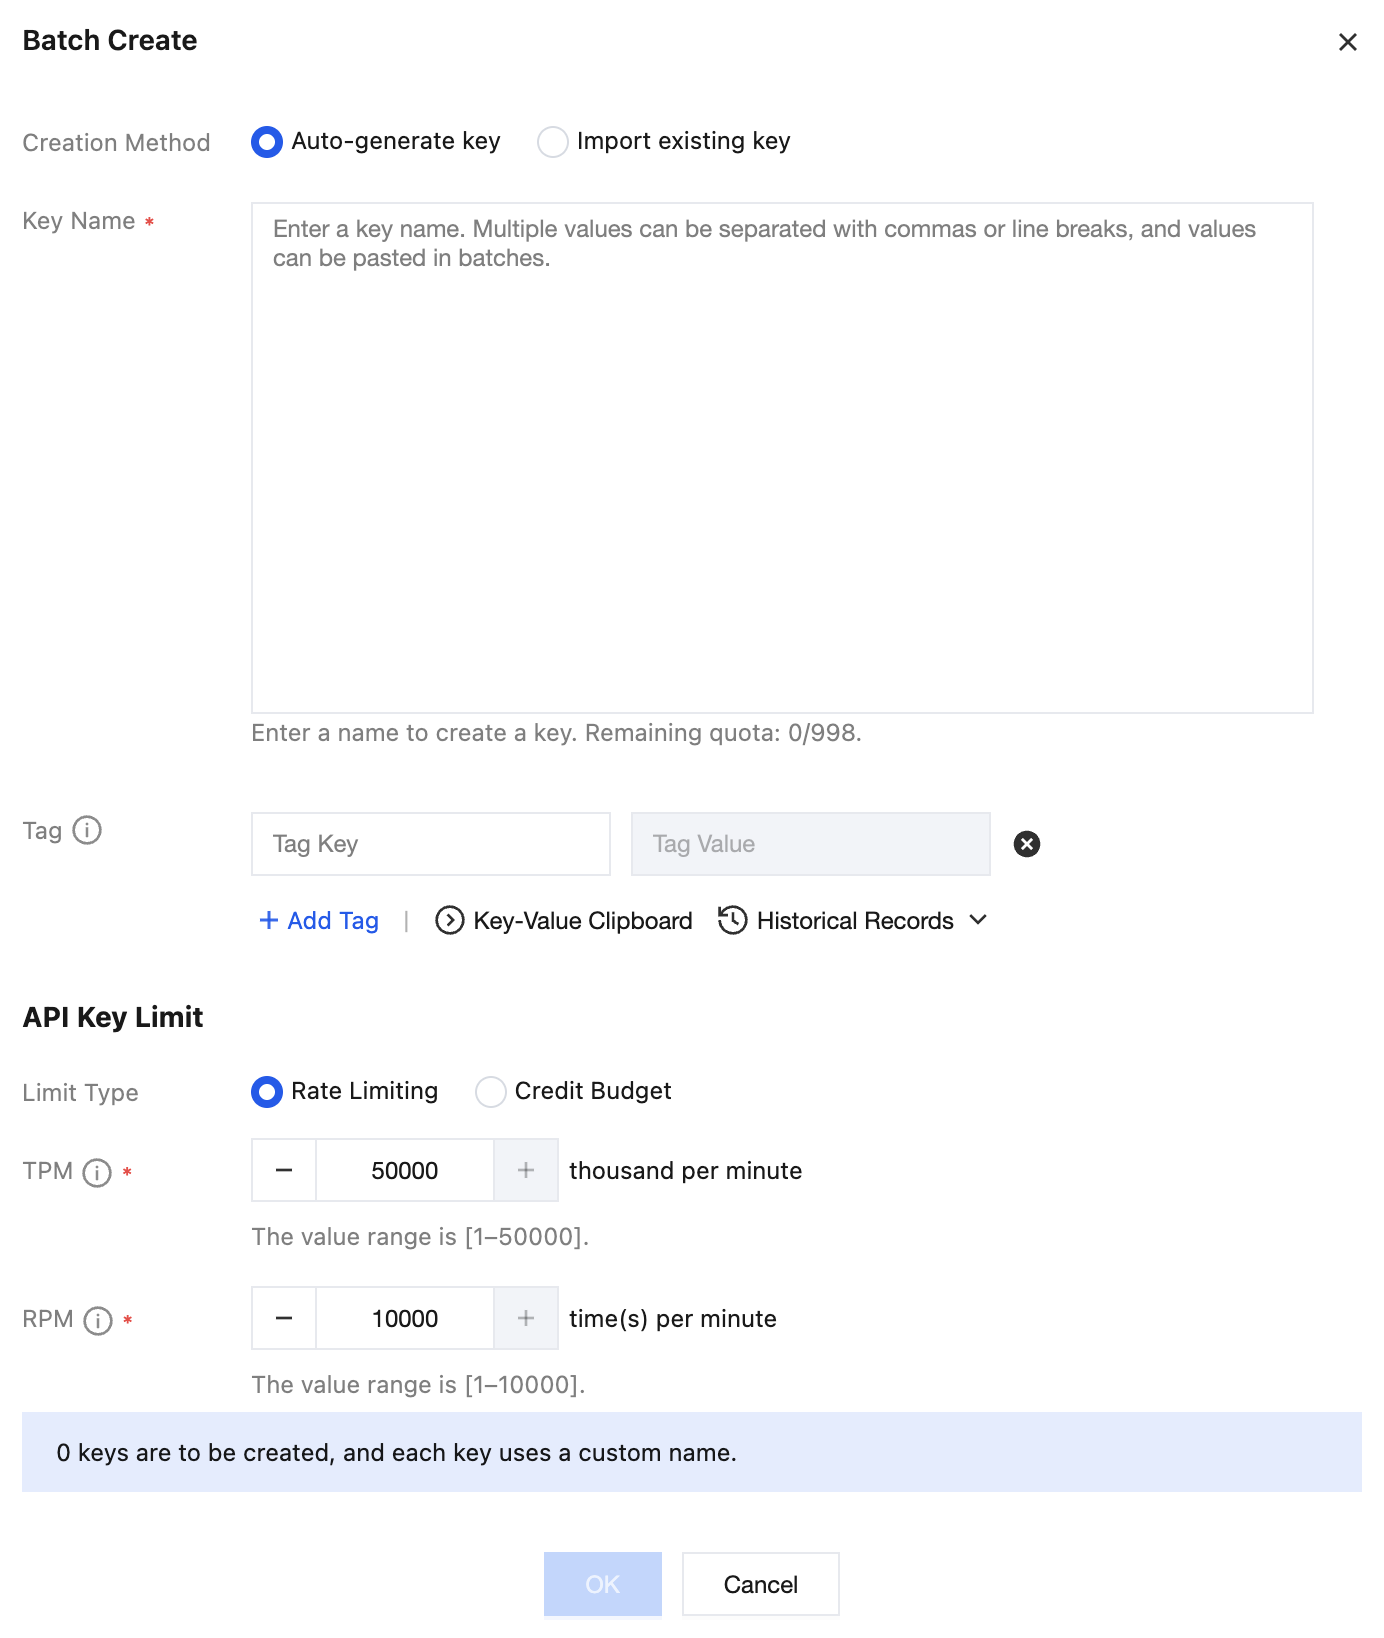
Enter the configuration information as required in the dialog, and click OK to create or import keys in batches.
Auto Generate Key: Enter the Key names to generate in batches. Separate multiple values with commas or line breaks. Batch pasting is supported.
Import Existing Key: Enter one Key to import per line in the format of Key Name, Key Content (separated by commas).
Note:
Import Existing Key is used to import credentials for accessing CMR instances, not for importing API keys from model service providers.
3. After API keys are created or imported in batches, the system displays the API Key information in a success dialog. Keep it secure. You can also click Download Locally to save it.
Note:
1. After closing the dialog, you will not be able to view the complete Key again. Proceed with caution and keep it secure.
2. API keys created or imported in batches are assigned to the Ungrouped API Keys user group by default.
Subsequent Operation Steps
1. Assign the API Key to the appropriate user group. For detailed instructions, see Assign Route Access Keys.
2. Add a BYOK model. For detailed instructions, see Creating a BYOK Instance.
3. Associate models and configure CMR policies. For detailed instructions, see Configuring Model Scheduling Management.
Help and Support
Was this page helpful?
You can also Contact sales or Submit a Ticket for help.
Help us improve! Rate your documentation experience in 5 mins.
Feedback