Model Scheduling Management Configuration
Download
Focus Mode
Font Size
This document describes how to associate models and manage model scheduling policies. After configuration is complete, user requests are centrally routed through CMR. After the platform completes billing, rate limiting, and log recording, it matches and makes decisions based on the models you associated and the routing policies you configured, and finally dispatches requests to the corresponding backend models.
Introduction
CMR scheduling management supports the following routing policies:
Intent routing: matches models based on the input intent.
Inter-model routing: selects models based on the routing policy.
Intra-model routing: selects a provider (or API key) based on the routing policy.
Sticky routing: supported in multi-turn session scenarios.
Fallback: supports two levels of Fallback, intra-model and inter-model.
Prerequisites
It is recommended to read Usage Constraints and Supported Models in advance for relevant information.
A CMR instance has been created. For detailed instructions, see Creating a CMR Instance.
A BYOK instance has been created. For detailed instructions, see Creating a BYOK Instance.
A CMR access key (API Key) has been created. For detailed instructions, see Creating a CMR Access Key.
Operation Steps
Step 1: Select a Modality
1. Log in to the CMR console. On the Instance Management page, click the target instance ID to go to the basic information page of the target instance. Switch to the Model Scheduling Management tab.
2. Supports selecting models such as text generation, video generation, vector embedding, reranking, and classification decision models (for example, the Jev model).
Step 2: Associate a Model
1. Log in to the CMR console. On the Instance Management page, click the target instance ID to go to the basic information page of the target instance.
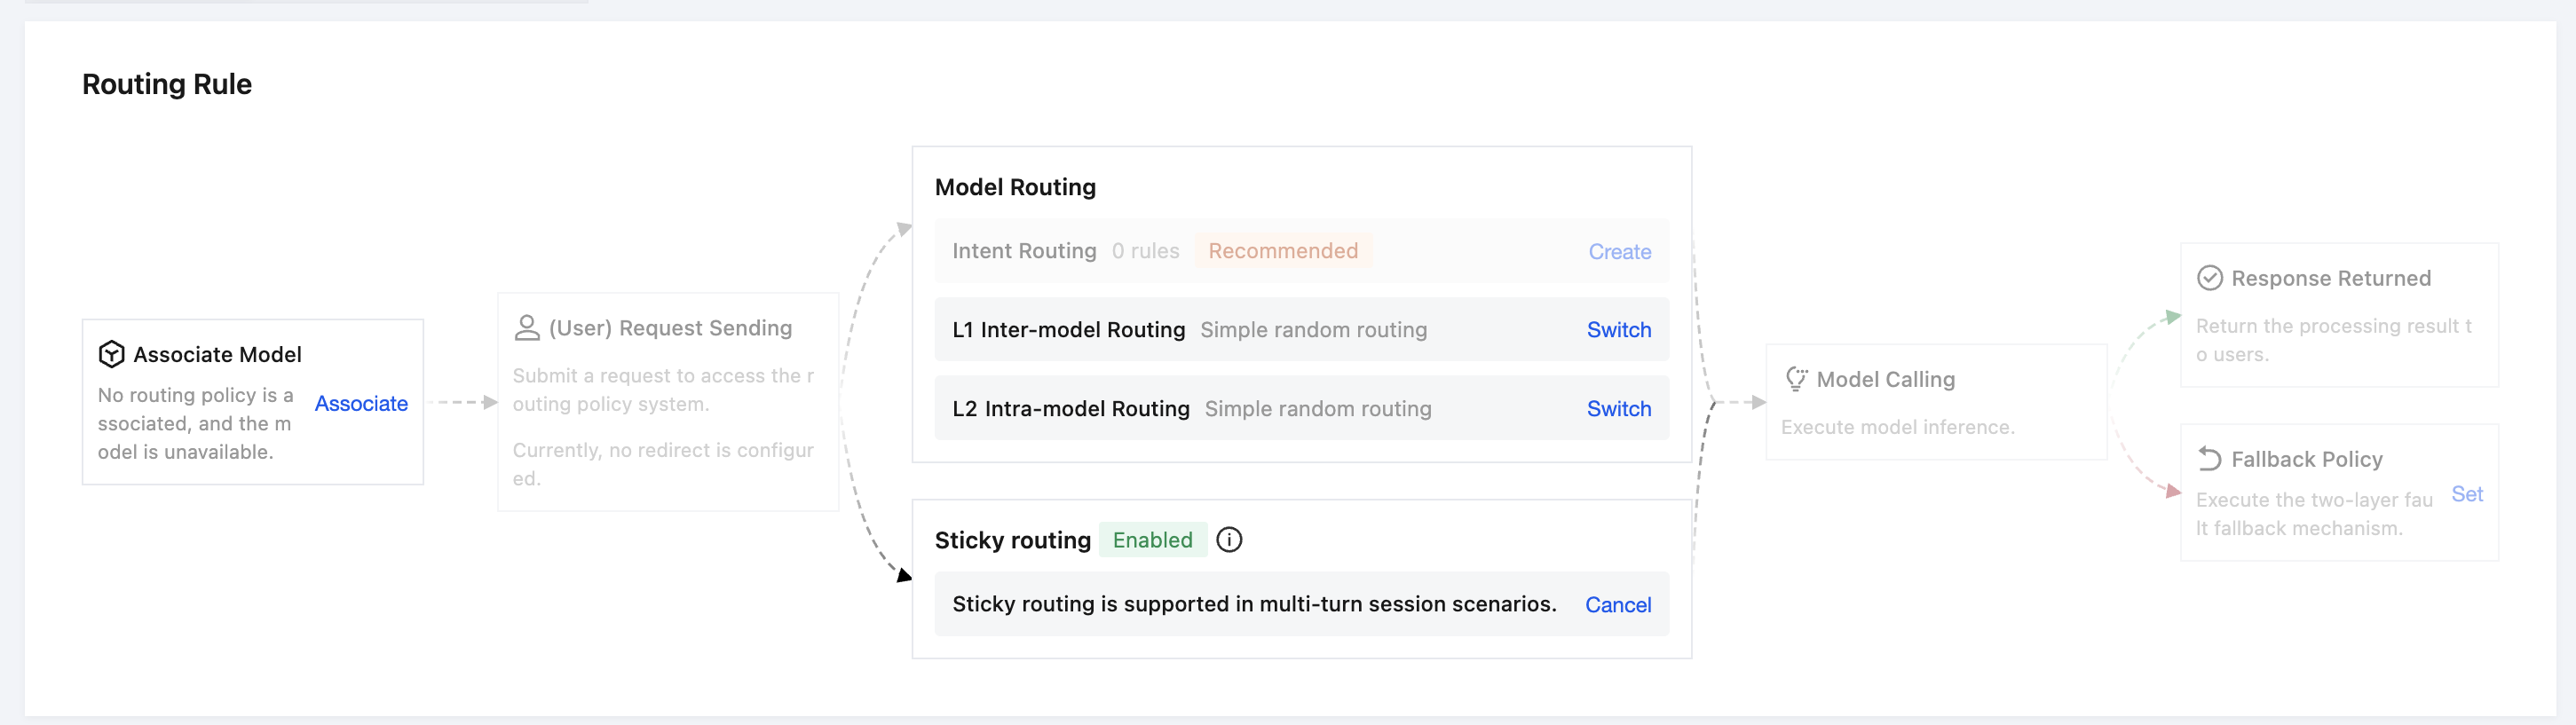
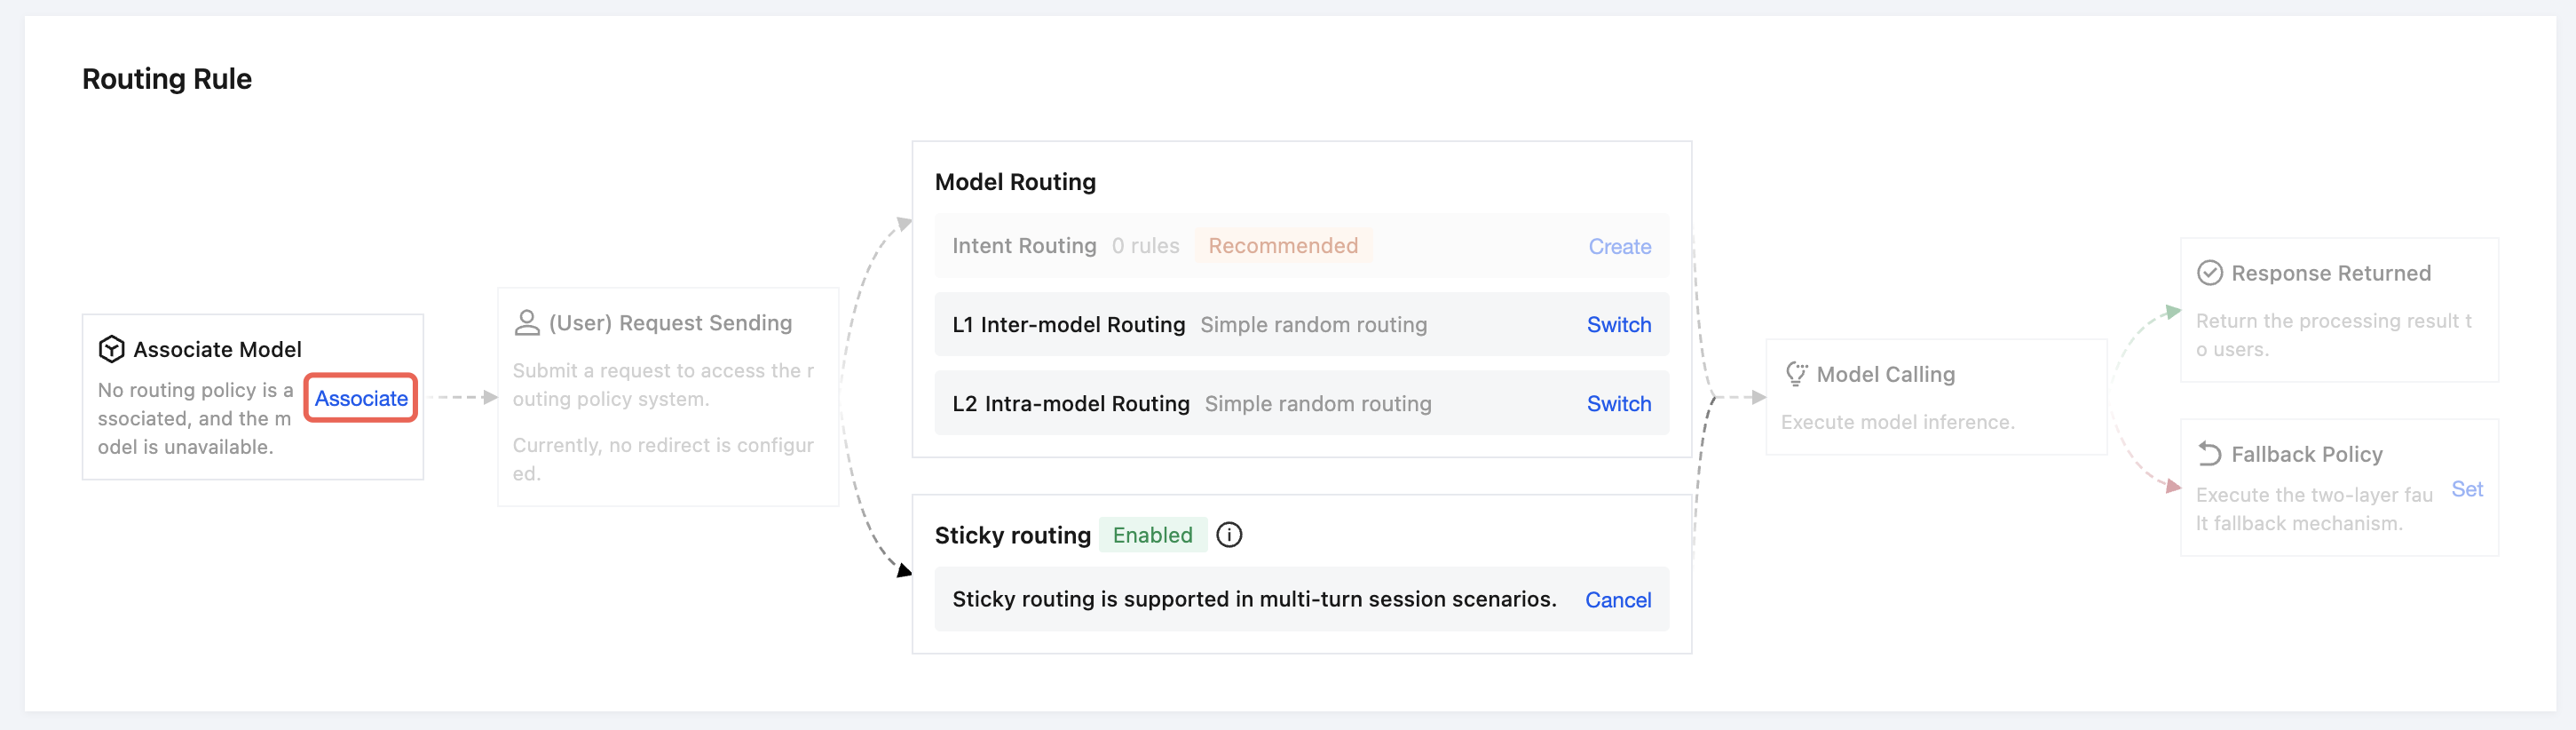
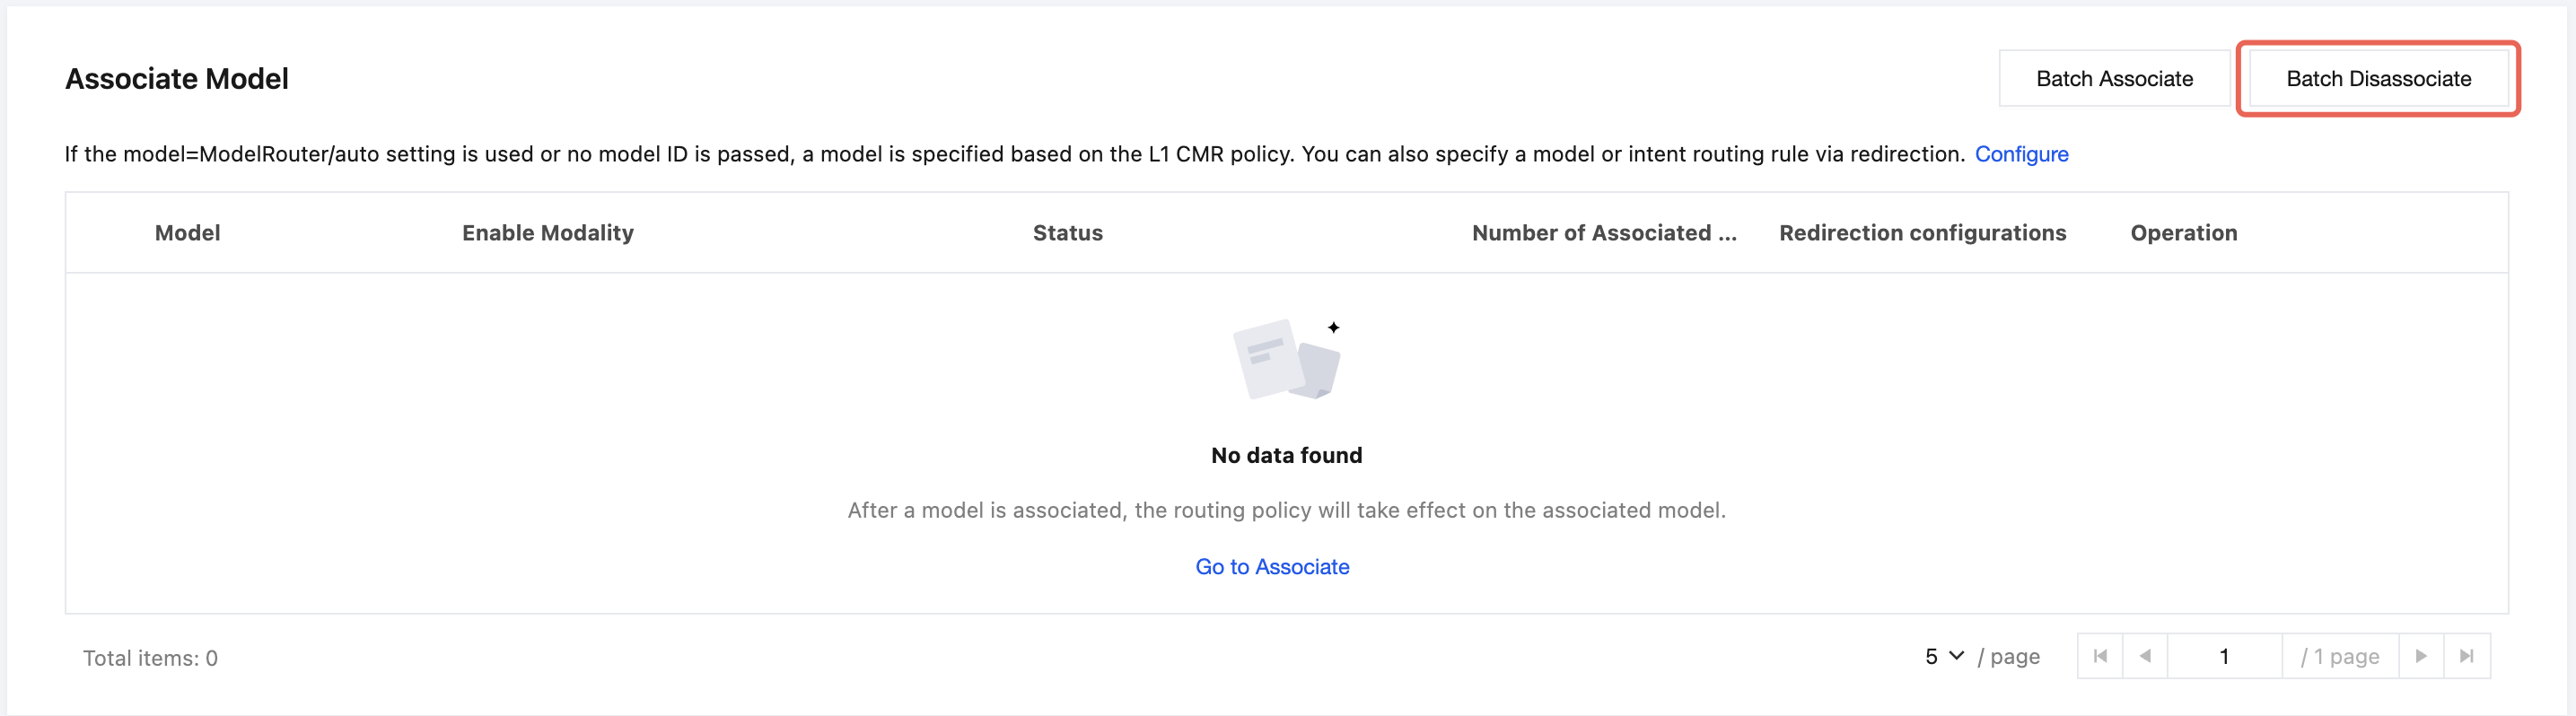
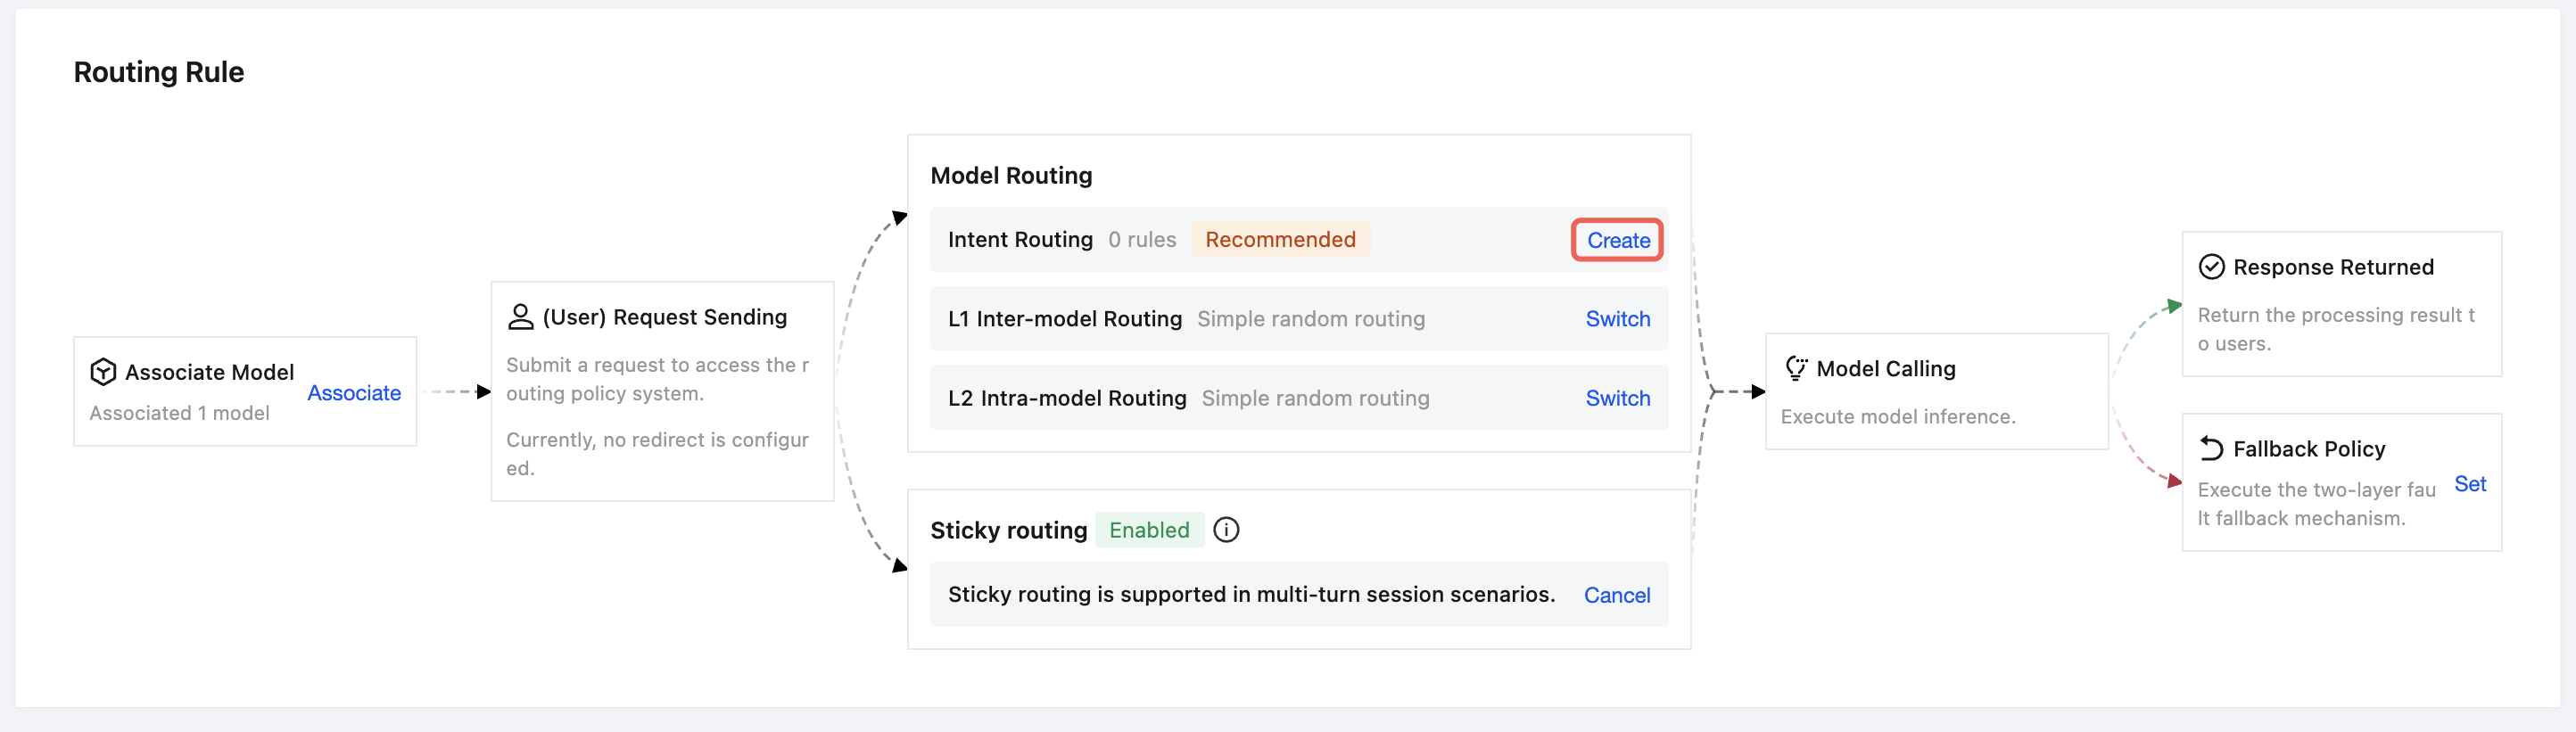
2. On the Model Scheduling Management tab, click Associate on the associated model node in the routing policy diagram. Alternatively, click Batch Associate in the Associated Model module on the page.
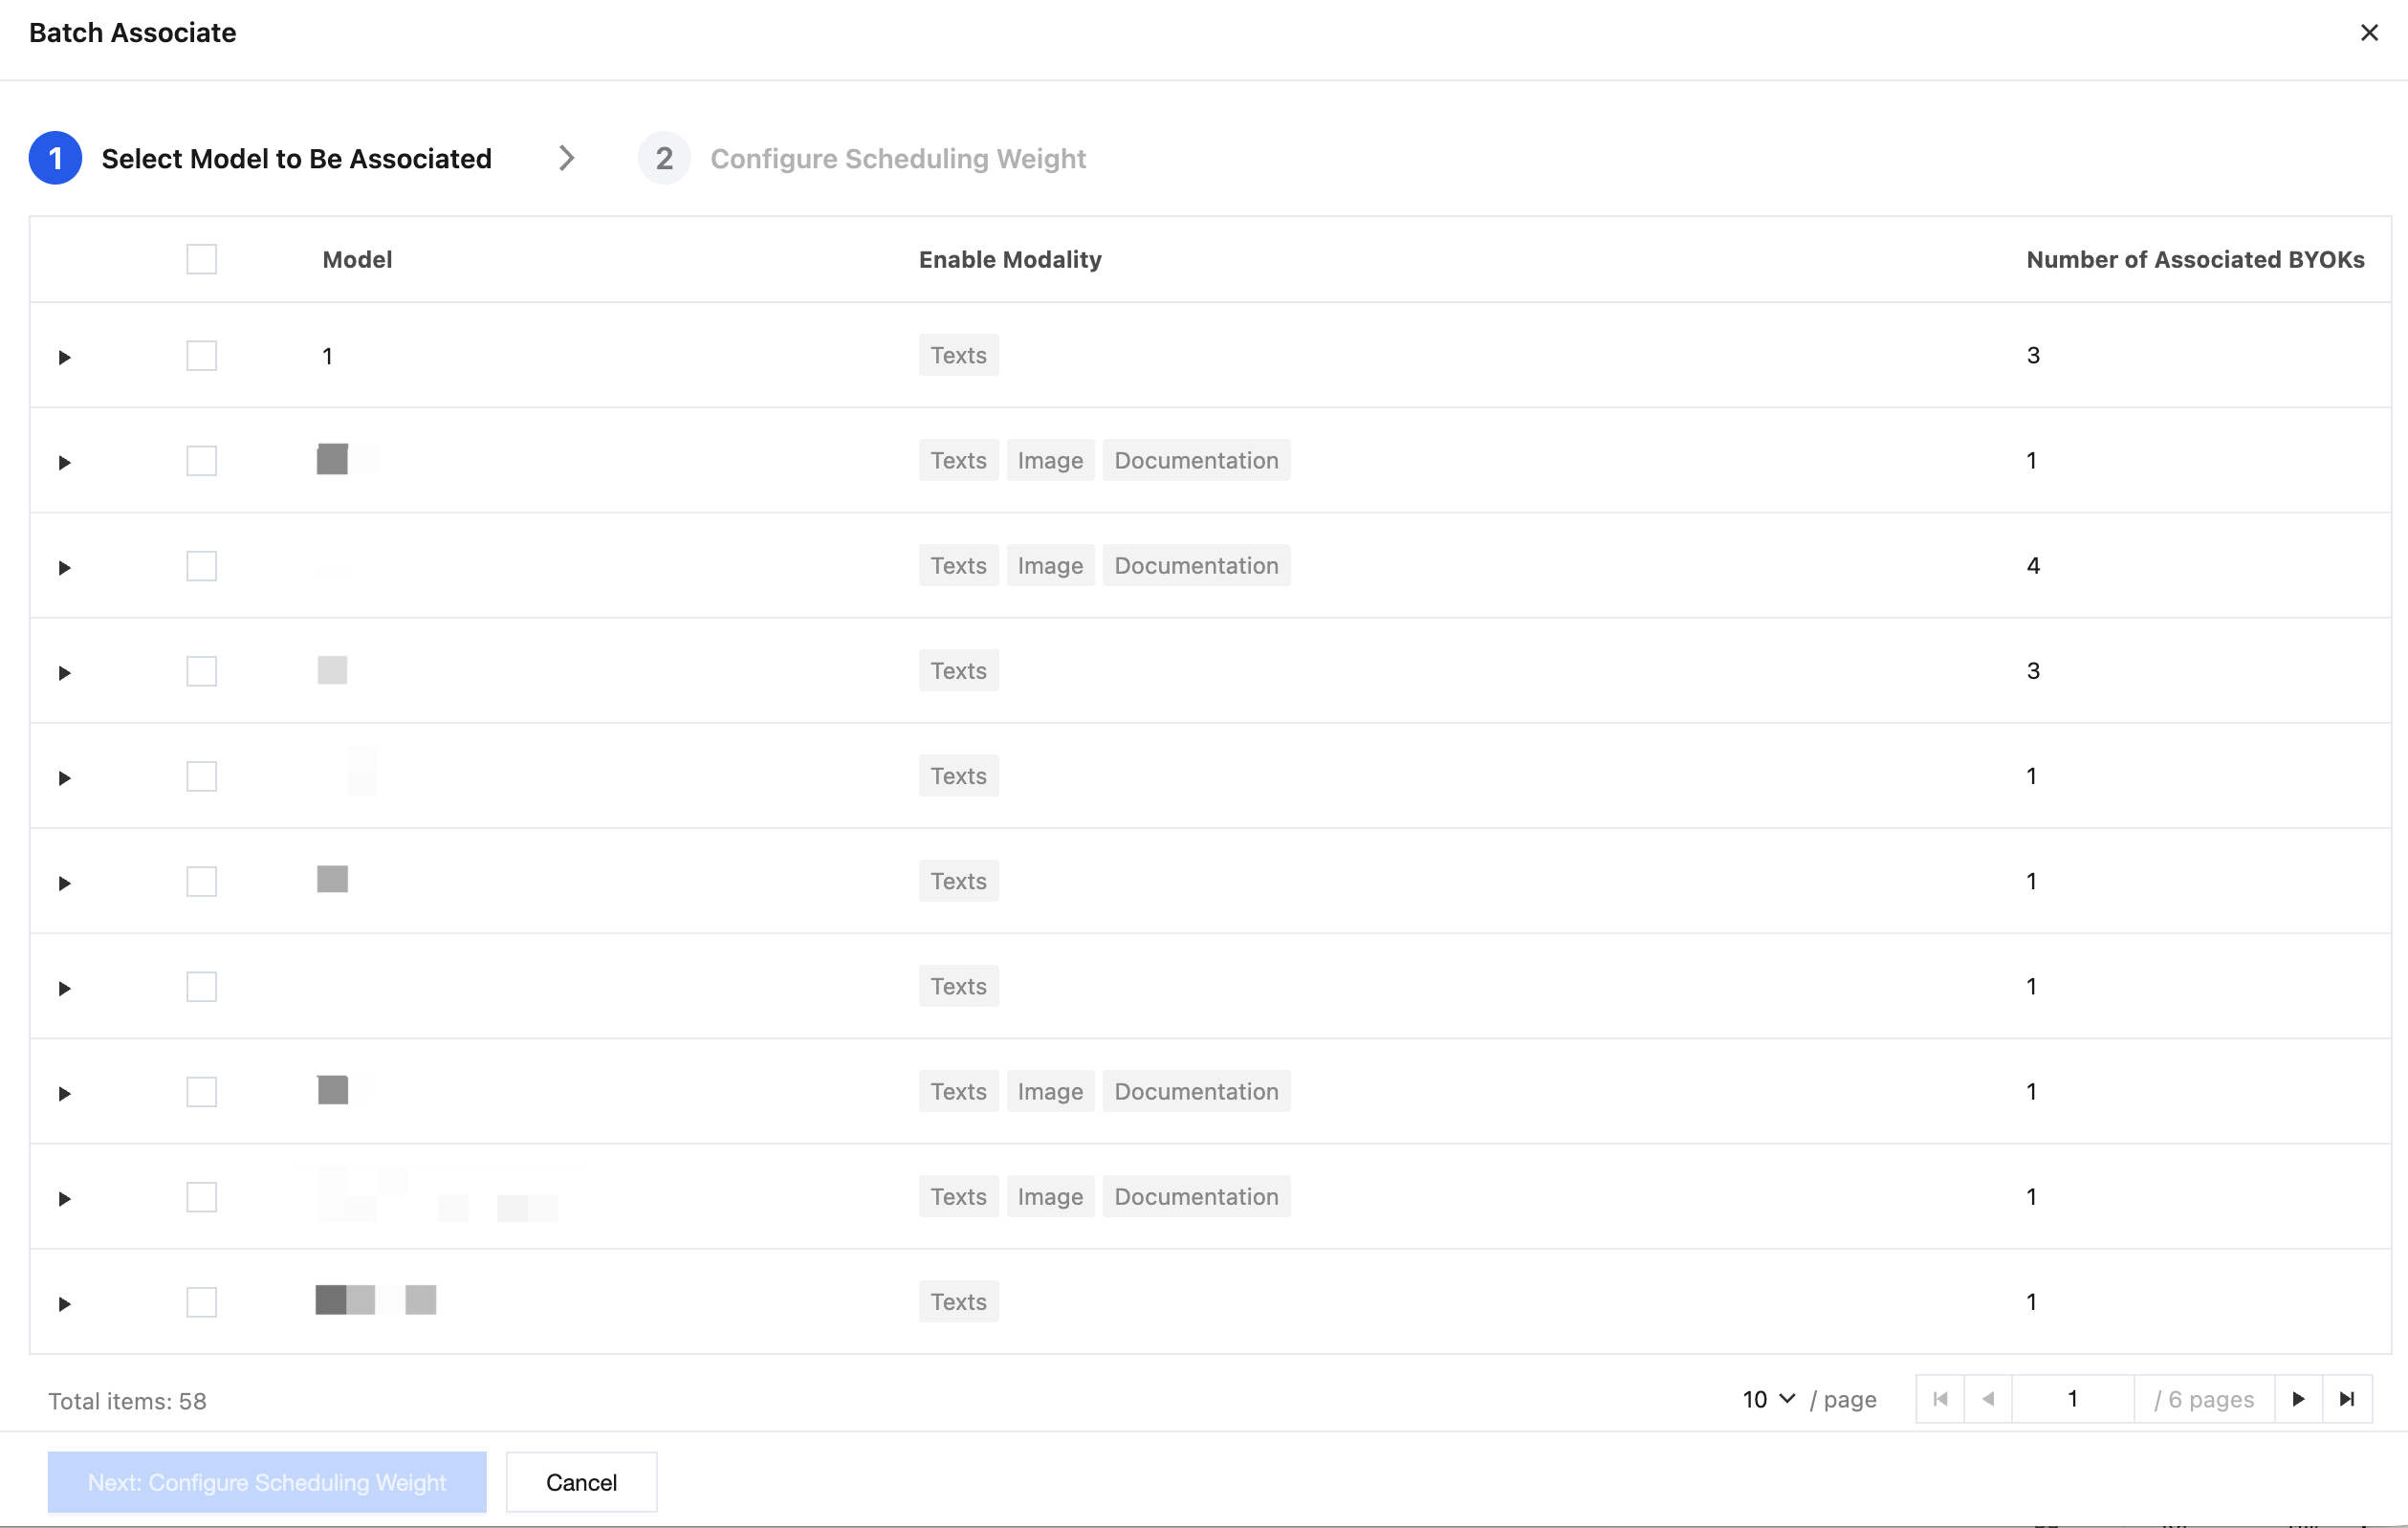
3. Confirm the model name, enabled modalities, and other information, select the model to associate, and after verifying that the information is correct, click Next: Scheduling Weight Configuration.
4. Configure the priority and weight for the selected models. The gateway selects models in the order of P0 → P1 → P2, and automatically downgrades when a higher-priority model is unavailable. Models within the same priority are selected based on weight, and the expected traffic share is calculated according to the weight proportion within the same priority. After confirming that the information is correct, click OK.
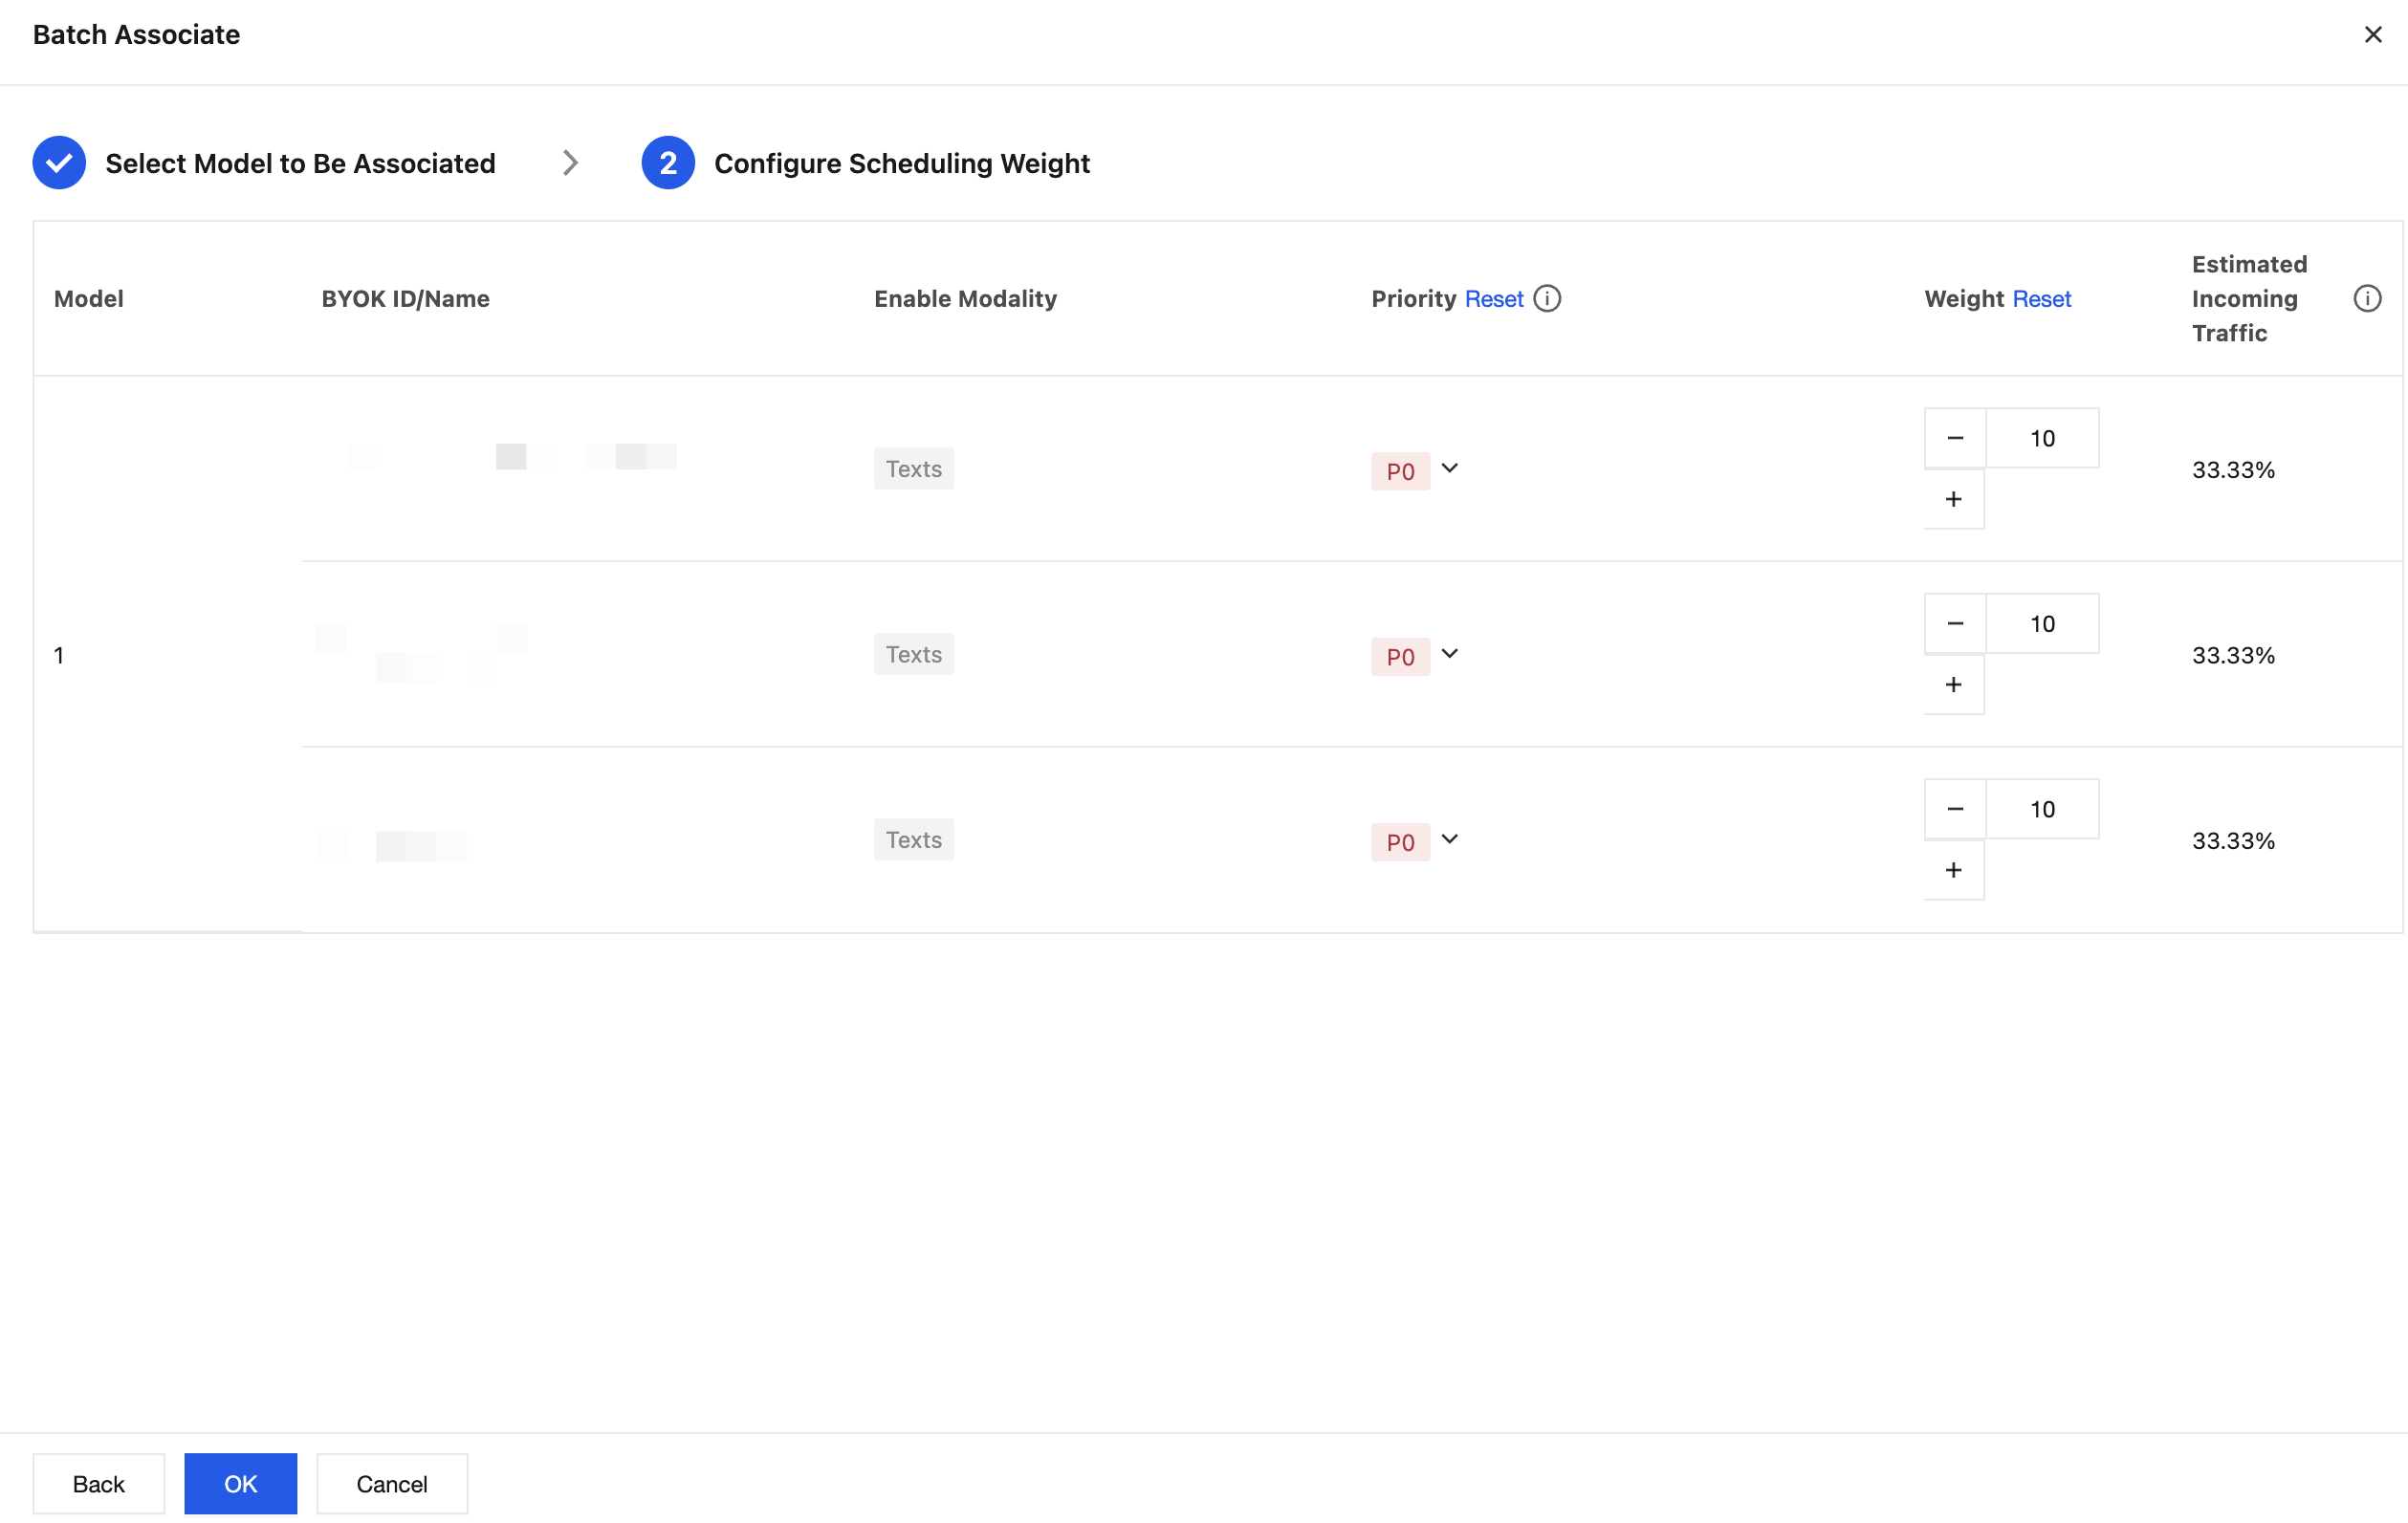
5. After the association is completed, you can view information about the associated models in the list, including model name, source, enabled modalities, model connection status, BYOK quantity, priority, and weight. You can also perform model redirection, disassociation, and scheduling configuration.
6. Associated models support redirection configuration. When a request includes an associated model ID, you can use redirection to specify another model or intent routing rule as the actual model to be called for that model. When model=auto or no model ID is passed, the system specifies a model based on the L1 CMR policy by default. You can also use redirection to specify a model or intent routing rule.
7. To configure redirection, click Configure in the Redirect Model column of the row where the target model is located, and then select the redirection type and target model to complete the configuration.
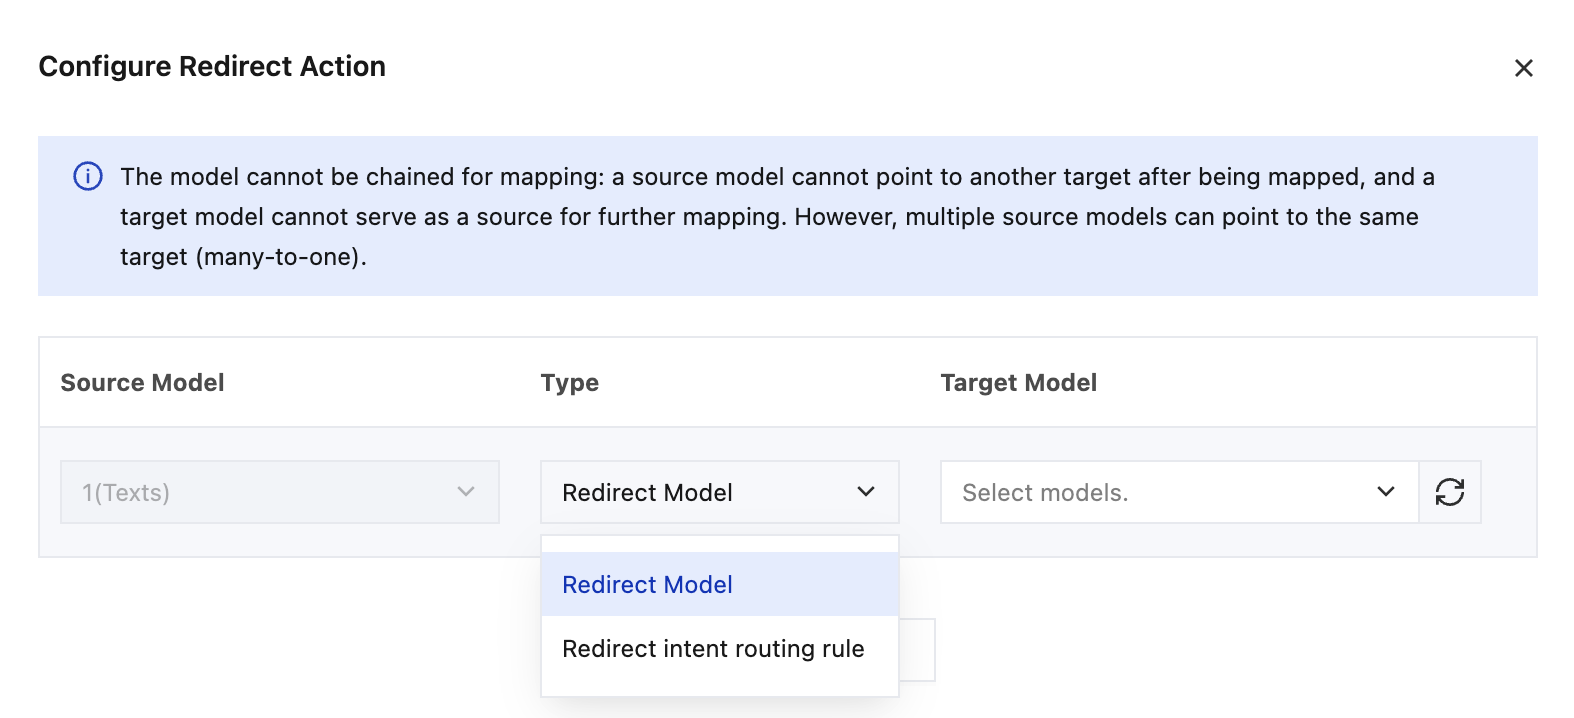
The following two types of redirection targets are supported:
Redirection Type | Description |
Redirection model | When a request hits the current model, the system no longer directly calls the current model but calls the model specified after redirection. |
Intent routing rule for redirection | When a request hits the current model, the system no longer directly calls the current model but enters the specified intent routing rule, and the processing model corresponding to the intent classification continues to complete request distribution. |
8. To disassociate a model, click Disassociate in the row where the target model is located. To disassociate models in batches, click Batch Disassociate. After disassociation, the model will be removed from the current instance and will no longer be available as an option in the CMR policy.
9. To modify the priority and weight configuration, click Scheduling Configuration in the row where the target model is located, and then reconfigure the scheduling priority and weight for the associated model.
Step 3: Configure Intent Routing (Recommended)
Note:
If no intent routing rule is configured, the policy is skipped.
1. On the Model Scheduling Management tab, click Create on the intent routing node in the routing policy diagram. Alternatively, click Create Rule in the Intent Routing module on the page.
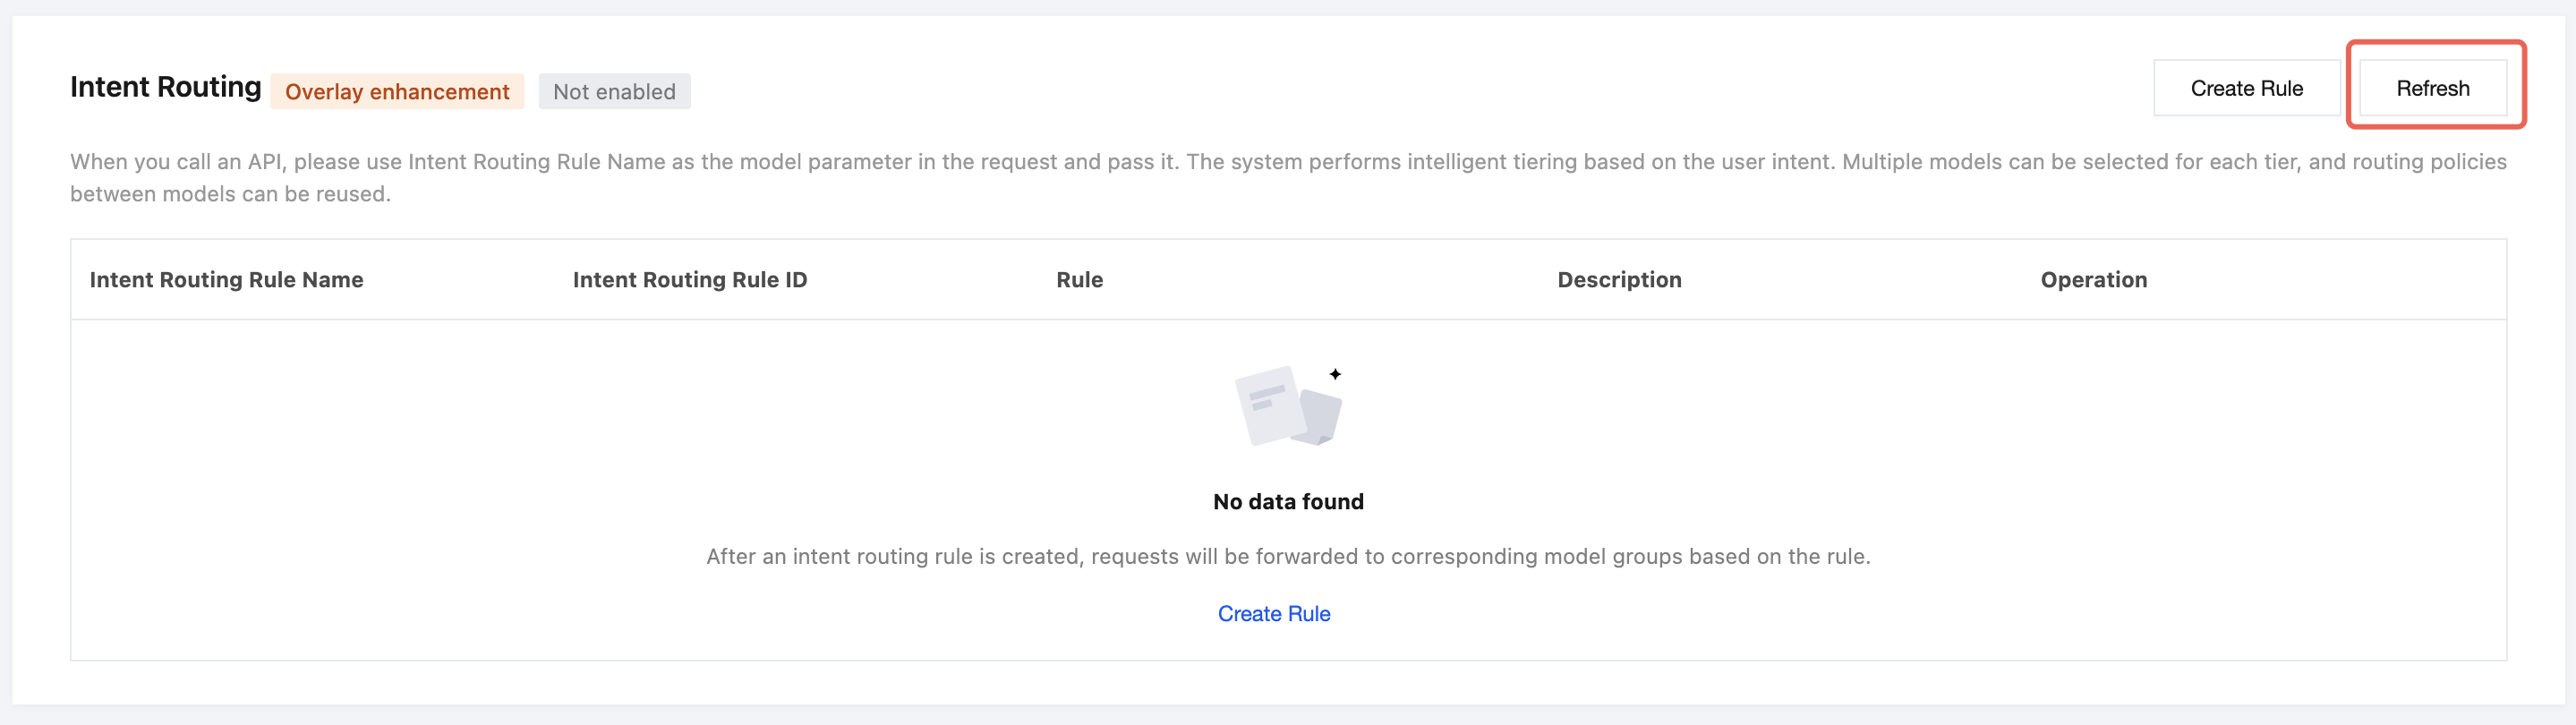
2. In the Create Intent Routing Rule dialog, configure the business template, intent routing rule name, intent routing configuration, and description. An intent routing rule can distribute requests to multiple intent categories, and each intent category can be configured with its own processing model. The system automatically determines the intent category of user requests based on common task classification, requiring no configuration of judgment rules.
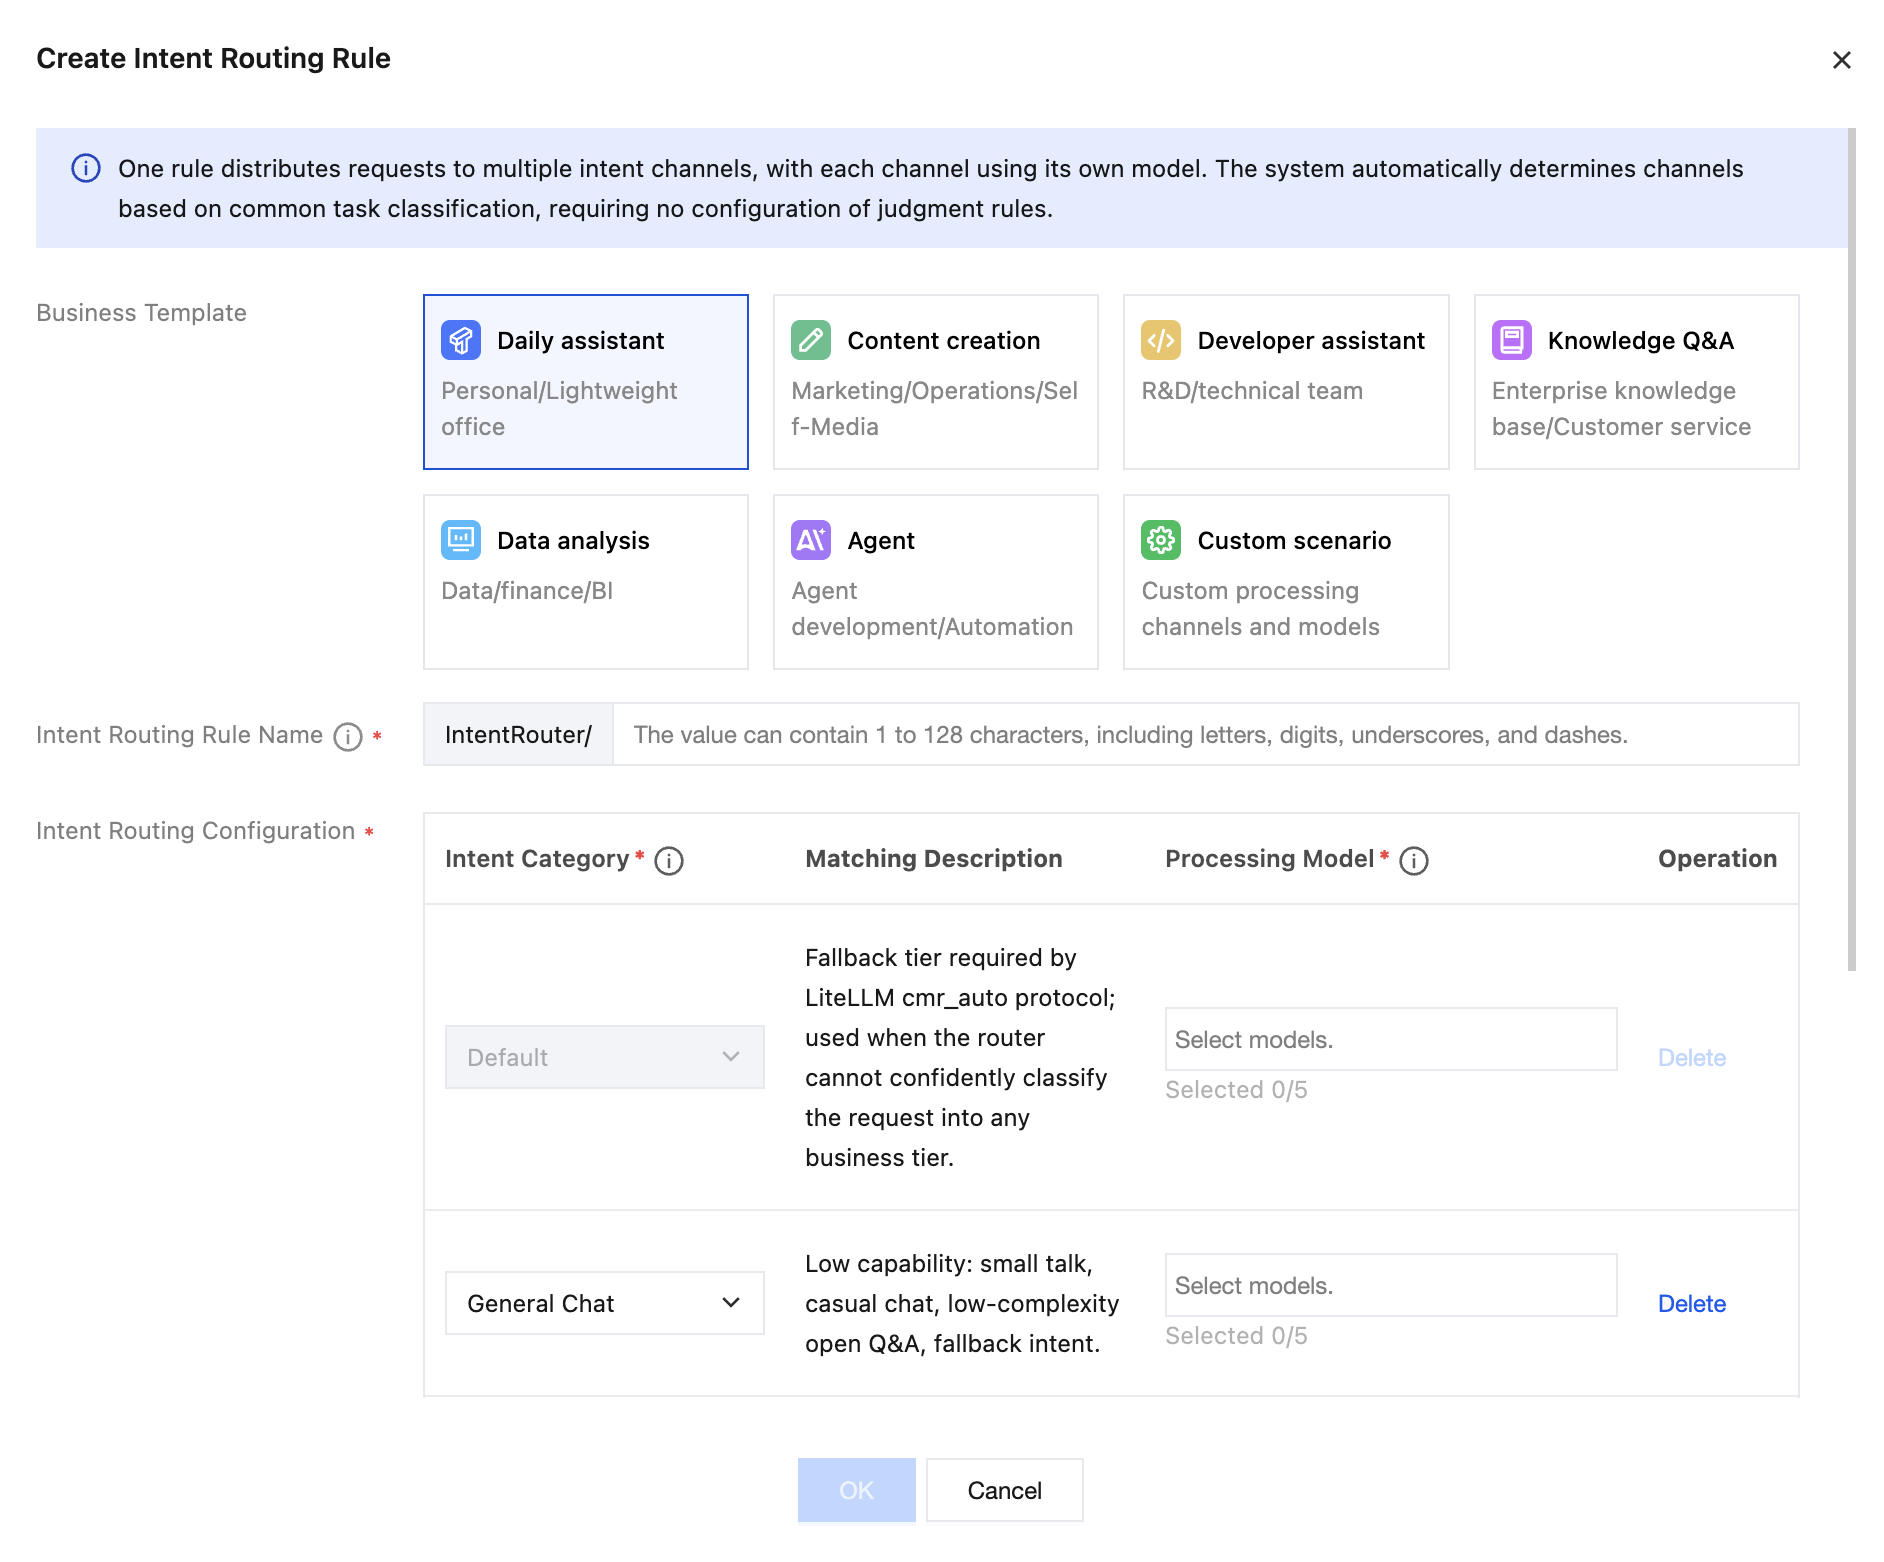
Field | Description |
Business Template | Used to quickly generate intent routing configurations for different business scenarios. Supports templates such as daily assistant, content creation, development assistant, knowledge Q&A, data analysis, and intelligent agent/Agent, and also supports custom scenarios. After a business template is selected, the system displays the corresponding intent categories and matching instructions. |
Intent Routing Rule Name | Intent routing rule name. Enter as needed. |
Intent Routing Configuration | Used to configure processing models corresponding to different intent categories. The system automatically matches intent categories based on user request content and calls the processing model configured for the matched intent category. |
Intent Category | Indicates the task type of user requests. The system automatically determines the intent category based on user messages. |
Processing Model | Model actually called after the intent category is matched. A maximum of 5 processing models can be selected for each intent category. When multiple processing models are configured, the system schedules requests based on the routing policy between models. |
Default Value | Default fallback category. When intent routing fails to match a request to other intent categories, the processing model configured for the default category is used. Configure an available model for the default category to prevent requests from being unprocessed. |
Add Channel | Click Add Channel to create an intent category configuration and select a processing model for the intent category. |
Deleting an alarm policy | Delete the intent category configuration of the current row. |
Enable Classification Decision Model | After enabled, the available classification decision model associated with this CMR instance is used to implement intent routing. |
Description | Enter a description as needed to help identify and locate different intent routing rules. |
3. Click OK to complete the configuration.
After the configuration is completed, you can perform the following operations:
Click Details to view the configuration information of the intent routing rule.
Click Edit to configure the intent routing rule.
Click Delete to delete the specified intent routing rule.
Click Copy to quickly copy the configuration of the current intent route.
Step 4: Configure Routing Policies Between Models
On the inter-model routing node in the routing policy diagram, click Switch to configure the inter-model routing policy. Alternatively, configure it in the Inter-Model Routing module on the page. After models are associated, the system dynamically selects different models under the associated models based on the selected routing algorithm.
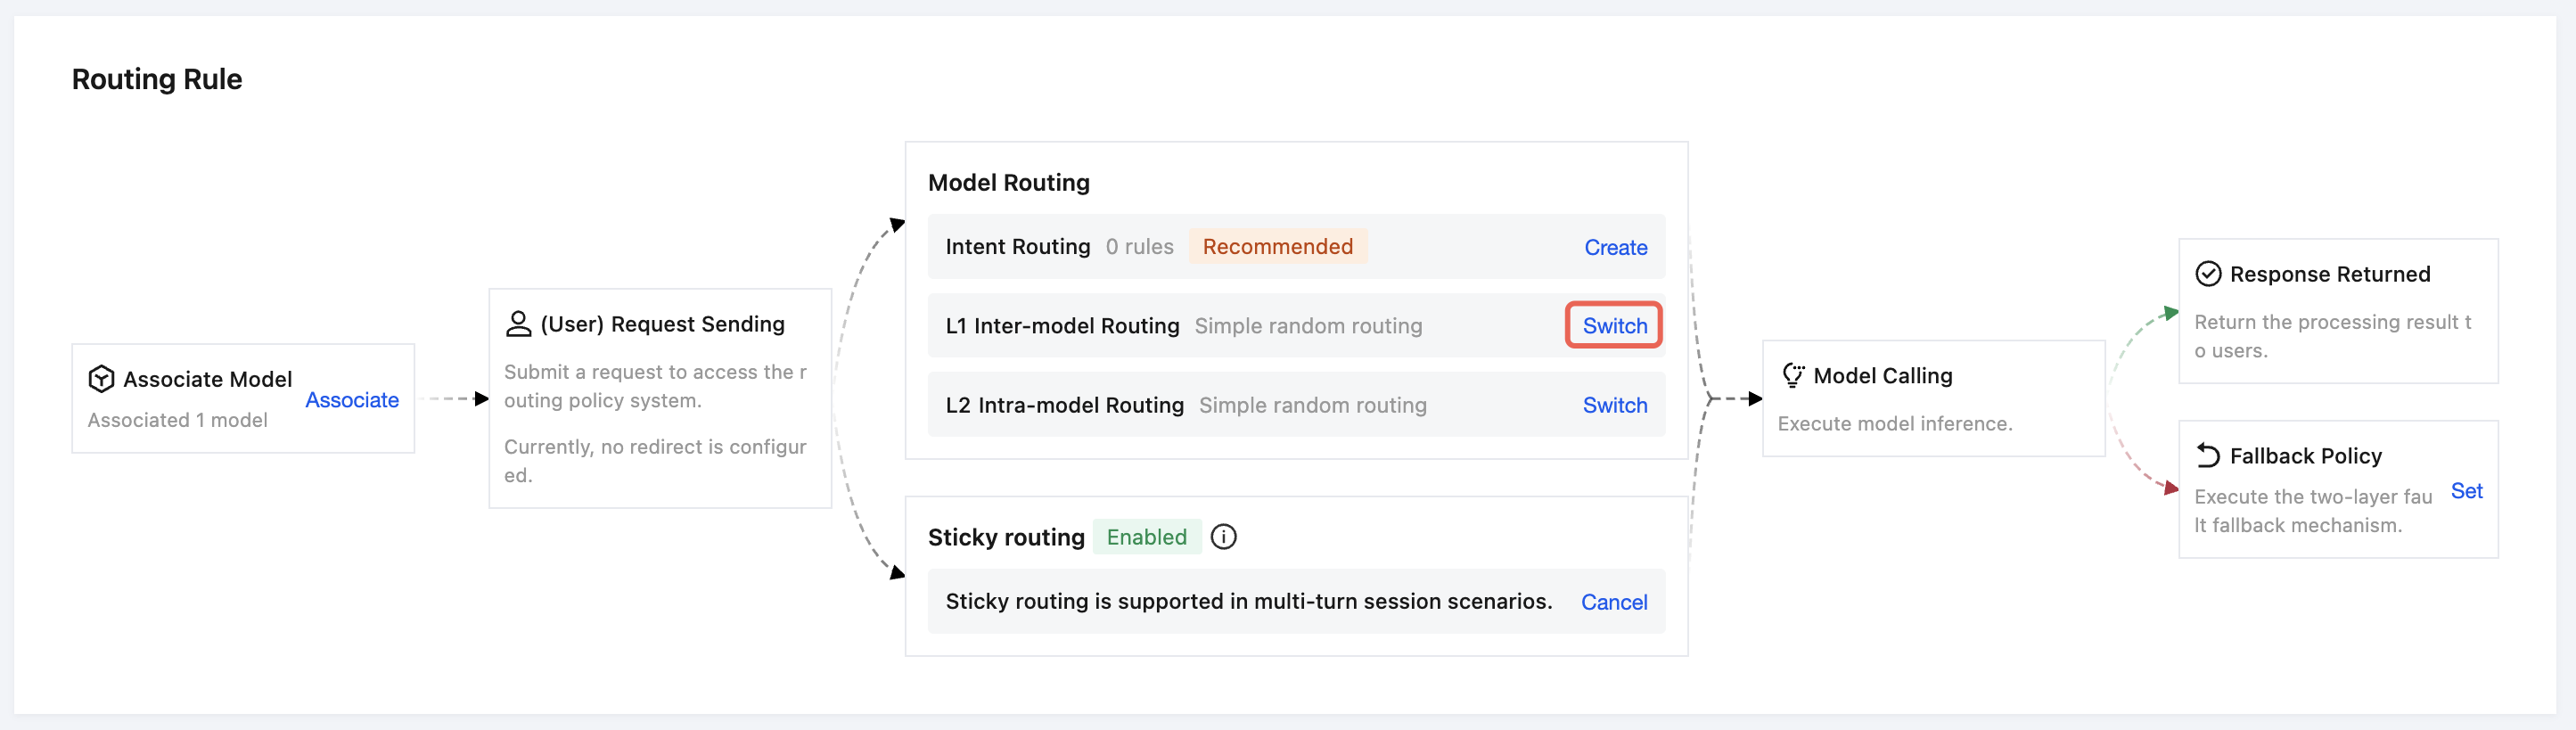
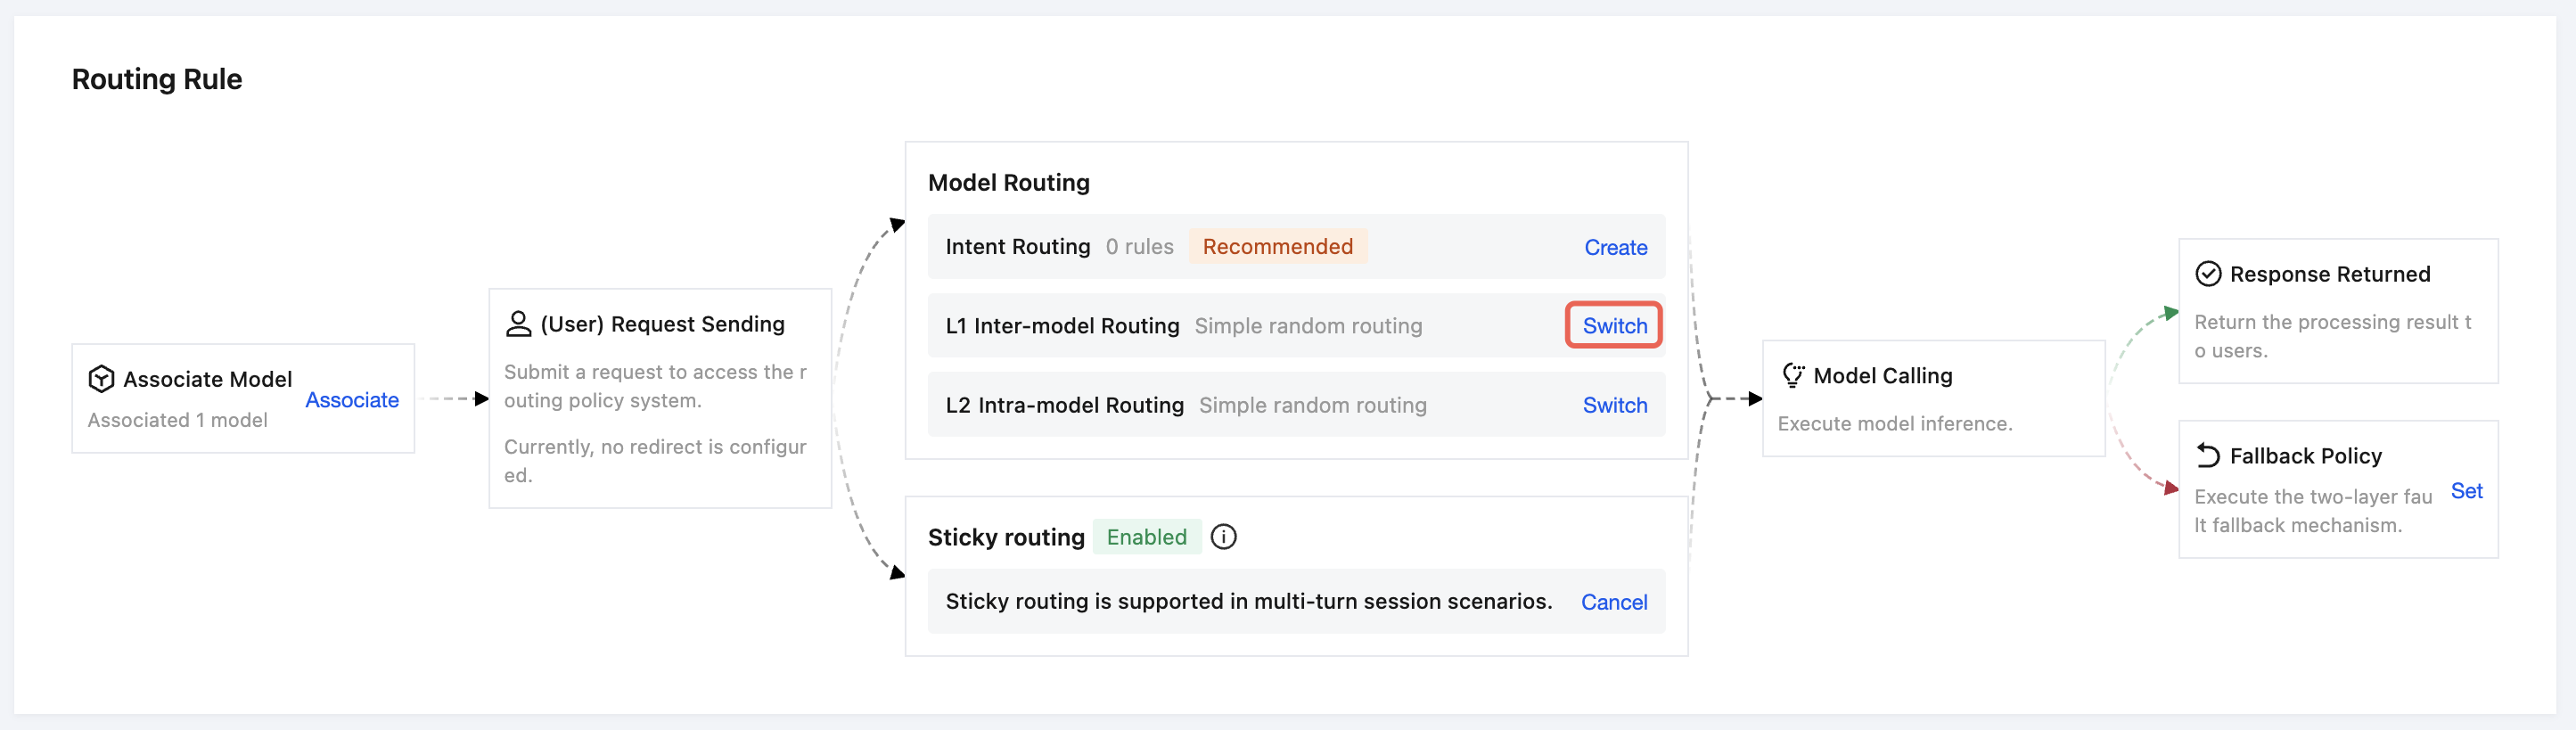
Policy | Description |
simple random routing | Randomly select from available models. |
least-busy routing | Assign requests to the currently least busy model. |
lowest-latency routing | Automatically select the model with the lowest current latency. |
usage-balanced routing | Distribute requests to each model evenly based on usage. |
Minimum coefficient routing | Prioritize distribution to models with lower scores. |
Step 5: Configure Routing Policies Within a Model
On the intra-model routing node in the routing policy diagram, click Switch to configure the intra-model routing policy. Alternatively, configure it in the Intra-Model Routing module on the page. After the model is determined, the system dynamically selects different service providers (or API keys) under the model based on the selected routing algorithm.
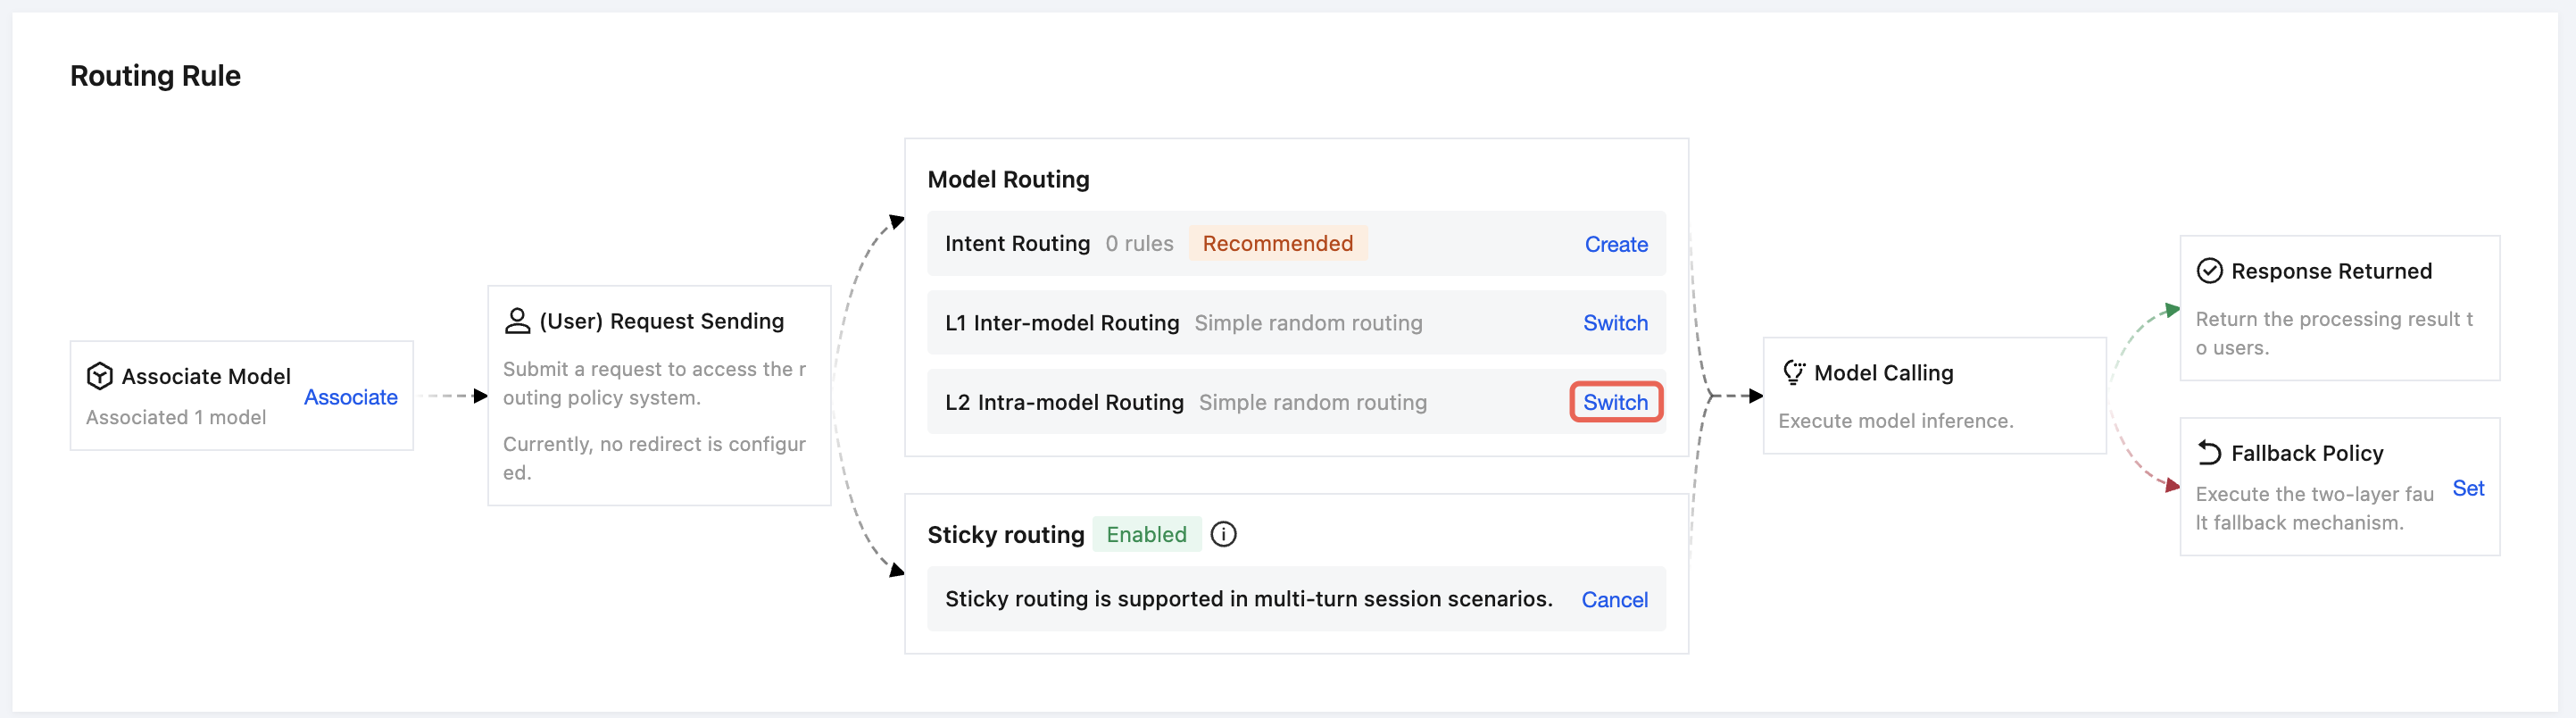
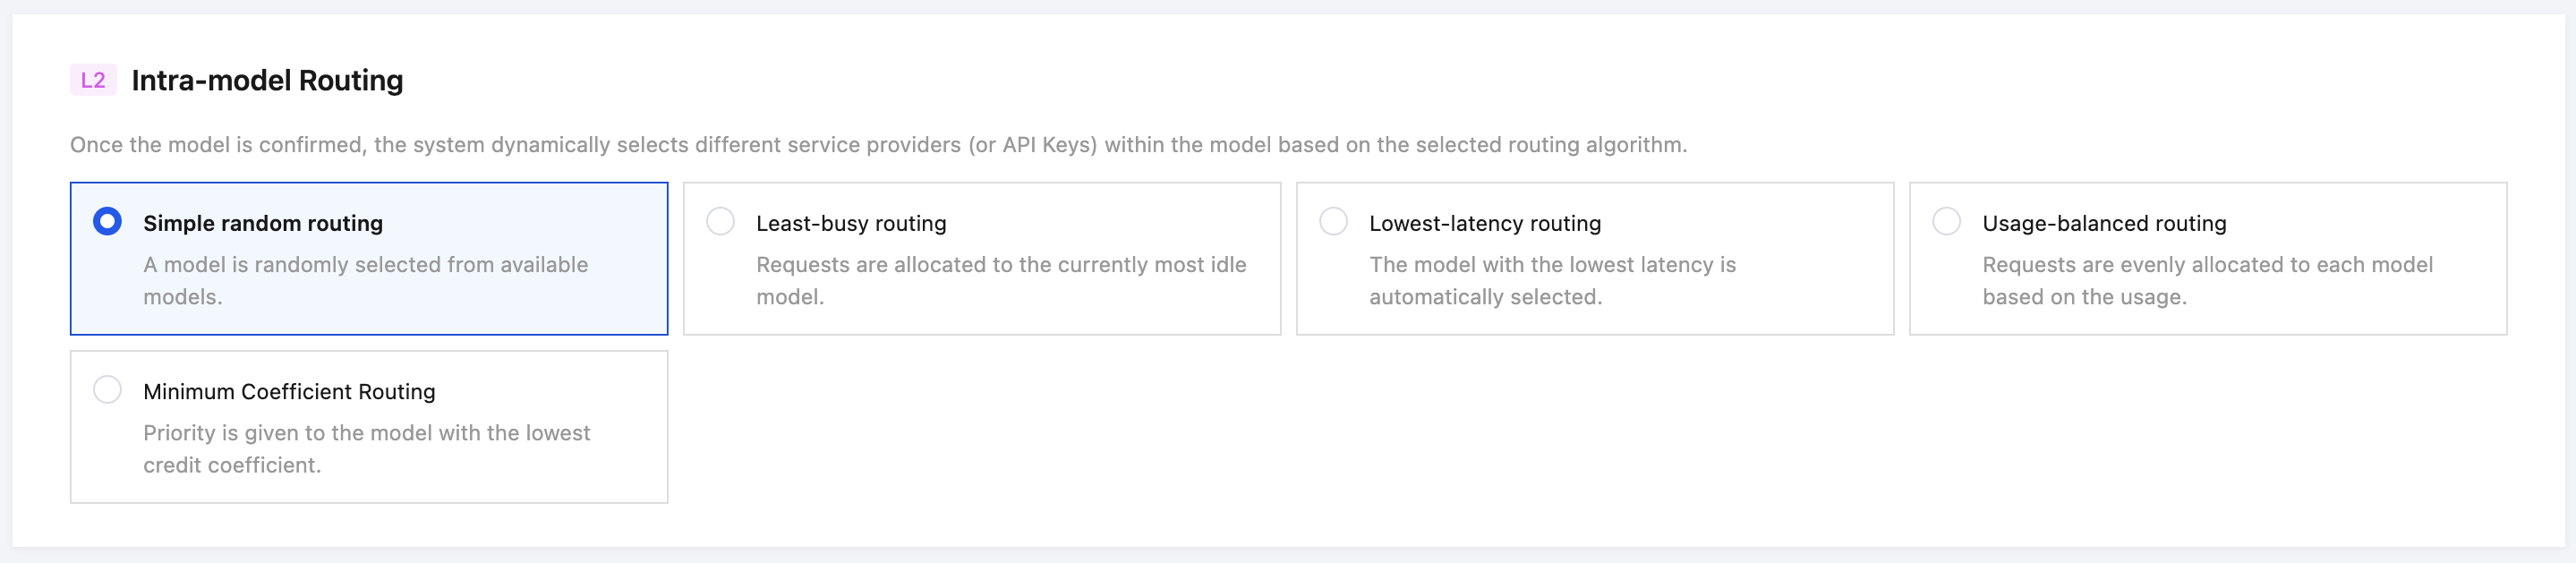
Policy | Description |
simple random routing | Randomly select from available providers. |
least-busy routing | Assign requests to the currently least busy provider. |
lowest-latency routing | Automatically select the provider with the lowest current latency. |
usage-balanced routing | Distribute requests to each provider evenly based on usage. |
Minimum coefficient routing | Prioritize distribution to providers with lower scores. |
Step 6: Configure Sticky Routing Policies
On the sticky routing node in the routing policy diagram, you can configure a sticky routing policy to effectively improve the upstream cache hit ratio and reduce first-packet latency. Sticky routing is enabled by default and can be disabled. After it is enabled, both soft affinity based on content recognition and hard affinity based on the client-passed x-cmr-session-id header are supported.
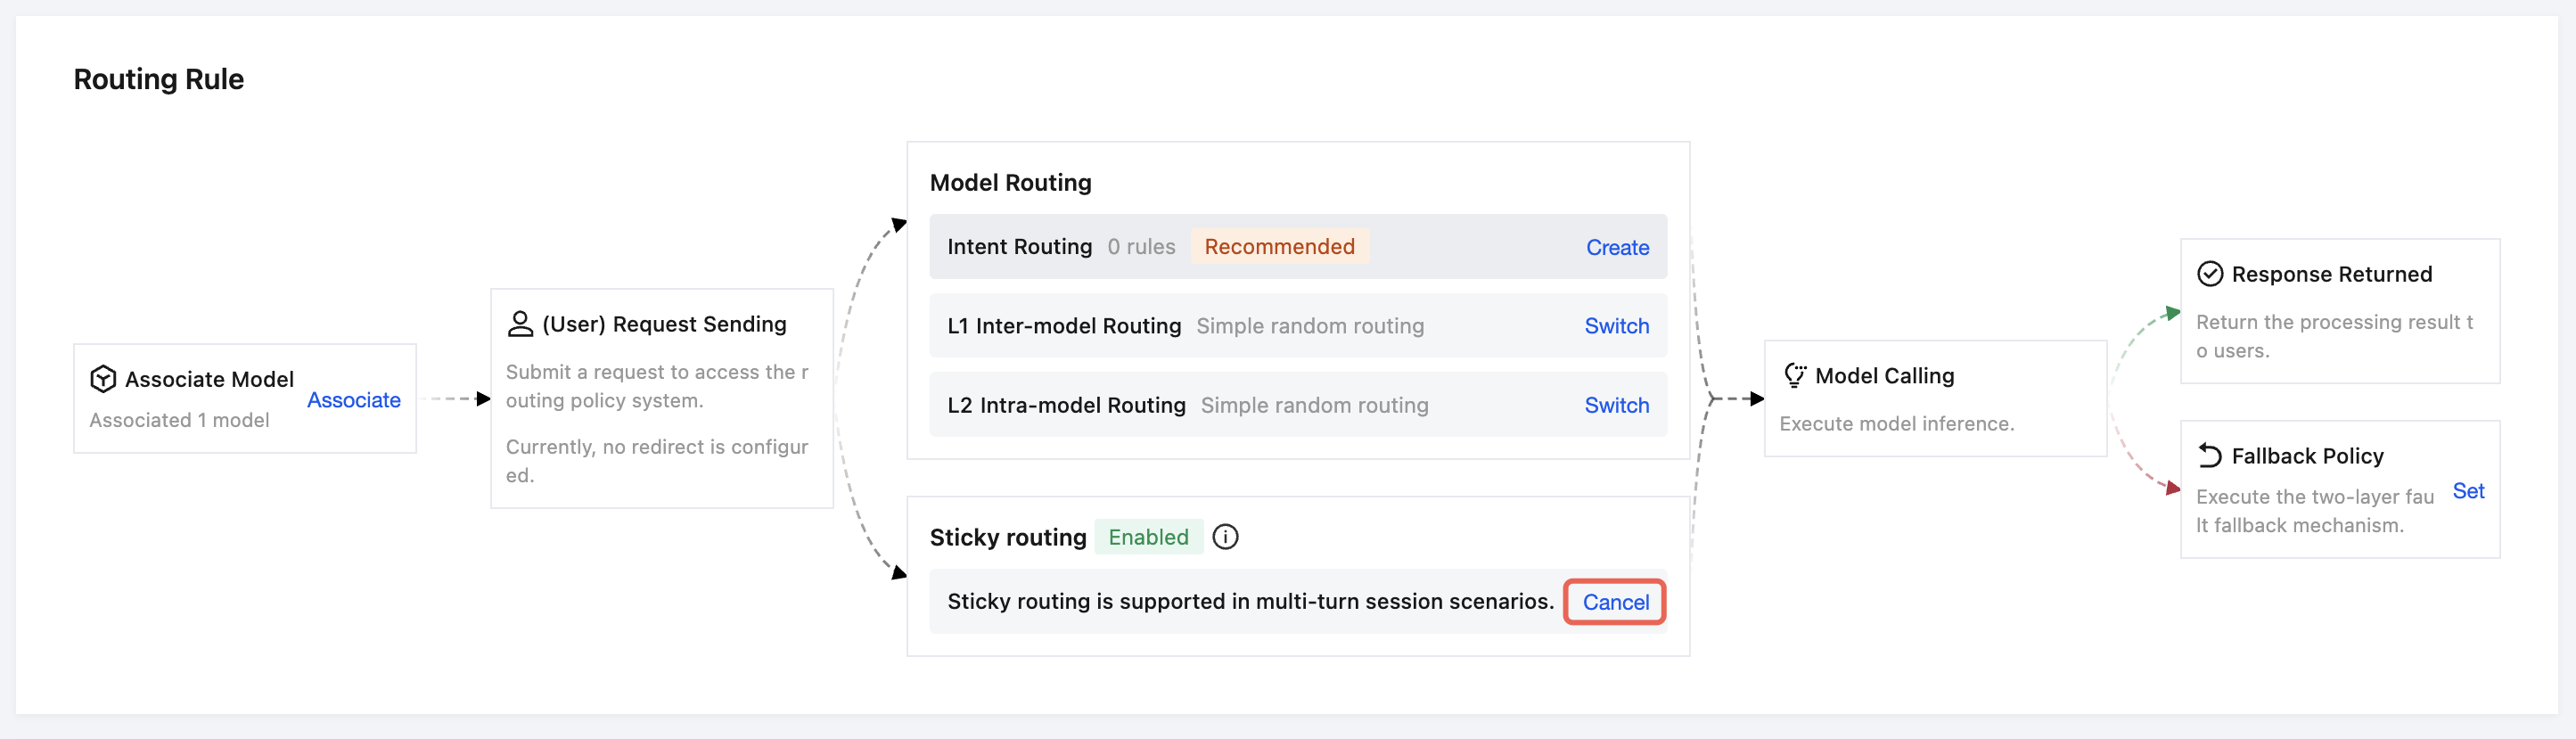
CMR provides two session persistence capabilities:
Soft affinity: The gateway decides to reuse the previous deployment based on the request content. If the reuse fails, the scheduling mechanism is still executed to complete the request.
Hard affinity: When a user passes the x-cmr-session-id header, the session is bound to the specified deployment. If the binding target does not exist or is unhealthy, the request fails directly and no other deployment is used.
Capability | Anchoring Basis | Scenario |
Soft affinity | Triggered when the number of input Tokens exceeds 1024, with no user perception. | Long-context request |
Hard affinity | Triggered when the user returns x-cmr-session-id. | Multi-turn session retention |
Step 7: Configure Fallback Policies
When the primary model service fails, the system automatically switches to the model in Fallback to ensure business continuity. The system uses a two-layer fault fallback mechanism:
Layer 1 (intra-model fallback): Switch attempts are preferentially made between different service providers (or API keys) under the same model.
Layer 2 (inter-model fallback): If no service provider is available for the current model, the system automatically switches to a backup model based on your preset model priority to continue providing services.
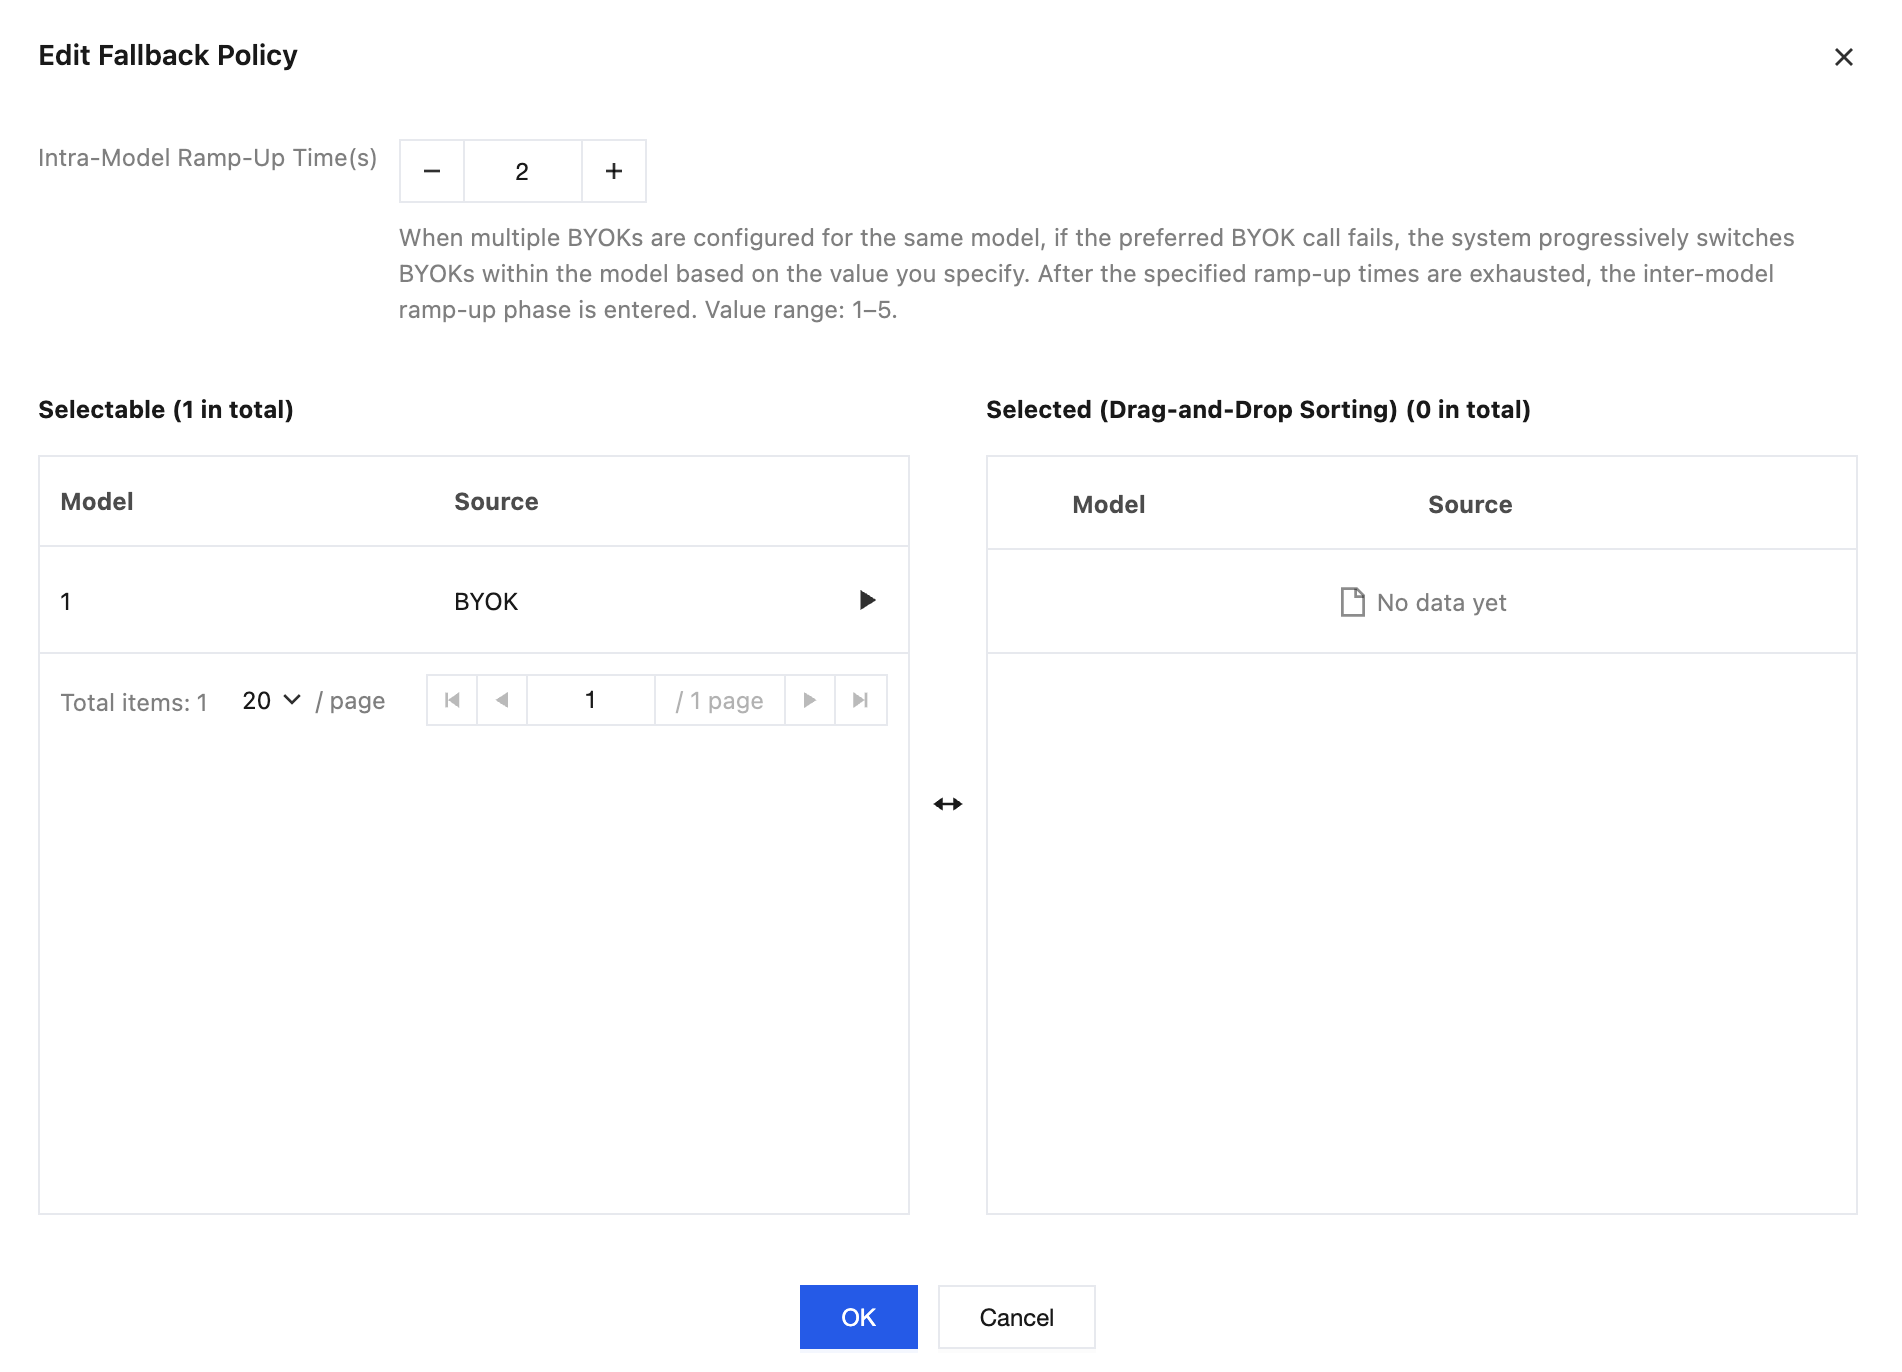
1. On the Fallback node in the routing policy diagram, click Settings to configure the Fallback policy. Alternatively, click the Edit button in the Fallback policy area or the Go to Settings button in the bottom bar when no Fallback policy is configured.
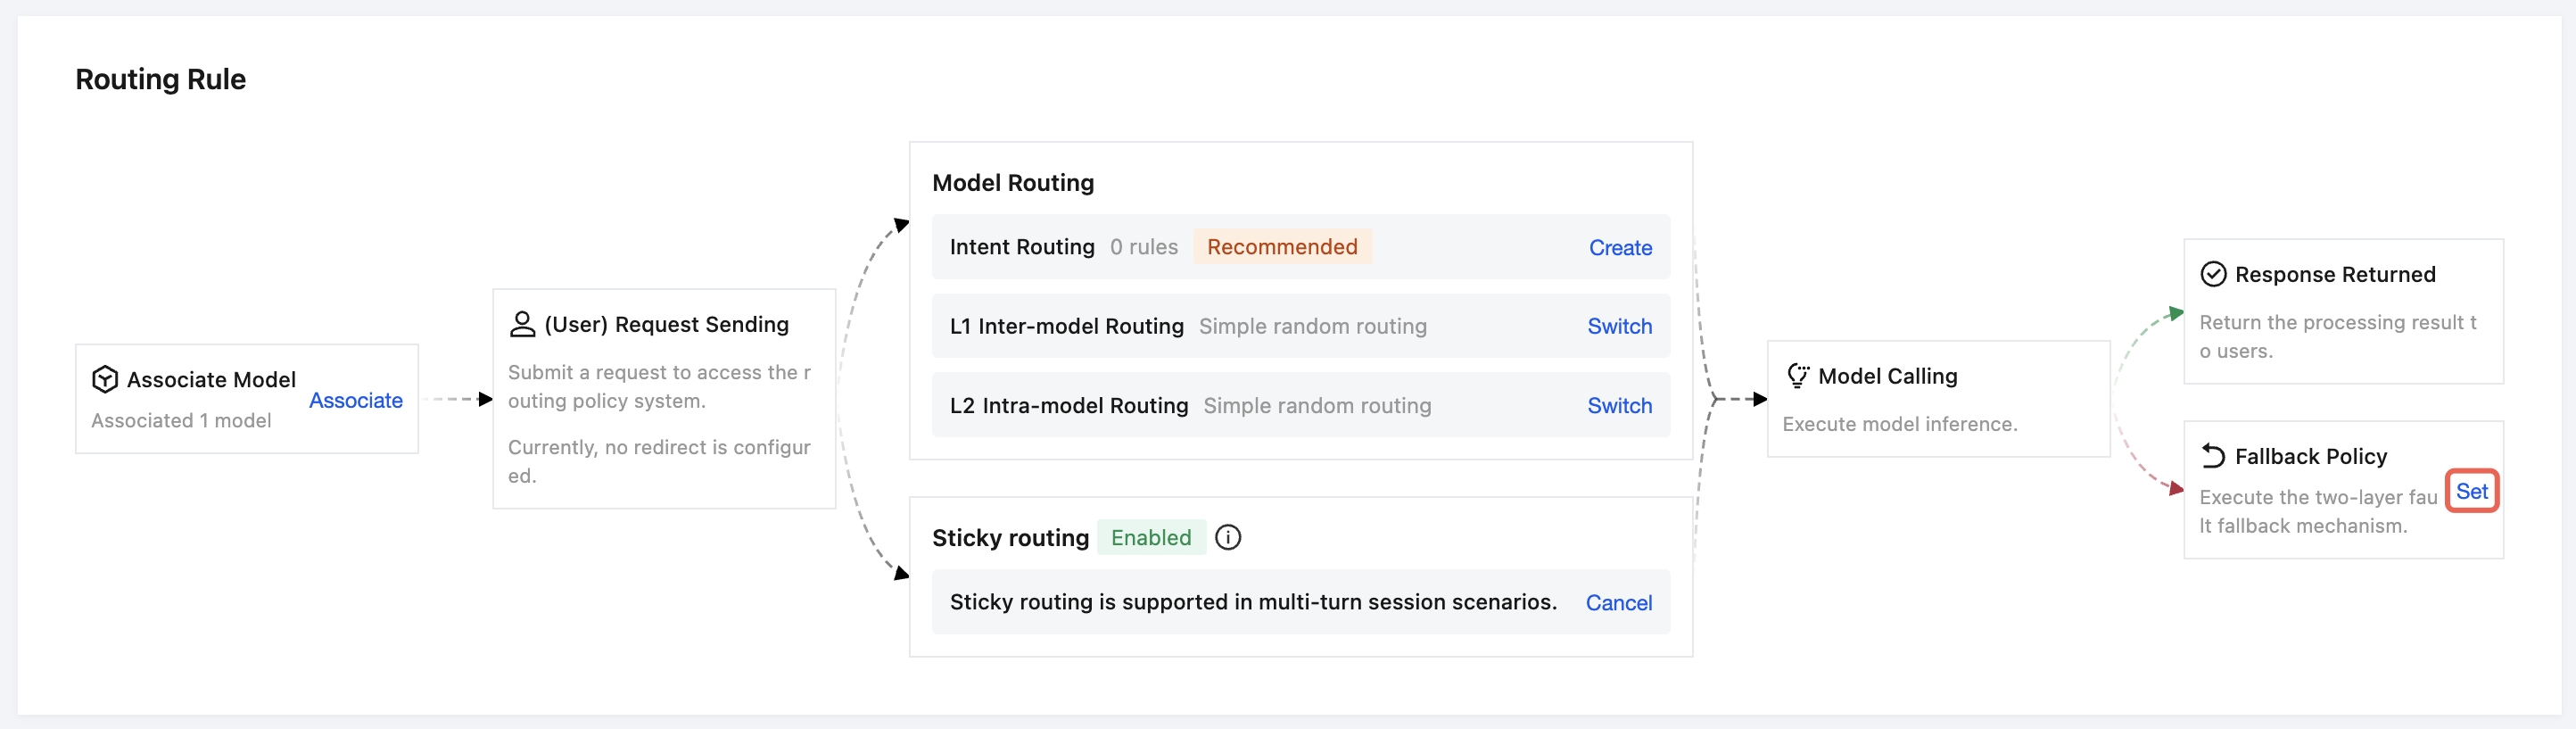
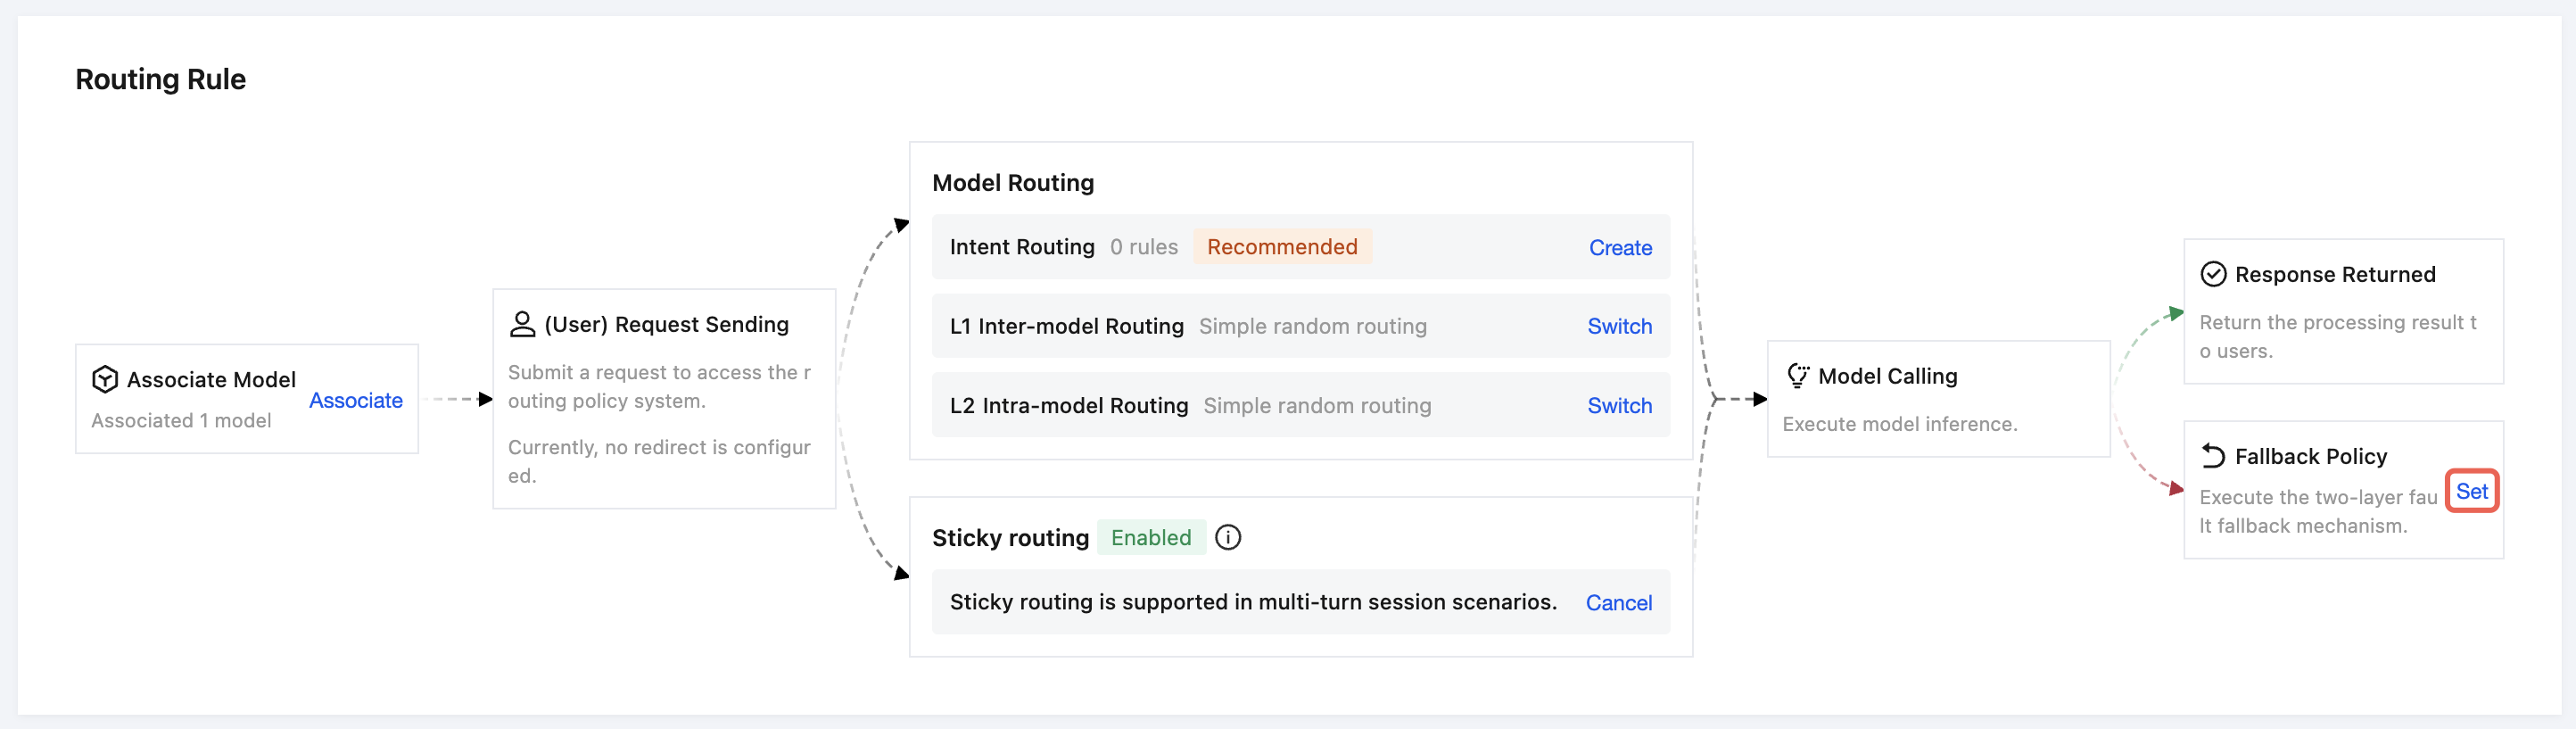
2. In the Edit Fallback Policy dialog, set the intra-model fallback attempts, select the inter-model Fallback model, and click OK to complete the configuration.
Subsequent Operation Steps
After creation is complete, you can switch to the Chat Test tab on the instance management page to verify the configuration. For detailed operations, see Configure Chat Test.
After creation is complete, you can switch to the Usage Details tab on the instance management page to monitor Token consumption and model resource usage. For detailed operations, see View Usage Details.
Help and Support
Was this page helpful?
You can also Contact sales or Submit a Ticket for help.
Help us improve! Rate your documentation experience in 5 mins.
Feedback