Managing User Groups
Download
Focus Mode
Font Size
This document describes how to create user groups in a CMR instance, configure user group limits, associate API keys, and define model access scopes.
Introduction
User groups are used to manage CMR access keys (API Keys) in groups. You can create user groups by team, business line, project, or environment, and centrally configure the models, intent routing rules, and resource limits that API Keys within a group can access.
Prerequisites
1. It is recommended to read Usage Constraints and Supported Models in advance for relevant information.
2. A CMR instance has been created. For detailed instructions, see Creating a CMR Instance.
3. A BYOK instance has been created. For detailed instructions, see Creating a BYOK Instance.
4. A CMR access key (API Key) has been created. For detailed instructions, see Creating a CMR Access Key.
5. To configure a credit budget for a user group, create the credit budget first. For detailed instructions, see Configuring a Credit Budget.
Operation Steps
Steps to Create a User Group
1. Log in to the CMR console. On the Instance Management page, click the target instance ID.

2. On the instance details page, select the User Group tab.
3. On the User Group tab, click Create User Group. In the Create User Group dialog box, follow the on-screen instructions to complete the user group configuration.
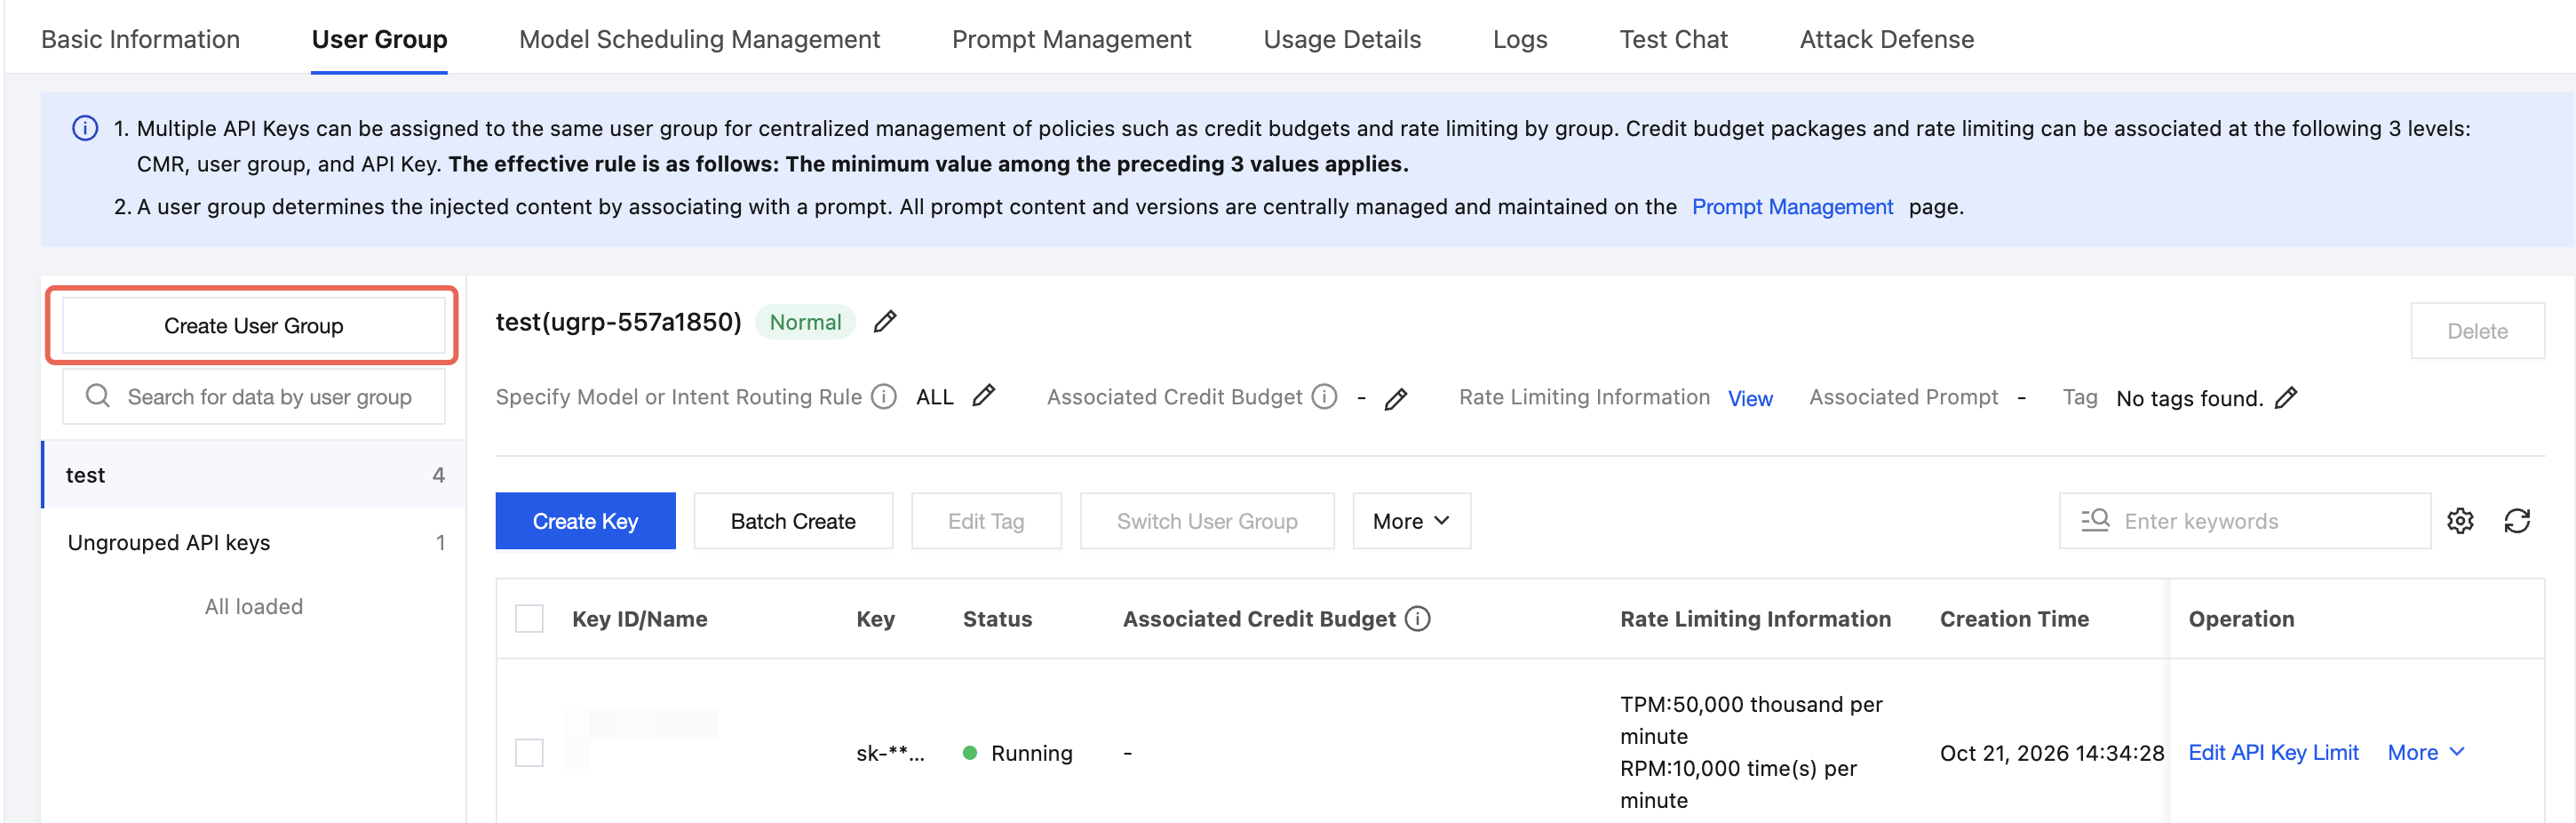
4. Configure the user group and enter its basic information.
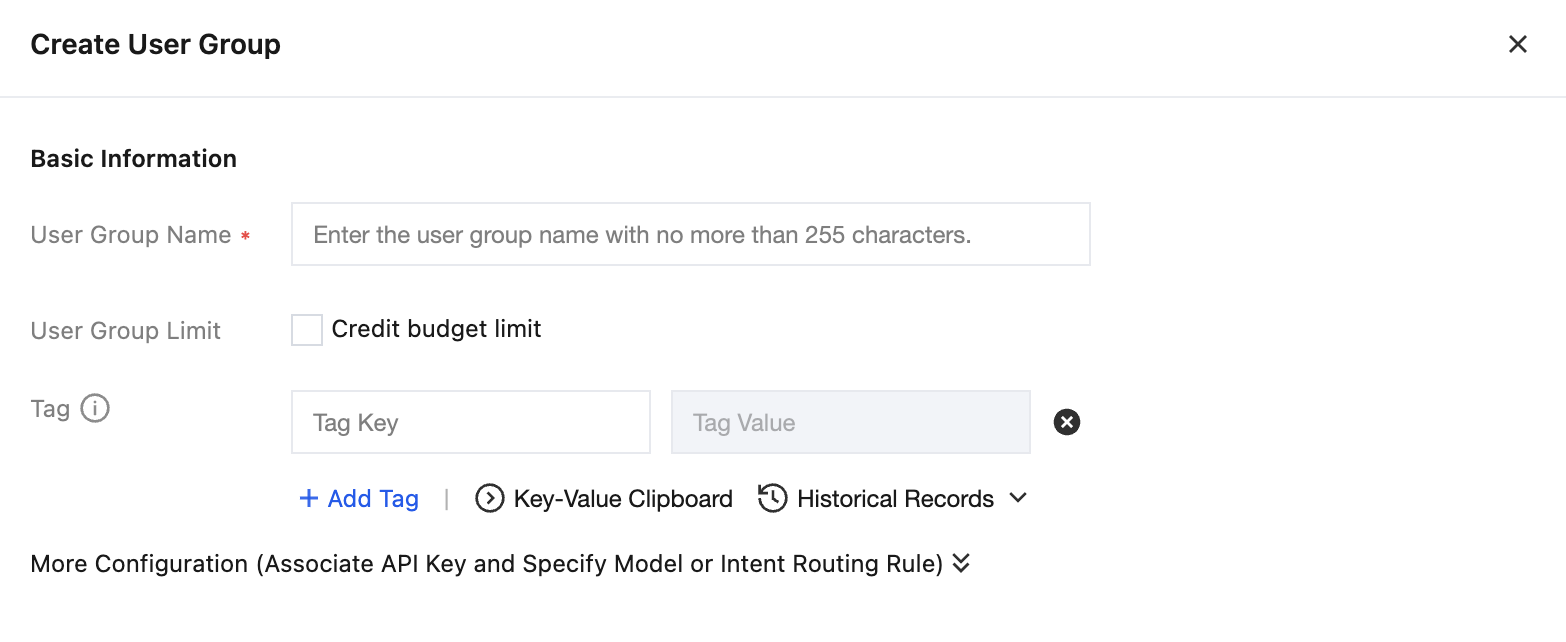
Parameter | Description |
User group name | Custom user group name used to identify teams, business lines, projects, or environments. Supports up to 255 characters. |
User group limit | Optional. Associate a credit budget with the user group to limit credit consumption and call rates of API keys within the group. |
Tags | Optional. Configure tag keys and values to classify and manage user groups. |
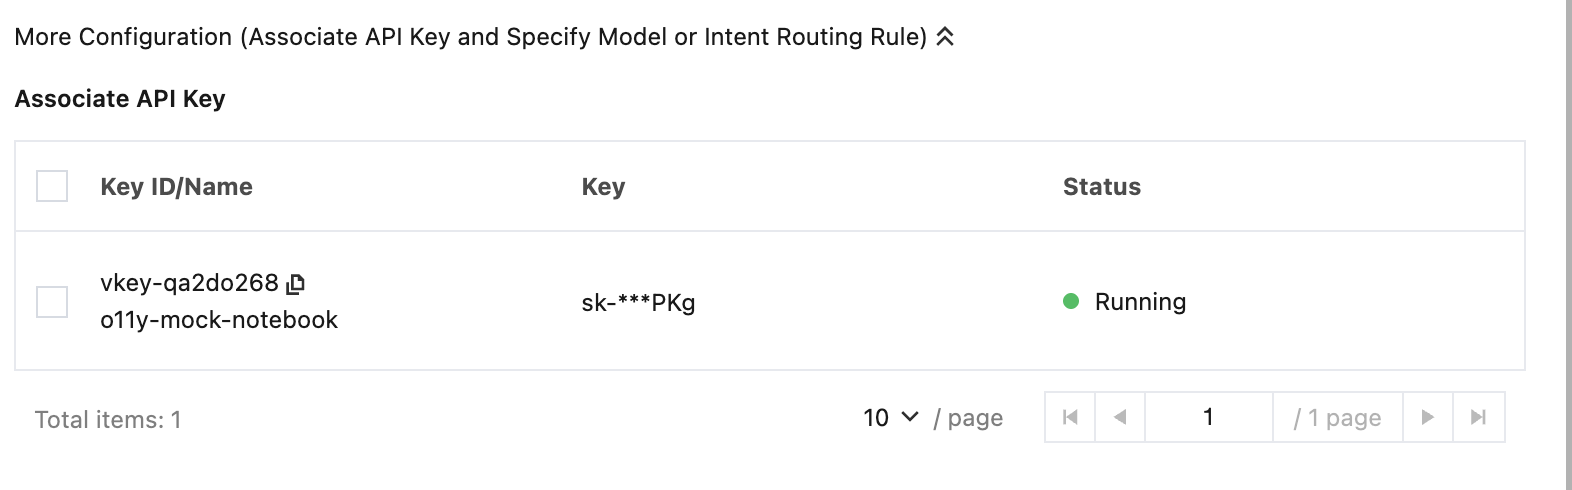
5. Associate API keys by selecting the API keys to assign to this user group. If you do not need to associate API keys for now, skip this step and assign them after the user group is created. For detailed instructions, see Assigning API Keys to User Groups.
6. Associate Models and Intent Routing Rules: Assign available models or intent routing rules to a user group. If not specified, all models and intent routing rules under the current CMR are allowed by default.
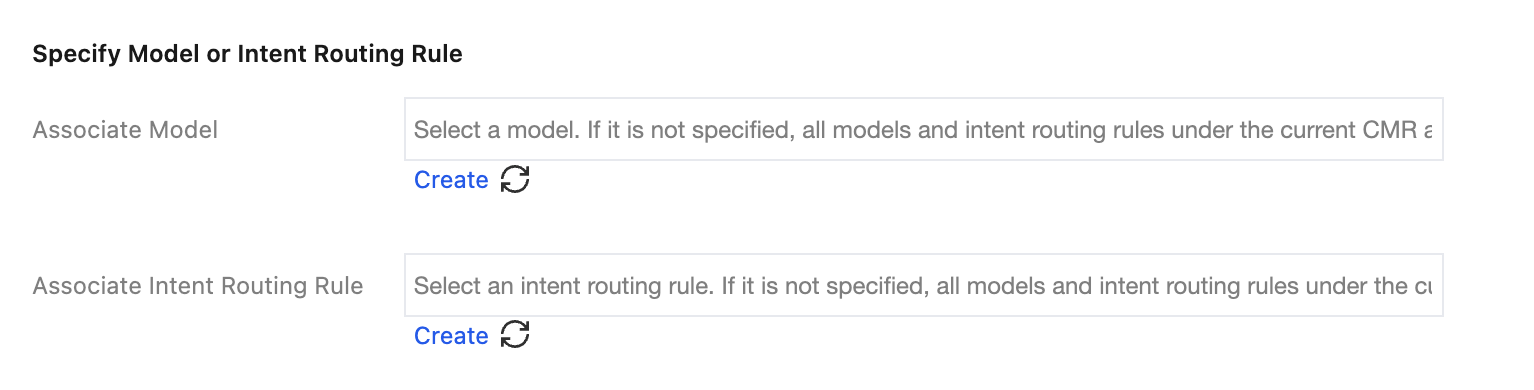
Parameter | Description |
Associated model | Select models that API keys in the user group can directly access. |
Associated intent routing rule | Select intent routing rules that API keys in the user group can use. |
7. After the configuration is completed, click Save.
Steps to Delete a User Group
When your business no longer needs to manage available models, intent routing, credit budgets, rate limits, or tag policies for API keys by user group, you can delete the corresponding custom user groups to simplify resource management.
1. Log in to the CMR console. On the Instance Management page, click the target instance ID.

2. On the instance details page, select the User Group tab.
3. On the User Group tab, select the user group to delete from the user group list on the left side of the page.
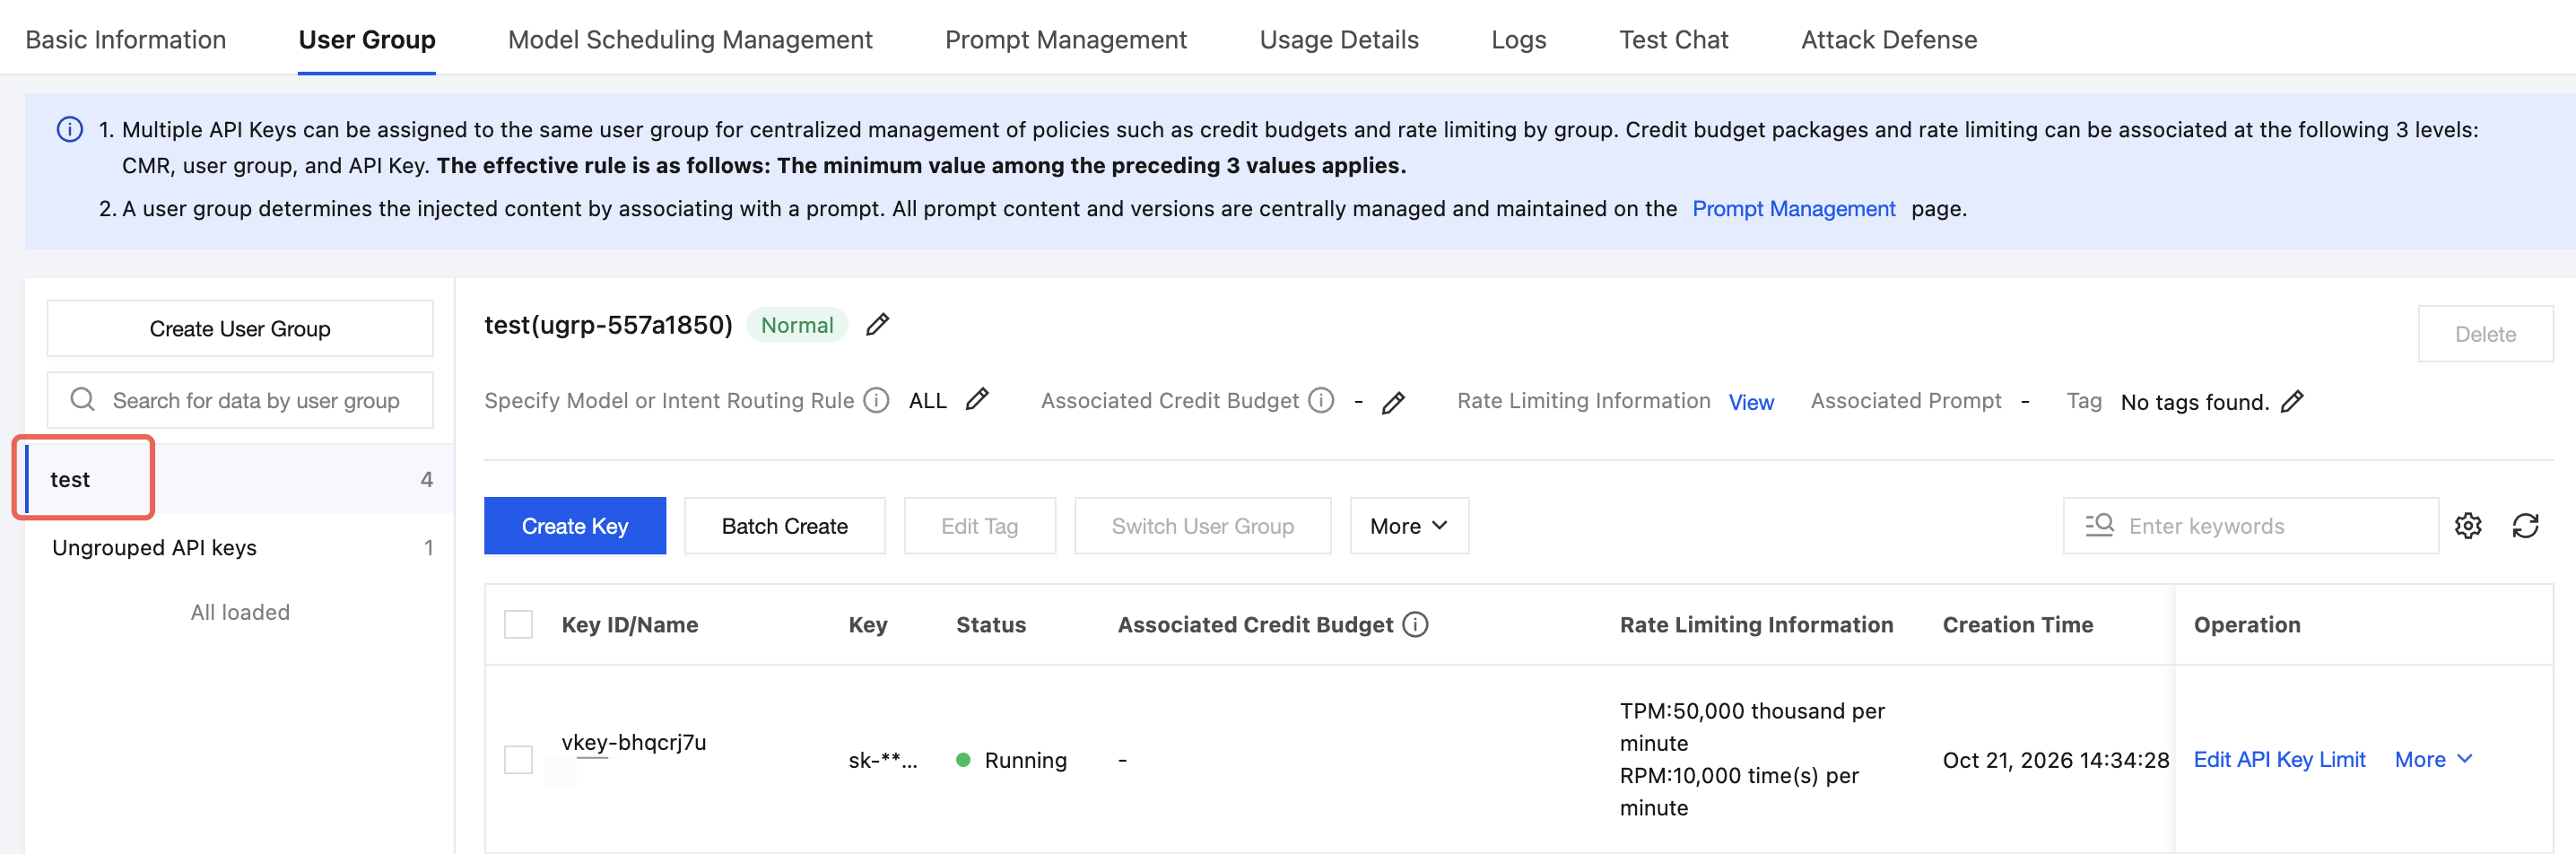
4. Clear all API keys in the group.
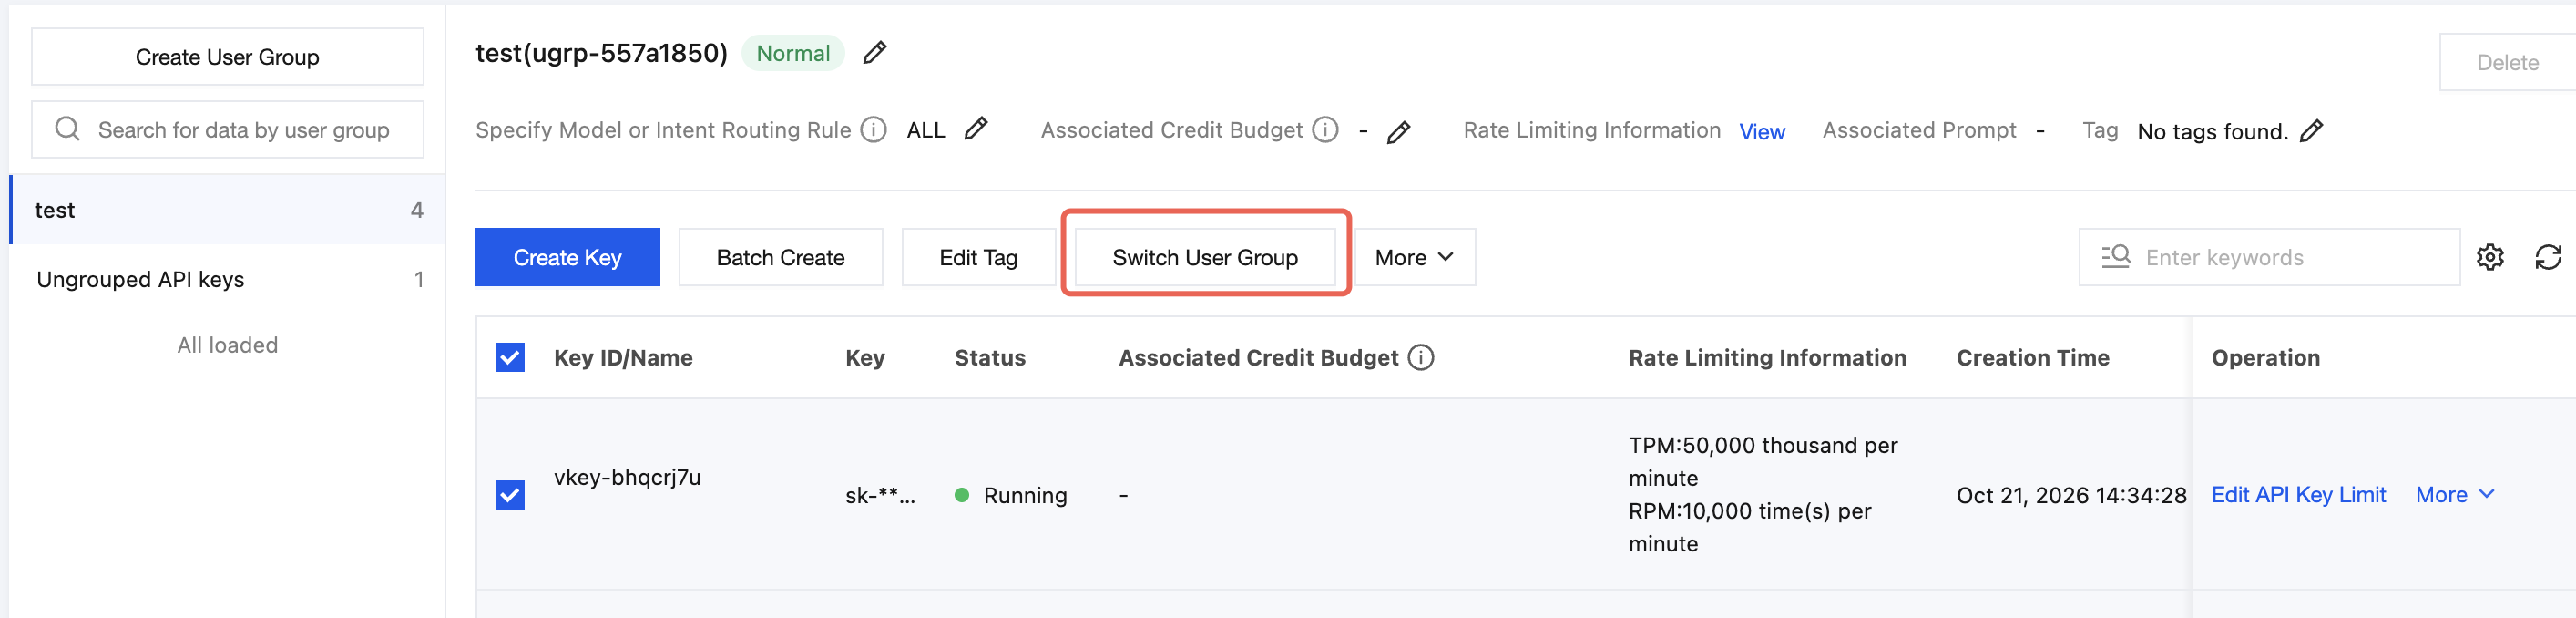
If API keys still exist in the user group, select the corresponding keys from the Key list below, click Switch User Group, and migrate them to another user group.
You can also delete the selected API keys in More Actions.
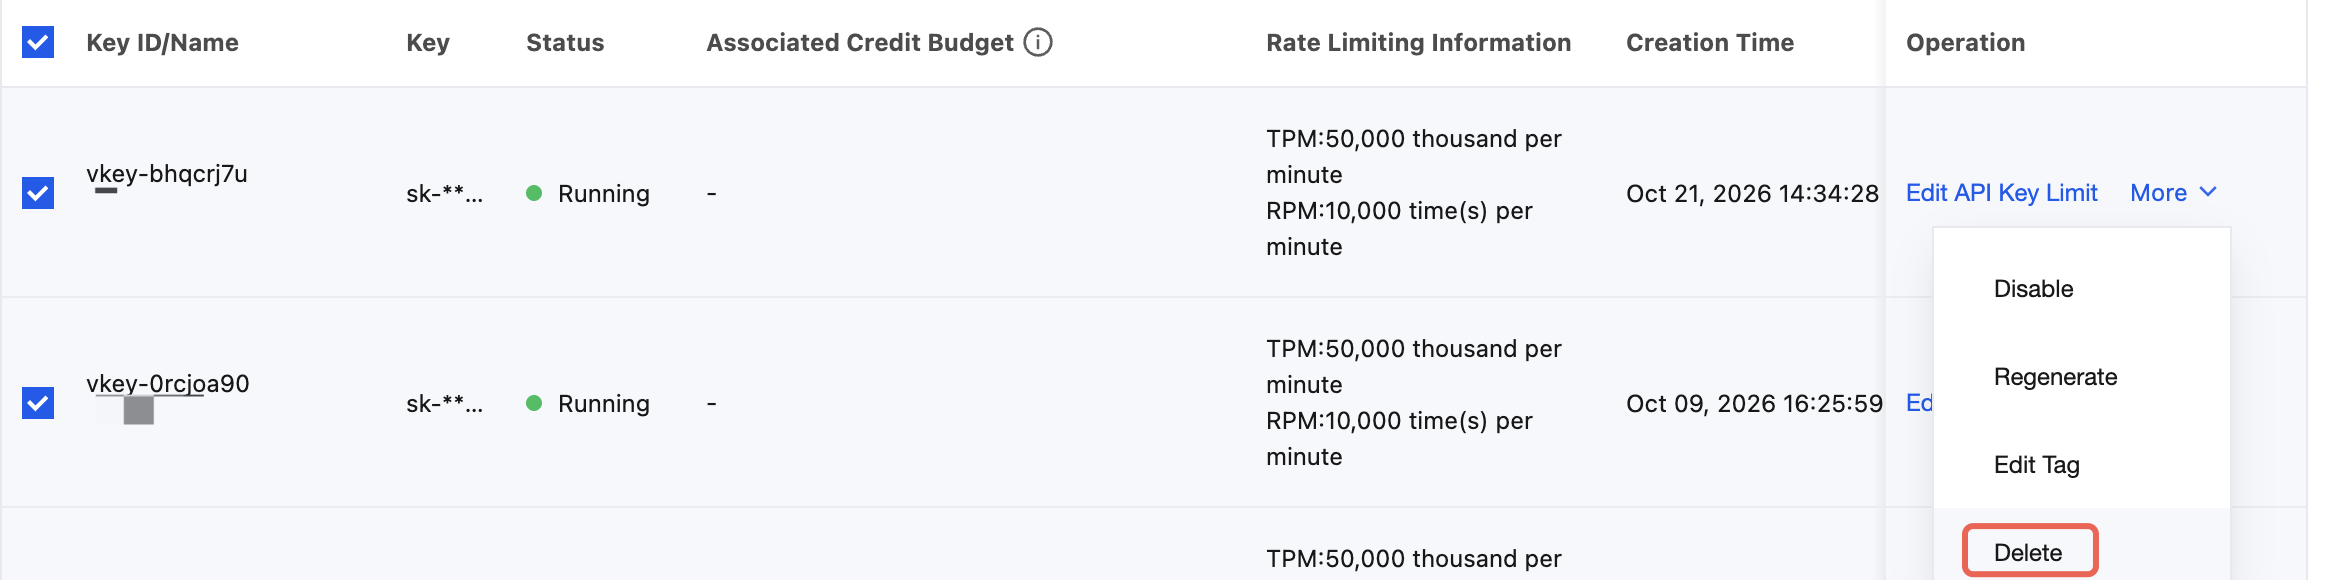
Note:
When API keys are still associated with the user group, the Delete button in the user group details section will be grayed out and the delete operation cannot be performed.
5. To initiate deletion, click Delete in the user group details section.
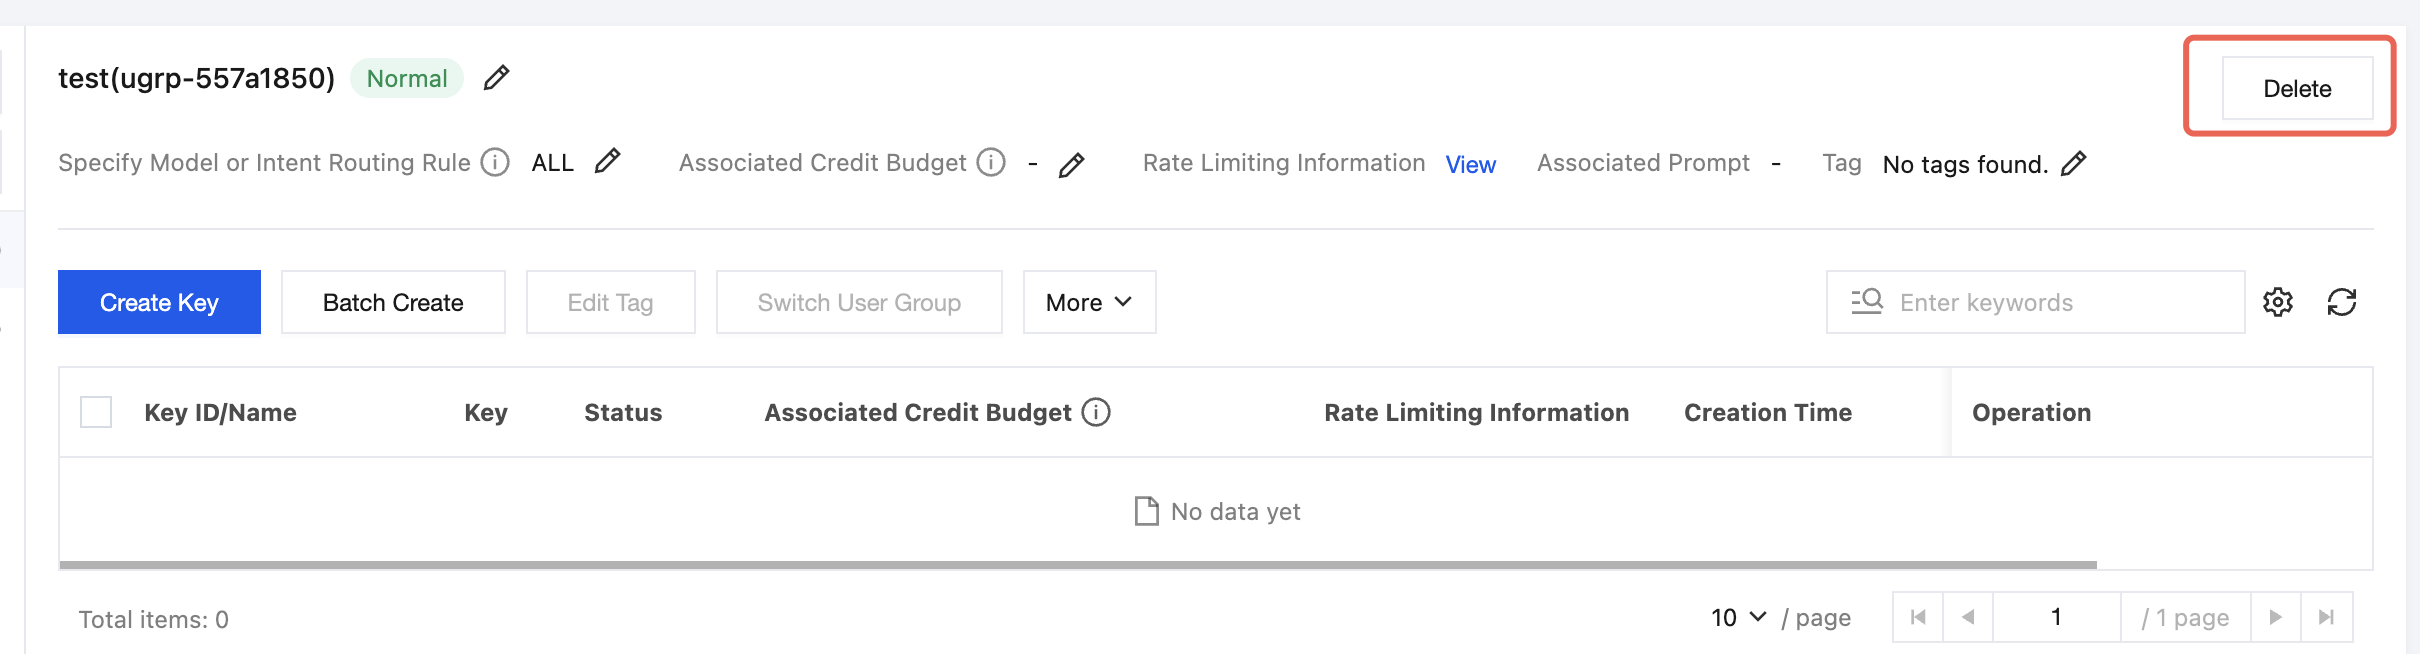
6. Confirm the deletion. In the confirmation dialog, verify the user group information, and click OK after confirming that it is correct.
Other Operations
To add or move API keys to a user group, see Assign API Keys to User Groups for detailed instructions.
To adjust the credit budget for a user group, see Configuring a Credit Budget for detailed instructions.
Configure model and intent routing rules. For detailed instructions, see Configuring Model Scheduling Management.
Help and Support
Was this page helpful?
You can also Contact sales or Submit a Ticket for help.
Help us improve! Rate your documentation experience in 5 mins.
Feedback