During the use of vhosts, you may need to perform management operations such as viewing basic information or deleting unnecessary vhosts. This document introduces how to manage vhosts in the console.
Viewing Vhost Information
2. In the left sidebar, choose Cluster > Vhost. Select the target region and cluster and locate the target vhost.
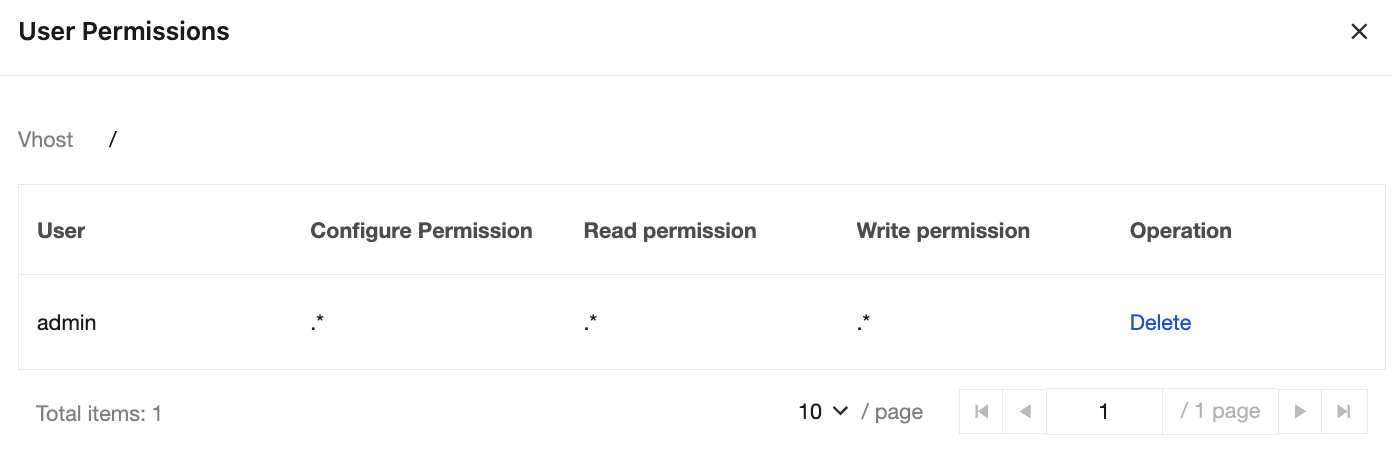
3. Click View User Permission in the Operation column of the vhost to view the user list and permission scope under this vhost. You can delete unnecessary user permissions based on actual needs.
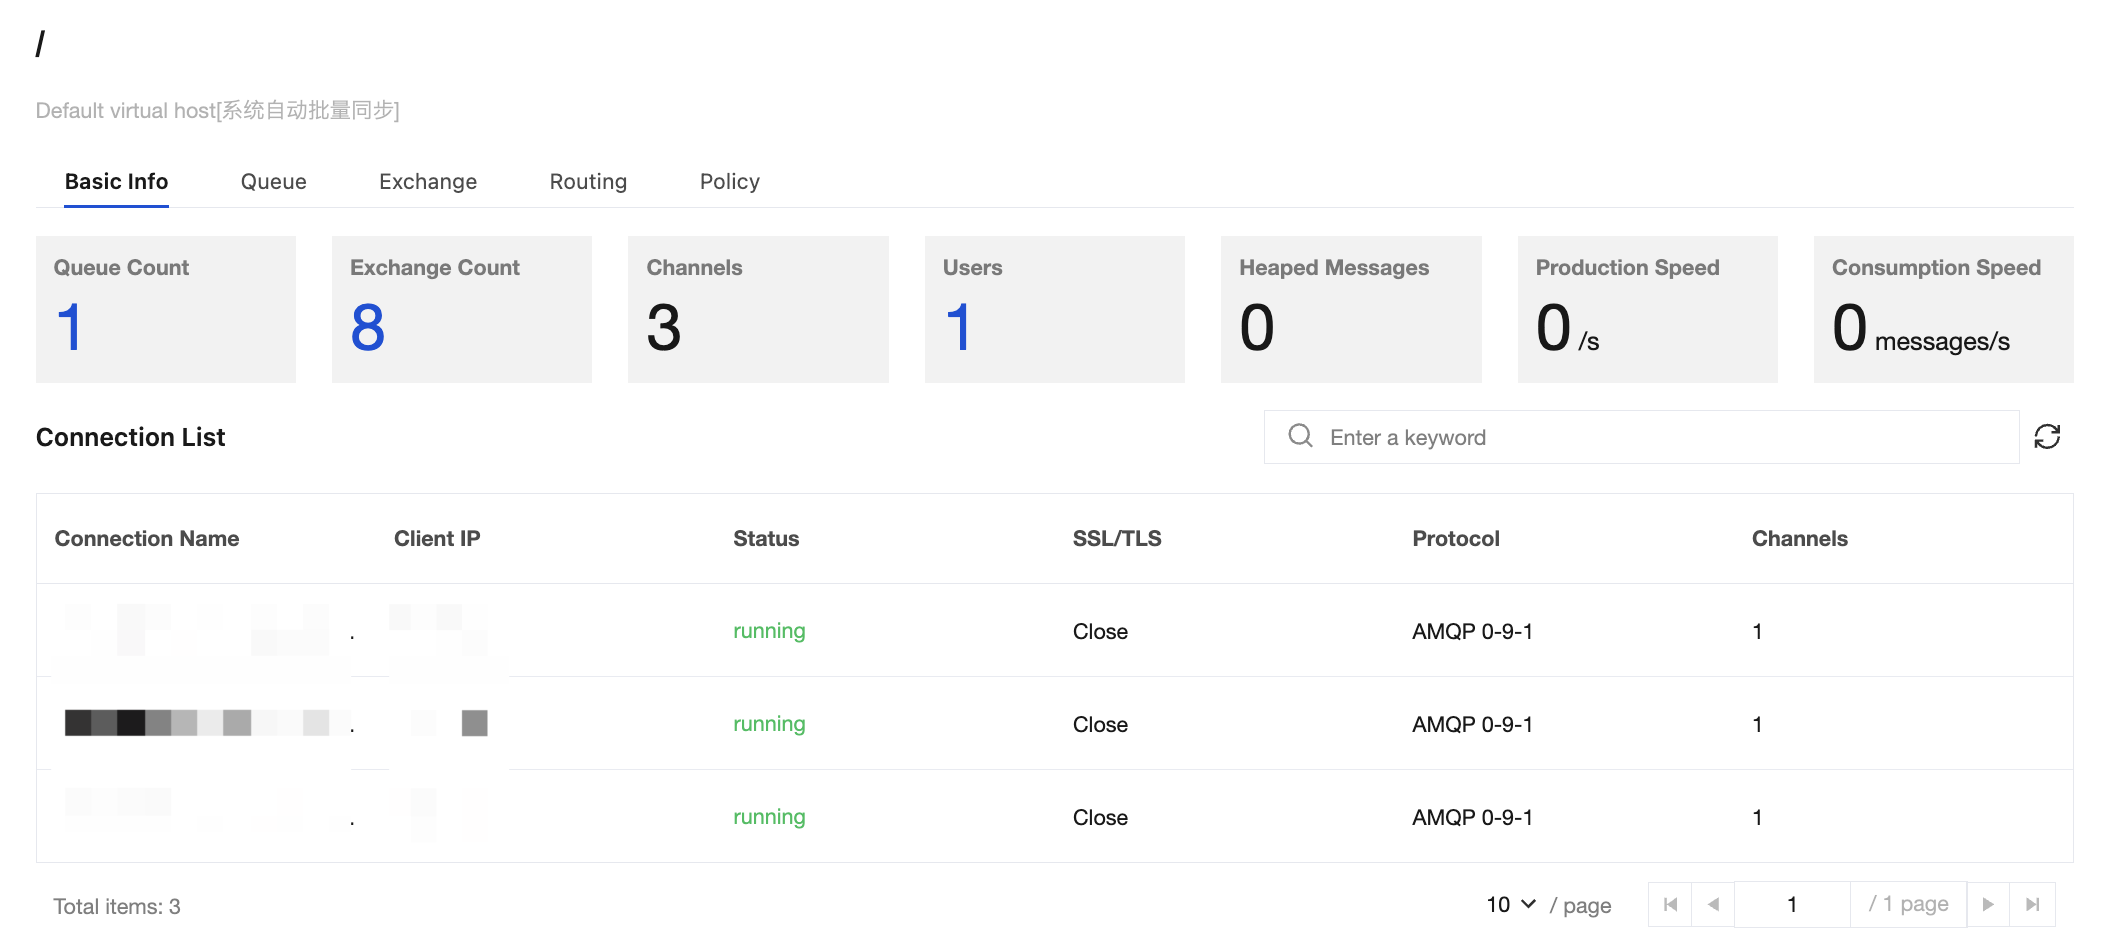
4. Click the vhost name to go to the Basic Information page. You can view the following information:
Overview: displays resource usage and message production and consumption under the vhost. You can understand the overall operational status of the vhost through these metrics. If you notice a significant increase in message backlogs or abnormal fluctuations in production and consumption rates, this indicates that the cluster may be under performance pressure or have potential issues. Timely scale-out optimization or troubleshooting is required to ensure the stability and availability of the message service.
Connection List: displays the connection list information under the current vhost. You can use this information to monitor the client connection status in real time, check for abnormal connections (such as long-term idleness or frequent disconnections), and quickly locate the issues.
Modifying a Vhost
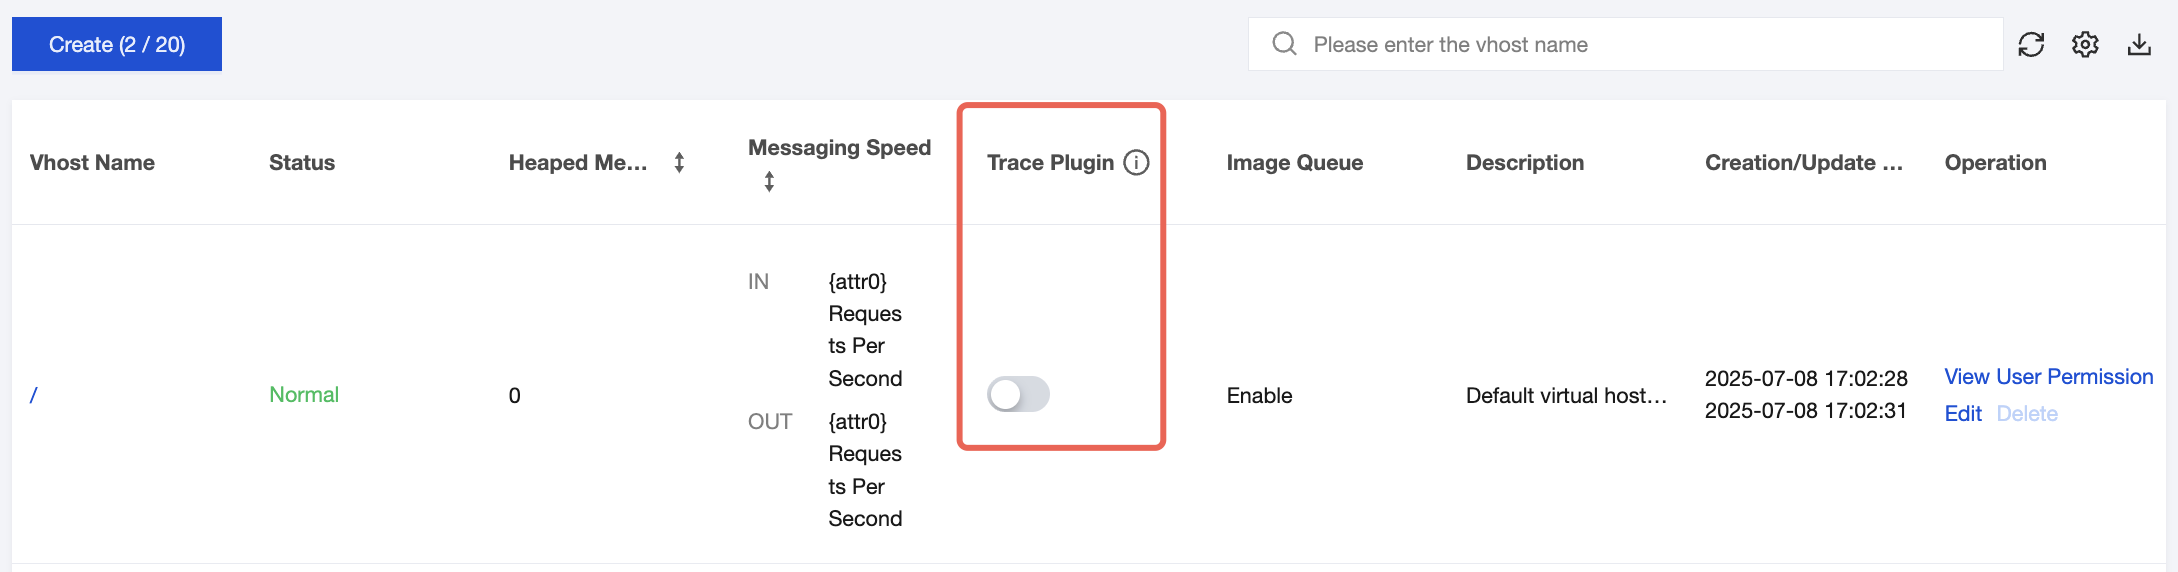
If you are using a Managed Edition cluster, you can enable or disable the Trace plugin toggle on the vhost list page to use the message query capability. It is recommended to use the Trace plugin for small-traffic validation/troubleshooting scenarios and not to enable it when cluster traffic exceeds 10,000 TPS. For details, see Querying Messages. If you are using a Serverless Edition cluster, the message query capability is supported by default, and no plugin configuration is required.
After a vhost is created, its name cannot be modified. Only its description can be modified. To modify the vhost description, follow these steps:
1. On the vhost list page, click Edit in the Operation column to go to the Edit page.
2. Modify the description and click Submit to complete the modification.
Deleting a Vhost
Note:
After a vhost is deleted, all resources under it (including exchanges and queues) will be cleared and cannot be recovered.
The default vhost named "/" created during cluster creation cannot be deleted.
You can delete a created vhost by following the following steps:
1. On the vhost list page, click Delete in the Operation column.
2. In the confirmation dialog box for deletion, click Delete to delete the vhost.