Release Notes
Announcements
src/***/tdmq/rabbitmq/demo directory.package com.tencent.tdmq.rabbitmq.demo;public class Constant {/*** RabbitMQ service address.* Select Cluster Details and go to the client access page to copy the access point.* For example, if the access point is amqp://1.1.1.1:5672, you only need to enter the IP address.*/public static final String URI = "1.1.1.1";/*** Username.* It is required to create the user first in the console, or use the admin account on the web console access address page, which appears after Cluster Details is selected.*/public static final String USERNAME = "test";/*** Password.* It is required to create the password first in the console.*/public static final String PASSWORD = "test";/*** It is used to specify the virtual hosts.* Enter the custom vhost. It is required to create the vhost first in the console.*/public static final String VHOST_NAME = "test";}
Parameter | Description |
URI | Access address of the cluster, which can be obtained from the Client Access module on the basic cluster information page. For example, if the access address is amqp://1.1.1.1:5672, only the IP address needs to be entered.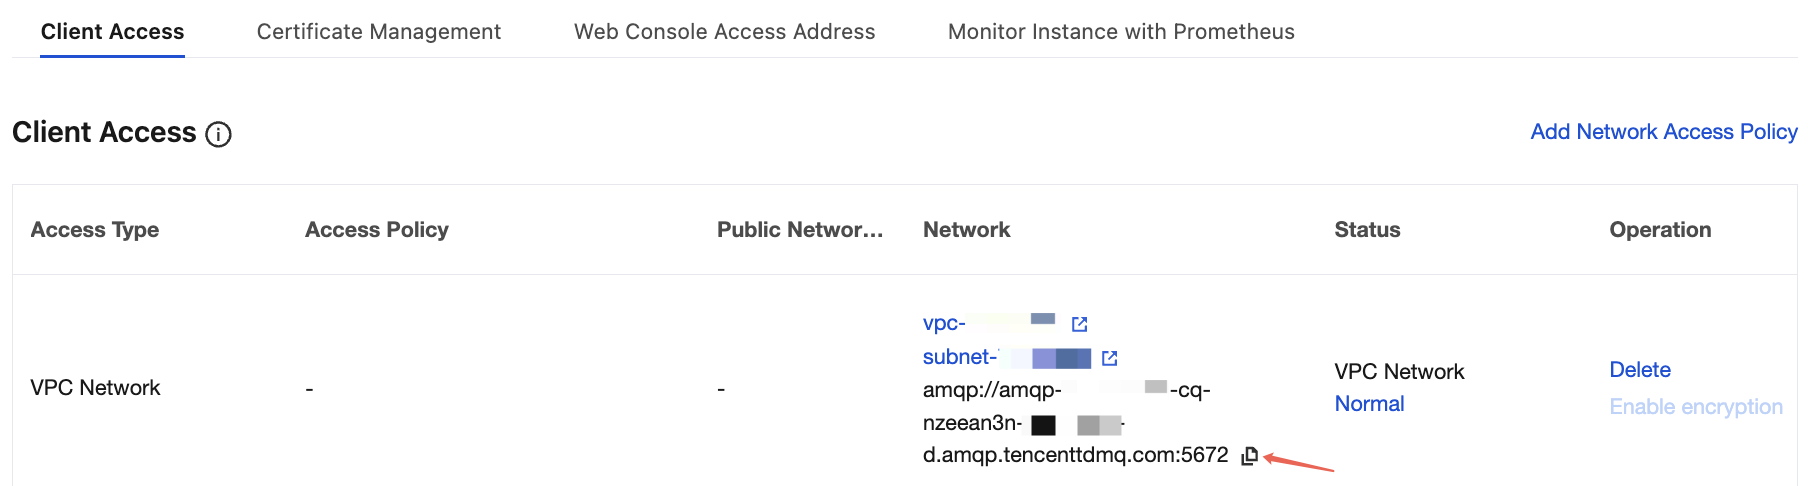 |
USERNAME | Username. Enter the username created in the console. 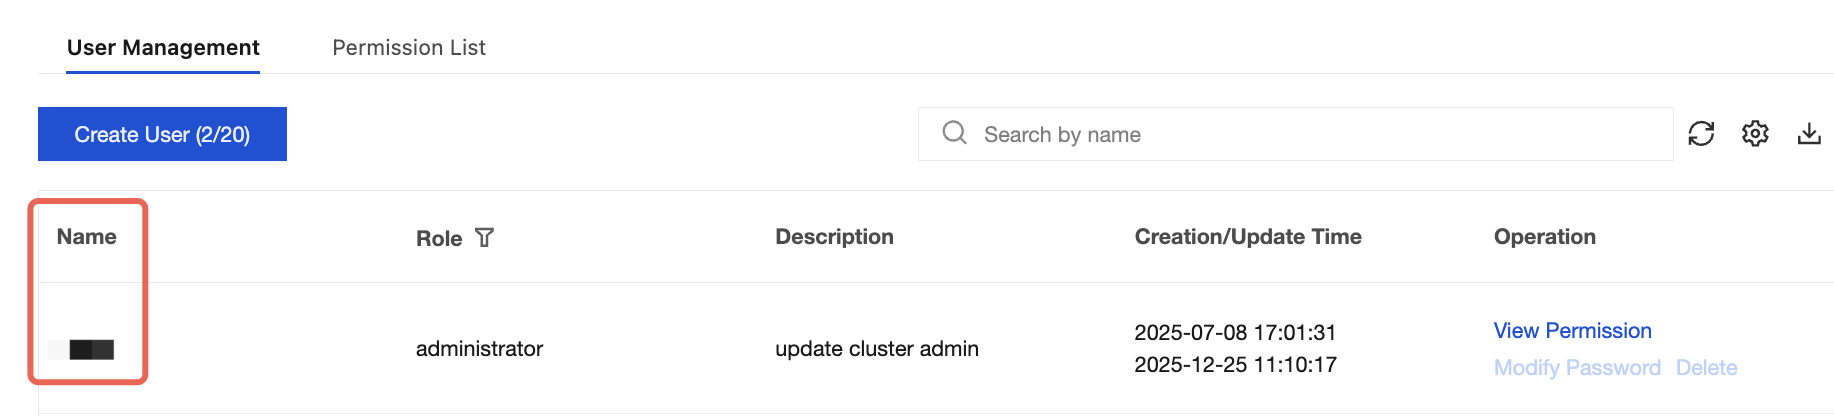 |
PASSWORD | User password. Enter the password specified during user creation in the console. |
VHOST_NAME | Vhost name, which can be obtained from the vhost list page in the console. 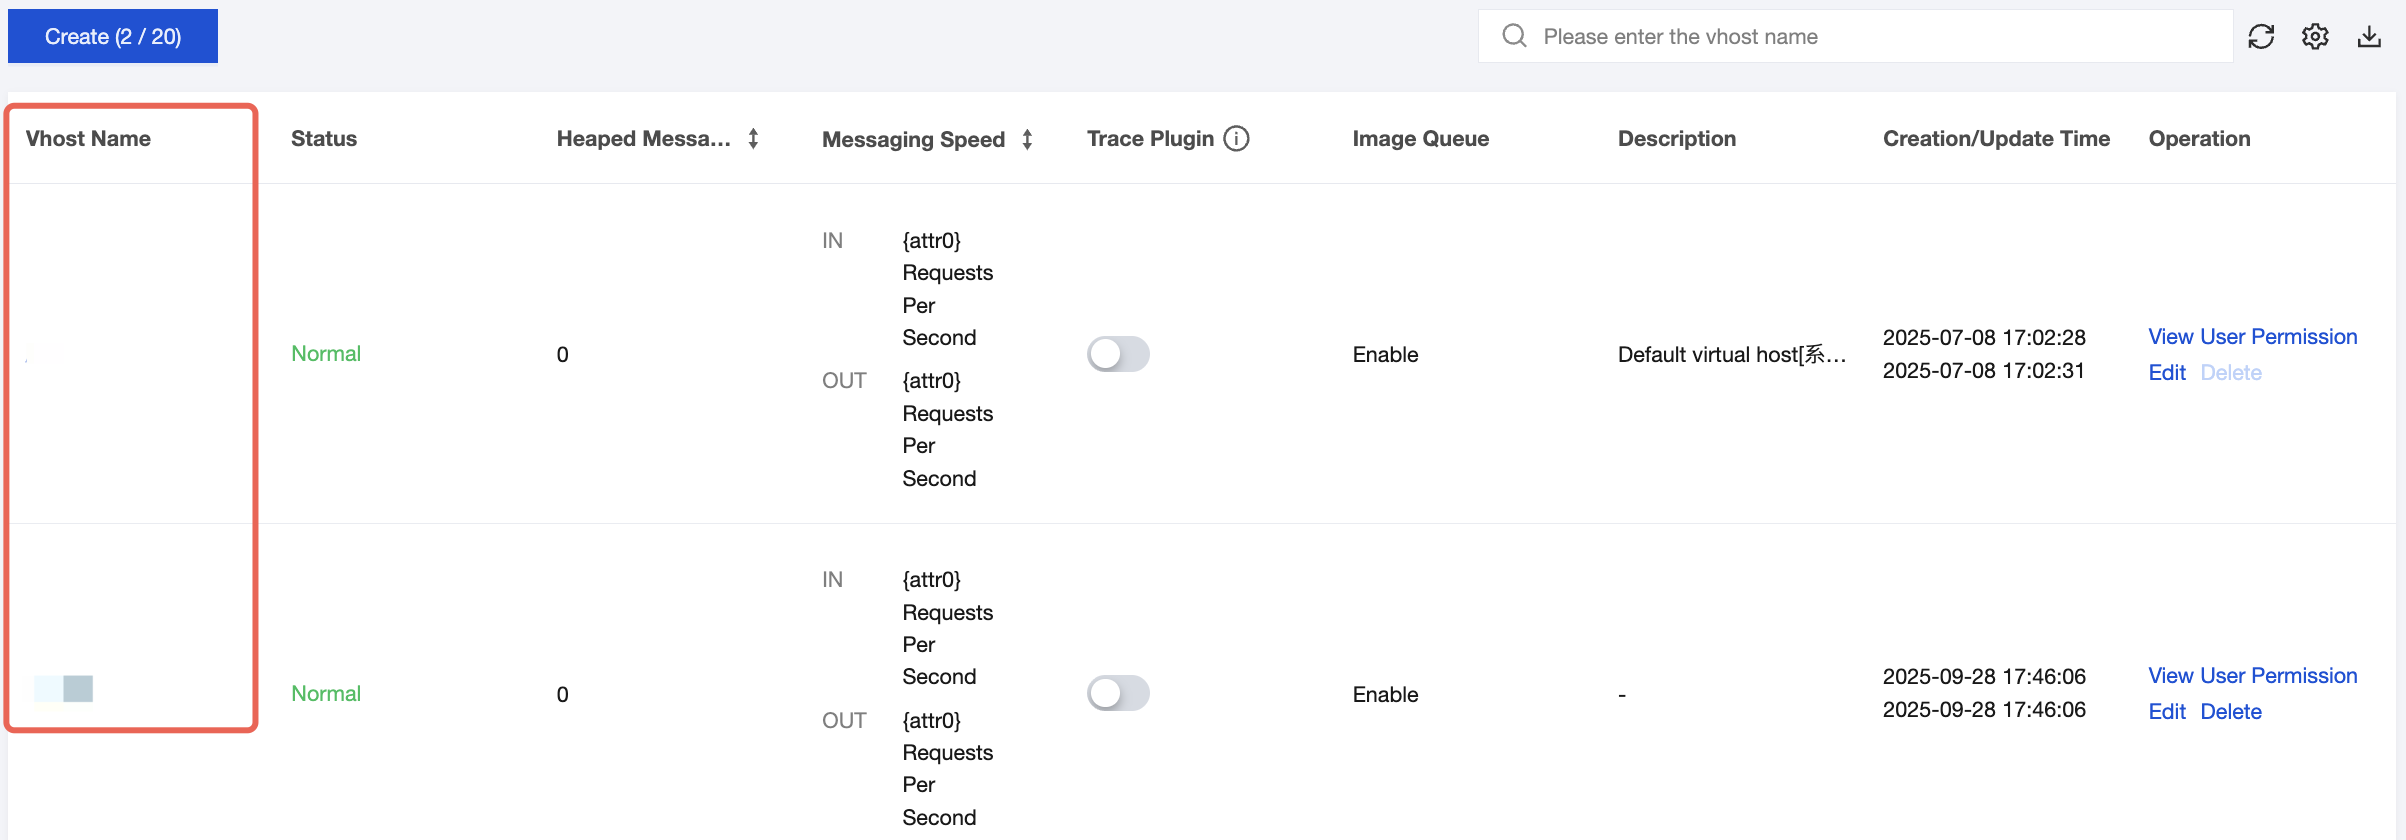 |
hello world directory is taken as an example.package com.tencent.tdmq.rabbitmq.demo.helloworld;import com.rabbitmq.client.Channel;import com.rabbitmq.client.Connection;import com.rabbitmq.client.ConnectionFactory;import com.tencent.tdmq.rabbitmq.demo.Constant;/*** RabbitMQ Hello World model example.* Message producer.*/public class MessageProducer {/*** Message queue name.*/public static final String QUEUE_NAME = "hello-world-queue";public static void main(String[] args) throws Exception {// Connection factory.ConnectionFactory factory = new ConnectionFactory();// Set the service address.factory.setHost(Constant.URI);// Set the virtual host.factory.setVirtualHost(Constant.VHOST_NAME);// Set the username.factory.setUsername(Constant.USERNAME);// Set the password.factory.setPassword(Constant.PASSWORD);Connection connection = null;Channel channel = null;try {// Obtain a connection.connection = factory.newConnection();// Establish a channel.channel = connection.createChannel();// Bind a message queue.channel.queueDeclare(QUEUE_NAME, true, false, false, null);String message = "Hello World!";// Publish a message (the exchange type is not required to be specified in the Hello World message model).channel.basicPublish("", QUEUE_NAME, null, message.getBytes());System.out.println(" [Producer(hello world)] Sent '" + message + "'");} catch (Exception e) {e.printStackTrace();} finally {// Release resources.if (channel != null) {channel.close();}if (connection != null) {connection.close();}}}}

[Producer(hello world)] Sent 'Hello World!'
package com.tencent.tdmq.rabbitmq.demo.helloworld;import com.rabbitmq.client.Channel;import com.rabbitmq.client.Connection;import com.rabbitmq.client.ConnectionFactory;import com.rabbitmq.client.DeliverCallback;import com.tencent.tdmq.rabbitmq.demo.Constant;import java.nio.charset.StandardCharsets;/*** RabbitMQ Hello World model example.* Message consumer.*/public class MessageConsumer {/*** Message queue name.*/public static final String QUEUE_NAME = "hello-world-queue";public static void main(String[] args) throws Exception {// Connection factory.ConnectionFactory factory = new ConnectionFactory();// Set the service address.factory.setHost(Constant.URI);// Set the virtual host.factory.setVirtualHost(Constant.VHOST_NAME);// Set the username.factory.setUsername(Constant.USERNAME);// Set the password.factory.setPassword(Constant.PASSWORD);// Obtain a connection and establish a channel.Connection connection = factory.newConnection();Channel channel = connection.createChannel();// Bind a message queue.channel.queueDeclare(QUEUE_NAME, true, false, false, null);System.out.println(" [Consumer(hello world)] Waiting for messages.");// Message processing callback. The message processing logic is executed when a message is received.DeliverCallback deliverCallback = (consumerTag, delivery) -> {String message = new String(delivery.getBody(), StandardCharsets.UTF_8);System.out.println(" [Consumer(hello world)] Received '" + message + "'");};// Subscribe to a message. (If the second parameter is true, it indicates that the message is automatically acknowledged upon being received.)channel.basicConsume(QUEUE_NAME, true, deliverCallback, consumerTag -> {System.out.println("consumerTag = " + consumerTag);});}}

[Consumer(hello world)] Waiting for messages.[Consumer(hello world)] Received 'Hello World!'consumerTag = amq.ctag-xxx (specific tag string.)
Apakah halaman ini membantu?
Anda juga dapat Menghubungi Penjualan atau Mengirimkan Tiket untuk meminta bantuan.
masukan