tencent cloud

TDMQ for RabbitMQ

Release Notes and Announcements
Release Notes
Announcements
Product Introduction
Introduction and Selection of the TDMQ Product Series
What Is TDMQ for RabbitMQ
Strengths
Use Cases
Description of Differences Between Managed Edition and Serverless Edition
Open-Source Version Support Description
Comparison with Open-Source RabbitMQ
High Availability
Use Limits
TDMQ for RabbitMQ-Related Concepts
Regions
Related Cloud Services
Billing
Billing Overview
Pricing
Billing Example
Convert to Monthly Subscription from Hourly Postpaid
Renewal
Viewing Consumption Details
Overdue Payments
Refund
Getting Started
Getting Started Guide
Step 1: Preparations
Step 2: Creating a RabbitMQ Cluster
Step 3: Configuring a Vhost
Step 4: Using the SDK to Send and Receive Messages
Step 5: Querying a Message
Step 6: Deleting Resources
User Guide
Usage Process Guide
Configuring the Account Permission
Creating a Cluster
Configuring a Vhost
Connecting to the Cluster
Managing Messages
Configure Advanced Feature
Managing the Cluster
Viewing Monitoring Data and Configuring Alarm Policy
Use Cases
Use Instructions of Use Cases
RabbitMQ Client Use Cases
RabbitMQ Message Reliability Use Cases
Usage Instructions for MQTT Protocol Supported by RabbitMQ
Migrate Cluster
Migrating RabbitMQ to Cloud
Step 1. Purchasing a TDMQ Instance
Step 2: Migrating Metadata to the Cloud
Step 3: Enabling Dual Read-Write
API Reference (Managed Edition)
API Overview
API Reference (Serverless Edition)
History
Introduction
API Category
Making API Requests
Relevant APIs for RabbitMQ Serverless PAAS Capacity
RabbitMQ Serverless Instance Management APIs
Data Types
Error Codes
SDK Documentation
SDK Overview
Spring Boot Starter Integration
Spring Cloud Stream Integration
Java SDK
Go SDK
Python SDK
PHP SDK
Security and Compliance
Permission Management
Network Security
Deletion Protection
Change Records
CloudAudit
FAQs
Service Level Agreement
Contact Us
DokumentasiTDMQ for RabbitMQGetting StartedStep 2: Creating a RabbitMQ Cluster

Step 2: Creating a RabbitMQ Cluster

PDF
Mode fokus
Ukuran font
Terakhir diperbarui: 2026-01-05 09:55:39
This document introduces the operation steps to create a RabbitMQ cluster in the TDMQ for RabbitMQ console.

Prerequisites

You have completed Step 1: Preparations.

Operation Steps

1. Log in to the TDMQ for RabbitMQ console.
2. In the left sidebar, choose Cluster Management > Cluster List. Click Create Cluster to go to the purchase page, and select the instance specifications to be purchased.
Parameter
Required
Description
Cluster Type
Yes
Select a Serverless Edition cluster.
Billing Mode
Yes
The TDMQ for RabbitMQ Serverless Edition clusters provide monthly subscription and postpaid by hour billing modes.
Region
Yes
Selecting a region close to the location where the client resources are deployed can reduce network latency and improve access speed. Cloud products in different regions cannot communicate with each other via the private network. Select a region with caution, as it cannot be changed after purchase.
The underlying architecture of TDMQ for RabbitMQ Serverless Edition is multi-AZ deployment by default.
Cluster Specification
Yes
Currently, only Pro Edition is supported.
TPS Specification
Yes
Select the TPS specification based on the business traffic requirements. Configuration changes can be performed quickly in the console.
Number of queues
No
The minimum adjustable value is the number of free queues provided. Each TPS specification includes a quota of free queues. If this does not meet your requirements, you can purchase additional queues. You can also increase or decrease the number of queues in the cluster later through the console.
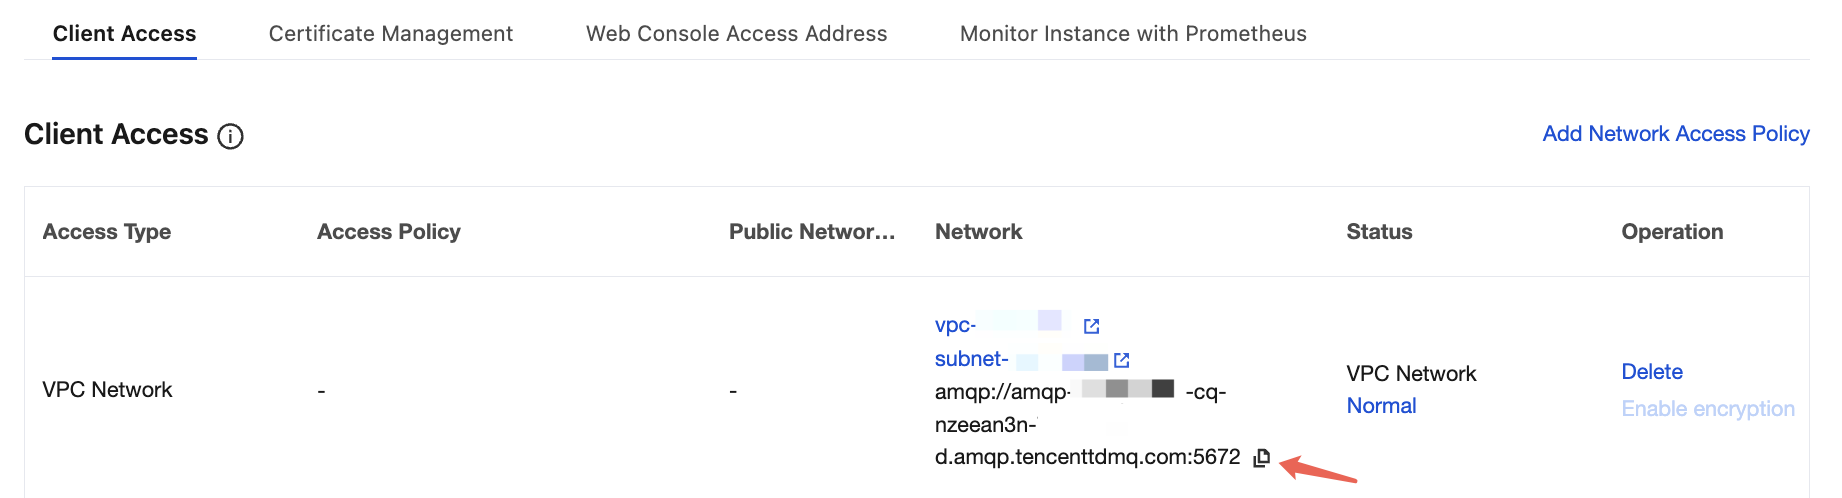
VPC
Yes
Bind the access point domain name of the newly purchased cluster to the pre-configured VPC in the same region.
Cluster Name
Yes
Enter a cluster name whose length is 3–64 characters. It can only contain digits, letters, hyphens (-), and underscores (_).
Tag
No
It is used for resource classification and management. For detailed usage methods, see Configuring Resource Tags.
3. After confirming that the cluster information is correct, check I Have Read and Agree to the TDMQ for RabbitMQ Terms of Service, and click Buy Now.
4. After completing the payment on the order payment page, wait for 3 to 5 minutes to view the created cluster on the cluster list page.
5. Click the ID of the created cluster to go to the basic information page. In the Client Access module, obtain and record the connection information of the server, which is used to connect to the cluster for sending and receiving messages later.


Bantuan dan Dukungan

Apakah halaman ini membantu?

masukan