Adding Serverless to a Provisioned-Resource Cluster
Download
Focus Mode
Font Size
A cluster whose instance mode is provisioned resources supports adding Serverless read-only nodes. After the addition, the cluster gains the capability to mount both provisioned resource read-only nodes and Serverless read-only nodes. Since the Serverless service charges based on actual compute and storage resource usage and offers features such as automatic start/stop and automatic scaling, adding Serverless read-only nodes helps you better manage the application of each node in the provisioned resource cluster to your business and control costs more precisely. This document describes the operation method for adding Serverless read-only nodes to a provisioned resource cluster.
Prerequisites
A provisioned resource cluster has been created. For operation instructions, see Creating a Cluster.
Note
After a provisioned resource cluster has Serverless read-only nodes added, the provisioned resource read-only nodes are configured to use the parameter template of the provisioned resource cluster and support parameter formulas. In contrast, the Serverless read-only nodes are configured to use the Serverless parameter template and do not support parameter formulas.
After a provisioned resource cluster has Serverless read-only nodes added, when you modify parameters for the Serverless read-only nodes, if a parameter is not supported by provisioned resource nodes (including read/write and read-only nodes), you cannot simultaneously modify the parameters of the provisioned resource nodes.
After a provisioned resource cluster has Serverless read-only nodes added, when you modify parameters for the provisioned resource nodes (including read/write and read-only nodes), if a parameter is not supported by Serverless read-only nodes, you cannot simultaneously modify the parameters of the Serverless read-only nodes.
Operation Steps
Adding Serverless to a Provisioned-Resource Cluster
1. Log in to the TDSQL-C for MySQL console.
2. Click the target cluster in the cluster list on the left to go to the cluster management page.
3. Click Serverless Configuration in the upper-right corner.

4. In the pop-up window, turn on the button that appears after Serverless is enabled, complete the configuration as described below, and click OK.
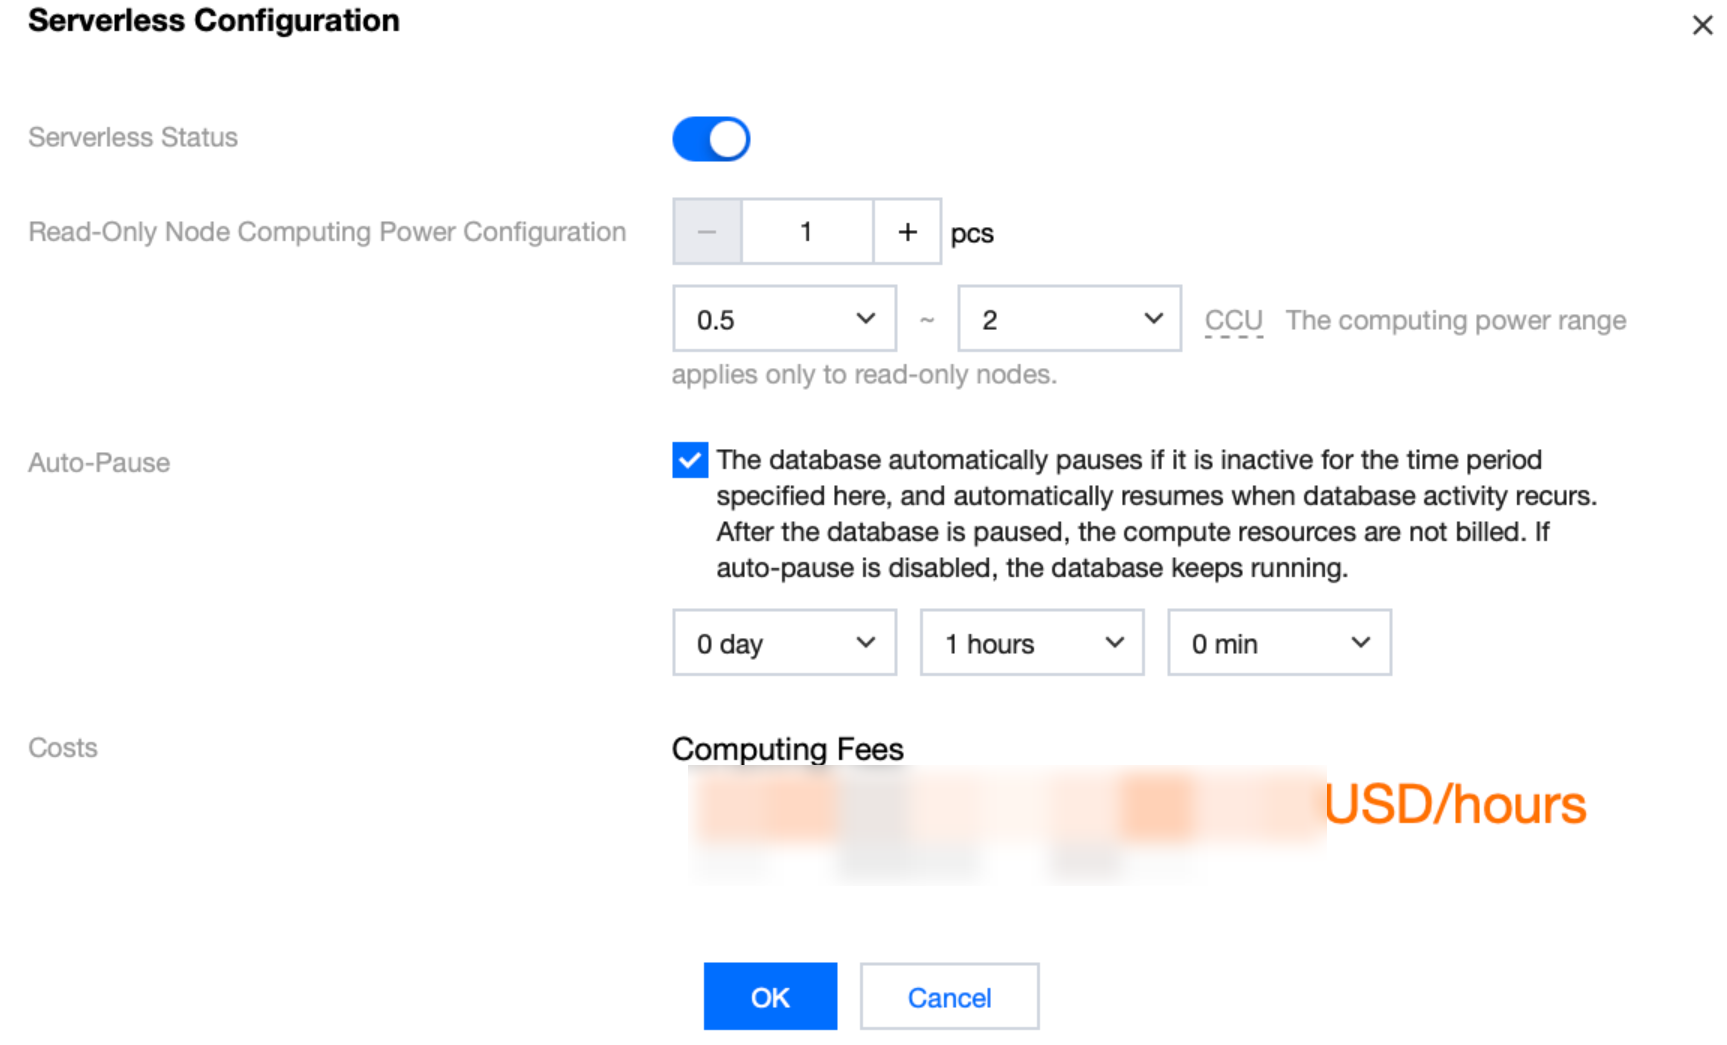
Parameter | Description |
Read-Only Node Computing Power Configuration | Count: Select the number of Serverless read-only nodes. The valid range is from 1 to 15, and the total number of provisioned resource read-only nodes plus Serverless read-only nodes should not exceed 15. Computing power range: Configure the computing power range for read-only nodes. Individual node configuration is not supported. |
Auto-Pause | If auto-pause is enabled, you should set an auto-pause duration, which is 1 hour by default. When there are no active connections or CPU usage within this period, the database will automatically pause. After pausing, computing resources will not be billed, while storage will continue to be billed based on actual usage. If auto-pause is not enabled, the database will remain running continuously. When there are no active connections or CPU usage, billing will be based on the minimum CCU computing power you have configured. Note: If the database proxy is enabled for the cluster, auto-pause cannot be configured. |
Modifying Serverless Configuration
After Serverless read-only nodes are added to a provisioned resource cluster, if you need to modify the configuration related to the Serverless read-only nodes, you can go to the cluster management page, click Serverless Configuration in the upper-right corner, and then modify the number of Serverless read-only nodes and the computing power configuration in the pop-up window.
Removing Serverless from a Provisioned-Resource Cluster
Note:
Performing the "Delete Serverless Read-Only" operation will terminate all Serverless read-only nodes in the cluster with a single click. Please proceed with caution.
Terminated Serverless read-only nodes are moved to the recycle bin. While in the recycle bin, if the corresponding cluster adds Serverless read-only nodes again, the system will prioritize restoring the nodes from the recycle bin. If the number of nodes to be restored is less than the number of Serverless read-only nodes from that cluster in the recycle bin, the restoration will be performed randomly. If the number of nodes to be restored is greater than the number of Serverless read-only nodes from that cluster in the recycle bin, and the system determines that the total number of read-only nodes in the cluster after restoration will be less than 15, the system will prioritize restoring all Serverless read-only nodes from that cluster in the recycle bin.
After Serverless read-only nodes are deleted, when you attempt to add a provisioned resource read-only node, if the sum of the number of Serverless read-only nodes from that cluster in the recycle bin and the number of provisioned resource read-only nodes is less than 15, you can add it normally. If the sum is, you will be unable to add the provisioned resource read-only node. In this case, you must first take the Serverless read-only nodes offline in the recycle bin and then retry.
1. Log in to the TDSQL-C for MySQL console.
2. Click the target cluster in the cluster list on the left to go to the cluster management page.
3. Click Serverless Configuration in the upper-right corner.
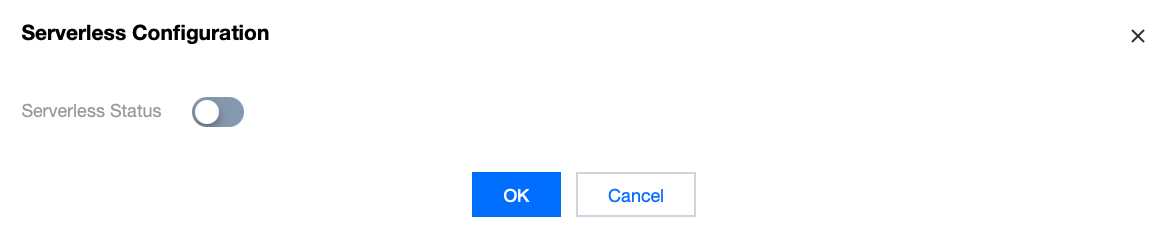
4. In the pop-up window, disable Serverless Status, click the button that appears, then click OK to delete the Serverless read-only nodes and terminate the instances.
Help and Support
Was this page helpful?
You can also Contact sales or Submit a Ticket for help.
Help us improve! Rate your documentation experience in 5 mins.
Feedback