Migrating a Public IP Address
Unduh
Mode fokus
Ukuran font
This document describes how to migrate a public IP address from one CVM to another CVM under the same account.
Scenarios
If CVM A fails and cannot provide services normally, the public IP on CVM A needs to be migrated to the healthy CVM B to ensure normal service. Public IP address for migration includes common public IP address and EIP.
Directions
Step 1: Converting the Common Public IP Address on CVM A to an EIP
Note
If the public IP address on CVM A is already an EIP, skip this step and execute Step 2: Unbinding the EIP from CVM A.
Currently, only the general BGP IP lines are supported by the common public IP addresses.
If your account is of the standard account type, you currently cannot convert a common public IP address billed on a yearly/monthly subscription by bandwidth to an EIP. However, you can switch the network billing mode to billing by traffic or postpaid billing by hourly bandwidth. Note that promo vouchers and purchase discounts will not be refunded after you switch the network billing mode. If you change the billing mode back to monthly bandwidth subscription later, you will need to purchase the resource again at the list price on the official website. If you are unsure of your account type, see Determining Account Type.
EIPs have flexible binding and unbinding capabilities that common public IP addresses do not have. If the public IP address on CVM A is a common public IP address, you need to convert it to an EIP and use the EIP's capabilities to migrate the public IP address.
1. Log in to the CVM Console.
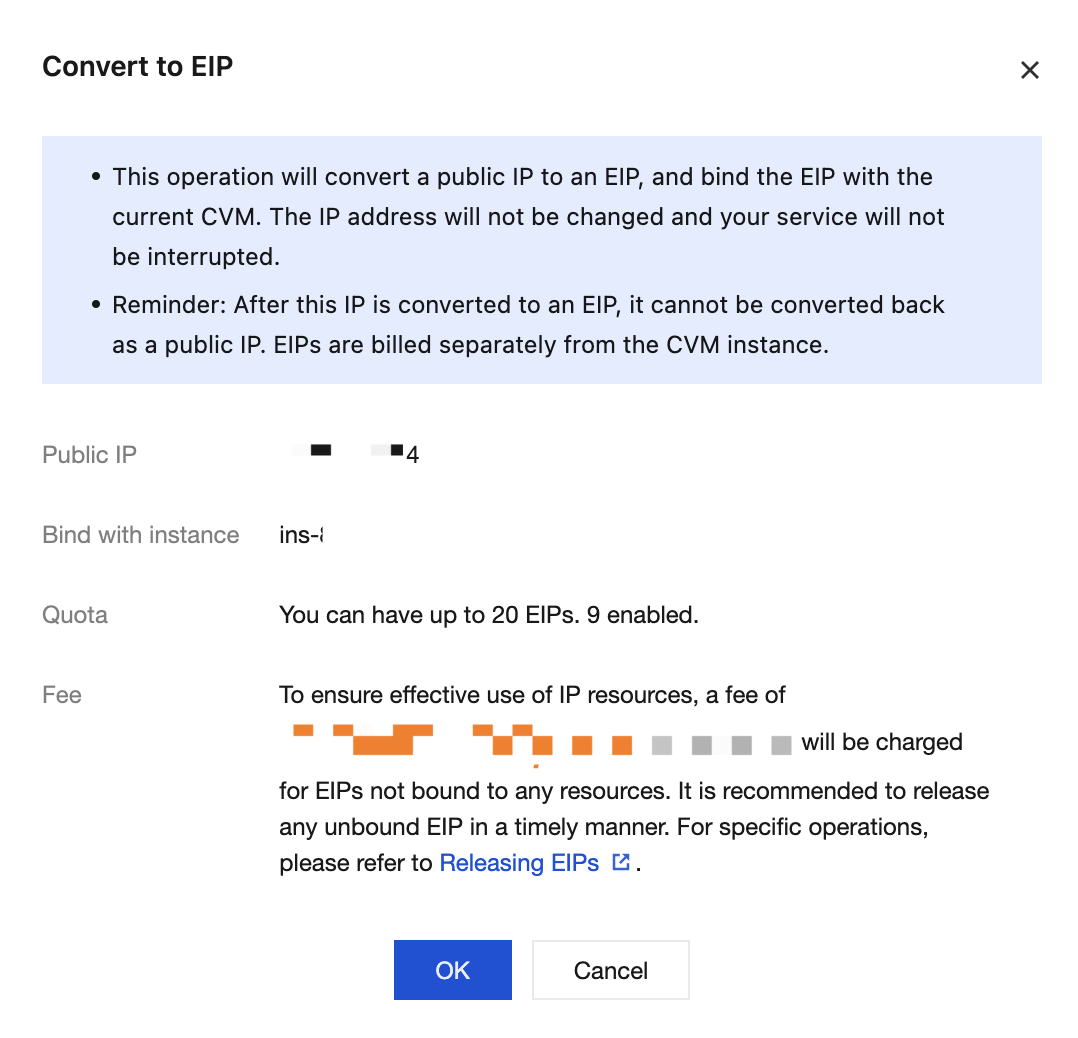
2. On the instances page, select the region of CVM A, and click the icon in the red box in the corresponding row.
Note:
When a common public IP address is converted to an EIP, the IP address remains unchanged, and your service is not interrupted. The EIP quota for each account in a single region is 20.

3. In the pop-up Convert to EIP window, click OK.
Step 2: Unbinding the EIP From CVM A
Unbind CVM A from the EIP. After it is unbound, CVM A cannot access the public network because it has no public IP.
1. Log in to the CVM Console.
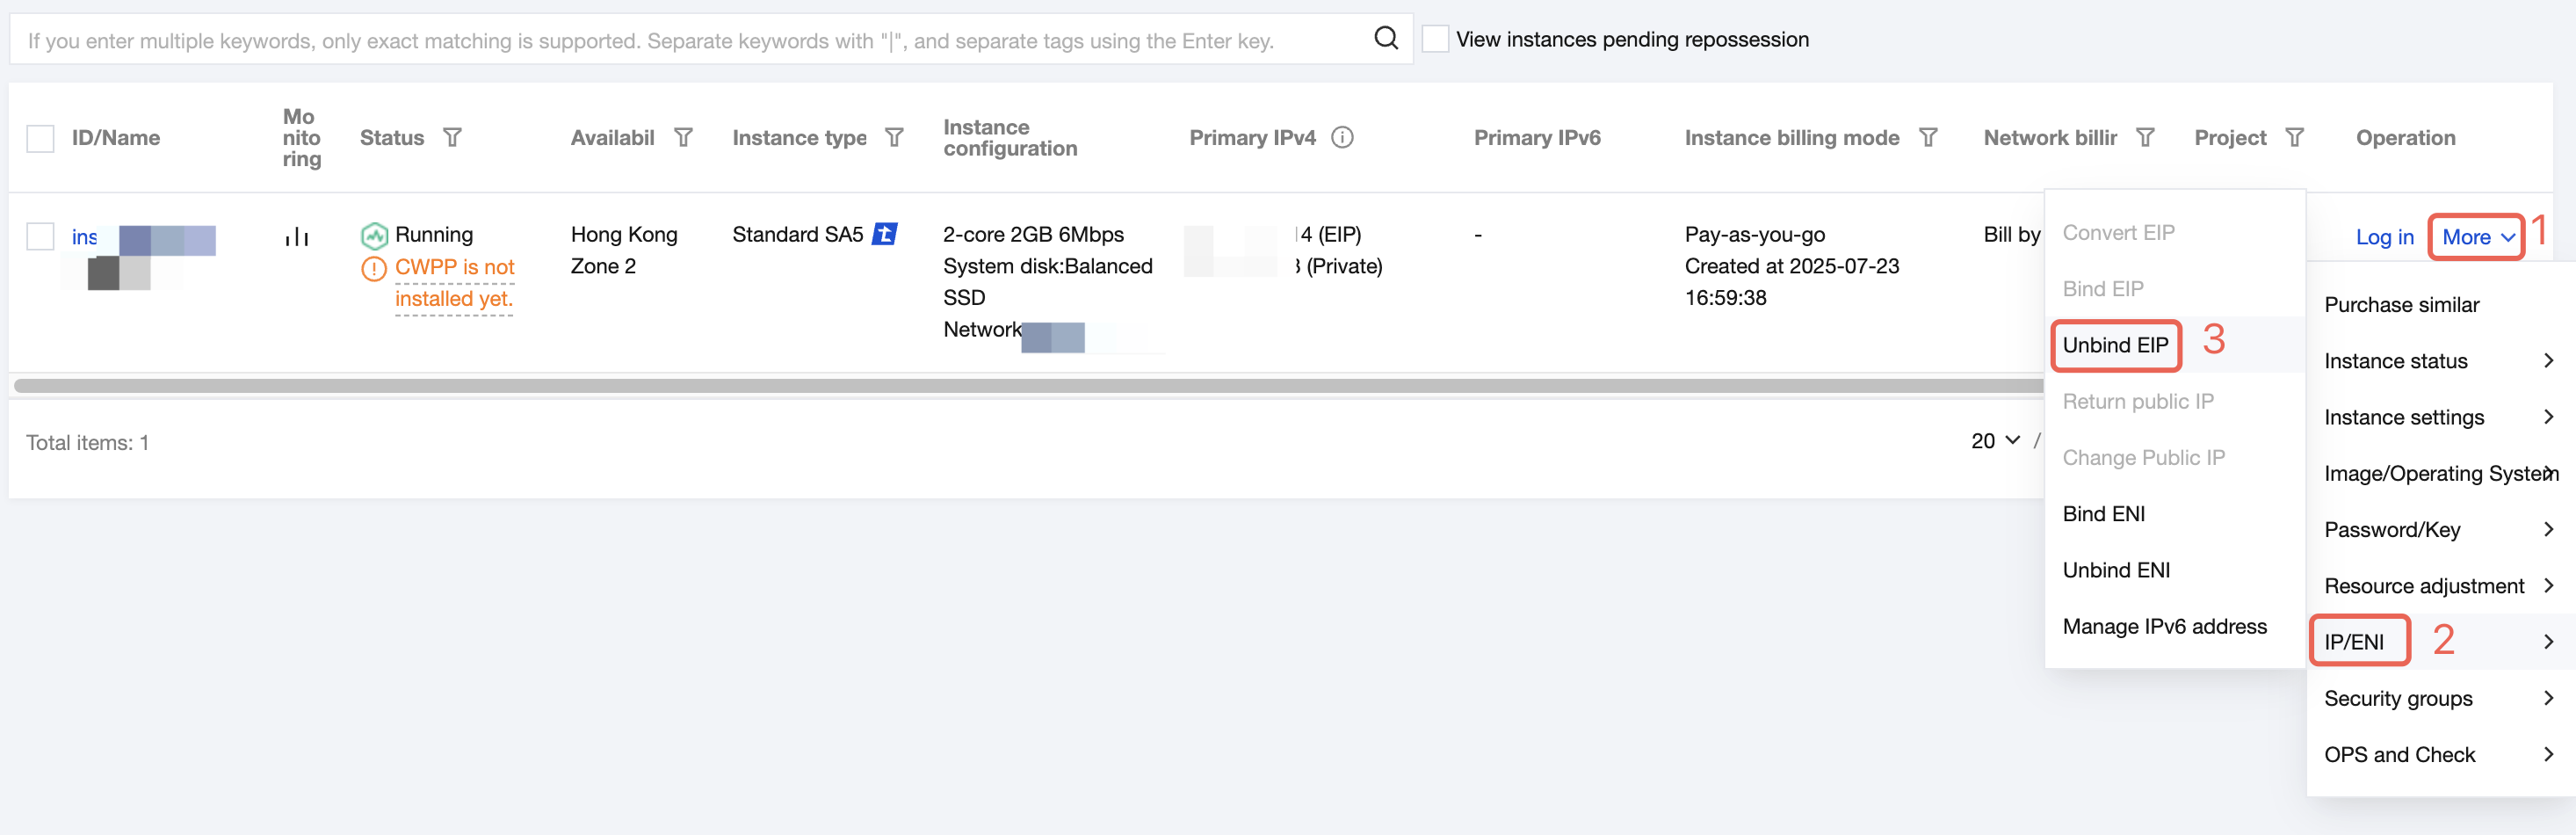
2. On the instance management page, select the region of CVM A. In the operation column in the row of the region, click More > IP/NIC > Unbind EIP.
3. In the pop-up Unbind EIP window, click OK.
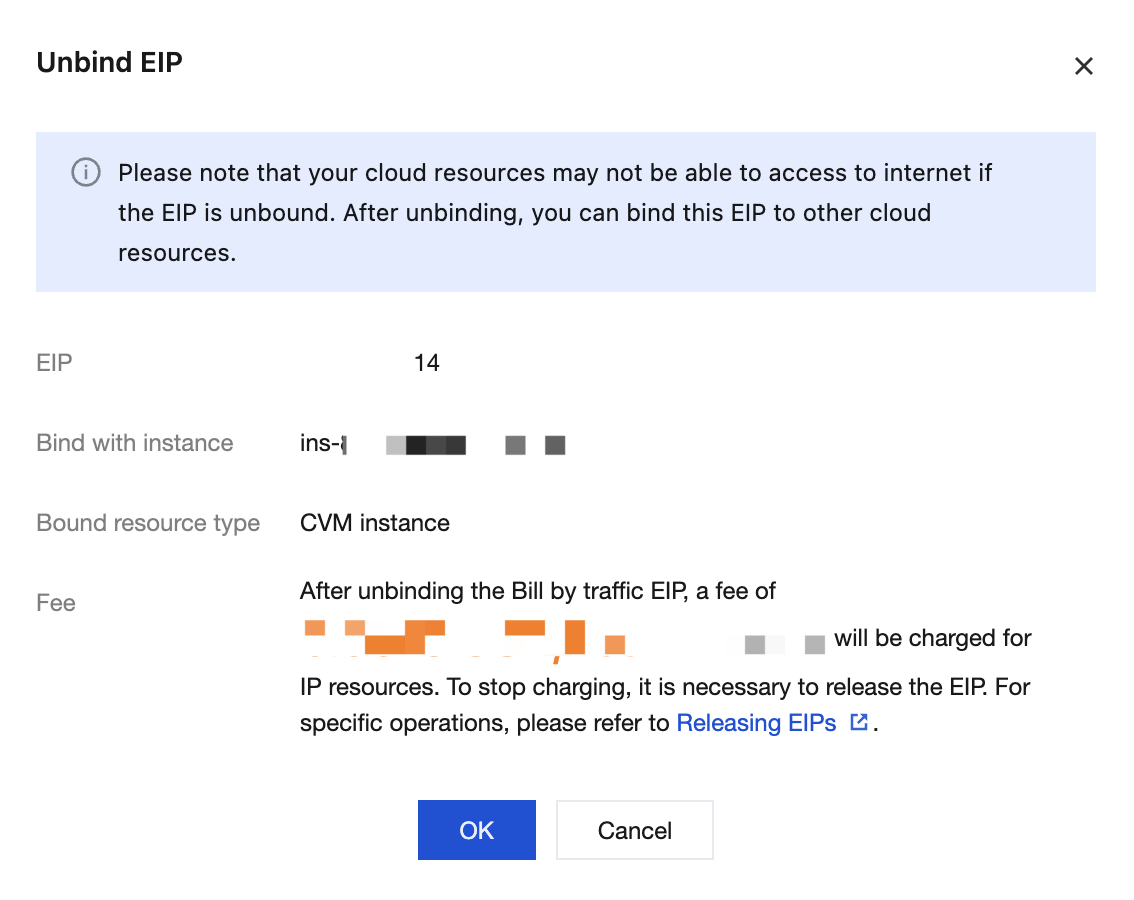
4. In the pop-up prompt box, click OK to complete the unbinding operation for the EIP.
Note
After unbinding the EIP, execute Step 3 promptly to save IP resource fees. The fees are charged hourly and are precise down to the second. If the duration is less than an hour, the fees are charged based on the proportion of idle time.
Step 3: Binding the EIP to CVM B
Bind the EIP unbound from CVM A to CVM B to complete the migration of the public IP.
1. Log in to the public IP address console.
2. Select the region of CVM A. In the list, find the row of the EIP unbound from CVM A, and click More > Bind in the operation column.
3. In the pop-up Bind resource window, select CVM instances as the resource type, select CVM B as the target CVM you want to migrate the EIP to, and click OK.
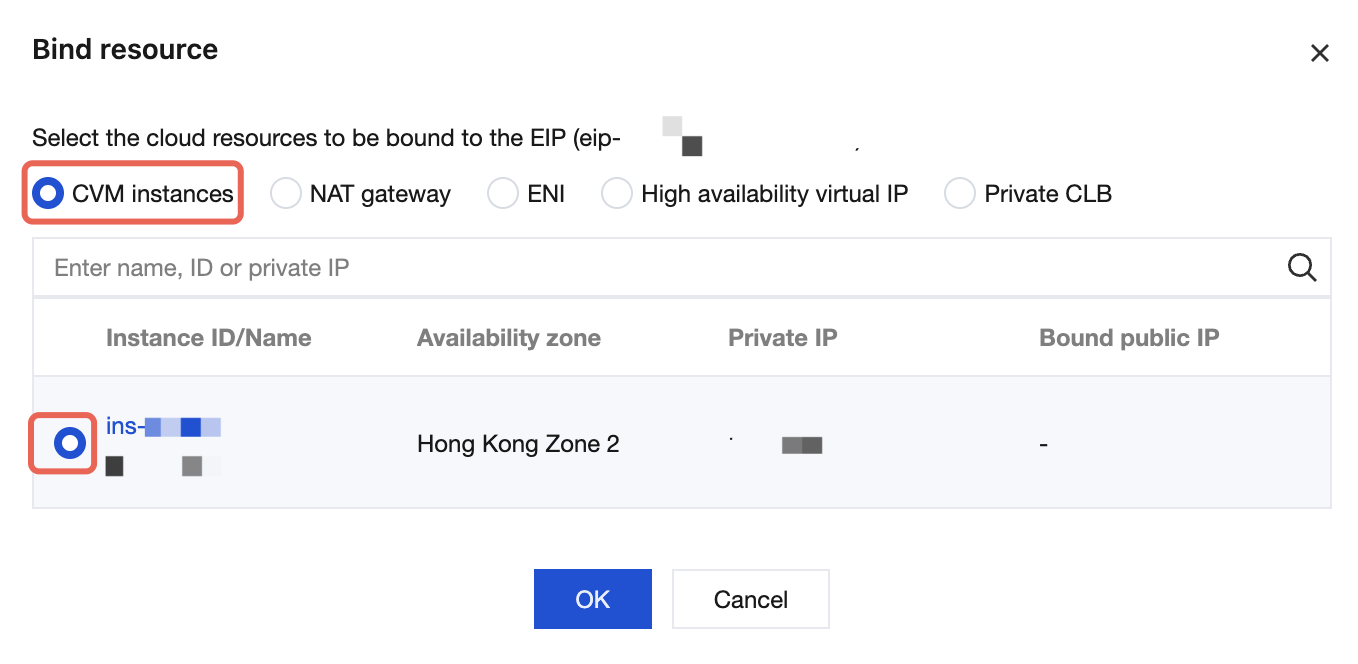
4. In the pop-up prompt box, click OK.
Step 4: Verifying the Migration Result
After the migration is completed, you can check on the CVM list page or EIP list page that the public IP has been bound to the target CVM B.
CVM List Page
1. Log in to the CVM Console.
2. On the instance management page, select the region of CVM B. In the list, find the row of CVM B, and you can see that the public IP address has been migrated successfully.

EIP List Page
1. Log in to the public IP address console.
2. Select the region where CVM B is located and find the row where the migrated EIP is located in the list. You can then check that the EIP has been successfully bound to CVM B.

Bantuan dan Dukungan
Apakah halaman ini membantu?
Anda juga dapat Menghubungi Penjualan atau Mengirimkan Tiket untuk meminta bantuan.
masukan