Quick deploying a website with Pages
Download
Mode fokus
Ukuran font
This guide will walk you through how to quickly create and deploy a website using Pages, helping you get started with the Pages service.
Pages is a front-end development and deployment platform built on the Tencent EdgeOne infrastructure, specifically designed for modern Web development. It helps developers quickly build and deploy static sites and serverless applications. By integrating Edge functions capabilities, it achieves efficient content delivery and dynamic functionality extension, supporting fast access for global users.
Step 1: Choose a Creation Method
After completing the preparation work, you can begin connecting to EdgeOne.
1. Log in to the EdgeOne console.
2. Choose how to create your Pages project based on the following scenarios:
If you're logging into the console for the first time or currently have no resources in EdgeOne, you'll enter the scenario selection hall. On this interface, hover over Create Project and choose from three methods: "Import Git Repository," "Start from Template," or "Upload directly."

If you're creating a Pages project for the first time but already have other resources, you can click the Pages Tab at the top and select how to create your Pages project in that tab.

Creation Method | Description |
Import Git Repository | Requires connection to a Git repository provider to import code and create a website from the Git repository. |
Start from Template | You can quickly create a website using EdgeOne's pre-made templates. |
Upload directly | You can upload your current project code to EdgeOne and deploy your site based on the uploaded content.Note: If you choose to upload files, your current project cannot switch to Git integration. You must create a new project with Git integration to use automatic deployment. |
Step 2: Connect to Git Repository
Note:If you chose "Upload directly" as your creation method, you can skip this step and proceed to Step 3.
When you select "Import Git Repository" or "Start from Template," you need to connect to your current Git provider. Currently supported Git providers include Github, Gitee, and others. Here's an example using Github:
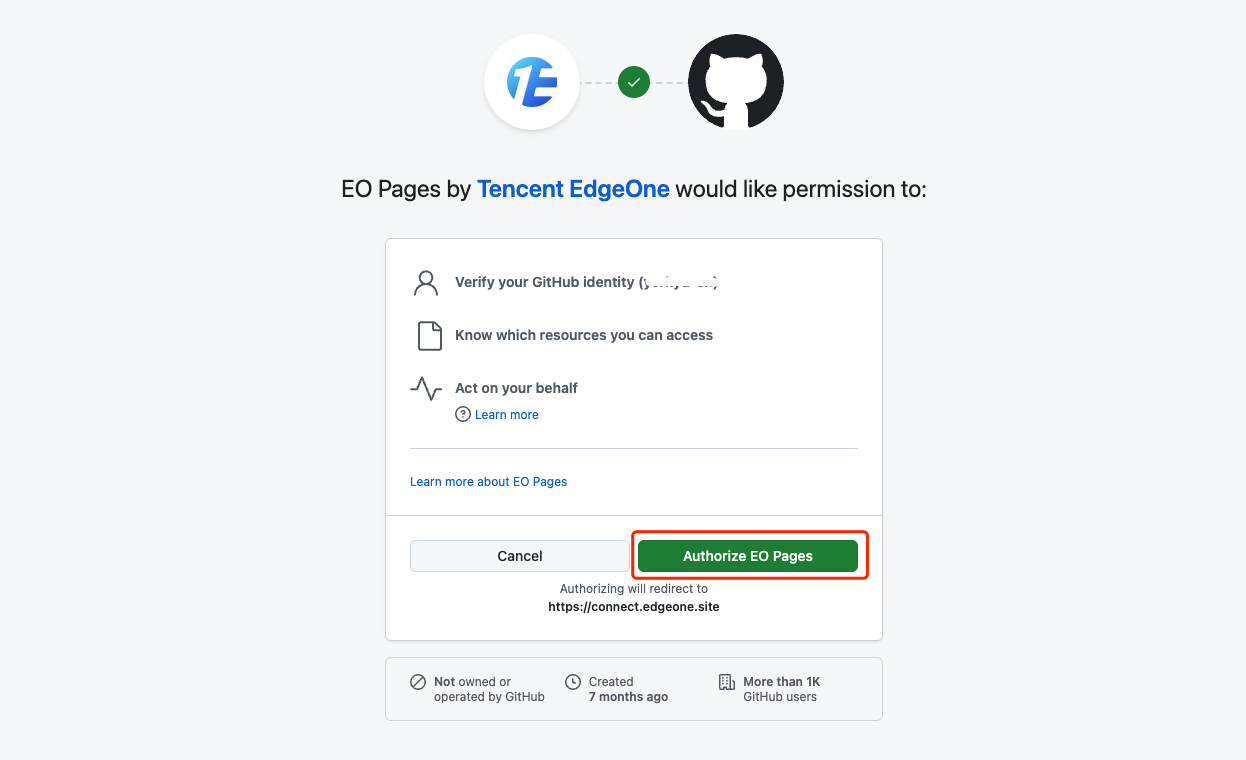
1. On the console page, click "Github" to link your repository.

2. Grant EdgeOne permission to access your repositories by clicking Authorize EO Pages.
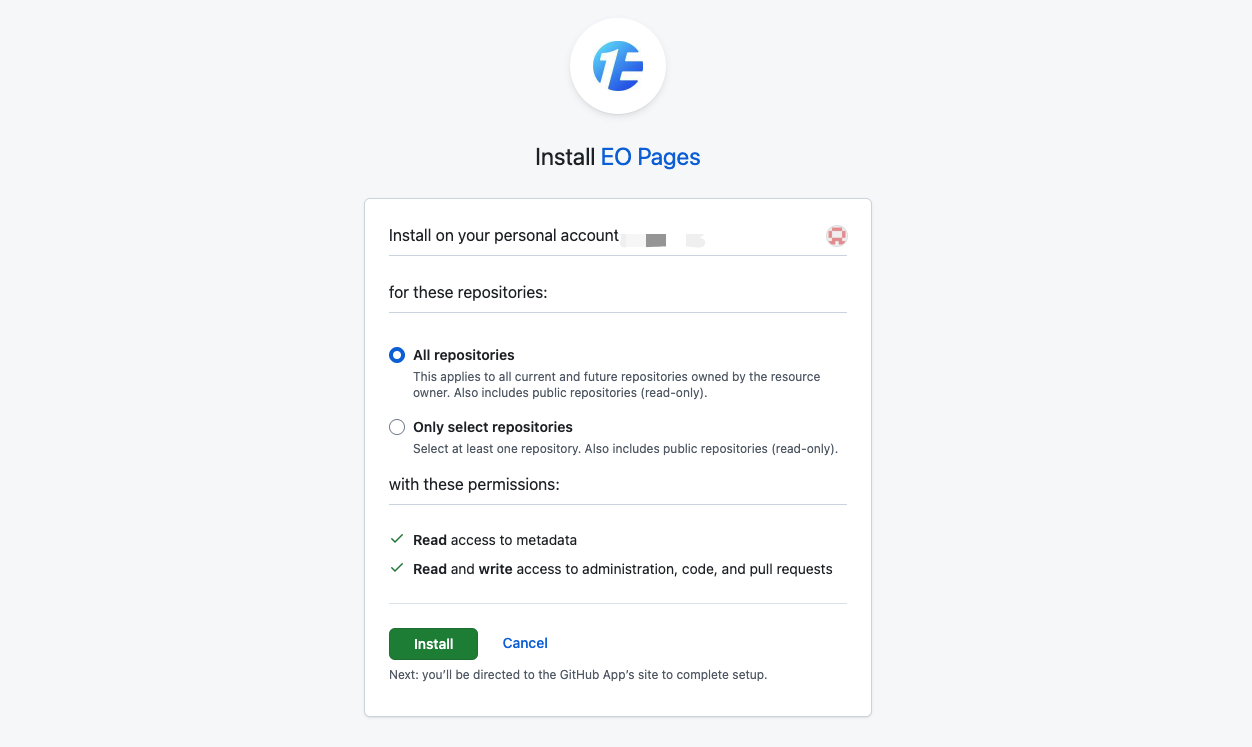
3. Select the repository you want to deploy or authorize all repositories, then click Install.
Step 3: Customize Build
The build process differs depending on the creation method you chose:
After connecting to a Git repository, you need to configure the build settings. This step is crucial for correctly compiling and successfully deploying your project.
1. Select the repository you want to deploy.

2. Enter your build commands. If you're unsure, check the scripts section in your package.json file. When selecting an acceleration region, different regions determine the node resources allocated to your project and whether ICP filing is required when adding a custom domain. For details, refer to Domain Management - Acceleration Region.
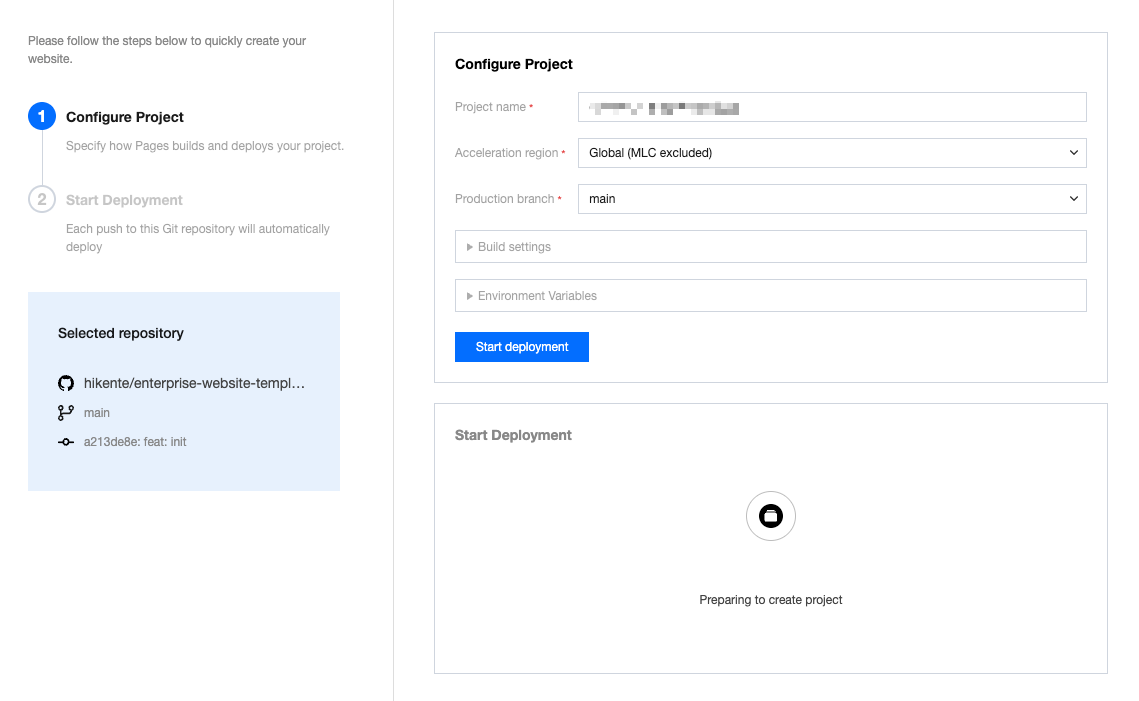
3. Review your configuration, and once confirmed, click Start Deployment. Pages will automatically build your project and deploy it to the global edge network.
We offer a variety of templates for different use cases. Below, we'll show you how to quickly launch and deploy a project using a template. Later, you can develop based on our templates with continuous builds and deployments.
1. After authorizing Github, select a template you want to deploy.

2. Set up the project name and repository name, and adjust repository properties if needed. When selecting an acceleration region, different regions determine the node resources allocated to your project and whether ICP filing is required when adding a custom domain. For details, refer to Domain Management - Acceleration Region.
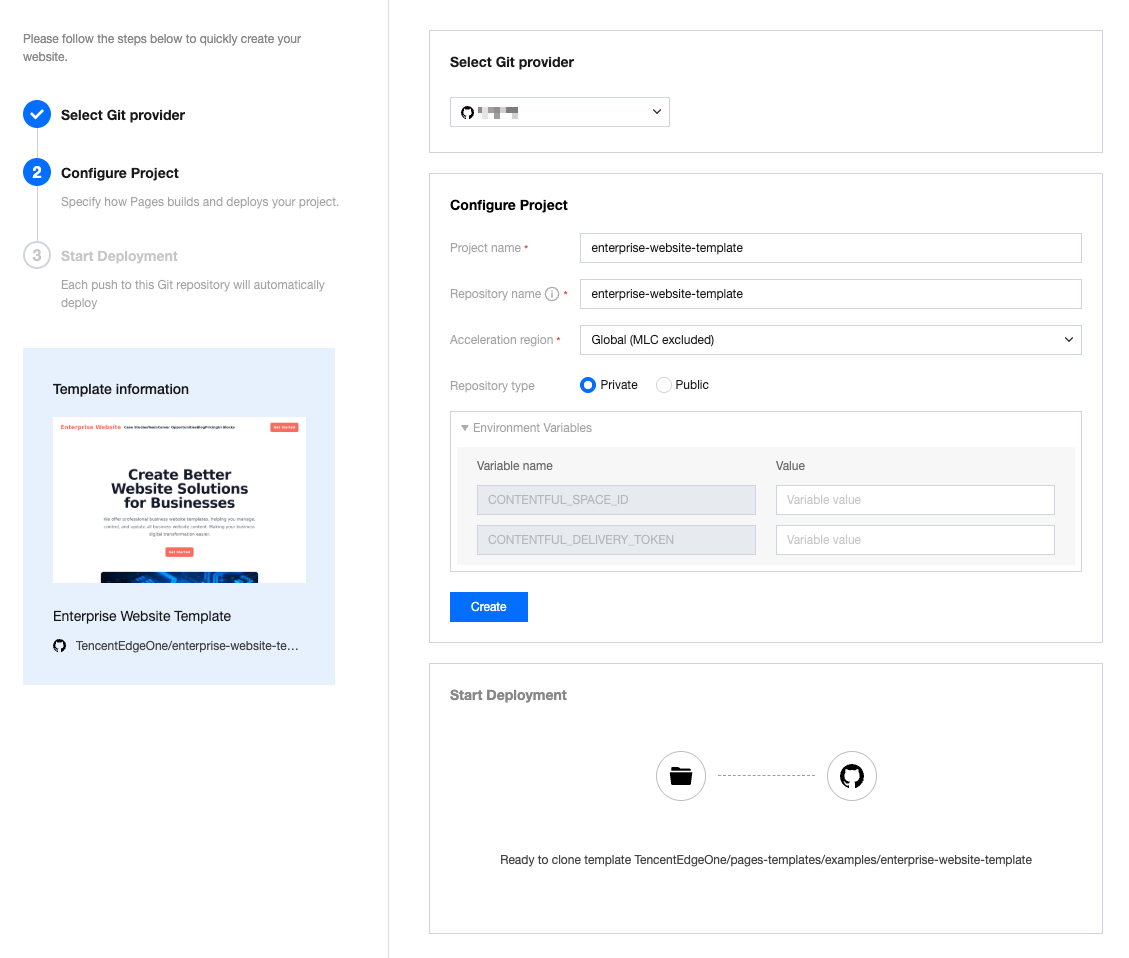
3. Click Create Now, and we'll create a repository in your GitHub account based on the template. The deployment process will start automatically. You can clone this repository locally for further development and push changes as needed.
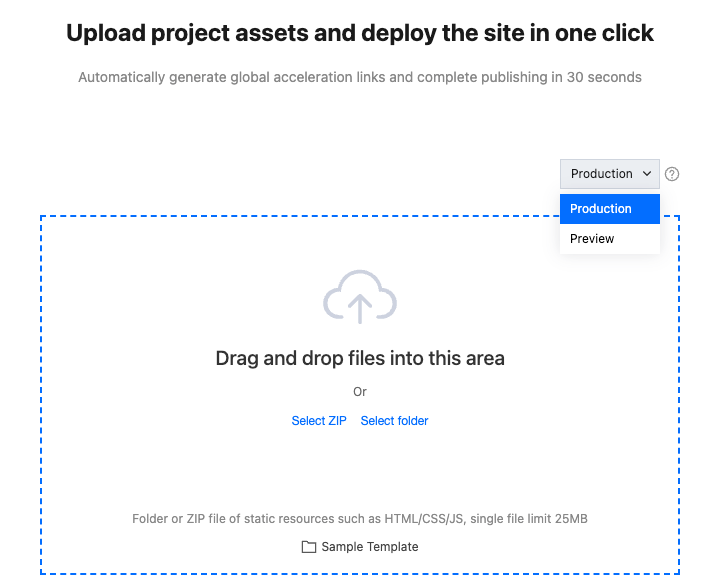
You can directly upload your built project assets to Pages and deploy them to EdgeOne's global network. If you want to integrate with your own build platform or upload from your local computer, you should choose direct upload rather than importing from a Git repository.
1. After selecting "Direct Upload" when creating your project, you'll see the following page.
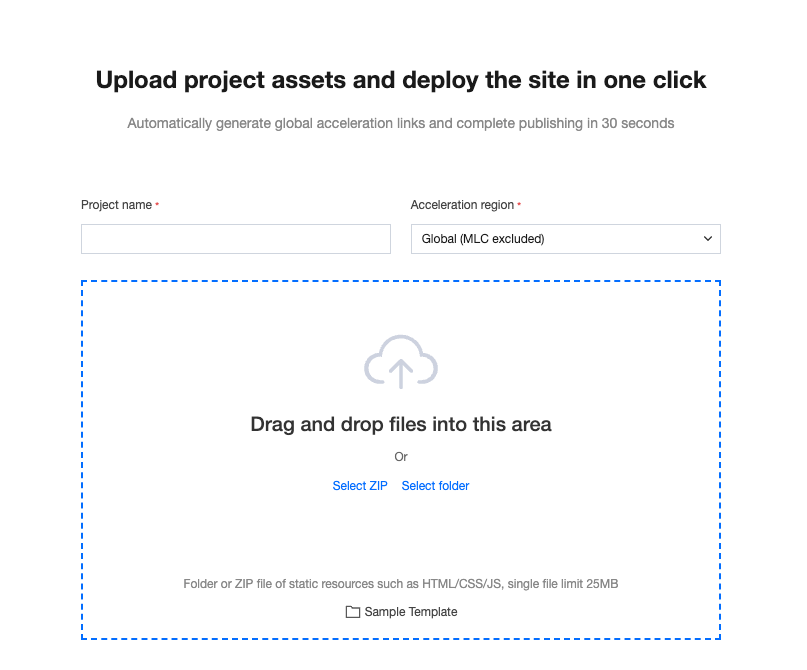
2. After filling in the "Project Name" and "Acceleration Region," drag and drop your project assets to the designated area.
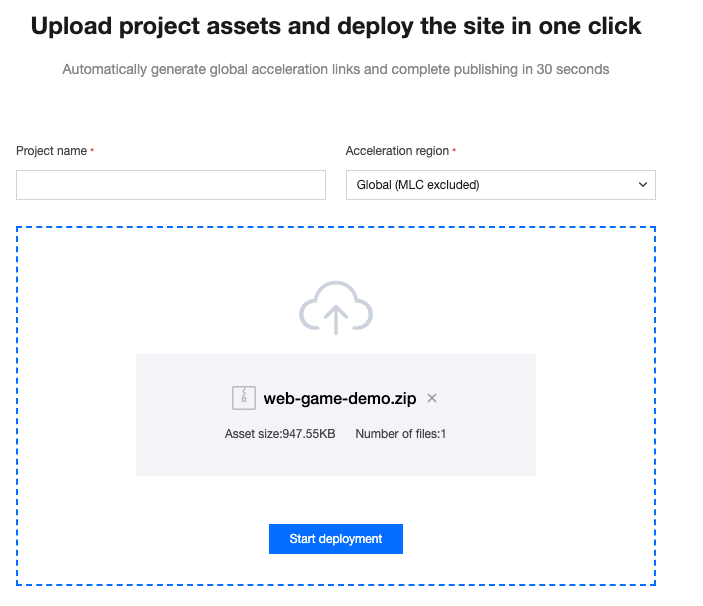
3. Click Start Deployment. After the assets are uploaded, the project will be created and you'll be directed to the deployment details page. Once deployment is successful, you can view your project through the preview link.
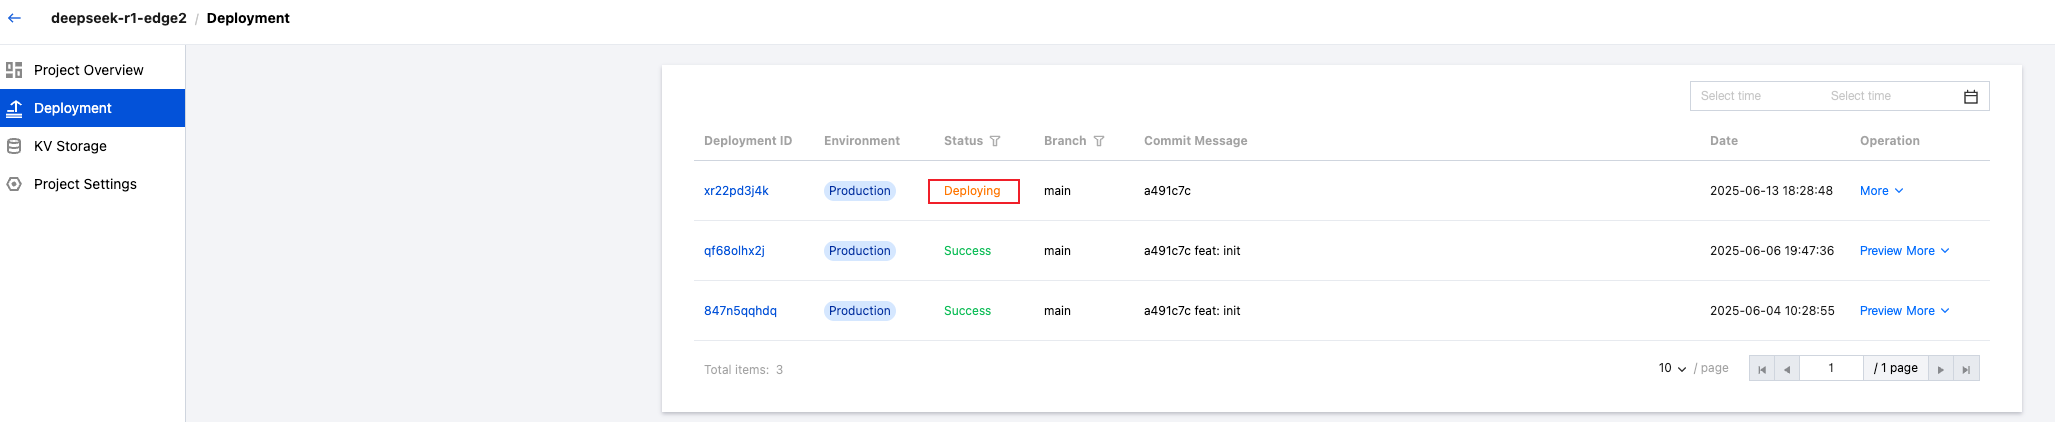
Step 4: Verify Deployment Status
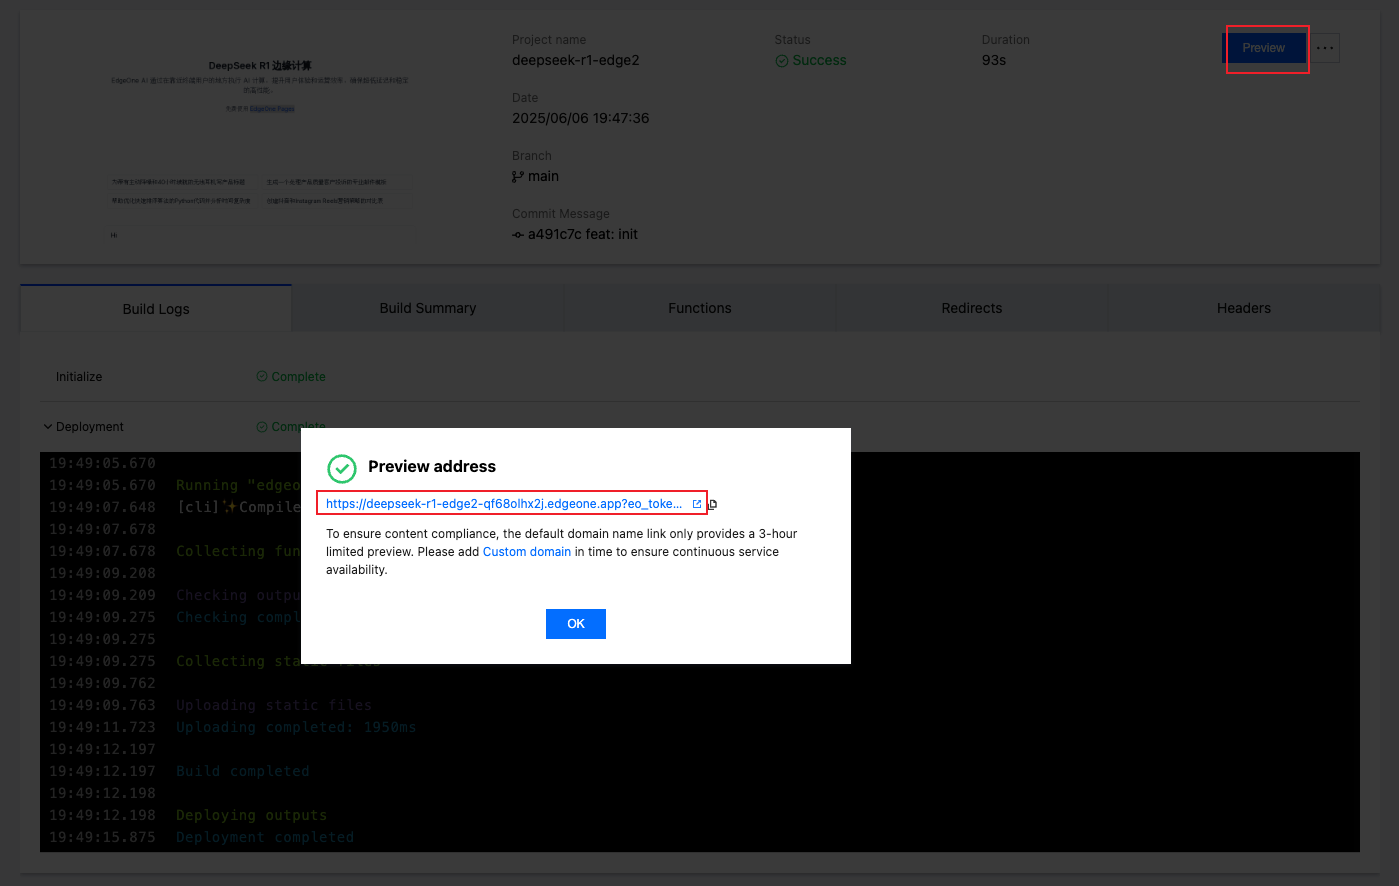
When deployment is complete, you'll see the following image indicating successful deployment!

You can generate a deployment preview link by clicking the Preview button in the upper right corner of the Build & Deploy menu to access that version's page content.
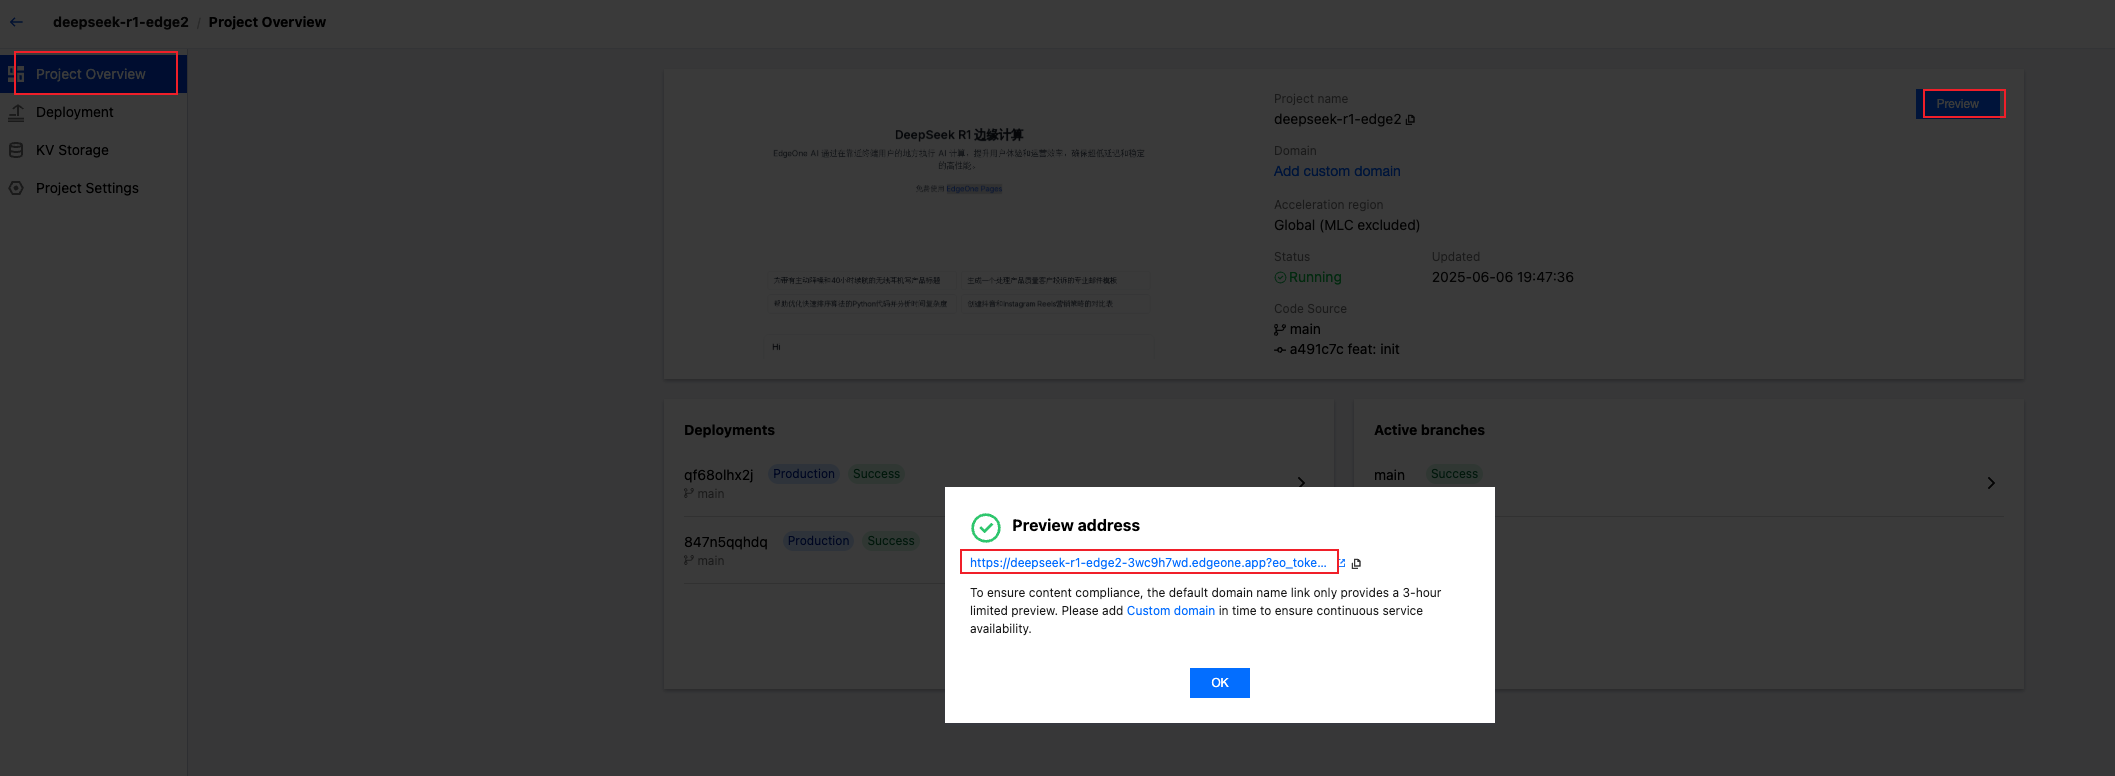
You can also generate a project preview link by clicking the "Preview" button in the upper right corner of the "Project Overview" page to access the latest version of the page content.
How to Add a Custom Domain
After verifying that the preview content is correct, we strongly recommend that you immediately add a custom domain for access to ensure your project appears more professional and trustworthy during long-term access. For detailed information on how to add a custom domain, please refer to the Domain Management - Custom Domain section.
How to Create a New Deployment
The process for creating a new deployment varies depending on how you initially created your project:
When a new commit is pushed to the main branch, EdgeOne will automatically pull and deploy the latest commit.
You can also use the "Redeploy" button in the Build & Deploy list to create a new deployment using the same source code as the current deployment with the latest project configuration.

You can deploy a new version through the "New Deployment" option on the Build & Deploy page.

Drag and drop the new version of your project assets to the designated area. The deployment environment defaults to "Production Environment" but can be switched to "Preview Environment."
Note:
Production Environment: Updates the live website that users access, effective immediately.
Preview Environment: Validate changes in an isolated environment without affecting official data.
Troubleshooting
If the deployed version differs from the repository, make sure to pull the latest version.
If a 404 error occurs after a successful direct upload deployment, check if there is an index.html file in the root directory of the uploaded folder.
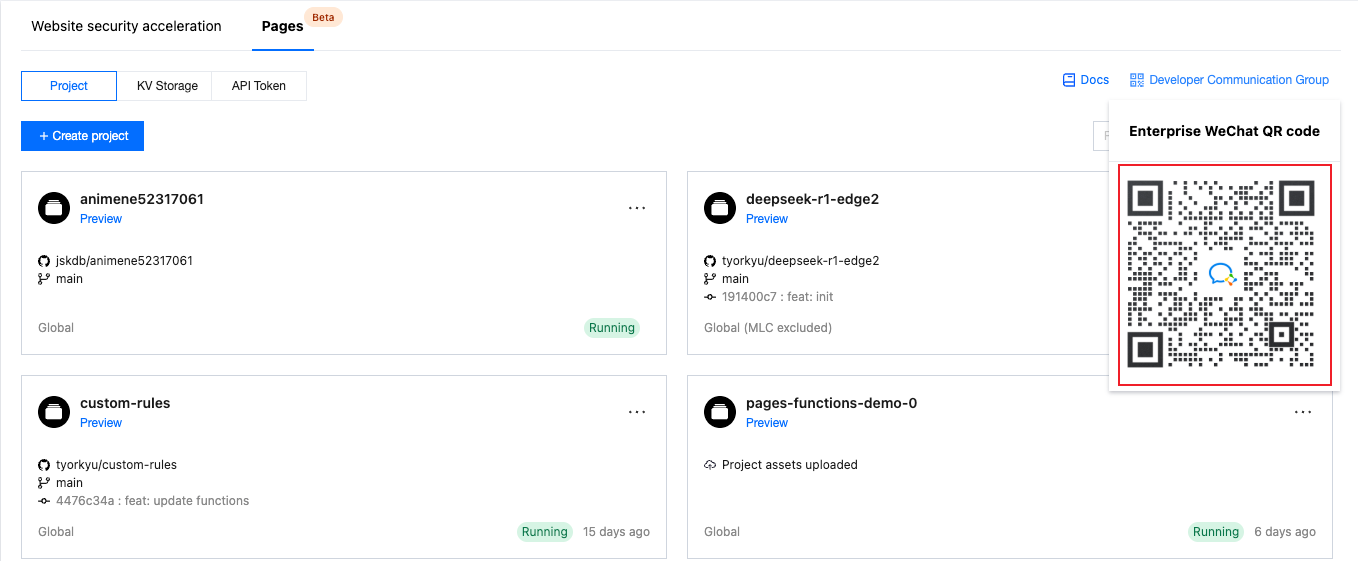
If you have other issues, refer to our Troubleshooting Guide, or scan the "Developer Communication Group" QR code in the upper right corner to join the group and contact us.
Bantuan dan Dukungan
Apakah halaman ini membantu?
Anda juga dapat Menghubungi Penjualan atau Mengirimkan Tiket untuk meminta bantuan.
masukan