React Native
Unduh
Mode fokus
Ukuran font
Prerequisites
Before you begin, complete the push prerequisite configuration for the corresponding native platforms. See iOS Prerequisites and Android Prerequisites.
Implementation steps
Step 1: Create a project (optional)
After completing manufacturer configuration for each native platform, create a React Native project. Skip this step if you already have a project.
npx @react-native-community/cli@latest init MyReactNativeApp --version 0.75.0
Step 2: Integrate push
Go to the MyReactNativeApp directory and integrate
@tencentcloud/react-native-push.npm install @tencentcloud/react-native-push --save
yarn add @tencentcloud/react-native-push
Step 3: Register for push
Copy the following code into
App.tsx, and replace SDKAppID and appKey with the application information from Console> Push > App Push > Overview.Note:
After
registerPush succeeds, you can use getRegistrationID to get the push ID, that is, RegistrationID. You can send messages to a specific RegistrationID.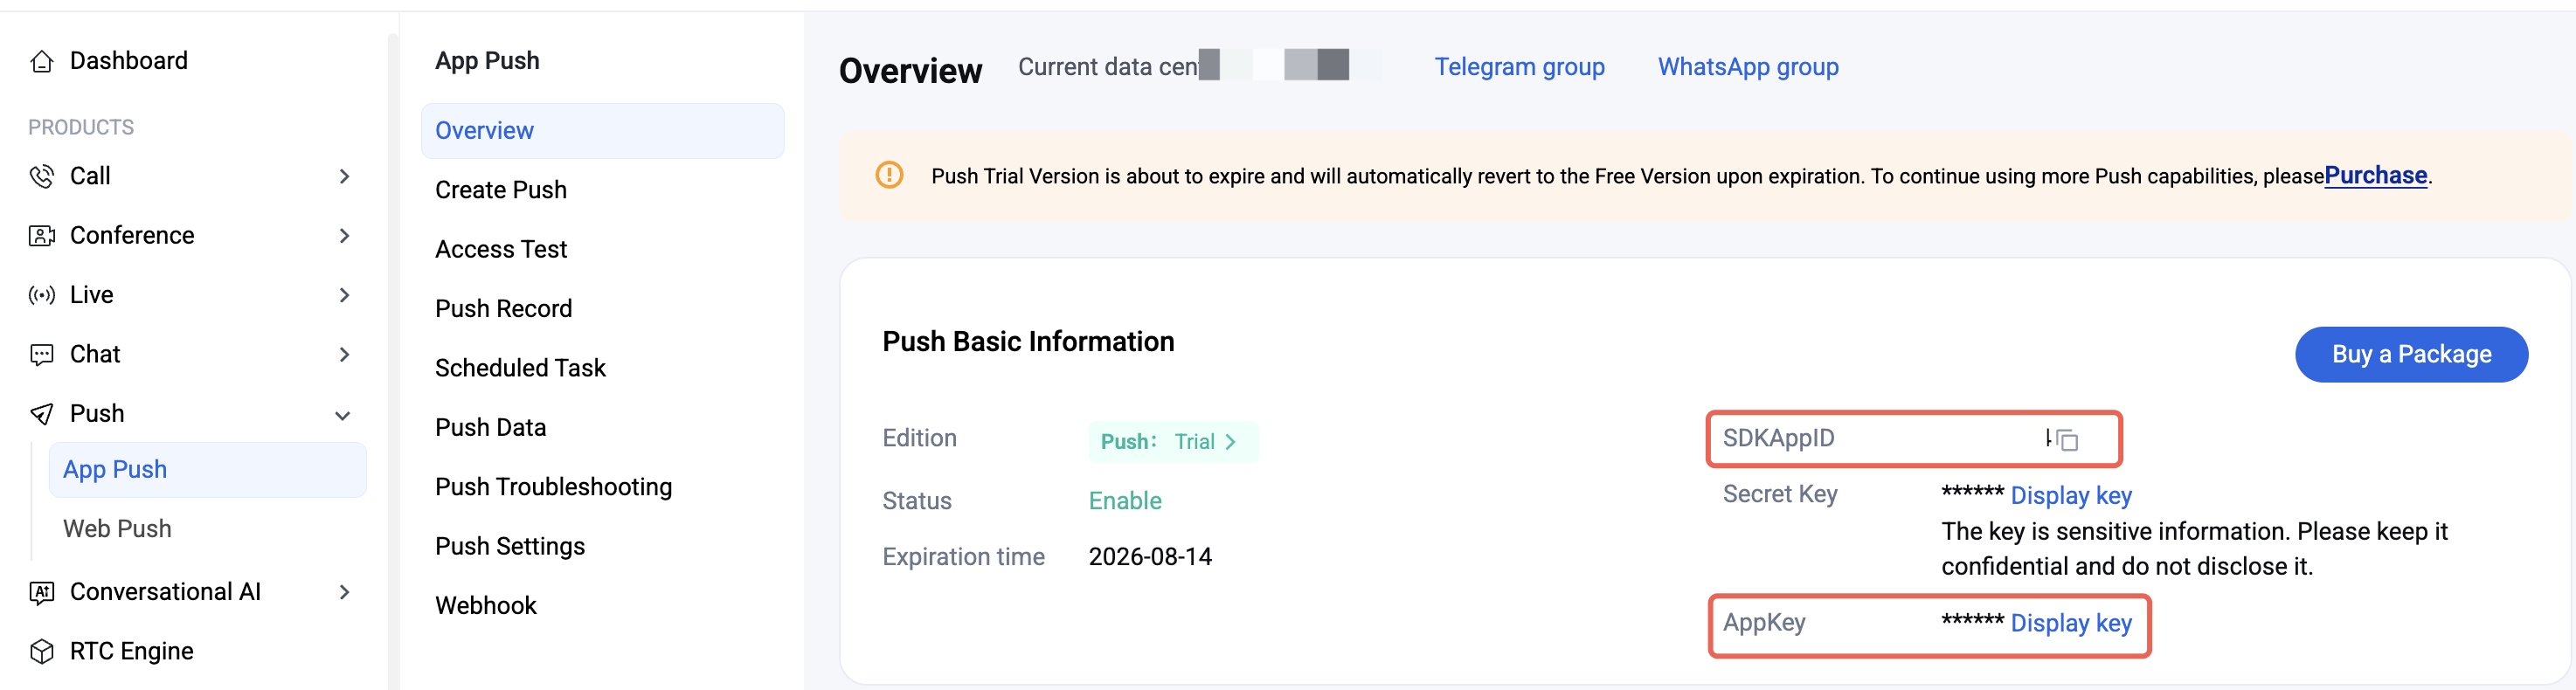
import Push from '@tencentcloud/react-native-push';const SDKAppID = 0; // Your SDKAppIDconst appKey = ''; // AppKeyif (Push) {// If you need to associate with the Chat login userID (to push messages to this userID), use setRegistrationID// Push.setRegistrationID(userID, () => {// console.log('setRegistrationID ok', userID);// });Push.registerPush(SDKAppID, appKey, (data) => {console.log('registerPush ok', data);Push.getRegistrationID((registrationID) => {console.log('getRegistrationID ok', registrationID);});}, (errCode, errMsg) => {console.error('registerPush failed', errCode, errMsg);});// Listen for notification bar click events to get push extension informationPush.addPushListener(Push.EVENT.NOTIFICATION_CLICKED, (res) => {// res is the push extension informationconsole.log('notification clicked', res);});// Listen for online pushPush.addPushListener(Push.EVENT.MESSAGE_RECEIVED, (res) => {// res is the message contentconsole.log('message received', res);});// Listen for online push recallPush.addPushListener(Push.EVENT.MESSAGE_REVOKED, (res) => {// res is the recalled message IDconsole.log('message revoked', res);});}
Step 4: Configure manufacturer push
1. After you complete manufacturer push information in the Console, download the
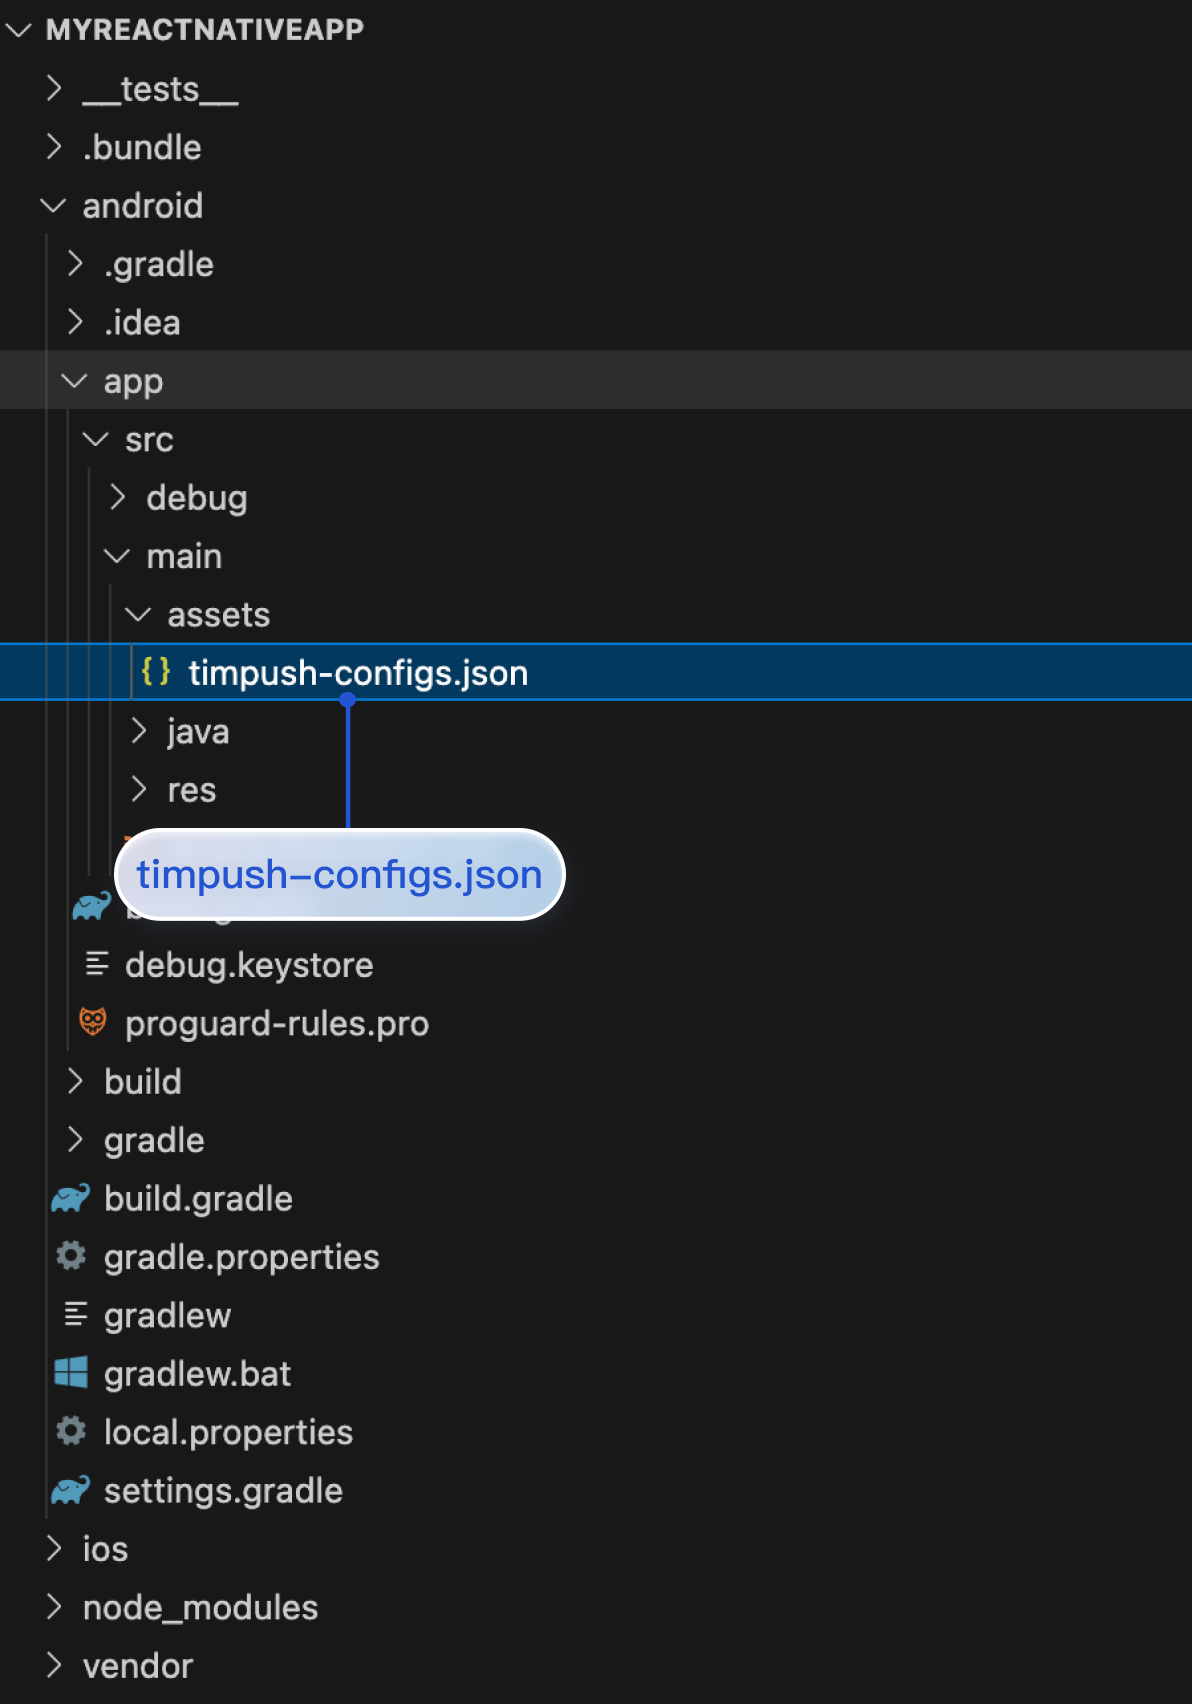
timpush-configs.json file from the Console and add it to MyReactNativeApp/android/app/src/main/assets. If the directory does not exist, create it manually. As shown below: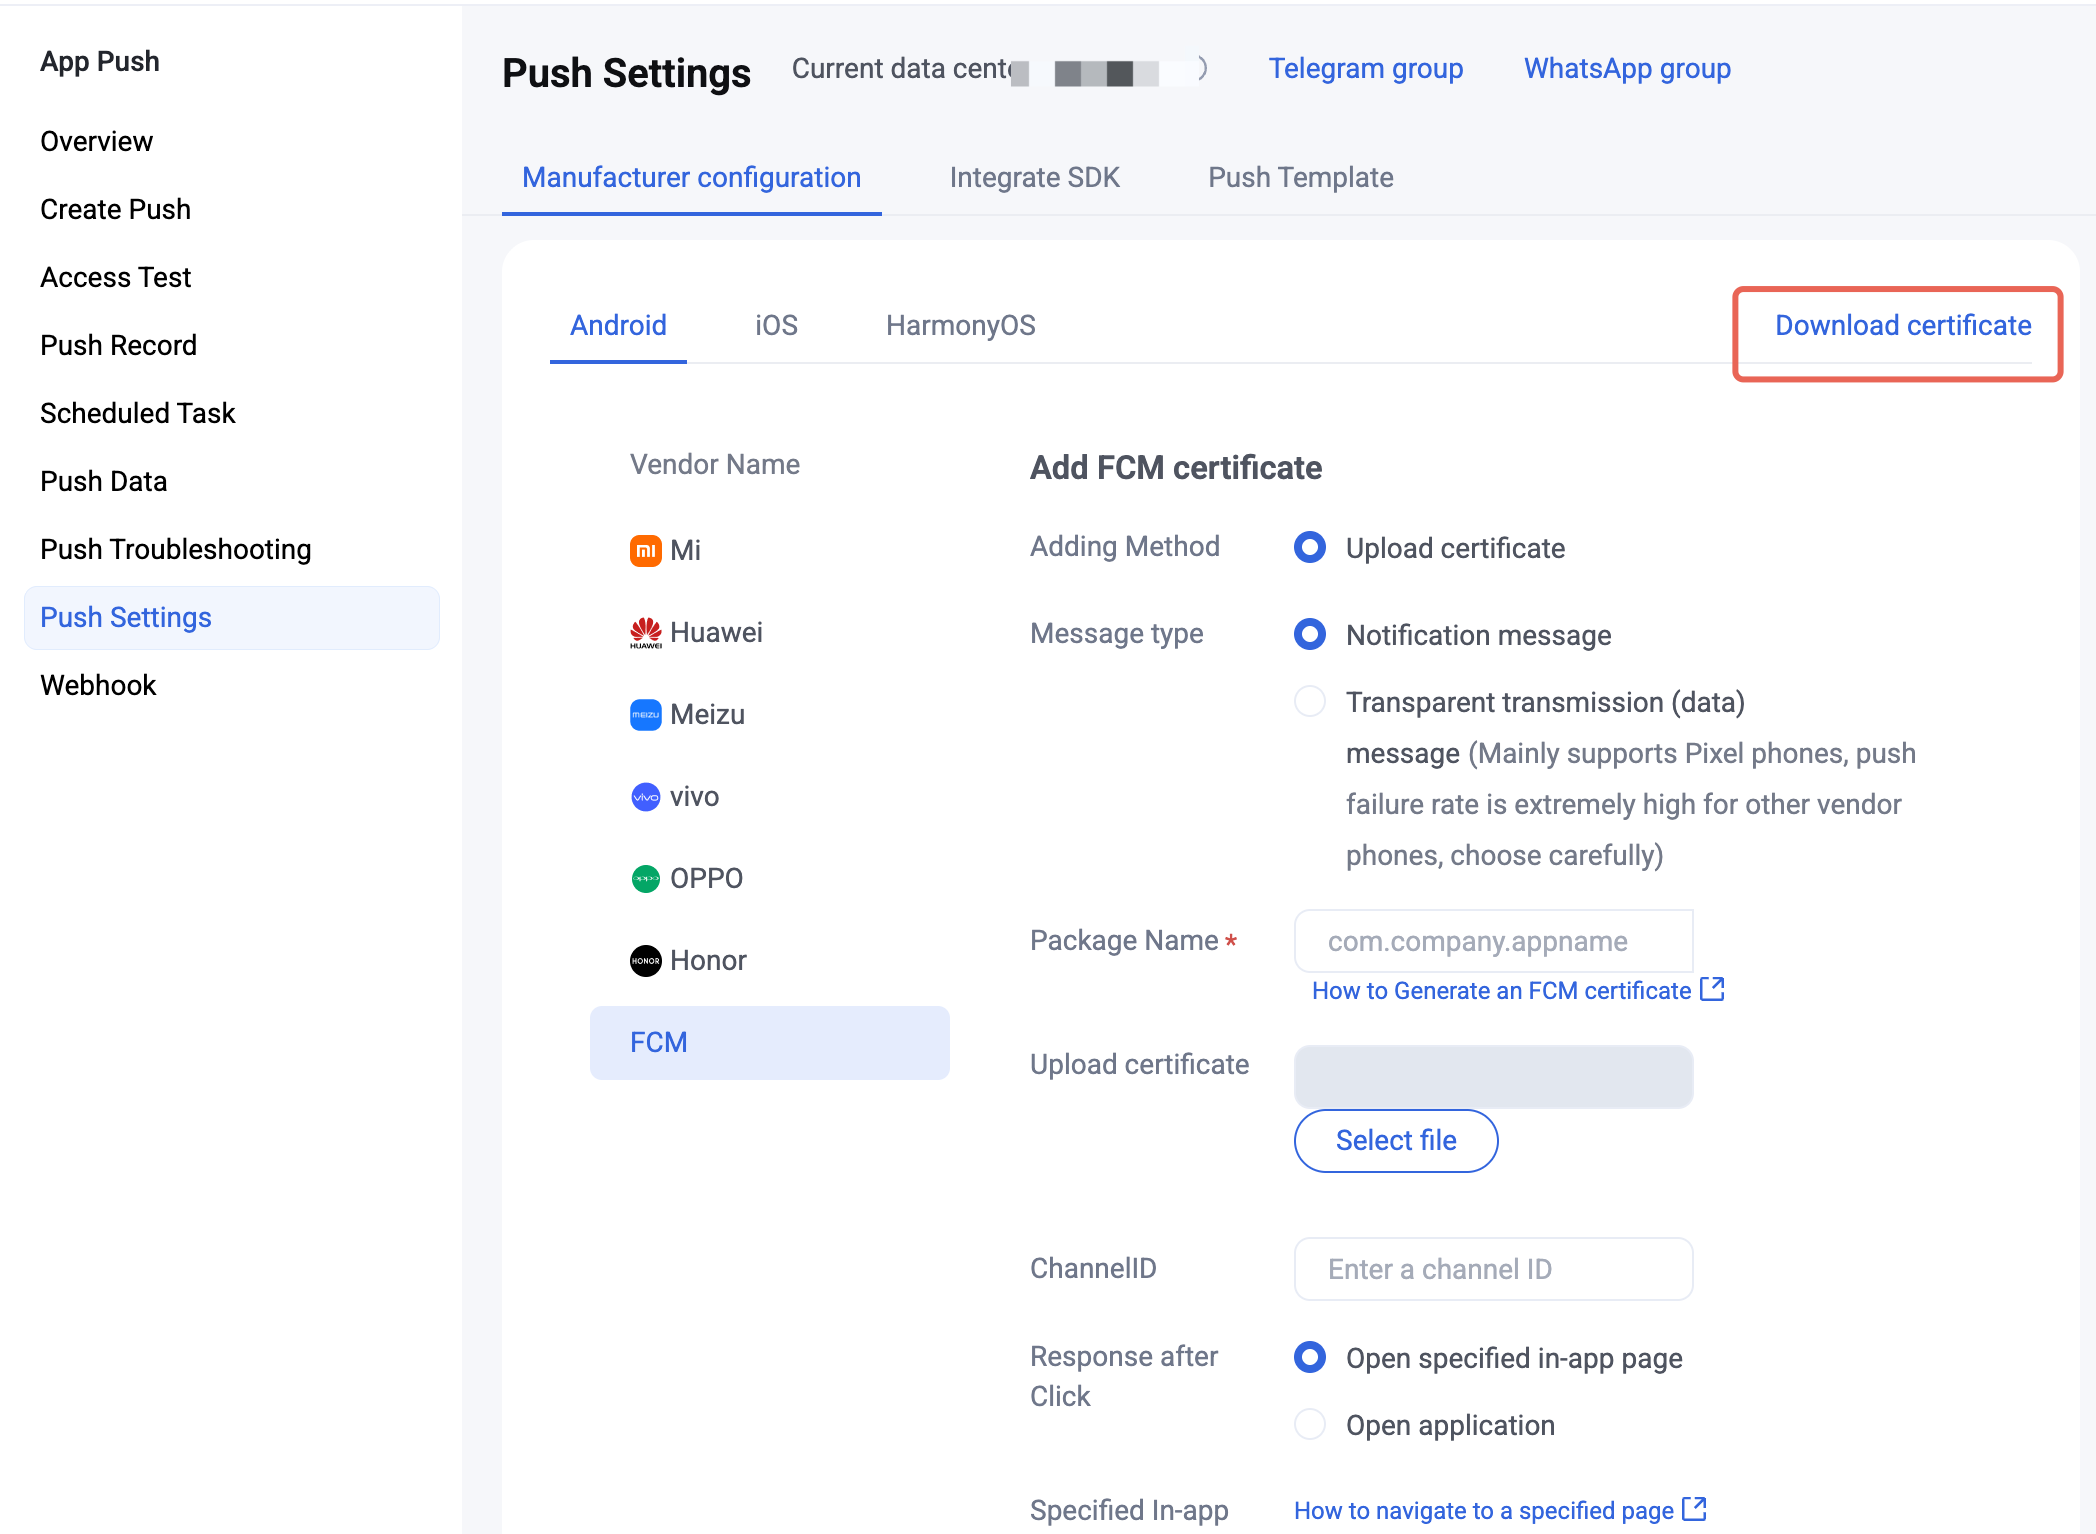
2. Configure the Google FCM channel.
To support FCM push, place the
google-services.json file under MyReactNativeApp/android/app, as shown below:(Note: not the "
MyReactNativeApp/android/app/src/main/assets" directory).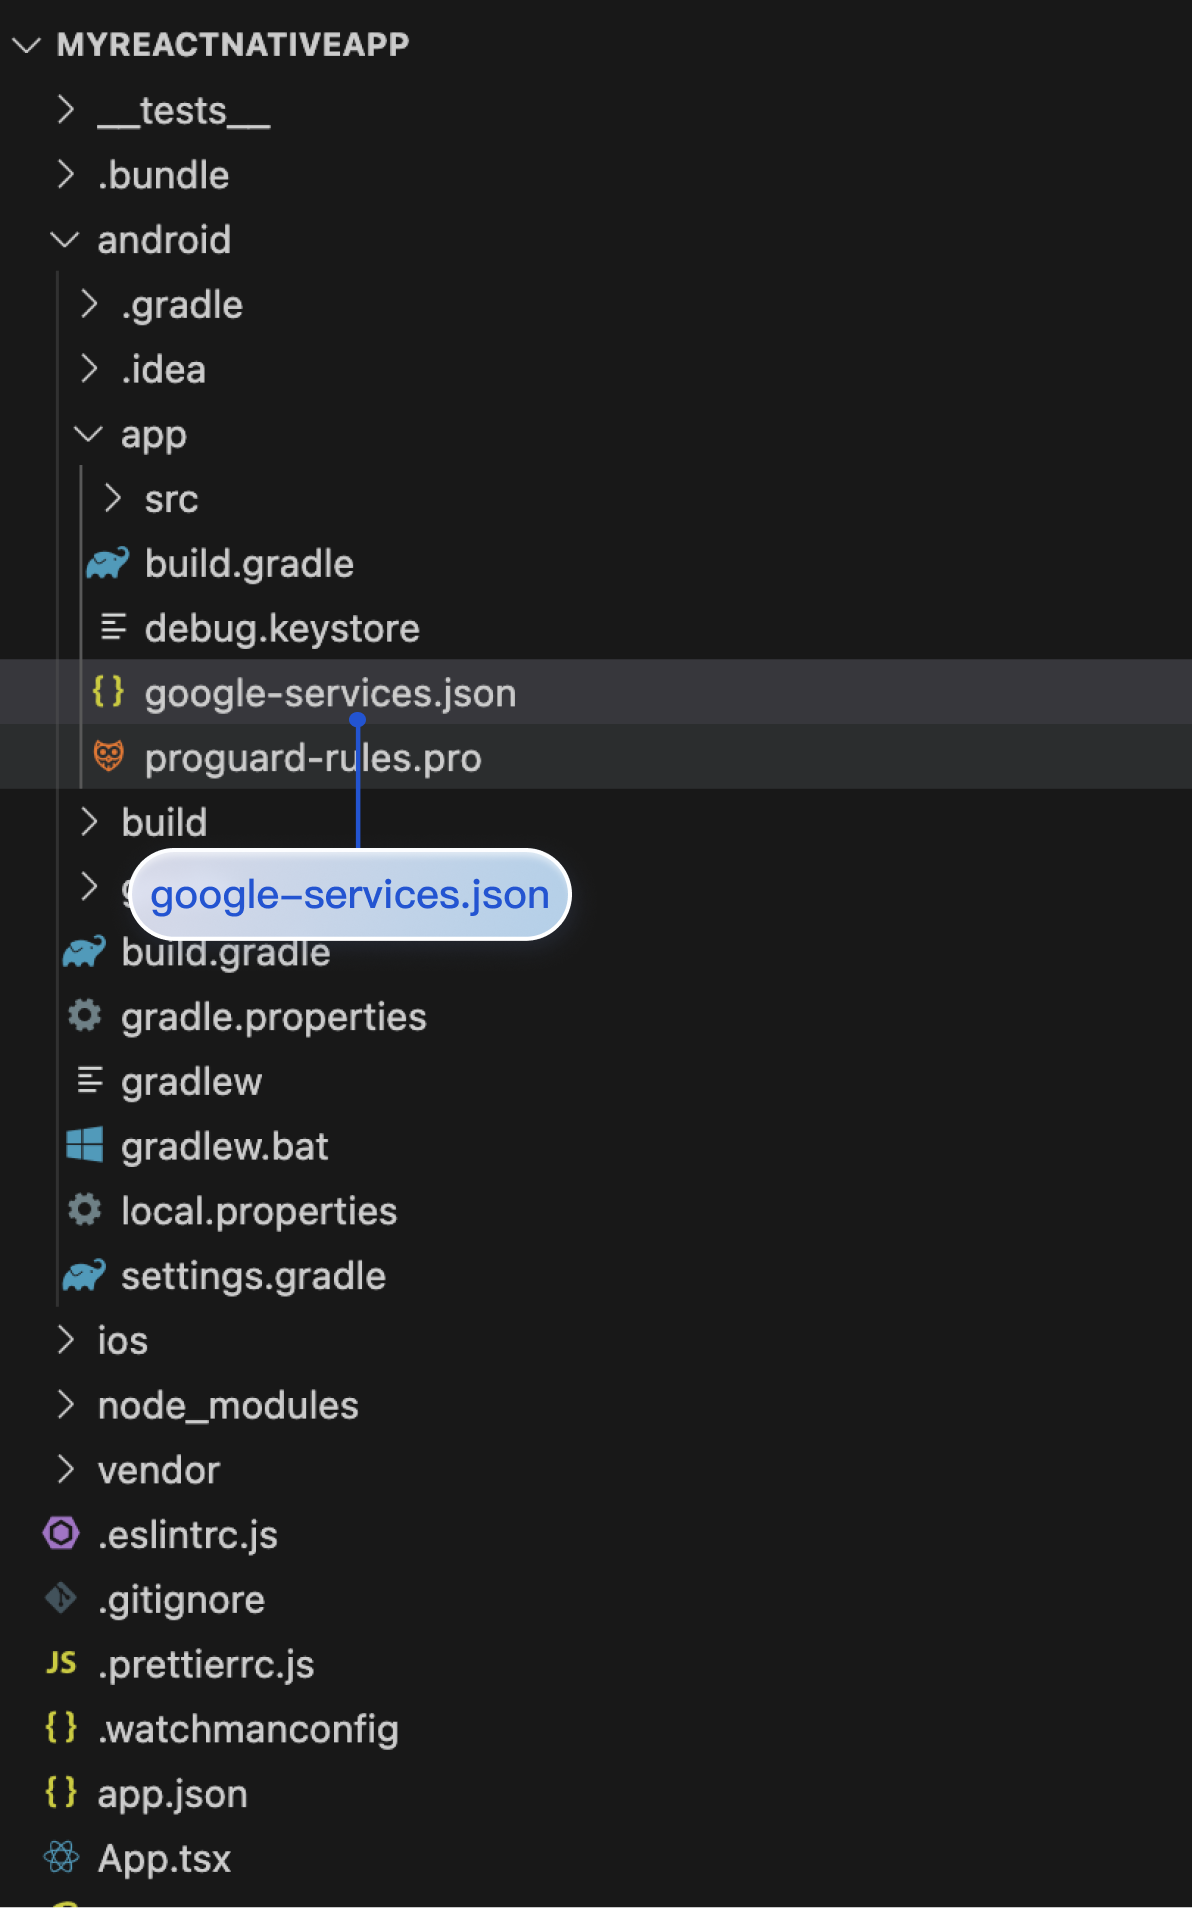
1. Upload the iOS APNs push certificate obtained in the manufacturer configuration steps to the Console. The Console assigns a certificate ID, as shown below:
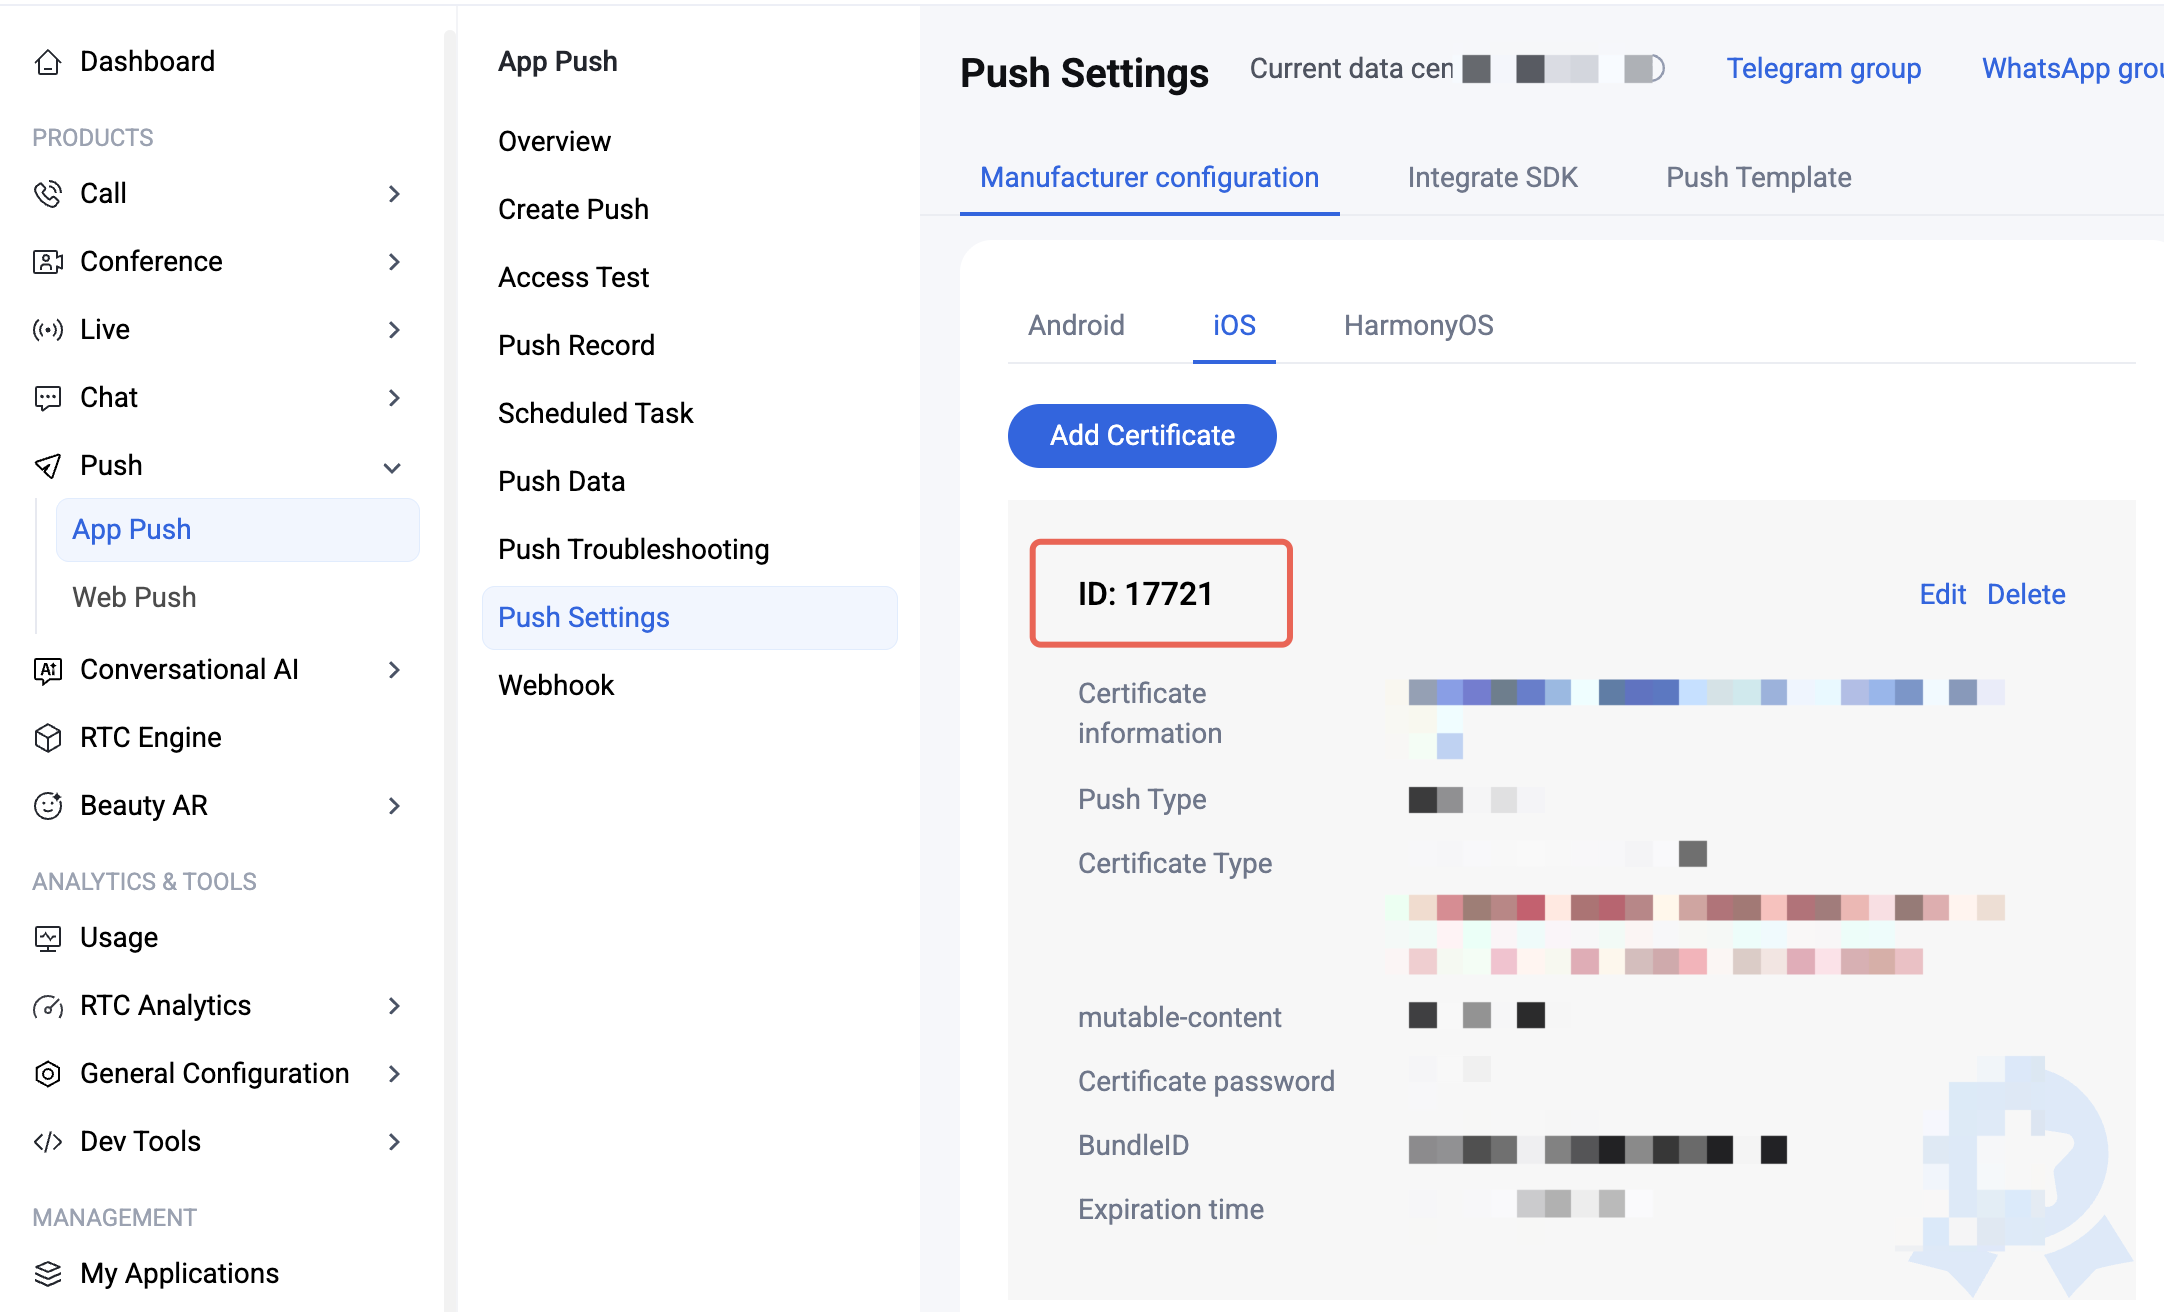
2. Under
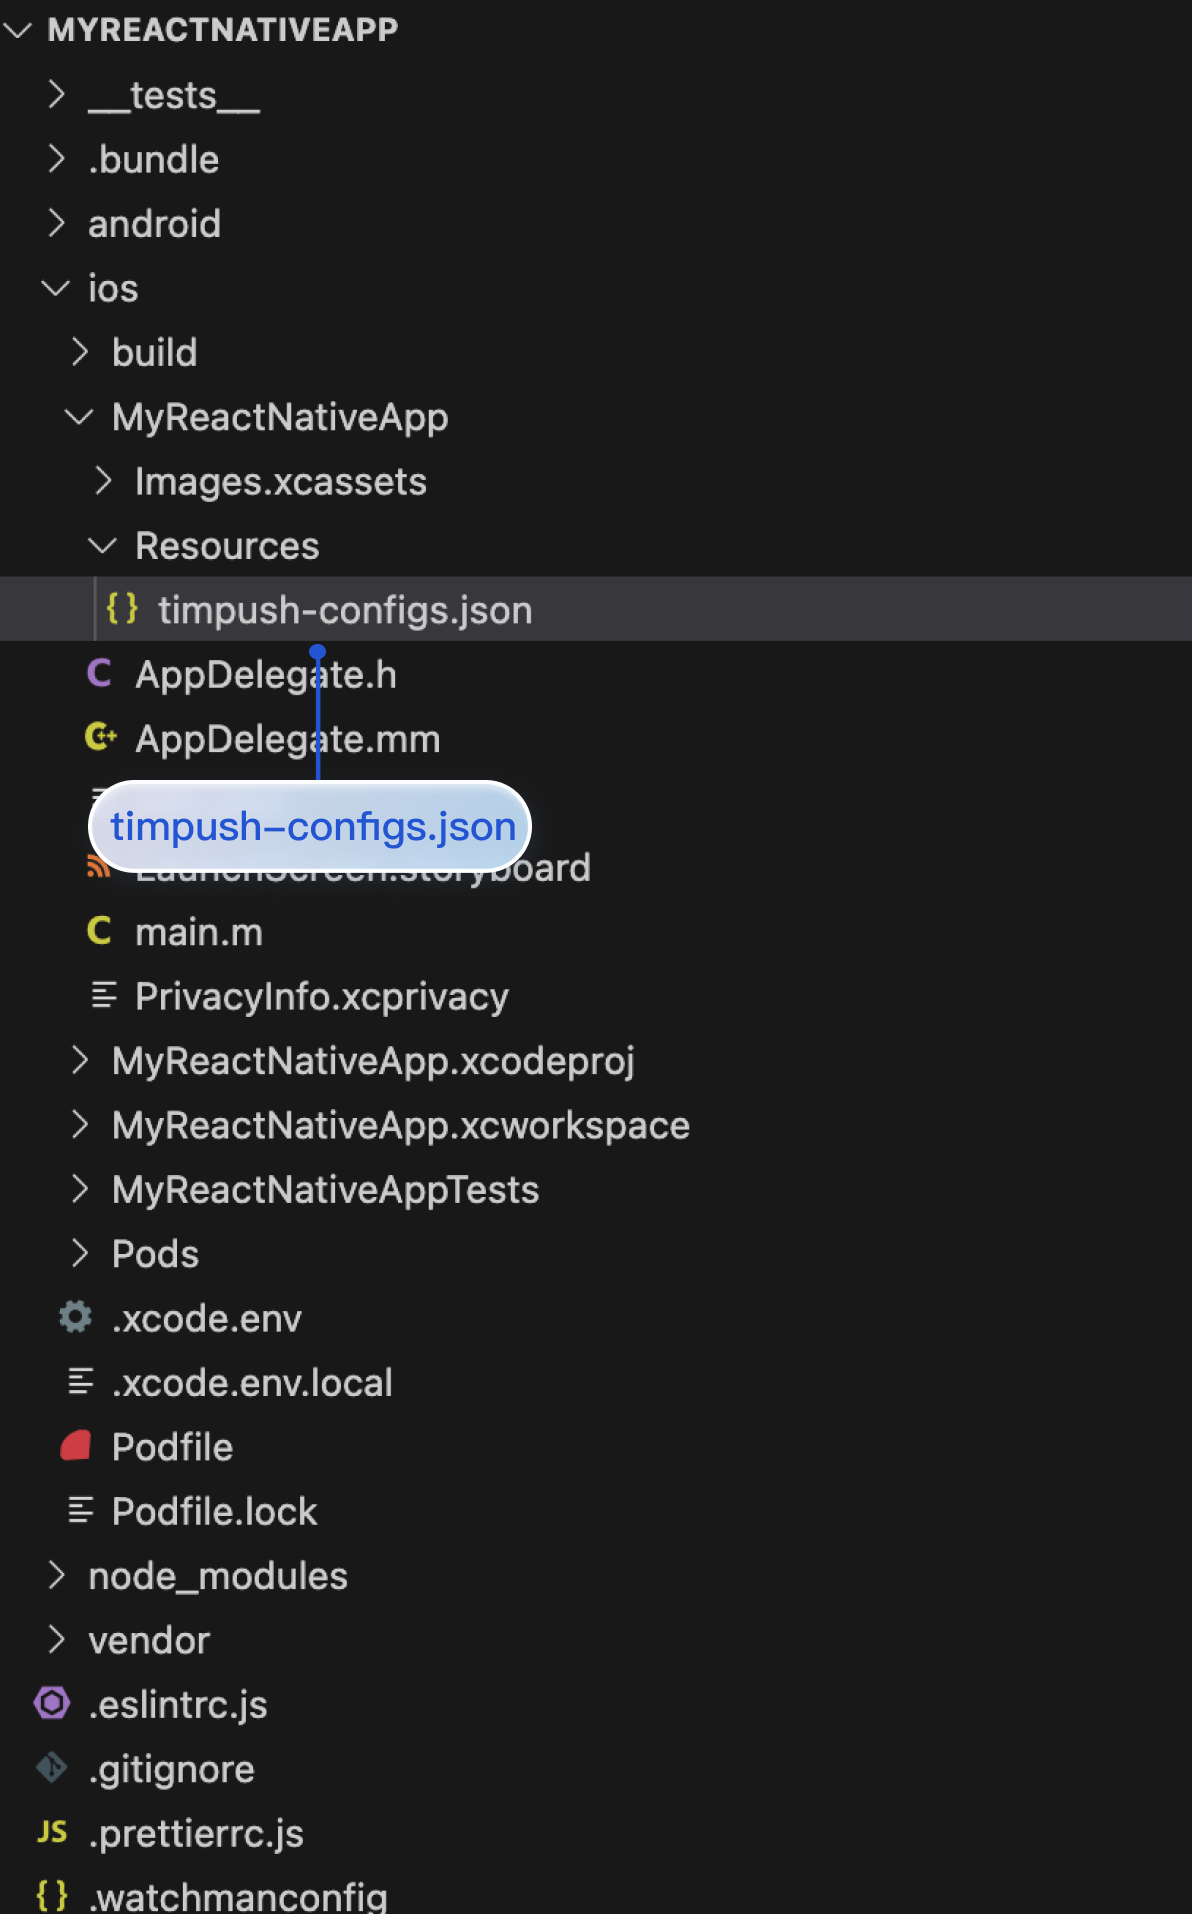
MyReactNativeApp/ios/MyReactNativeApp, create a Resources folder and a timpush-configs.json file. Edit timpush-configs.json and enter the certificate ID from the Console, as shown below:{"businessID": "Your certificate ID"}
3. Open the MyReactNativeApp project in Xcode, right-click the project > Add Files to "MyReactNativeApp", and add
timpush-configs.json to the project. As shown below: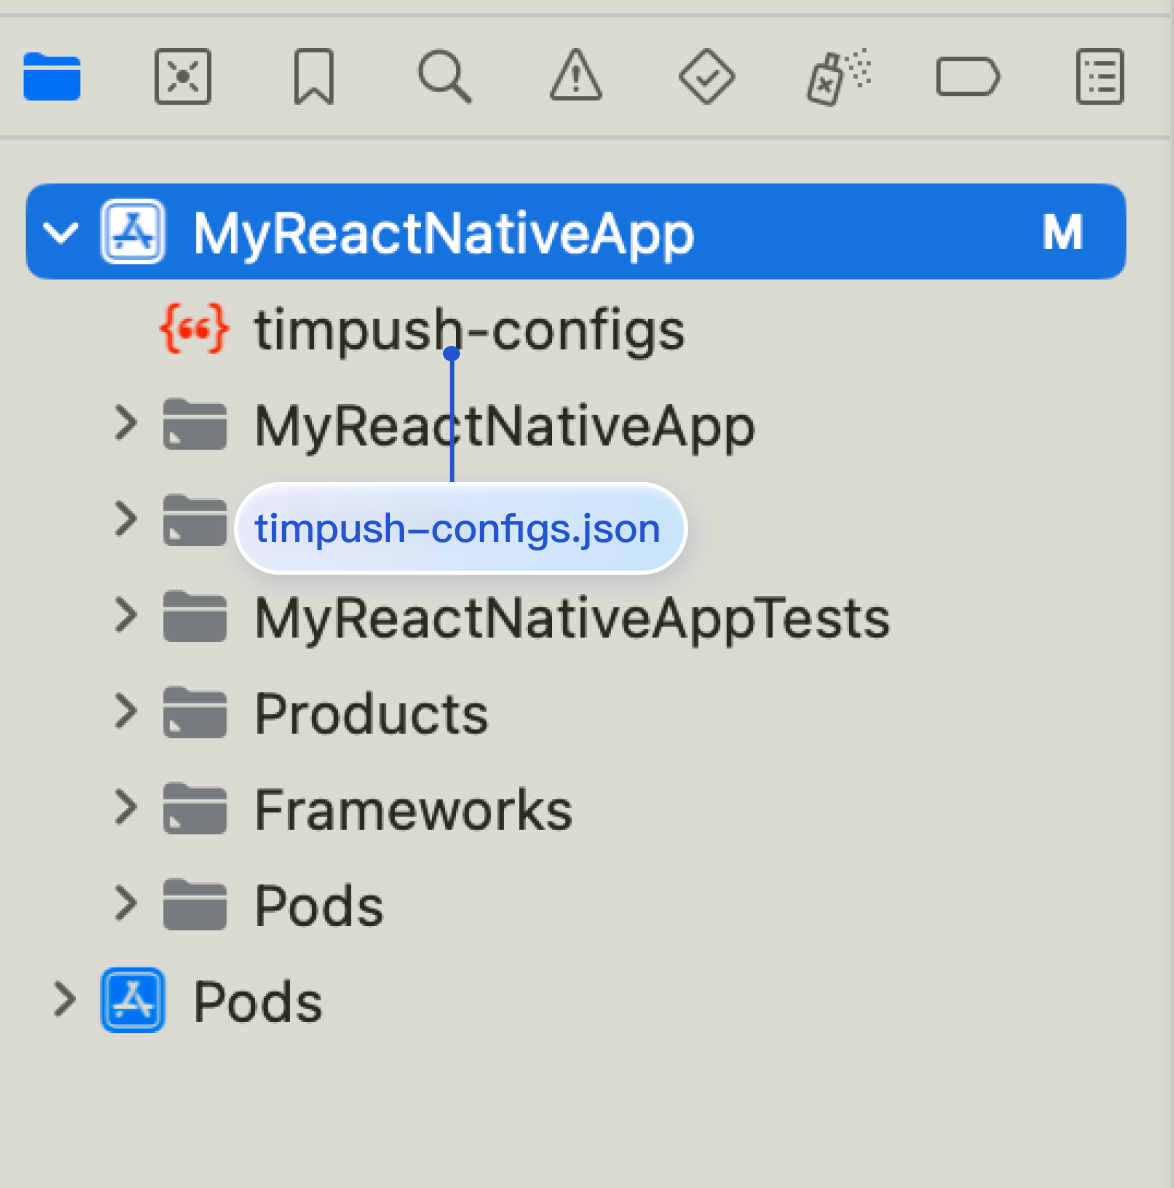
Step 5: Configure native modules and dependencies
Note:
Make sure the package name in
timpush-configs.json matches the applicationId in MyReactNativeApp/android/app/build.gradle. If they do not match, offline push will not work.1. Open the
MyReactNativeApp/android directory in Android Studio.2. Modify the project entry file.
...import com.tencent.qcloud.rntimpush.TencentCloudPushApplication// Replace Application with TencentCloudPushApplicationclass MainApplication : TencentCloudPushApplication(), ReactApplication {...// add TencentCloudPushPackage to the list of packages returned in ReactNativeHost's getPackages() methodoverride fun getPackages(): List<ReactPackage> =PackageList(this).packages.apply {// Packages that cannot be autolinked yet can be added manually here, for example:// add(MyReactNativePackage())}}
...import com.tencent.qcloud.rntimpush.TencentCloudPushApplication;// Replace Application with TencentCloudPushApplicationpublic class MainApplication extends TencentCloudPushApplication implements ReactApplication {...// add TencentCloudPushPackage to the list of packages returned in ReactNativeHost's getPackages() method@Overrideprotected List<ReactPackage> getPackages() {List<ReactPackage> packages = new PackageList(this).getPackages();// Packages that cannot be autolinked yet can be added manually here, for example:// packages.add(new MyReactNativePackage());return packages;}...
3. Edit
android/build.gradle to update repositories, dependencies, and allprojects.buildscript {...repositories {...google()mavenCentral()maven { url 'https://mirrors.tencent.com/nexus/repository/maven-public/' }}dependencies {...// If com.android.tools.build:gradle in your project has no version number, set it to 8.5.0// classpath("com.android.tools.build:gradle:8.5.0")classpath 'com.google.gms:google-services:4.3.15'}}allprojects {repositories {mavenCentral()maven { url 'https://mirrors.tencent.com/nexus/repository/maven-public/' }}}...
4. Edit
android/app/build.gradle to configure manufacturer push packages as needed and apply plugins....// If your app needs FCM push, uncomment the next line// apply plugin: 'com.google.gms.google-services'...android {...defaultConfig {...manifestPlaceholders = []}}dependencies {...// Add manufacturer push packages as needed. Native push for a manufacturer is enabled only after you add the corresponding package.implementation 'com.tencent.timpush:fcm:8.5.6864'}
5. After completing the steps above, choose File > Sync Project with Gradle Files.
1. Open MyReactNativeApp/ios/MyReactNativeApp.xcworkspace in Xcode.
2. Go to the
MyReactNativeApp/ios directory and install TIMPush.pod install# If you cannot install the latest version, run the following command to update the local CocoaPods repo listpod repo update
3. Enable push notifications in the app. See Configure iOS message reach statistics.
Step 6: Run your project
Run on a physical device (before testing, enable notification permission and allow app notifications). From the project root, run the following commands in the terminal to install and launch your app on the device:
npm run android
npm run ios
Integration troubleshooting
If you still cannot receive push after integration, use Push Troubleshooting to check the cause. If the issue remains, Contact us to submit feedback.
Bantuan dan Dukungan
Apakah halaman ini membantu?
Anda juga dapat Menghubungi Penjualan atau Mengirimkan Tiket untuk meminta bantuan.
masukan