You have created a cluster. For operation details, see Creating a Cluster.
Directions
Creating Nginx service
1. Log in to the TKE console and click Cluster in the left sidebar.
2. On the Cluster Management page, click the target cluster ID to enter the Basic Information page.
3. On the Workload > Deployment page, click Create. For more information, see Creating a Deployment.
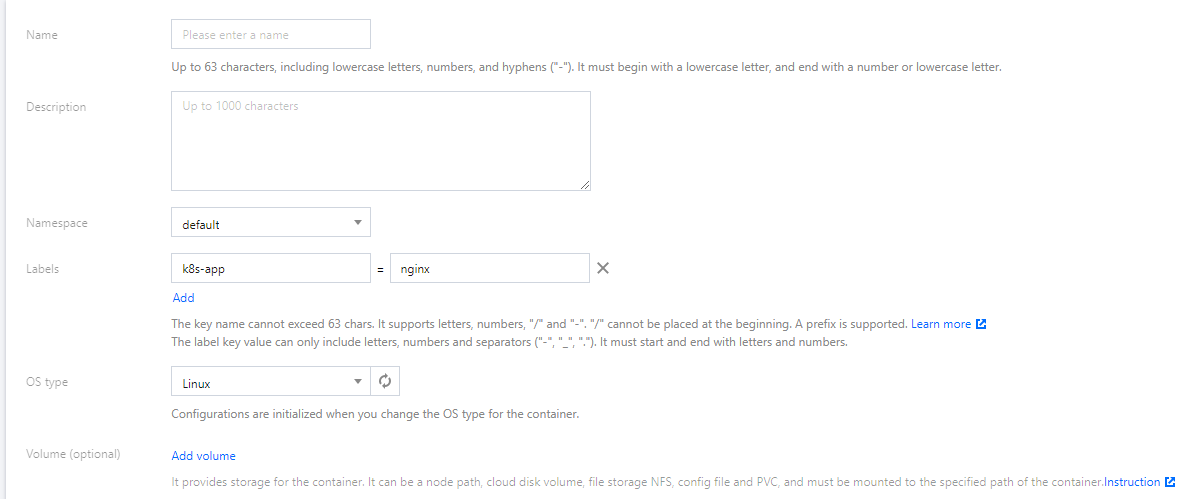
4. On the Create Deployment page, specify basic information of the workload as instructed in the figure below.
Workload Name: Take nginx as an example in this document.
Description: Specify related workload information.
Label: In this example, the default value of the label is k8s-app = nginx.
Namespace: Select a namespace as needed. The default value is default.
Volume: set the volume to which your workload will be mounted based on your requirements. For more information, see Instructions for Other Storage Volumes.
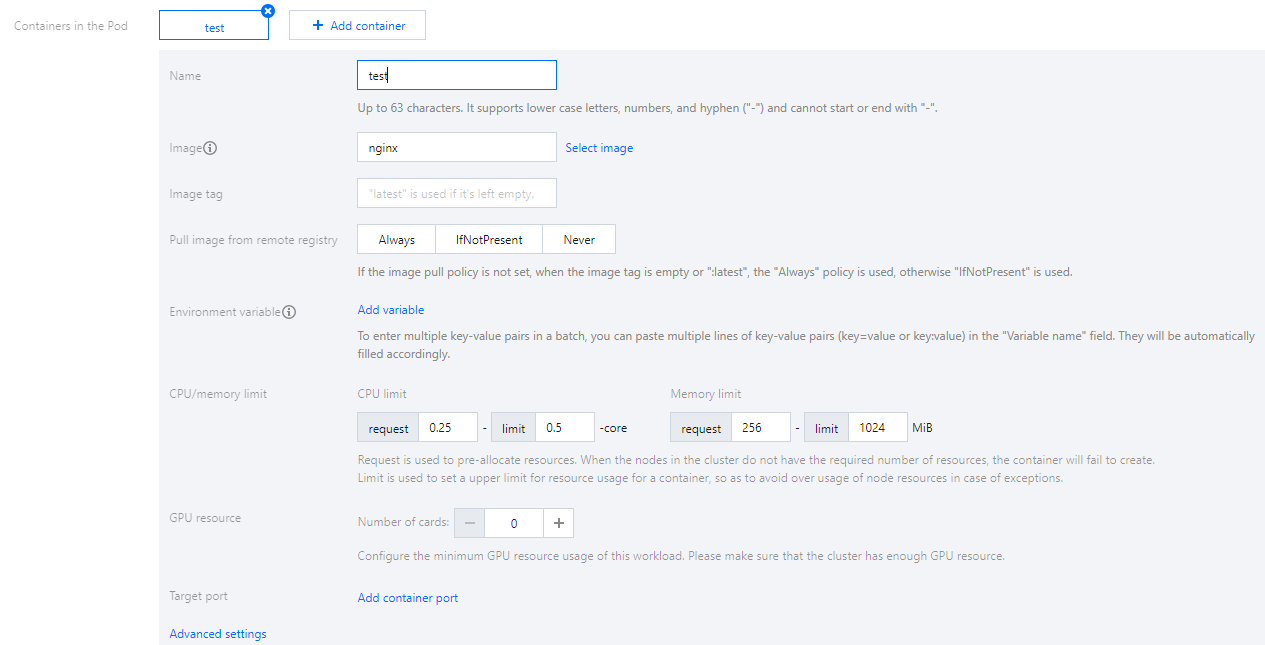
5. Configure Containers in the Pod as instructed in the figure below.
The main parameters are described as follows:
Name: Enter the name of the container in the pod. Here, “test” is used as an example.
Image: Click Select Image, select your target image in the pop-up, and click OK.
Image Tag: Use the default value latest.
Image Pull Policy: Choose from Always, IfNotPresent and Never as needed. In this document, we use the default policy as an example.
6. n Number of Instances, set the number of instances for the service according to the following information. In this document, we choose Manual Adjustment and set the instance number to one. See the figure below:
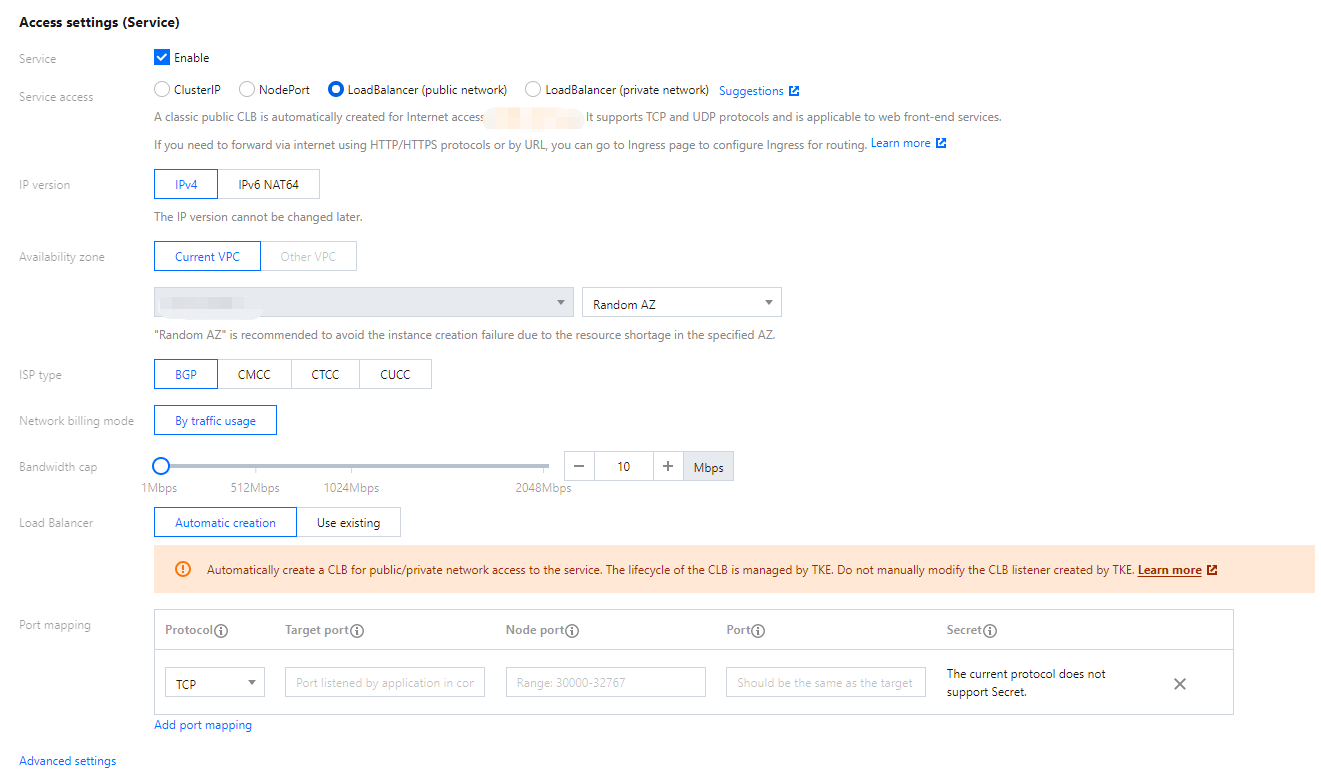
7. Configure Access Settings (Service) for the workload as instructed in the figure below.
Service: Select Enable.
Service Access: Select LoadBalancer (public network).
Load Balancer: Select according to your requirements.
Port Mapping: Select TCP, and set both the container port and service port to 80.
Protocol: Select the communication protocol as needed.
Target port: Set the port on which the application in the container listens. The port range is 1 to 65535.
Node Port:The service can be accessed via "CVM IP + host port". The port range is 30000 to 32767. A random port is assigned if it's left empty
Port: A created Service can be accessed from outside the cluster with the "CLB instance domain name or IP + Service port" or from within the cluster with the "Service name + Service port".
Secret: Select a value only when the TCP SSL protocol is used.
Notes
The node network, container network, and ports 30000 to 32768 need to be opened to the internet for the security group of the cluster to which the service belongs. Otherwise, the TKE may be unavailable. For more information, see TKE Security Group Settings.
8. Click Create workload to complete the creation of the Nginx service.
Accessing Nginx service
Nginx service can be accessed using the following two methods.
Accessing Nginx service using Cloud Load Balancer IP
1. In the left sidebar, click Cluster to go to the Cluster Management page.
2. Click the ID of the cluster to which the Nginx service belongs and select Services and Routes > Service.
3. On the service list page, copy the CLB IP of the Nginx service as shown below:
4. Paste the CLB IP address in the browser and press Enter to access the service.
Accessing Nginx service using service name
Other services or containers in the cluster can access the WordPress service using the service name.
Verifying Nginx service
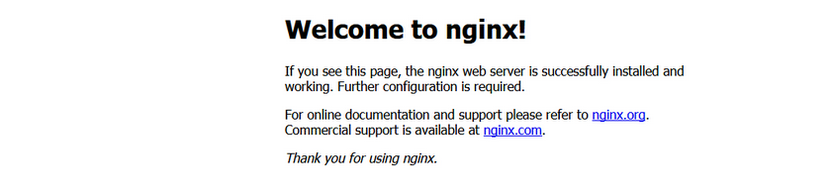
When the service is successfully created, you directly enter the Nginx server welcome page when accessing the service. See the figure below:
More Nginx settings
If the container cannot be created, see Event FAQs for a solution.