WordPress is a blogging platform developed with PHP. You can use it as a content management system, or use it to create websites on services that support PHP and MySQL databases.
This document describes how to use the official wordpress image on Docker Hub to create a publicly accessible WordPress website.
Prerequisites
Note:
The wordpress image contains all operating environments for WordPress, allowing you to pull and create the service directly.
WordPress with a single Pod is used for testing purposes only, and therefore cannot ensure persistent data storage. It is recommended that you use a self-built MySQL or TencentDB to store your data. For more information, see WordPress Using TencentDB.
You have created a standard TKE cluster. For more information, see Creating a Cluster.
Directions
Creating a WordPress service
1. Log in to the TKE console and select Cluster in the left sidebar.
2. On the Cluster Management page, click the ID of the target cluster to go to the cluster details page.
3. On the Workload > Deployment page, click Create. For more information, see Creating a Deployment.
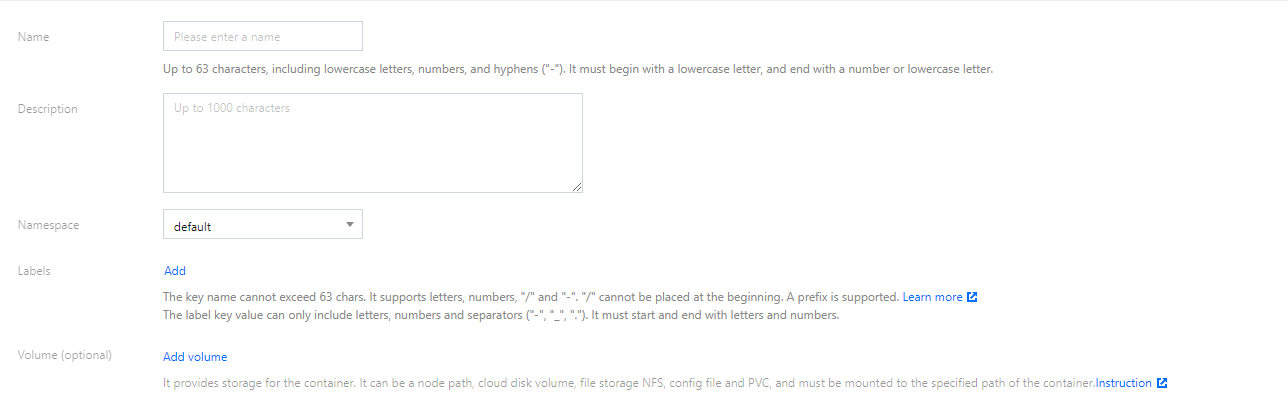
4. On the Create Deployment page, specify basic information of the workload as instructed in the figure below.
Workload Name: enter the name of the workload to create. In this example, wordpress is used.
Description: specify related workload information.
Labels: the default value is k8s-app = wordpress in this example.
Namespace: select a namespace based on your requirements.
Volume: set the volume to which the workload is mounted based on your requirements. For more information, see Volume Management.
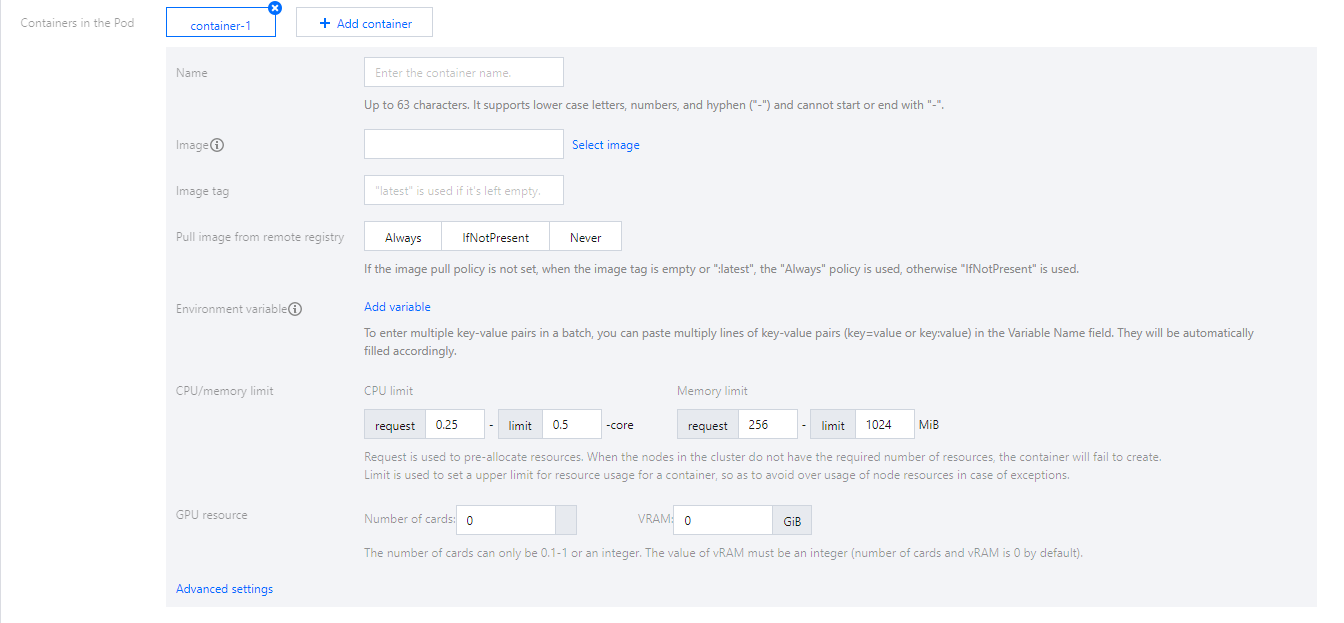
5. Configure "Containers in the Pod" as instructed. See the figure below:
The main parameters are described as follows:
Name: enter the name of the container in the pod. Here, “test” is used as an example.
Image: click Select Image, select DockerHub Image > wordpress in the pop-up window, and click OK.
Image Tag: use the default value latest.
Image Pull Policy: choose from Always, IfNotPresent and Never as needed. In this document, we use the default policy as an example.
6. In Number of Instances, set the number of instances for the service according to the following information. In this document, we choose Manual Adjustment and set the instance number to one. See the figure below:
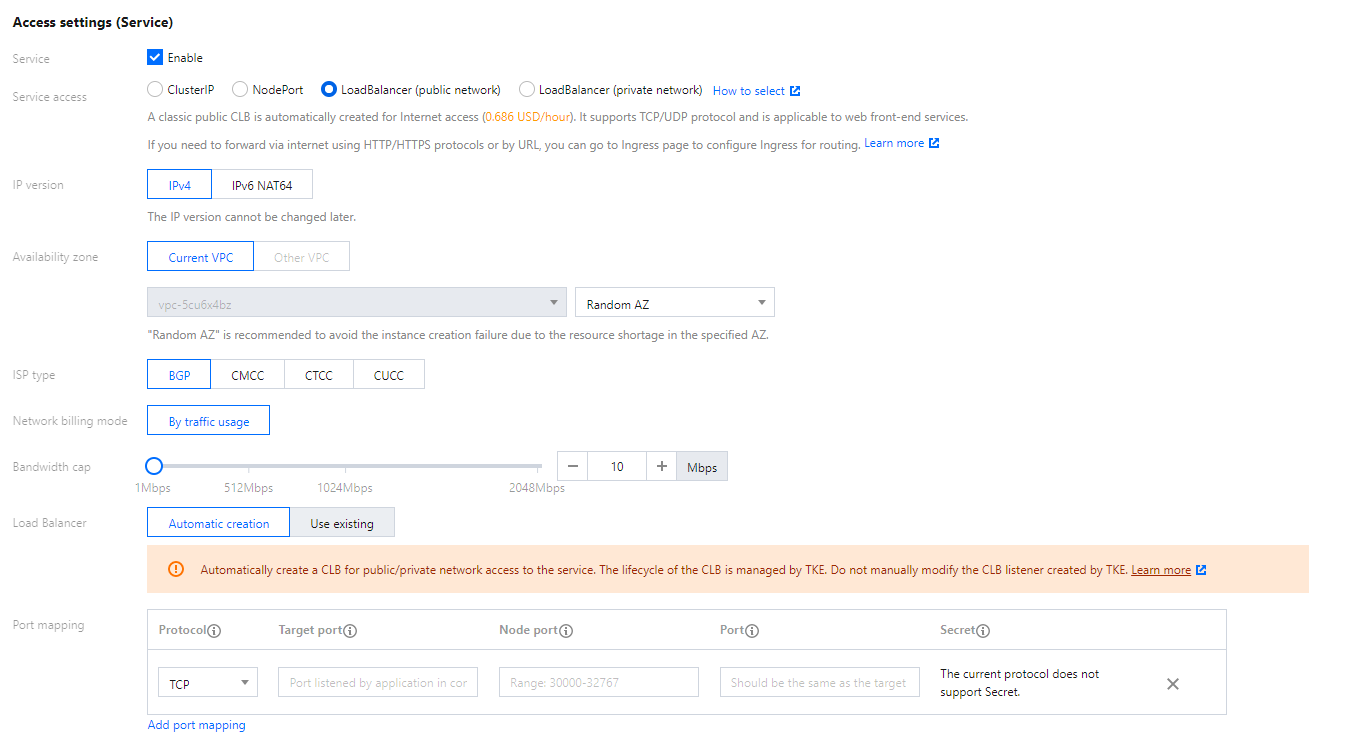
7. Specify the access mode of the workload, as shown in the following figure.
Service: select Enable.
Service Access: select LoadBalancer (public network).
Load Balancer: select according to your requirements.
Port Mapping: select TCP, and set both the container port and service port to 80.
Note:
The security group of the service’s cluster must open the node network and container network to the Internet. It is also required to open ports 30000 to 32768 to the Internet. Otherwise, the problem of TKE being unusable could occur. For more details, see TKE Security Group Settings.
8. Click Create Deployment.
Accessing the WordPress service
You can access the WordPress service using either of the following two methods.
Access using the CLB IP address
1. In the left sidebar, click Cluster to go to the Cluster Management page.
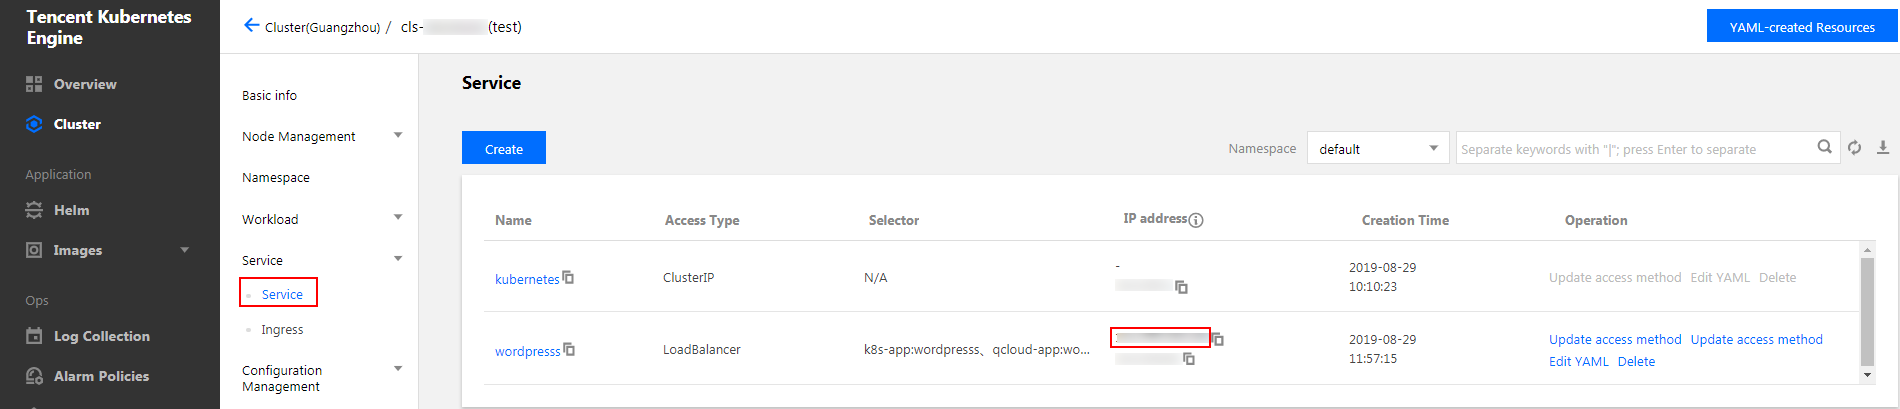
2. Click the ID of the cluster to which the WordPress service belongs and choose Services and Routes > Service.
3. On the service list page, copy the CLB IP address of the WordPress service, as shown in the figure below.
4. Paste the CLB IP address in the browser and press Enter to access the service.
Accessing the WordPress service using the service name
Other services or containers in the cluster can access the WordPress service using the service name.
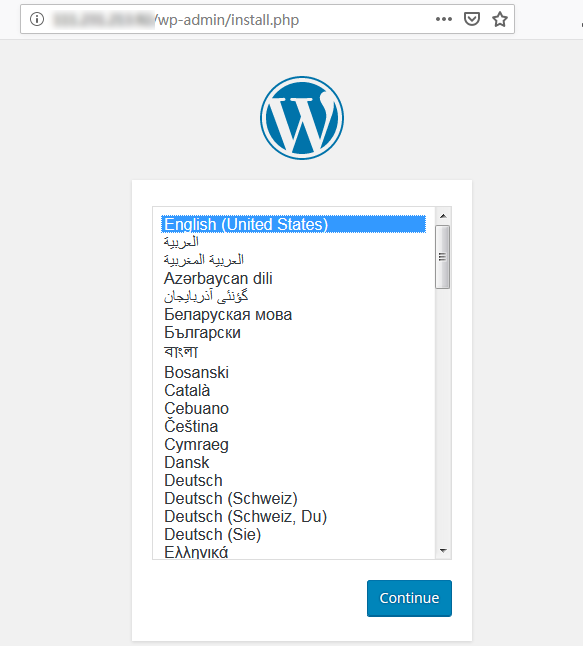
Verifying the WordPress service
After the service is created, the WordPress server configuration page is displayed when you access the service, as shown in the figure below.
More WordPress settings
If the container fails to be created, you can view Event FAQs to locate the causes.