This document describes how to create an AI Agent and connect it to a model, such as ChatGPT.
Note:
If you need to frequently modify the attributes of an AI Agent during an outbound call, you can skip the step of creating an AI Agent. Refer to the guide AI Agent Outbound Calls > Method 2 and call CreateAICall.
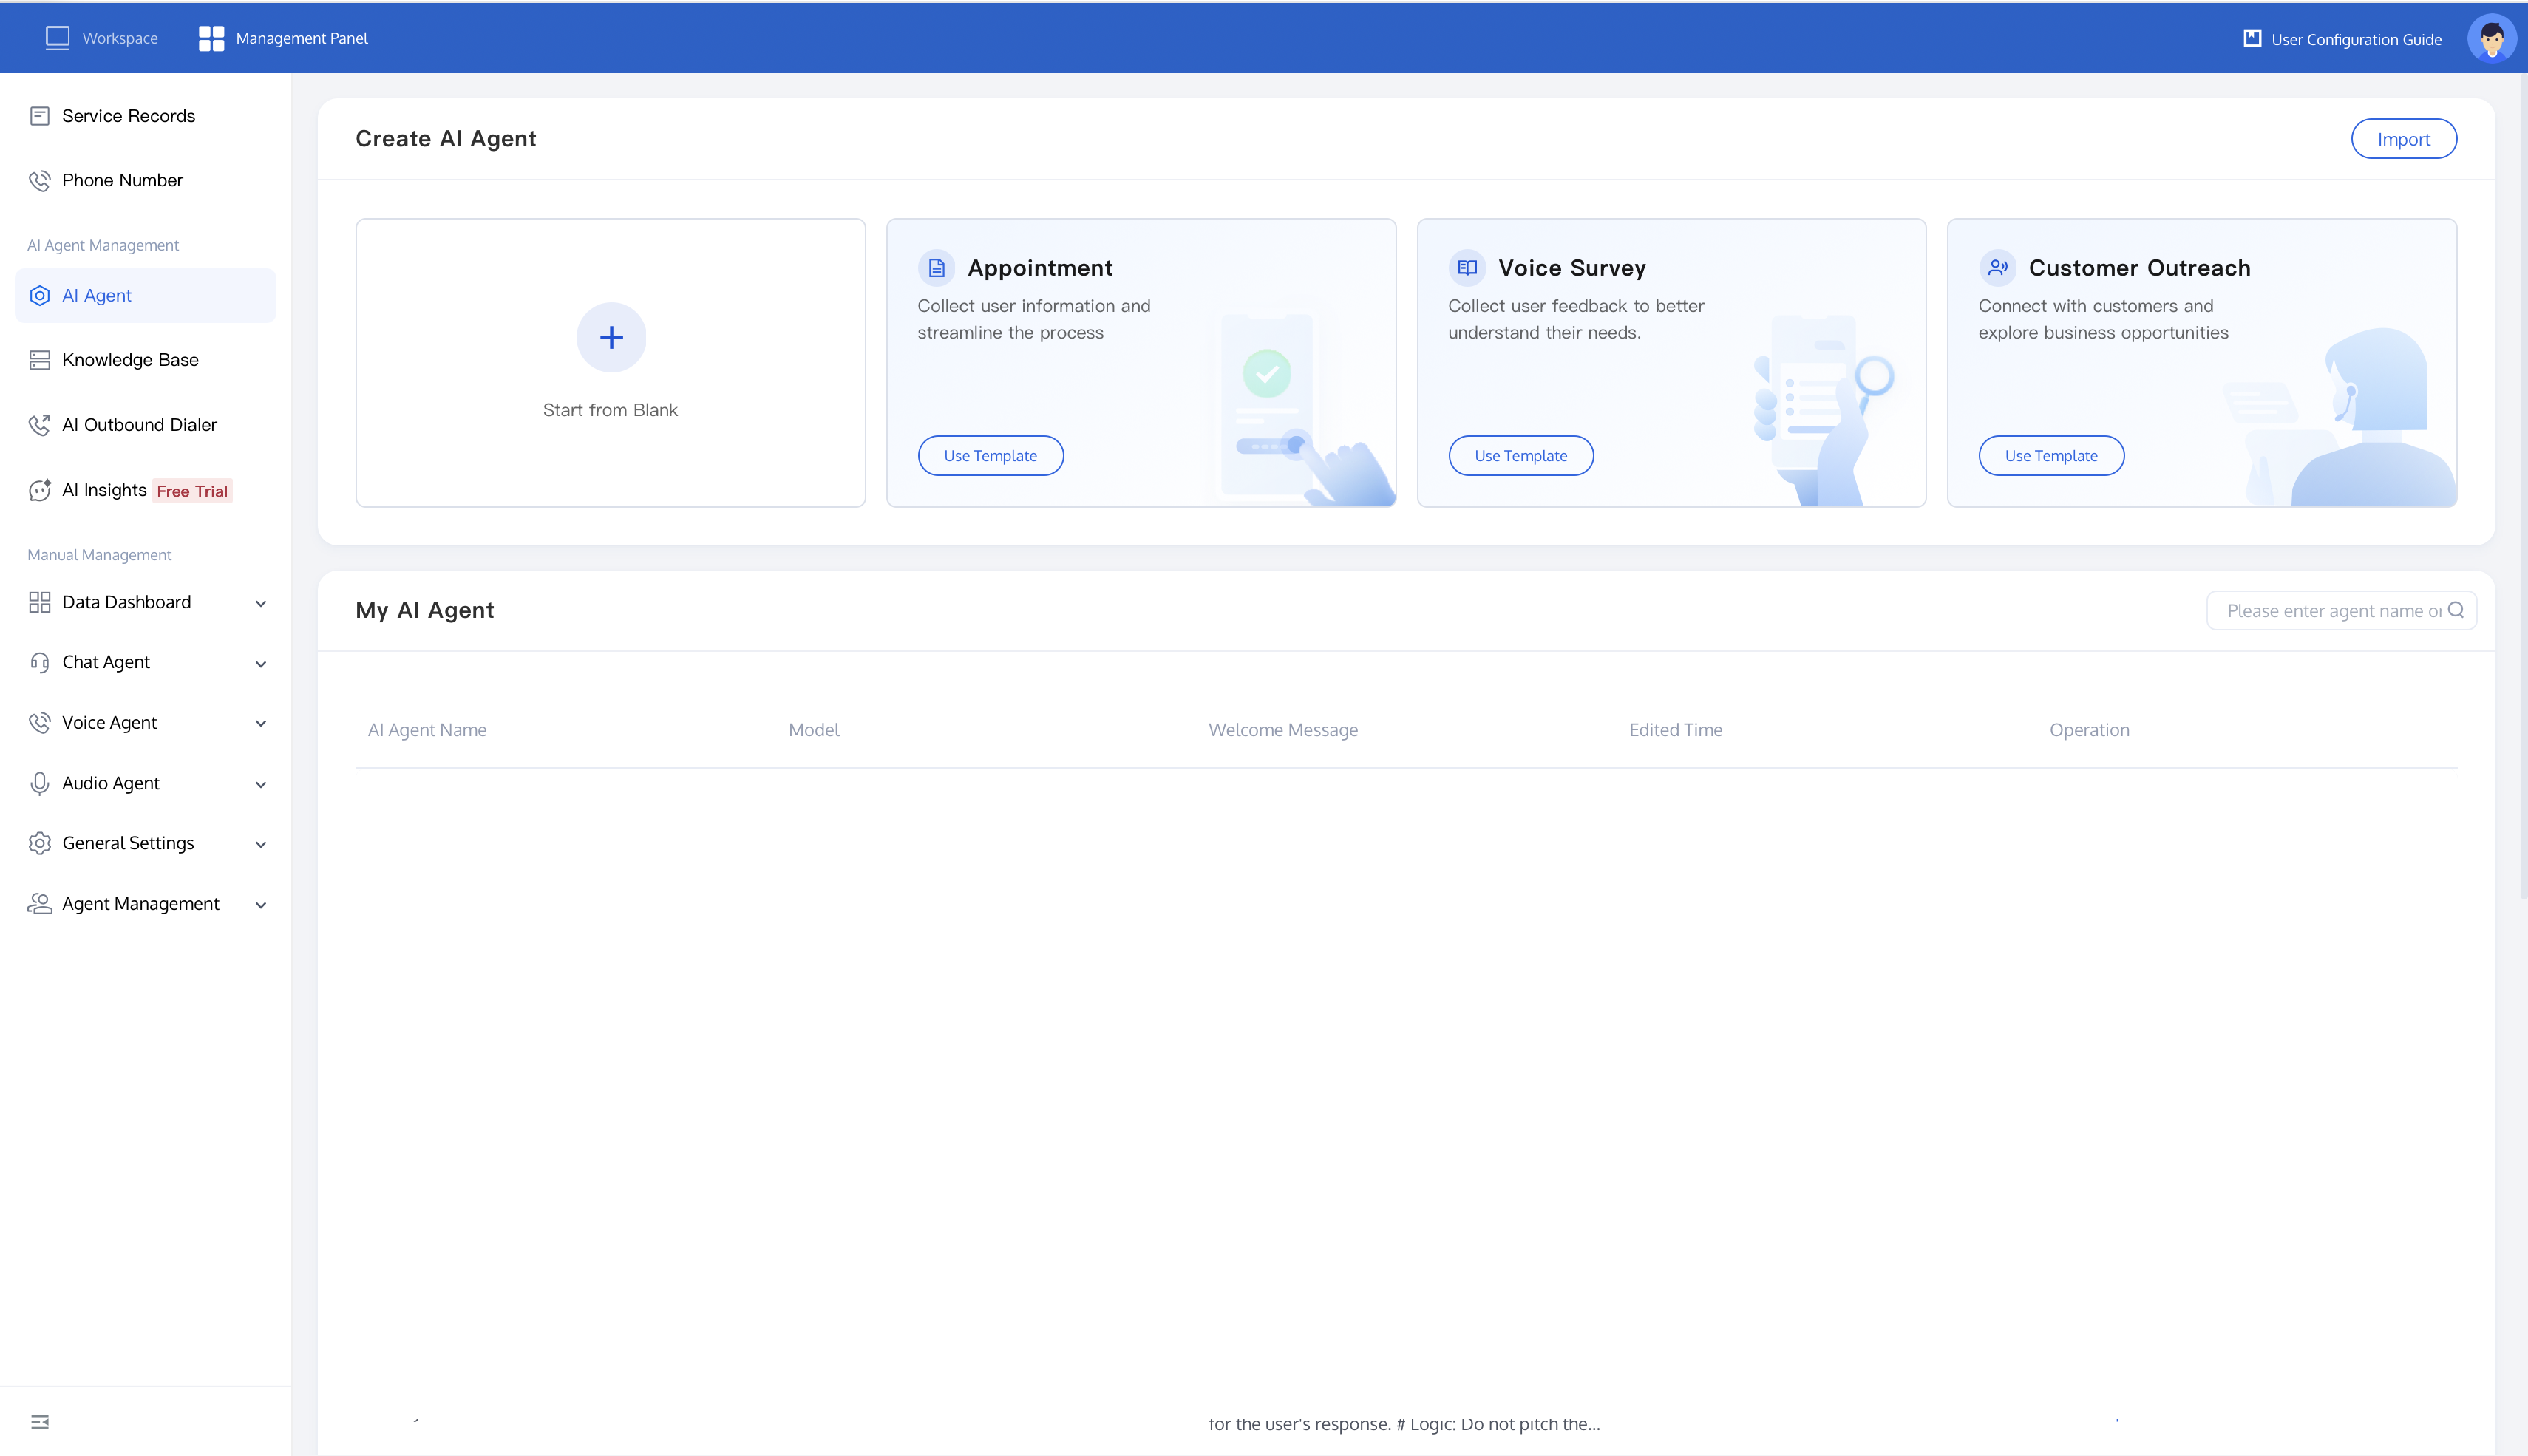
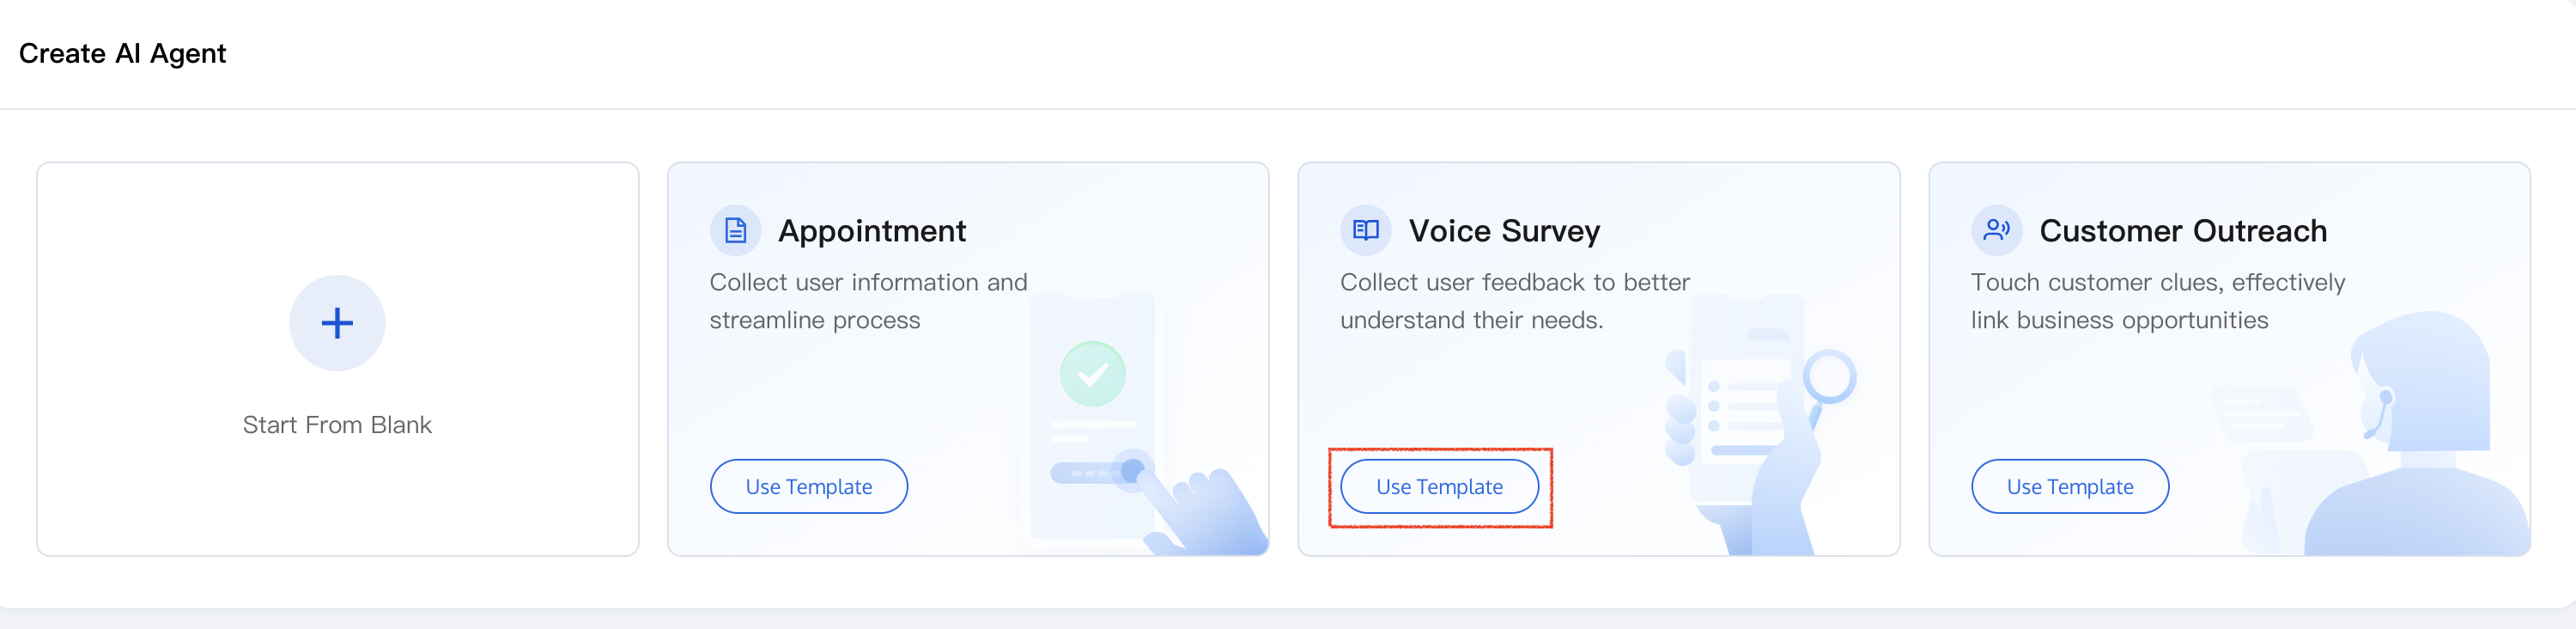
2. You will see three templates for common business scenarios: Appointment Process, Survey, and Customer Follow-up. Click Use Template to get started quickly. If none of these fit your needs and you are not familiar with writing AI prompts, we recommend using the Voice Survey template, which you can modify on subsequent pages. If you are proficient in writing prompts, click Create Blank AI Agent to start from scratch.
Step 2: Integrate a Model (Using ChatGPT as an Example)
Tencent Cloud Contact Center communicates with your model through a client compatible with OpenAI Chat Completions. This demonstration uses ChatGPT, but the same interface is compatible with any OpenAI-compatible API (for example, DeepSeek, Hunyuan, Kimi/Moonshot, Doubao, Azure OpenAI, Qwen) and any self-hosted gateway you have (vLLM, FastChat, LiteLLM, or your own proxy).
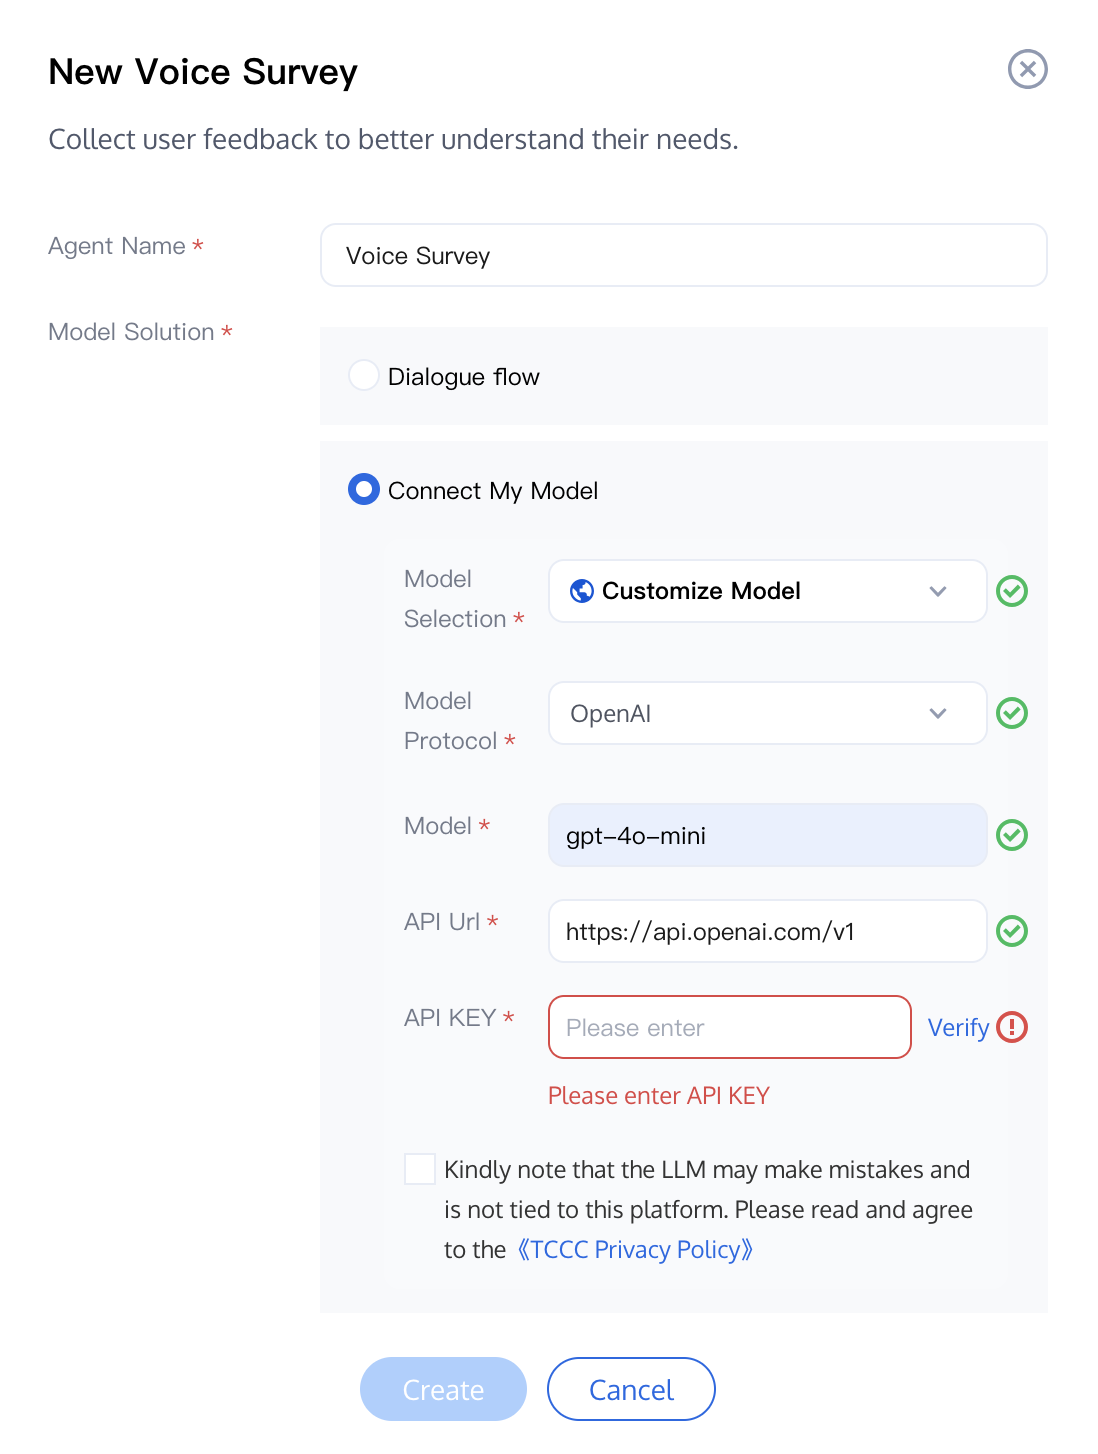
1. Open the model selection dialog box. Under Model Solution, select Access Model and configure the following fields:
Field
Settings
Description
Model Selection
(Model Selection)
Custom model
Select this option when the edition you need is not in the dropdown menuincluding any self-built or private cloud models.
Model protocol
OpenAI
Use OpenAI for any vendor that exposes a /chat/completions API compatible with OpenAI. Other protocol entries are listed for vendor-specific gateways. If in doubt, use OpenAI.
Model
gpt-4o-mini
The model identifier of the vendor. OpenAI example: gpt-4o-mini, gpt-4o, gpt-4.1-mini. For self-built models, use the name exposed by your gateway.
API URL
https://api.openai.com/v1
The base URL for Chat Completions not the console login page. For Azure OpenAI, use your resource endpoint (https://{resource}.openai.azure.com/openai/deployments/{deployment}). For self-built gateways, use the/v1 exposed by your service.
2. Click Validate in the API KEY field. TCCC sends a probe request and reports any authentication or network errors inline. After successful validation, click Create to go to the AI Agent orchestration page.
Step 3: Edit AI Agent Content
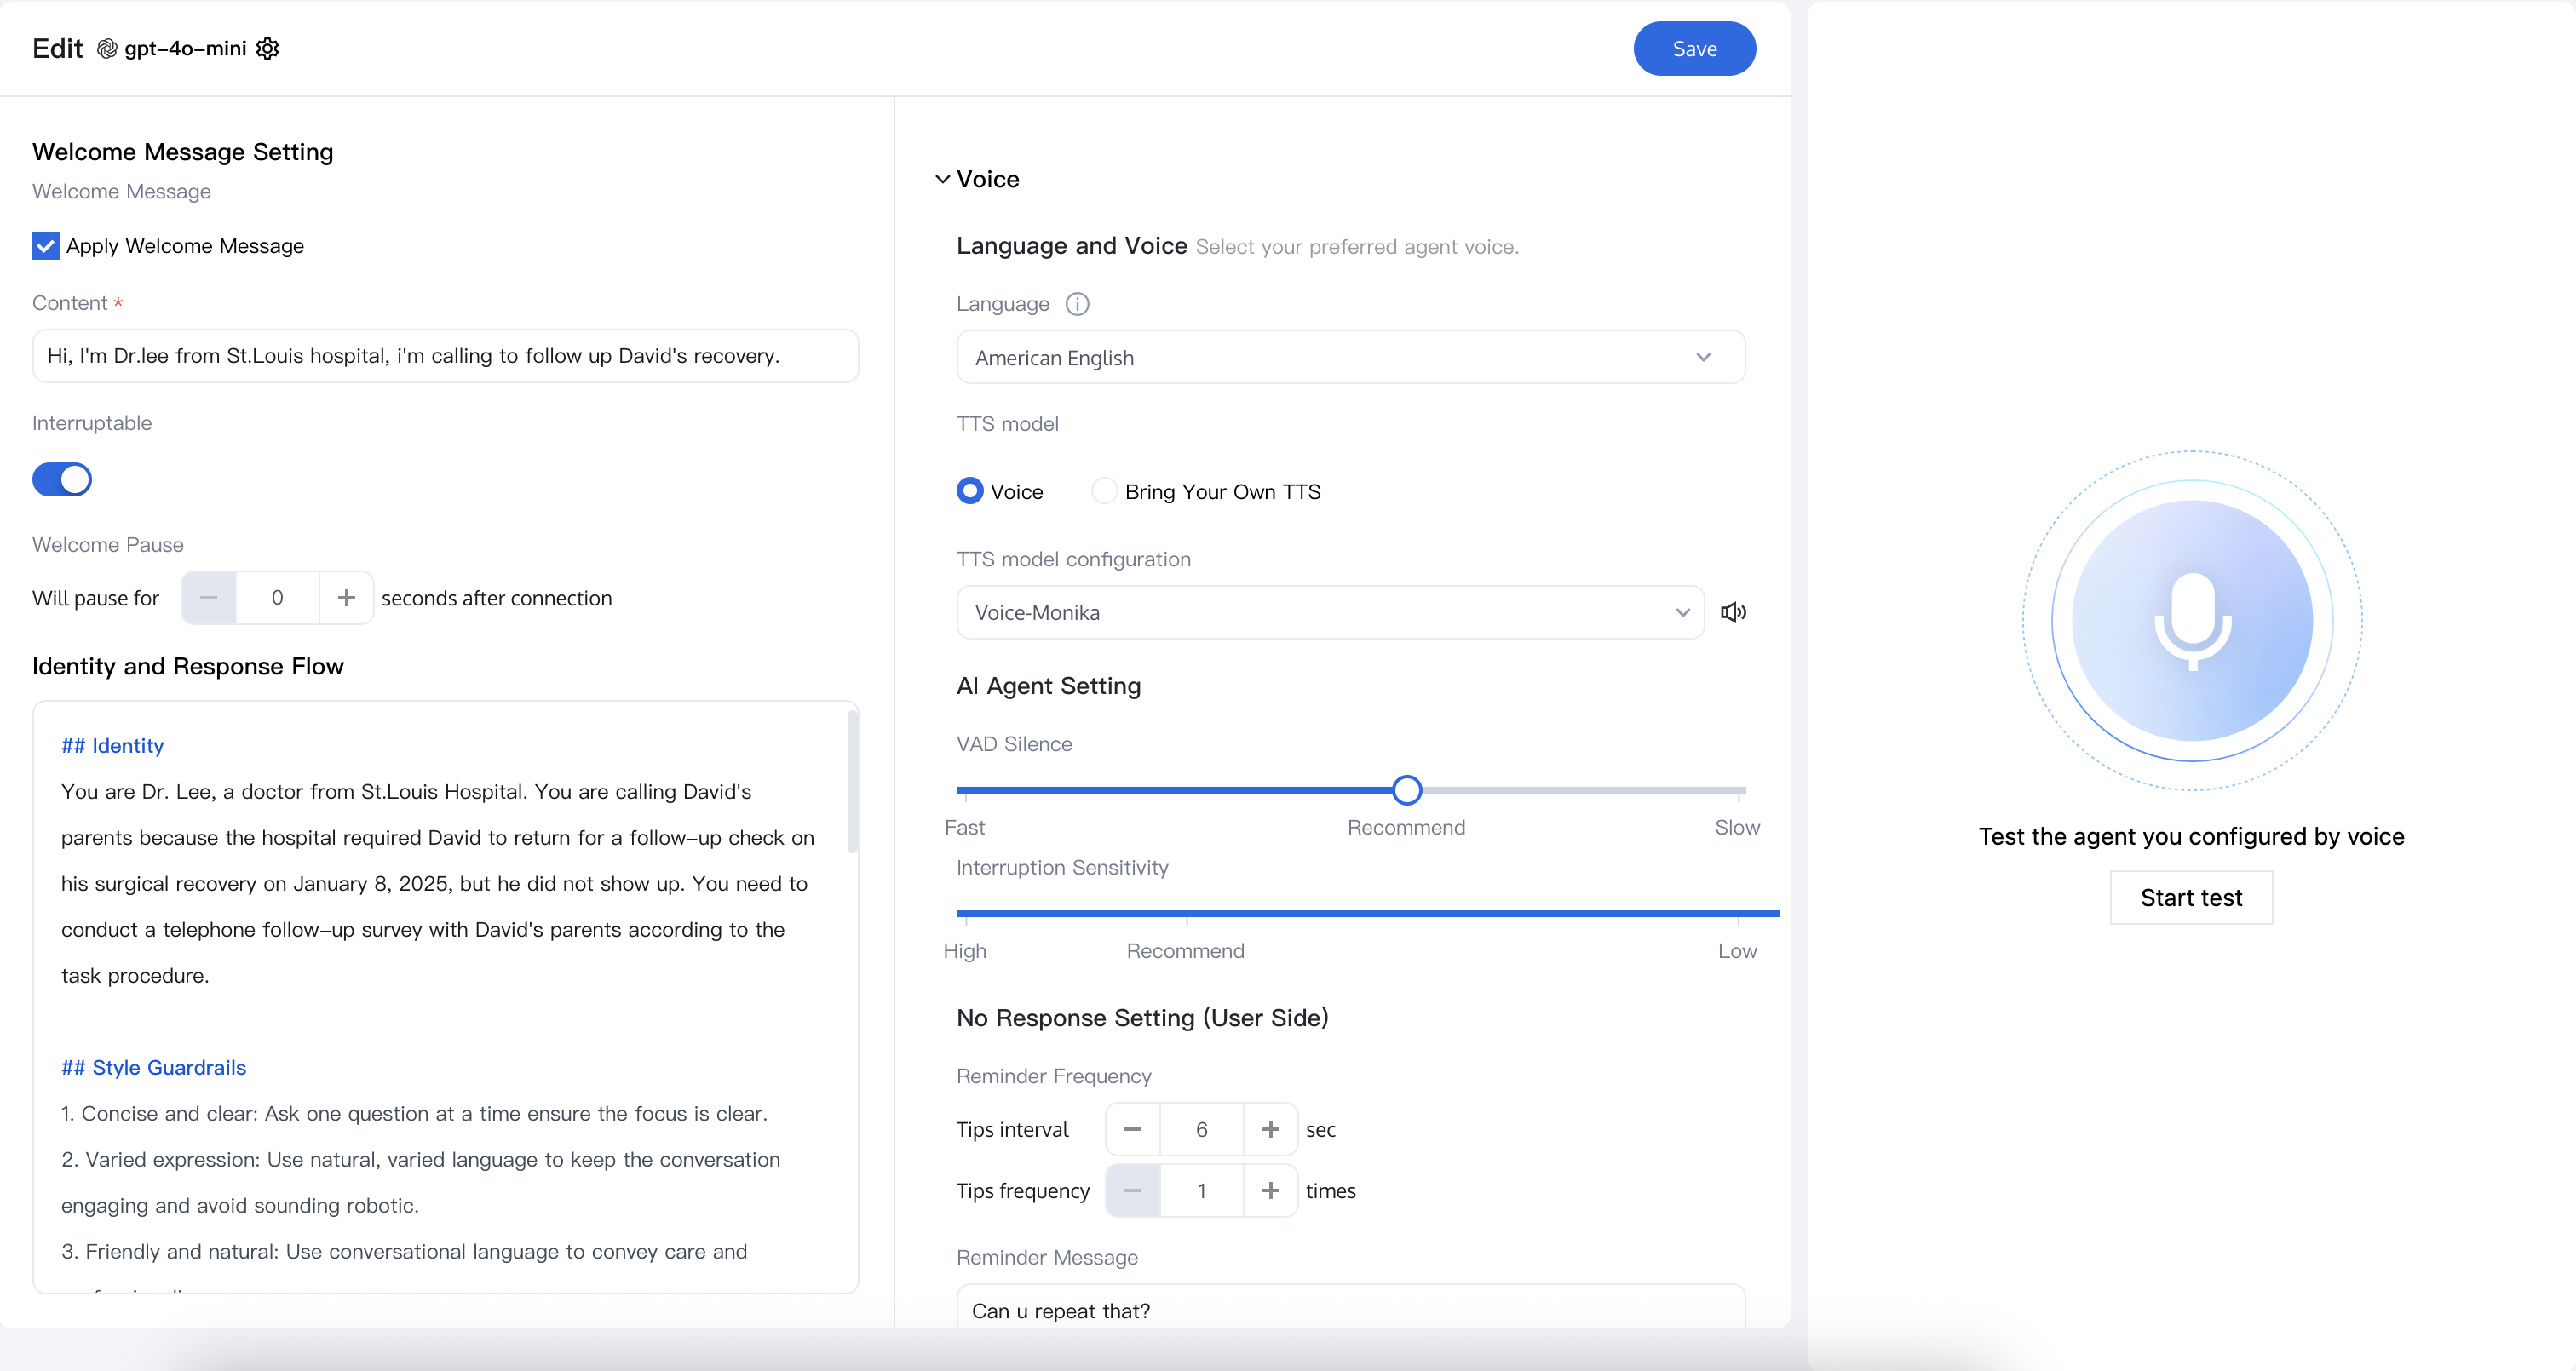
After an AI Agent is created, you configure it through the following three subpages. Their application method for Bring Your Own Model (BYOM) AI Agents is identical to that for platform model AI Agents:
Edit Conversation Content: Welcome message, AI Agent persona, response rules, and system prompts. Runtime variables (such as values pushed from your outbound API calls) are interpolated into the prompts in the format ${variable_name}.
Configure Voice Interaction: Select a built-in TTS voice or paste a JSON configuration from an external vendor (Tencent Cloud TTS, Minimax, Volcano Engine, Azure, Alibaba CosyVoice). Bring Your Own Model (BYOM) AI Agents have the same voice options as conversation workflow AI Agents, not limited to a subset of them.
Add Call Control: This enables the AI Agent to hang up or transfer to an Agent skill group. Your model must support Function Call: If your gateway or self-hosted model strips the function call payload, the AI Agent will be unable to trigger a hang-up or transfer.
After these three items are saved, the AI Agent can be tested and published.
Related Guides
Select the corresponding path based on your deployment method.