ビデオピクチャーインピクチャーソリューション
Download
フォーカスモード
フォントサイズ
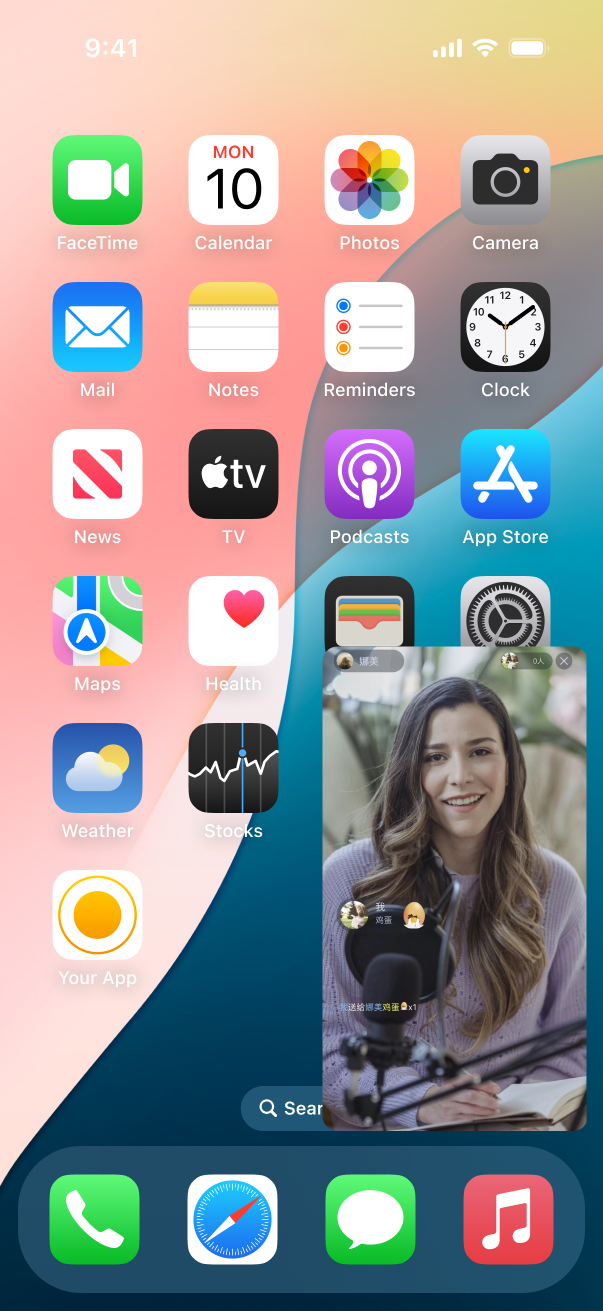
インタラクションライブストリーミングなどのビデオシーンでは、モバイルデバイスの視聴者が長時間配信者の画面を視聴している際に、他のAPPを一時的に操作する必要がある場面があります。このような場合、配信者の画面を中断せずに他のAPPを操作できれば、視聴者により良いユーザー体験を提供できます。ビデオピクチャーインピクチャーはこのシーンに対するソリューションであり、実現効果は下図の通りです。本文では、iOS、Android、およびFlutter端末におけるピクチャーインピクチャーの実現についてそれぞれ紹介します。
ピクチャーインピクチャーは、iOSとAndroidが提供するシステム機能に依存して実現されており、配信者側(カメラの収集とデータのアップロードが必要)と視聴者側(データのダウンロードのみ必要)に分けられます。iOSシステムは権限管理が比較的厳しいため、iOS端末では視聴者側のピクチャーインピクチャーのみを提供し、Android端末では配信者側と視聴者側の両方のピクチャーインピクチャーを提供しています。ビデオ再生に関しては、一般的にReal-Time Communication Engine (RTC Engine)を使用した再生とライブストリーミング再生の2つの方法があり、ピクチャーインピクチャーソリューションでもこの2つの状況について説明します。
iOS 端末の視聴者ピクチャーインピクチャー実現
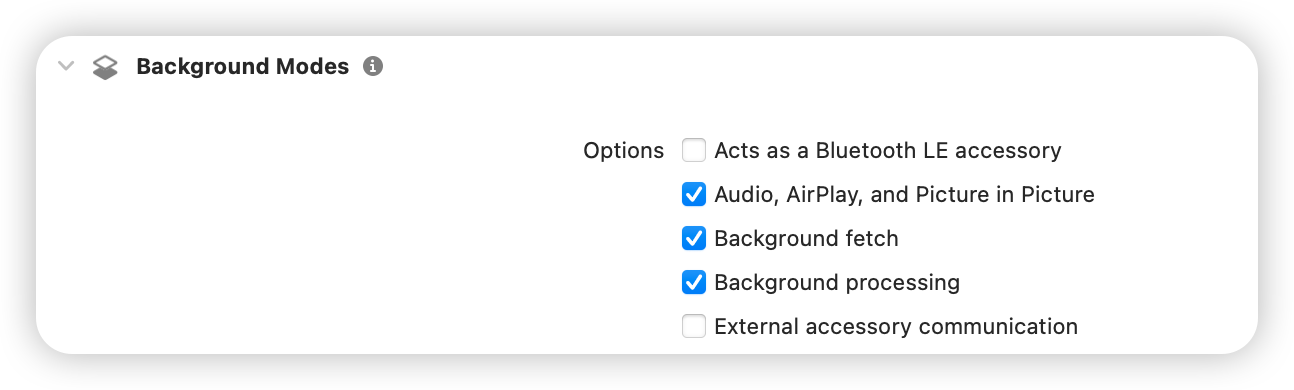
対応する権限を有効化
iOSプロジェクトのSigning & Capabilitiesで以下の権限を有効化する必要があります。
SDKを呼び出して実現
iOS端末では、SDKはピクチャーインピクチャー機能を実現するためのインターフェースを提供しており、APIを呼び出すことで簡単にピクチャーインピクチャーを有効化できます(関連APIは以下のサンプルコードを参照)。ただし、SDKは単一の配信者を視聴するピクチャーインピクチャー機能のみを提供しており、複数の配信者PKピクチャーインピクチャーを視聴する機能をサポートする必要がある場合は、システムのAPIを呼び出して実現する必要があります。詳細はシステムAPIを呼び出して実現をご参照ください。
RTC Engine 再生
説明:
RTC EngineのSDKは12.1以降のバージョンが必要です。
視聴者側で以下のインターフェースを呼び出して有効化します。
NSDictionary *param = @{@"api" : @"enablePictureInPictureFloatingWindow",@"params" : @{@"enable" : @(true)}};NSError *err = nil;NSData *jsonData = [NSJSONSerialization dataWithJSONObject:param options:0 error:&err];if (err) {NSLog(@"error: %@", err);}NSString *paramJsonString = [[NSString alloc] initWithData:jsonData encoding:NSUTF8StringEncoding];[self.trtcCloud callExperimentalAPI:paramJsonString];
let param: [String : Any] = ["api": "enablePictureInPictureFloatingWindow", "params": ["enable":true]]if let jsonData = try? JSONSerialization.data(withJSONObject: param, options: .fragmentsAllowed) {let paramJsonString = String.init(data: jsonData, encoding: .utf8) ?? ""trtcCloud.callExperimentalAPI(paramJsonString)}
無効化する必要がある場合は、対応するパラメータ位置にfalseを入力してください。
システムAPIを呼び出して実現します
ピクチャーインピクチャーはiOSシステムが提供する機能であり、システムAPIを呼び出すことで複雑なシーンのピクチャーインピクチャー機能を実現できます。iOSはピクチャーインピクチャー機能をサポートしていますが、この特性には多くの制限があり、レンダリングビデオのUIViewを直接使用してピクチャーインピクチャーを実現することはできません。カスタムレンダリングを使用し、ピクチャーインピクチャーに表示するビデオを要件に合ったコンポーネントにレンダリングする必要があります。以下では、2人の配信者PKピクチャーインピクチャーのシーンを例に、システムAPIを呼び出してピクチャーインピクチャーを実現する方法を紹介します。
説明:
単一の配信者または2人以上の配信者のピクチャーインピクチャーを実現する場合も、以下のソリューションを参考にすることができます。ここでは、2人の配信者PKのシーンについてのみ説明します。
1. ピクチャーインピクチャーに必要なコンポーネントを定義します。
iOSシステムは、特定のコンポーネントのみがピクチャーインピクチャーにレンダリングできることを要求するため、ここではAVSampleBufferDisplayLayerを使用します。また、このコンポーネントが対応するビデオを直接レンダリングする必要があるため、2人の配信者のビデオデータを結合するためにcombinedPixelBufferを定義します。
import UIKitimport AVKitimport CoreFoundationimport TXLiteAVSDK_Professionalclass PipVC: UIViewController {let trtcCloud = TRTCCloud()var pipController: AVPictureInPictureController?var combinedPixelBuffer: CVPixelBuffer?let pixelBufferLock = DispatchQueue(label: "com.demo.pip")var pipDisplayLayer: AVSampleBufferDisplayLayer!}
2. RTC Engine ルームに入室。
func enterTrtcRoom() {let params = TRTCParams()params.sdkAppId = UInt32(SDKAppID)params.roomId = UInt32(roomId)params.userId = userIdparams.role = .audienceparams.userSig = GenerateTestUserSig.genTestUserSig(identifier: userId) as StringtrtcCloud.addDelegate(self)trtcCloud.enterRoom(params, appScene: .LIVE)}
3. オーディオを設定し、バックエンドデコードを有効化。
func setupAudioSession() {do {try AVAudioSession.sharedInstance().setCategory(.playback)} catch let error {print("+> error: \\(error)")return}do {try AVAudioSession.sharedInstance().setActive(true)} catch let error {print("+> error: \\(error)")return}}func enableBGDecode() {let param: [String : Any] = ["api": "enableBackgroundDecoding","params": ["enable":true]]if let jsonData = try? JSONSerialization.data(withJSONObject: param, options: .fragmentsAllowed) {let paramJsonString = String.init(data: jsonData, encoding: .utf8) ?? ""trtcCloud.callExperimentalAPI(paramJsonString)}}
4. ピクチャーインピクチャーコンポーネントを初期化。
func setupPipController() {let screenWidth = UIScreen.main.bounds.widthlet videoHeight = screenWidth / 2 / 9 * 16pipDisplayLayer = AVSampleBufferDisplayLayer()pipDisplayLayer.frame = CGRect(x: 0, y: 0, width: screenWidth, height: videoHeight) // Adjust size as neededpipDisplayLayer.videoGravity = .resizeAspectpipDisplayLayer.isOpaque = truepipDisplayLayer.backgroundColor = CGColor(red: 0, green: 0, blue: 0, alpha: 1)view.layer.addSublayer(pipDisplayLayer)if AVPictureInPictureController.isPictureInPictureSupported() {let contentSource = AVPictureInPictureController.ContentSource(sampleBufferDisplayLayer: pipDisplayLayer,playbackDelegate: self)pipController = AVPictureInPictureController(contentSource: contentSource)pipController?.delegate = selfpipController?.canStartPictureInPictureAutomaticallyFromInline = true} else {print("+> error")}}
5. カスタムレンダリングを有効化。
注意:
カスタムレンダリングを有効化する際に指定する形式
._NV12とステップ6:左右2つの画面を結合の方法は関連しており、異なる形式には異なる結合方法が必要です。この例では._NV12形式の左右結合のみを表示しています。extension PipVC: TRTCCloudDelegate {func onUserVideoAvailable(_ userId: String, available: Bool) {if available {trtcCloud.startRemoteView(userId, streamType: .big, view: nil)trtcCloud.setRemoteVideoRenderDelegate(userId, delegate: self, pixelFormat: ._NV12, bufferType: .pixelBuffer);}else{trtcCloud.stopRemoteView(userId, streamType: .big)}}}
6. 左右2つの画面を結合。
2人の配信者のビデオデータを結合する際、SDKがビデオデータをコールバックするタイミングが同期していないため、単一の配信者のビデオデータを受信するたびに対応するデータを更新し、ロックをかける必要があります。複数の配信者を実現する場合も、同様の方法で操作する必要があります。以下のコードは、左右2人の配信者がそれぞれ半分ずつ占めるレイアウト方法です。他のレイアウトが必要な場合は、業務上で必要に応じて実装する必要があり、ここではSDKには関わりません。
func createCombinedPixelBuffer(from sourceBuffer: CVPixelBuffer) {let width = CVPixelBufferGetWidth(sourceBuffer) * 2let height = CVPixelBufferGetHeight(sourceBuffer)let pixelFormat = CVPixelBufferGetPixelFormatType(sourceBuffer)let attributes: [CFString: Any] = [kCVPixelBufferWidthKey: width,kCVPixelBufferHeightKey: height,kCVPixelBufferPixelFormatTypeKey: pixelFormat,kCVPixelBufferIOSurfacePropertiesKey: [:]]CVPixelBufferCreate(kCFAllocatorDefault, width, height, pixelFormat, attributes as CFDictionary, &combinedPixelBuffer)}func updateCombinedPixelBuffer(with sourceBuffer: CVPixelBuffer, forLeft: Bool) {guard let combinedBuffer = combinedPixelBuffer else { print("+> error"); return}CVPixelBufferLockBaseAddress(combinedBuffer, [])CVPixelBufferLockBaseAddress(sourceBuffer, [])// Plane 0: Y/luma planelet combinedLumaBaseAddress = CVPixelBufferGetBaseAddressOfPlane(combinedBuffer, 0)!let sourceLumaBaseAddress = CVPixelBufferGetBaseAddressOfPlane(sourceBuffer, 0)!let combinedLumaBytesPerRow = CVPixelBufferGetBytesPerRowOfPlane(combinedBuffer, 0)let sourceLumaBytesPerRow = CVPixelBufferGetBytesPerRowOfPlane(sourceBuffer, 0)let widthLuma = CVPixelBufferGetWidthOfPlane(sourceBuffer, 0)let heightLuma = CVPixelBufferGetHeightOfPlane(sourceBuffer, 0)// Plane 1: UV/chroma planelet combinedChromaBaseAddress = CVPixelBufferGetBaseAddressOfPlane(combinedBuffer, 1)!let sourceChromaBaseAddress = CVPixelBufferGetBaseAddressOfPlane(sourceBuffer, 1)!let combinedChromaBytesPerRow = CVPixelBufferGetBytesPerRowOfPlane(combinedBuffer, 1)let sourceChromaBytesPerRow = CVPixelBufferGetBytesPerRowOfPlane(sourceBuffer, 1)let widthChroma = CVPixelBufferGetWidthOfPlane(sourceBuffer, 1)let heightChroma = CVPixelBufferGetHeightOfPlane(sourceBuffer, 1)for row in 0..<heightLuma {let combinedRow = combinedLumaBaseAddress.advanced(by: row * combinedLumaBytesPerRow + (forLeft ? 0 : widthLuma))let sourceRow = sourceLumaBaseAddress.advanced(by: row * sourceLumaBytesPerRow)memcpy(combinedRow, sourceRow, widthLuma)}// ._nv12 the chroma plane is subsampled 2:1 horizontally and verticallyfor row in 0..<heightChroma {let combinedRow = combinedChromaBaseAddress.advanced(by: row * combinedChromaBytesPerRow + (forLeft ? 0 : 2 * widthChroma))let sourceRow = sourceChromaBaseAddress.advanced(by: row * sourceChromaBytesPerRow)memcpy(combinedRow, sourceRow, 2 * widthChroma)}CVPixelBufferUnlockBaseAddress(sourceBuffer, [])CVPixelBufferUnlockBaseAddress(combinedBuffer, [])}
7. 結合後の画面を対応するコンポーネントにレンダリングします。
func displayPixelBuffer(_ pixelBuffer: CVPixelBuffer, in layer: AVSampleBufferDisplayLayer) {var timing = CMSampleTimingInfo.init(duration: .invalid,presentationTimeStamp: .invalid,decodeTimeStamp: .invalid)var videoInfo: CMVideoFormatDescription? = nilvar result = CMVideoFormatDescriptionCreateForImageBuffer(allocator: nil,imageBuffer: pixelBuffer,formatDescriptionOut: &videoInfo)if result != 0 {return}guard let videoInfo = videoInfo else {return}var sampleBuffer: CMSampleBuffer? = nilresult = CMSampleBufferCreateForImageBuffer(allocator: kCFAllocatorDefault,imageBuffer: pixelBuffer,dataReady: true,makeDataReadyCallback: nil,refcon: nil,formatDescription: videoInfo,sampleTiming: &timing,sampleBufferOut: &sampleBuffer)if result != 0 {return}guard let sampleBuffer = sampleBuffer else {return}guard let attachments = CMSampleBufferGetSampleAttachmentsArray(sampleBuffer,createIfNecessary: true) else {return}CFDictionarySetValue(unsafeBitCast(CFArrayGetValueAtIndex(attachments, 0), to: CFMutableDictionary.self),Unmanaged.passUnretained(kCMSampleAttachmentKey_DisplayImmediately).toOpaque(),Unmanaged.passUnretained(kCFBooleanTrue).toOpaque())layer.enqueue(sampleBuffer)if layer.status == .failed {if let error = layer.error as? NSError {if error.code == -11847 {print("+> error")}}}}
8. リモートユーザーのビデオデータを取得し、結合後に指定されたコンポーネントにレンダリングします。
サンプルでは left を使用して左側に表示される配信者IDを識別していますが、実際の業務では業務ニーズに応じて変更する必要があります。
extension PipVC: TRTCVideoRenderDelegate {func onRenderVideoFrame(_ frame: TRTCVideoFrame, userId: String?, streamType: TRTCVideoStreamType) {guard let newPixelBuffer = frame.pixelBuffer else { print("+> error"); return}pixelBufferLock.sync {if combinedPixelBuffer == nil {createCombinedPixelBuffer(from: newPixelBuffer)}if userId == "left" {updateCombinedPixelBuffer(with: newPixelBuffer, forLeft: true)} else {updateCombinedPixelBuffer(with: newPixelBuffer, forLeft: false)}}if let combinedBuffer = combinedPixelBuffer {DispatchQueue.main.async {self.displayPixelBuffer(combinedBuffer, in: self.pipDisplayLayer)}}}}
9. 関連プロトコルを実現します。
extension PipVC: AVPictureInPictureControllerDelegate {func pictureInPictureControllerWillStartPictureInPicture(_ pictureInPictureController: AVPictureInPictureController) {}func pictureInPictureControllerDidStartPictureInPicture(_ pictureInPictureController: AVPictureInPictureController) {}func pictureInPictureControllerDidStopPictureInPicture(_ pictureInPictureController: AVPictureInPictureController) {}func pictureInPictureController(_ pictureInPictureController: AVPictureInPictureController, restoreUserInterfaceForPictureInPictureStopWithCompletionHandler completionHandler: @escaping (Bool) -> Void) {completionHandler(true)}func pictureInPictureController(_ pictureInPictureController: AVPictureInPictureController, failedToStartPictureInPictureWithError error: any Error) {}}extension PipVC: AVPictureInPictureSampleBufferPlaybackDelegate {func pictureInPictureControllerTimeRangeForPlayback(_ pictureInPictureController: AVPictureInPictureController) -> CMTimeRange {return CMTimeRange.init(start: .zero, duration: .positiveInfinity)}func pictureInPictureControllerIsPlaybackPaused(_ pictureInPictureController: AVPictureInPictureController) -> Bool {return false}func pictureInPictureController(_ pictureInPictureController: AVPictureInPictureController, setPlaying playing: Bool) {}func pictureInPictureController(_ pictureInPictureController: AVPictureInPictureController, didTransitionToRenderSize newRenderSize: CMVideoDimensions) {}func pictureInPictureController(_ pictureInPictureController: AVPictureInPictureController, skipByInterval skipInterval: CMTime) async {}}
10. ピクチャーインピクチャーを開始/終了します。
// ピクチャーインピクチャーを終了しますpipController?.stopPictureInPicture()// ピクチャーインピクチャーを開始しますpipController?.startPictureInPicture()
注意:
ここでは実現ソリューションについてのみ説明し、実際の業務では様々な可能性のある異常ケースへの対応も必要です。
ピクチャーインピクチャーの上層制御ボタンの処理はiOSシステム関連の機能であり、SDKには関わらないため、ここでは説明しません。業務側で実際の必要に応じて対応する必要があります。
Android端末のピクチャーインピクチャーの実現
Android 8.0(APIレベル26)以降、Androidはactivityをピクチャーインピクチャー(PIP)モードで起動することを許可しています。ピクチャーインピクチャーは、特殊なタイプのマルチウィンドウモードで、主にビデオ再生に使用されます。このモードを使用すると、ユーザーは画面の隅に固定された小さなウィンドウでビデオを視聴しながら、アプリケーション間を移動したり、ホーム画面のコンテンツを閲覧したりできます。RTC Engine SDKはAndroidのピクチャーインピクチャー APIをさらにカプセル化しておらず、ピクチャーインピクチャー機能はAndroid APIを直接呼び出して実現されています。詳細については、Androidドキュメントピクチャーインピクチャー(PIP)機能を使用してビデオを追加をご参照ください。
Android端末はピクチャーインピクチャーを開始すると、xmlのレイアウトルールに基づき、ピクチャーインピクチャーのウィンドウサイズでmeasure、layoutを再度実行します。そのため、配信者側と視聴者側はこのルールに従ってピクチャーインピクチャーを実現できます。
ピクチャーインピクチャーの実現
1. AndroidManifest.xmlで<activity>に対してピクチャーインピクチャー属性を宣言します。
<activityandroid:name="com.tencent.trtc.pictureinpicture.PictureInPictureActivity"android:theme="@style/Theme.AppCompat.Light.NoActionBar"android:configChanges="screenSize|smallestScreenSize|screenLayout|orientation"android:supportsPictureInPicture="true"
android:supportsPictureInPicture="true" はピクチャーインピクチャーをサポートすることを宣言します。ピクチャーインピクチャーモードの切り替え中にレイアウト変更が発生した場合、activityの再起動を防ぐには、android:configChanges属性に対応する値を設定する必要があります。
2. ピクチャーインピクチャーを開始します。
private void startPictureInPicture() {if (Build.VERSION.SDK_INT >= Build.VERSION_CODES.O) {PictureInPictureParams.Builder pictureInPictureBuilder = new PictureInPictureParams.Builder();Rational aspectRatio = new Rational(mVideoView.getWidth(), mVideoView.getHeight());pictureInPictureBuilder.setAspectRatio(aspectRatio);//ピクチャーインピクチャーを開始しますenterPictureInPictureMode(pictureInPictureBuilder.build());} else {Toast.makeText(this, R.string.picture_in_picture_not_supported, Toast.LENGTH_SHORT).show();}}
pictureInPictureBuilder.setAspectRatio(aspectRatio); ピクチャーインピクチャーのアスペクト比を設定します。ここでは再生ビデオViewのアスペクト比に設定します。enterPictureInPictureMode(pictureInPictureBuilder.build()); ピクチャーインピクチャーを開始します。3. ピクチャーインピクチャー開始/終了のコールバック。
@Overridepublic void onPictureInPictureModeChanged(boolean isInPictureInPictureMode, Configuration configuration) {super.onPictureInPictureModeChanged(isInPictureInPictureMode, configuration);if (isInPictureInPictureMode) {//ピクチャーインピクチャーを開始した後、非表示にする必要があるview} else{//ピクチャーインピクチャーを終了した後、表示する必要があるview}}
ピクチャーインピクチャーで複数のビデオ画面を表示します
複数のビデオ画面を表示したい場合、ピクチャーインピクチャーを開始する時に、View Aに固定の幅と高さを設定し、他のViewはレイアウトルールに従って表示されるか、パーセンテージレイアウトを設定します。
説明:
ピクチャーインピクチャーで複数のビデオ画面を表示する方法はAndroidの規定された使い方ではなく、現在Android 12で使用可能ですが、今後のAndroidシステムの更新に伴い変更される可能性があります。リリース前に各バージョンのシステムとの互換性をテストする必要があります。
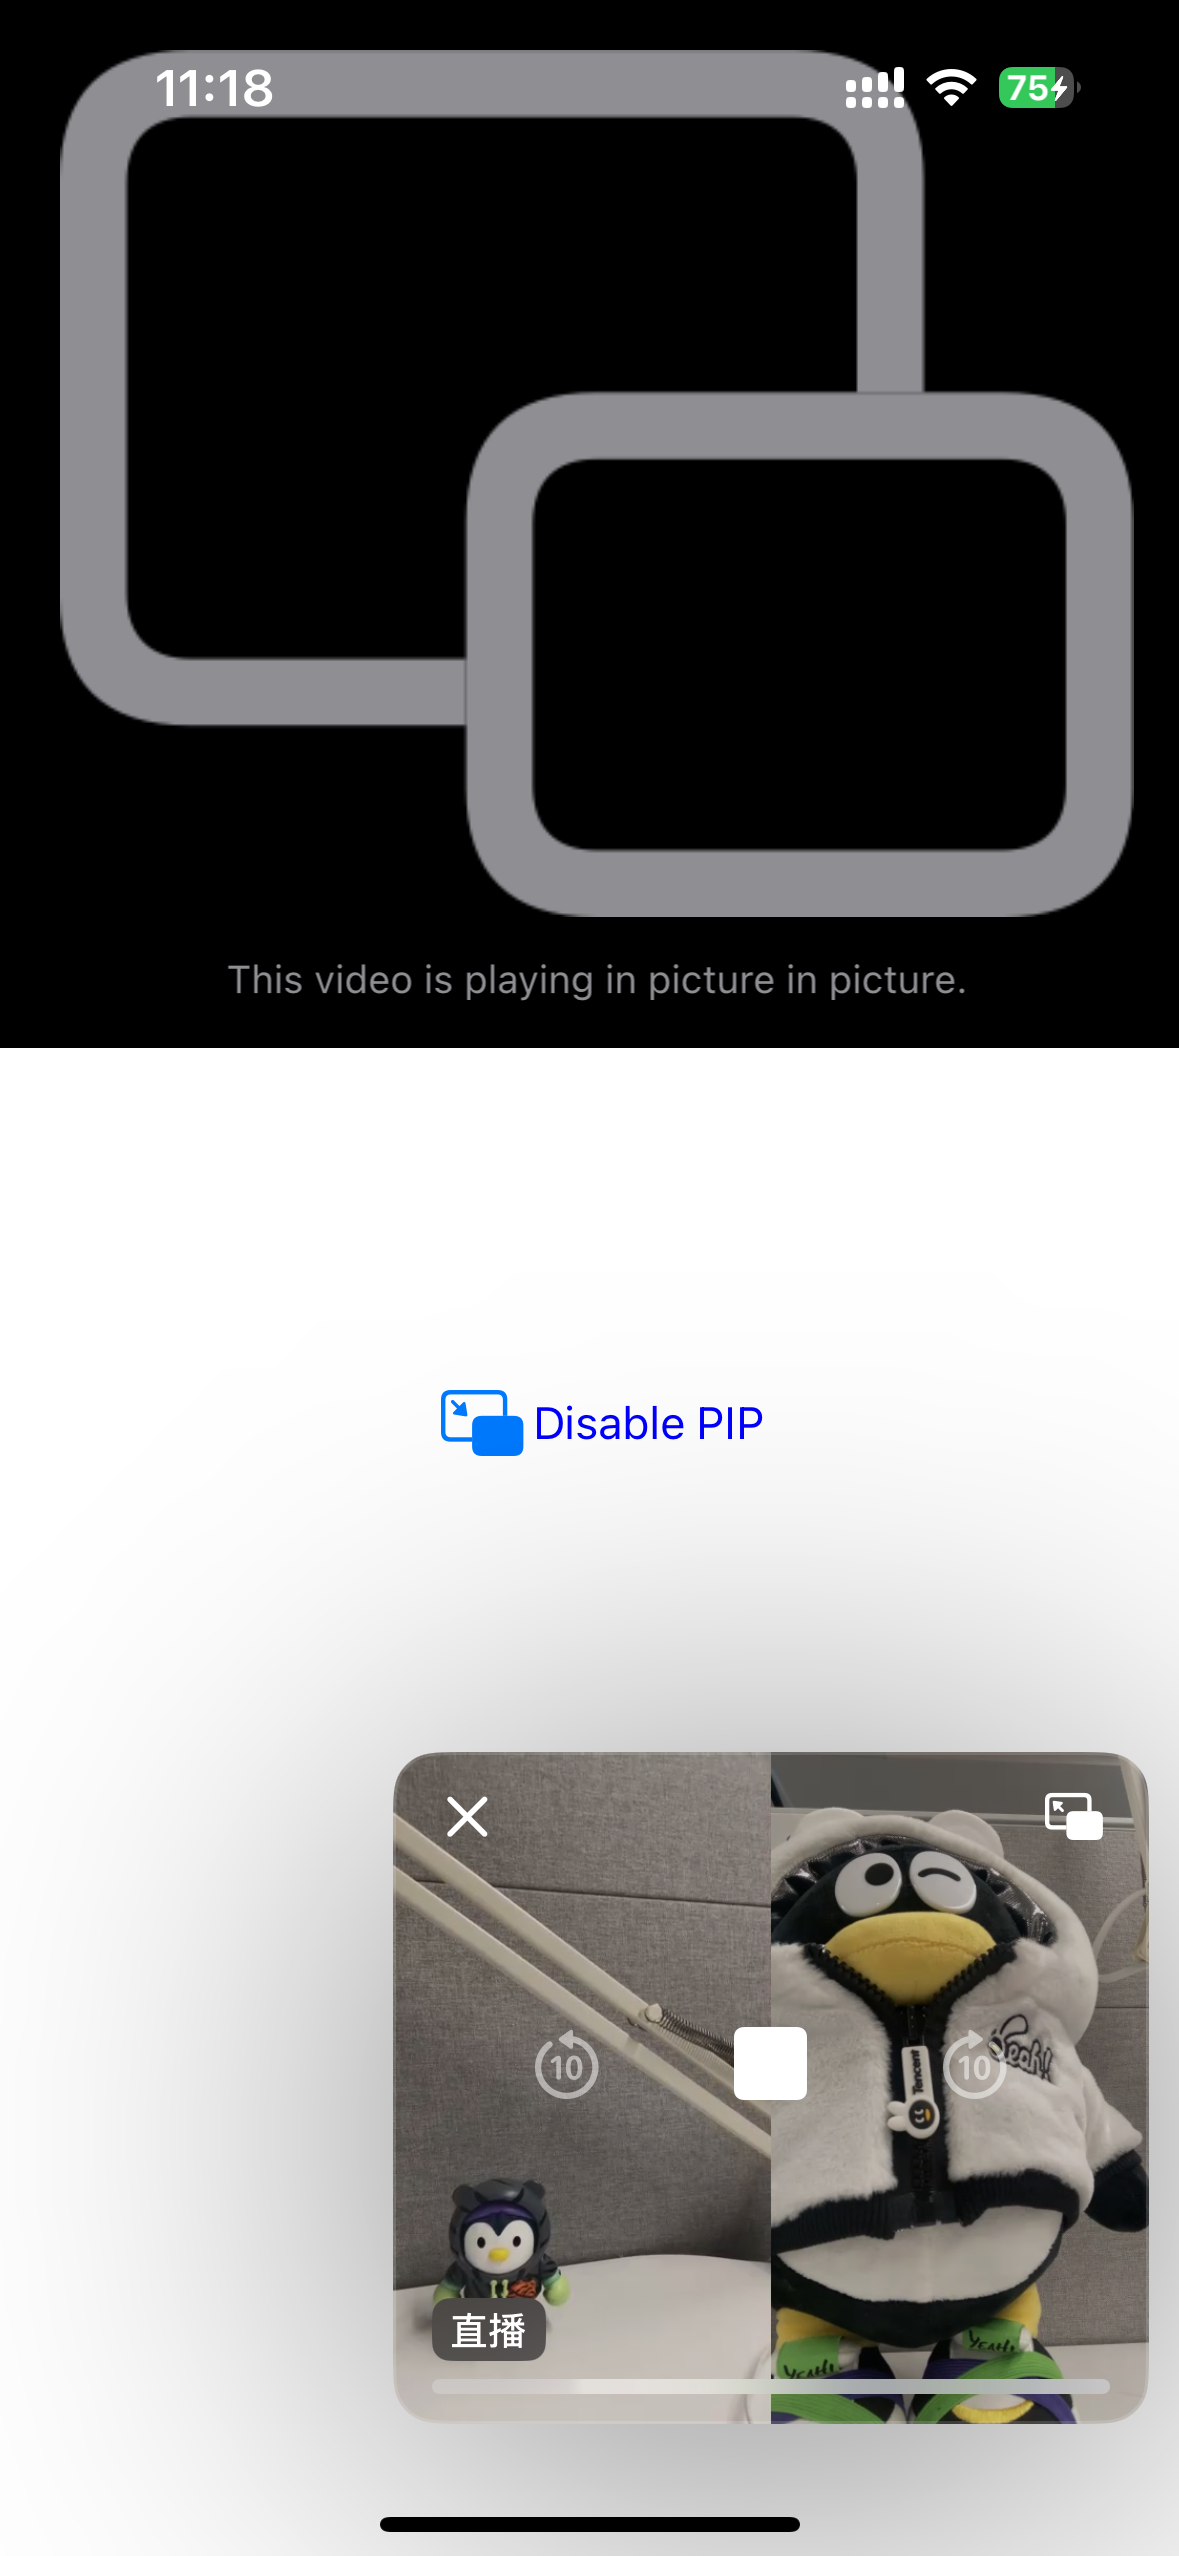
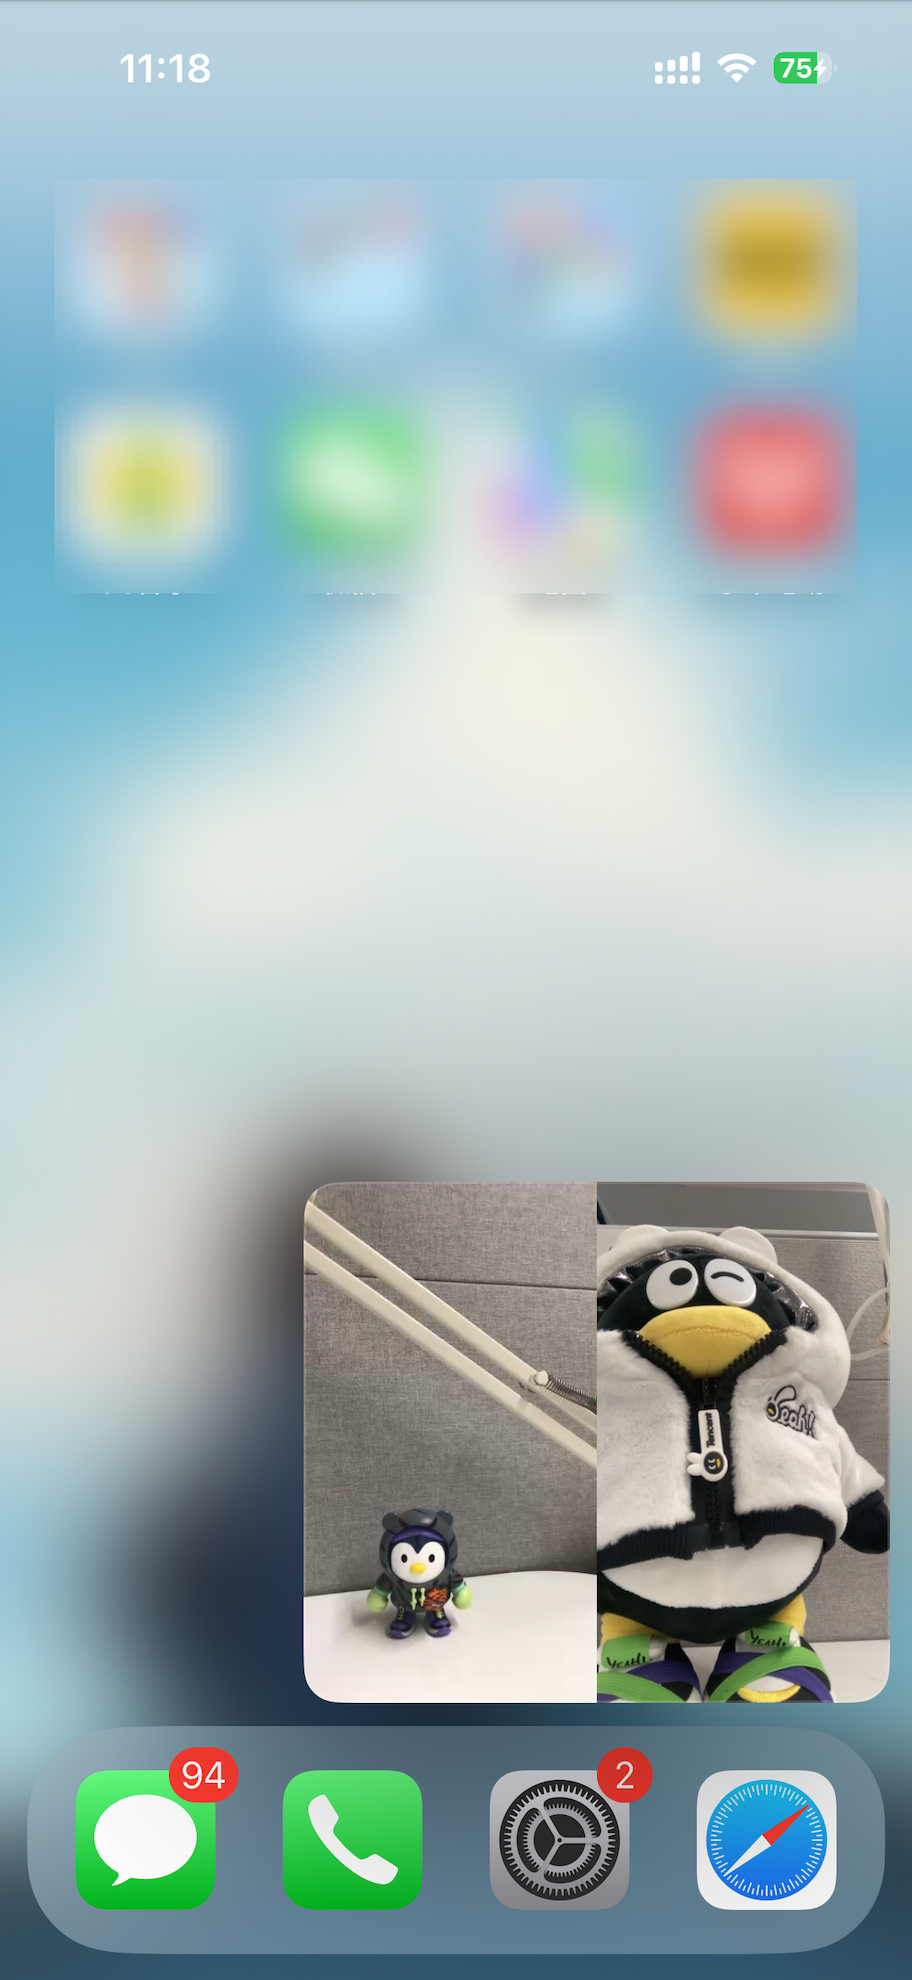
効果展示
// mTRTCCloudは左側のビデオView(TXCloudVideoView)に対応し、TRTC_VIDEO_RENDER_MODE_FITを設定していますTRTCCloudDef.TRTCRenderParams param = new TRTCCloudDef.TRTCRenderParams();param.fillMode = TRTCCloudDef.TRTC_VIDEO_RENDER_MODE_FIT;mTRTCCloud.setRemoteRenderParams(remoteUserIdA,TRTCCloudDef.TRTC_VIDEO_STREAM_TYPE_BIG, param);mTRTCCloud.startRemoteView(remoteUserIdA, TRTCCloudDef.TRTC_VIDEO_STREAM_TYPE_BIG, mTXCloudRemoteView);// mTRTCCloudは右側のビデオビュー(TXCloudVideoView)に対応しますmTRTCCloud.startRemoteView(remoteUserIdB, TRTCCloudDef.TRTC_VIDEO_STREAM_TYPE_BIG, mTXCloudRemoteView);
ピクチャーインピクチャーを開始した後のレイアウトでは、TXCloudVideoViewの幅と高さを計算して手動で設定するか、フィルモードを設定することで、ビデオ画面の完全な表示を保証できます。mTRTCCloud(TRTCCloudオブジェクト)のsetRemoteRenderParamsメソッドを呼び出して、ビデオ画面のフィルモードを設定します。
ピクチャーインピクチャーの左側のTXCloudVideoViewは、TRTC_VIDEO_RENDER_MODE_FITを設定した効果です。
ピクチャーインピクチャーの右側のTXCloudVideoViewは、TRTC_VIDEO_RENDER_MODE_FILLを設定した効果です。
この例では、2つのビデオ画面(TXCloudVideoView)のみがあり、左側のTXCloudVideoViewに幅と高さを設定すると、右側のTXCloudVideoViewはレイアウトルールに従って表示されます。複数のTXCloudVideoViewがある場合、レイアウトを適切に設計して目的の効果を達成できます。
実現手順
1. activity_picture_in_picture.xml に2つの TXCloudVideoView を並べて表示するように追加します。
<com.tencent.rtmp.ui.TXCloudVideoViewandroid:id="@+id/video_view"android:layout_width="192dp"android:layout_height="108dp"android:layout_alignParentStart="true"android:background="#00BCD4"/><com.tencent.rtmp.ui.TXCloudVideoViewandroid:id="@+id/video_view2"android:layout_width="192dp"android:layout_height="108dp"android:layout_alignTop="@+id/video_view"android:layout_toEndOf="@+id/video_view"android:background="#3F51B5"/>
2. ピクチャーインピクチャー開始時と終了時に、video_viewの幅と高さを設定します。
@Overridepublic void onPictureInPictureModeChanged(boolean isInPictureInPictureMode, Configuration configuration) {super.onPictureInPictureModeChanged(isInPictureInPictureMode, configuration);if (isInPictureInPictureMode) {// mVideoViewの幅を100dpに設定しますRelativeLayout.LayoutParams layoutParams = (RelativeLayout.LayoutParams) mVideoView.getLayoutParams();layoutParams.width = (int) TypedValue.applyDimension(TypedValue.COMPLEX_UNIT_DIP, 100, getResources().getDisplayMetrics());} else {// ピクチャーインピクチャークを終了し、video_viewの幅を元に戻しますRelativeLayout.LayoutParams layoutParams = (RelativeLayout.LayoutParams) mVideoView.getLayoutParams();layoutParams.width = (int) TypedValue.applyDimension(TypedValue.COMPLEX_UNIT_DIP, 192, getResources().getDisplayMetrics());}}
Flutter側の視聴者ピクチャーインピクチャー実現
Flutter側でピクチャーインピクチャーを有効化するには、プラットフォームごとに異なる実現方法があります。以下では、iOSとAndroidプラットフォームについてそれぞれ説明します。
iOSデバイスにリリース
SDKを呼び出して実現
Flutter側でも、SDKが提供するAPIを呼び出すことで簡単にピクチャーインピクチャーを有効化できます。ネイティブのiOS端末と同様に、SDKは単一の配信者のピクチャーインピクチャー表示機能のみを提供しています。複数の配信者のビデオをピクチャーインピクチャーで表示する必要がある場合は、システムAPIを呼び出して実現をご参照ください。
注意:
RTC Engine 再生
Flutter SDKはバージョン2.9.1以降が必要で、視聴者側で以下のインターフェースを呼び出して実現します。
trtcCloud.callExperimentalAPI(jsonEncode({"api": "enablePictureInPictureFloatingWindow","params": {"enable": true}}));
無効化する必要がある場合は、対応するパラメータ位置にfalseを入力してください。
ライブストリーミング再生
視聴者側で以下のインターフェースを呼び出して有効化します。
var pipCode = await _livePlayer!.enablePictureInPicture(true);if (pipCode != V2TXLIVE_OK) {print("error: $pipCode");}
無効化する必要がある場合は、対応するパラメータ位置にfalseを入力してください。
システムAPIを呼び出して実現します
複雑なピクチャーインピクチャー機能(例:ピクチャーインピクチャーで複数の配信者のビデオを表示するなど)を実現する必要がある場合は、iOSシステムが提供するAPIを呼び出して実現する必要があります。iOS端末の視聴者ピクチャーインピクチャー実現-システムAPIを呼び出して実現の部分をご参照ください。以下では、Flutter側でiOSシステムAPIを呼び出す部分について説明します。
1. Flutter 側は MethodChannel を使用して iOS ネイティブ端末にメッセージを送信します。
final channel = MethodChannel('flutter_ios_pip_demo');await channel.invokeMethod('enablePip', {'marginTop': appBarHeight + topSafeAreaHeight,'pkLeft': pkLeftUserId,'pkRight': pkRightUserId,});
2. Flutterでパッケージ化されたiOSプロジェクトで、対応するメッセージを受信し、適切な処理を行います。
FlutterがシステムAPIを呼び出して複数配信者PKのピクチャーインピクチャーを実現する場合、実際にはiOSシステムAPIを呼び出し、カスタム収集機能を使用して2つの配信者PKの画面を再描画し、Flutterレイヤーの上に表示します。そのため、iOSシステムAPIを呼び出して描画するウィンドウのサイズと位置がFlutter側と一致する必要があり、MethodChannelで対応するレイアウトパラメータと配信者IDを渡すことができます。
var channel: FlutterMethodChannel?let pipListener = PipRender()guard let controller = window?.rootViewController as? FlutterViewController else {fatalError("Invalid root view controller")}channel = FlutterMethodChannel(name: "flutter_ios_pip_demo", binaryMessenger: controller.binaryMessenger)channel?.setMethodCallHandler({ [weak self] call, result inguard let self = self else { return }switch (call.method) {case "enablePip":if let arg = call.arguments as? [String: Any] {let marginTop = arg["marginTop"] as? CGFloat ?? 0let pkLeft = arg["pkLeft"] as? String ?? ""let pkRight = arg["pkRight"] as? String ?? ""pipListener.enablePip(mainView: vc.view, mt: mt, pkLeft: pkLeft, pkRight: pkRight)}result(nil)breakcase "disablePip":pipListener.disablePip()result(nil)breakdefault:break}})
3. ピクチャーインピクチャーを処理するクラスを定義します。
ピクチャーインピクチャーを有効化する際、対応する配信者のストリームをカスタムレンダリングに変更し、レンダリング後の画面をルートビューに挿入して表示します。
import UIKitimport AVKitimport TXLiteAVSDK_Professionalclass PipRender: NSObject {// その他の変数はiOSネイティブ端末でシステムAPIを呼び出して実現する部分をご参照くださいvar mainView: UIView?var mt: CGFloat?// trtcCloudはシングルトンインスタンスであるため、コード内でこのように取得できますlet trtcCloud = TRTCCloud.sharedInstance()func disablePip() {pipDisplayLayer?.removeFromSuperlayer()pipController?.stopPictureInPicture()}func enablePip(mainView: UIView, mt: CGFloat, pkLeft: String, pkRight: String) {self.mainView = mainViewself.mt = mttrtcCloud.addDelegate(self)enableBGDecode()setupAudioSession()setupPipController()pipController?.startPictureInPicture()if pkLeft.count > 0 {trtcCloud.startRemoteView(pkLeft, streamType: .big, view: nil)trtcCloud.setRemoteVideoRenderDelegate(pkLeft, delegate: self, pixelFormat: ._NV12, bufferType: .pixelBuffer);}if pkRight.count > 0 {trtcCloud.startRemoteView(pkRight, streamType: .big, view: nil)trtcCloud.setRemoteVideoRenderDelegate(pkRight, delegate: self, pixelFormat: ._NV12, bufferType: .pixelBuffer);}}// このメソッドは、業務ニーズに応じてピクチャーインピクチャーの表示位置を調整し、Flutter側の表示位置と一致させる必要がありますfunc setupPipController() {let screenWidth = UIScreen.main.bounds.widthlet videoHeight = screenWidth / 2 / 9 * 16pipDisplayLayer = AVSampleBufferDisplayLayer()// ここでは実際のニーズに応じて、ピクチャーインピクチャーの表示位置を調整しますlet tsa = self.mainView?.safeAreaInsets.top ??let vmt = tsa + (self.mt ?? 0)pipDisplayLayer.frame = CGRect(x: 0, y: vmt, width: screenWidth, height: videoHeight) // Adjust size as neededpipDisplayLayer.videoGravity = .resizeAspectpipDisplayLayer.isOpaque = truepipDisplayLayer.backgroundColor = CGColor(red: 0, green: 0, blue: 0, alpha: 1)// ここではenablePipで渡されたmainViewを使用してピクチャーインピクチャーの画面を追加しますmainView?.layer.addSublayer(pipDisplayLayer)if AVPictureInPictureController.isPictureInPictureSupported() {let contentSource = AVPictureInPictureController.ContentSource(sampleBufferDisplayLayer: pipDisplayLayer,playbackDelegate: self)pipController = AVPictureInPictureController(contentSource: contentSource)pipController?.delegate = selfpipController?.canStartPictureInPictureAutomaticallyFromInline = true} else {print("+> PiP not supported")}}// その他のメソッドは、iOSネイティブ端末でシステムAPIを呼び出して実現する部分と一致します}
4. Flutter側はピクチャーインピクチャーを停止する際に対応する配信者のストリームを再取得し、Flutter側のレンダリングを復元する必要があります。
// ビジネス上でピクチャーインピクチャーを停止するトリガーが発生した場合trtcCloud.startRemoteView(pkLeftUserId, TRTCCloudDef.TRTC_VIDEO_STREAM_TYPE_BIG, pkLeftId);trtcCloud.startRemoteView(pkRightUserId, TRTCCloudDef.TRTC_VIDEO_STREAM_TYPE_BIG, pkRightId);await channel.invokeMethod('disablePip');
5. Flutter側は現在のページを破棄する際にピクチャーインピクチャーを停止する必要があります。
ピクチャーインピクチャーを開始すると、実際にはiOSシステムAPIを呼び出して新しいビューを再描画し、Flutterのビューの上に重ねるため、現在のページを破棄する際にはピクチャーインピクチャーを停止し、対応するビューをルートビューから削除する必要があります。
@overridedispose() {channel.invokeMethod('disablePip');super.dispose();}
AndroidでFlutterを通じてピクチャーインピクチャーを実現
Flutterでピクチャーインピクチャーを実現する場合も、AndroidのピクチャーインピクチャーAPIを呼び出す必要があります。ピクチャーインピクチャーを開始すると、Flutter UIは既存のWidgetレイアウトルールに従って表示され、業務ルールに基づいてピクチャーインピクチャー開始後に一部のWidgetを非表示にし、ビデオWidgetの幅と高さを適切に設定することができます。
プラットフォームチャネルを使用してAndroidのコードを呼び出し、チャネルはクライアント(Flutter)と配信者(Android)に分かれており、以下にピクチャーインピクチャーの具体的な実現方法を示します。
1. Flutterクライアントのコード:チャネル名「samples.flutter.dev」を使用してチャネルメソッド「pictureInPicture」を呼び出します。このメソッドの具体的な実現はAndroid配信者側にあります。
MethodChannel _channel = MethodChannel('samples.flutter.dev');final int? result = await _channel.invokeMethod('pictureInPicture');
2. Android配信者側のコード。
2.1 FlutterActivityを継承したActivityで実現します:
private void startPictureInPicture() {if (Build.VERSION.SDK_INT >= Build.VERSION_CODES.O) {PictureInPictureParams.Builder pictureInPictureBuilder = new PictureInPictureParams.Builder();//具体的な業務ニーズに応じて、指定されたピクチャーインピクチャーのサイズを設定しますRational aspectRatio = new Rational(100, 100);pictureInPictureBuilder.setAspectRatio(aspectRatio);//ピクチャーインピクチャーを開始しますenterPictureInPictureMode(pictureInPictureBuilder.build());} else {Toast.makeText(this, R.string.picture_in_picture_not_supported, Toast.LENGTH_SHORT).show();}}@Overridepublic void configureFlutterEngine(@NonNull FlutterEngine flutterEngine) {super.configureFlutterEngine(flutterEngine);MethodChannel channel = new MethodChannel(flutterEngine.getDartExecutor().getBinaryMessenger(), "samples.flutter.dev");channel.setMethodCallHandler((call, result) -> {if (call.method.equals("pictureInPicture")) {startPictureInPicture();} else {result.notImplemented();}});}
2.2 AndroidManifest.xmlでactivityにピクチャーインピクチャーのパラメータ
android:supportsPictureInPicture="true"を設定します。以下の通り:<activityandroid:name="example.android.app.src.main.java.com.tencent.live.example.MainActivity"android:supportsPictureInPicture="true"android:configChanges="orientation|keyboardHidden|keyboard|screenSize|smallestScreenSize|locale|layoutDirection|fontScale|screenLayout|density|uiMode">...</activity>
ピクチャーインピクチャーで2つのビデオ画面(例:配信者同士のPK)を表示したい場合は、レイアウトルールとサイズを適切に設定することで実現できます。
フィードバック