TUIKit is a UI component library built on the Chat SDK. It enables rapid implementation of chat, conversation, search, relationship chain, and group features through UI components. This document describes how to quickly integrate TUIKit and implement core features.
Integrate TUIKit
TUIKit adopts a data-driven, responsive architecture with the native iOS UIKit system (non-declarative UI) and is integrated as open source code. It provides complete UI capabilities including conversation list, chat, contacts, search, and group management.
Prerequisites
Xcode: 16.0 or later (Xcode 16.x recommended).
iOS: A physical device running iOS 14.0 or later (simulators are not supported currently).
CocoaPods: 1.12.0 or later (1.16.x recommended). If it is not installed, see CocoaPods Getting Started to install it.
A valid Tencent Cloud account and Chat application. See Activate the Service to obtain the following information from the Console:
SDKAppID: The ID of the Chat application obtained from the Console. It is the unique identifier of the application.
Copy the chat and call folders from the repository root to your project root directory. The directory structure after copying is as follows:
YourApplication/
├── source/ # Your project code
├── call/ # Audio/video call component
│ └── TUICallKit_Swift.podspec
│ └── TUICallKit_Swift/
├── chat/ # Chat source code
│ ├── demo/ # Demo project
│ └── uikit/ # Chat UIKit component library
├── Podfile # Dependency configuration file
├── YourApplication.xcworkspace # Your project file
Description:
TUIKit_iOS is an open-source repository containing multiple products. The Chat UI source code is located in the chat/ directory (chat/uikit is the UIKit component library, and chat/demo is the demo project), and its dependent audio/video call component call/TUICallKit_Swift is located in the repository root. Module directories can be placed anywhere in your project; just set the correct relative paths in the Podfile.
Integrate Components
1. Add the corresponding modules to your Podfile (adjust the relative paths based on where you actually place the source code):
# Replace your_project_name with your actual project name
target 'your_project_name'do
# Add the following two dependencies: TUIChatKit and TUICallKit_Swift
# Note the relative paths
pod 'TUIChatKit', :path =>'chat/uikit/TUIChatKit.podspec'
pod 'TUICallKit_Swift', :path =>'call/TUICallKit_Swift.podspec'
end
2. After modifying the Podfile, run the following command to install the TUIKit components.
pod install
# If you cannot install the latest version of TUIKit, run the following commands to update your local CocoaPods repository list.
# pod repo update
# pod update
Implementation Steps
After completing the integration above, follow these steps to quickly build core UIs such as the conversation list, chat, and contacts with only a few lines of code.
You must log in before using component features. Call the login API of LoginStore and pass in the sdkAppID, userID, and userSig obtained above for login authentication:
importAtomicXCore
importTUIChatKit
importUIKit
let yourSdkAppID:Int32=10_000_000_00// Replace with your actual sdkAppID
let testUserID ="testUserID"// Your test userID
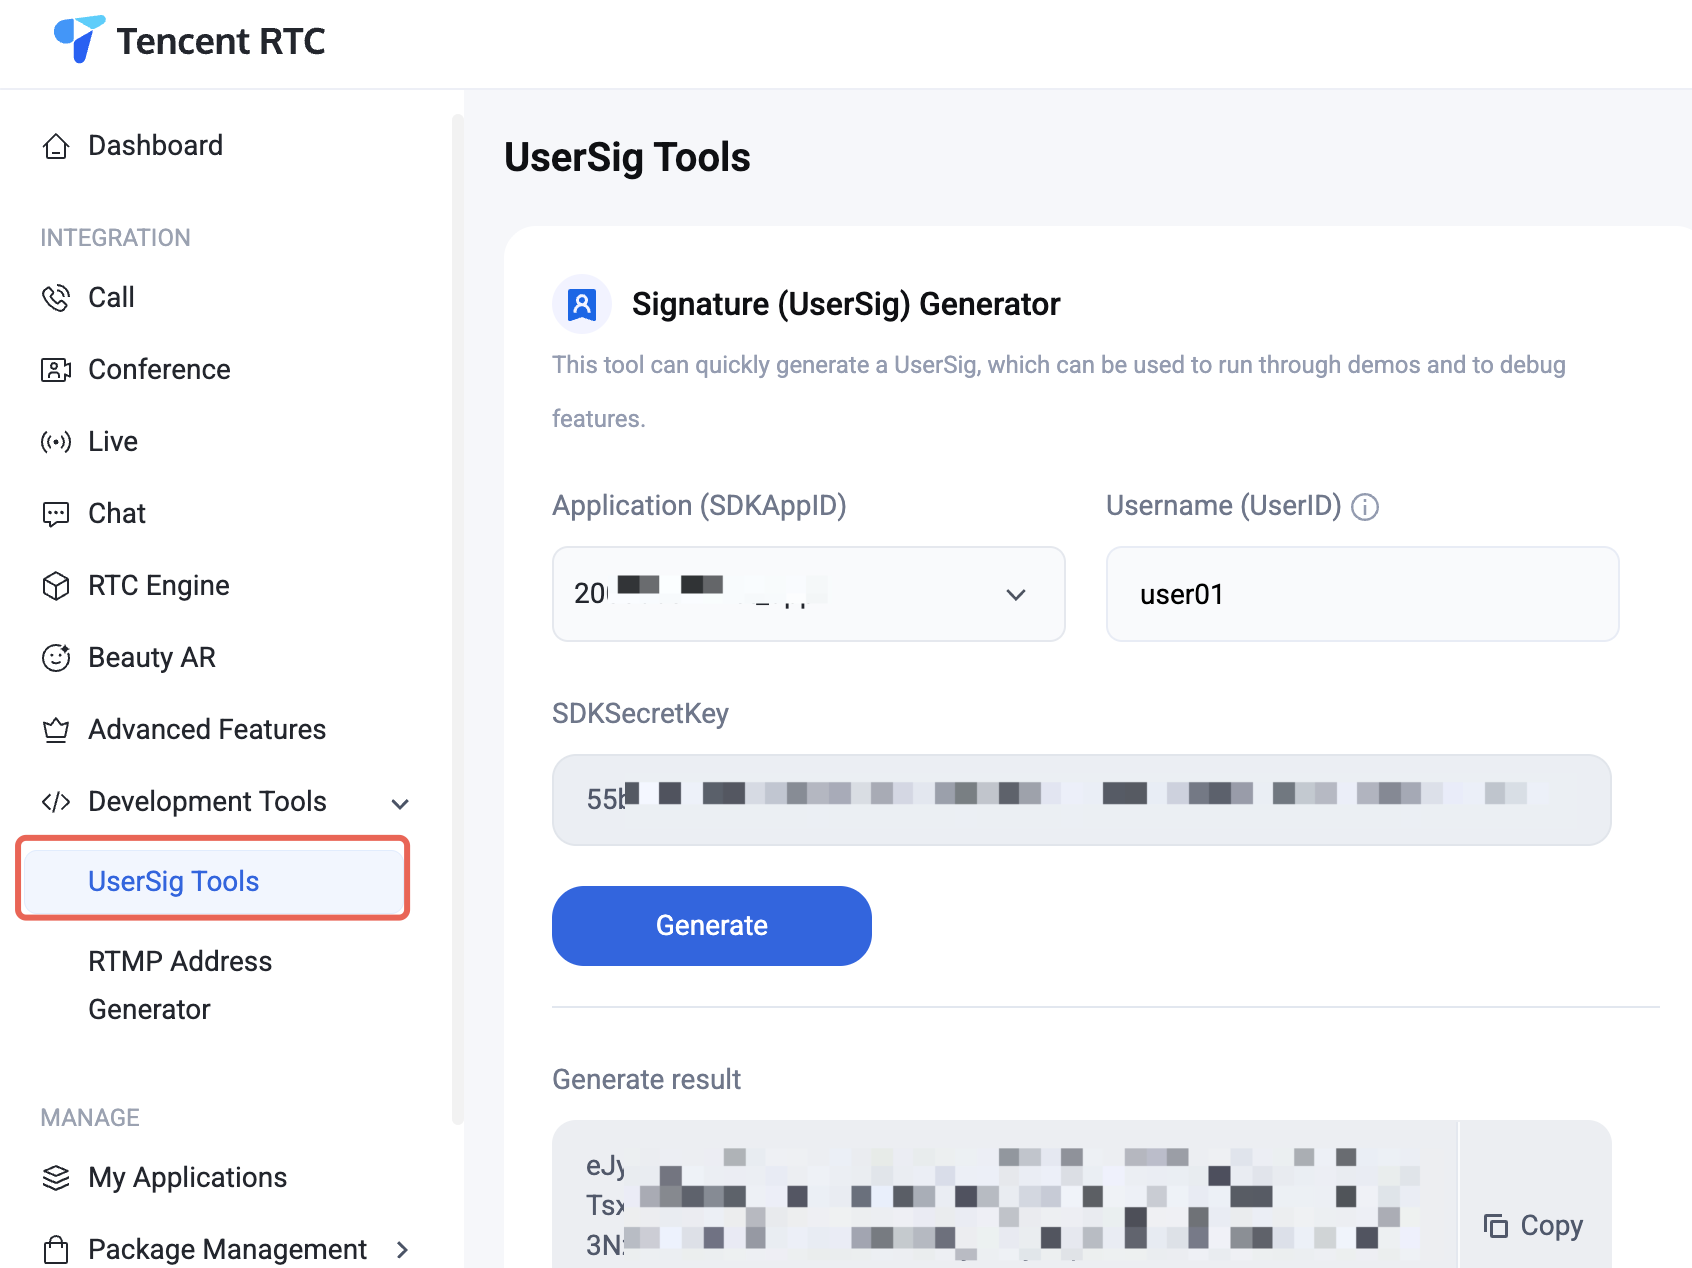
let userSig ="xxxxxxx"// The userSig for your test userID (obtained from the Console; see the screenshot above)
LoginStore.shared.login(sdkAppID: yourSdkAppID, userID: testUserID, userSig: userSig){[weakself] result in
DispatchQueue.main.async{
switch result {
case.success:
// After login succeeds, show the conversation list
In a production environment, we recommend generating UserSig on your server. When needed, your app should request a dynamic UserSig from your business server for authentication. For details, see Generating UserSig on the Server.
Step 3. Build the Conversation List UI
After login succeeds (Step 2), you can show the conversation list. Simply create a ConversationsPage object and push it to the navigation controller:
importAtomicXCore
importTUIChatKit
importUIKit
funcshowConversationList(){
let conversationsPage =ConversationsPage(onConversationClick:{[weakself] info in
// After tapping a conversation in the list, navigate to the corresponding chat page
ConversationsPage automatically loads recent conversations from the local database. When the user taps a conversation, ConversationsPage passes the selected conversation's information to the upper layer through the onConversationClick callback, where you can create and navigate to the chat page (see Step 4).
Step 4. Build the Chat UI
The chat page is hosted by ChatPage, which displays and sends or receives messages. When constructing a ChatPage, you must pass in a ConversationInfo to specify the conversation to enter. conversationID and type are required key fields, and title is used for the initial display of the chat page navigation bar title.
importAtomicXCore
importTUIChatKit
importUIKit
// One-to-one chat
let userID ="test_user"
var conversation =ConversationInfo(conversationID:ChatUtil.getC2CConversationID(userID))
conversation.type =.c2c
conversation.title ="Chat with \\(userID)"
showChat(conversation)
// Group chat
let groupID ="@TGS#xxxxxx"
var groupConversation =ConversationInfo(conversationID:ChatUtil.getGroupConversationID(groupID))
groupConversation.type =.group
groupConversation.title ="Test Group"
showChat(groupConversation)
funcshowChat(_ info:ConversationInfo){
let chatPage =ChatPage(conversation: info, onBack:{[weakself]in
Using features such as photo album, video recording, and video calls in the chat UI requires declaring the corresponding permissions. Declare the following permissions in your app's Info.plist:
<key>NSCameraUsageDescription</key>
<string>Camera access isrequired to send photos or videos</string>
<key>NSMicrophoneUsageDescription</key>
<string>Microphone access isrequired to send voice messages</string>
<key>NSPhotoLibraryAddUsageDescription</key>
<string>Photo library access isrequired to save photos or videos</string>
<key>NSPhotoLibraryUsageDescription</key>
<string>Photo library access isrequired to send photos or videos</string>
Step 5. Build the Contacts UI
The contacts page is hosted by ContactsPage, which displays the current user's friend list (grouped by alphabetical index) and a group list entry. The page has its own navigation bar, and the +button in the upper-right corner provides built-in entries for Add Friend and Join Group.
importAtomicXCore
importTUIChatKit
importUIKit
funcshowContacts(){
let contactsPage =ContactsPage(
onContactClick:{[weakself] contact in
// Callback when a contact in the friend list is tapped (ContactInfo); navigate to a one-to-one chat here
userIdList:["John"],// List of callee user IDs. Pass one element for a one-to-one call, or multiple for a group call
mediaType:.video,// Call type: .video for video call, .audio for voice call
params:nil,
completion:nil
)
}
After the call is initiated, TUICallKit automatically displays the full-screen call UI (including call waiting, connection, and hang-up flows), with no need to implement it yourself.
4. How to remove the audio/video call feature?
ChatPage integrates the audio/video call feature by default. If you don't need it, you can disable the audio/video call switches when creating the chat UI in Step 4, as shown below:
funcshowChat(_ info:ConversationInfo){
// Disable video call and audio call features in the input panel via the input configuration
let inputConfig =ChatMessageInputConfig(isShowVideoCall:false, isShowAudioCall:false)
let chatPage =ChatPage(conversation: info, messageInputConfig: inputConfig, onBack:{[weakself]in
When integrating the IM SDK, you can use the AI assistant through MCP to quickly complete knowledge Q&A, error troubleshooting, and UIKit integration code generation. It supports platforms such as Web, Android, iOS, Flutter, and uni-app, with answers based on official documentation. It is suitable for querying SDK APIs, UI component usage, server APIs, and IM product configurations. Try it now and ask your first question.
FAQs
Audio and Video
TUICallKit conflicts with my integrated audio/video library?
Tencent Cloud audio/video libraries cannot be integrated at the same time; symbol conflicts may occur. Handle them according to the following scenarios:
1. If you use the TXLiteAVSDK_TRTC library, no symbol conflict occurs. You can add the dependency directly to your Podfile:
pod 'TUICallKit_Swift'
2. If you use the TXLiteAVSDK_Professional library, symbol conflicts will occur. Add the following dependency to your Podfile:
pod 'TUICallKit_Swift/Professional'
3. If you use the TXLiteAVSDK_Enterprise library, symbol conflicts will occur. We recommend upgrading to TXLiteAVSDK_Professional and then using TUICallKit_Swift/Professional.
How long is the default timeout for a call invitation?
The default timeout for a call invitation is 30 seconds.
If the invitee goes offline and comes back online within the invitation timeout period, can they receive the invitation immediately?
For a one-to-one call invitation, the invitee can receive the call invitation after going offline and coming back online, and TUIKit automatically brings up the call invitation UI.
For a group call invitation, after the invitee goes offline and comes back online, invitations from the last 30 seconds are automatically pulled, and TUIKit automatically brings up the group call UI.
App Store Submission
Packaging fails when submitting to App Store with the error "Unsupported Architectures"?
The issue is shown below. During packaging, you are prompted that ImSDK_Plus.framework contains the x86_64 simulator version, which is not supported by the App Store. This is because the IMSDK includes the simulator version by default for developer debugging.
Follow these steps to remove the simulator version during packaging:
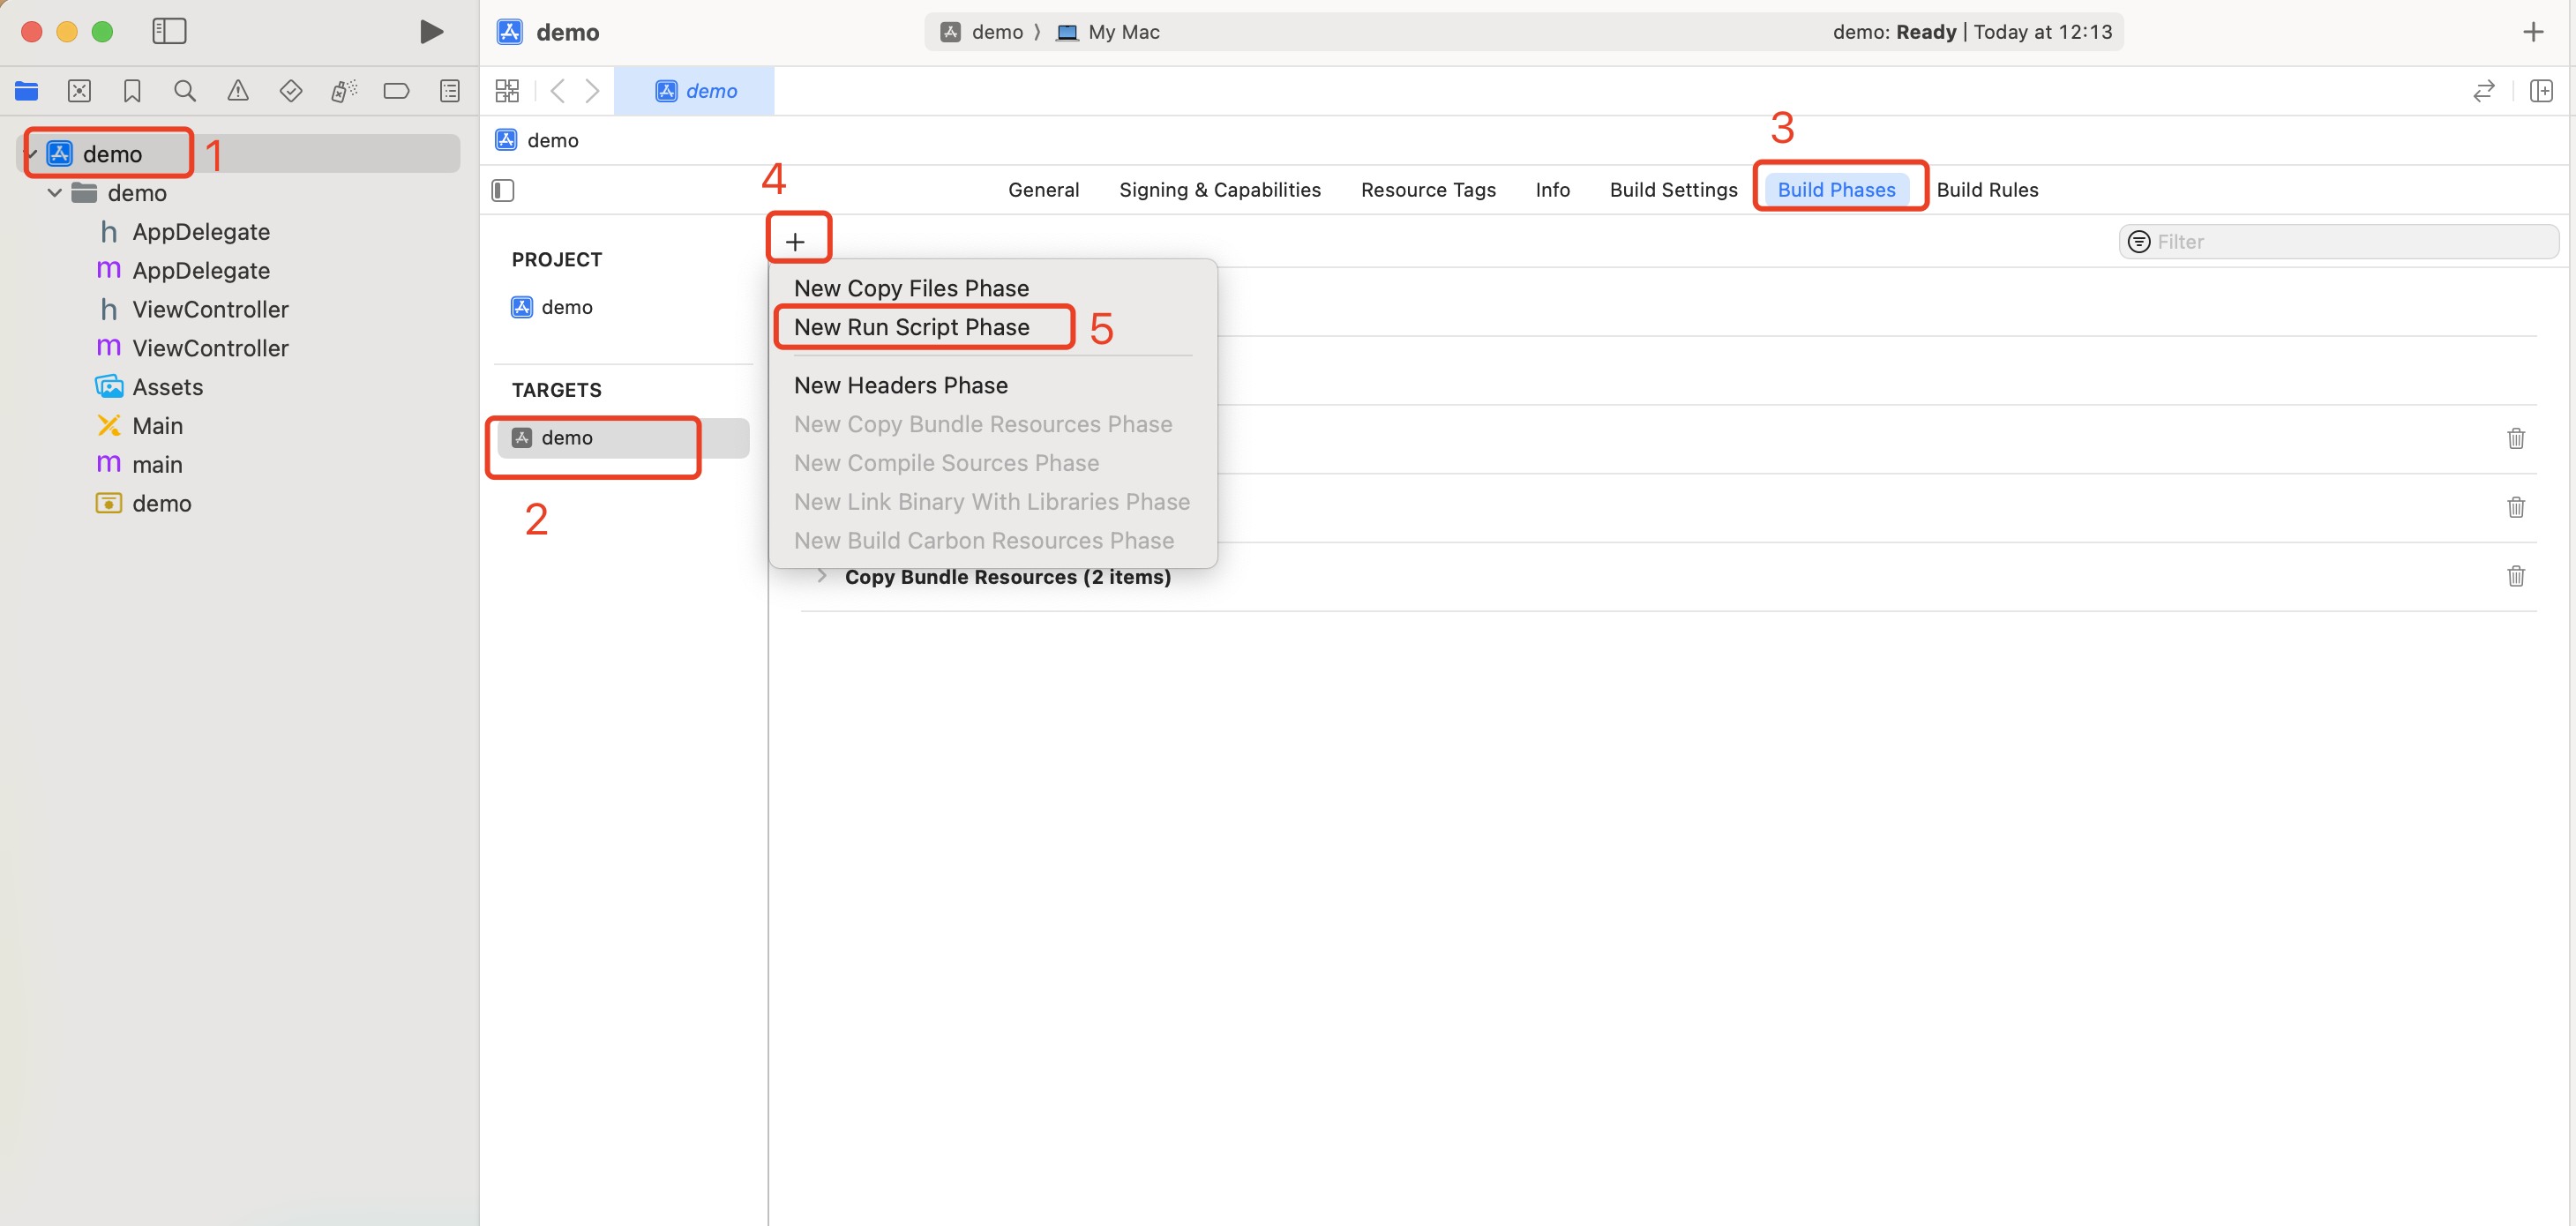
1. Select your project's Target, go to the Build Phases tab, and add a Run Script in the current panel.
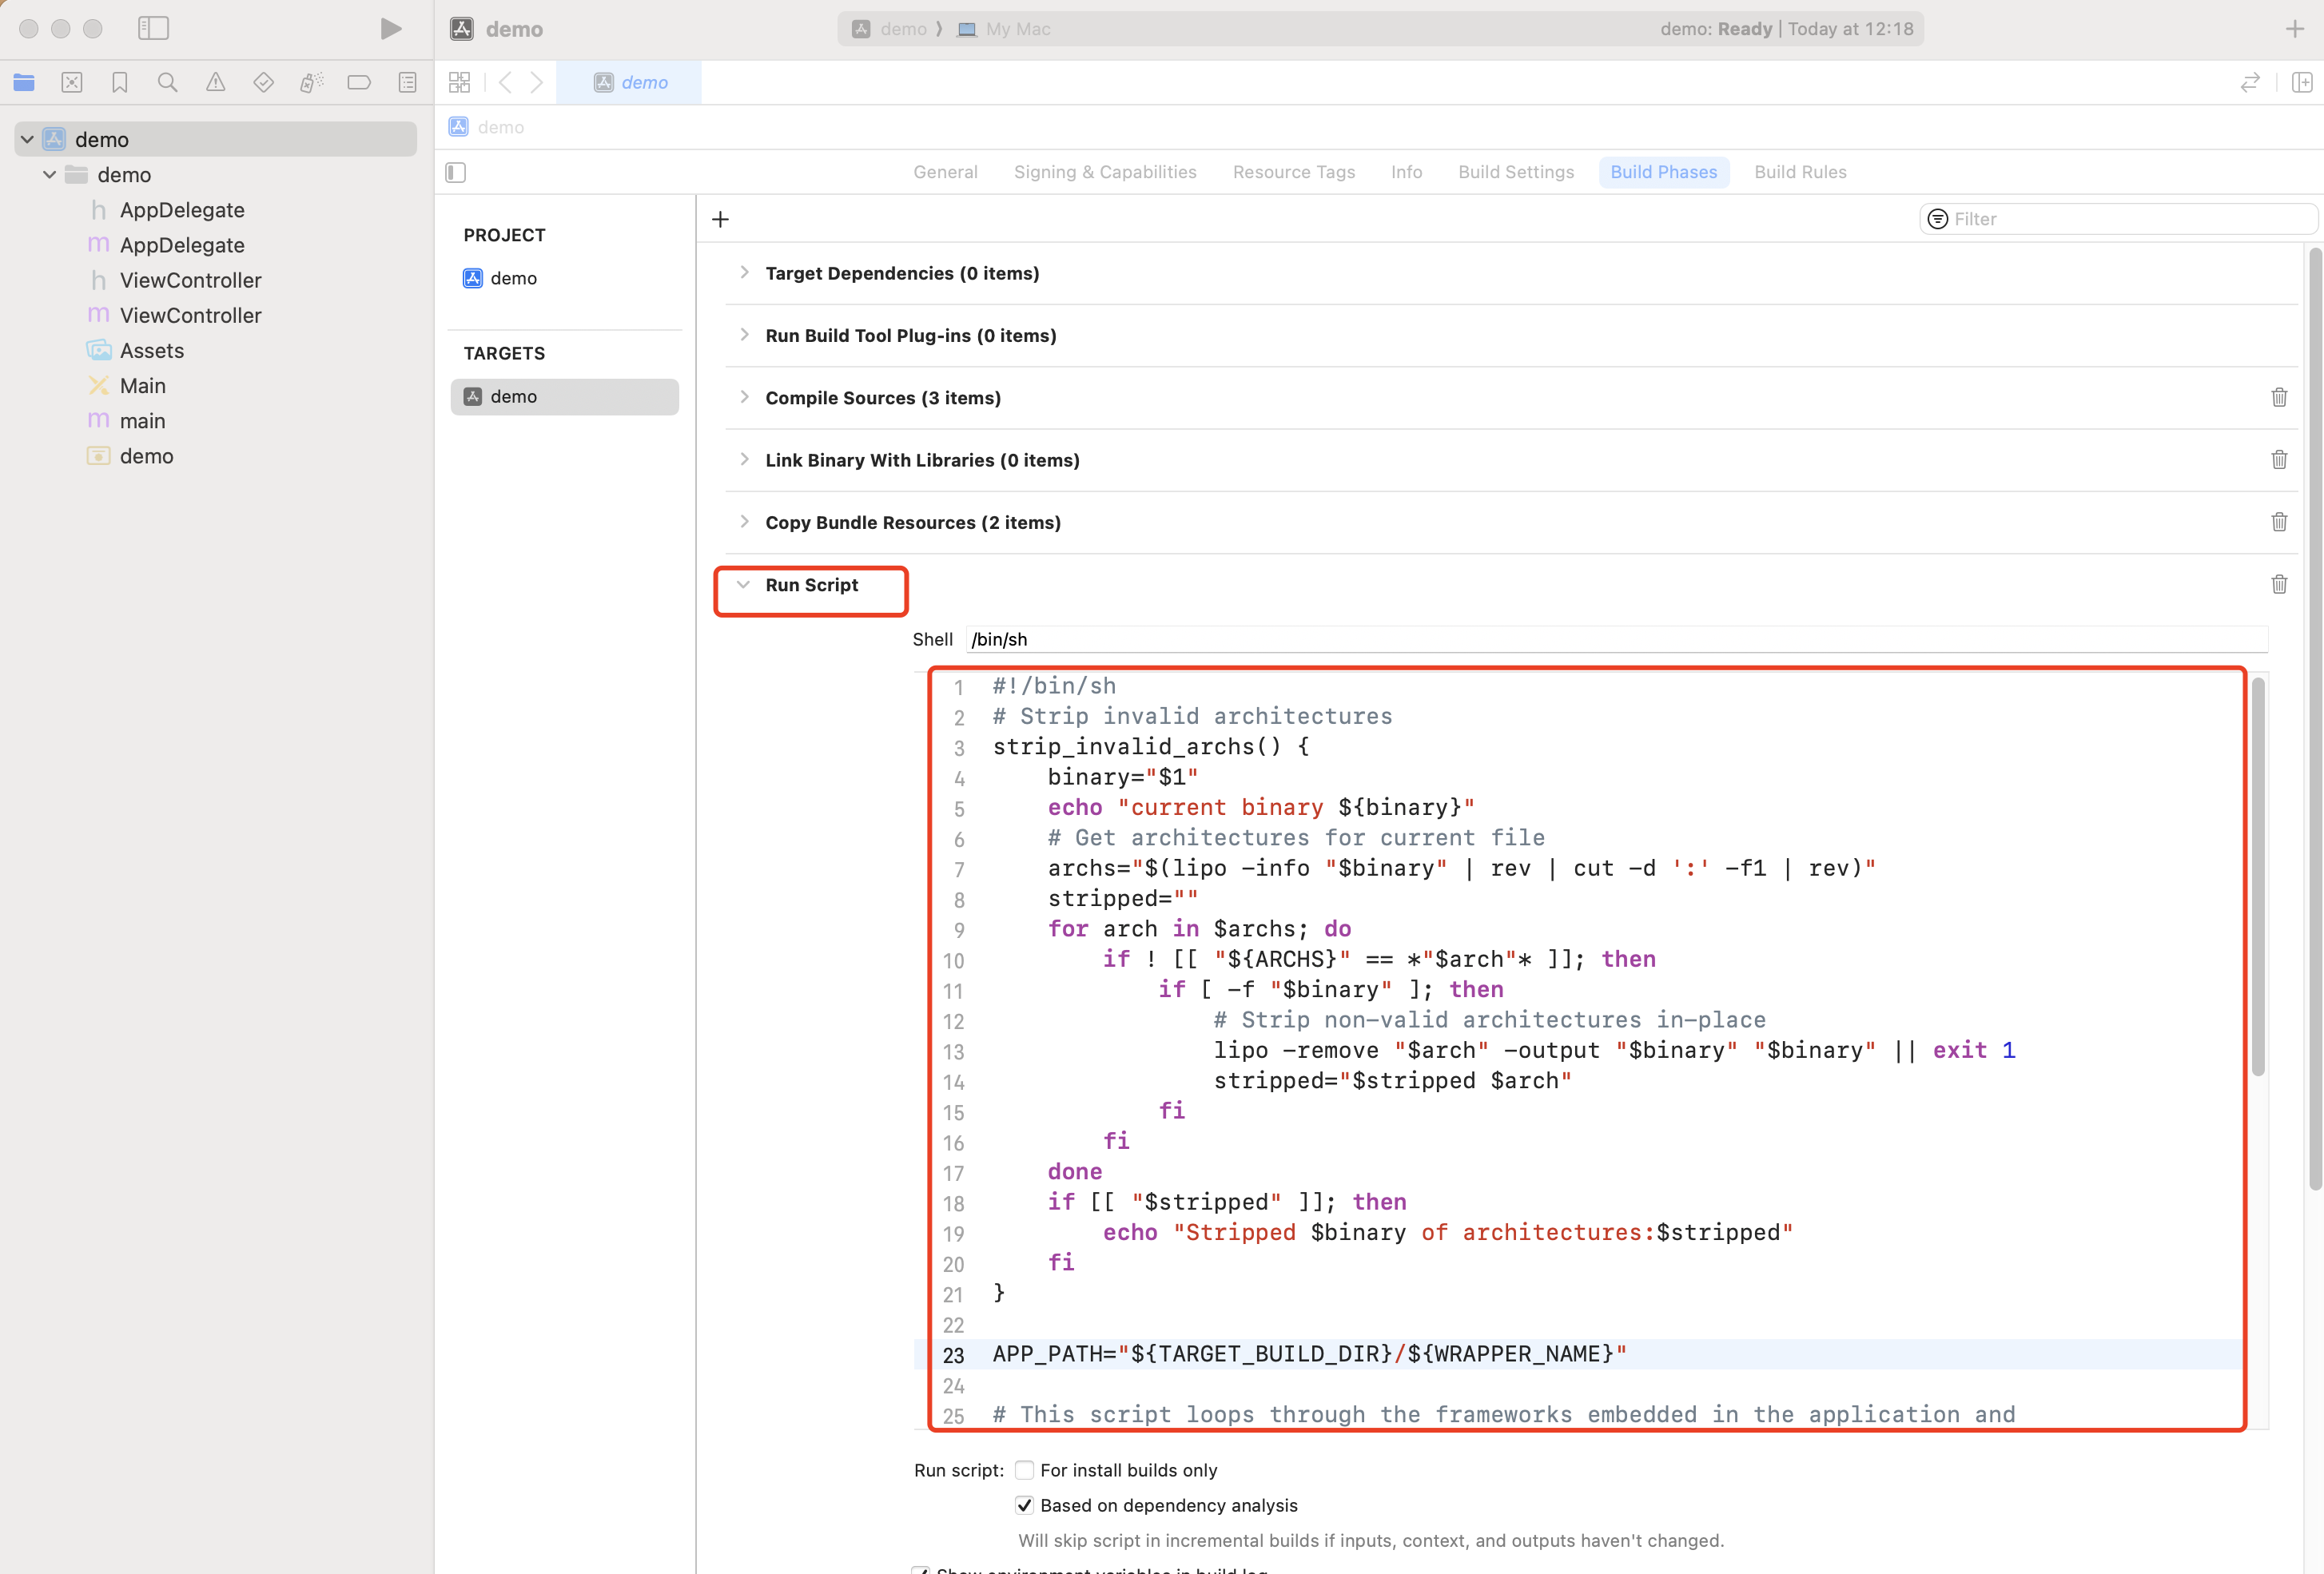
2. Add the following script to the new Run Script:
[Xcodeproj] Unknown object version (60). (RuntimeError)
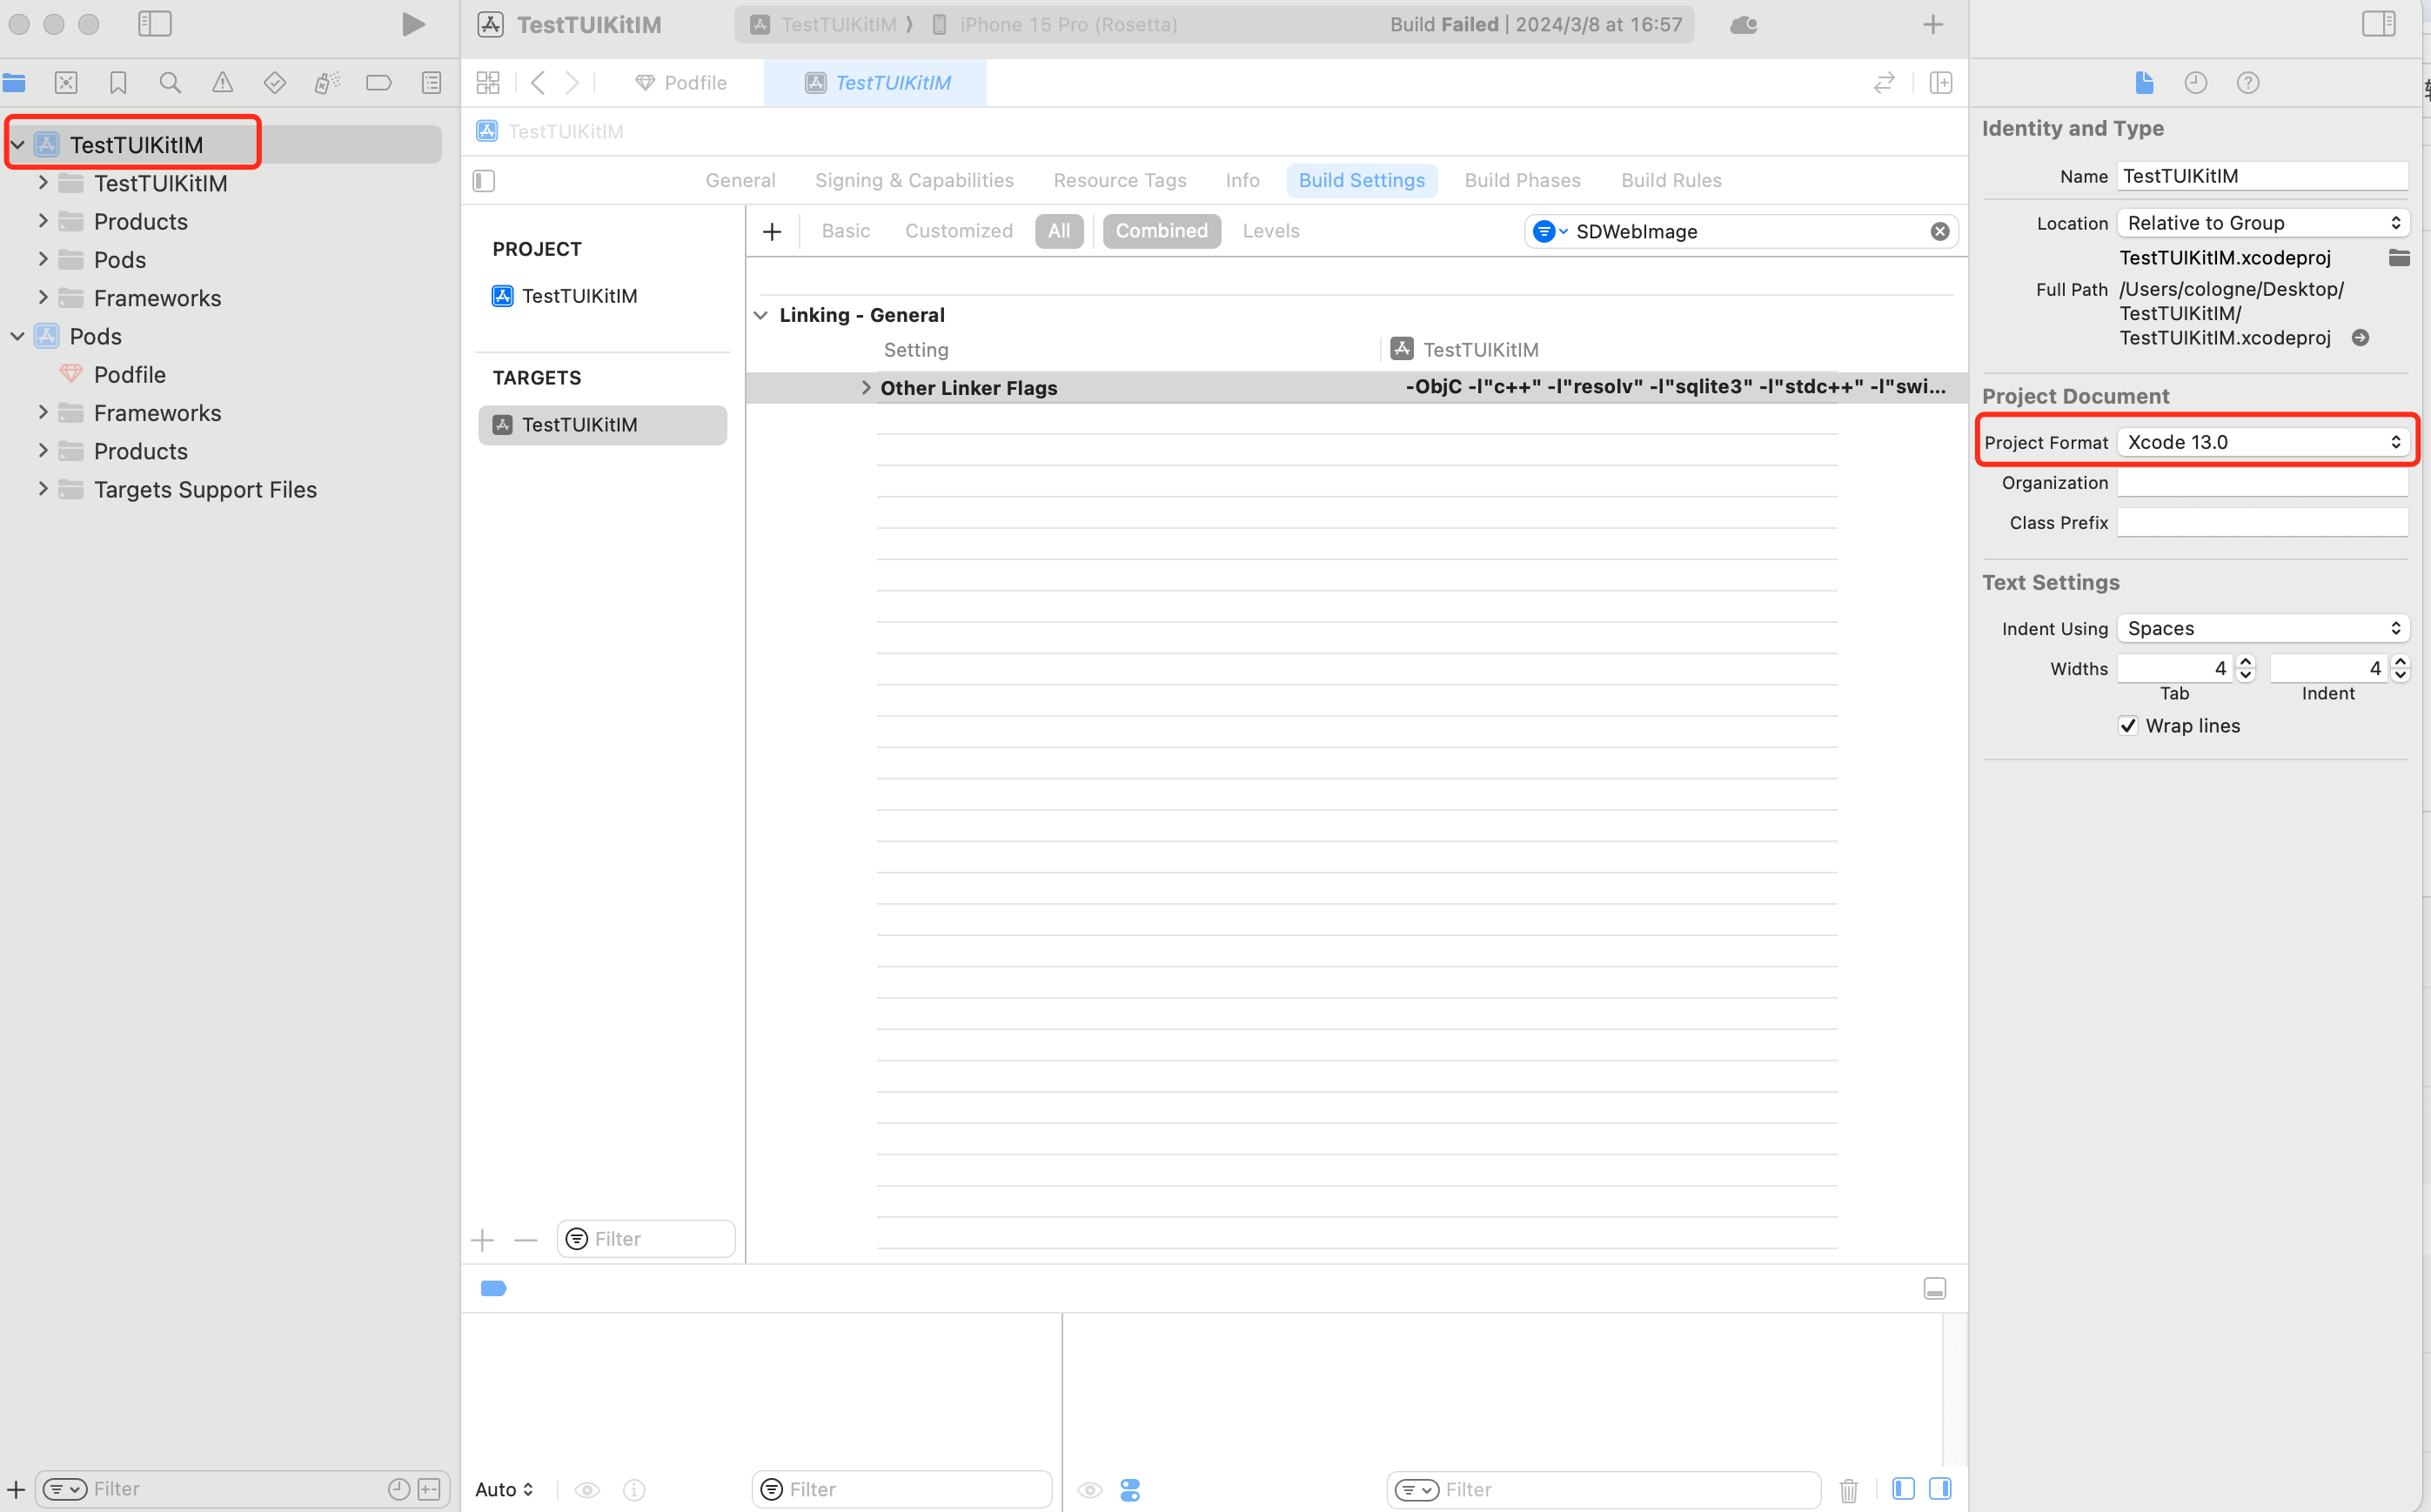
When creating a new project with Xcode 15 and integrating TUIKit, this error may occur after running pod install. It is caused by an outdated version of CocoaPods. There are two solutions:
Solution 1: Change your Xcode project's Project Format version.
Solution 2: Upgrade your local version of CocoaPods. (Upgrade steps not detailed here.)
You can run pod --version in Terminal to check the current Pods version.
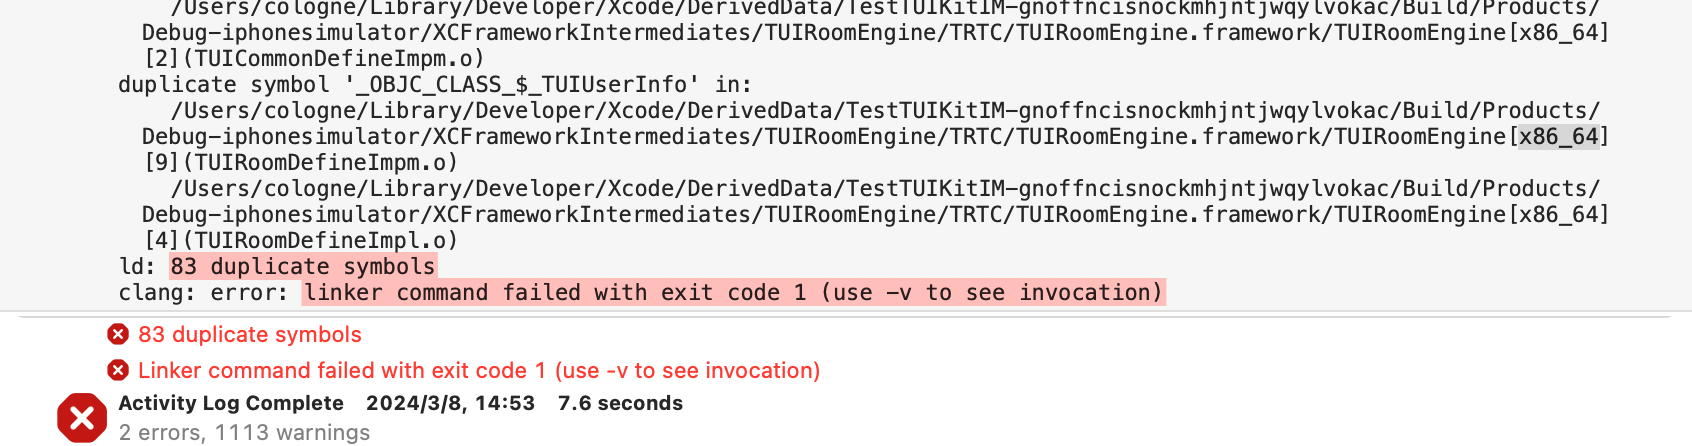
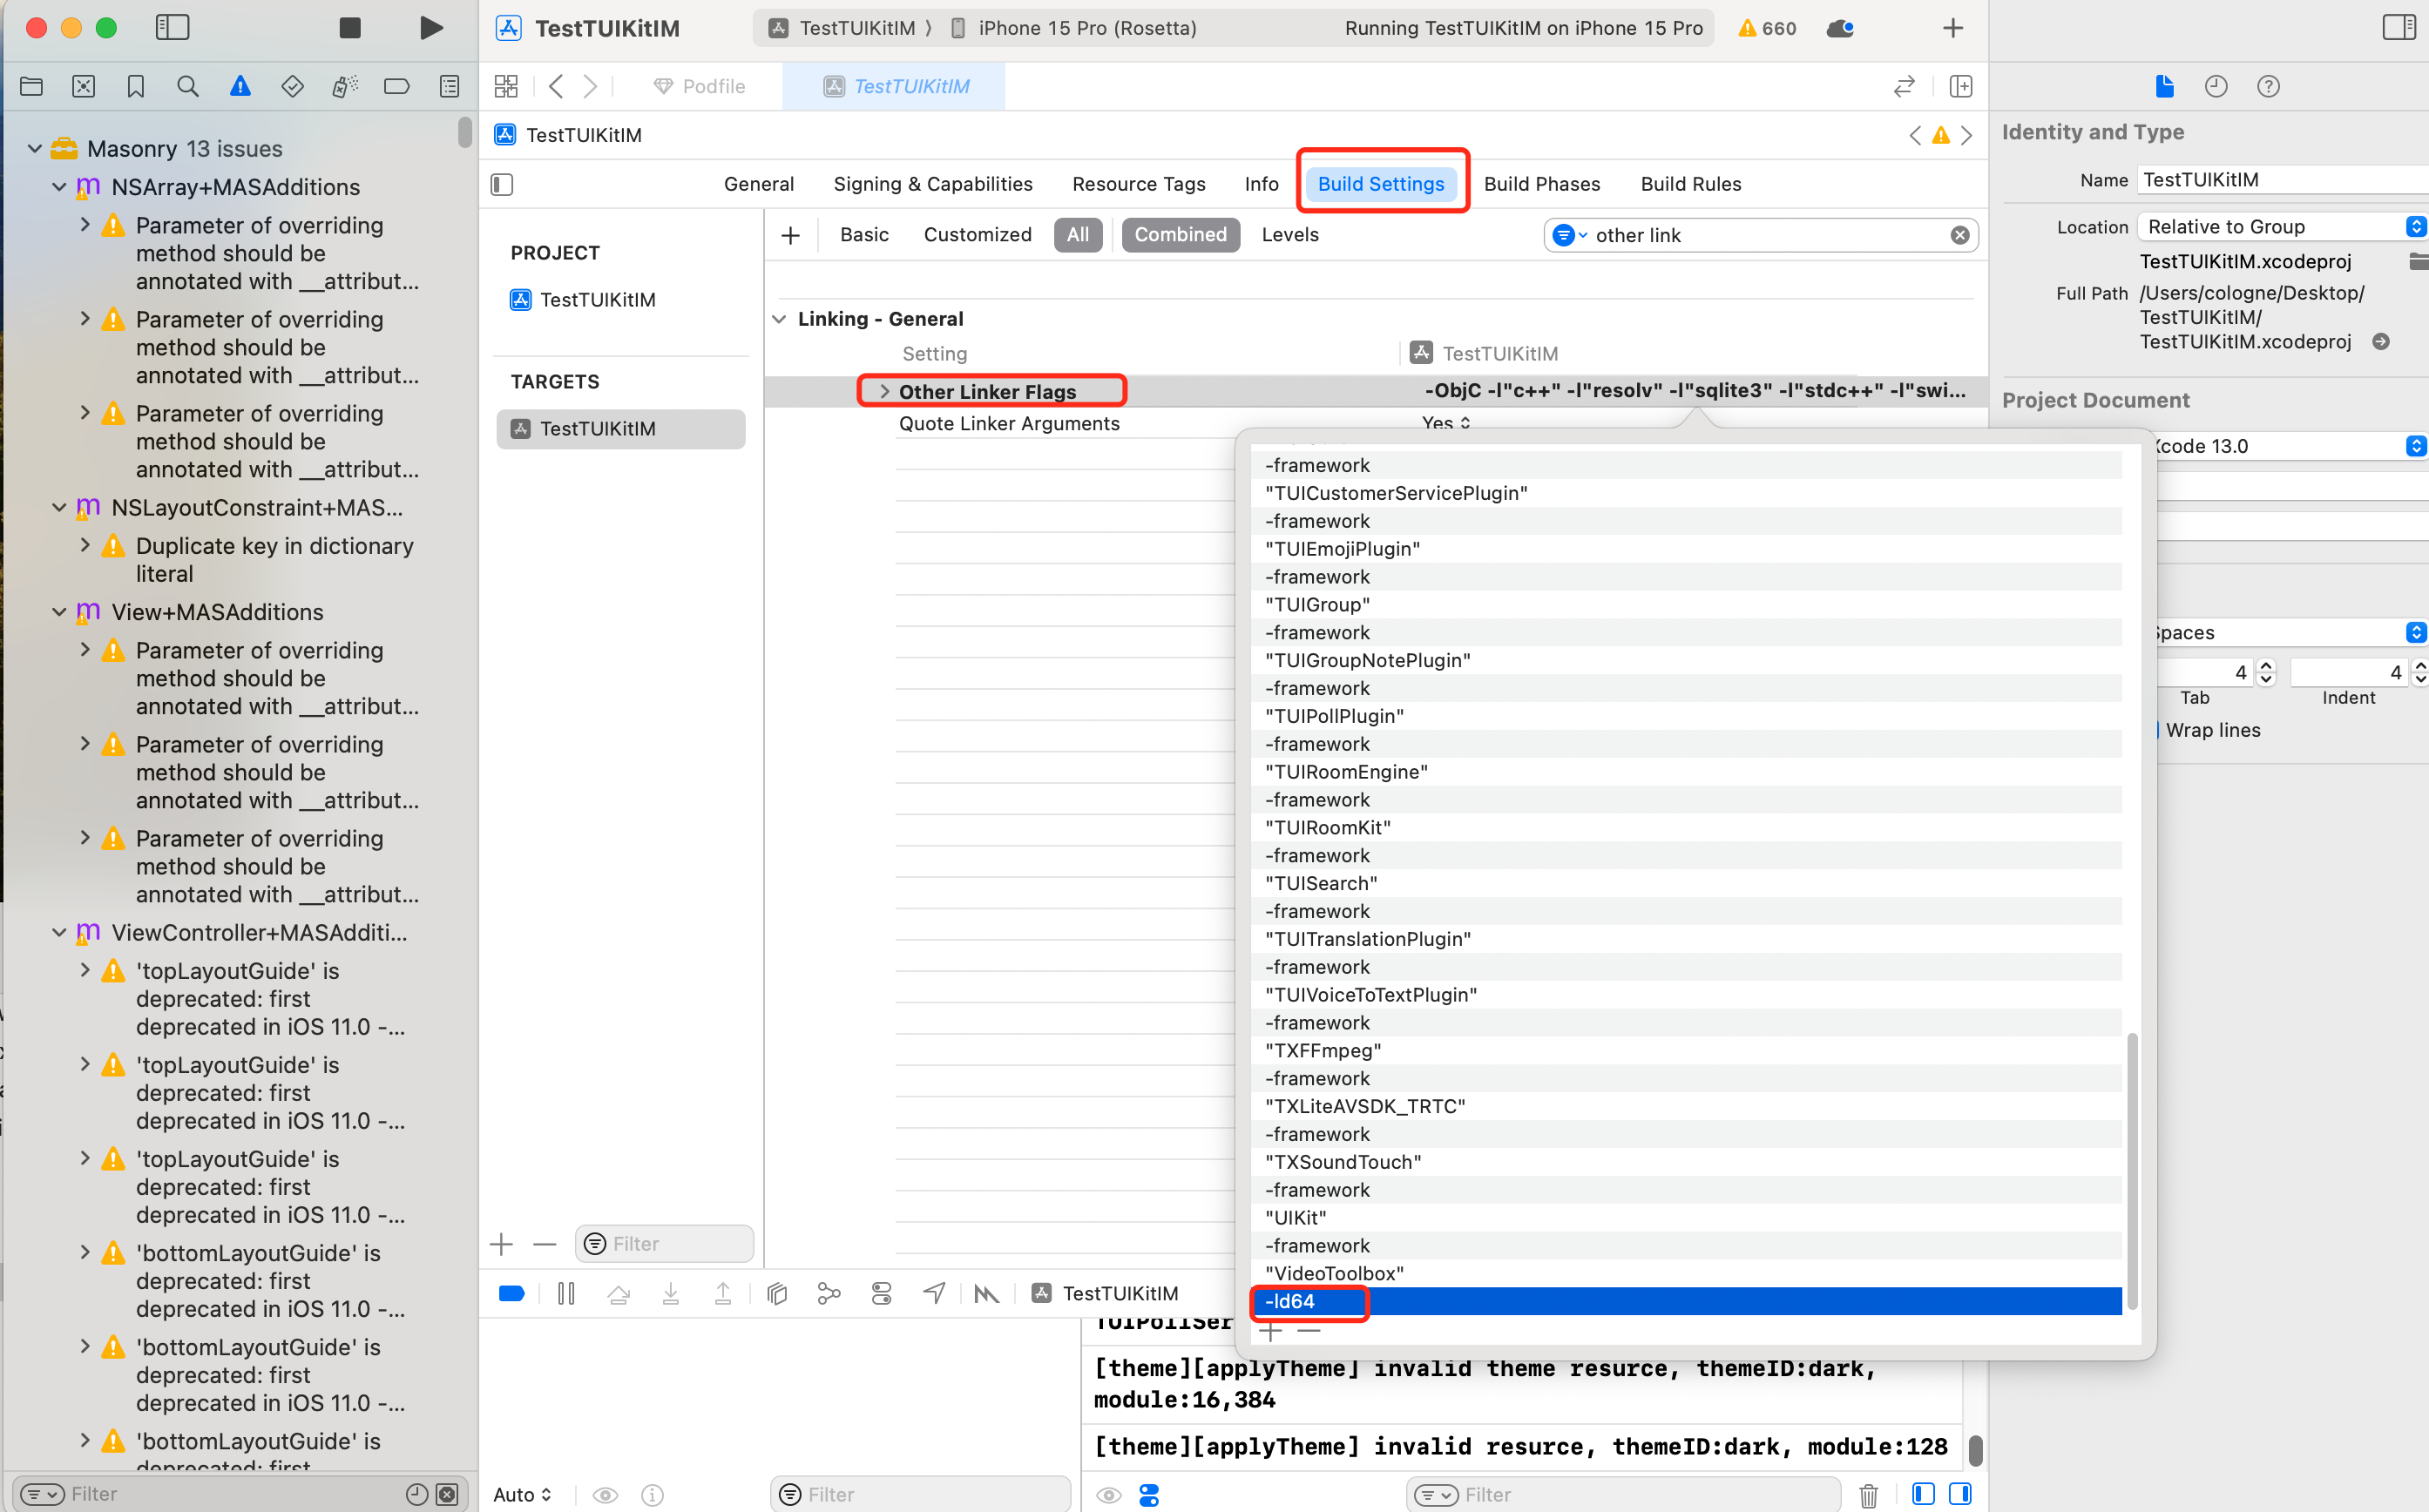
-ld64 linker issue?
Assertion failed: (false && "compact unwind compressed function offset doesn't fit in 24 bits"), function operator(), file Layout.cpp,
Alternatively, when integrating TUIRoom with Xcode 15, you may encounter symbol conflicts in TUIRoomEngine caused by the latest linker. Both issues have the same root cause.
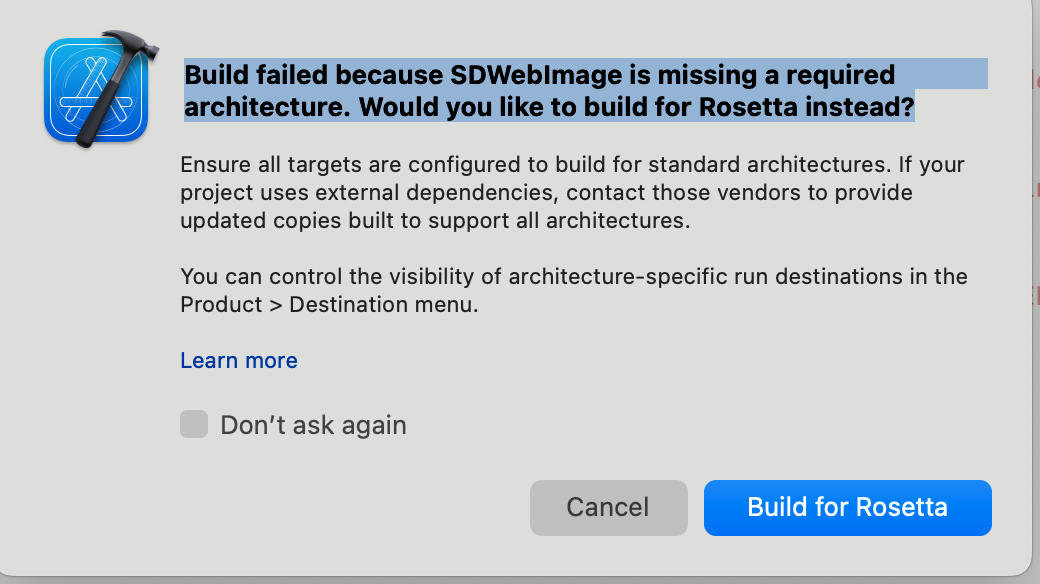
On Apple Silicon chips (M1/M2 series), you may see a popup due to some third-party libraries (such as SDWebImage) not supporting XCFramework. Apple provides a workaround: enable Rosetta on the simulator. The Rosetta option usually appears automatically during compilation.
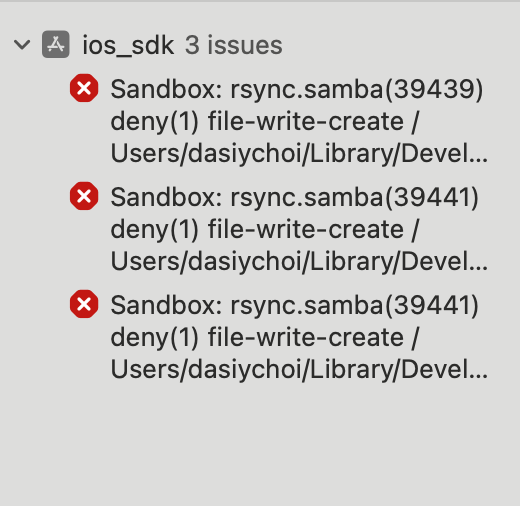
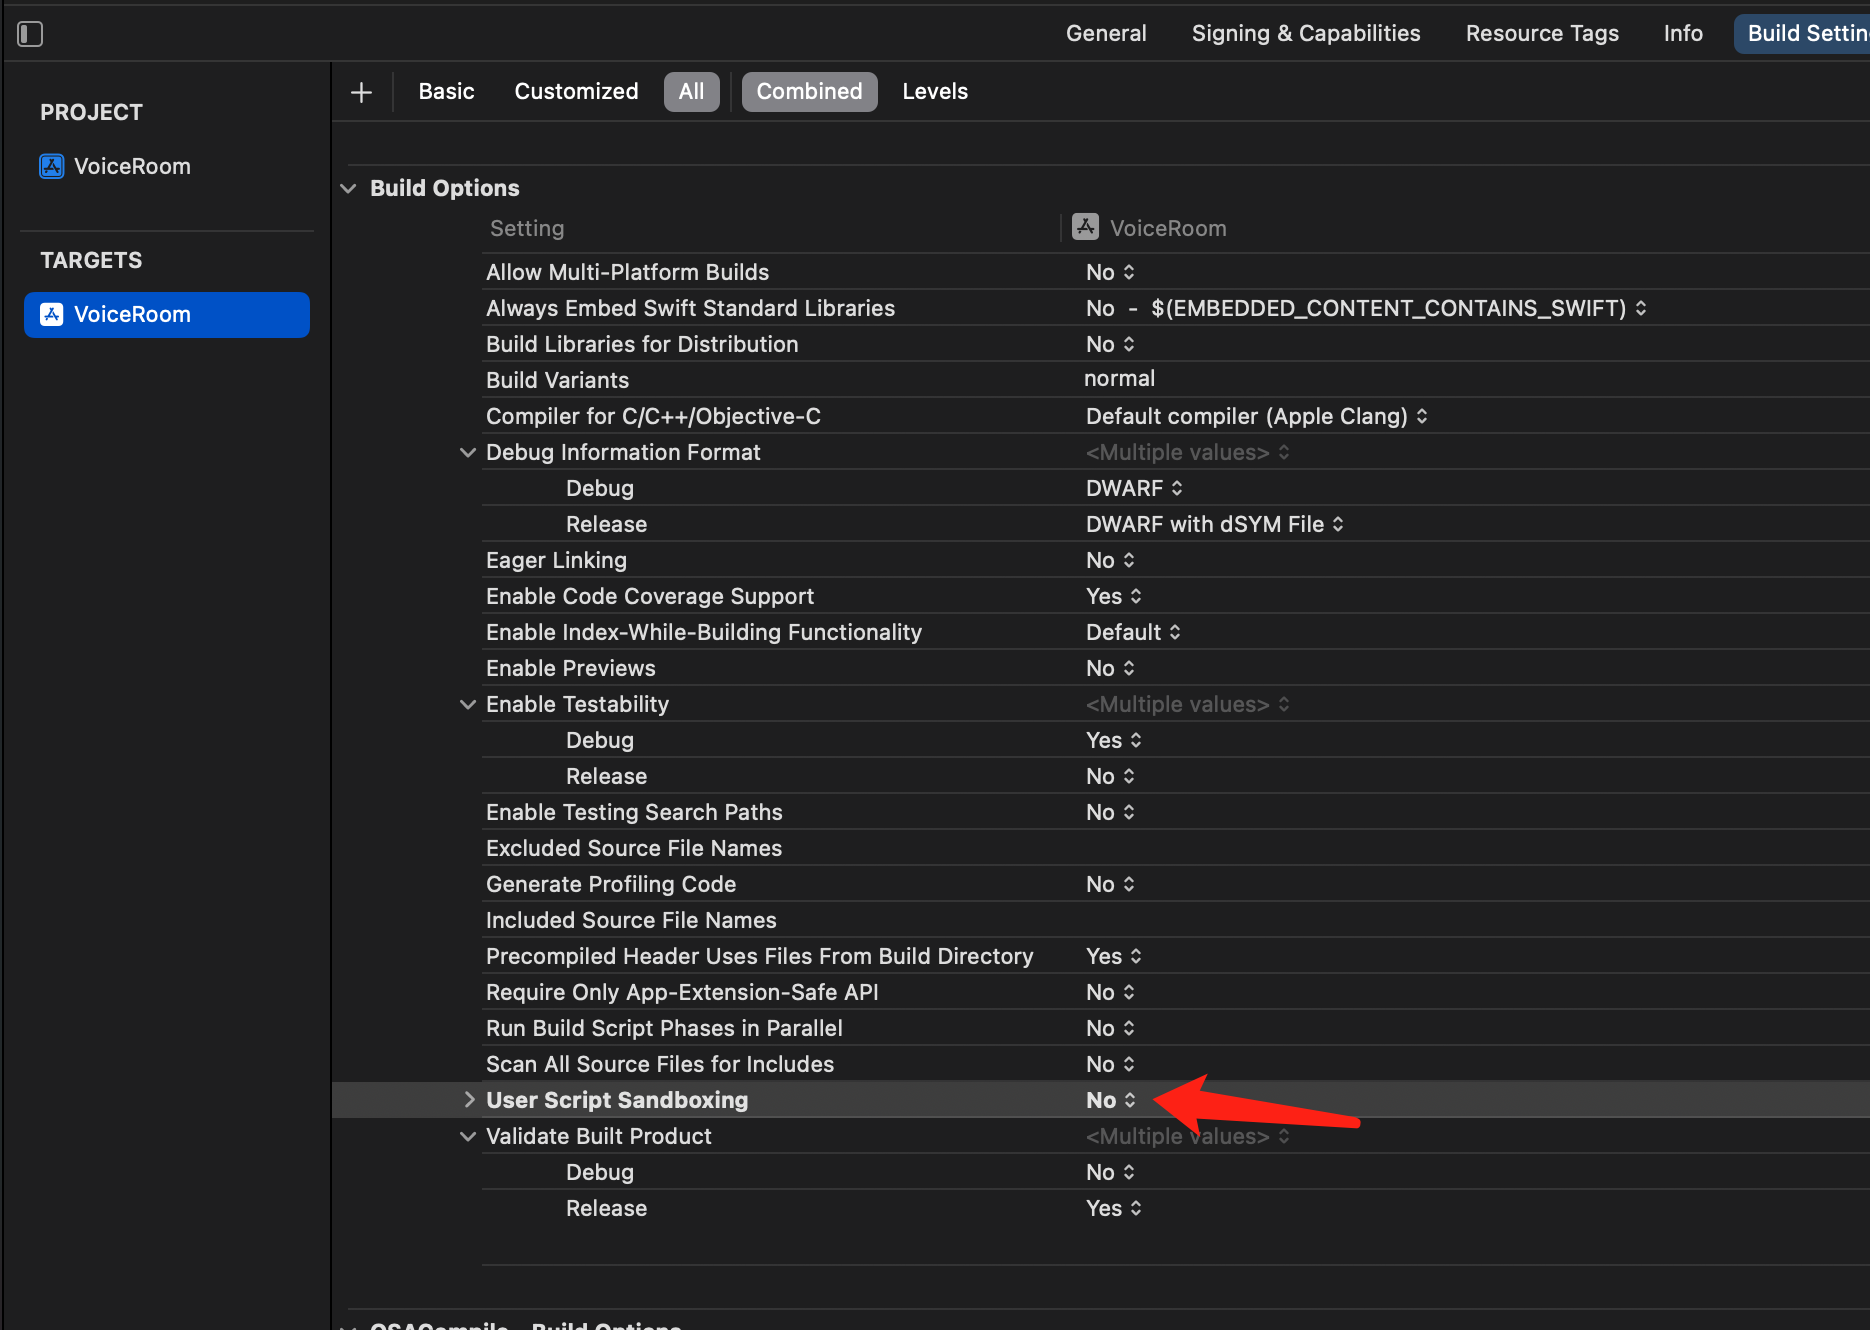
Xcode 15 developer sandbox option issue?
Sandbox: bash(xxx) deny(1) file-write-create
When creating a new project with Xcode 15, this option may cause build and run failures. We recommend disabling this option.
Xcode 16 does not support enabling bitcode for Frameworks?
Solution 1: Upgrade the SDK
If you are using an old SDK version that contains Bitcode (such as TXIMSDK_iOS), we recommend upgrading the SDK to TXIMSDK_Plus_iOS_XCFramework as guided in this document.
Solution 2: Modify the Podfile configuration
Add the following configuration to the end of your Podfile and run pod install again.
If you run pod install and encounter a version mismatch between Podfile.lock and the plugin dependency versions:
Delete the Podfile.lock file, run pod repo update to update the local code repository, and then run pod update.
Others
Using Emoji Packs
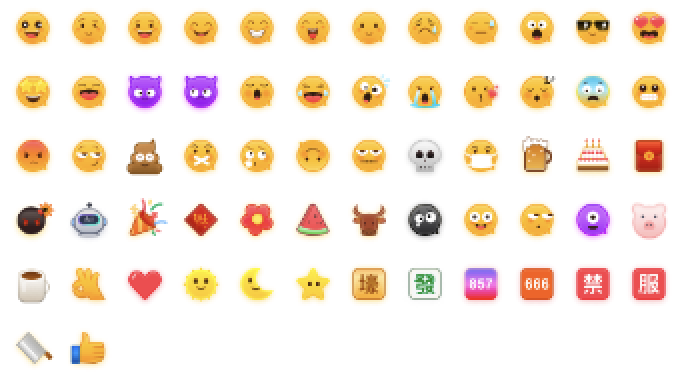
To respect emoji design copyrights, the Chat Demo/TUIKit project does not include large emoji image assets. Before commercial release, replace them with emoji packs designed by you or otherwise licensed to you. The default smiley emoji pack shown below is copyrighted by Tencent Cloud, and you can use it for free by upgrading to Chat Pro Plus or Enterprise Edition.
Contact Us
If you have any questions or suggestions during integration or usage, contact us to submit feedback.