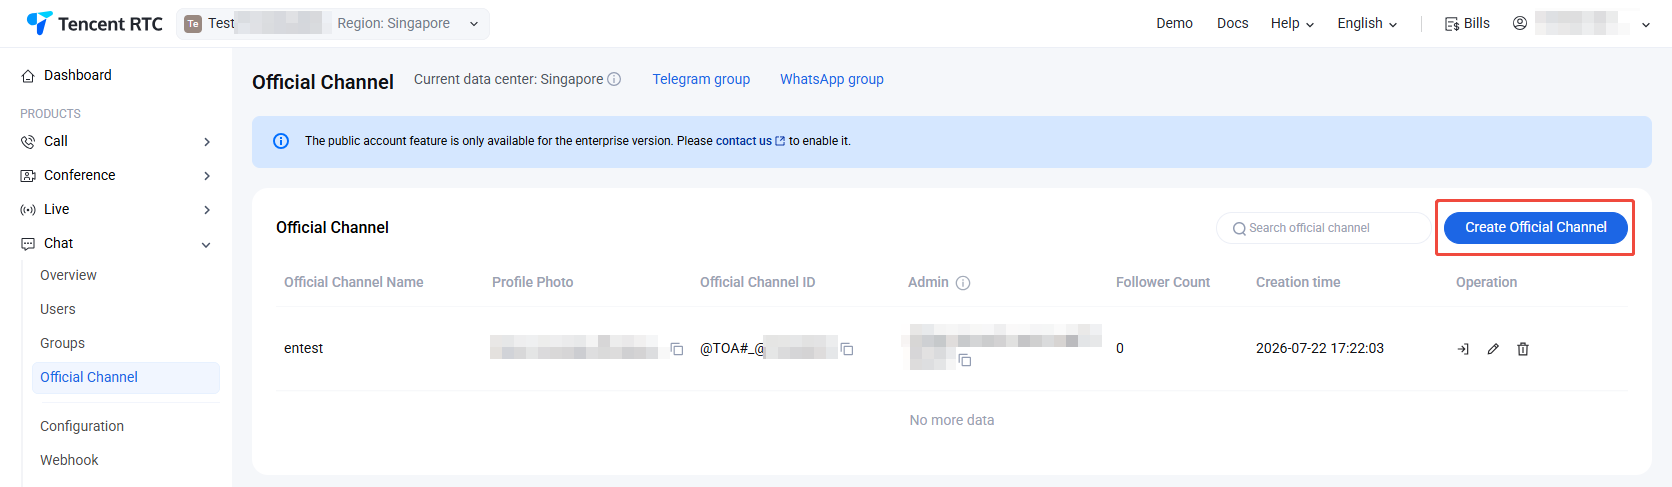
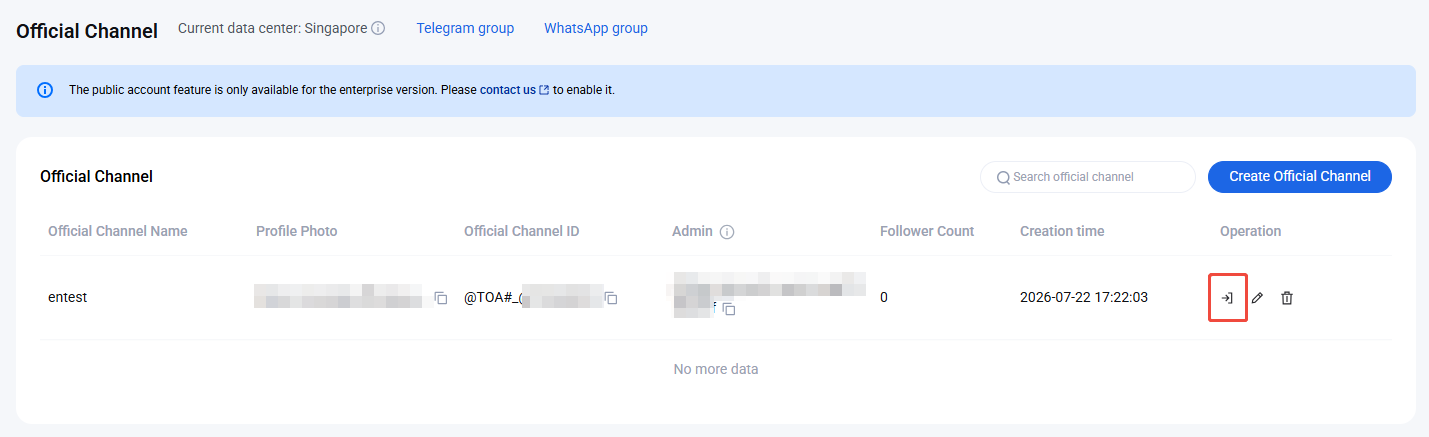
Log in to the Chat Console, and in the left navigation bar, select Chat > Official Channel. You can manage official channels according to your actual business needs. You can also manage official channels by calling the corresponding REST APIs. For detailed instructions, see the Official Channel Management API Documentation.
Create Official Channel
1. On the Official Channel page, click Create Official Channel.
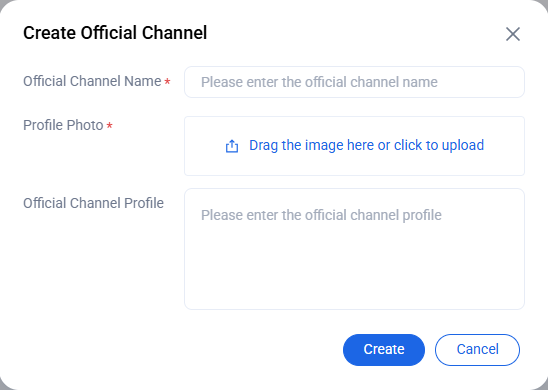
2. On the Create Official Channel window, configure the following parameters:
Official Channel Name: Enter a name for the official channel. This parameter is required and must not exceed 150 bytes.
Profile Photo: Upload an image to use as the avatar for the official channel. This parameter is required. There are no restrictions on image size or format.
Official Channel Profile: Optionally, enter a brief description for the official channel. This parameter must not exceed 400 bytes.
3. Click Create to save the official channel.
Edit public account
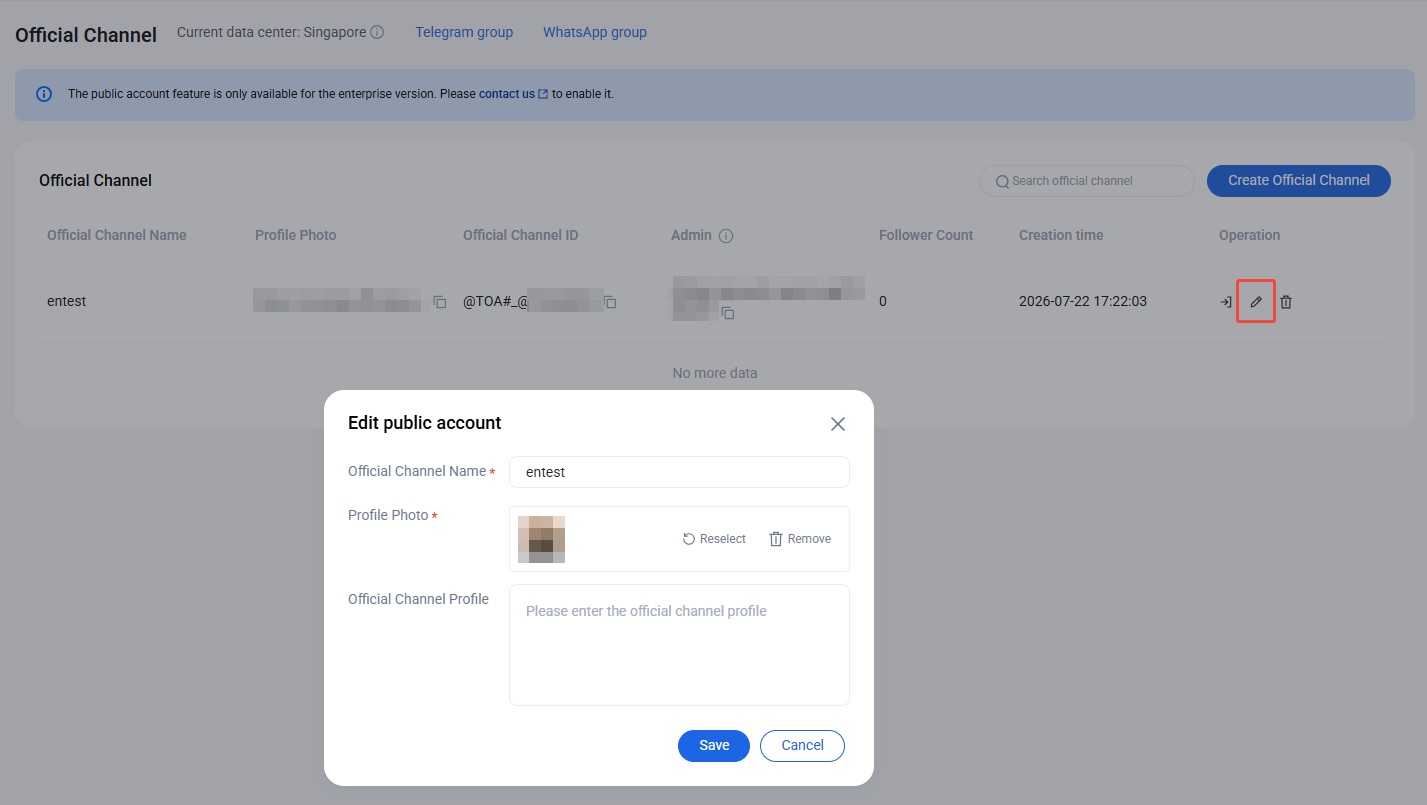
1. On the Official Channel page, click Edit button.
2. In the Edit public account window, update the official channel name, description, or photo as needed.
Delete Official Channel
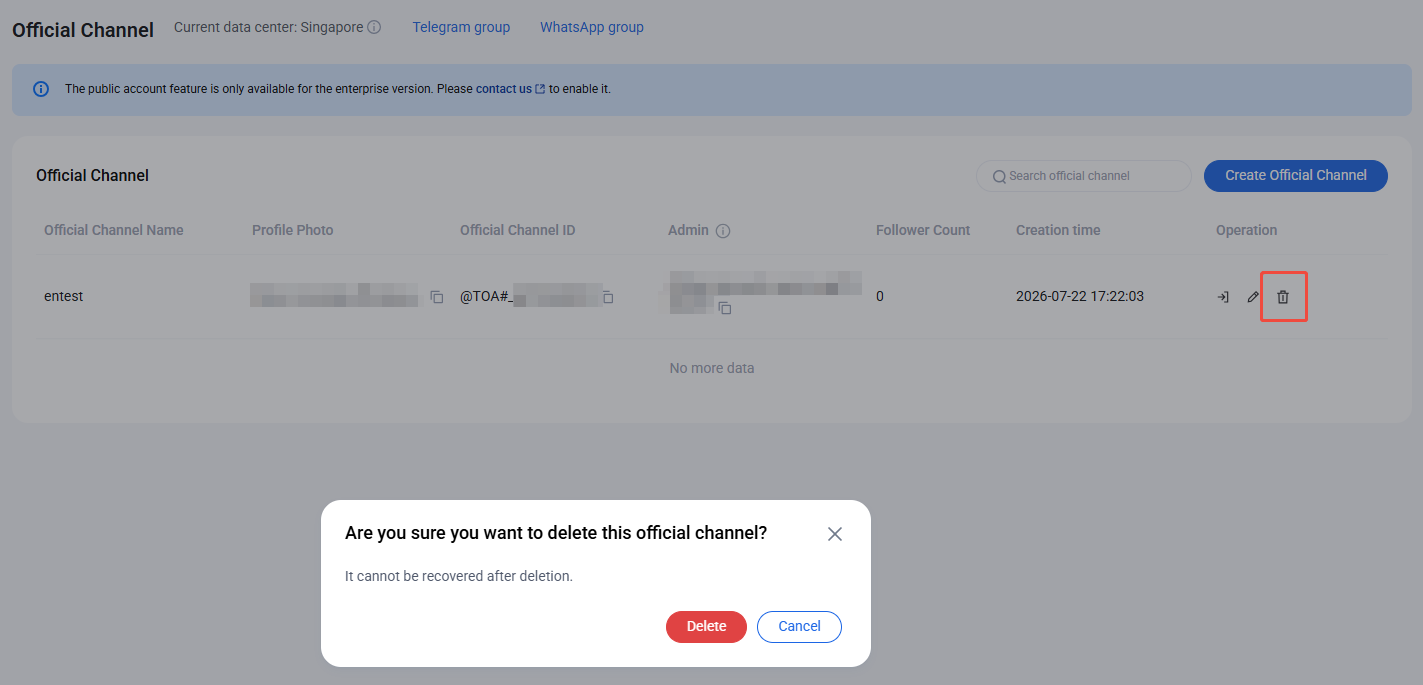
1. On the Official Channel page, select the official channel you want to delete and click Delete button on the right.
2. After clicking Delete button, a confirmation window will appear. Deleted official channels cannot be recovered.
Create Post
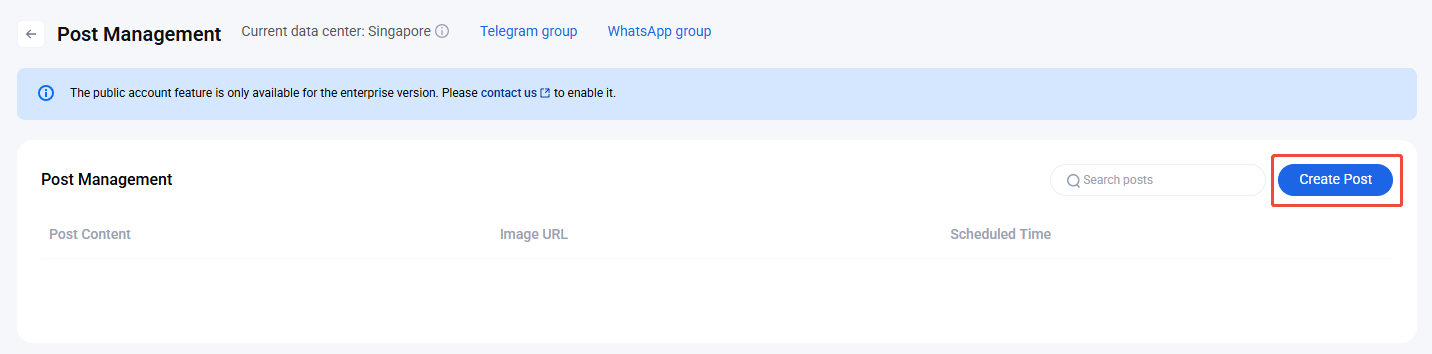
On the Official Channel page, select the target public account and click Enter on the right to access the Post Management page. The Post Management page lets you create, view, and search all posts sent from the selected public account.
To create a post:
1. On the Post Management page, click Create Post.
Note:
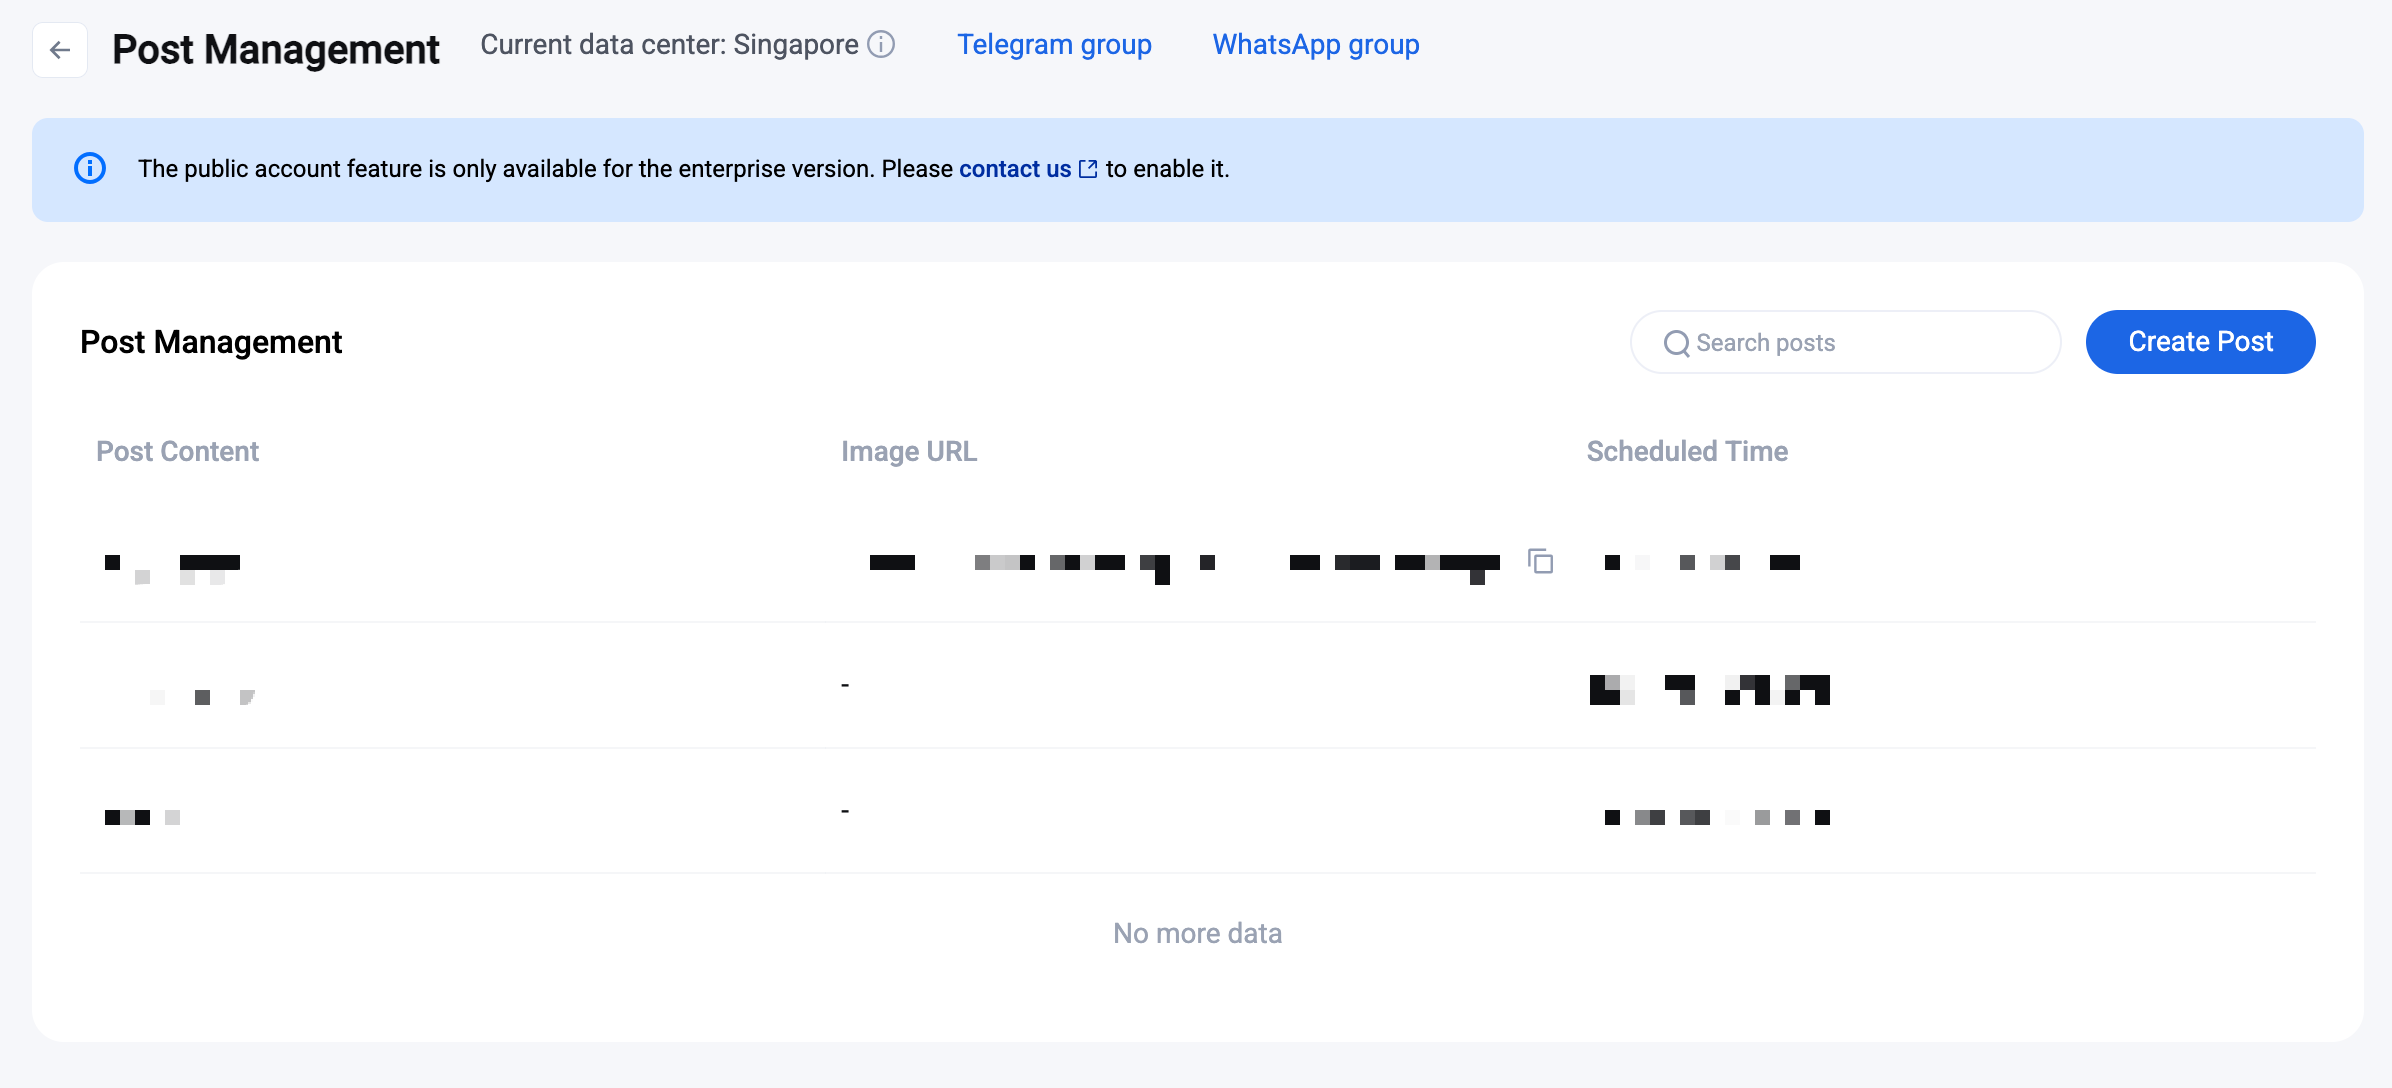
The Post Management page only displays published posts and their details. Editing posts is not supported.
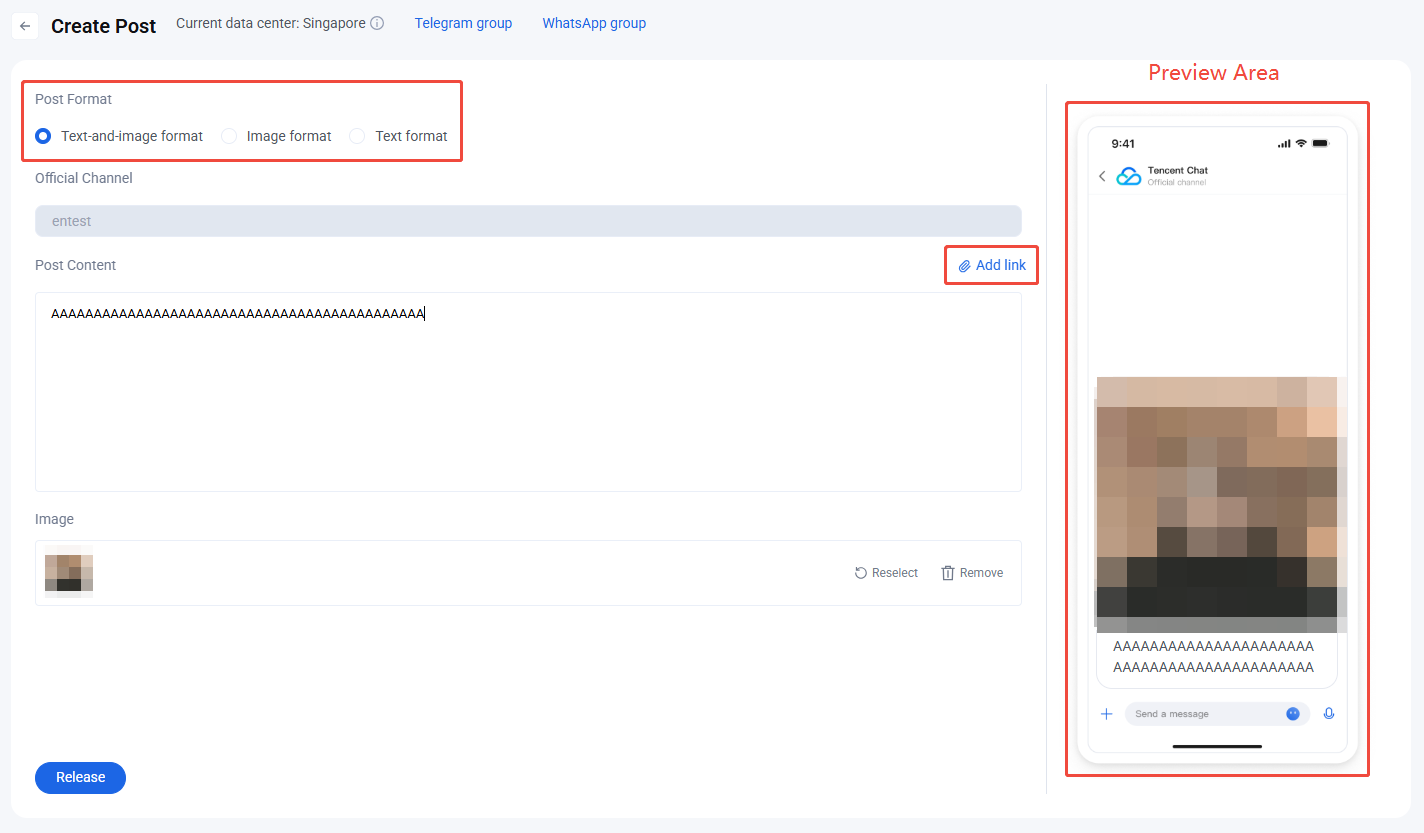
2. Select Post Type. Choose the type of post to create. The system supports the following types:
Text-and-image format: Post with images and text.
Image format: Post with images only.
Text format: Post with text only.
3. Edit Post Content. Enter the post content in the input box and upload images in the image upload area.
4. Add Links. Click Add Link to insert hyperlinks for secondary navigation.
5. Preview Content. You can preview the post in real time in the preview area on the right.
6. Publish Post. After completing all required fields, click Release to send the post. Once published, the post will appear in the post list.
7. If the post fails to send, a popup in the upper right corner will show the error message. Update the post as needed based on the prompt.