Using GooseFS
Baixar
Modo Foco
Tamanho da Fonte
Scenarios
Tencent Cloud TKE supports using GooseFS by creating PersistentVolumes (PVs) and PersistentVolumeClaims (PVCs) and mounting data volumes to workloads. This document describes how to mount COS to workloads in a TKE cluster.
Preparations
1. Installing the Data Accelerator Extension Component
1. Log in to the TKE console and select Cluster in the left sidebar.
2. On the Cluster Management page, click the target cluster ID to go to the Cluster Details page.
3. In the left sidebar, choose Component Management. On the Component Management page, click Create.
4. On the Create Component Management page, select the GooseFS (Tencent Cloud Data Accelerator) component.
5. Click Complete.
2. Creating a Data Accelerator
Log in to the Data Accelerator console and create a GooseFS cluster. For detailed operations, see Creating a GooseFS Cluster. After creation, view it in the instance list.
Operation Steps
Using the Data Accelerator via the Console
Step 1: Creating a PV That Supports GooseFS-CSI Static Provisioning.
Attention:
This step requires the Data Accelerator. If no GooseFS cluster is available in the current region, see Creating a GooseFS Cluster to create one.
1. On the target cluster details page, select Storage in the left sidebar. On the PersistentVolume page, click Create.
2. On the Create Storage page, create a PV by referring to the following information.
The main parameters are described as follows:
Source Setting: Select Static creation.
Name: Customize. This document uses
goosefs-pv as an example.Provisioner: Select Data Acceleration GooseFS.
Read/Write Permissions: The Data Accelerator supports only multi-server read/write.
Note:
Single-machine read/write: Currently, only cloud disks can be mounted to the same machine. Therefore, only data read/write requests on a single machine can be processed.
Multi-server read/write: File Storage, COS, and the Data Accelerator can be mounted to multiple machines simultaneously, enabling them to process data read/write requests from multiple machines.
GooseFS Cluster: Select an available GooseFS as needed.
GooseFS Namespace: Enter a namespace that has been created in the GooseFS cluster. This document uses "goosefs-test" as an example.
Attention:
The GooseFS namespace you enter must already exist. If it does not, go to the Data Accelerator console to create it in advance.
Namespace Subpath: Enter the subpath of a namespace that already exists in the GooseFS cluster.
GooseFS FUSE:
Attribute Key | Description | Default Value | Required |
-Xms4g | Minimum jvm Memory | 4g | No |
-Xmx8g | Maximum jvm Memory | 8g | No |
-XX:MaxDirectMemorySize | Maximum Off-Heap Memory | 8g | No |
-XX:+UseG1GC | jvm Garbage Collection Algorithm | g1 | No |
-Dgoosefs.fuse.web.enabled | Whether to Enable Monitoring | false | No |
-Dgoosefs.fuse.web.port | Monitoring Port | 9213 | No |
Attention:
Separate different mount items with spaces.
When monitoring is enabled (goosefs.fuse.web.enabled=true), ensure that the configured port (goosefs.fuse.web.port) is unique.
Mount Options: The GooseFS tool supports mounting a bucket to the local system. After mounting, you can directly operate on objects in COS. This option is used to set related restrictions. In this example, the mount option "allow_other" means allowing other users to access the mount point, and "direct_io" means enabling direct I/O. For more parameters, refer to the FUSE Mount Parameter List document.
3. Click Create PersistentVolume.
Step 2: Creating a PVC to Bind to the PV
Attention:
Do not bind a PV that is in the Bound state.
1. On the target cluster details page, select Storage in the left sidebar. On the PersistentVolumeClaim page, click Create.
2. On the Create Storage page, create a PVC by referring to the following information. The following figure shows the details:
Name: Customize. This document uses
goosefs-pvc as an example.Namespace: Select
kube-system.Provisioner: Select GooseFS.
Read/Write Permissions: The Data Accelerator supports only multi-server read/write.
PersistentVolume: Select the PV created in Step 1. This document uses
goosefs-pv as an example.3. Click Create PersistentVolumeClaim.
Step 3: Creating a PVC for the Pod to Use
Note:
This step provides an example on how to create a Deployment workload.
1. On the target cluster details page, select Workload in the left sidebar. On the Deployment page, click New.
2. On the New Deployment page, create the Deployment by referring to Create Deployment and configure the volume mount.
Volume (Optional):
Mount Method: Select Use Existing PVC.
Volume Name: Customize. This document uses
goosefs as an example.Select PVC: Select the PVC created in Step 2. This document uses
goosefs-pvc as an example.Instance Container: Click Add Mount Point to set a mount point.
Volume: Select the volume "goosefs" added in this step.
Target Path: Enter the target path.
Mount Subpath: Only mounts a subpath or a single file from the selected volume.
3. Click Create Deployment.
Using the Data Accelerator via YAML Files
Creating a PV That Supports GooseFS-CSI Dynamic Provisioning
You can create a PV using YAML to support GooseFS-CSI dynamic provisioning. The template is as follows:
apiVersion: v1kind: PersistentVolumemetadata:name: goosefs-pvspec:accessModes:- ReadWriteManycapacity:storage: 10Gicsi:driver: com.tencent.cloud.csi.goosefsvolumeAttributes:goosefsPath: /borgerli-1251707795javaOptions: -Dgoosefs.master.embedded.journal.addresses=172.21.112.141:9202,172.21.112.133:9202,172.21.112.30:9202-Xms4g -Xmx8g -XX:MaxDirectMemorySize=8g -XX:+UseG1GC -Dgoosefs.fuse.web.enabled=true-Dgoosefs.fuse.web.port=9213volumeHandle: goosefs-pvmountOptions:- allow_other- direct_iopersistentVolumeReclaimPolicy: RetainvolumeMode: Filesystem
Creating a PVC and Binding It to a PV
You can create a PVC and bind it to the preceding PV by using a YAML file. The YAML file template is as follows:
apiVersion: v1kind: PersistentVolumeClaimmetadata:name: goosefs-pvcnamespace: kube-systemspec:accessModes:- ReadWriteManyresources:requests:storage: 10GistorageClassName: ""volumeMode: FilesystemvolumeName: goosefs-pvstatus:accessModes:- ReadWriteManycapacity:storage: 10Gi
Creating a Pod that Uses a PVC
You can create a Pod by using a YAML file. The YAML file template is as follows:
apiVersion: v1kind: Podmetadata:name: pod-goosefsspec:containers:- name: pod-goosefscommand: ["tail", "-f", "/etc/hosts"]image: "centos:latest"volumeMounts:- mountPath: /dataname: goosefsresources:requests:memory: "128Mi"cpu: "0.1"volumes:- name: goosefspersistentVolumeClaim:# Replaced by your pvc name.claimName: goosefs-pvc
Usage Recommendations
Using the Same PVC for the Same GooseFS Cluster
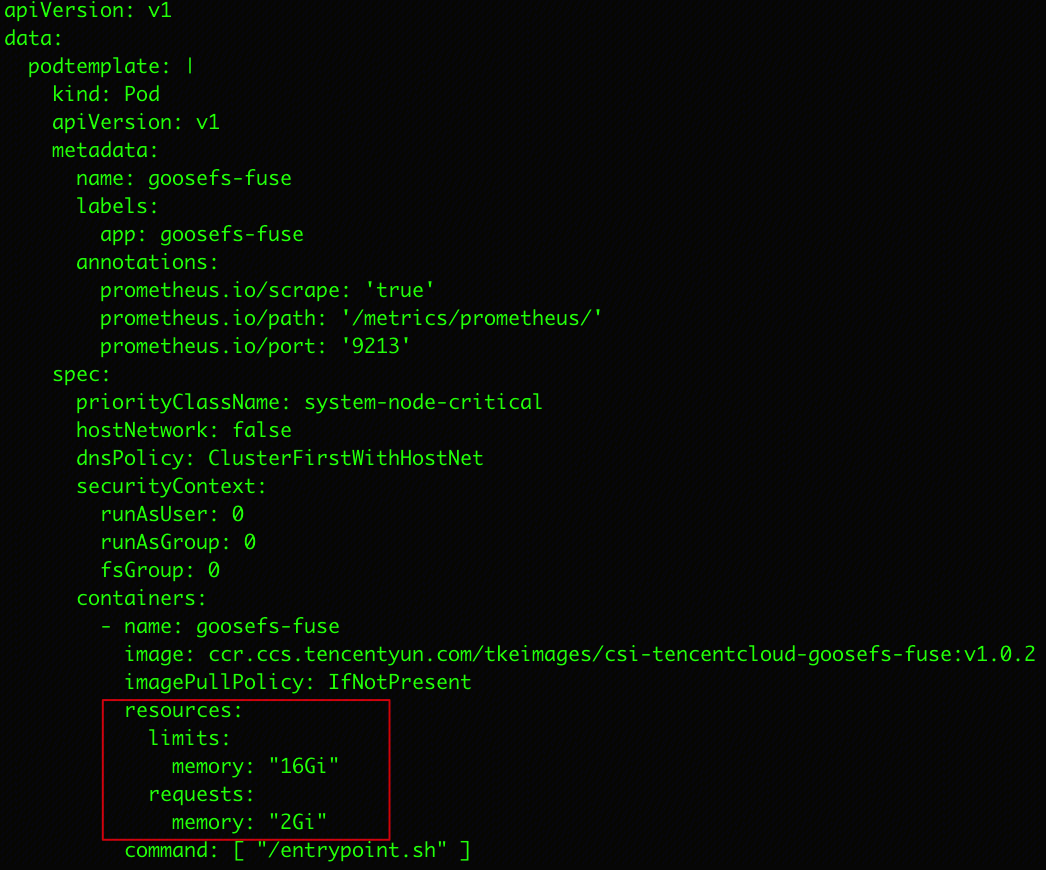
After a service Pod is deployed to a node, goosefs csi creates a fuse pod to handle mounting. It creates one fuse pod for each volumeHandle. The fuse pod consumes a relatively large amount of resources and requests 2 GB of memory by default. It is recommended that services within the same GooseFS cluster use the same PVC. A node running service pods runs only one fuse pod to minimize resource usage.
fuse pod Priority
The fuse pod consumes a relatively large amount of resources and requests 2 GB of memory by default. This leads to the following two issues:
When node resources are insufficient, scheduling fails.
After the service starts running, if node resources become insufficient, the node may be evicted, which affects existing services.
To resolve the preceding two issues, you can add the priorityClassName: system-node-critical to the fuse pod. However, this introduces a third issue: during scheduling, if a node has insufficient memory, other Pods may be evicted, affecting services. You need to configure this based on your usage scenario.
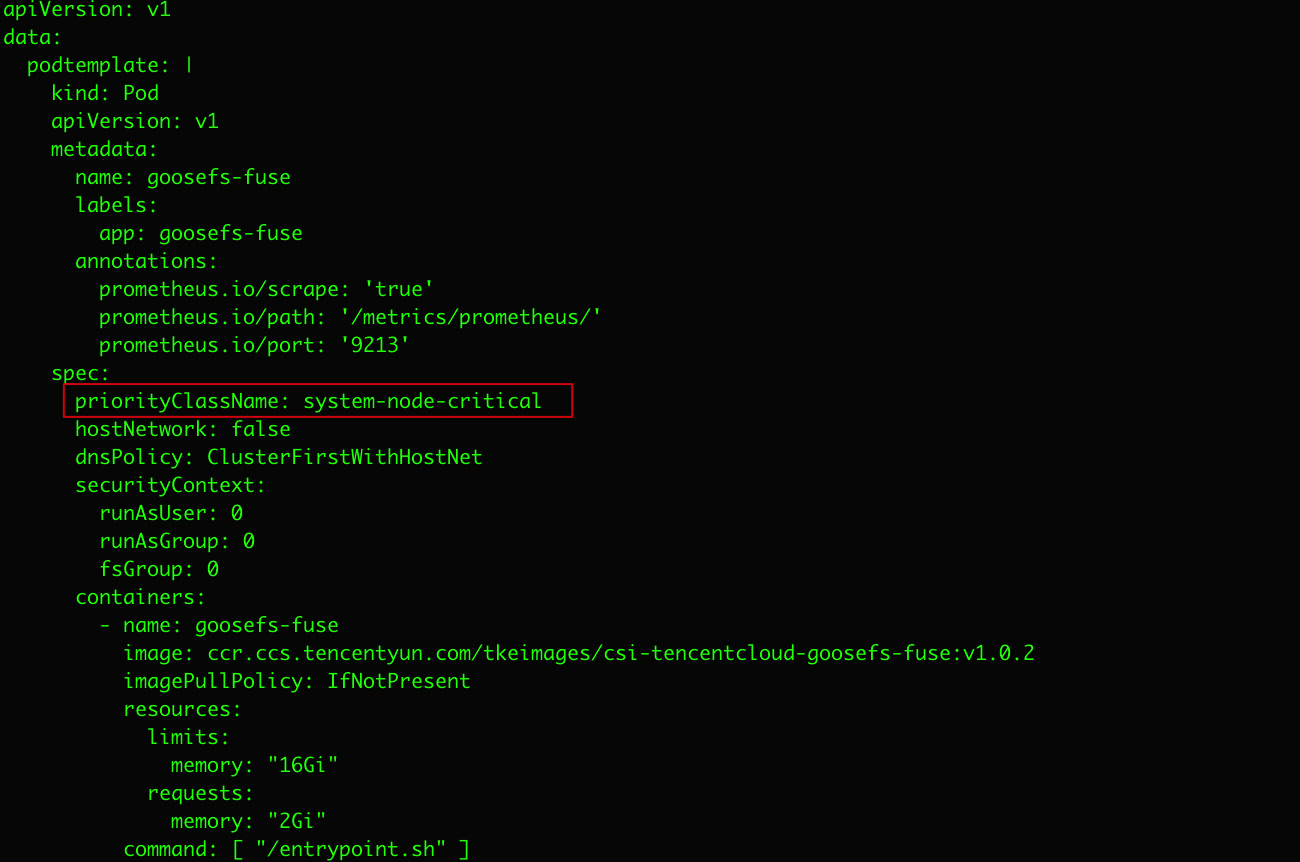
Adjusting fuse pod Resource Requirements
You can modify the configmap -nkube-system goosefs-csi-fuse-config to adjust the resource configuration of the podtemplate:
Ajuda e Suporte
Esta página foi útil?
Você também pode entrar em contato com a Equipe de vendas ou Enviar um tíquete em caso de ajuda.
comentários