Fine-Grained Disk IO Scheduling
Download
Modo Foco
Tamanho da Fonte
The fine-grained scheduling capability of disk IO provides a series of features to ensure the service quality for business disks and flexibly limit the usage of disk transfers by a container.
Use Limits
1. Deploy QoS Agent.
2. Within the Add-on management page in the cluster, locate the successfully deployed QoS Agent, and click Update Configuration on the right.
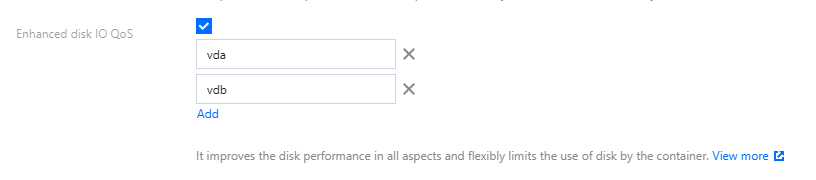
3. On the add-on configuration page for modifying QoS Agent, select Disk IO QoS Enhancement.
4. Enter the name of disk with limits specified by parameters. As shown in the following figure, you can enter multiple names:
Note:
1. The disk names shall match the actual device names. For information on how to obtain the disk names of a node, please refer to How to Determine the Disk Name of a Node.
2. When entering in the console, please click Add to add a new disk name once the name of a disk device is entered each time. Do not enter multiple disk names at a time.
3. If the corresponding disk name is missing on the node, fine-grained scheduling for disk IO will not take effect.
4. This feature is not supported for non-native nodes. Please ensure that there are native nodes in the cluster, and that Pods configured with Disk IO limits are scheduled on the native nodes.
5. Click Complete.
Feature 1: Disk IOPS Limits (direct IO + buffer IO)
1. Deploy the components according to the above usage limits, enable the relevant switches, and enter the relevant disk names.
2. Deploy a business.
3. Deploy the PodQOS object associated with the business, and select the business to apply, as shown below:
apiVersion: ensurance.crane.io/v1alpha1kind: PodQOSmetadata:name: aspec:labelSelector:matchLabels:k8s-app: a # select the Label of the businessresourceQOS:diskIOQOS:diskIOLimit:readIOps: 1024 # readIOps represents the limit on the amount of read IO for the Pod, measured in IOPS/swriteIOps: 1024 # writeIOps represents the limit on the amount of write IO for the Pod, measured in IOPS/s
Throttling Mechanism for Buffer IO
Due to a low-version kernel or cgroup v1 not being able to effectively throttle the buffer IO, it may cause the Buffer IO to interfere with the normal business IO (the direct IO is usually used in a database scenario). TKE provides the Buffer IO throttling feature based on cgroup v1. The Buffer IO throttling based on cgroup v2 is consistent with the upstream kernel.
The main reason of cgroup v1 not being able to support throttling is that, during the asynchronous dirty page flushing, the kernel cannot determine which blkio cgroup this IO should be submitted to. For example:
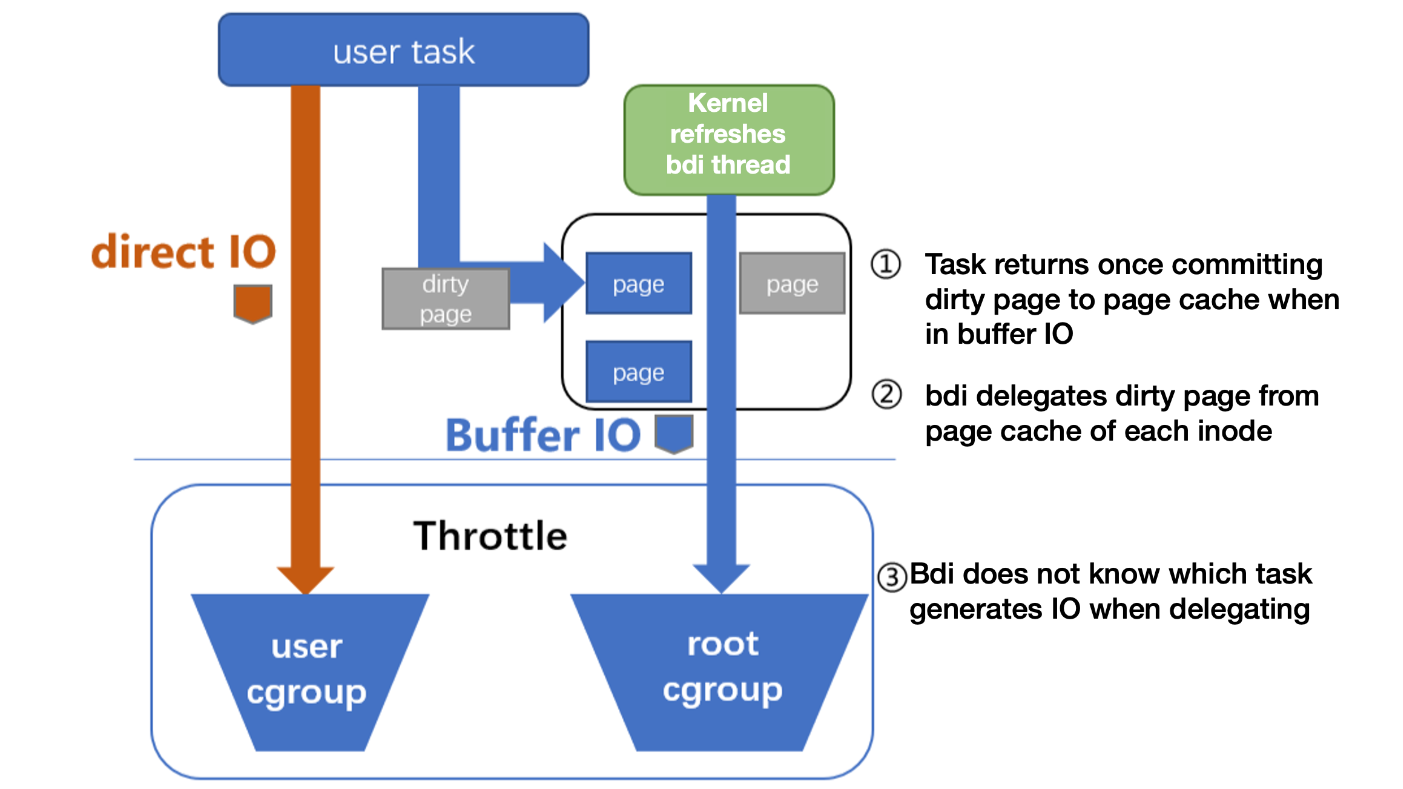
To solve this accounting problem, TKE binds the cgroup of the page cache with the corresponding blkio cgroup. Then the kernel thread can determine the target blkio cgroup when asynchronously flushing.
Feature 2: Disk BPS Limits (direct IO + buffer IO)
1. Deploy the components according to the above usage limits, enable the relevant switches, and enter the relevant disk names.
2. Deploy a business.
3. Deploy the PodQOS object associated with the business, and select the business to apply, as shown below:
apiVersion: ensurance.crane.io/v1alpha1kind: PodQOSmetadata:name: aspec:labelSelector:matchLabels:k8s-app: aresourceQOS:diskIOQOS:diskIOLimit:readBps: 1048576 # readBPS limits the read bandwidth of the Pod, measured in mbpswriteBps: 1048576 # writeBPS limits the write bandwidth of the Pod, measured in mbps
FAQs
How to Determine the Disk Name of a Node?
1. Log in to the native nodes where the disk IO needs to be enabled. For operation details, please refer to Enabling SSH Key Login for a Native Node.
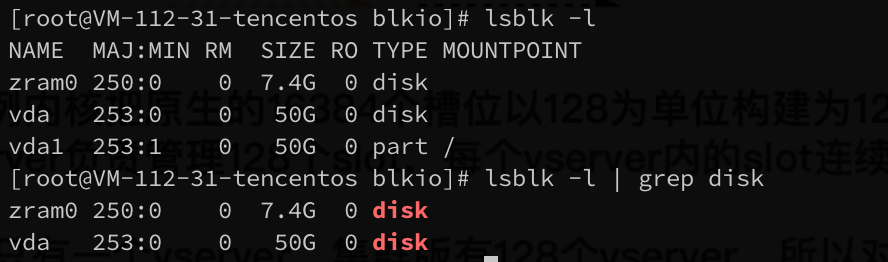
2. Execute the following command to obtain all disk devices:
lsblk -l | grep disk
The execution result is shown below:
Note:
1. In the image below, zram0 is a module used for virtual memory compression, not a disk name.
2. In the image below, vda1 is a part partition block, also not a disk name.
3. The example below only shows one disk with the disk name of: vda.
Community BFQ Issues May Cause Native Node Kernel Panics
Suggestion: Upgrade the version of QoS Agent to 1.1.2 or above, avoiding kernel panics on native nodes due to a bug in the Linux community kernel BFQ module. The relevant issues are as follows:
Query Solution: You can verify the scheduling policy by executing the command of
cat /sys/block/[disk_name]/queue/scheduler on the node. If the output contains the field of [bfq], it means that the BFQ is enabled and changes shall be made.Modification Solution: Change the scheduling policy to mq-deadline. For example, if the disk name is vda, you can modify it as follows:
echo mq-deadline > /sys/block/vda/queue/scheduler
Ajuda e Suporte
Esta página foi útil?
Você também pode entrar em contato com a Equipe de vendas ou Enviar um tíquete em caso de ajuda.
comentários