It is recommended to use the quick start demo guidance for the demo experience. If you want to learn the detailed operation steps, you can refer to the following steps.
Step 1: Create Projects and Devices
In the console, create projects, field devices, and remote devices in sequence with filling in the device ID and device password. Then revise the corresponding information in the configuration files (e.g. config.json) of the field and remote device demo.
Step 2: Bind Trial Licenses
In Console > License Management, click Free Trial to get 2 trial licenses. Then bind the licenses to the field device created in step 1.
1. Modify the config.json configuration file in the demo directory. According to the Field Device Configuration Generation Tool, modify the config.json configuration file. The minimum nodes are as follows:
Note:
"//" Comments must be deleted before use.
{"device_id":"dev1",//Change to the on-site device ID created in the console"device_name":"vin234","device_streams":1,//If there are multiple inputs, change the number of streams here, and increase the number of elements in the streams_config array"cloud_mode":"public","certificate":"./device.pem","projectid":"xxxxx",//Change to the project ID created in the console"password":"xxxxx",//Change to the password created in the console"streams_config":[{"fps":30,"bps":2000,"width":1920,"height":1080,"camera":0,//Change to the actual camera accessed, corresponding to /dev/videox"protocol":"v4l2"//If it is external input YUV data, change to outside. If it is external input encoded stream data, change to outenc}]}
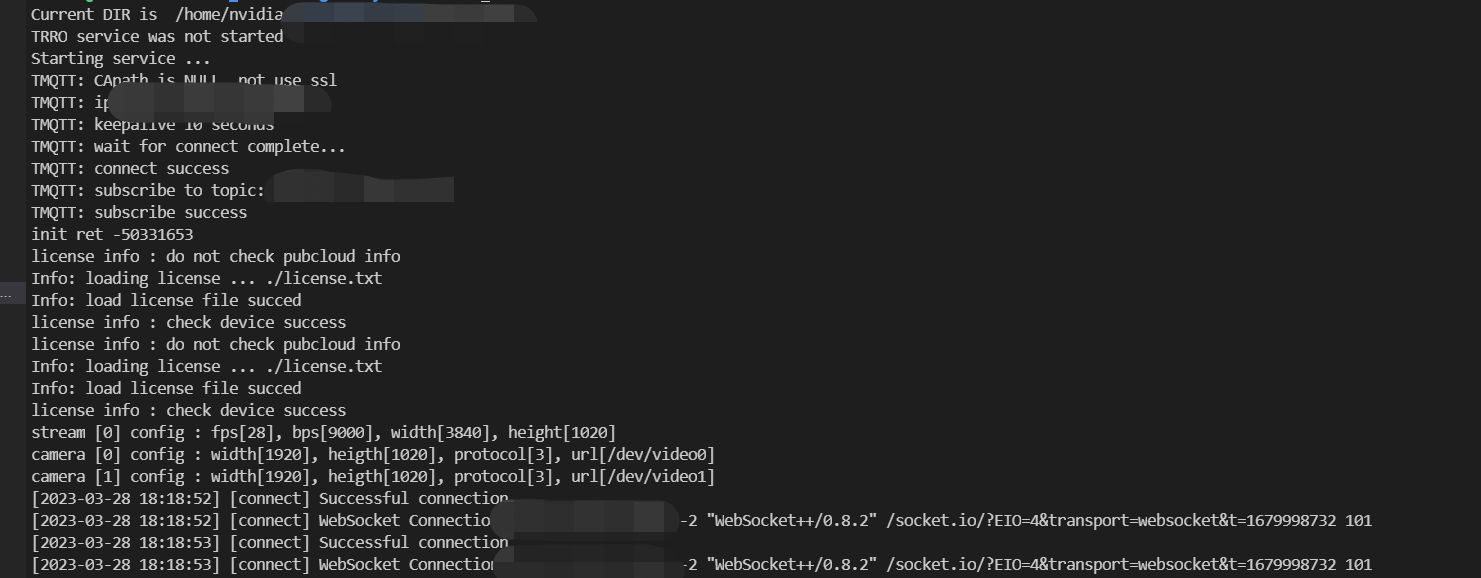
2. Start the Linux run script run_loader.sh, wait for the remote device to pull the stream, and after a successful startup, a connection to the server will be established successful.
Run the remote device demo (pull video stream)
1. Modify the config.json configuration file in the demo directory. According to the Remote Device Configuration Generation Tool, modify the config.json configuration file.
Note:
"//" Comments must be deleted during use.
{
"device_id":"dev1",//change to the remote device ID created in the console
"device_name":"vin99",
"max_streams":8,
"cloud_mode":"public","certificate":"./device.pem","projectid":"xxxxx",//change to the project ID created in the console"password":"xxxxx"//change to the password created in the console
}
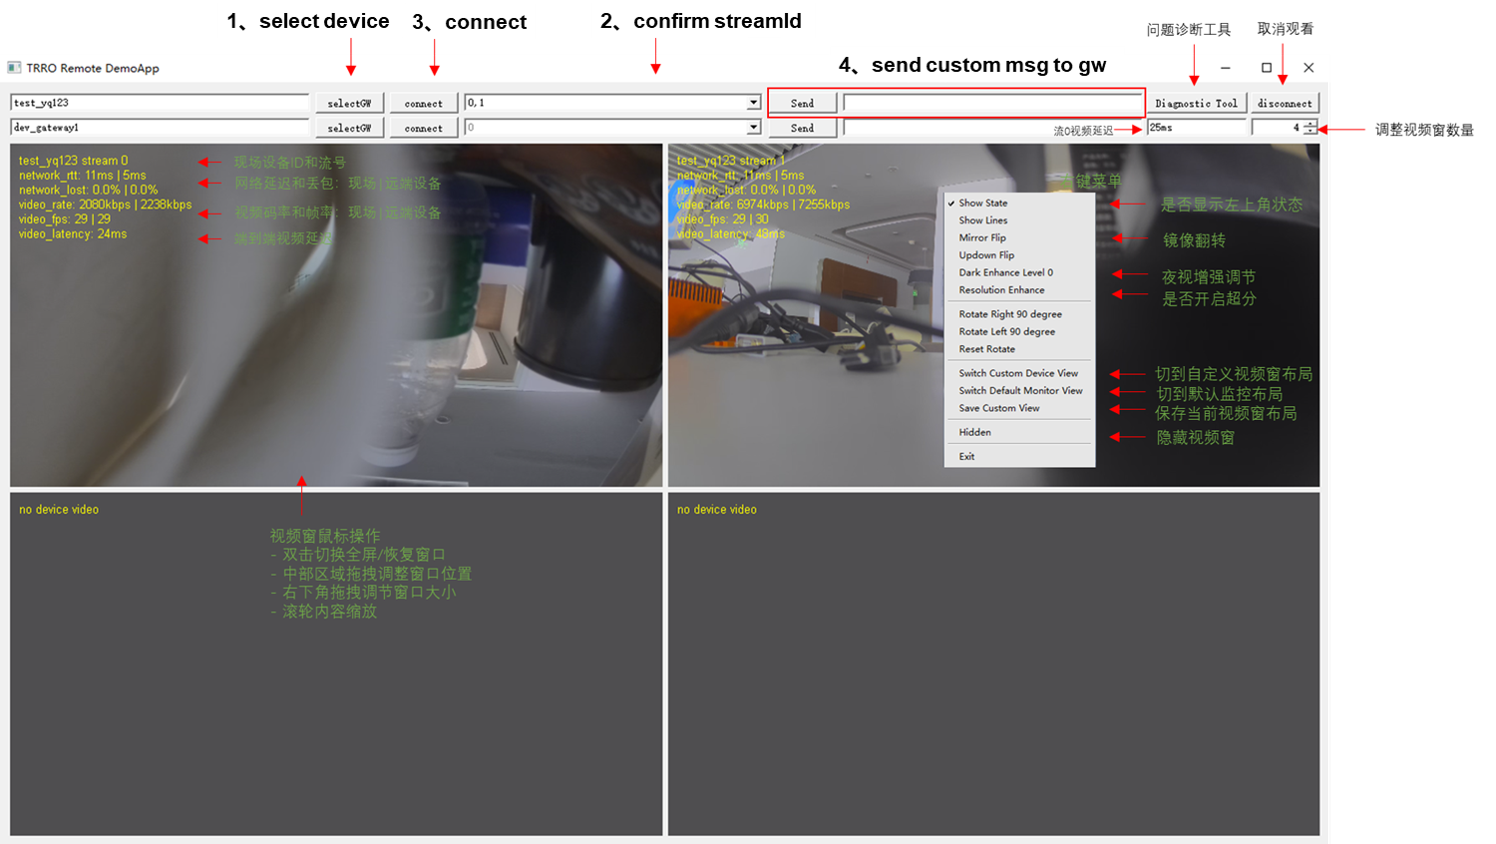
2. Start the demo program:
Double-click to run QtApplicationWidget1.exe on the Windows system.
On Linux, run the script run.sh:./run.sh
Click select to choose the field device, then confirm. Click connect to start pulling the video stream.