Scenarios
This task guides you to create a Lark group bot to receive your subscribed Tencent Cloud site message notifications in the Lark group. The bot will automatically forward the messages to the group upon receipt.
Operation Steps
Create a Bot
2. On the Chatbot Reception Management page, click Create Chatbot.
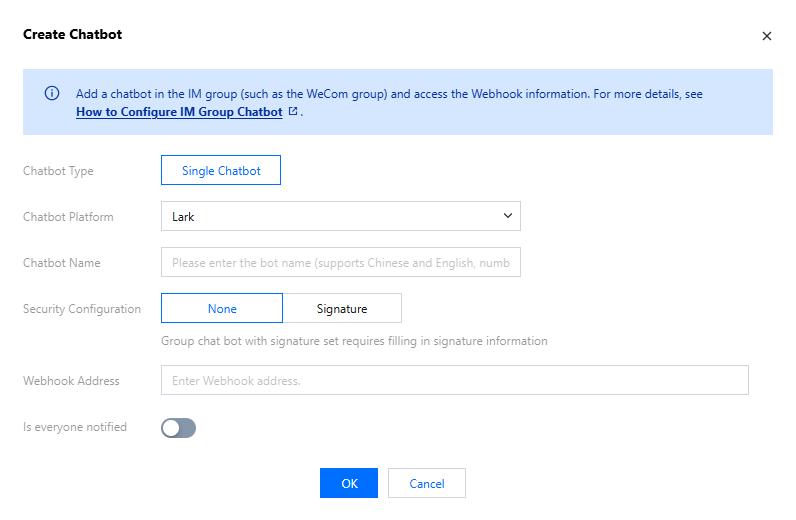
3. In the Create Chatbot window, fill in the following configuration information.
Bot platform: Select "Lark".
Bot name: Enter the bot name.
Security Configuration: can be set to None or Set Signature (Selecting signature requires filling in the key set when creating the bot).
Notify All: You can enable the notification switch as needed.
4. Click OK, and the creation is successful.
Get Webhook
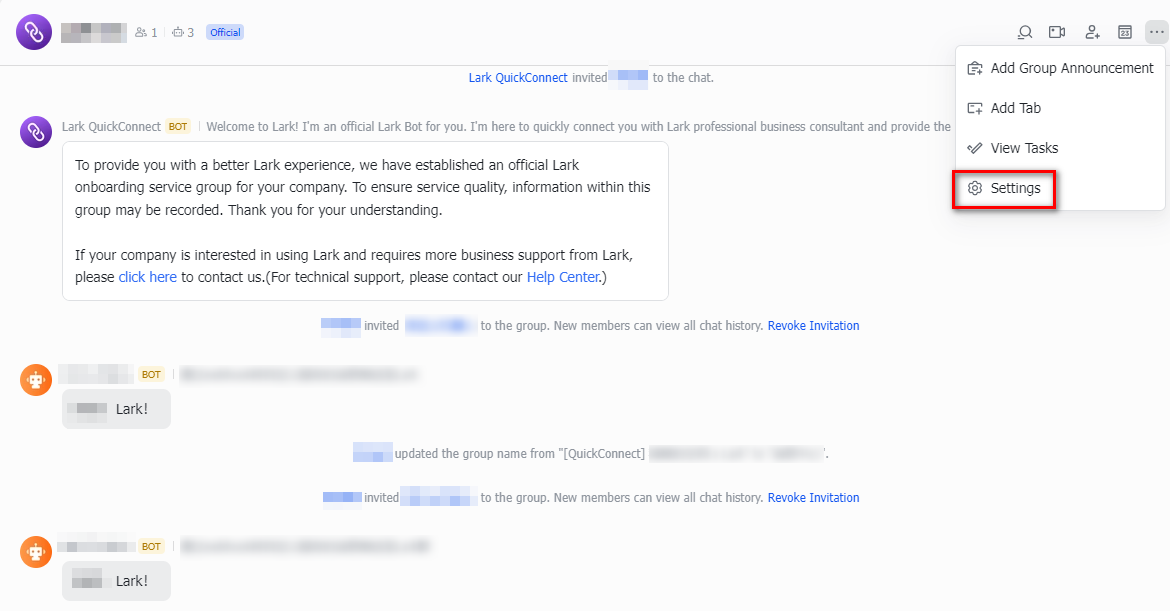
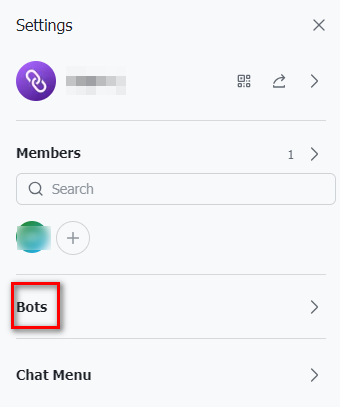
1. Open Lark on your PC, find the Lark group that needs to receive messages, and click . 2. On the Settings page, click Bots.
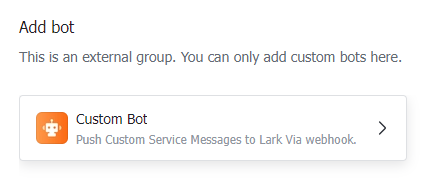
3. On the Bots page, click Add Bot.
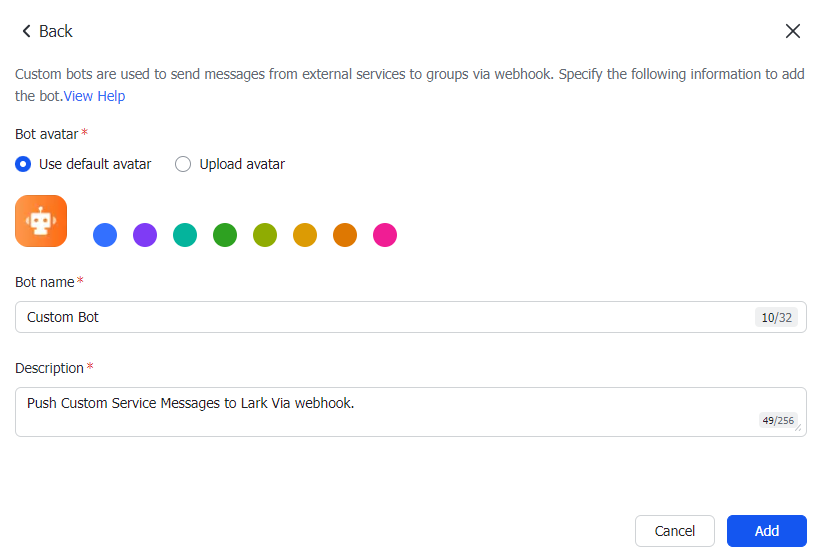
4. On the Add Bot page, click Custom Bot.
5. After adding the bot avatar, bot name, and description, click Add in the lower-right corner.
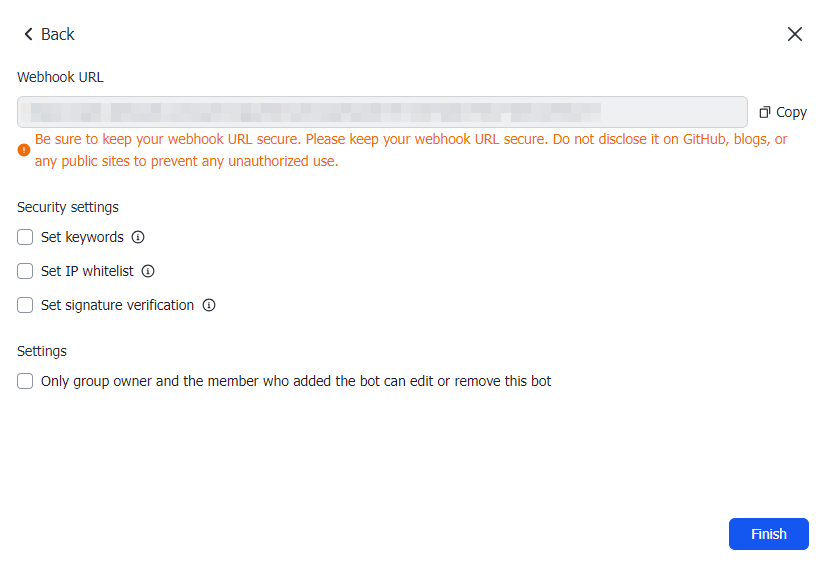
6. After the addition is completed, the interface will display the Webhook URL.
Test Push Message
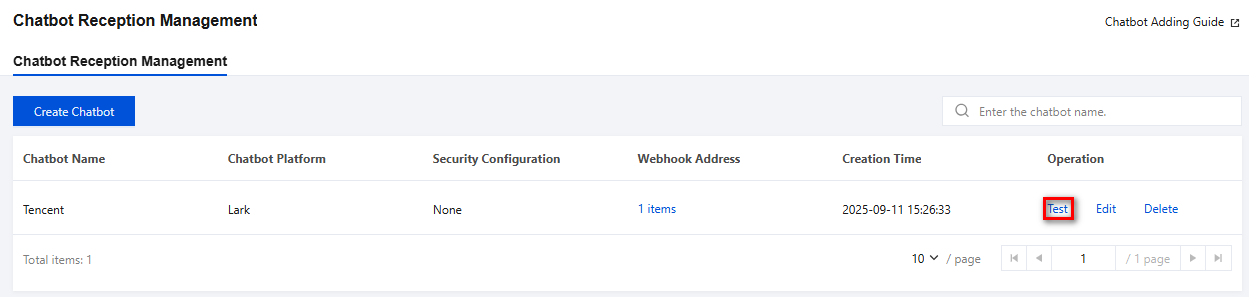
1. In Chatbot Reception Management, click Test.
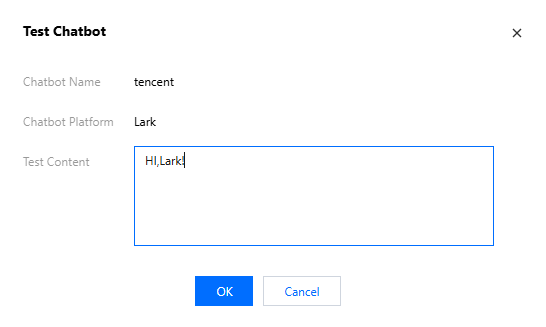
2. On the Test Chatbot page, enter test content.
3. Click OK to send a test message.
4. In Lark groups, test messages can be viewed.
Configure Bot to Receive Messages
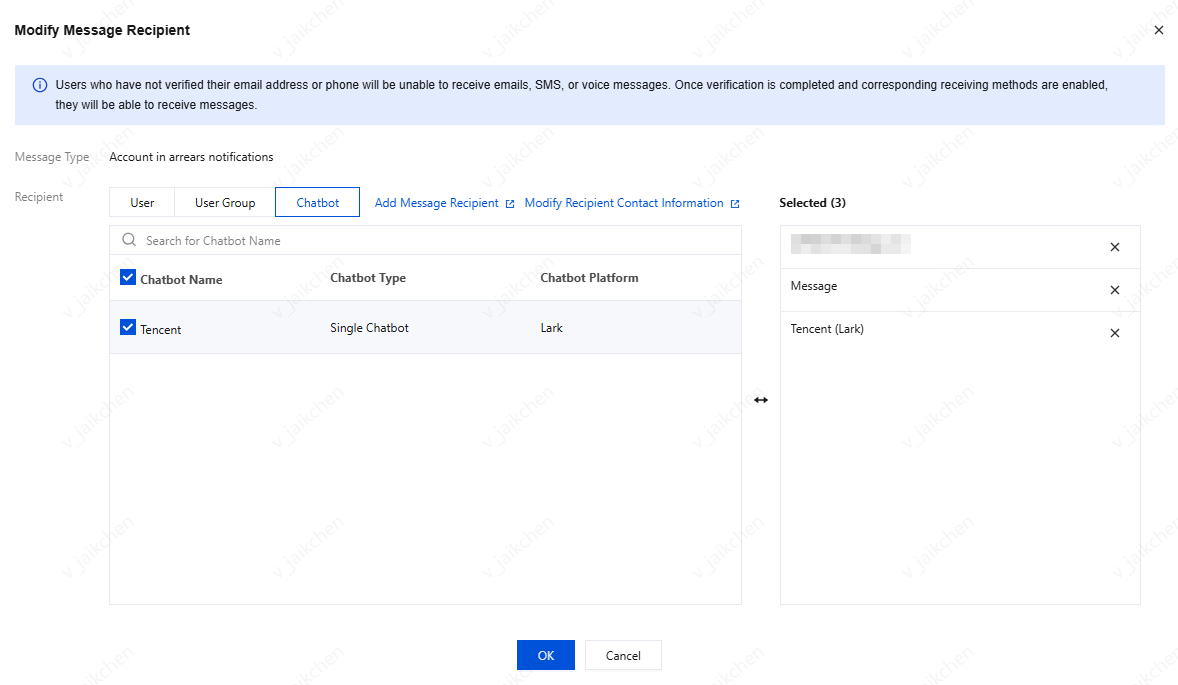
1. Enter the Message Center console, click Subscription Management in the left navigation to enter the Subscription Management page. 2. Select the message types you want to subscribe to. After checking the boxes, click Modify Message Recipient to enter the subscription editing page.
3. On the Modify Message Recipient page, select Chatbot, check the bot that needs to receive messages, click OK, then you can configure and add a bot under the product's sub-messages.
Note:
Currently, bots require being bound to an SMS channel to receive messages.