Data matters, we all know that. Digital photos, e-documents, work products, saved game…none of them we can easily afford to lose. It will be a huge headache if we lose all of our files due to a disk failure, or a single file due to misoperation, computer shutdown, or software crash, or if we cannot provide a requested “callback version” just because we haven’t saved one. This is why backups are absolutely important.
When it comes to backups, the first idea that occurs to our mind is most probably using a portable hard drive or building a NAS within an individual network so that we can just move files into it. Well, is it really as simple as all that?
In fact, backup involves a lot of work to do. Copy our files onto backup media, check if the backups are correct, and we may have to do both of them regularly in order to minimize lost files. Besides, backup media require maintenance, so we need to replace our hard drives promptly once they are dead.
Given all this, is there an easier way to keep our files safe? The answer is Yes.
As Tencent Cloud’s business grows, it has already developed a suite of enterprise cloud storage services, including COS. Now, we need backup software to connect the files in our PC with cloud storage services. It will help us back up files automatically onto the cloud, and check backup correctness on a regular basis.
Software Introduction
Arq® Backup is commercial backup software for Windows and macOS. Running in the background, it automatically backs up specified directories at intervals you configure. Besides, it retains backup files for each point in time so that you can easily get an old version. This software offers minimal backup size and maximum backup speed by backing up only files that are different from those at the last point in time, and by backing up repeated files across paths only once. It encrypts backups with a password only you know before they leave your computer. Therefore, you can be assured that your sensitive data is well-protected from being stolen during the transfer over Internet or on-cloud storage.
To get a commercial license of Arq® Backup, each user needs to pay $49.99. This software, which is used on a single computer, offers a 30-day free trial which you may want to try before purchase.
Note:
Arq® Backup currently does not support the simplified Chinese language. You can download, purchase it and read its instructions from the Official Website.
2. Log in to the COS Console, and activate COS service as instructed.
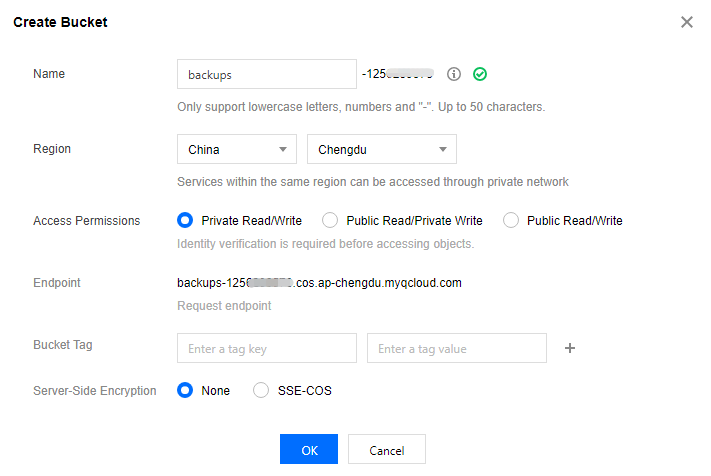
3. In the COS console, click Bucket List in the left sidebar first, and then Create Bucket to add a new bucket.
Name: bucket name, e.g. “backups”.
Region: you can choose a region closest to your location. Currently, we offer price discounts for regions in southwest China, so you may alternatively choose “Chengdu” or “Chongqing” to enjoy this offer.
For the other fields, leave the default. Copy and save the Request endpoint, and click OK.
Note:
Now, you have created a bucket. For more information, see Creating a Bucket.
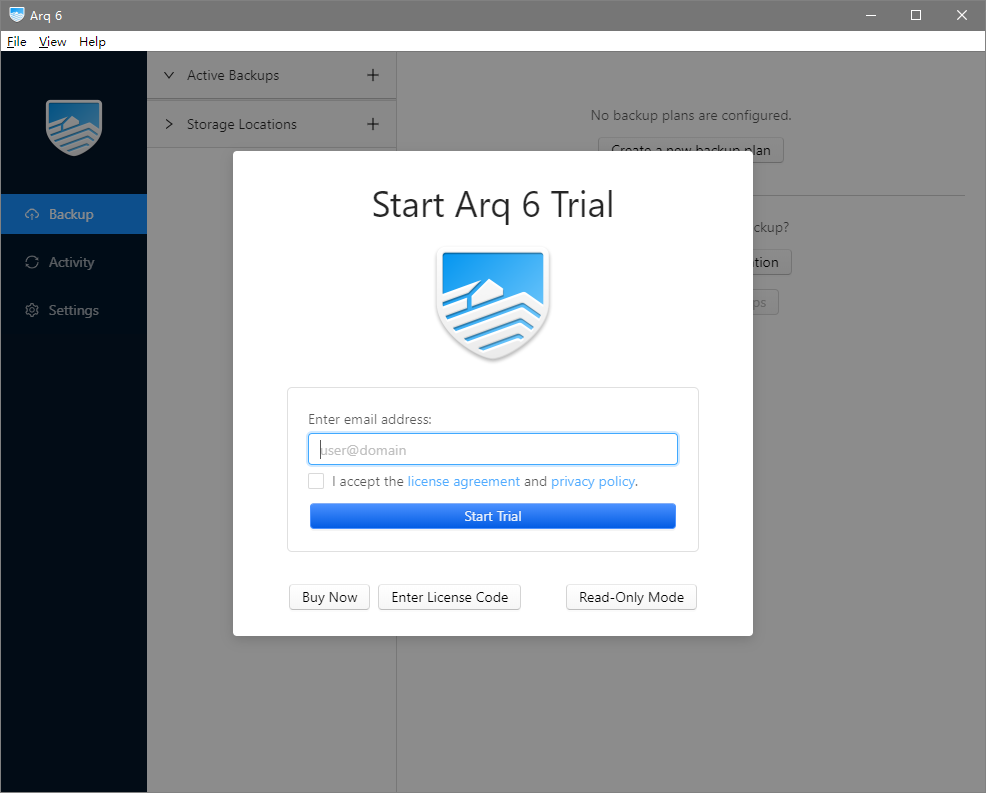
2. Follow the wizard to install the software. Once completed, it will start automatically while prompting you to log in. Then, enter your email address and click Start Trial.
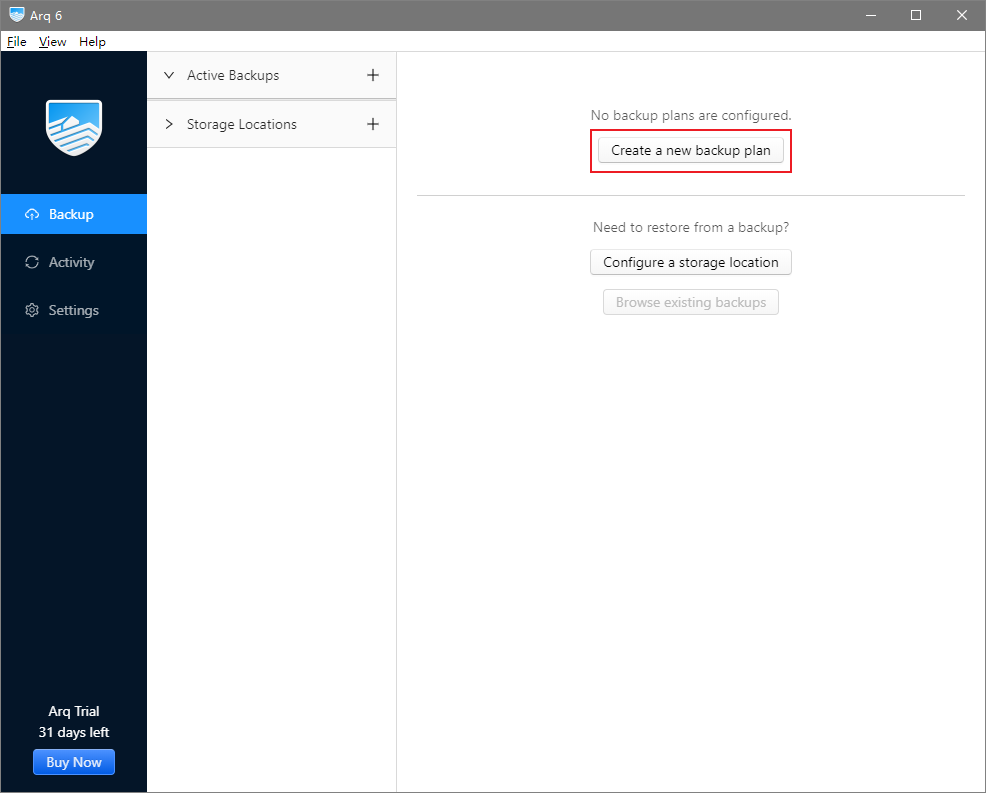
3. In the Backup pane, click Create a new backup plan to add a backup plan.
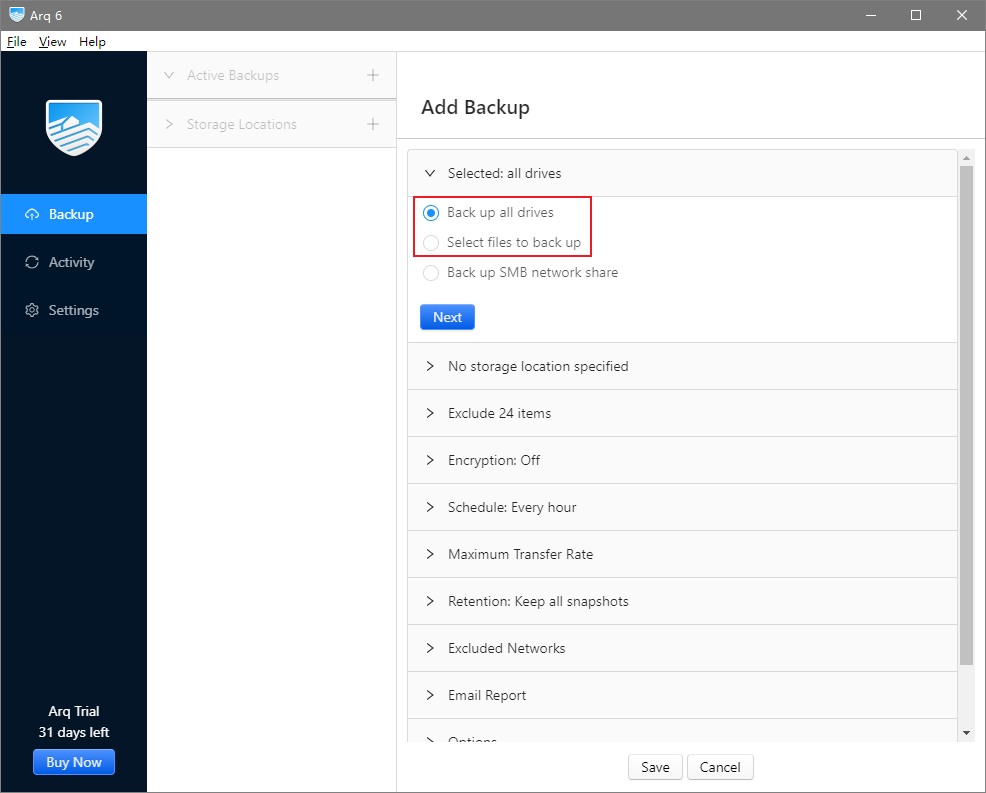
4. In the opened window, select Back up all drives* or Select files to back up.
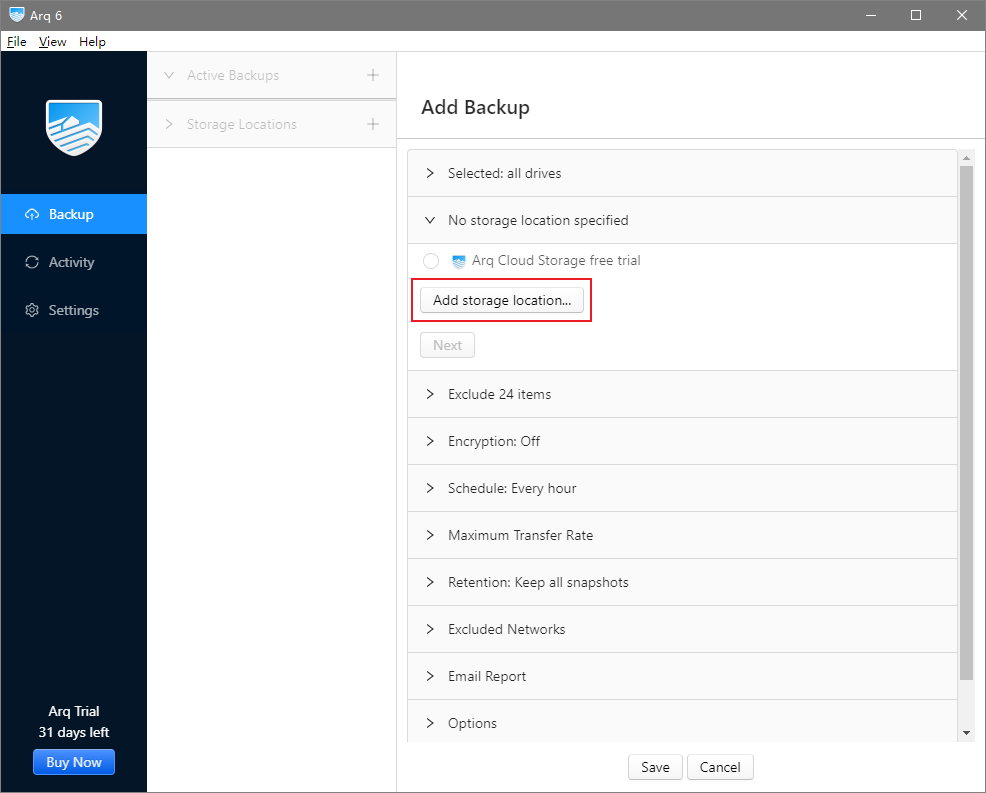
5. Click Add storage location to add a location for storing your backups as shown below:
6. In this example, we select S3-Compatible Server.
7. In the opened window, configure the following as instructed, and click Continue.
Server URL: enter the above-mentioned request endpoint, starting from cos and prepending https:// to the beginning of it, such as https://cos.ap-chengdu.myqcloud.com. Note that the bucket name is excluded here.
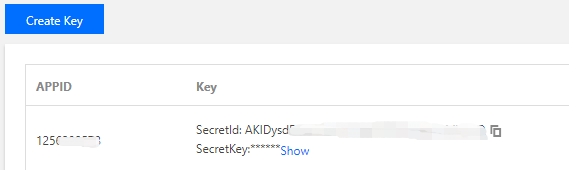
Access Key ID: the above-mentioned SecretId.
Secret Access Key: the above-mentioned SecretKey.
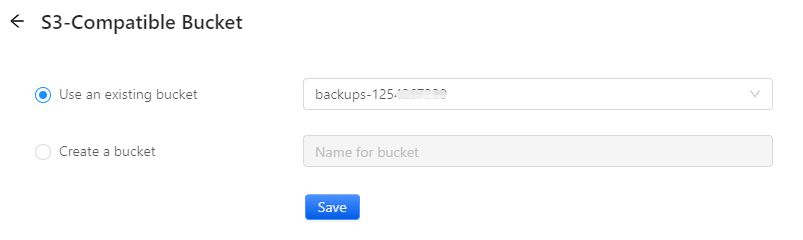
8. In the new window, click Use an existing bucket, select the above bucket you created, such as backups-1250000000, and click Save.
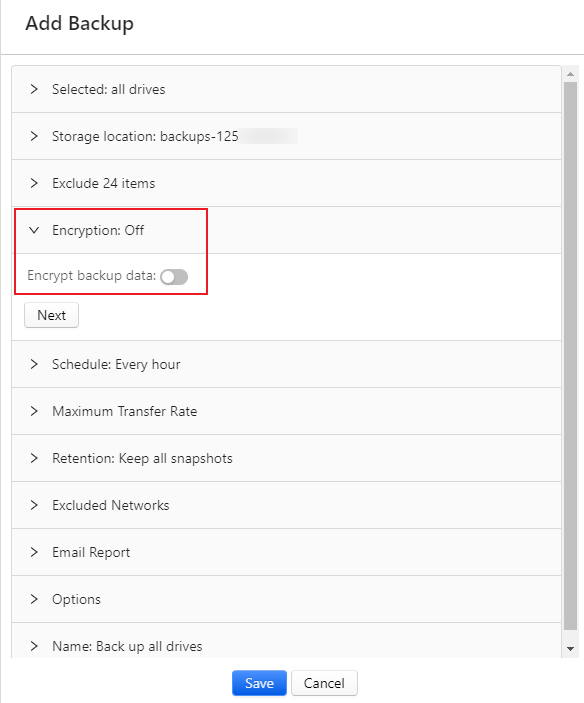
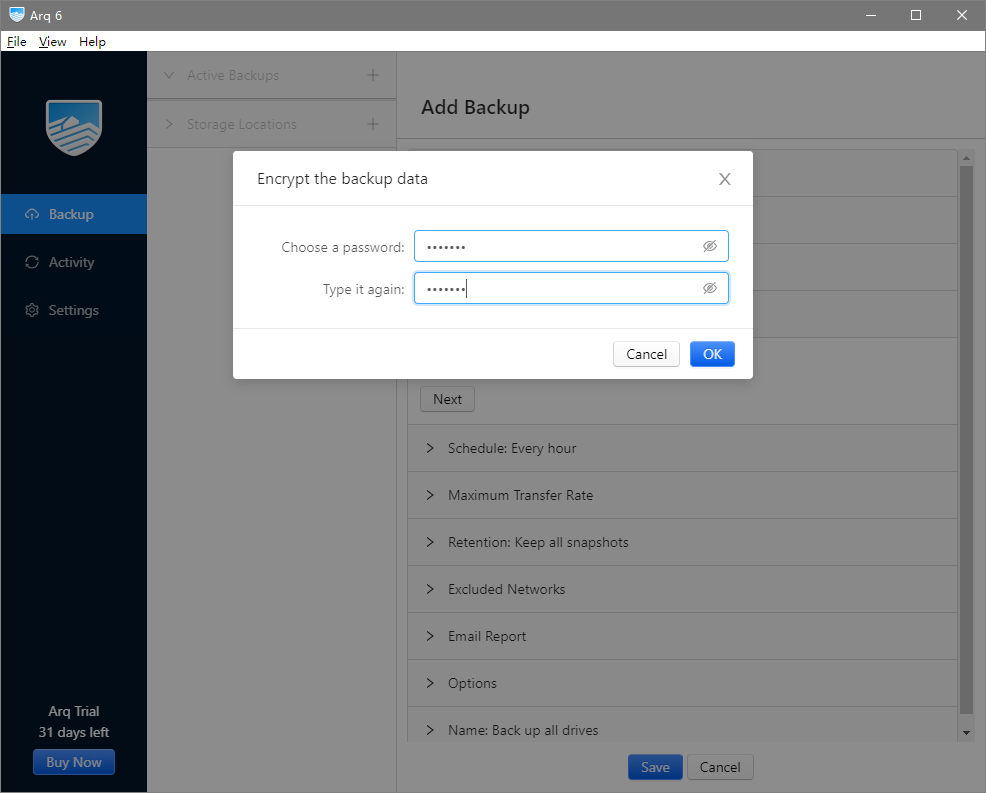
9. (Optional) You may choose to encrypt backup data. Here, we select On.
10. In the pop-up window, set your encryption password. Enter it twice and click OK. Please keep your password in mind, otherwise, you may not be able to restore your files from backup.
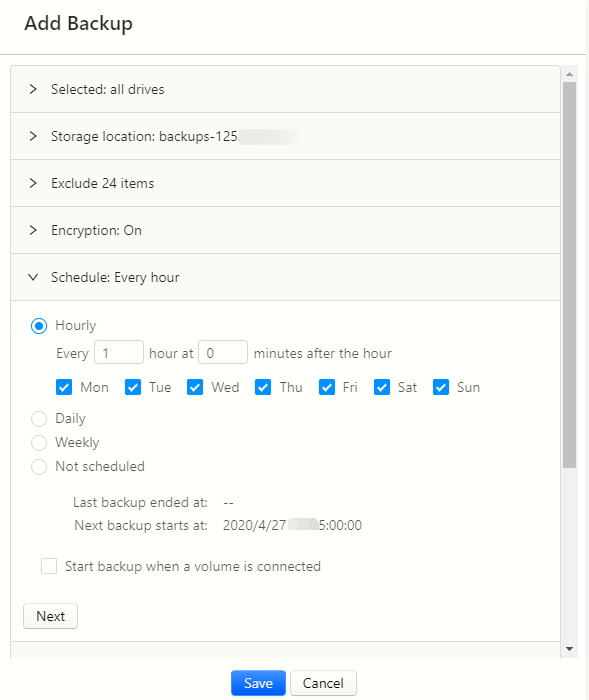
11. (Optional) You may configure a backup schedule.
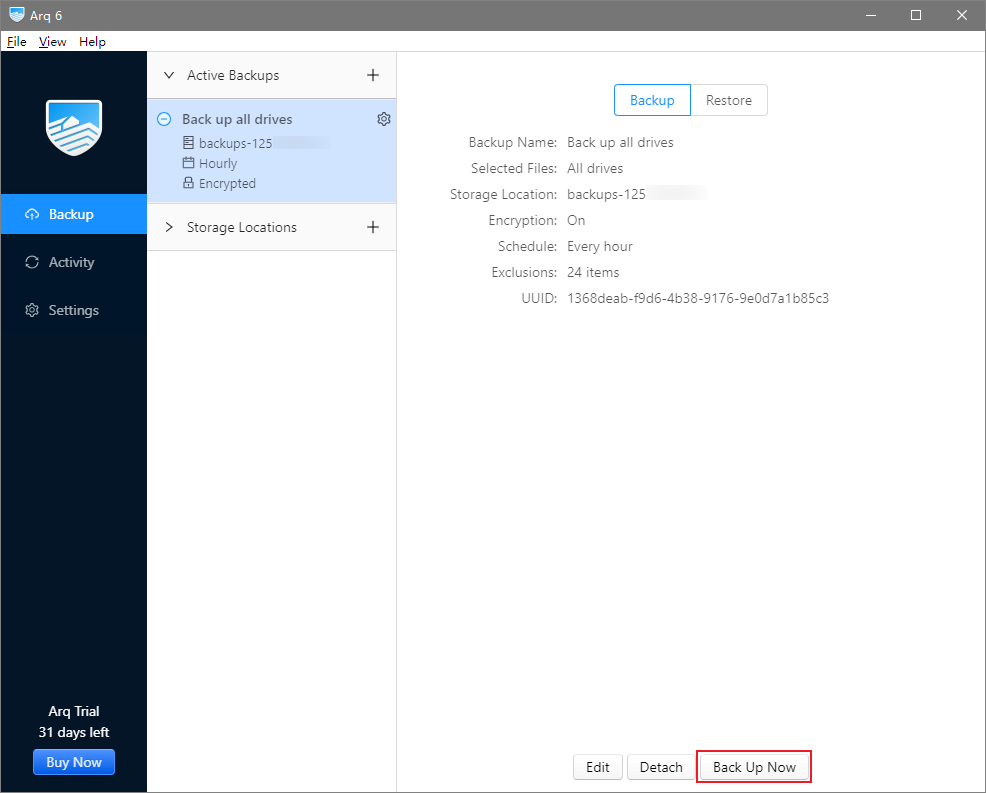
12. Click Save, and then Back Up Now to start the backup.
Restoring Files from Backup
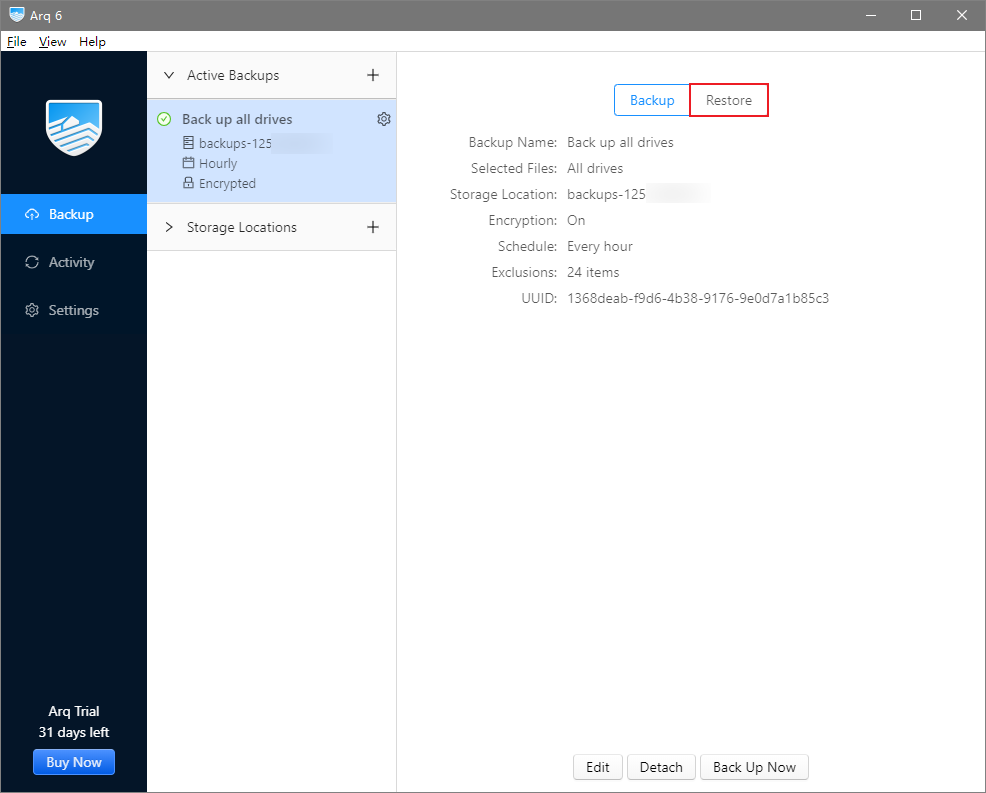
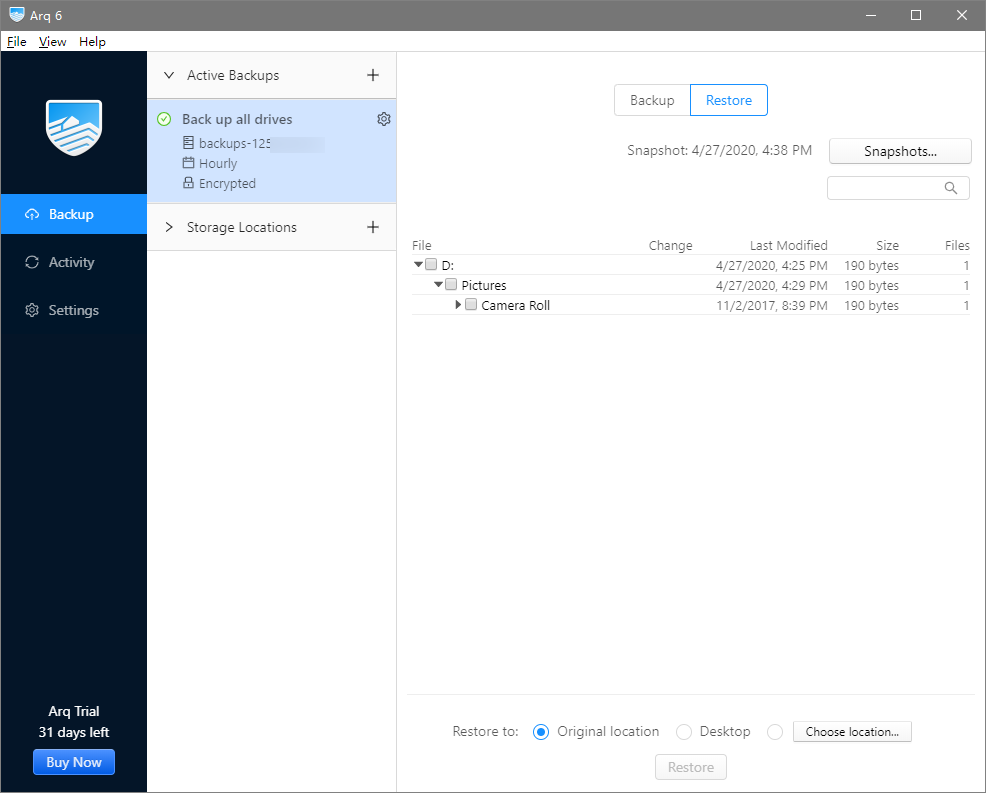
1. Click Restore in the list of Backup in the left sidebar.
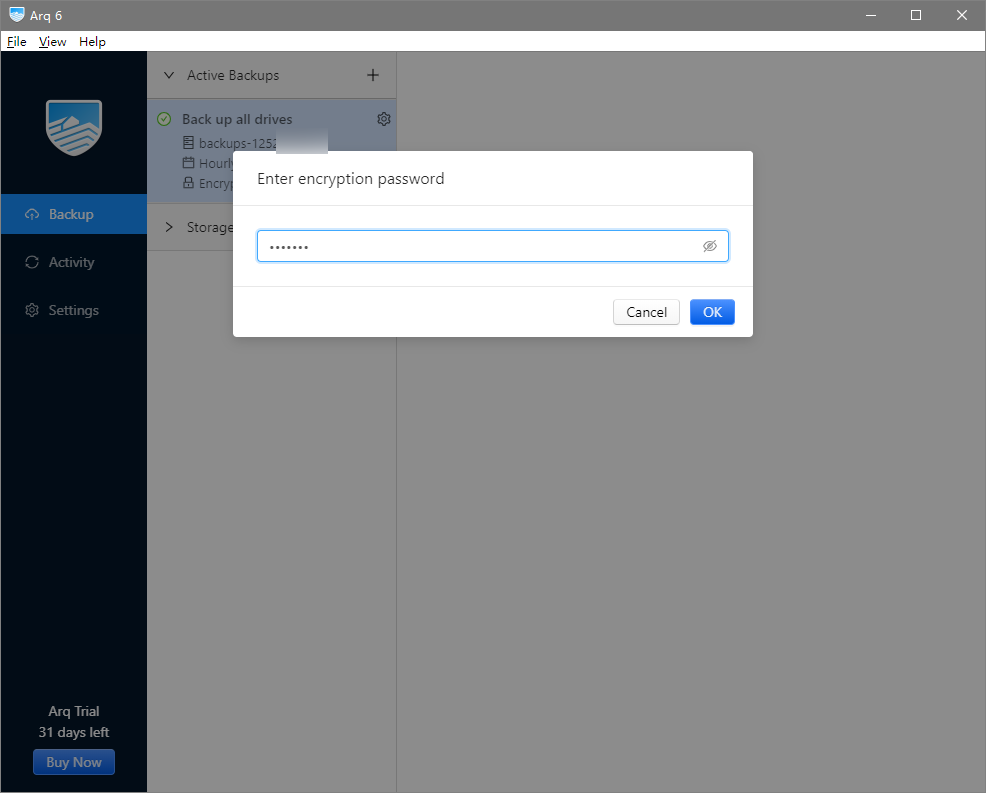
2. Enter your password if you have enabled Encrypt backup data in Step 9.
3. Select the directories or files to restore, and the location to save them, and then click Restore.
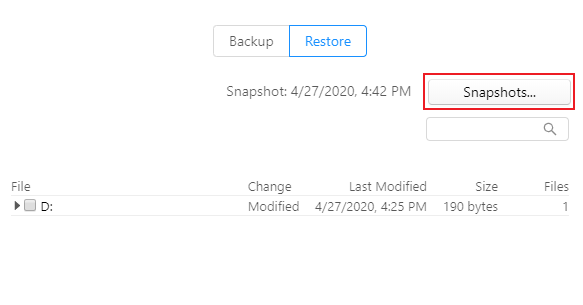
4. By default, files are restored from their latest backup. If necessary, you can choose to restore from an old version of backup in snapshots, which can be viewed by clicking Snapshots.
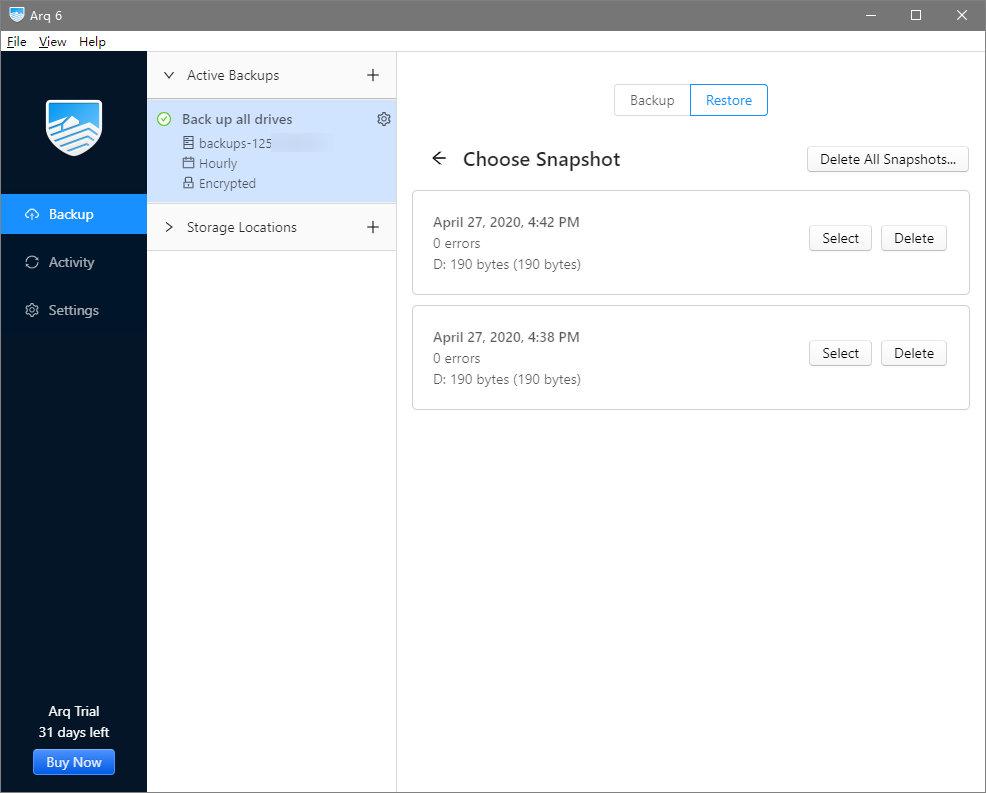
5. Choose a snapshot.
6. Select the snapshot directories or files to restore, and the location to save them, and then click Restore.
7. Once prompted that the restore operation is completed, you can go to the specified directories and view your restored files.