Preliminary Preparation
ダウンロード
フォーカスモード
フォントサイズ
Overview
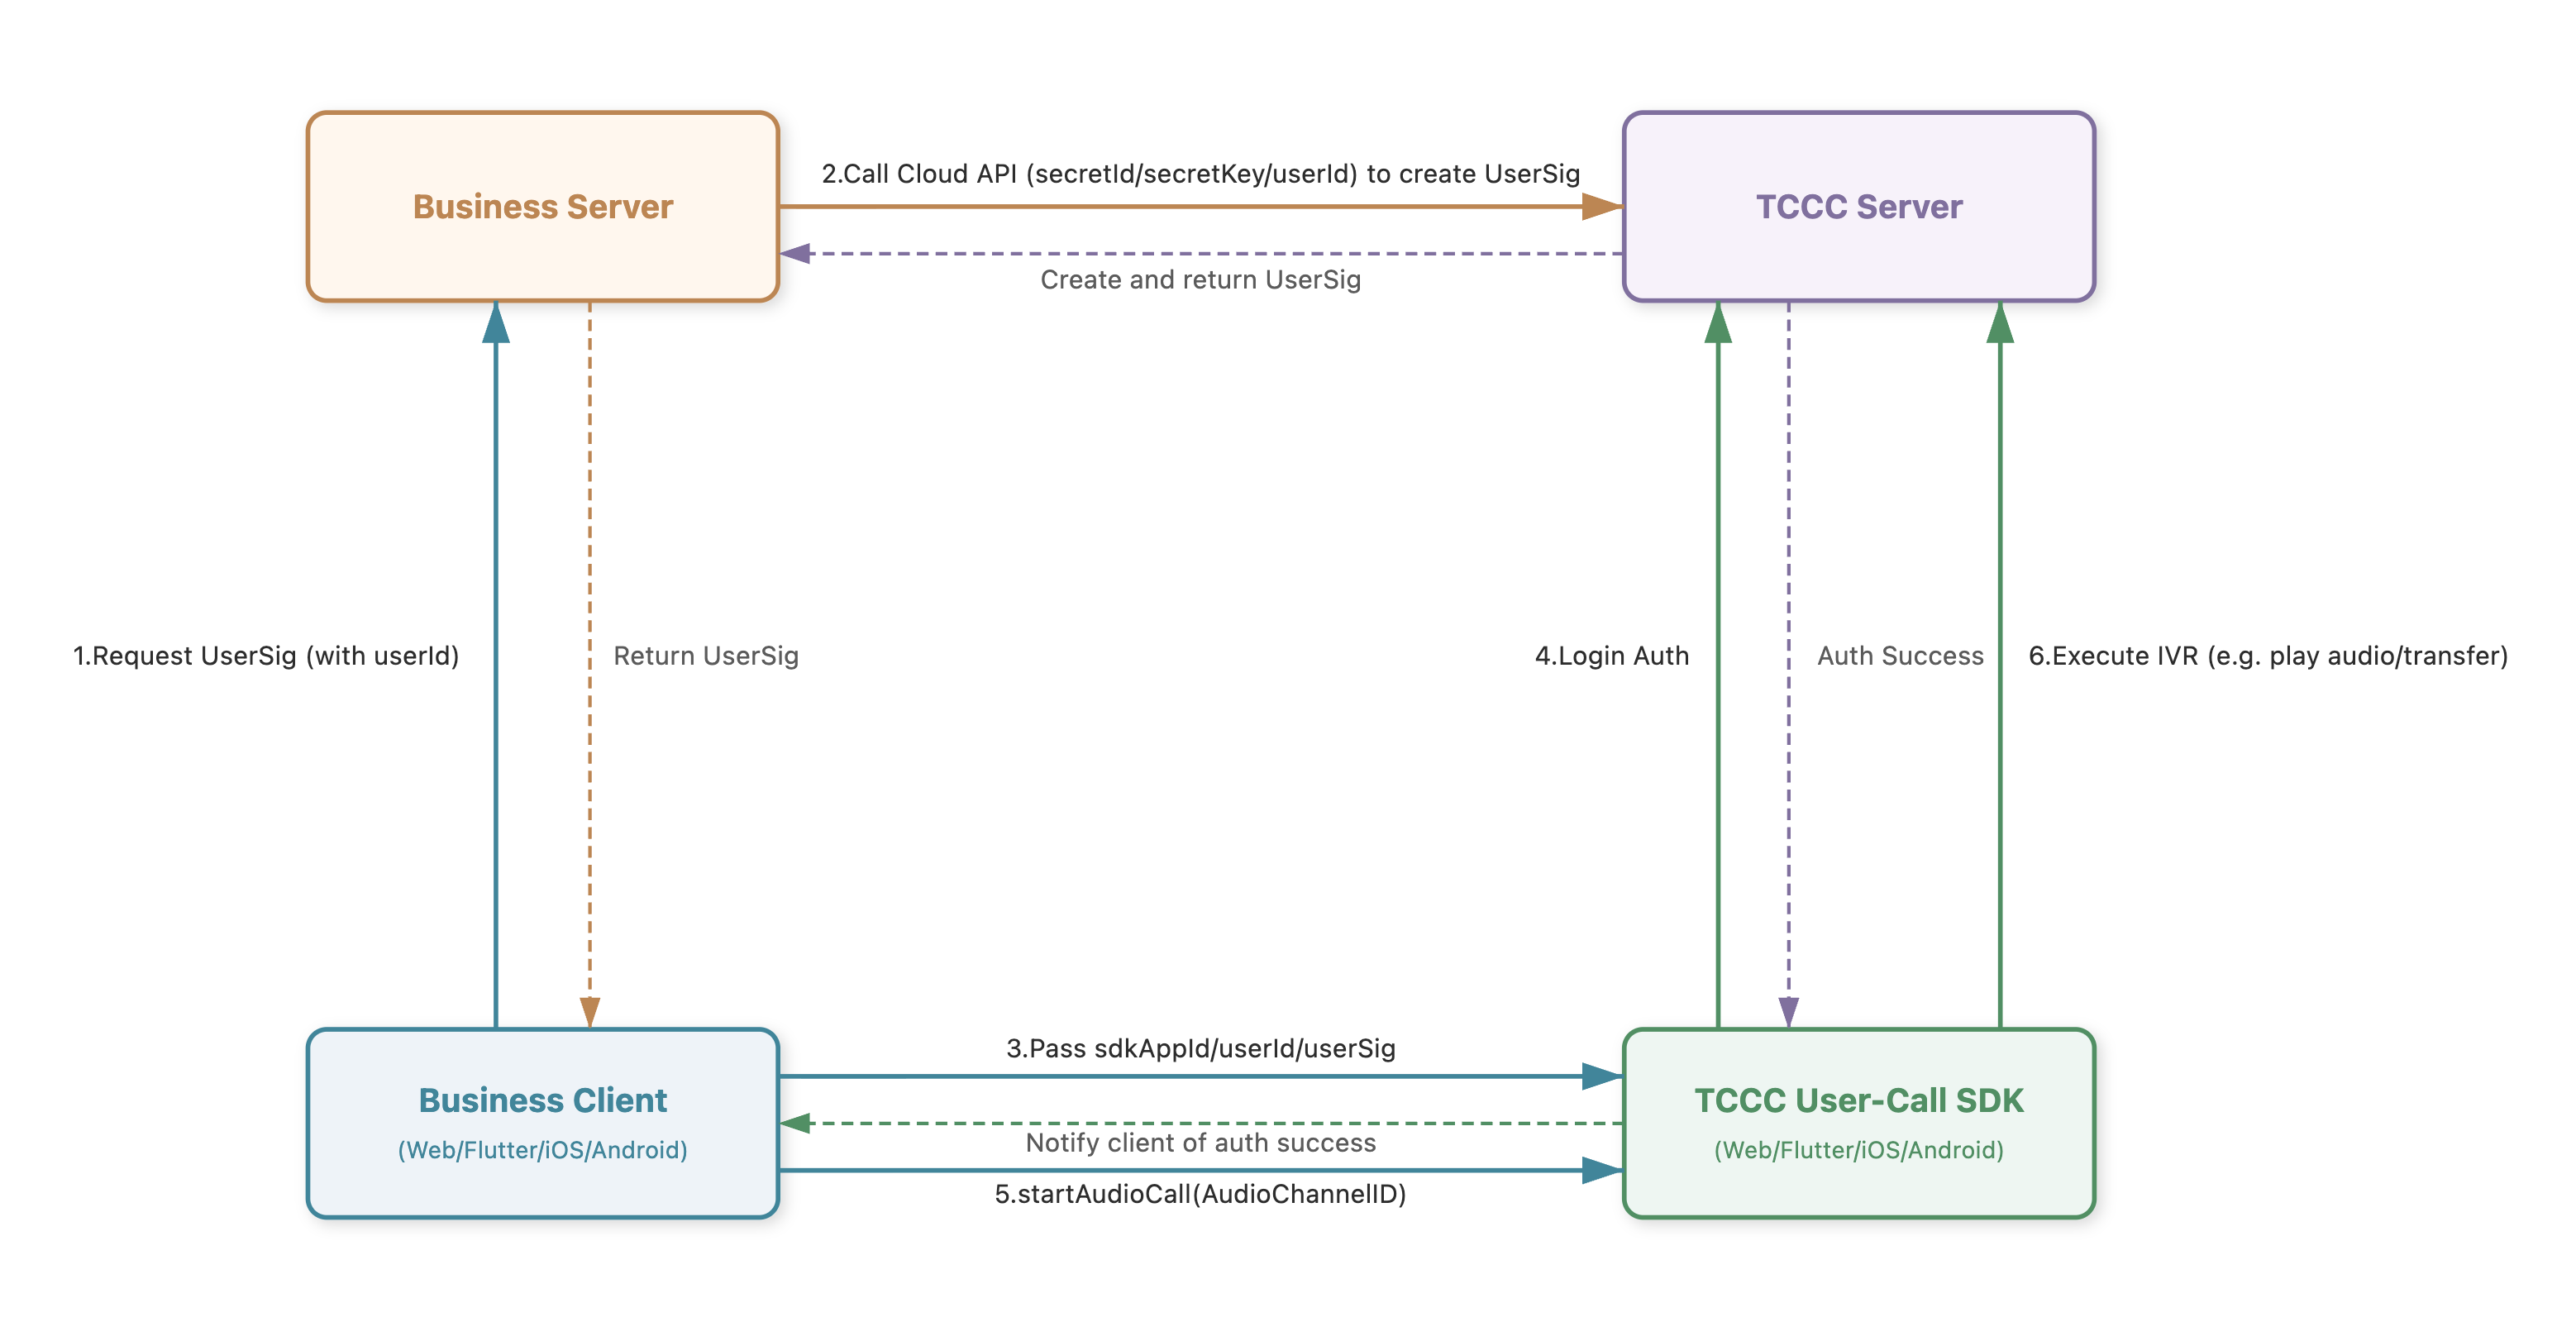
With the TCCC client outbound call SDK, you can quickly integrate audio outbound call capabilities, including initiating calls and sending DTMF tones.
Overall Process
Integration Prerequisites
1. A Cloud Contact Center application has been created.
2. Purchase and add agent accounts.
Access Process
Step 1: Obtain SecretId and SecretKey
Caution:
SecretId and SecretKey are sensitive information. To prevent unauthorized use, keep them secure and prevent leakage.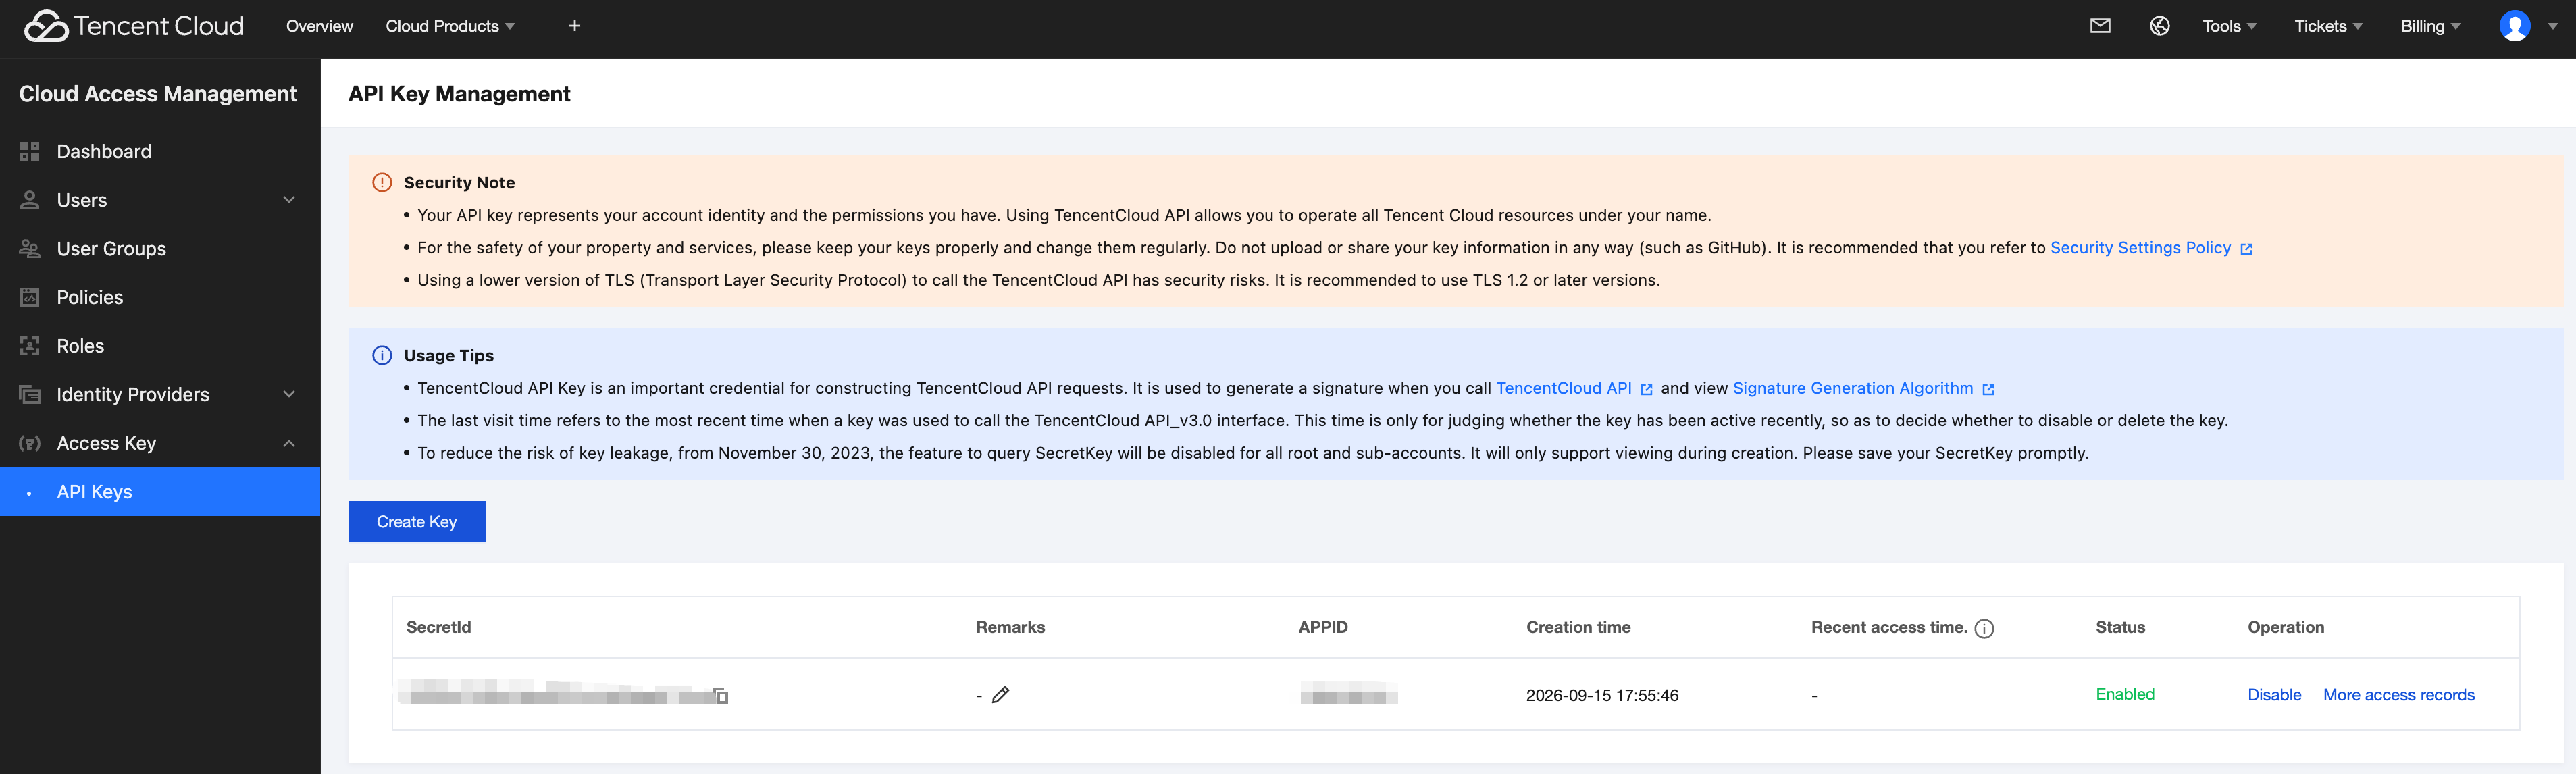
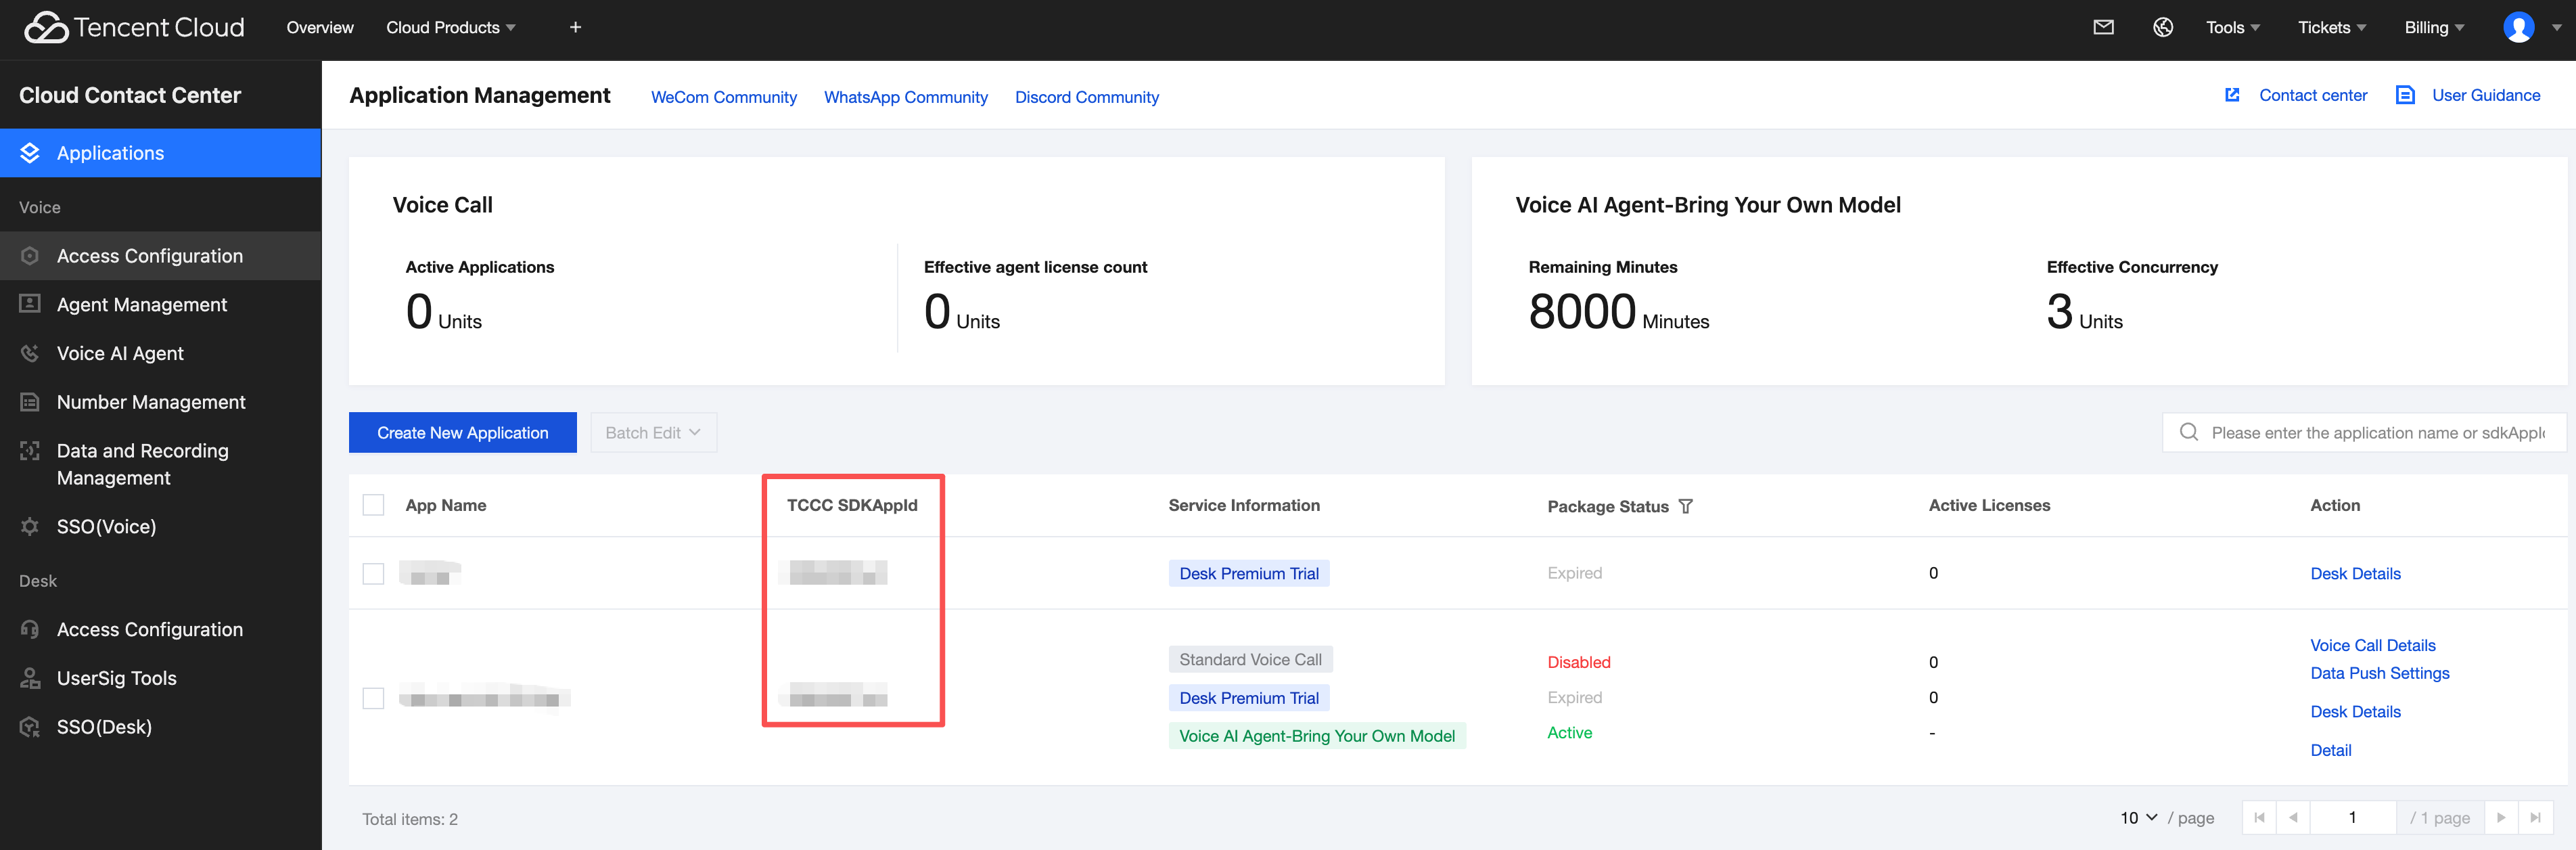
Step 2: Obtain the SDKAppId of TCCC
Step 3: Management Panel Configuration
1. Log in to the Management Panel.
If you are logging in for the first time, see First Login to the Management Panel to obtain your account and password.
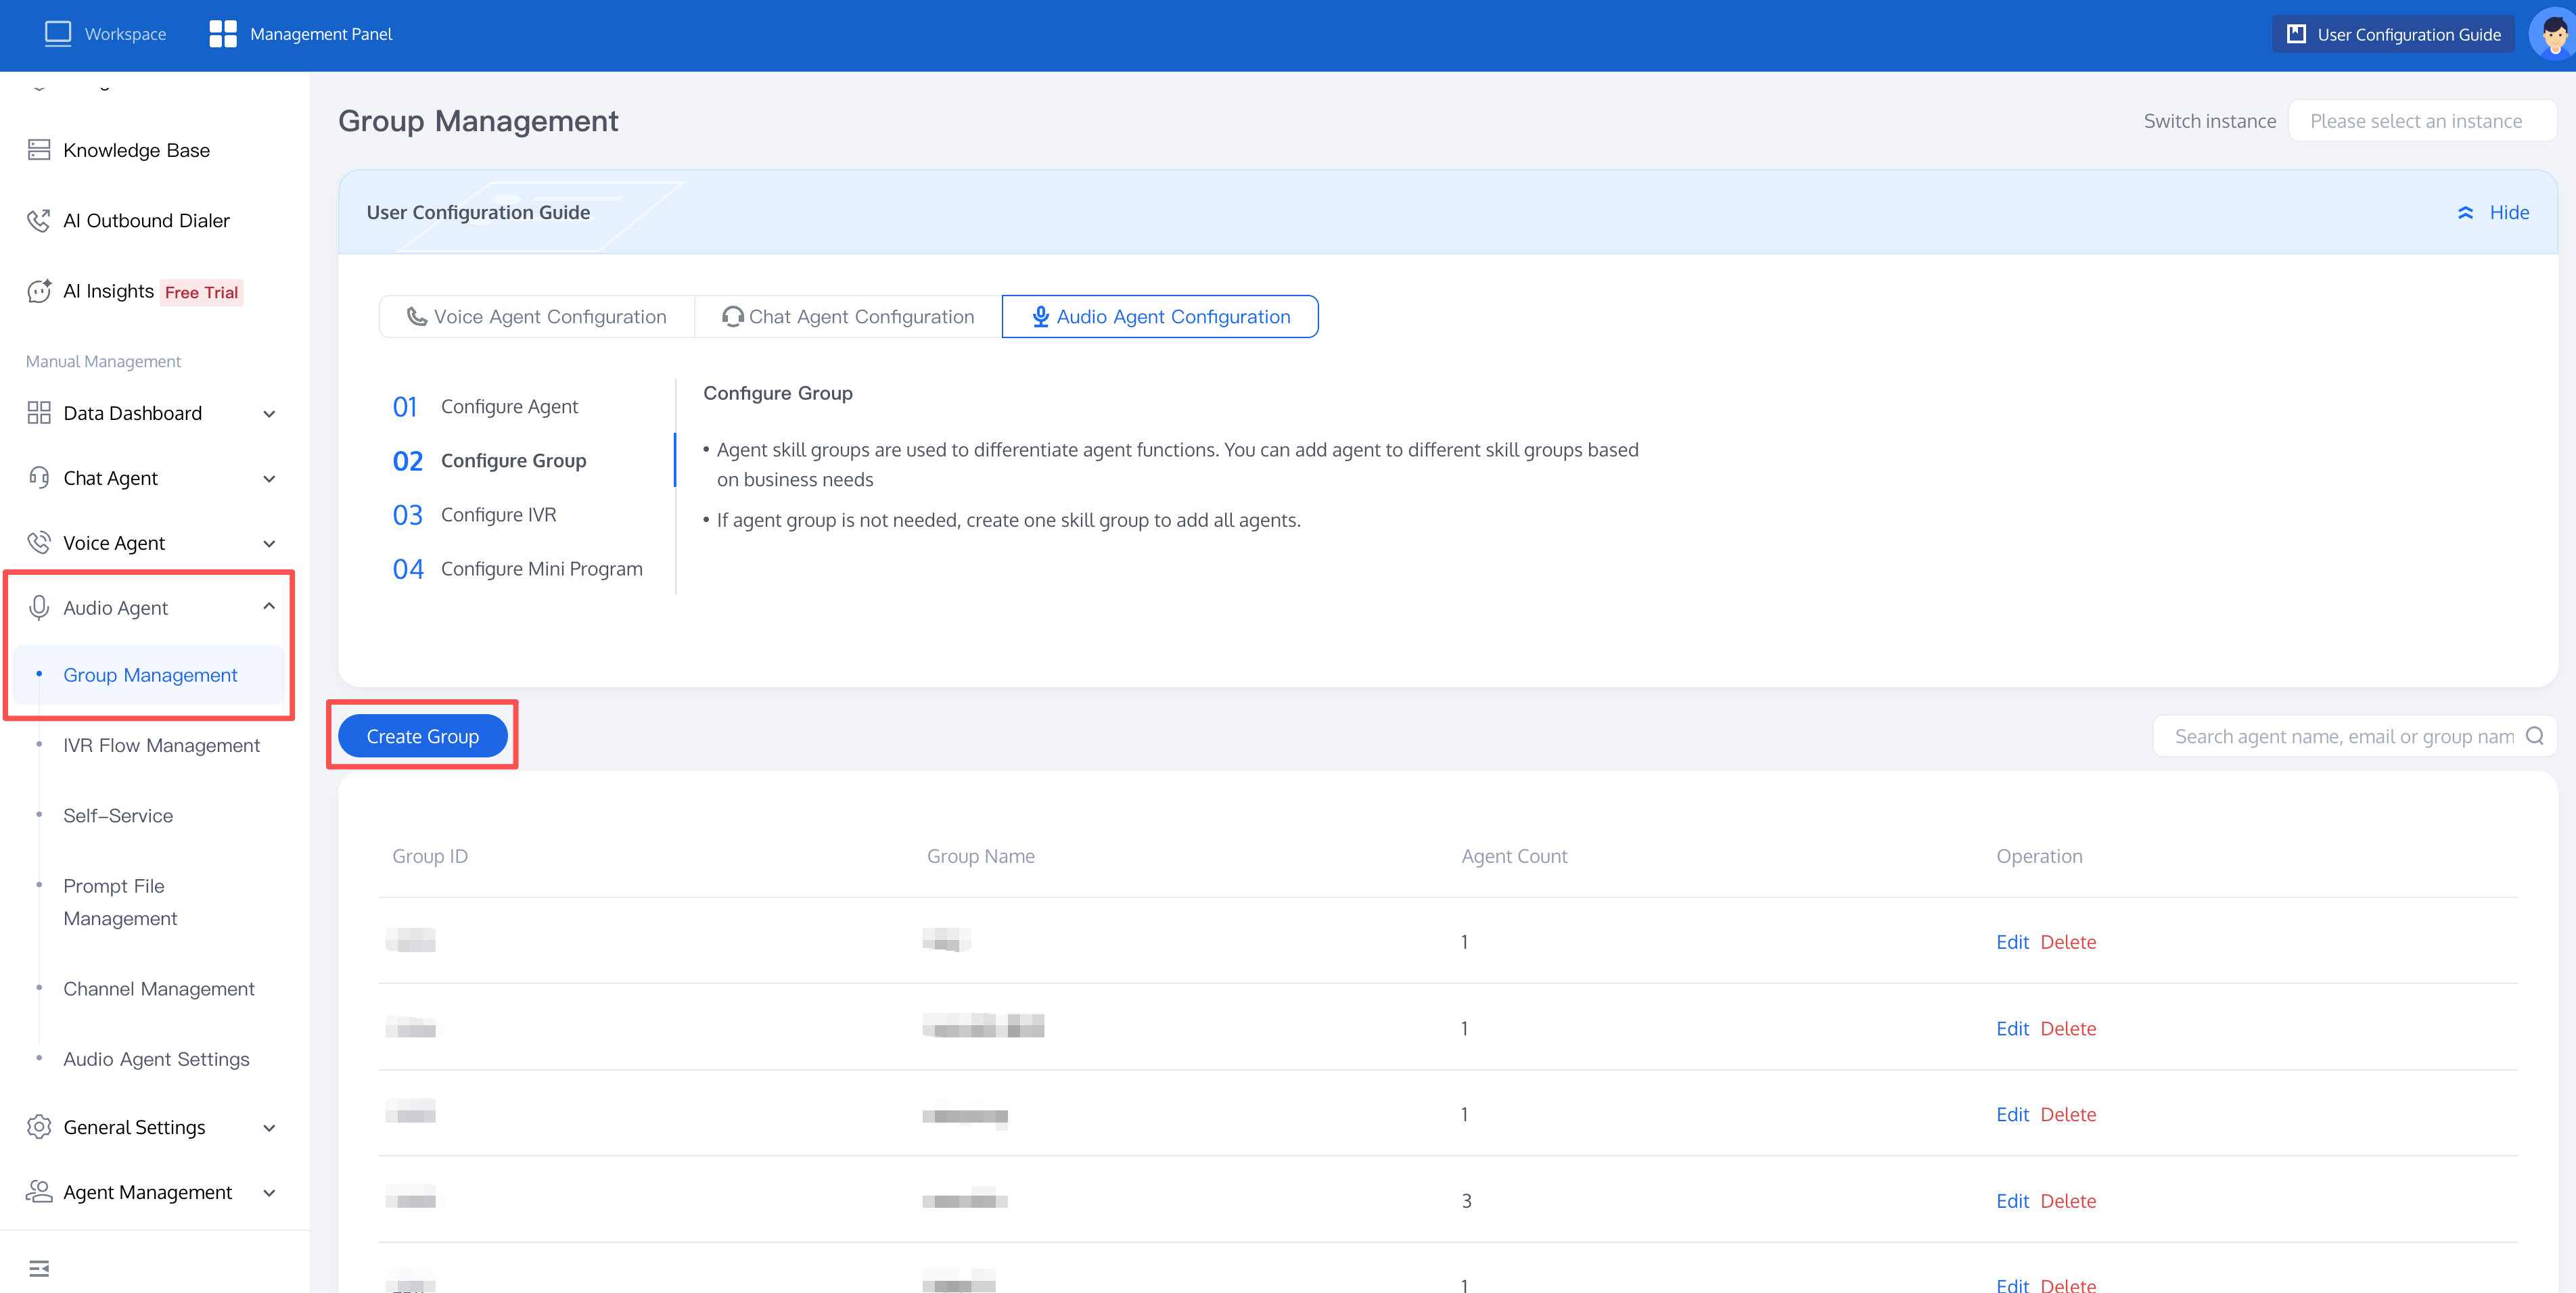
2. Create a group.
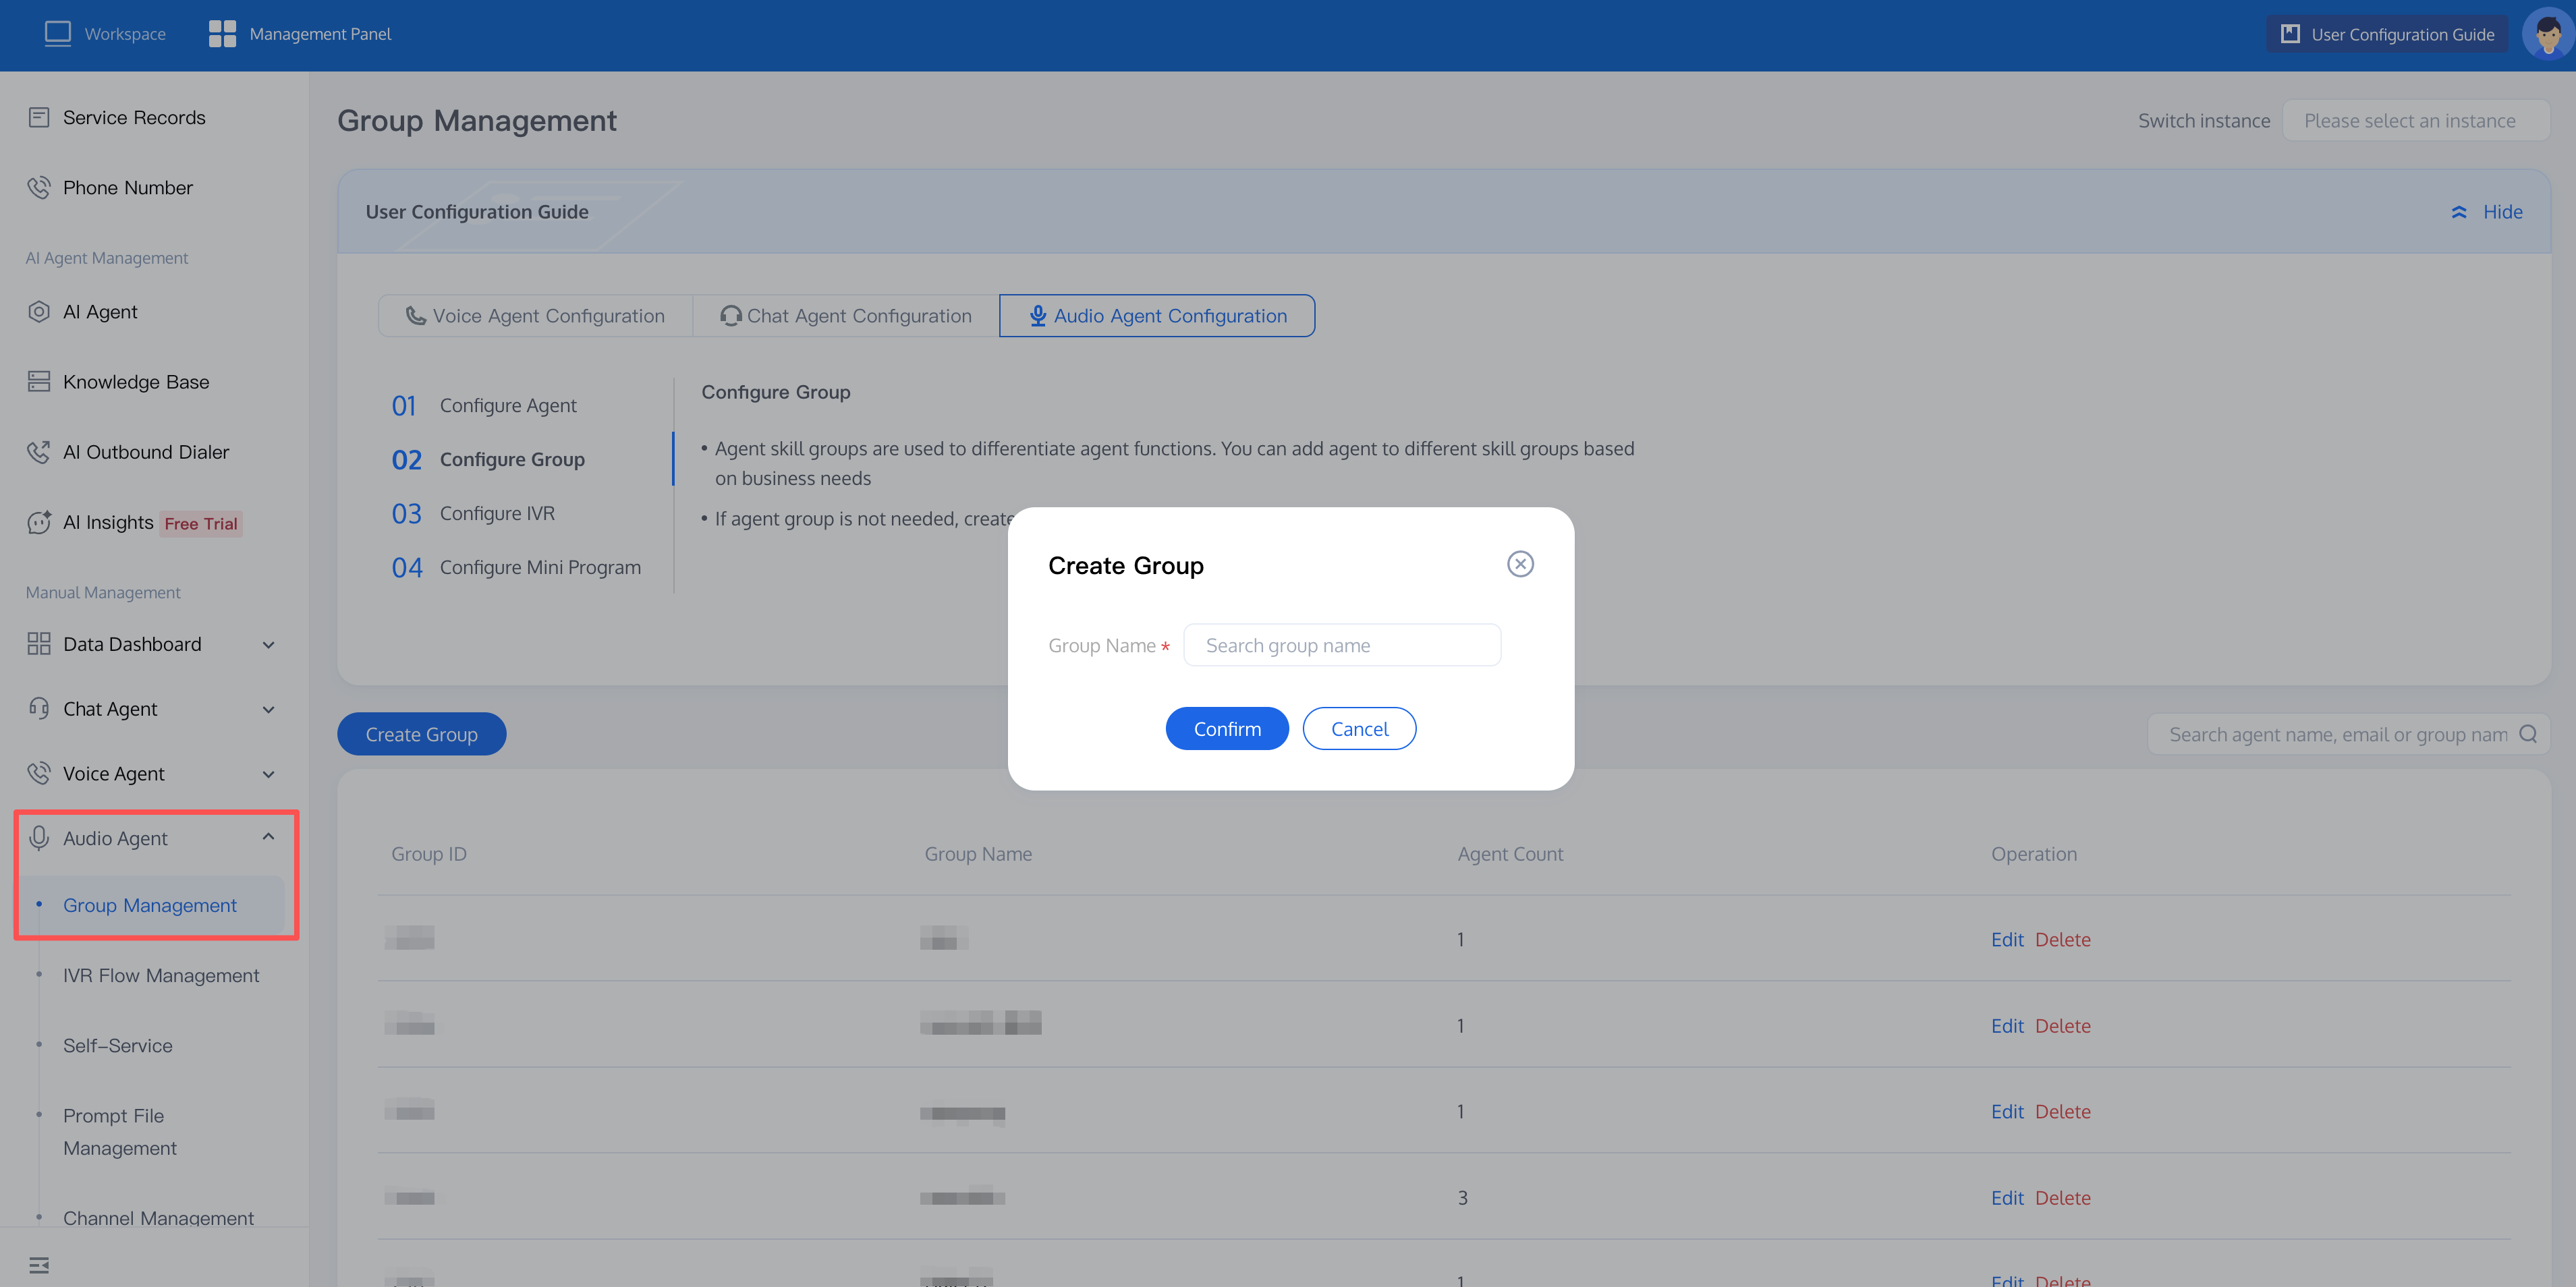
In the Manual Management module in the left sidebar of the management panel, choose Audio Agent > Group Management > Create Group, enter a group name, and click Confirm to create the group.
3. Add agents and assign them to skill groups.
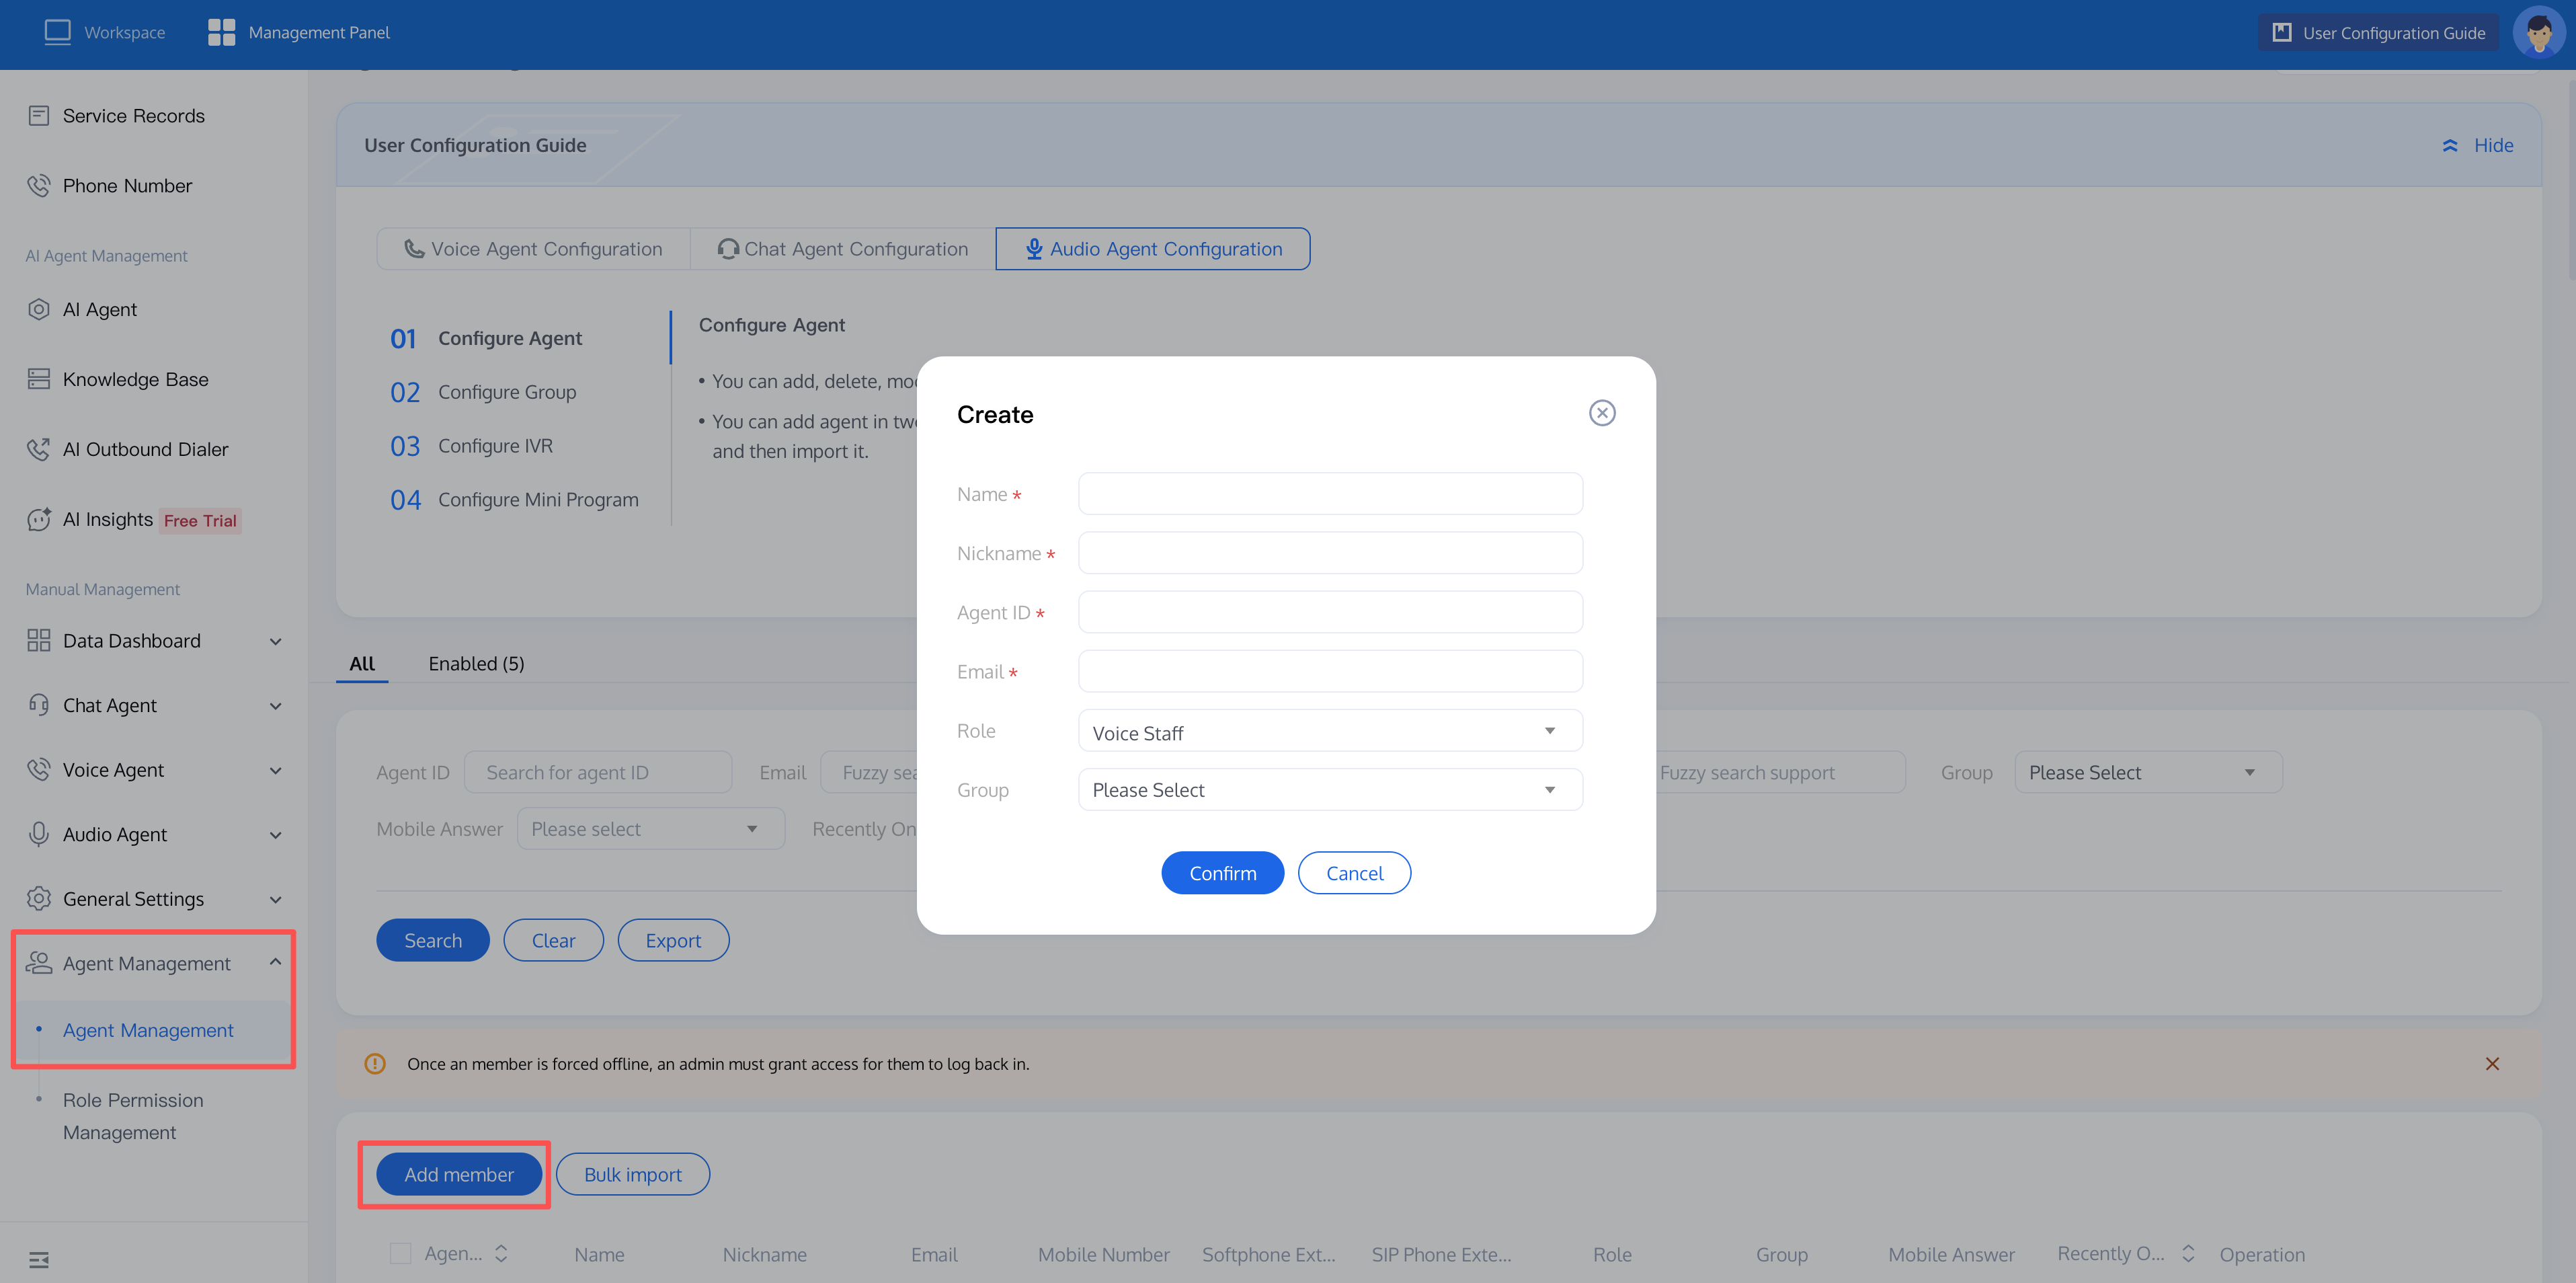
In the Manual Management module in the left sidebar of the management panel, choose Agent Management > Agent Management > Add Member. In the pop-up window, enter the agent's Name, Nickname, Agent ID, and Email. For Role, select Voice Staff. For Skill Group/Group, select the skill group added in the previous step and click Confirm to complete adding the agent.
4. Create a simple agent response IVR.
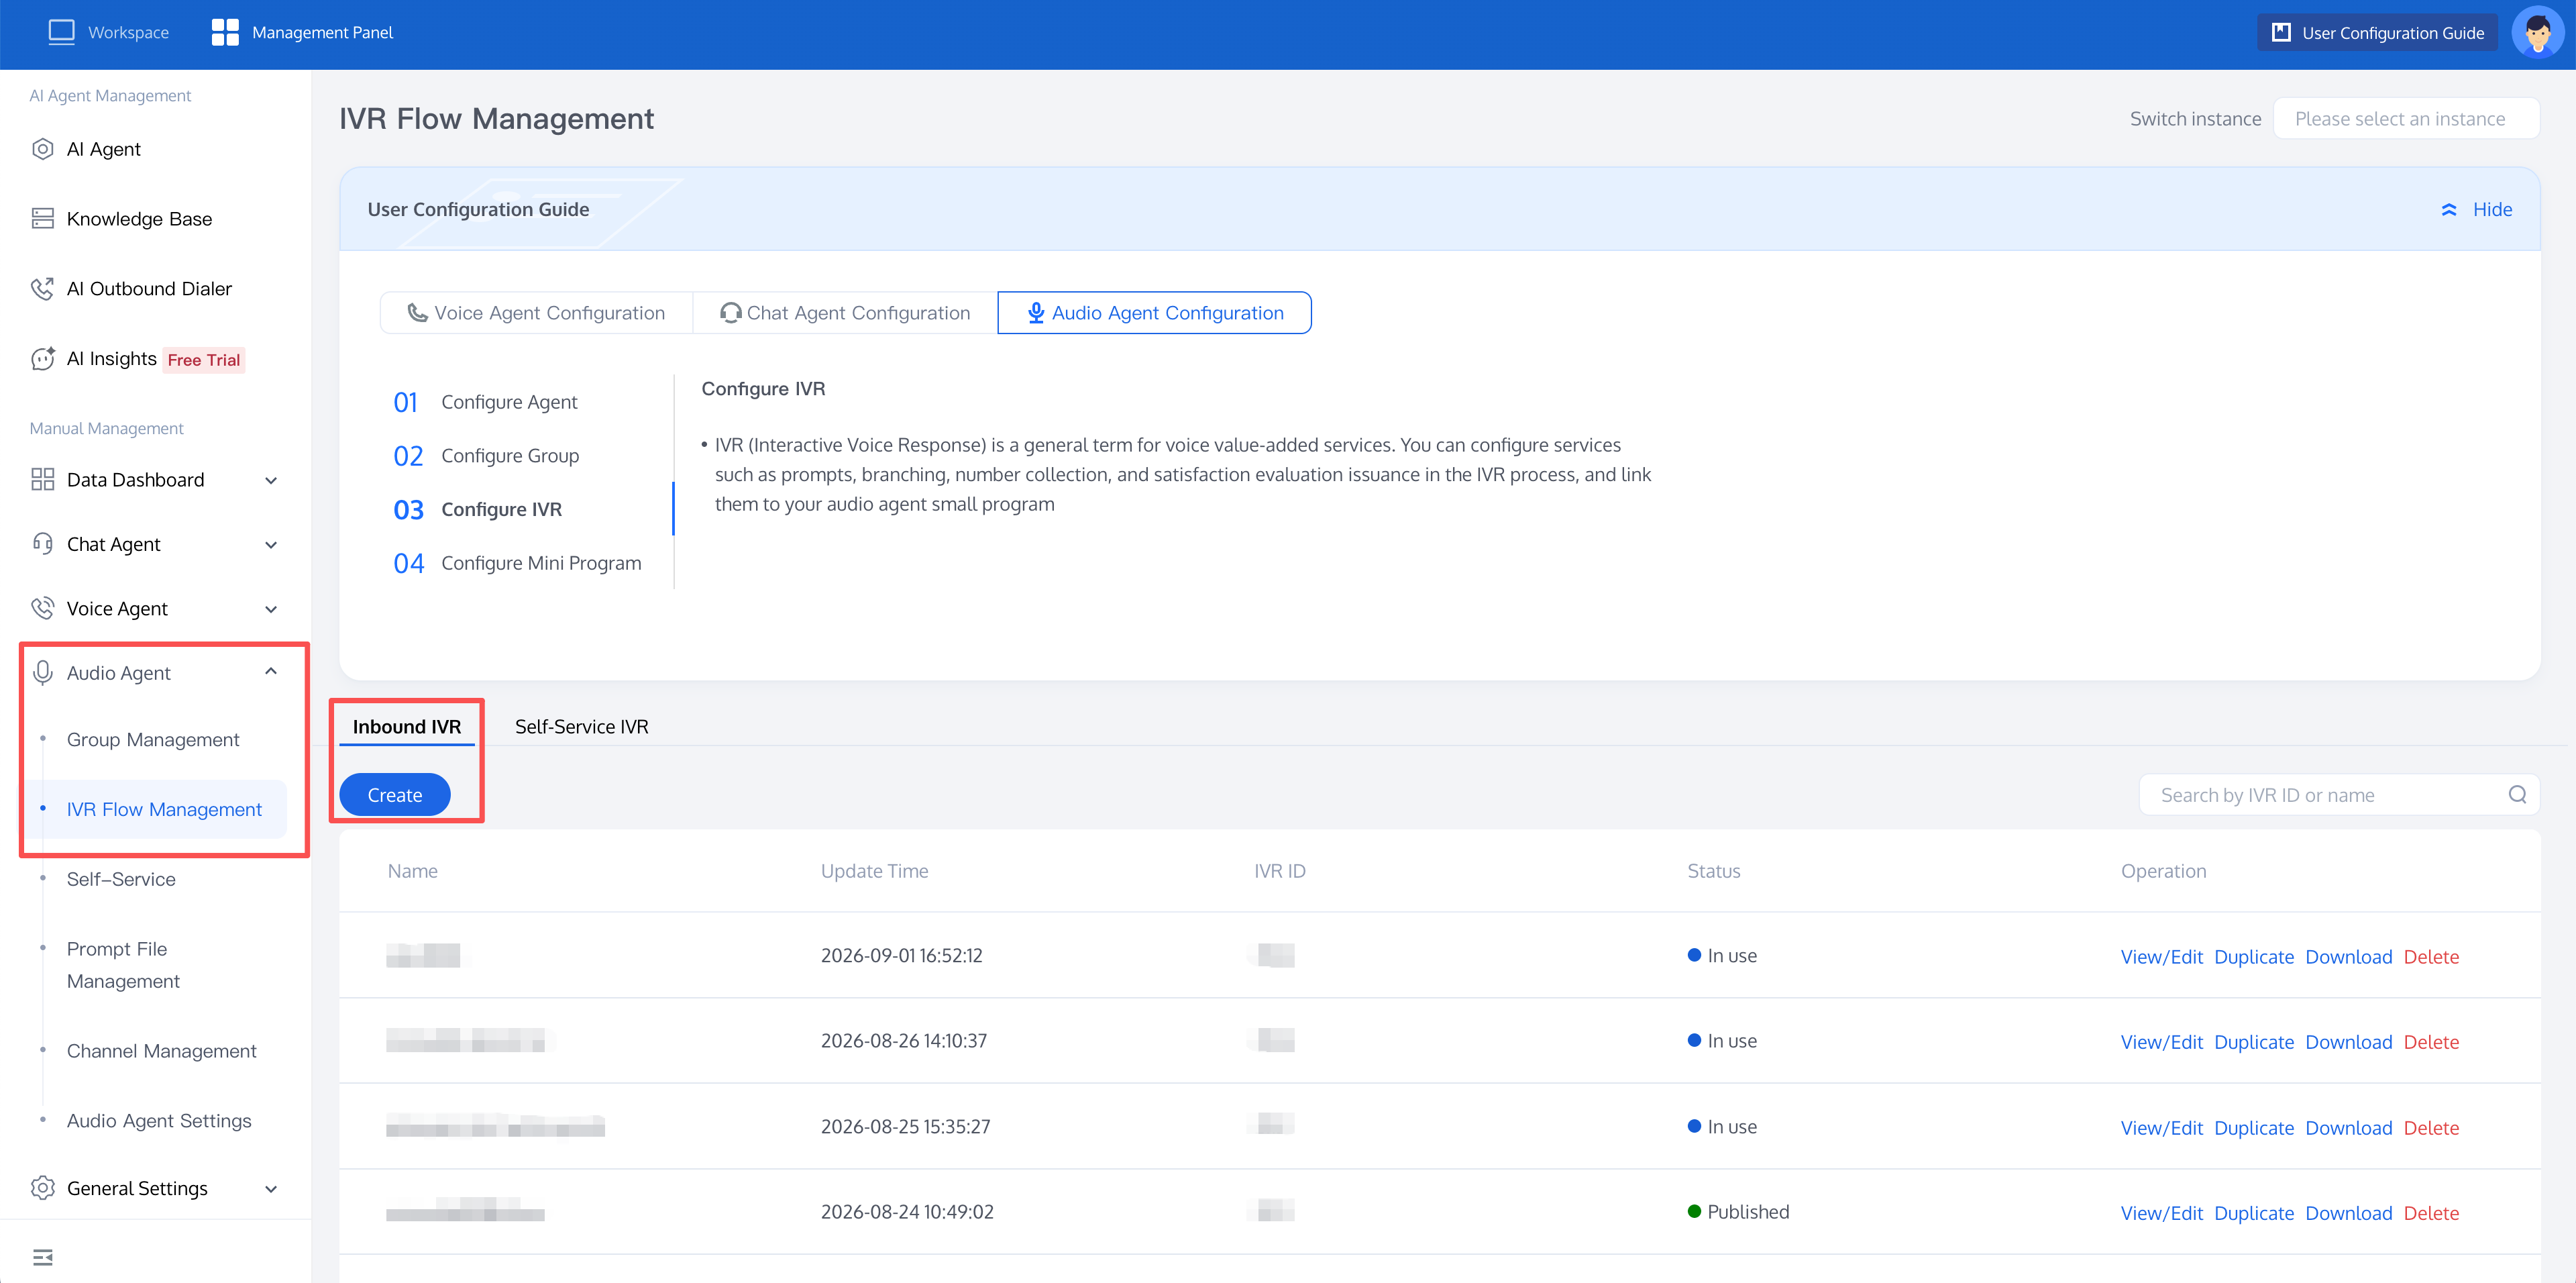
4.1 In the Manual Management module in the left sidebar of the management panel, choose Audio Agent > IVR Flow Management > Inbound IVR > Create. You can select "Blank IVR" for a quick test.
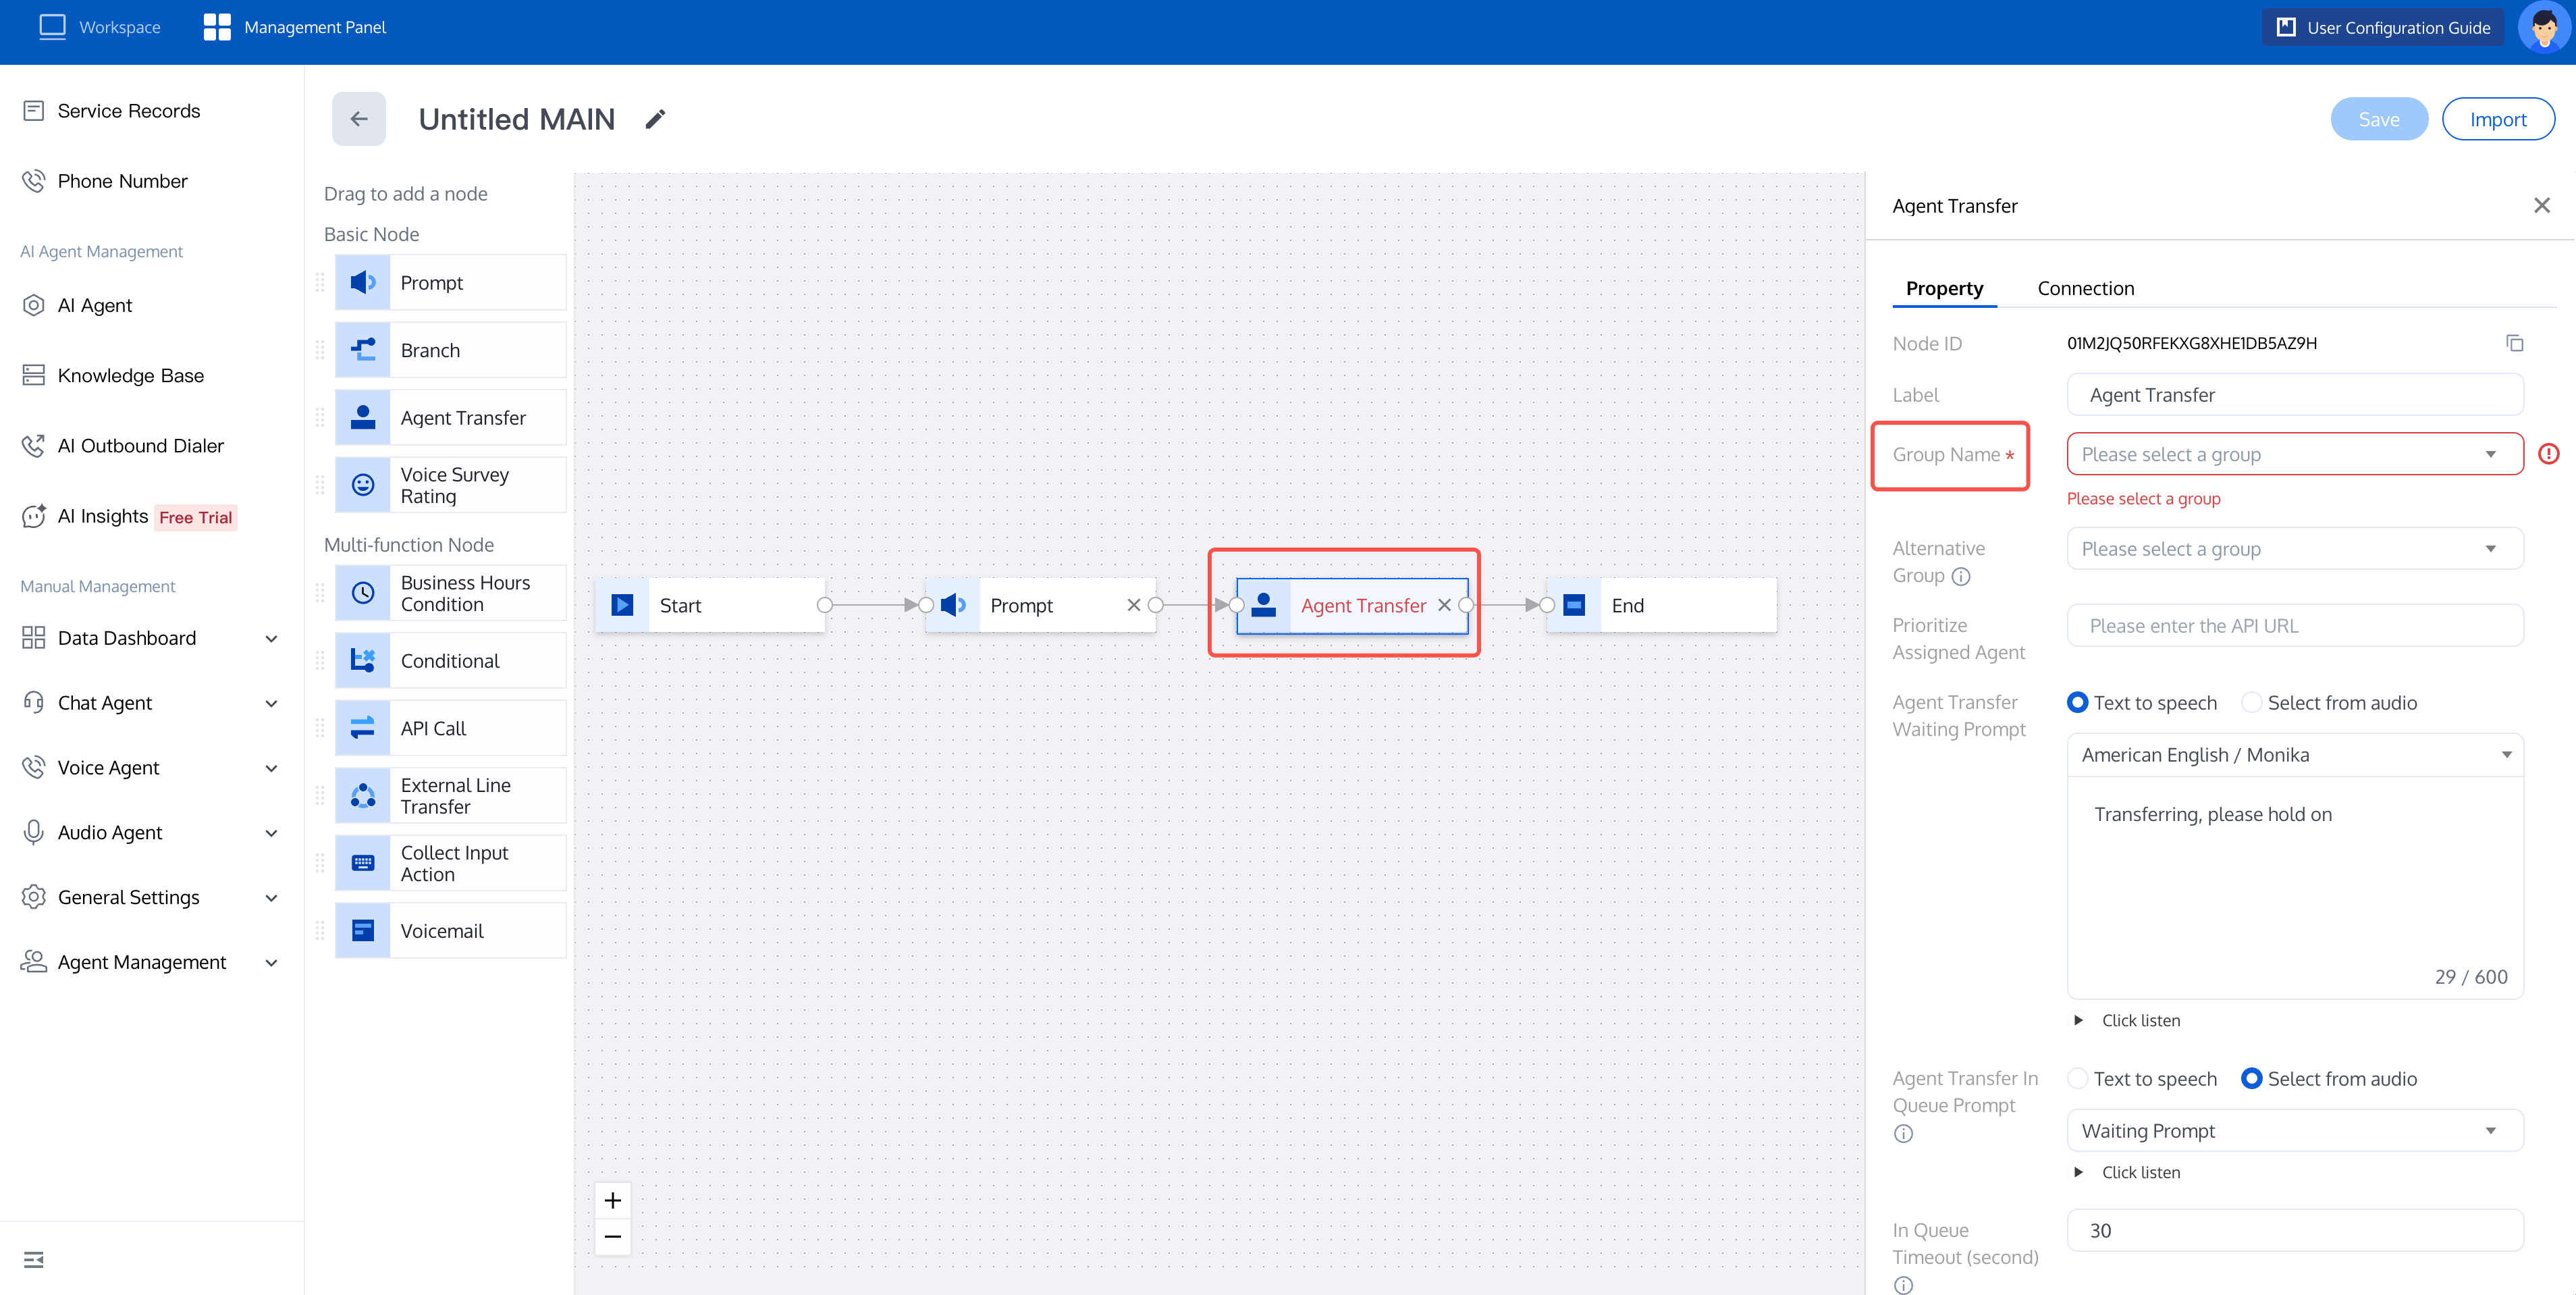
4.2 You can configure a simple IVR flow as shown in the following figure. Note that in the "Agent Transfer" node, select the group added in step 2 for the "Group Name" option.
5.
Create a channel
and obtain the audioChannelId.5.1 In the Manual Management module in the left sidebar of the management panel, click Audio Agent > Channel Management > Configure Audio Entrance > Add.
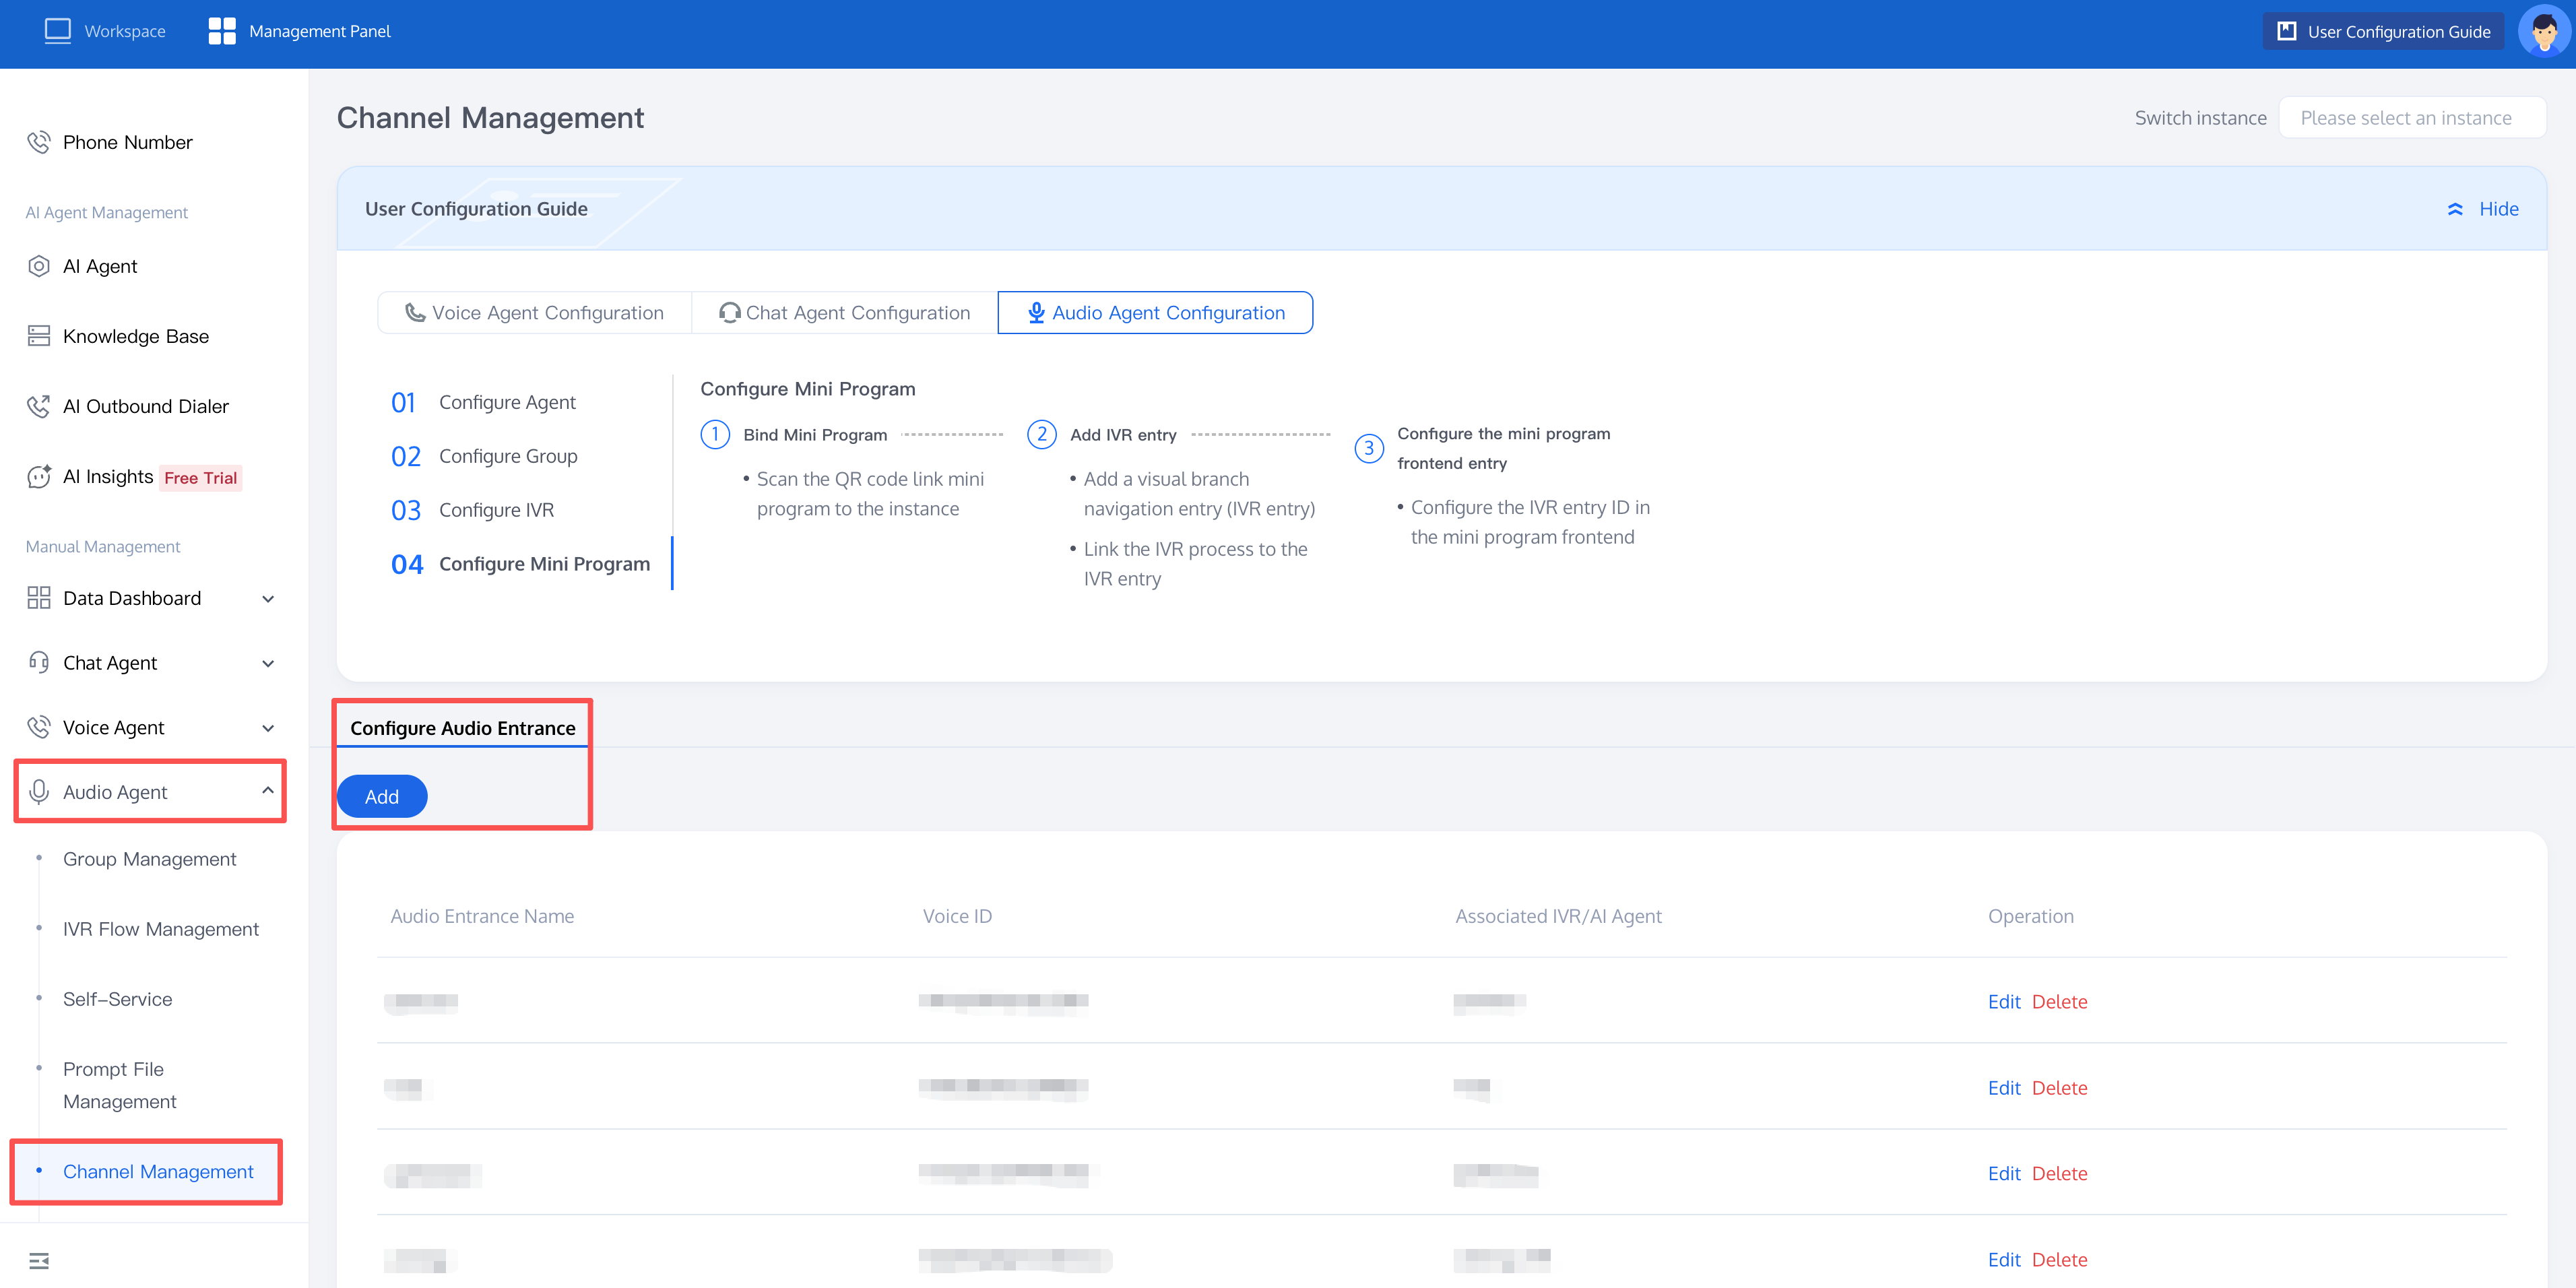
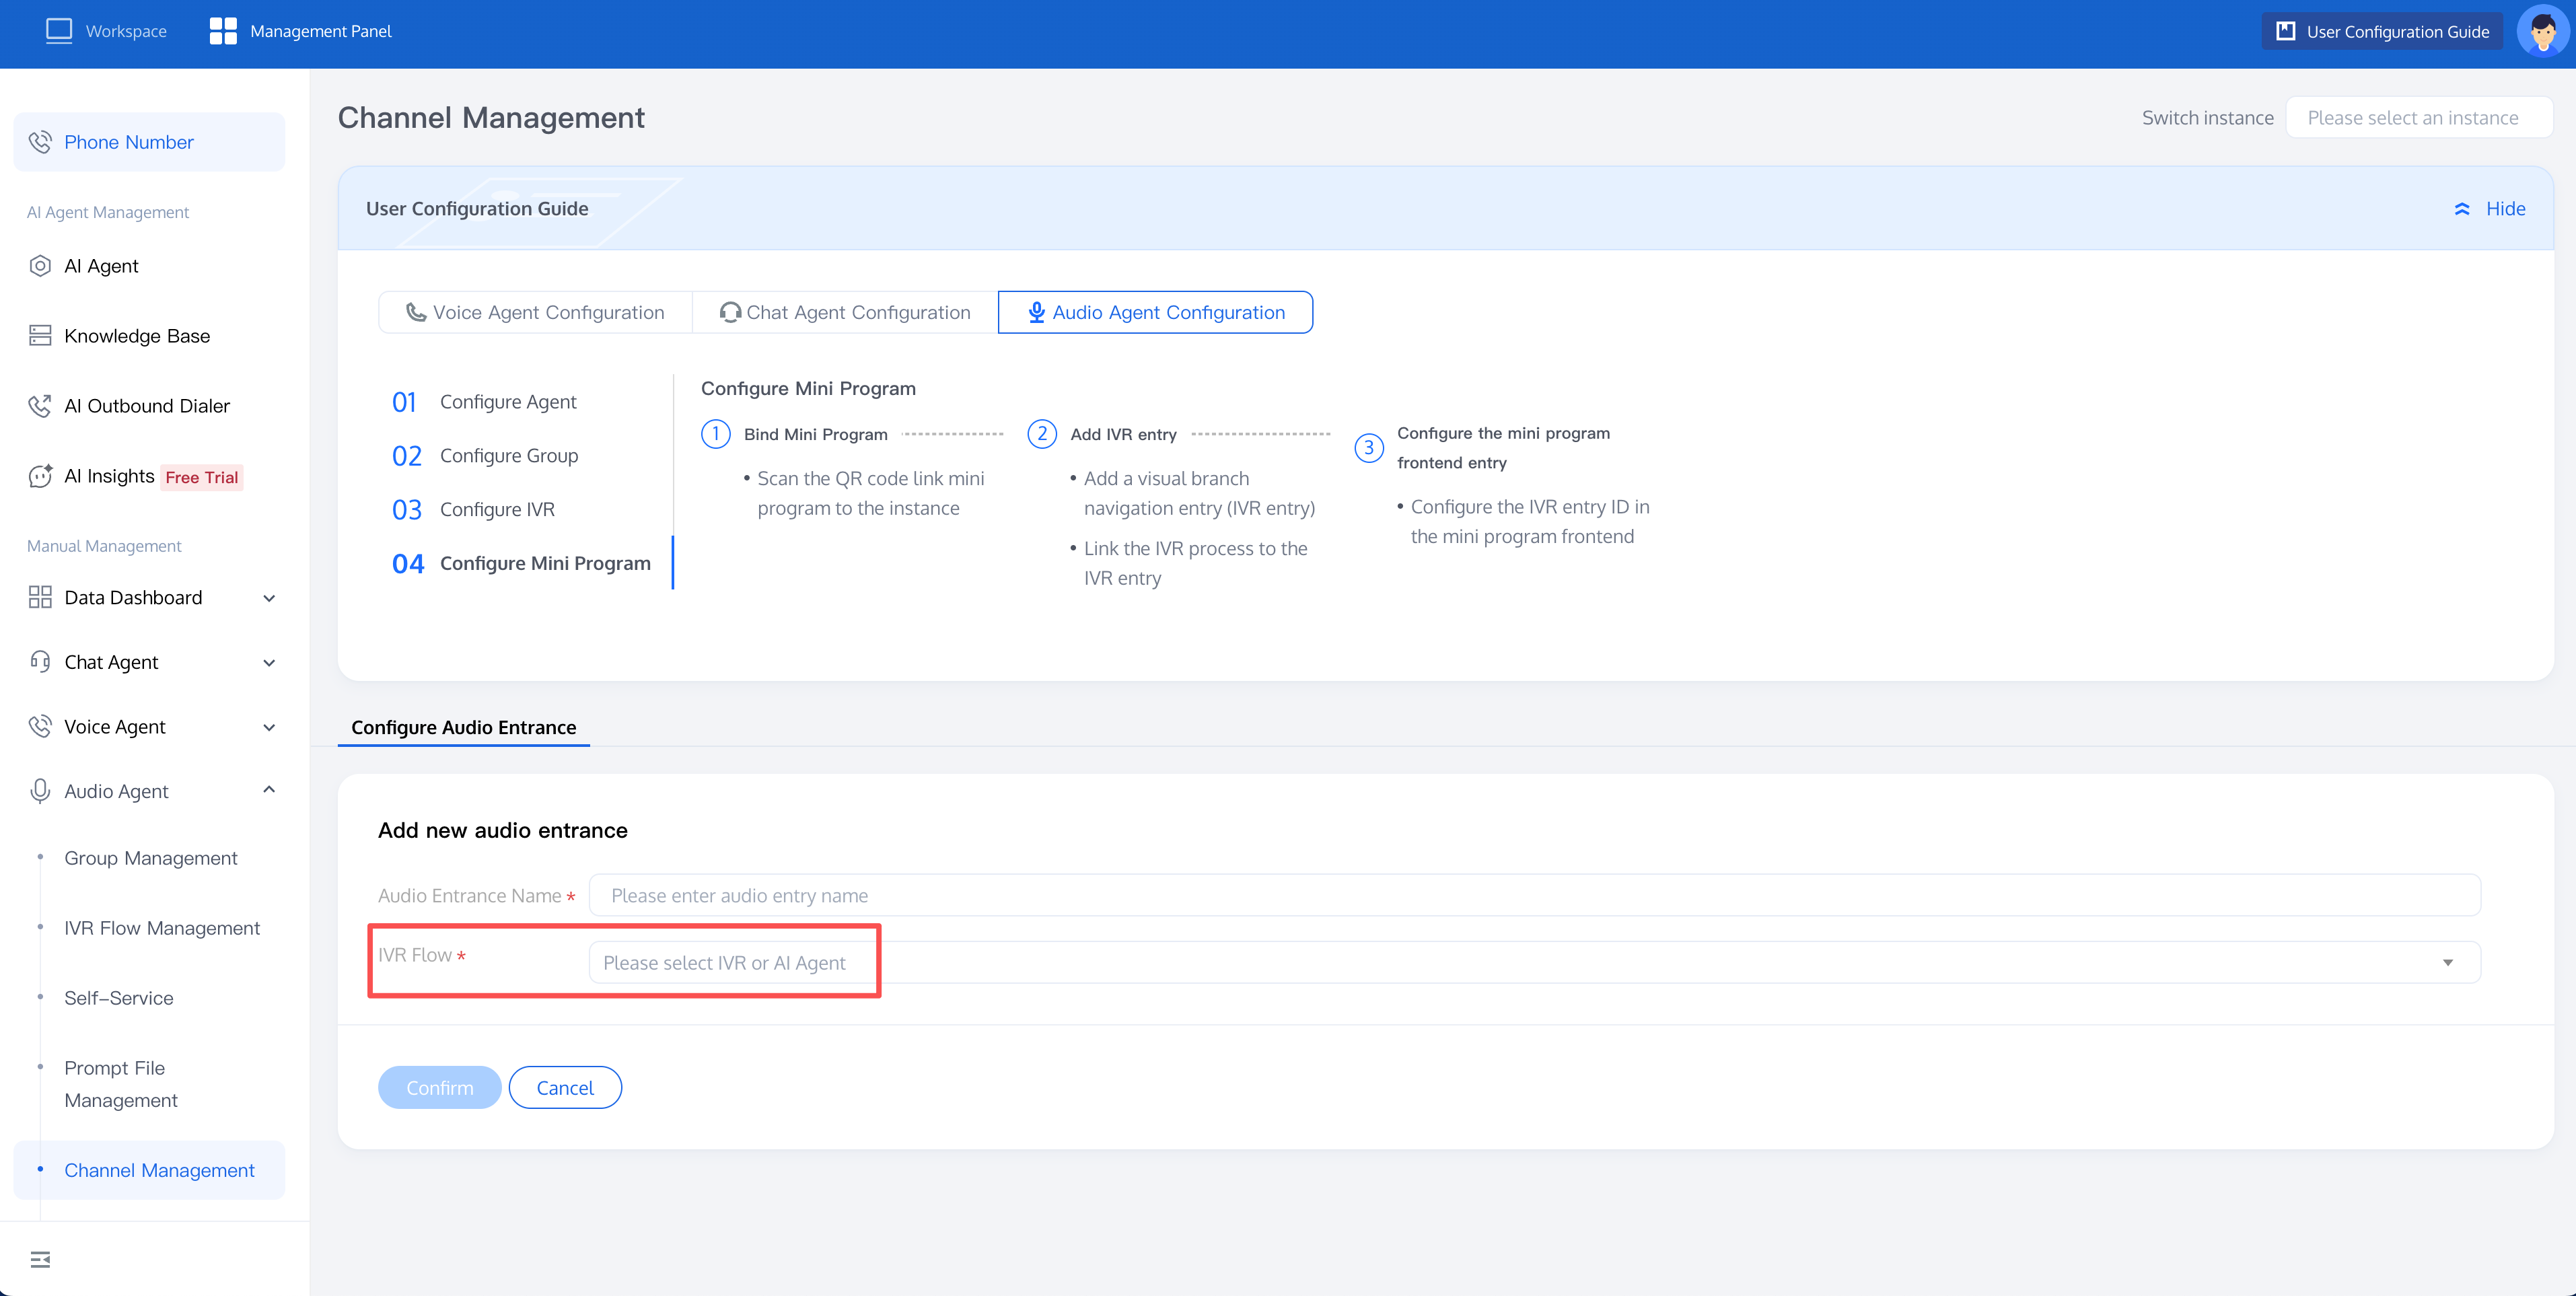
5.2 When creating a channel, enter the audio entry name. In Visual IVR, select the IVR created in step 4 and click OK.
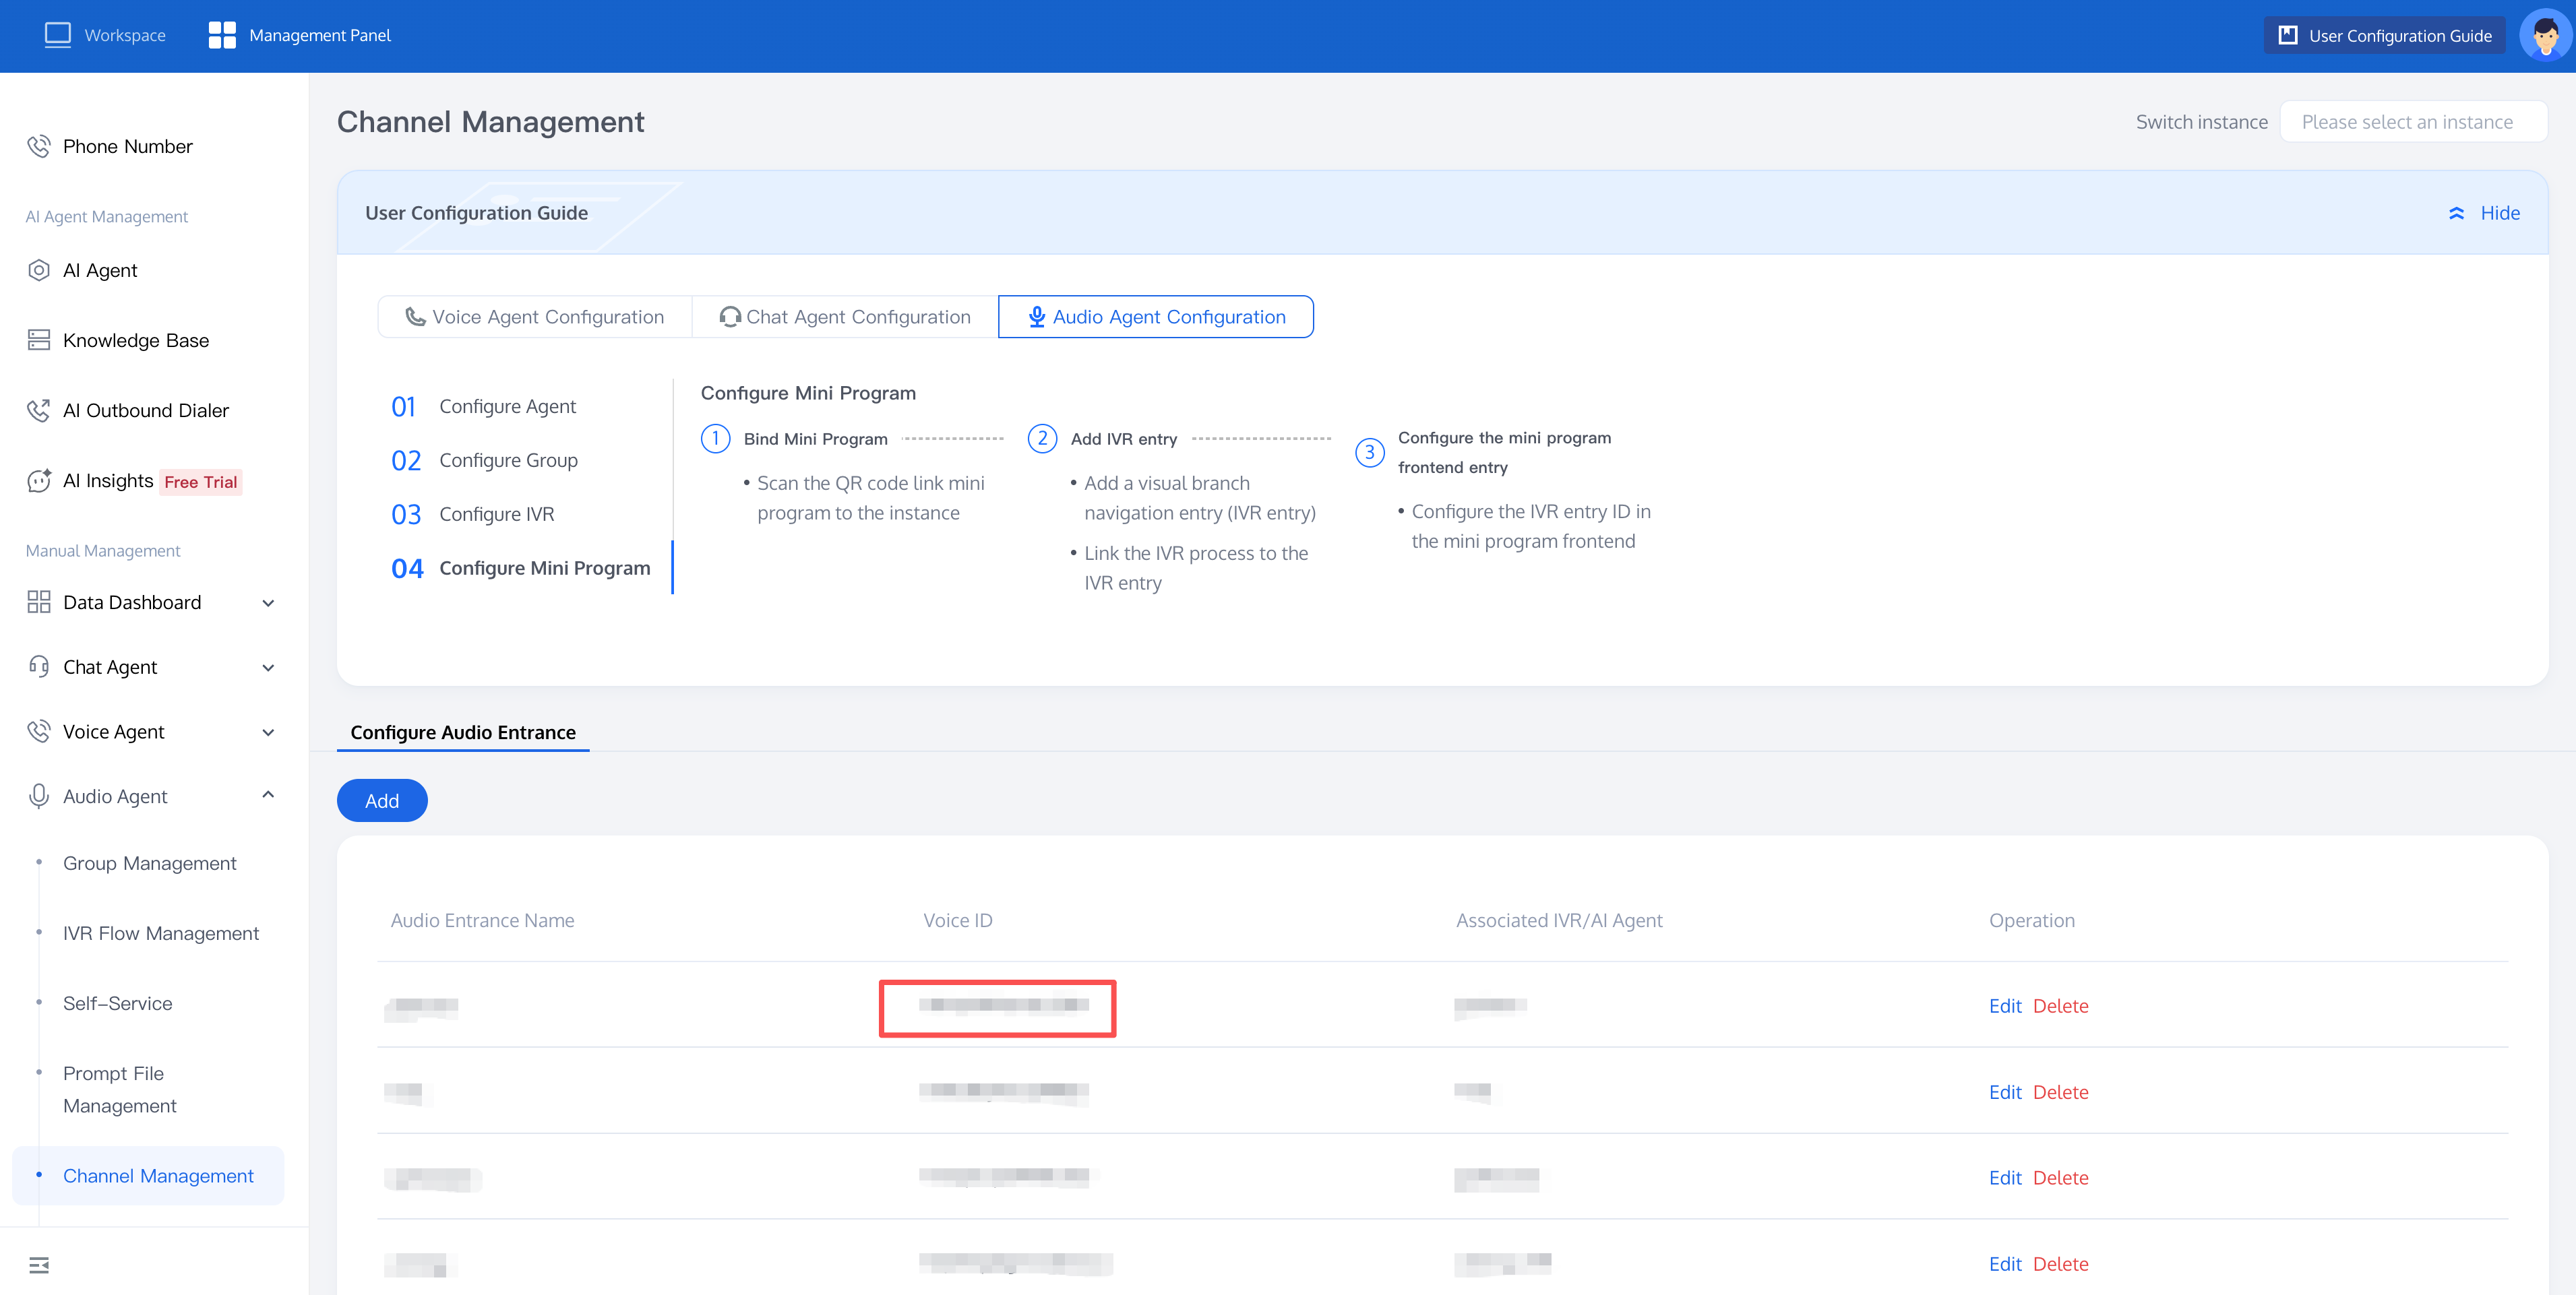
5.3 After creation, copy the ID from the Voice ID column (referred to as audioChannelId). It will be used as a parameter for SDK outbound calls, for example, startAudioCall(audioChannelId).
Step 4: Obtain a userSig Signature
The backend service of the integrator should introduce the tencentcloud-sdk. For the introduction method, see the corresponding language in the SDK Center.
Call the CreateUserSig API. For online debugging or language-specific implementation demos, see API Explorer.
Return the obtained userSig to the integrator's client.
The following section uses the API example.api.com/genUserSig to illustrate this step. The code below uses Node.js as an example.
const express = require('express');const app = express();const tencentcloud = require('tencentcloud-sdk-nodejs-intl-en');const CccClient = tencentcloud.ccc.v20200210.Client;const models = tencentcloud.ccc.v20200210.Models;const Credential = tencentcloud.common.Credential;const ClientProfile = tencentcloud.common.ClientProfile;const HttpProfile = tencentcloud.common.HttpProfile;app.get('/genUserSig', (req, res) => {// Read the userId from the request parameters (for example, /genUserSig?userId=qiao123).// Unique user identifier in the caller's business system.const userId = req.query.userId;if (!userId) {return res.status(400).send({error: 'Missing parameter: userId is required',});}let cred = new Credential('Your_SecretId', 'Your_SecretKey');let httpProfile = new HttpProfile();httpProfile.endpoint = 'ccc.intl.tencentcloudapi.com';let clientProfile = new ClientProfile();clientProfile.httpProfile = httpProfile;let client = new CccClient(cred, 'ap-singapore', clientProfile);let clientReq = new models.CreateUserSigRequest();let params = {SdkAppId: 20000000,Uid: userId,ExpiredTime: 3600,// Optional field.// ClientData: 'xxx',};clientReq.from_json_string(JSON.stringify(params));client.CreateUserSig(clientReq, function (err, response) {if (err) {console.log(err);res.status(500).send({error: err.message || 'Internal Server Error',});return;}res.send({userId: userId,userSig: response.UserSig,// ClientData is an optional field. However, if it is specified in the request, it must be returned to SDK initialization.// userClientData: params.ClientData,});});});
Step 5: Client Development
Complete the final client development using the parameters obtained in the previous steps, as follows:
SDKAppId: TCCC application ID.
userId: Unique user identifier in the caller's business system.
audioChannelId: Outbound IVR address.
userSig: User signature.
フィードバック