Step 1: Creating a Conversation Workflow
ダウンロード
フォーカスモード
フォントサイズ
Overview
The conversation workflow is a visual design platform for building intelligent voice systems. It allows easy configuration of voice interactions through drag-and-drop, enabling businesses to design multi-round conversations, set business rules, integrate APIs, and customize voice styles. This visual approach simplifies complex conversation logic, allowing quick adjustments to meet business needs while ensuring precise execution. It helps businesses deliver smart voice services, improving both customer experience and operational efficiency.
Guide
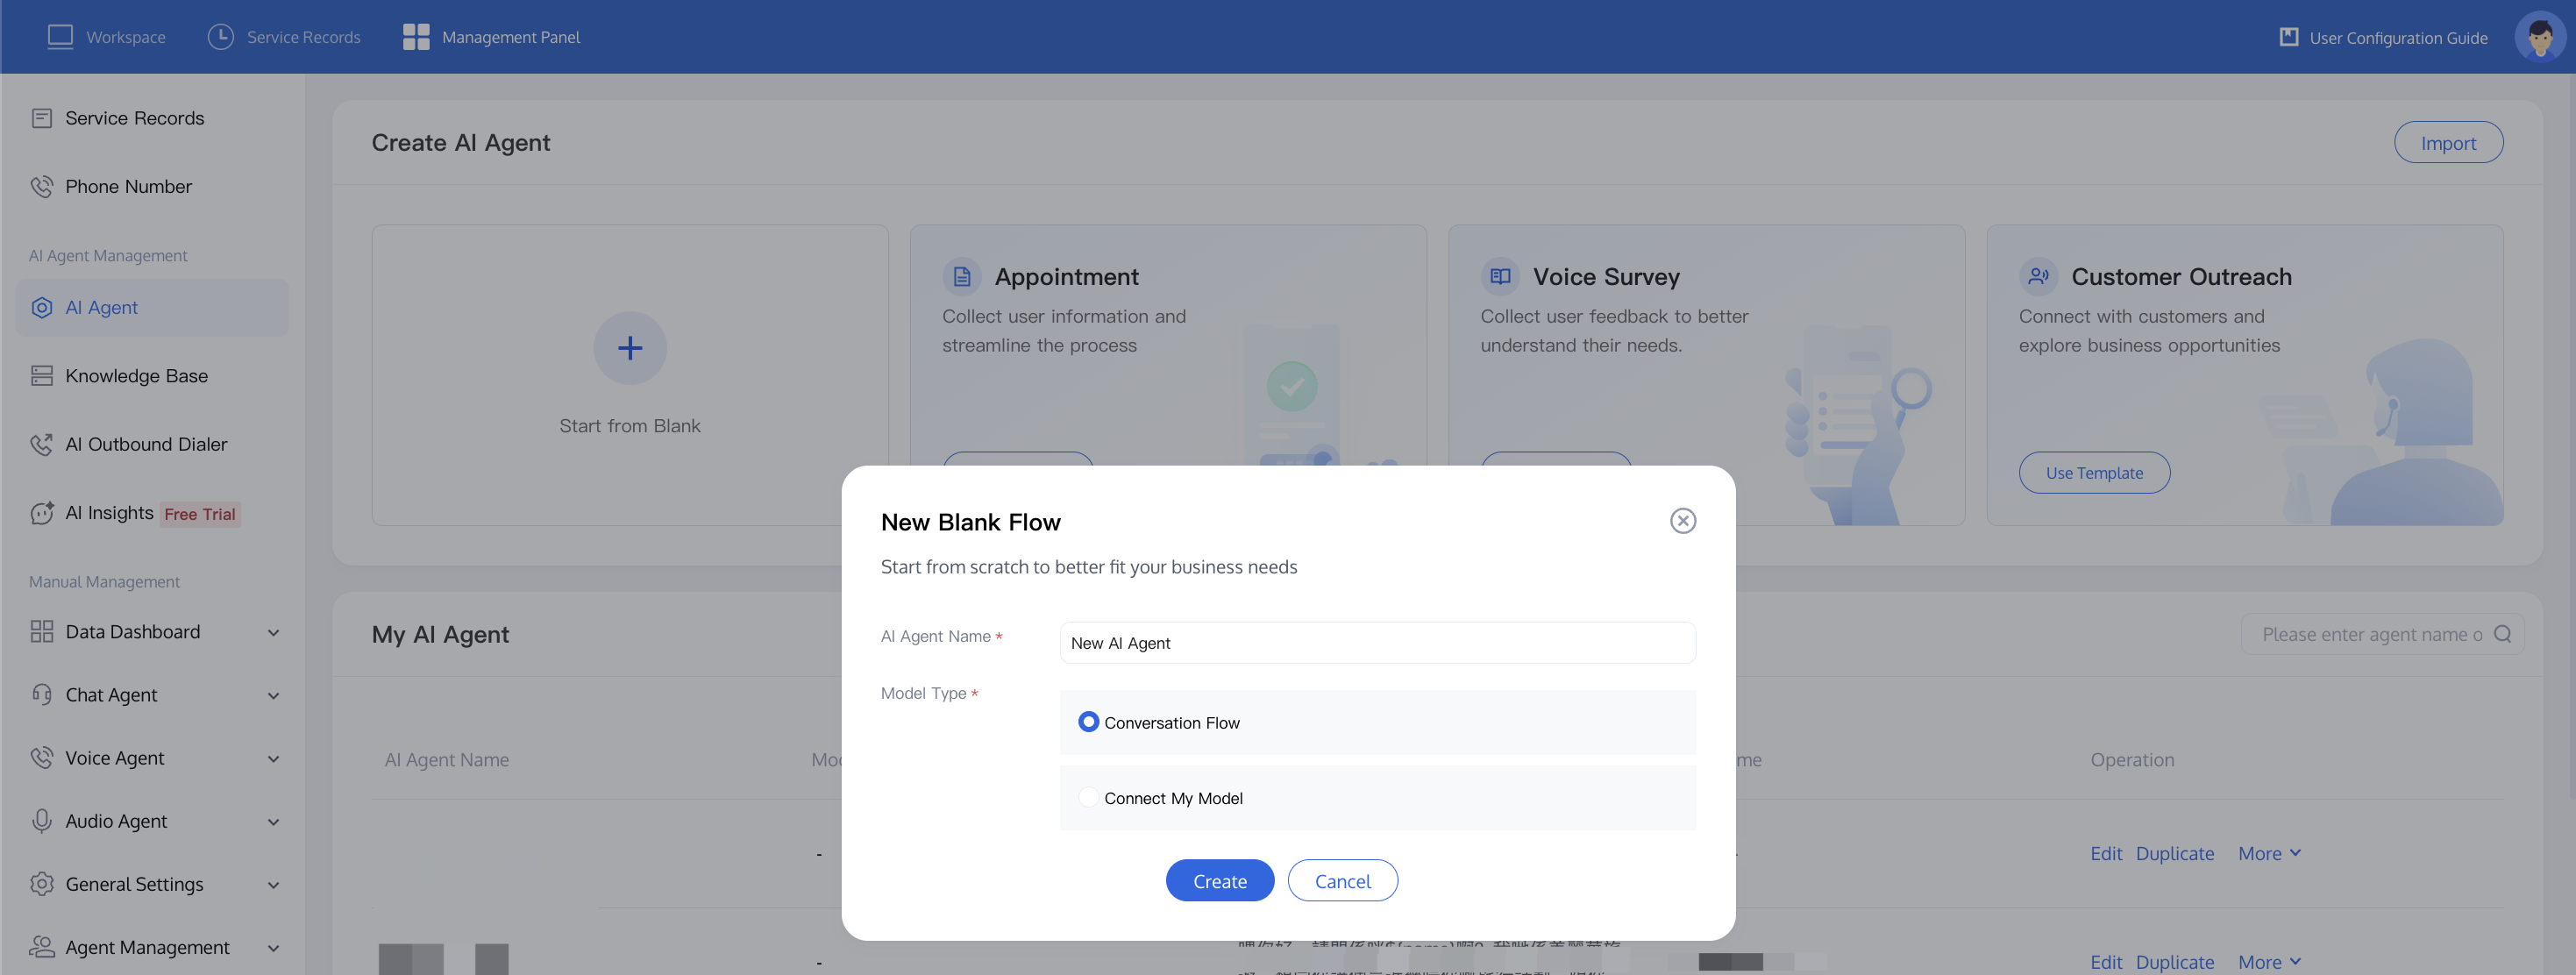
1. Log in to the Tencent Cloud Contact Center (TCCC) console. Choose AI Agent Management > Create Blank AI Agent on the left to start customizing a workflow from scratch. In the Create Blank Workflow dialog, enter the AI Agent name (such as Outbound Call). Leave the Model Solution as the default Conversation Workflow. After Create is clicked, the system automatically creates a blank workflow canvas for you.
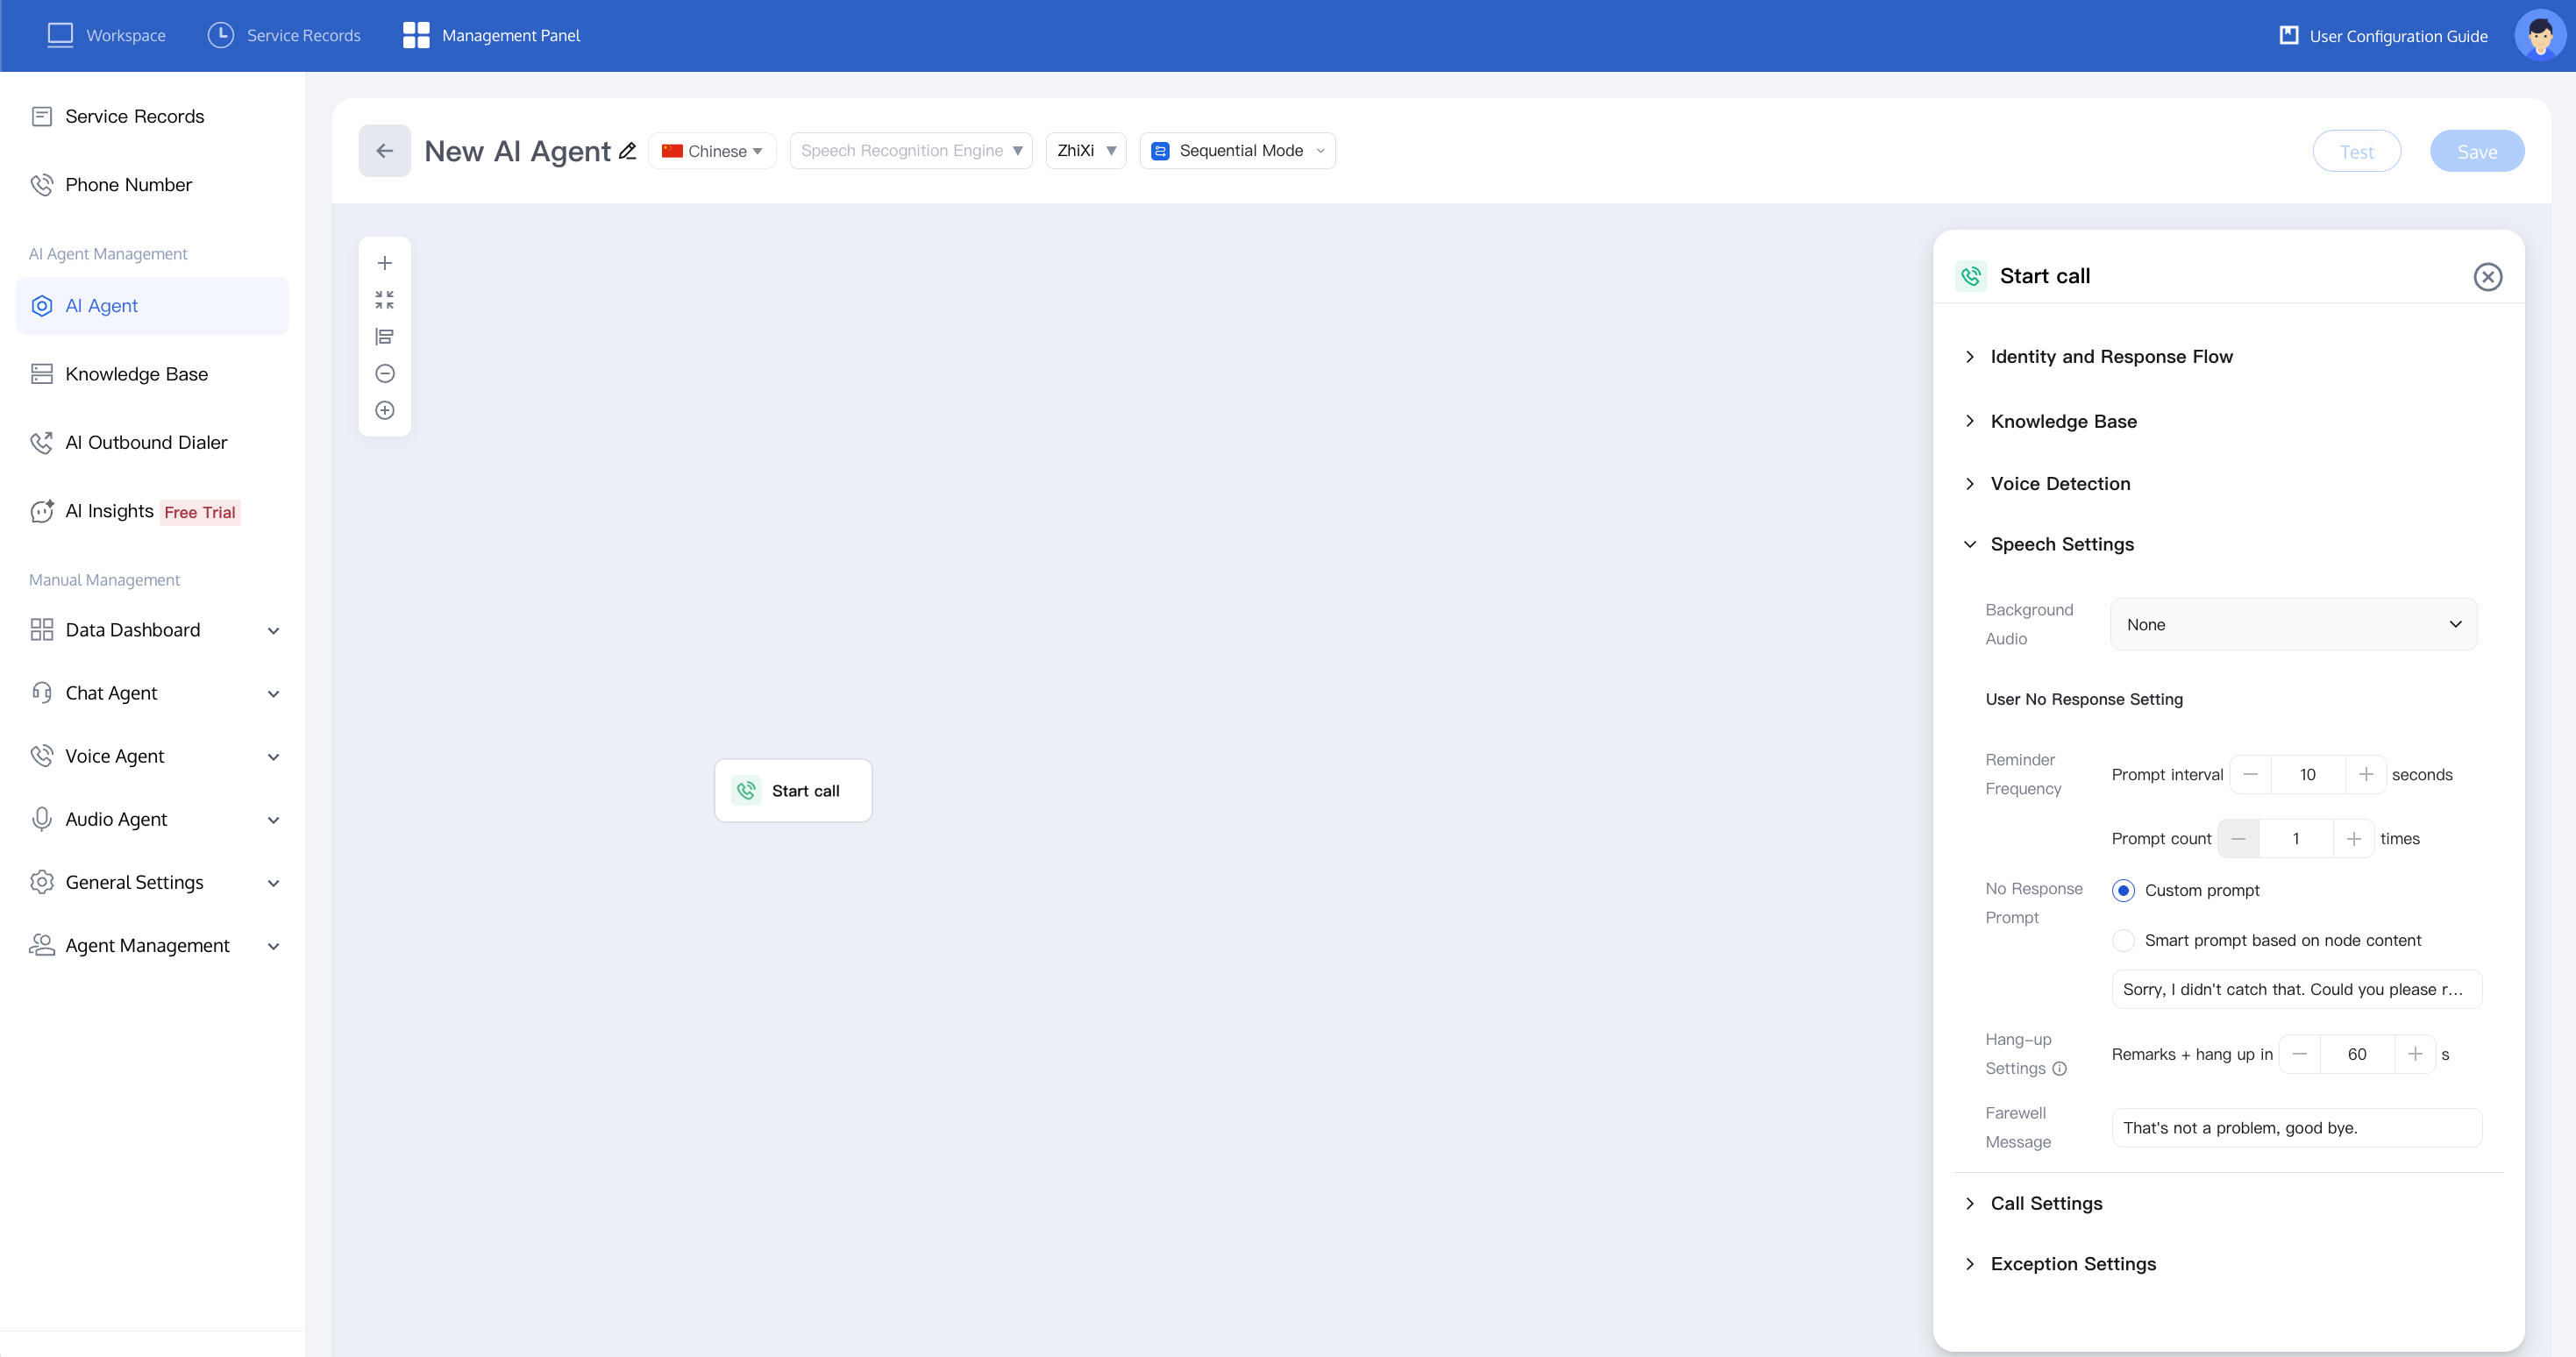
2. When you first go to the workflow canvas, click Start Call. The Start Call settings panel automatically opens on the right. Here you can configure general properties for the entire workflow. The panel contains the following sections from top to bottom: Persona & Response Logic, Knowledge Base, Listening Settings, Playback Settings, Call Settings, and Exception Settings. The following sections explain each of these in order.
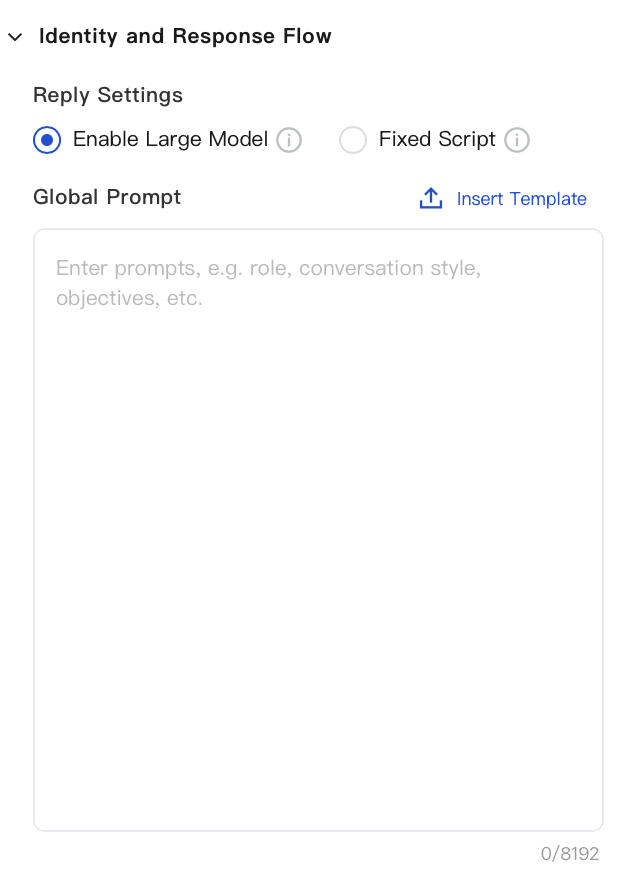
Persona & Response Logic: Configure the AI Agent's response persona and logic based on your business scenario. Write prompts to define the AI Agent's persona and conversation requirements. We recommend including content persona, character, and question scope. For reference, see the content in Insert Template:
Knowledge Base: Mount a knowledge base to the AI Agent so that it prioritizes using the knowledge base content to answer user questions during conversations. This section only covers the association. The creation and configuration of the knowledge base are described in detail in a later section. For details, see Build Your Knowledge Base.
Listening Settings: This setting controls the AI Agent's recognition and interruption behavior.
Listening Recognition Speed: This setting adjusts the response speed for recognizing user speech. You can select from "Fast", "Recommended", or "Slow".
Interruption Sensitivity: This setting adjusts the sensitivity for interrupting the AI Agent's playback when a user interjects. You can select from "High", "Recommended", or "Low".
Far-field Voice Suppression: This feature suppresses distant or bystander speech. You can select Smart Mode or Custom Mode.
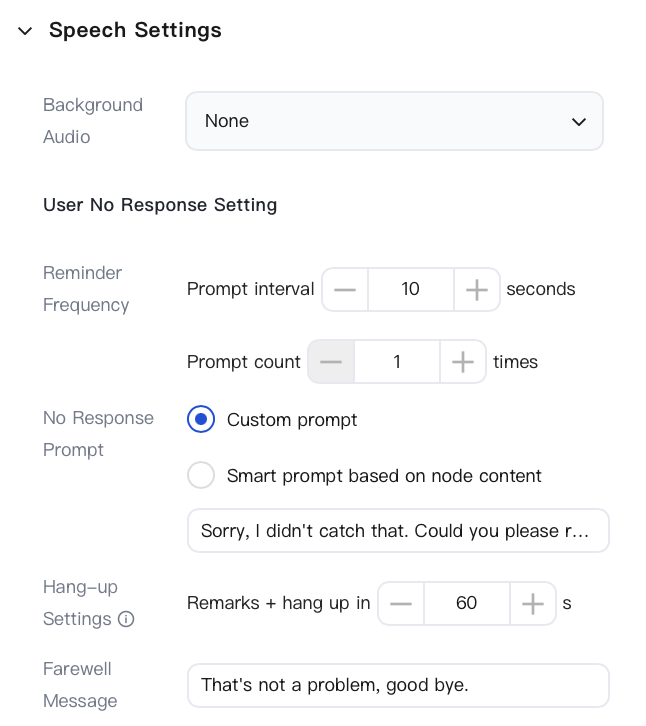
Playback Settings: Configure the call background music and the handling of user non-response.
Background Music: Background music is added to the call. The default setting is "None".
User Non-response Settings: This setting applies when a user does not respond for an extended period. The call is kept active during user pauses and is terminated when the user has left. You can configure the Prompt Frequency (prompt interval, for example, 10 seconds; number of prompts, for example, 1), Non-response Prompt (options include "Custom Prompt" or "Intelligent Prompt based on node script content", for example, "Sorry, I didn't catch that. Could you repeat it, please?"), Termination Settings (seconds before playing the closing message and hanging up, for example, 60 seconds), and Closing Message (for example, "We won't disturb you further. Goodbye.").
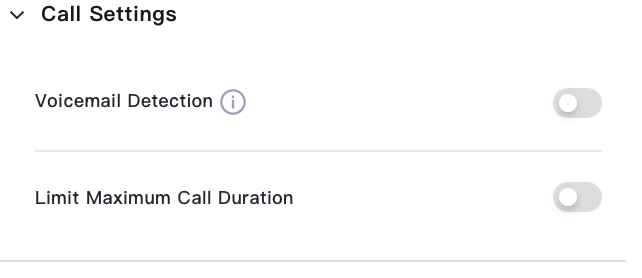
Call Settings: Manage switches related to the entire call.
Voicemail Recognition: After this feature is enabled, the AI Agent can recognize when a call goes to the carrier's voicemail and handle it accordingly.
Limit Maximum Call Duration: After this feature is enabled, you can set a maximum duration for a single call. The call is automatically terminated when the duration exceeds the limit.
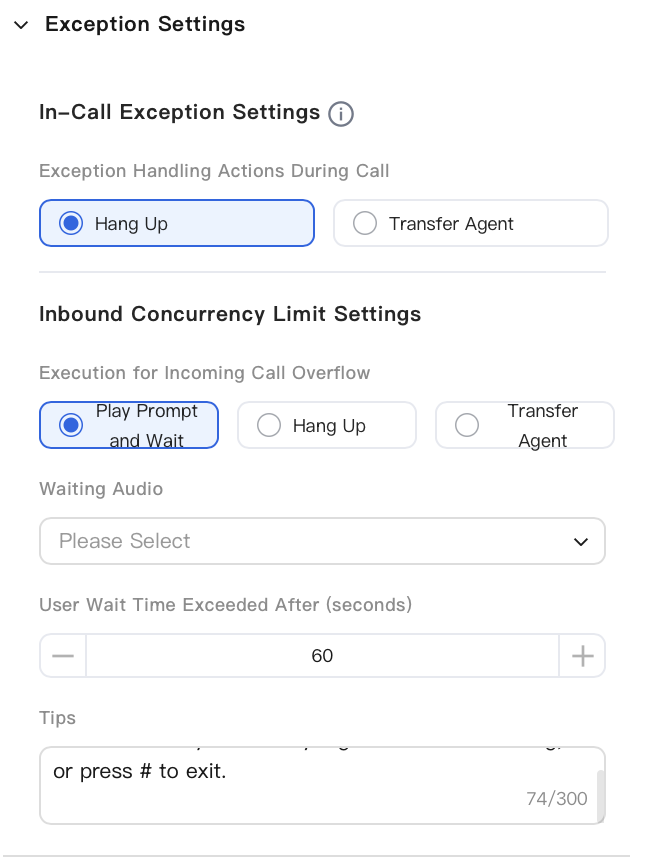
Exception Settings: Define a fallback policy for when exceptions occur during a call or when incoming calls exceed the concurrency limit.
Call Process Exception Settings: Configure the action to be executed when an exception occurs during a call. You can select Hang Up or Transfer to Agent.
Inbound Over-concurrency Settings: This defines the execution policy when inbound concurrency exceeds the upper limit. You can select Play Audio and Wait, Hang Up, or Transfer to Agent. When "Play Audio and Wait" is selected, you can further configure the Wait Audio, the User Wait Timeout (seconds) (for example, 60 seconds), and the Prompt text (for example, "The line is busy. Press any number key to continue waiting, or press the # key to exit.").
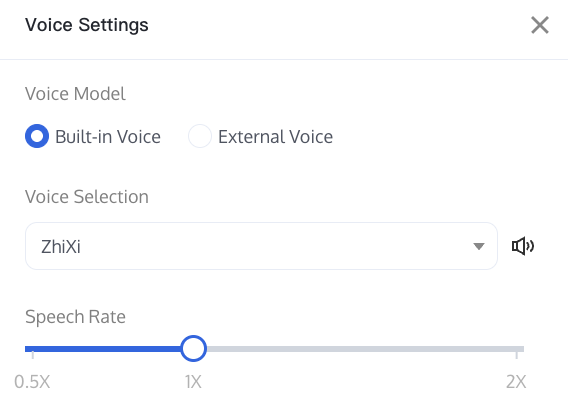
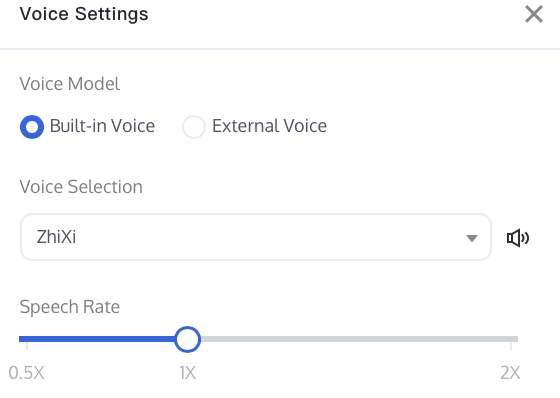
Voice Settings (Top Toolbar): The voice timbre is not configured in the Start Call panel. Instead, you open the Voice Settings separately via the timbre dropdown in the canvas top toolbar (for example, "Zhixi") to configure it, including the timbre model, timbre selection, and speech rate.
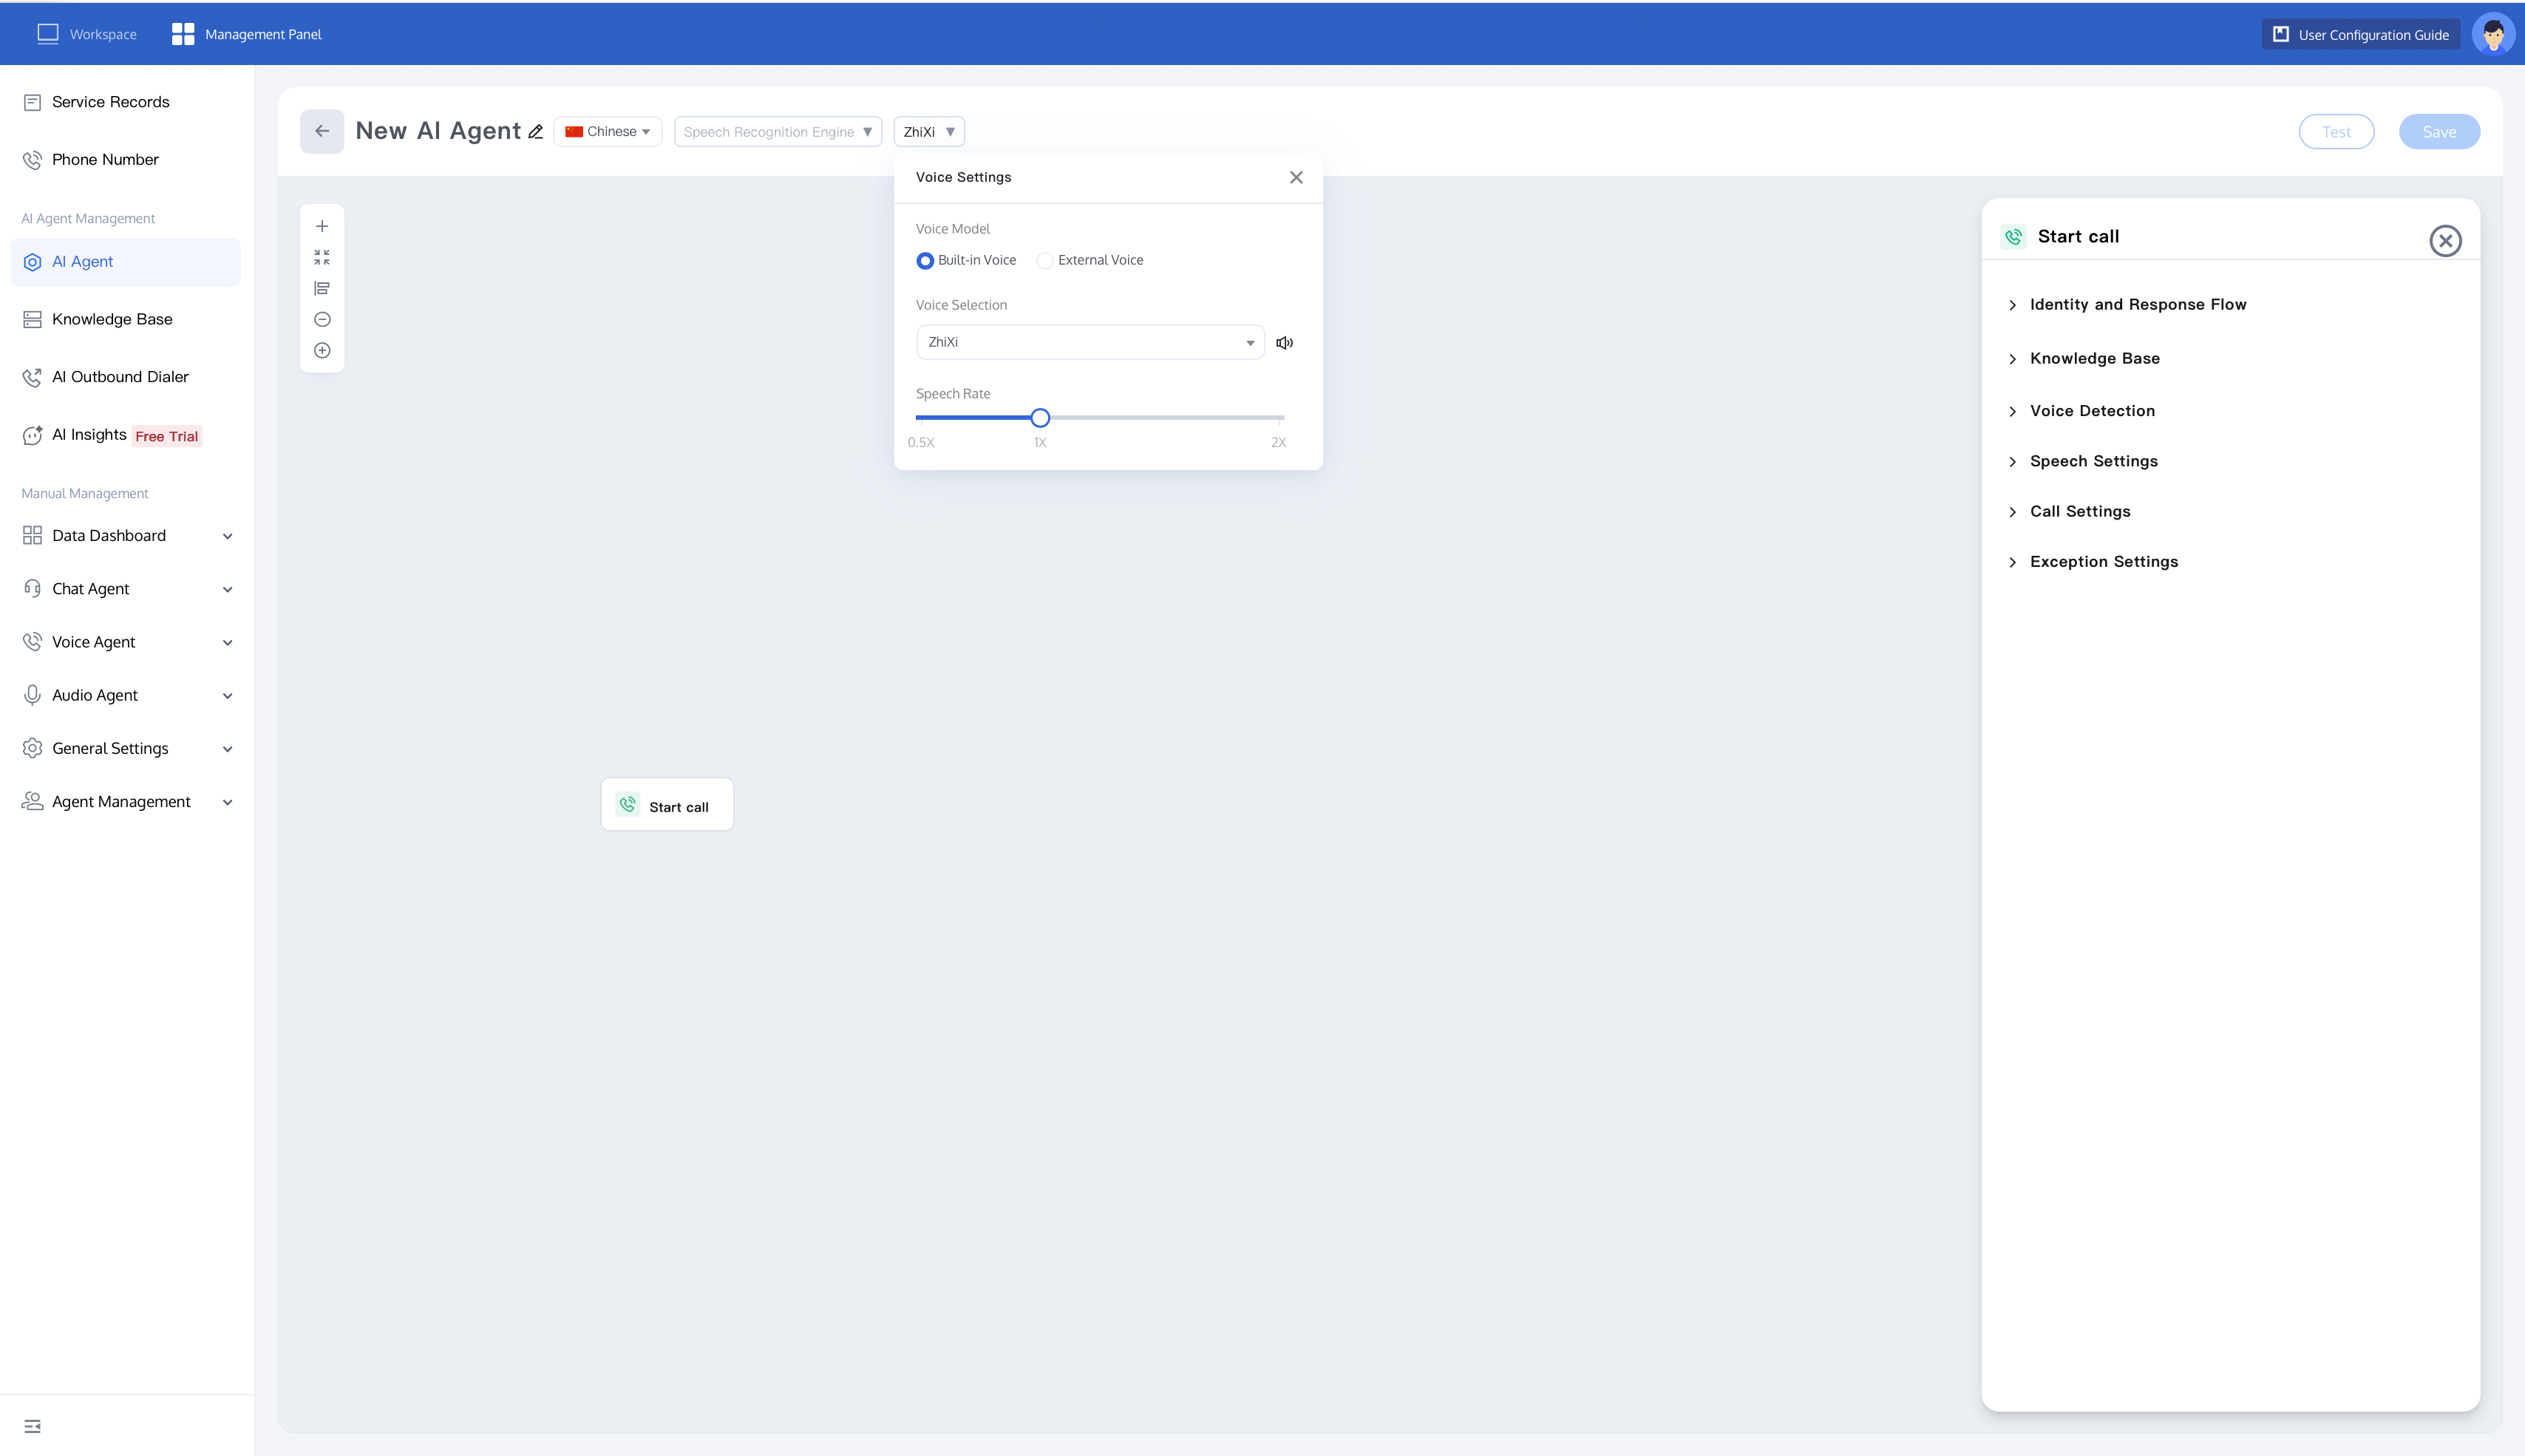
Built-in Voice Timbre: Select different built-in voice timbres (such as Intellectual Female Voice) to meet the requirements of different scenarios.
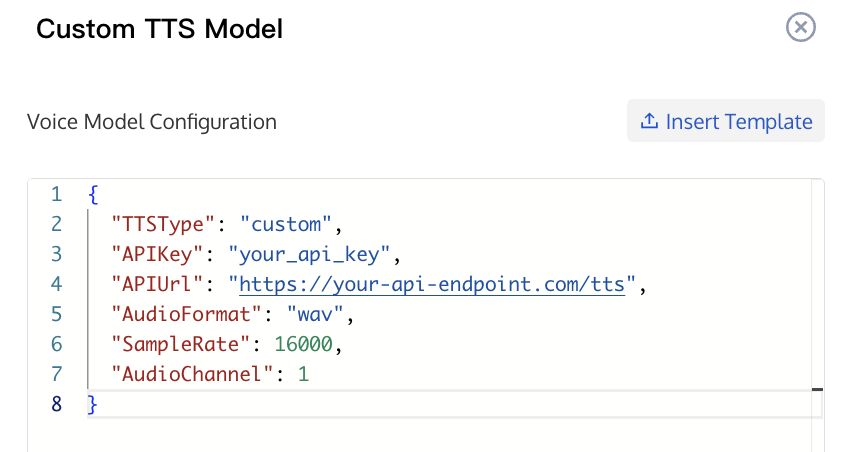
External Voice Timbre: Integrate third-party TTS engines from mainstream vendors. Click "Insert Template" to view the available configurations.
Speech Rate: Drag the slider to adjust the playback speech rate. The adjustable range is from 0.5X to 2X.
3. Design business processes to plan how the AI Agent interacts with customers from the start to the end of a conversation. You can create different processes based on business needs, such as customer service, survey follow-up, account inquiry, and claims processing or Agent transfer. Each process can include greetings, user reply classification, API calls, conditional judgment, data collection, automatic replies, and escalation transfer, making customer service processes more efficient and standardized.
To help you get started quickly, two typical scenarios are provided below. Each scenario offers two items: a Process Structure Diagram (which shows what this type of flow typically looks like, how its nodes are connected, and can be used directly as a reference template for your design), and an Application Scenario Link (clicking on it allows you to view the complete setup steps that can be directly applied to that scenario).
Scenario 1: Marketing Invitation Process with Branches
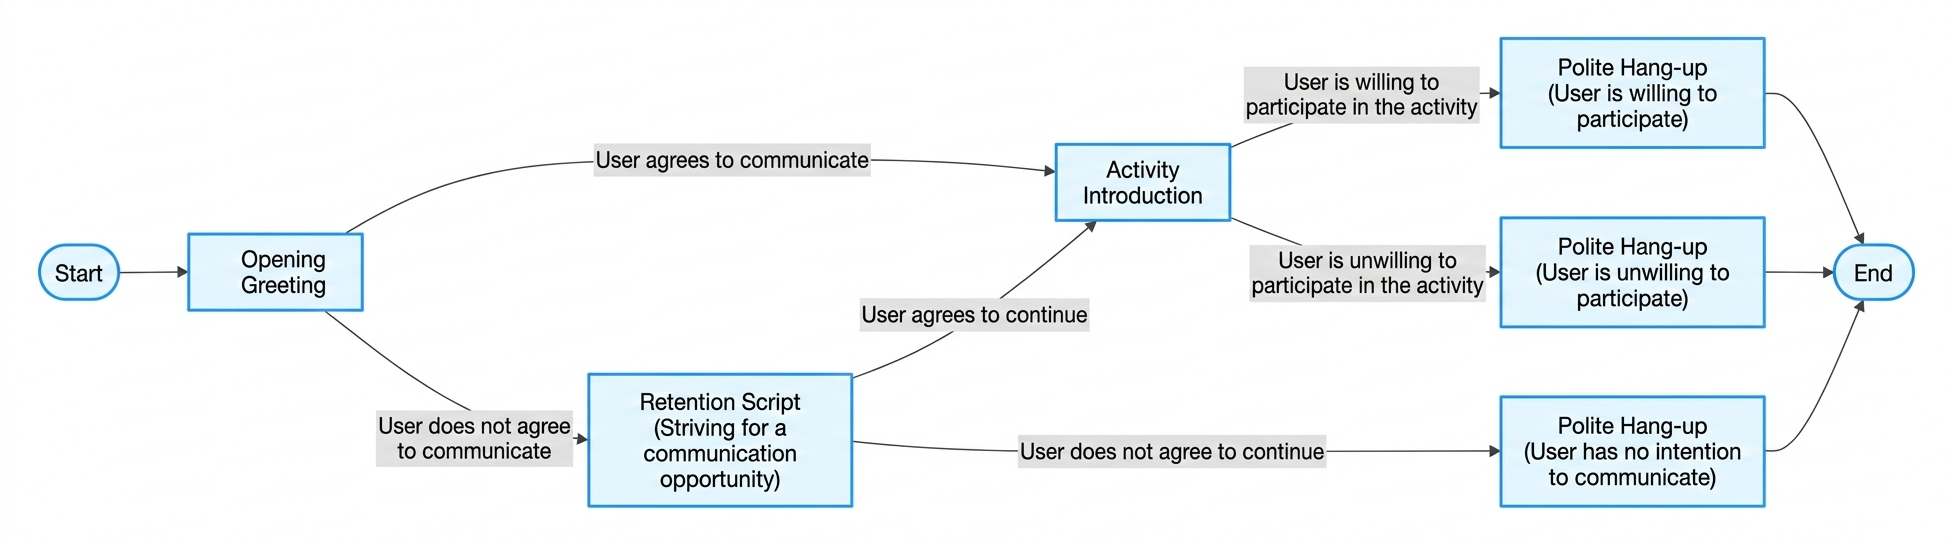
This process is suitable for scenarios such as lead mining and event invitations, which "require different branches based on user intent". The flow starts with an Opening Greeting. It first determines whether the user agrees to communicate. If the user agrees, the flow proceeds to the Event Introduction. Then, based on whether the user is willing to participate in the event, it branches to different Polite Hang-ups. If the user disagrees, the flow first uses Retention Scripts to attempt to secure a communication opportunity. If the user still disagrees to continue, the flow directly ends with a Polite Hang-up.
Reference Template (Process Structure):
Scenario 2: Linear Survey / Feedback Collection Process
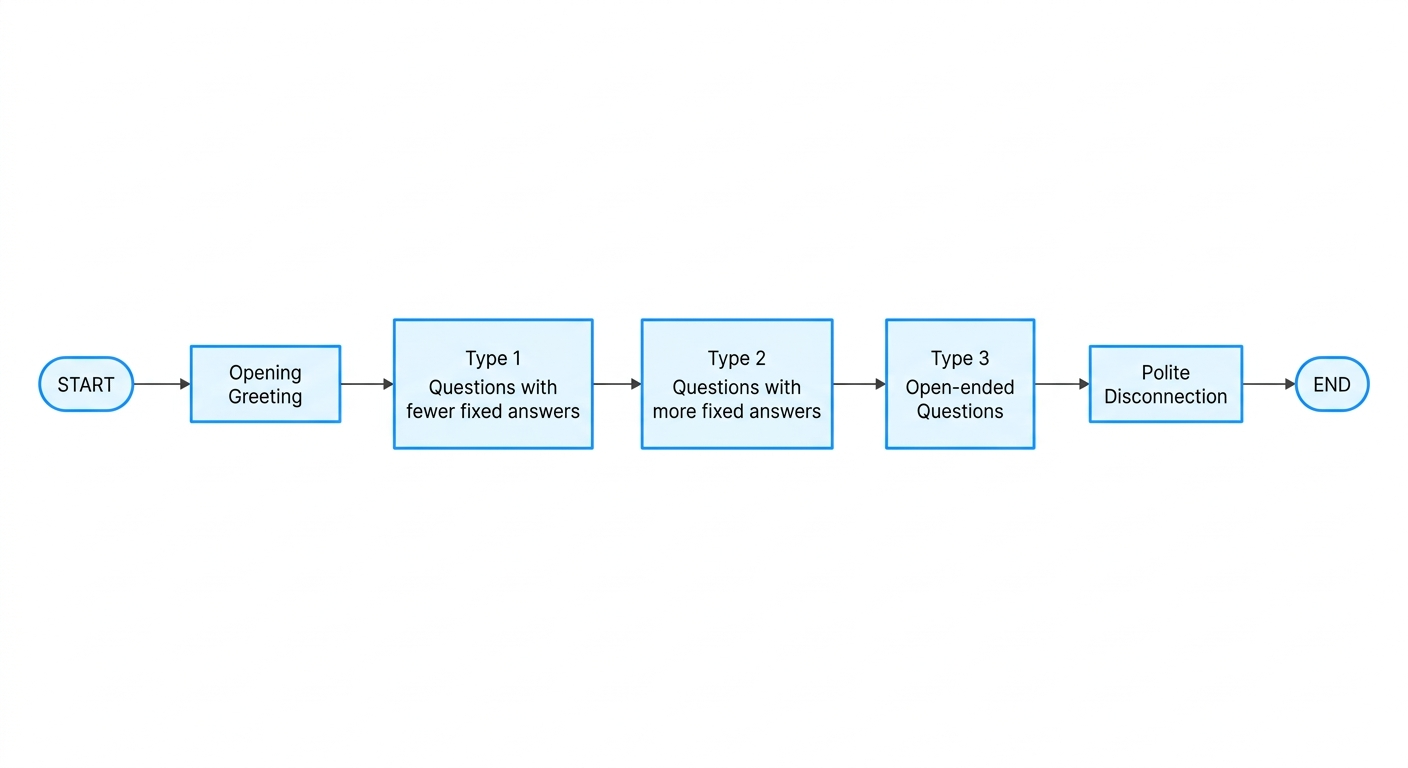
This process is suitable for scenarios such as survey follow-ups and satisfaction collection, which "ask questions in a fixed, sequential order". The flow starts with an Opening Greeting, then sequentially presents Type I (questions with fewer fixed answers) → Type II (questions with more fixed answers) → Type III (open-ended questions), and finally ends with a Polite Hang-up.
Reference Template (Process Structure):
Related Guidelines
Select the corresponding path based on your deployment method.
First time user? Deploy a functional AI Agent in just five minutes create a conversation flow or integrate an external model.
Want to learn about our conversation flow nodes? Go to Conversation Nodes.
Build a knowledge base for your conversation flow? Go to Build Your Knowledge Base.
How to test your model? Refer to Test Conversation Workflow.
Configure a voice AI Agent with your own model? Go to Integrate External Model, Edit Conversation Content, Configure Voice Interaction, and Add Call Control.
Want to view application scenarios? Try Voice Notification, Lead Mining, Feedback Collection, or Customer Support.
How to make outbound and inbound calls with an AI Agent? Refer to AI Agent Outbound Calls or AI Agent Inbound Calls.
View data logs? Refer to Call Records, Call Recordings, Latency.
How to create and view post-call tags? Refer to Post-call Tags (Created via Conversation Flow) or Post-call Tags (Created via External LLM).
フィードバック