Cloud Log Service (CLS) provides a one-stop solution for log data, supporting features such as log collection, storage, processing, search and analysis, consumption and delivery, dashboards, and alarms. CLS delivers stable and reliable services, freeing you from concerns about resource issues like scaling. This lowers the barrier to log Ops and helps you improve the efficiency of problem troubleshooting and metric monitoring.
This document describes how to use basic CLS features:
Collect log files from servers with LogListener
Search for and analyze logs
If you don't have proper resources to collect logs, you can use demos to quickly try out CLS's log search and analysis, dashboard, and alarming features free of charge without collecting logs.
Step 1. Activate the service
Log in to the Tencent Cloud CLS console. If CLS is not activated for your account, you will be prompted for activation. Just click Activate.
Step 2. Install LogListener
LogListener is the collection client for CLS. You can use LogListener to collect log files to CLS. This document demonstrates how to install LogListener on Tencent Cloud CVM/Lighthouse.
Additionally, LogListener can be deployed on non-Tencent Cloud servers, TKE, and self-built K8s clusters.
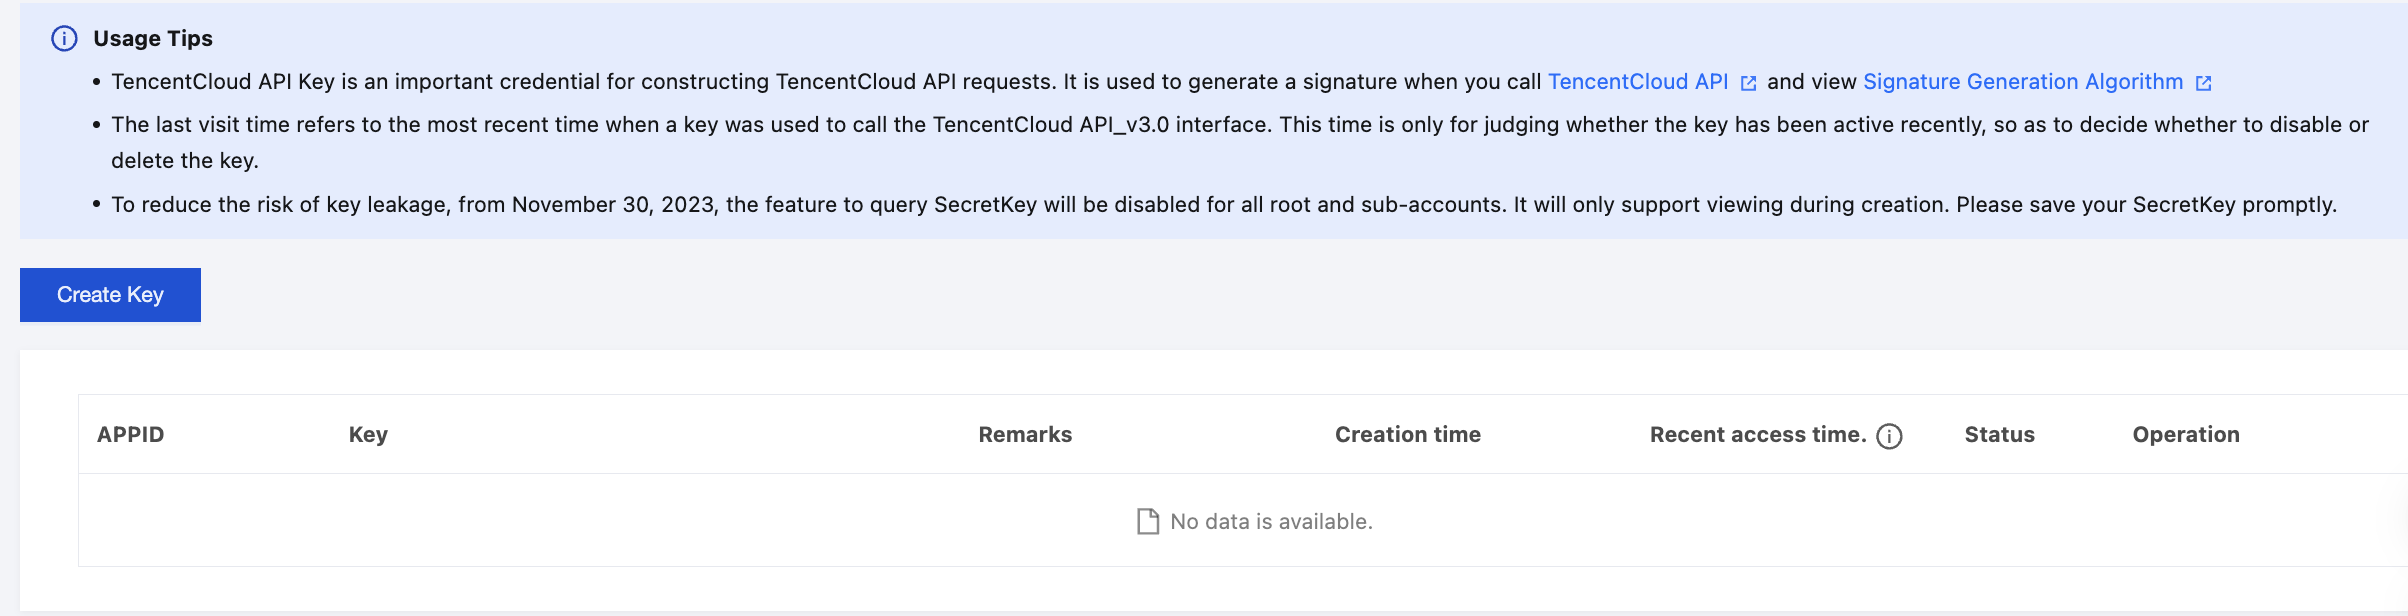
Step 2.1. Get the key
Go to the CAM console, view/create and record the key, and make sure that the key is enabled.
Step 2.2. Install LogListener
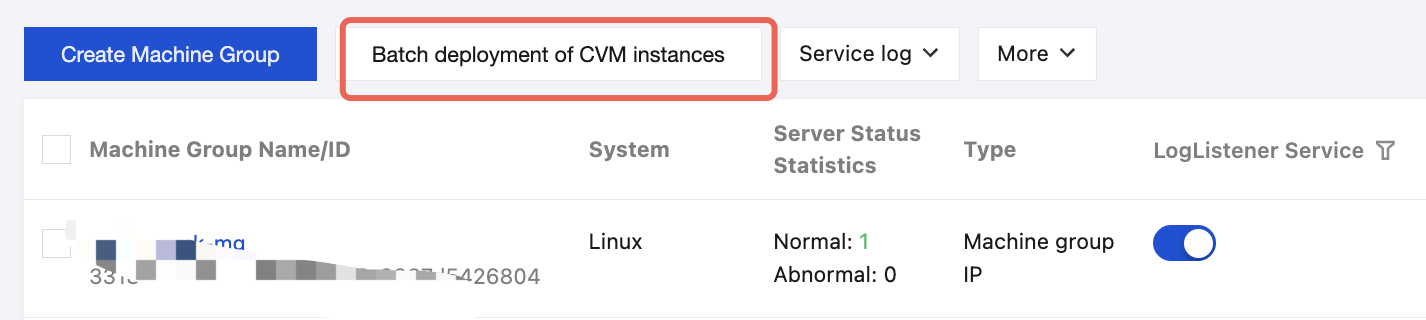
1. Go to Machine Group Management. In the upper-left corner of the page, switch the region to the one where the CVM/Lighthouse that requires LogListener installation is located. Then click Batch Deployment for CVM Instances.
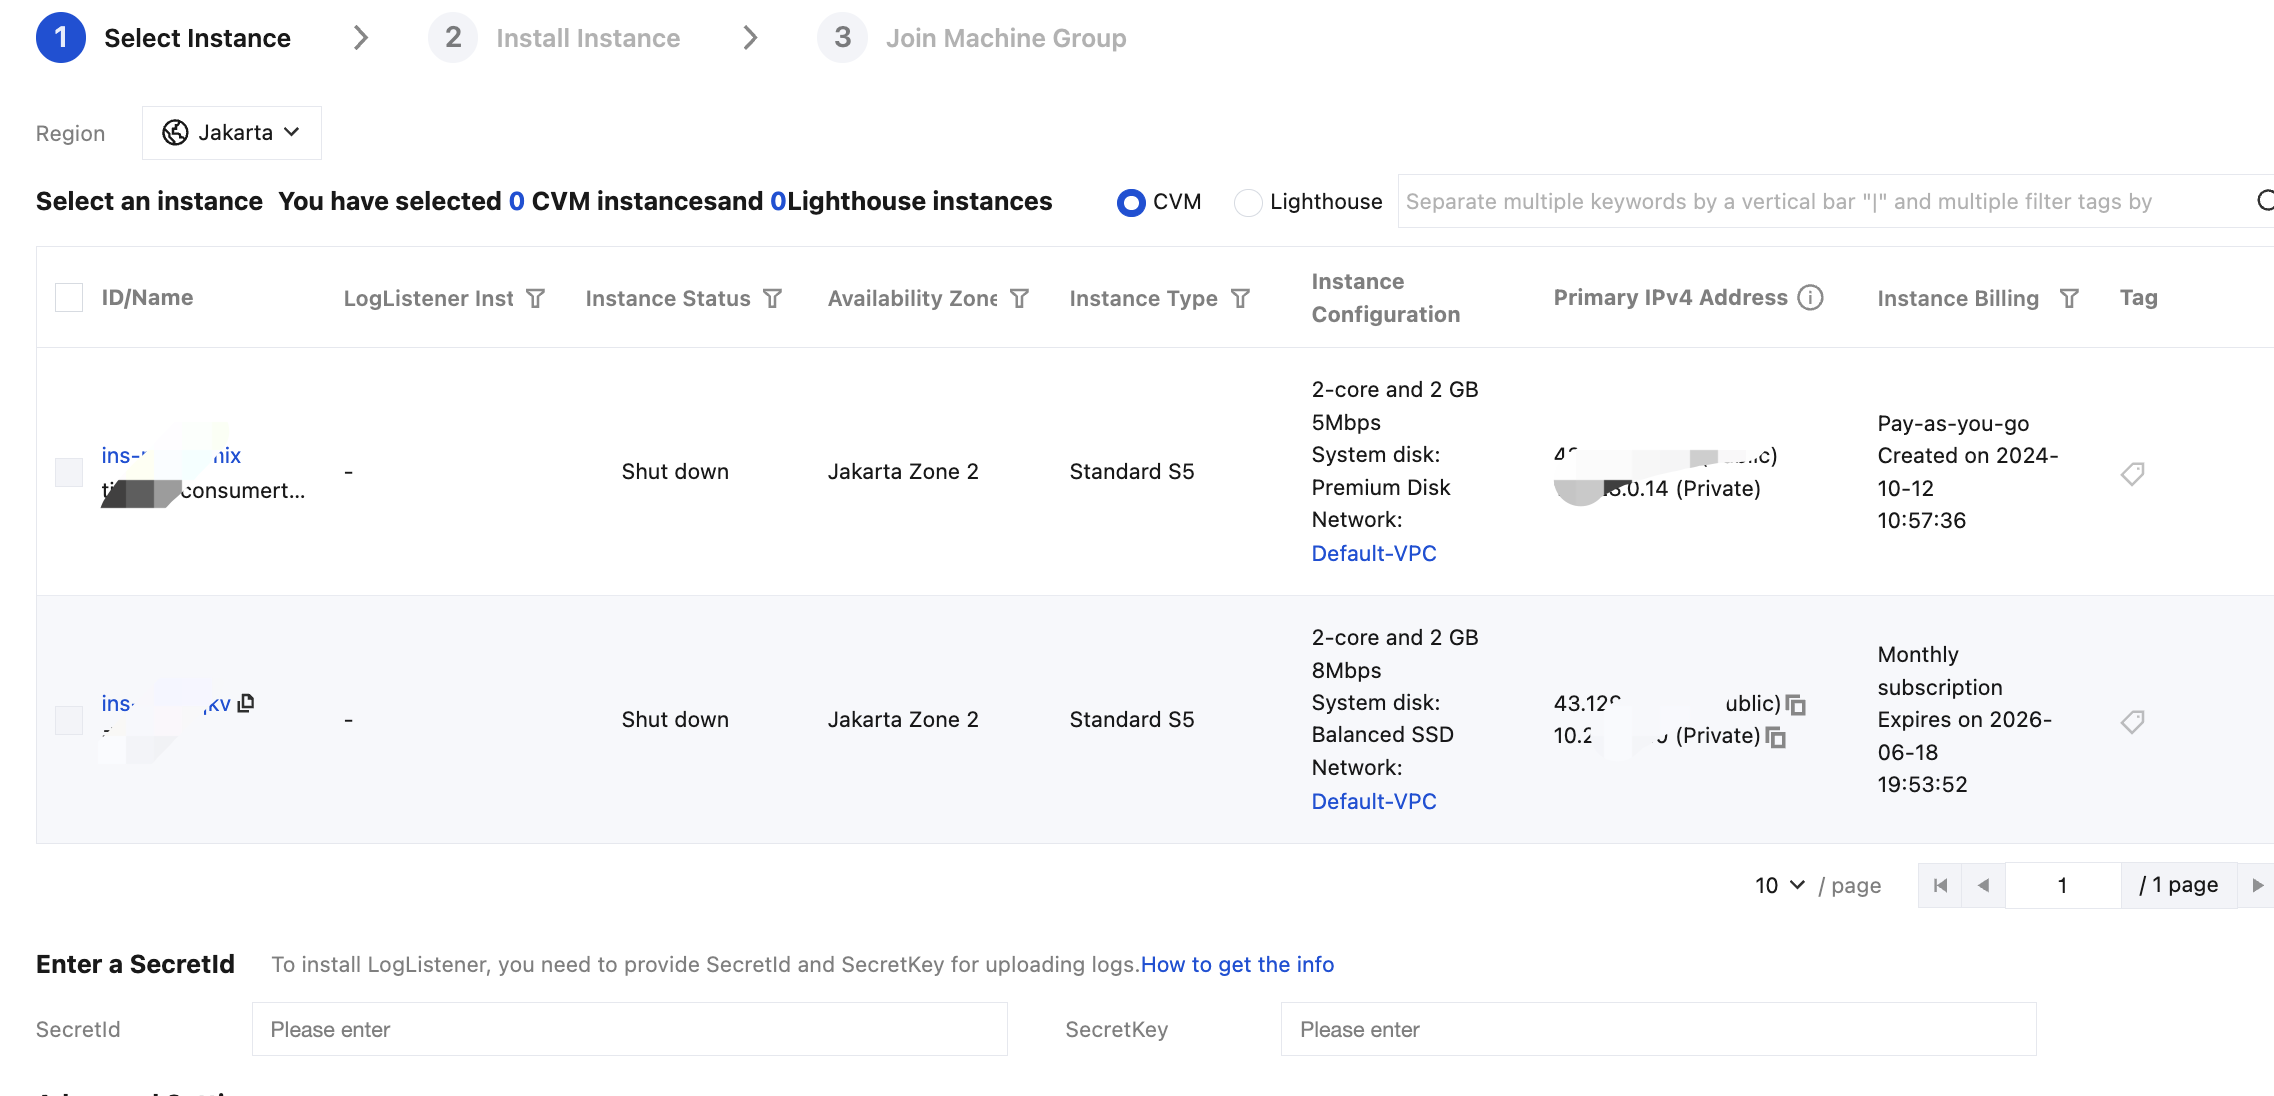
2. Select the machine instances that require LogListener installation. In the Enter SecretId Information field, enter the SecretId and SecretKey from Step 2.1. Also, enter a machine id (such as test), which categorizes the machine instances to facilitate subsequent batch log collection from multiple machines based on this identifier.
3. After the installation is completed, click Next.
4. Add the instance with LogListener installed to a new machine group that requires log collection. Log files under the same path can be batch collected for instances in the same group. Enter the Machine Group Name and click Join.
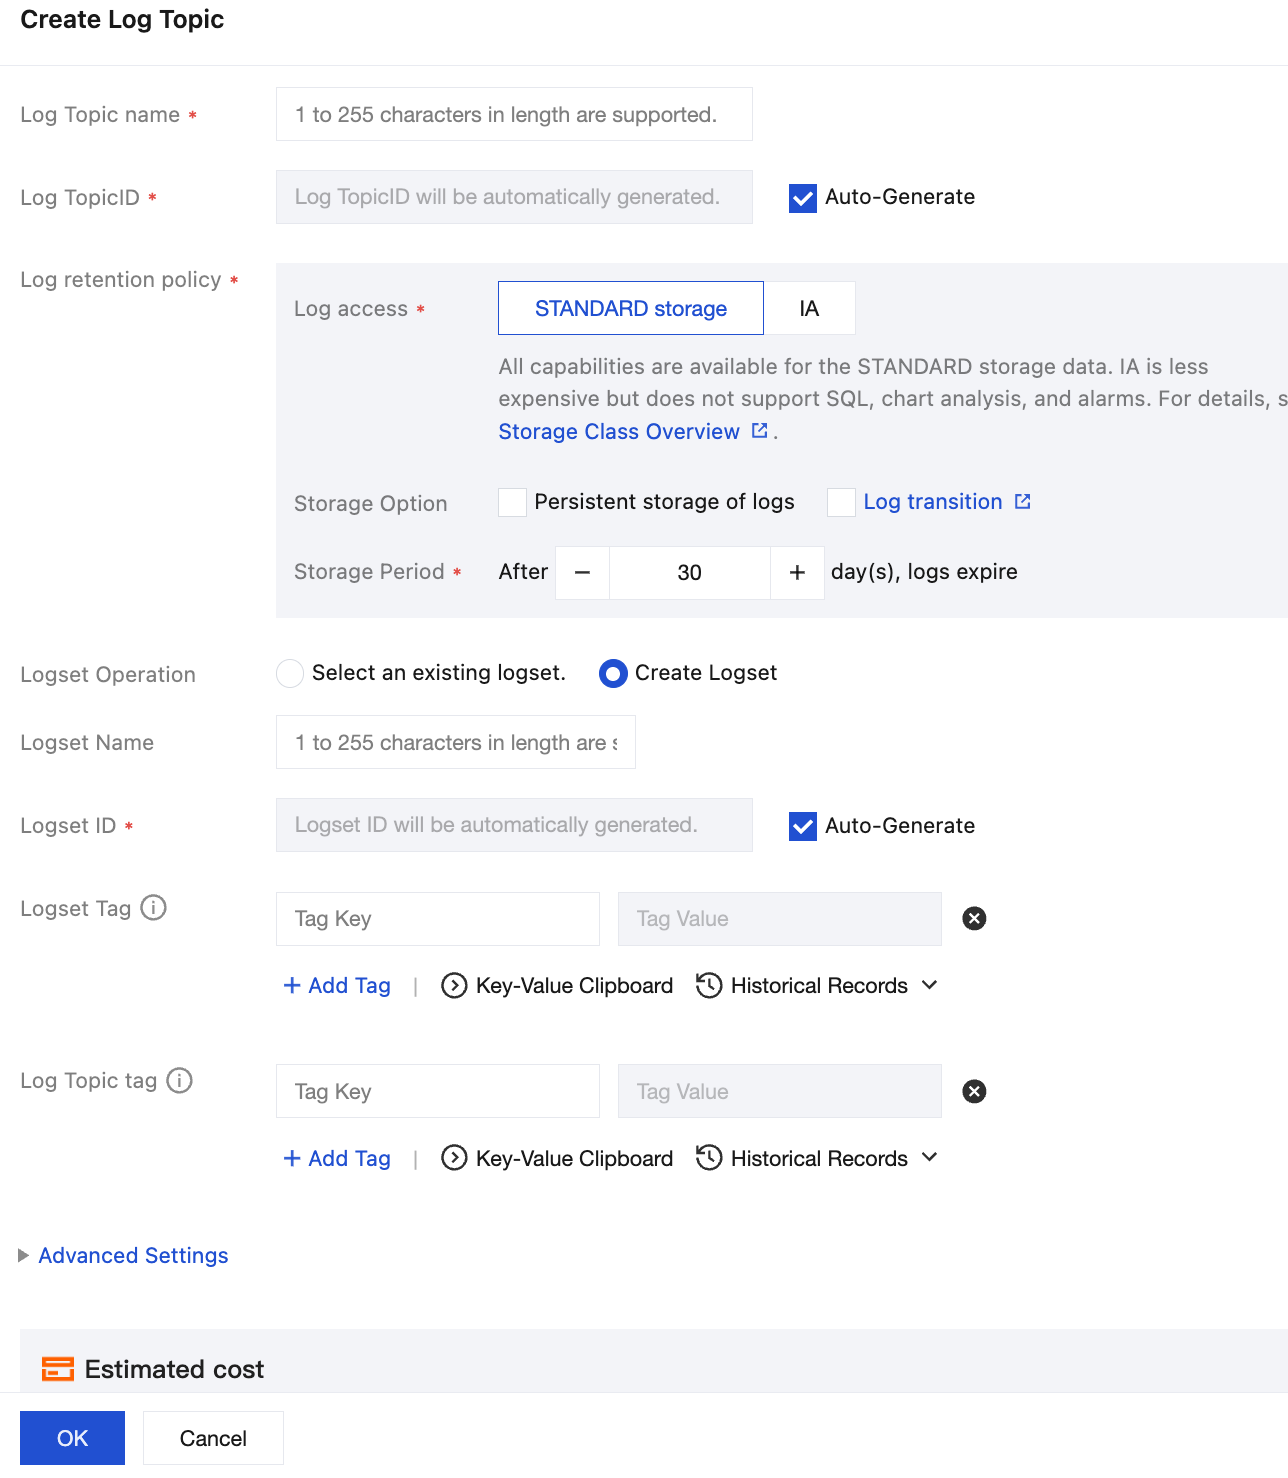
Step 3. Create a log topic
A log topic is the basic unit for log data collection, storage, search, and analysis. It usually corresponds to a certain application/service (with a similar log structure). Log topics can be grouped by logset. A logset doesn't store any log data and is only used to facilitate log topic management.
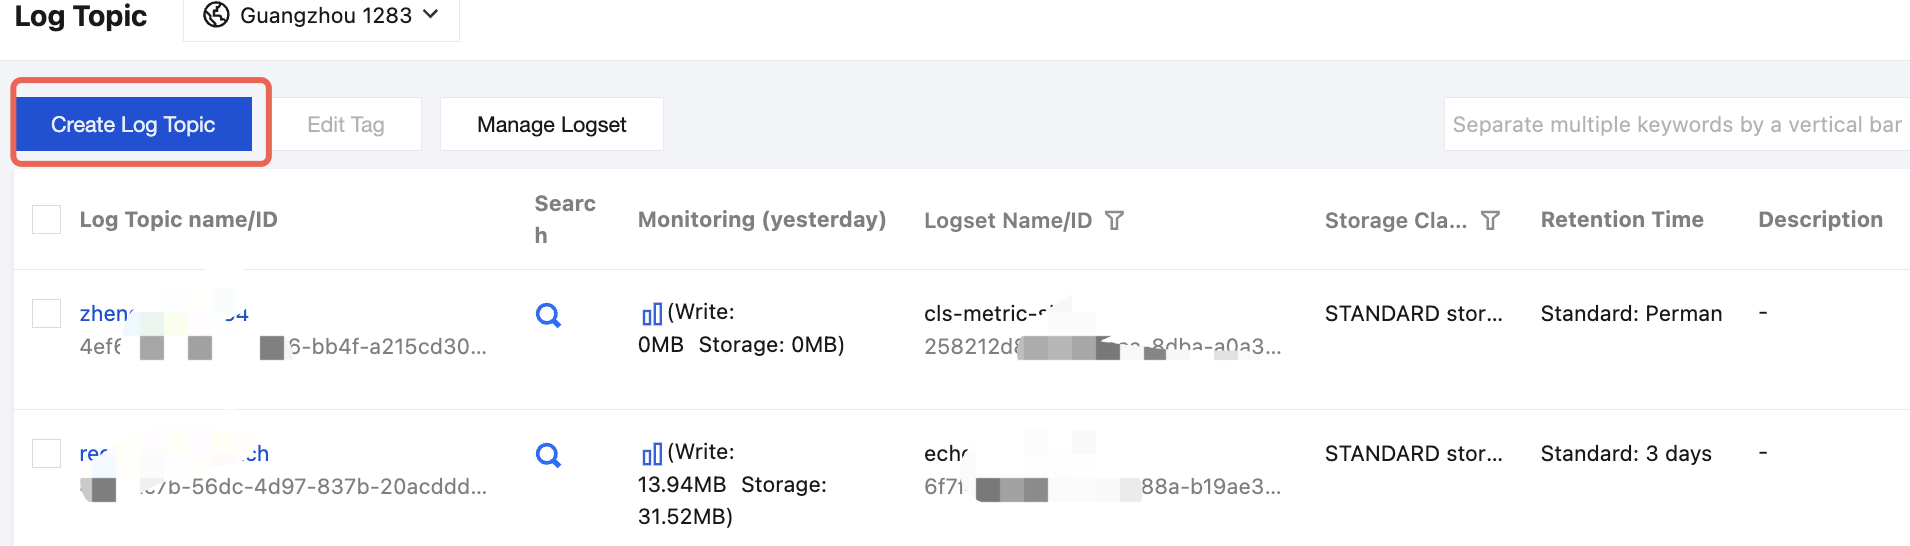
1. Go to the Log Topic management page. In the upper-left corner of the page, switch the region to the one specified in Step 2.2. Then click Create Log Topic.
2. In the pop-up window, enter information and click OK.
Log Topic Name:
Storage Class: STANDARD
Logset Operation:
Logset Name:
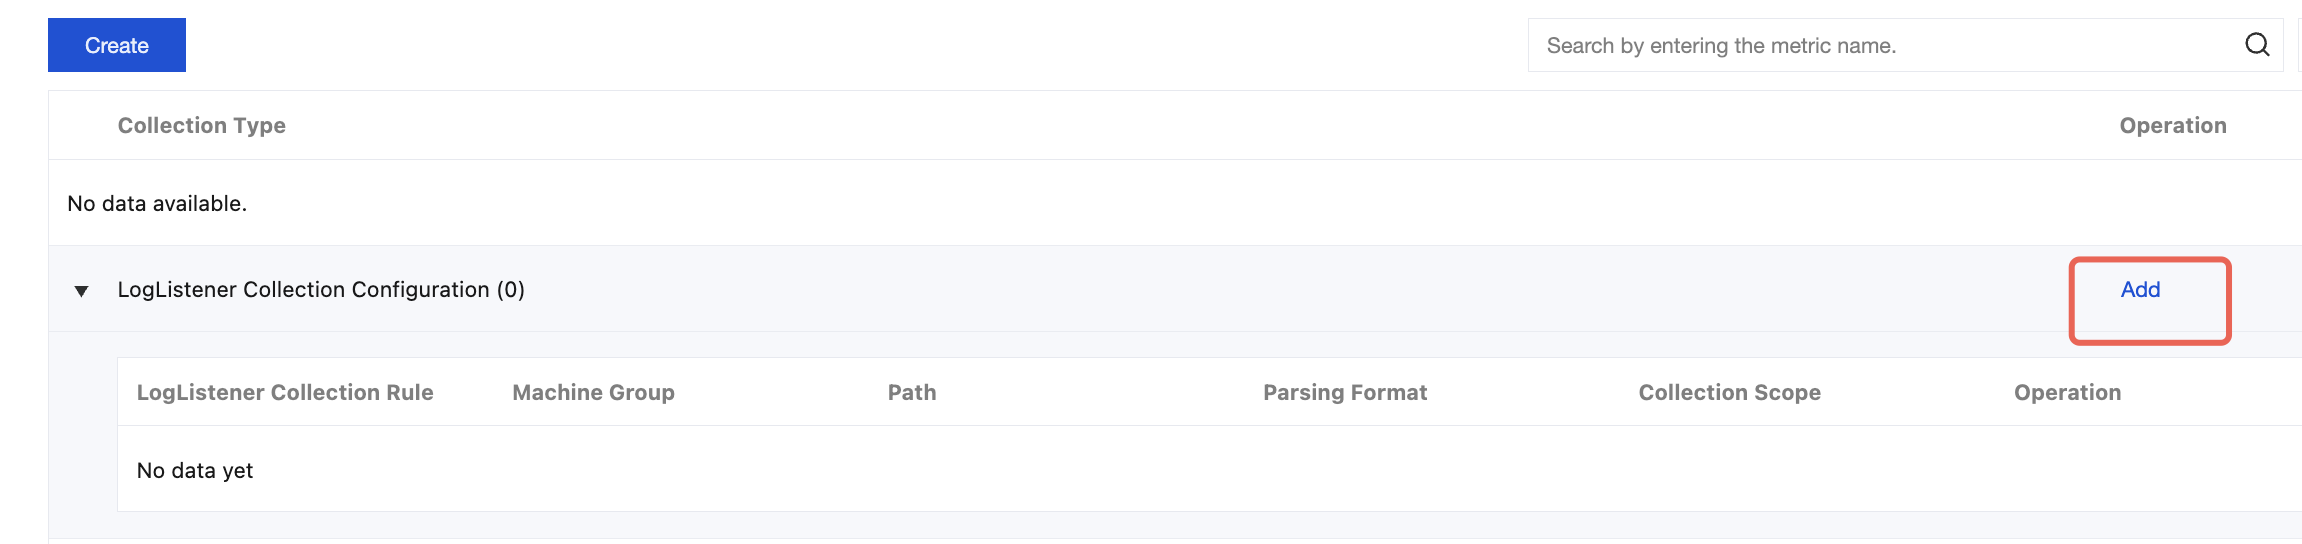
Step 4. Configure collection rules and indexes
1. On the Log Topic page, click the Log Topic Name/ID in step 3.
2. Select the Collection Configuration tab, and click Add in LogListener Collection Configuration.
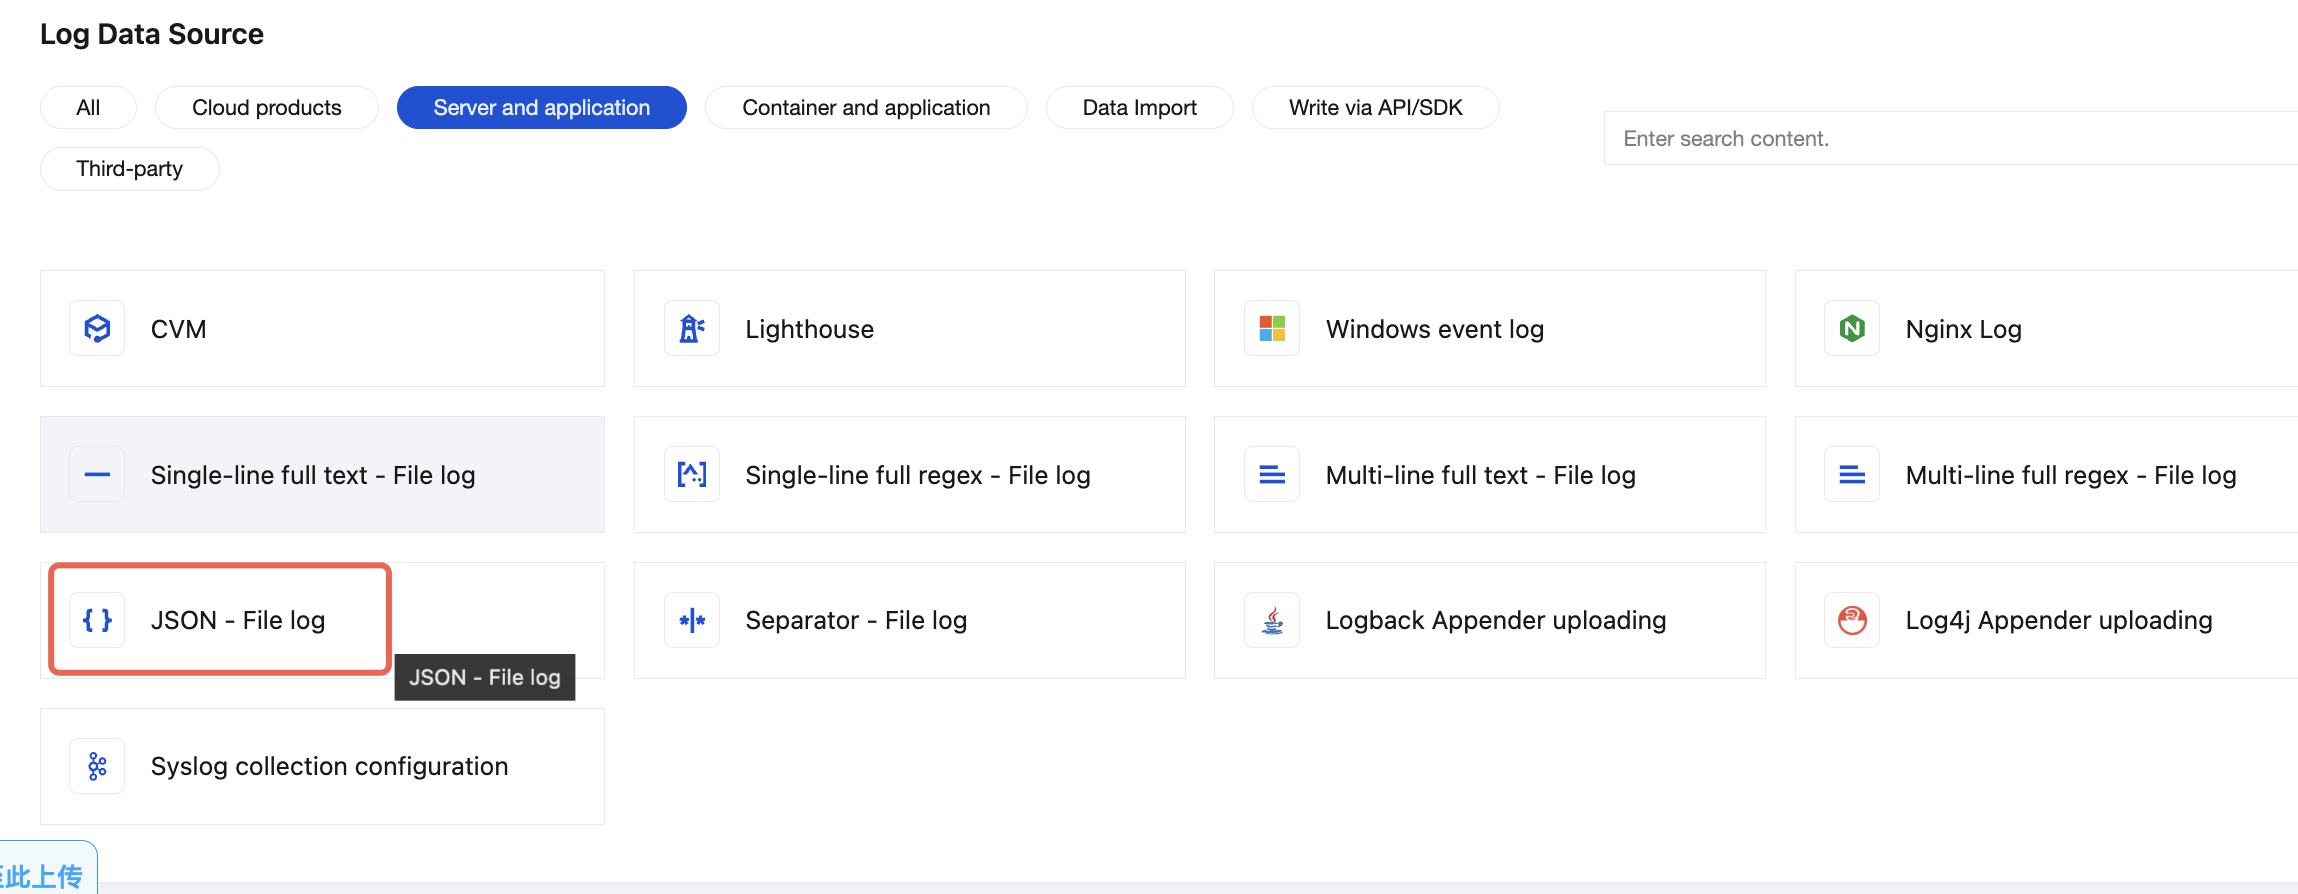
3. On the Log Data Source page, select JSON-File Log.
Note:
JSON is a structured data type. After logs are collected to CLS, you can directly use the log search and analysis feature (search logs by specific fields or perform statistical analysis using SQL).
If your logs are unstructured text, you can select Single-Line Full-Text Log. Text logs can be searched by keyword, but they must be structured before you can use SQL for statistical analysis. See Single-Line - Regex Extraction Log to split and extract log fields.
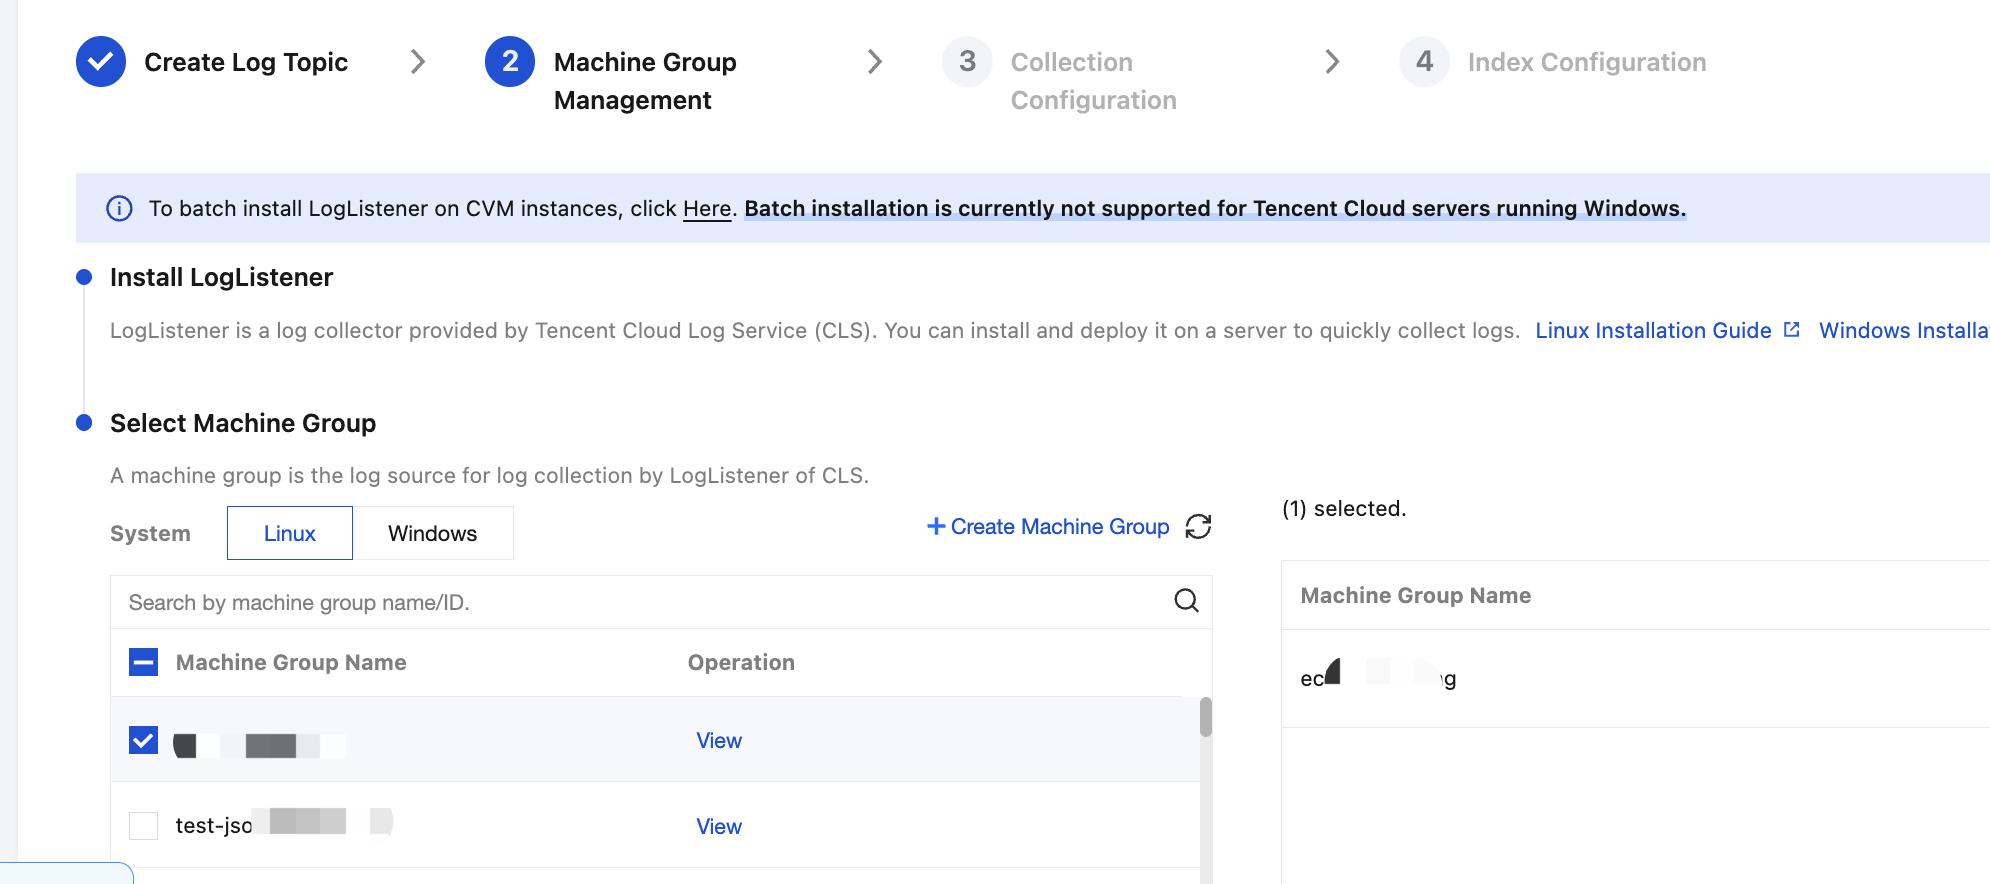
4. Select the machine group created in Step 2.2, and click Next.
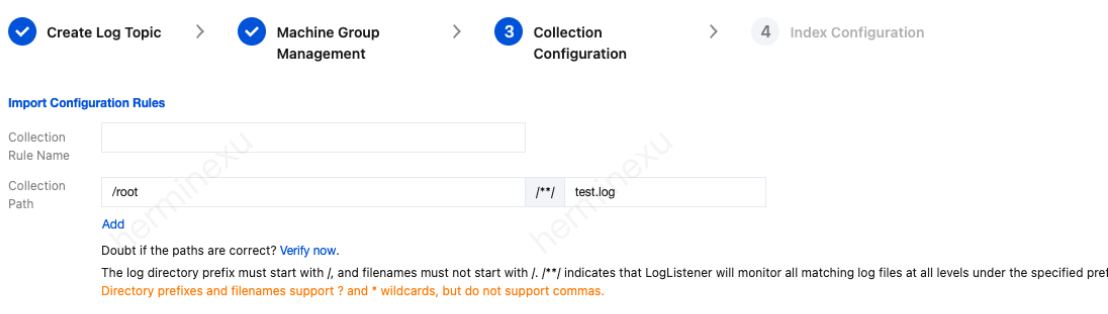
5. Enter the Collection Rule Name and Collection Path (that is, the path of the log file to be collected), then click Next.
For example, if the absolute path of the file to be collected is /root/test.log, then the directory prefix to enter in the Collection Path field is /root, and the log file name to enter is test.log.
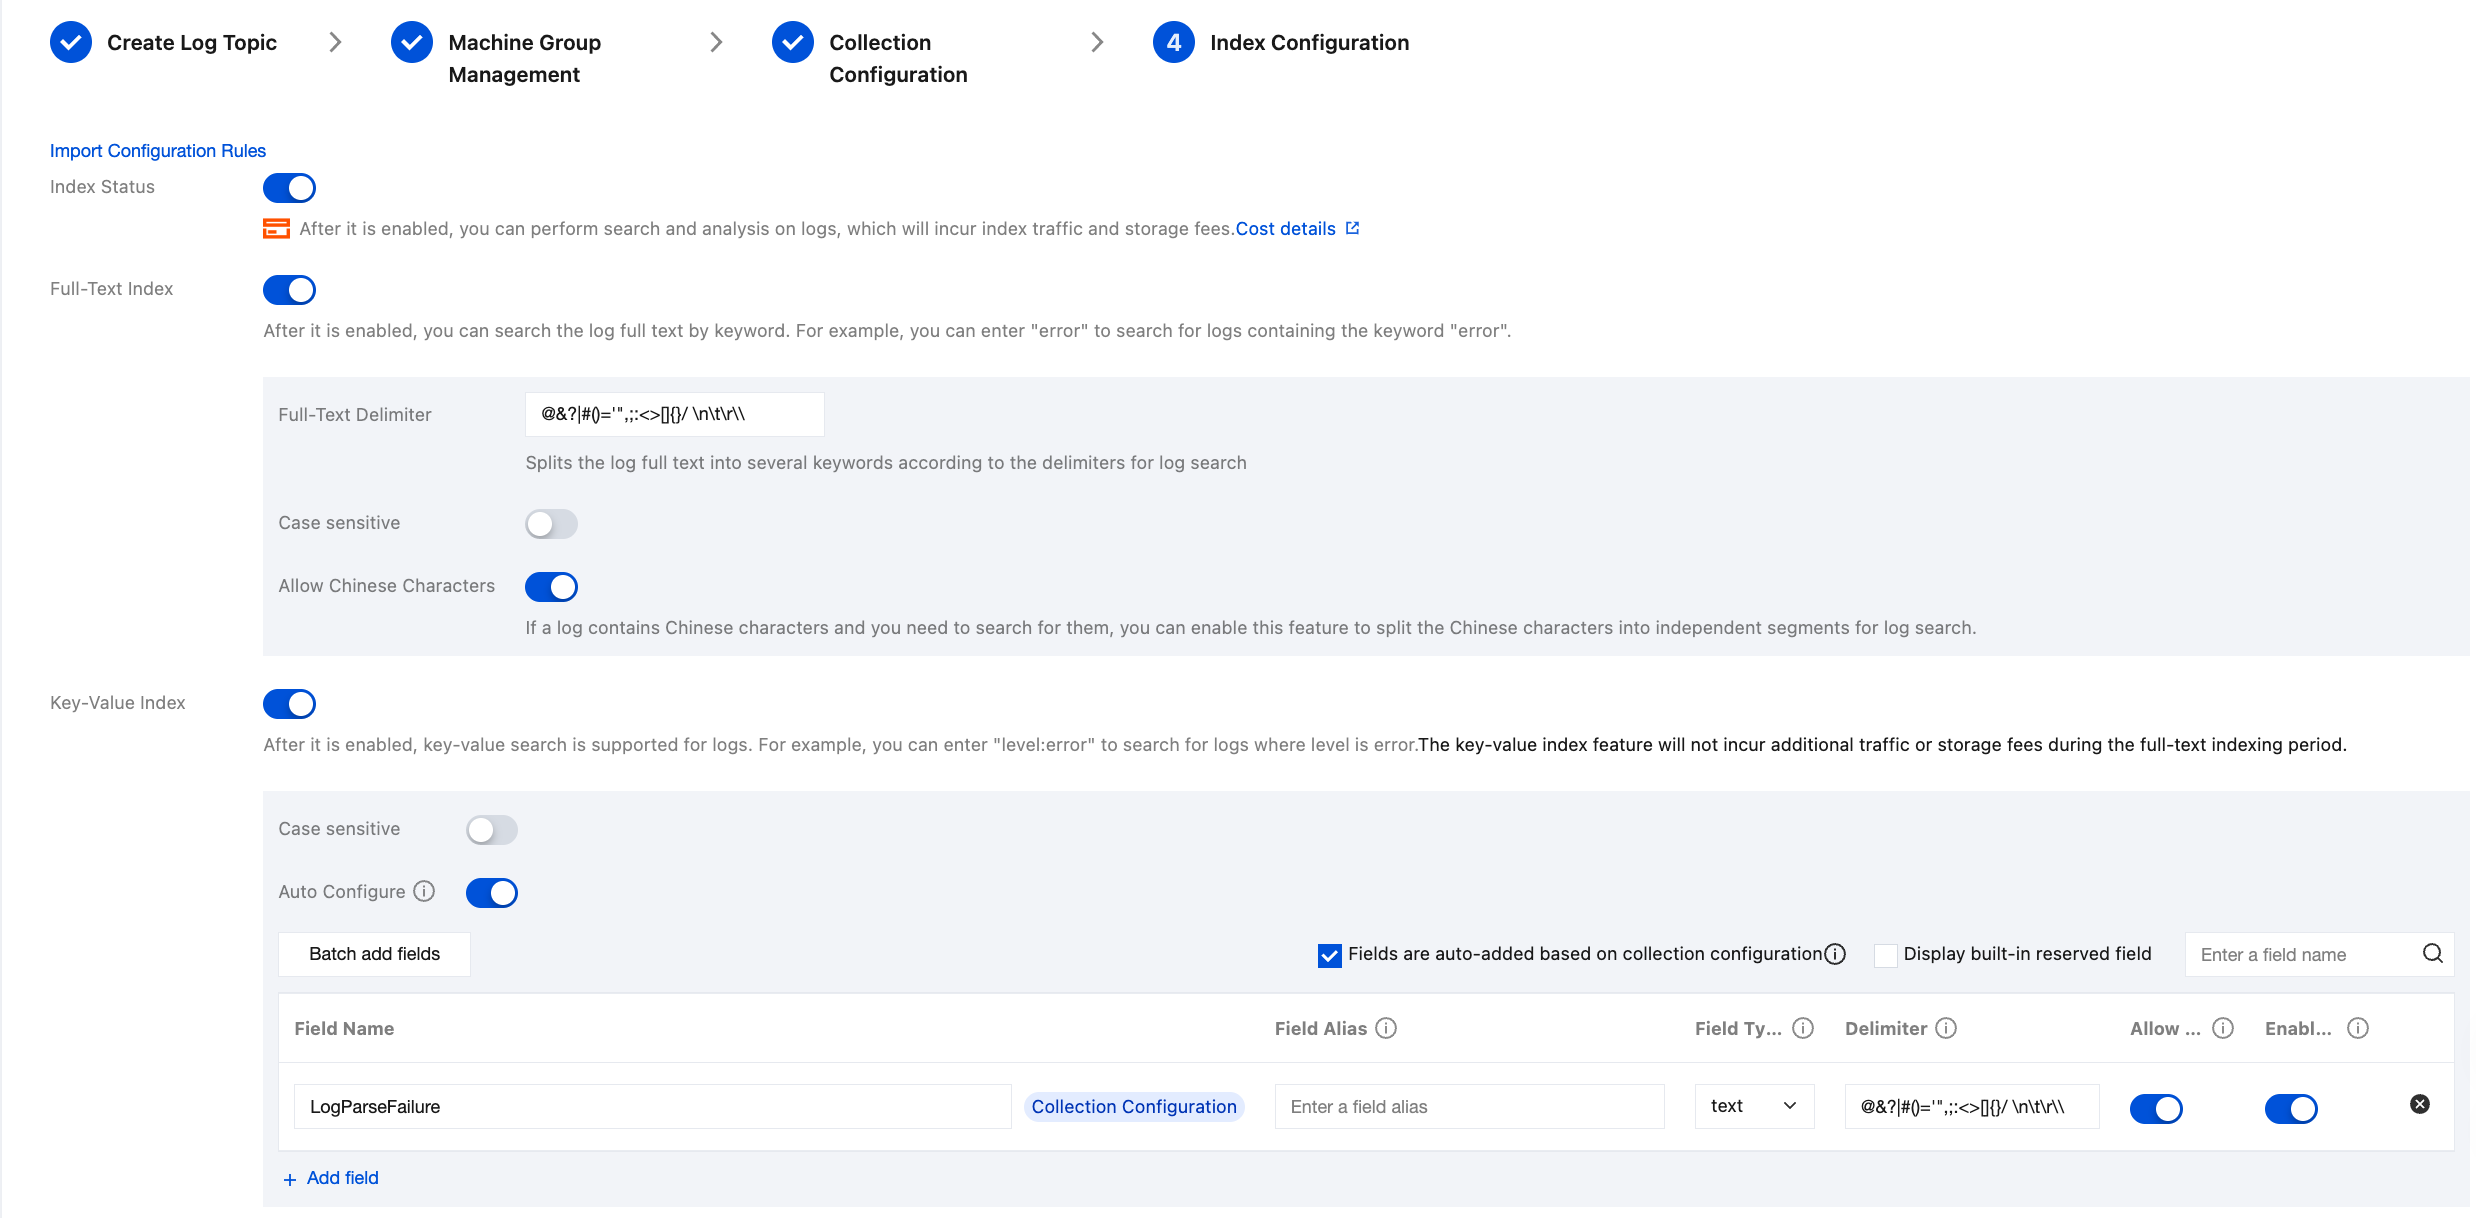
6. Configure the index settings by enabling both the full-text index and key-value index. After entering the relevant information, click Submit.
Note:
The modified index configuration takes effect only for newly written logs. Existing data won't be updated.
For descriptions of each configuration item in index configuration, see the Index Configuration document.
Step 5. Search for and analyze logs
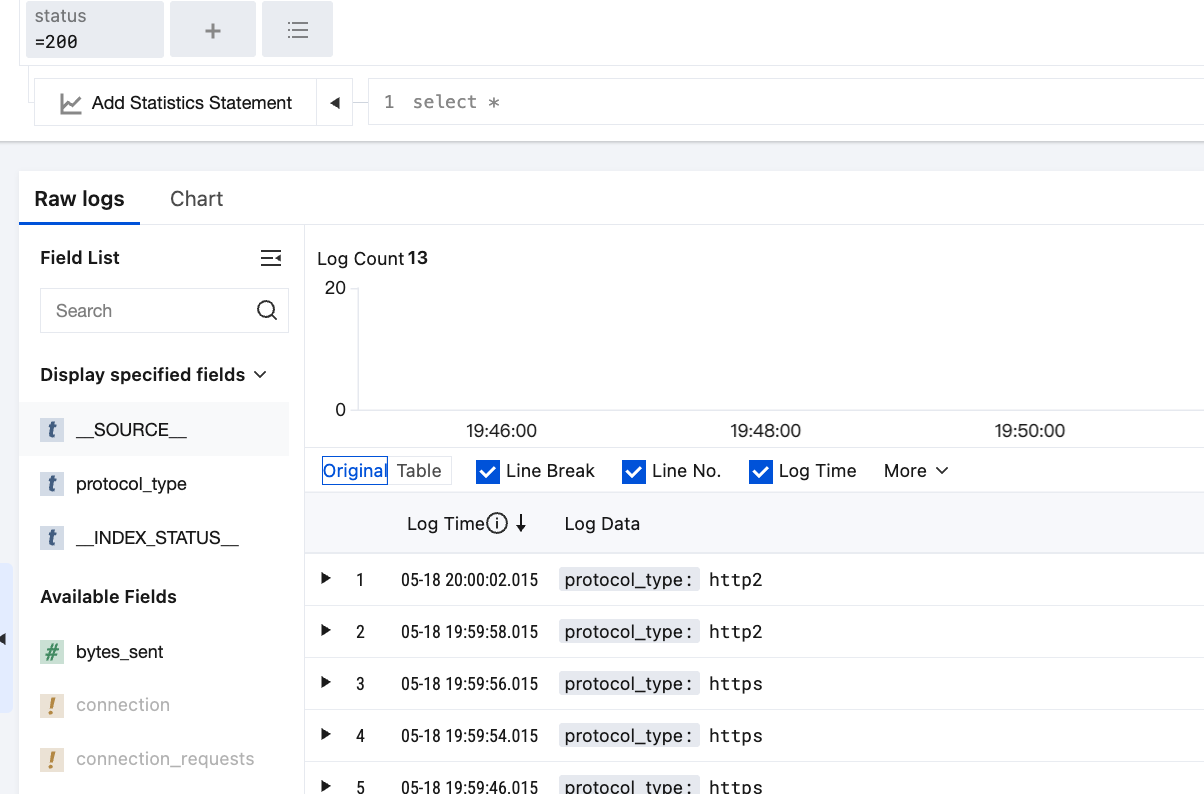
1. Go to Search and Analysis to search for logs that meet the search criteria. For example, the figure below shows logs containing a status of 200.
2. Perform statistical analysis on the retrieved raw data using the pipe operator and SQL. For example, count the number of log entries with a status of 200.
Note:
For more syntax descriptions of search and analysis, see the Syntax Rules document.
Additional Information
Concepts: This document describes the basic concepts of CLS, including log topic, logset, index, and segment.
Creating Processing Task: The data processing feature provides the capabilities to filter, cleanse, mask, enrich, and distribute raw logs.
Monitoring and Alarm Overview: You can configure alarm policies for logs. For example, an alarm is triggered when the number of ERROR logs exceeds 10 within one minute.