Member Management
Download
Focus Mode
Font Size
Overview
FWM supports unified management of multiple accounts. It can connect to Tencent Cloud Organization to achieve centralized policy distribution and resource quota sharing across multiple accounts.
Note:
This module is applicable only to Organization scenarios. It is not required for Non-Organization scenarios.
CFW management and VPC management are automatically enabled for Single-Account Individual Users. If you have not purchased CFW, the system provides 10 enterprise-level security group rules (trial quota) for free to help you quickly build basic network protection.
Member Management is the entry point for multi-account management. It is used to view member accounts, assign identities and shared roles, configure account groups, set specification sharing roles, control management switches, and more.
Role | Permission Scope |
Administrator | Has full FWM permissions, is unique within the organization, and corresponds to the management account of the group account. |
Delegated Administrator | Has full FWM permissions, is specified by the administrator in Organization Service Management > Firewall Manager, and can be set to multiple. |
Member | Has no permission to log in to the console. |
Prerequisites
Before using the multi-account management feature, you must first activate the Organization service.
1. Log in to the TCO console using an admin account. In the left sidebar, select Basic Information.
2. On the Basic Information page, complete enterprise identity verification and create a group organization. For details, see Creating Organization.
3. In the left sidebar, select Member Account Management.
4. On the Member Account Management page, invite other root accounts to join the enterprise organization. For details, see Adding Organization Member.
Operation Steps
Set Delegated Aministrator
Delegated administrators are designated by an administrator in the TCO console. Multiple delegated administrators can be designated. After being designated, they have full permissions for FWM. The Member Management page provides a quick jump entry. Actual authorization is completed on the TCO side.
1. Log in to the FWM console using an administrator account. In the left sidebar, select Member Management.
2. At the top of the member list page, click Set Delegated Admin. You will be redirected to the TCO console.

3. For details on how to set a delegated administrator, see Managing Delegated Admin Account.
4. Return to the Member Management page. You can view the updated result in the Identity column of the member list.
Note:
Only an administrator can perform this operation. Delegated administrators or members do not have permission to add or remove members after clicking the button and being redirected.
After a delegated administrator is removed, their CFW Shared Role is not automatically changed. If the account is a sharer, you must first designate a new sharer according to Set CFW Shared Role.
Manage Account Group
Account Group is a collection of member accounts. It serves as the scope for applying rule groups: the same policy is applied to the same account group, and new members added to the group automatically inherit all existing rules of the group. An account group itself does not directly hold rules. Rules are bound through rule groups.
1. Log in to the FWM console using an administrator or delegated administrator account. In the left sidebar, select Member Management.
2. Above the member list, click Manage Account Group to go to the Manage Account Group panel.

3. On the account group management panel, you can perform the following operations:
New Account Group: Enter the account group name and click OK. You can then select it in the Account Group column of the member list.
Edit Account Group: Modify the account group name. The change takes effect immediately after you click OK.
Delete Account Group: Deletes the account group. This action cannot be undone after you click Confirm.
Note:
You cannot delete an account group if it contains accounts or has associated rules that have been deployed. You can try again after disassociating the rules.
Set Associated Account Group
Accounts within the same account group have the group's policies deployed to them uniformly. After a new account joins the group, the system automatically deploys all existing group policies to it. Account group configuration is high-risk and supports editing only for individual accounts.
1. Log in to the FWM console using an administrator or delegated administrator account. In the left sidebar, select Member Management.
2. Locate the target account in the member list, and then click the Associated Account Group name.

3. Select a configured account group. The selection takes effect after you confirm it again.
Note:
After the modification, the policy binding between this account and the old account group will be removed. Policies that were historically deployed to this account through the old account group will be deleted. The system will automatically deploy all existing policies from the new account group to it. For a new account, the initial configuration automatically inherits all group policies. Click Deploy Now to make them effective. Please configure with caution.
Setting an account to Ungrouped follows the same logic as changing its account group. This action deletes the policies deployed from the original account group.
Set CFW Management
1. Log in to the FWM console using an administrator or delegated administrator account. In the left sidebar, select Member Management.
2. Click the switch in the CFW Management column of the member list. The system displays a corresponding prompt based on the account's current status:

Scenario | Solution |
Account with CFW already activated. | Click Confirm to enable management. |
Account without CFW activated. | Select Trial to use 10 enterprise security group policies and the operation log module, and complete management integration. Select No Trial to not enable it. |
Sharer / user with specification sharing enabled | The switch is enabled by default and cannot be disabled, and is automatically maintained by the system. |
3. Click the switch again to disable CFW management. Before disabling CFW management, the system checks whether any policies have been deployed. If there are associated account group rules, move them to Ungrouped first. If other deployed rules exist, the switch is disabled and cannot be turned off.
Set VPC Management
After this feature is enabled, the system hosts and centrally manages the VPC security group assets under the member account. It is designed for multi-account and cross-region scenarios.
1. Log in to the FWM console using an administrator or delegated administrator account. In the left sidebar, select Member Management.
2. Click the switch in the VPC Management column of the member list.

3. In the pop-up window that asks whether to enable VPC management, click Enable.
4. Click the switch again to disable VPC management.
Set CFW Shared Role
Note:
Setting as a sharing account or consuming account: The system supports having one sharing account centrally activate CFW and share the core specifications with multiple consuming accounts.
Modifying the sharing account: This action reclaims the shared specification resources, causing current users to be unable to continue using CFW. Proceed with caution.
In multi-account specification scenarios, FWM supports a resource pool model. In this model, one sharing account centrally activates CFW and shares the specifications with multiple consuming accounts on a first-come, first-served basis. This approach helps reduce costs and optimize resource utilization.
The role of an account in Specification Sharing is determined by the independence between its sharing role and identity:
Share-Nothing Role: It is excluded from specification sharing.
Sharer: Activates CFW and shares its specifications externally. It is globally unique and can only be assigned to an administrator or a delegated administrator.
User: Uses the specification pool provided by the sharing account. It can be assigned to any identity.
Identity changes and sharing roles are independent of each other: Identity changes are managed in Organization and do not automatically alter sharing roles.
1. Log in to the FWM console using an administrator or delegated administrator account. In the left sidebar, select Member Management.
2. Locate the target account in the member list and click the CFW Sharing Role name. The following rules apply when a sharing role is changed:
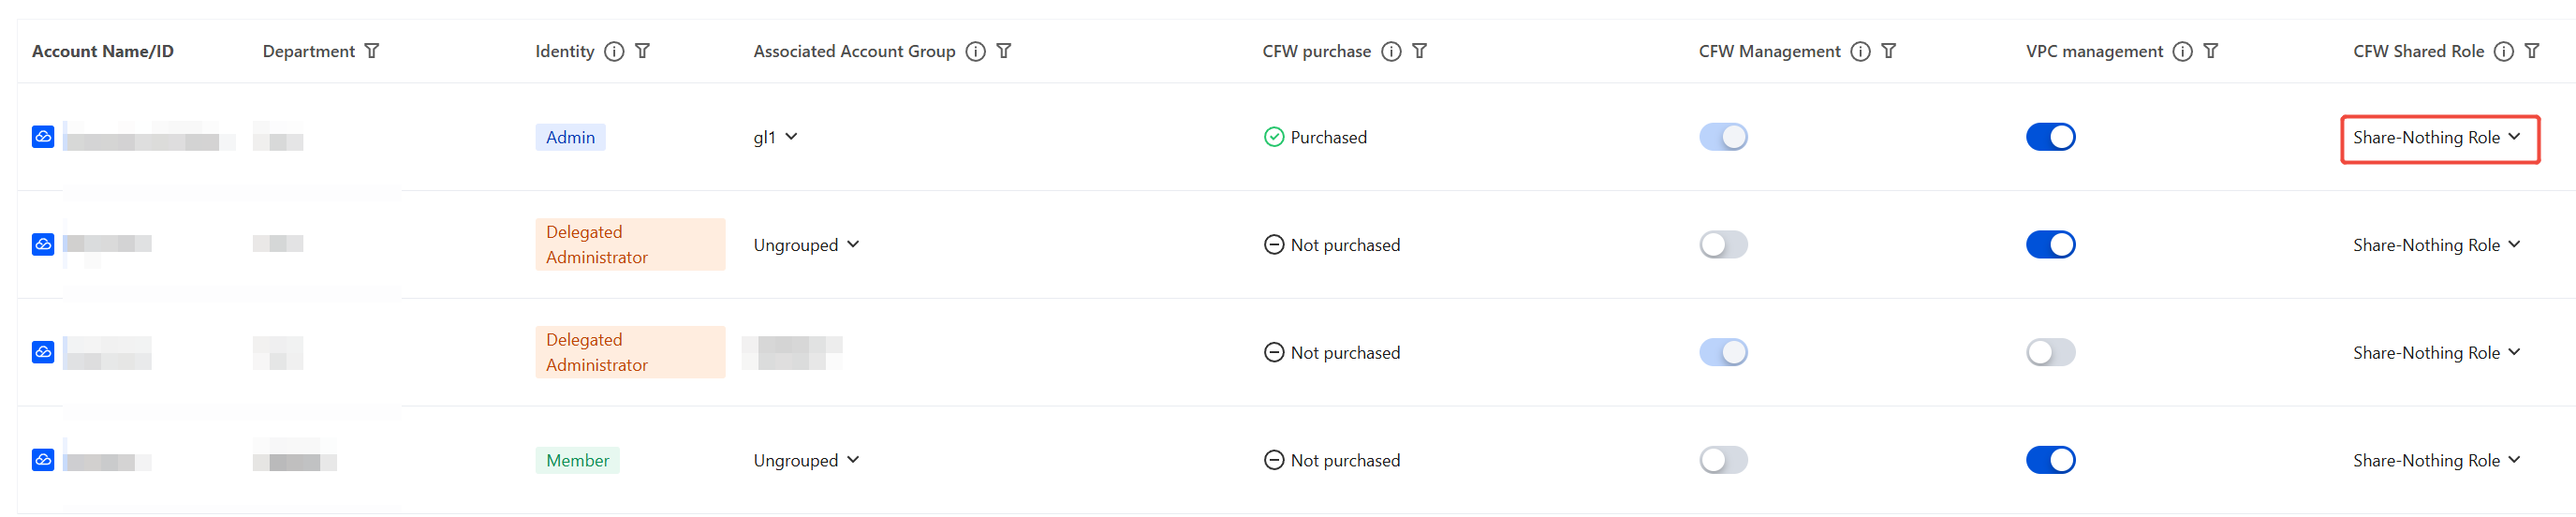
Change Scenario | Constraints and Handling |
Share-Nothing Role → Sharer | Allowed only when there is no global sharer; the account must have CFW already activated. |
Share-Nothing Role → User | Edit directly and confirm again. |
Sharer / User → Share-Nothing Role | Check whether any associated firewall instances exist; if they do, delete them first. |
Sharer → User | Cannot be changed directly: First change to no shared role → designate a new sharer → release the CFW resources under this account → then set as user. |
User → Sharer | Allowed only when there is no global sharer: First change to no shared role → activate CFW for this account → then set as sharer. |
Sign in to Cloud Firewall
Impersonation login is used to allow administrator sub-accounts to temporarily switch to a member account's CFW console or VPC console for Ops operations.
Note:
Only administrator sub-accounts can perform impersonation login to other member accounts.
Configure permissions
1. Log in to the CAM console using an administrator or administrator sub-account. In the left sidebar, select Policies and check whether the following policies exist:
Full read-write access to Cloud Firewall: QcloudCFWFullAccess
Service role associate with Cloud Firewall: QcloudAccessForCFWRoleInEnterpriseSecurityGroup
Full read-write access to VPC: QcloudVPCFullAccess

Note:
2. Log in to the TCO console using an administrator or administrator sub-account. In the left sidebar, select Login Permission Settings and click Create login permission.
2.1 It is recommended to name the Permission Name as
fwmuse. Fill in the Description based on the actual scenario and click Next.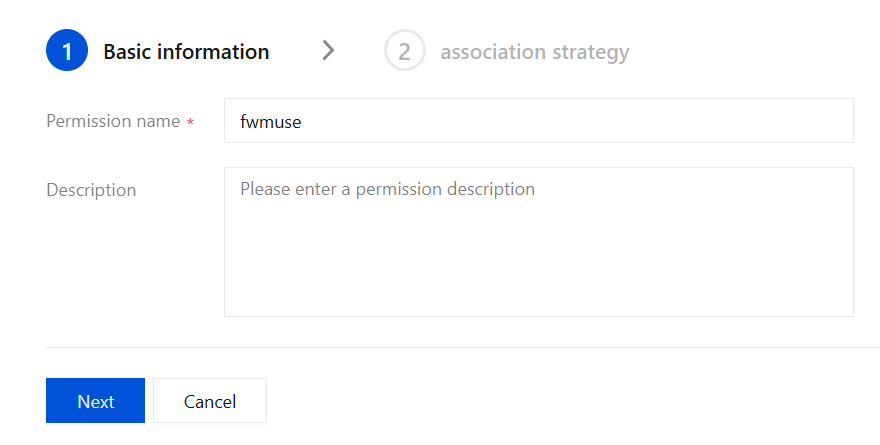
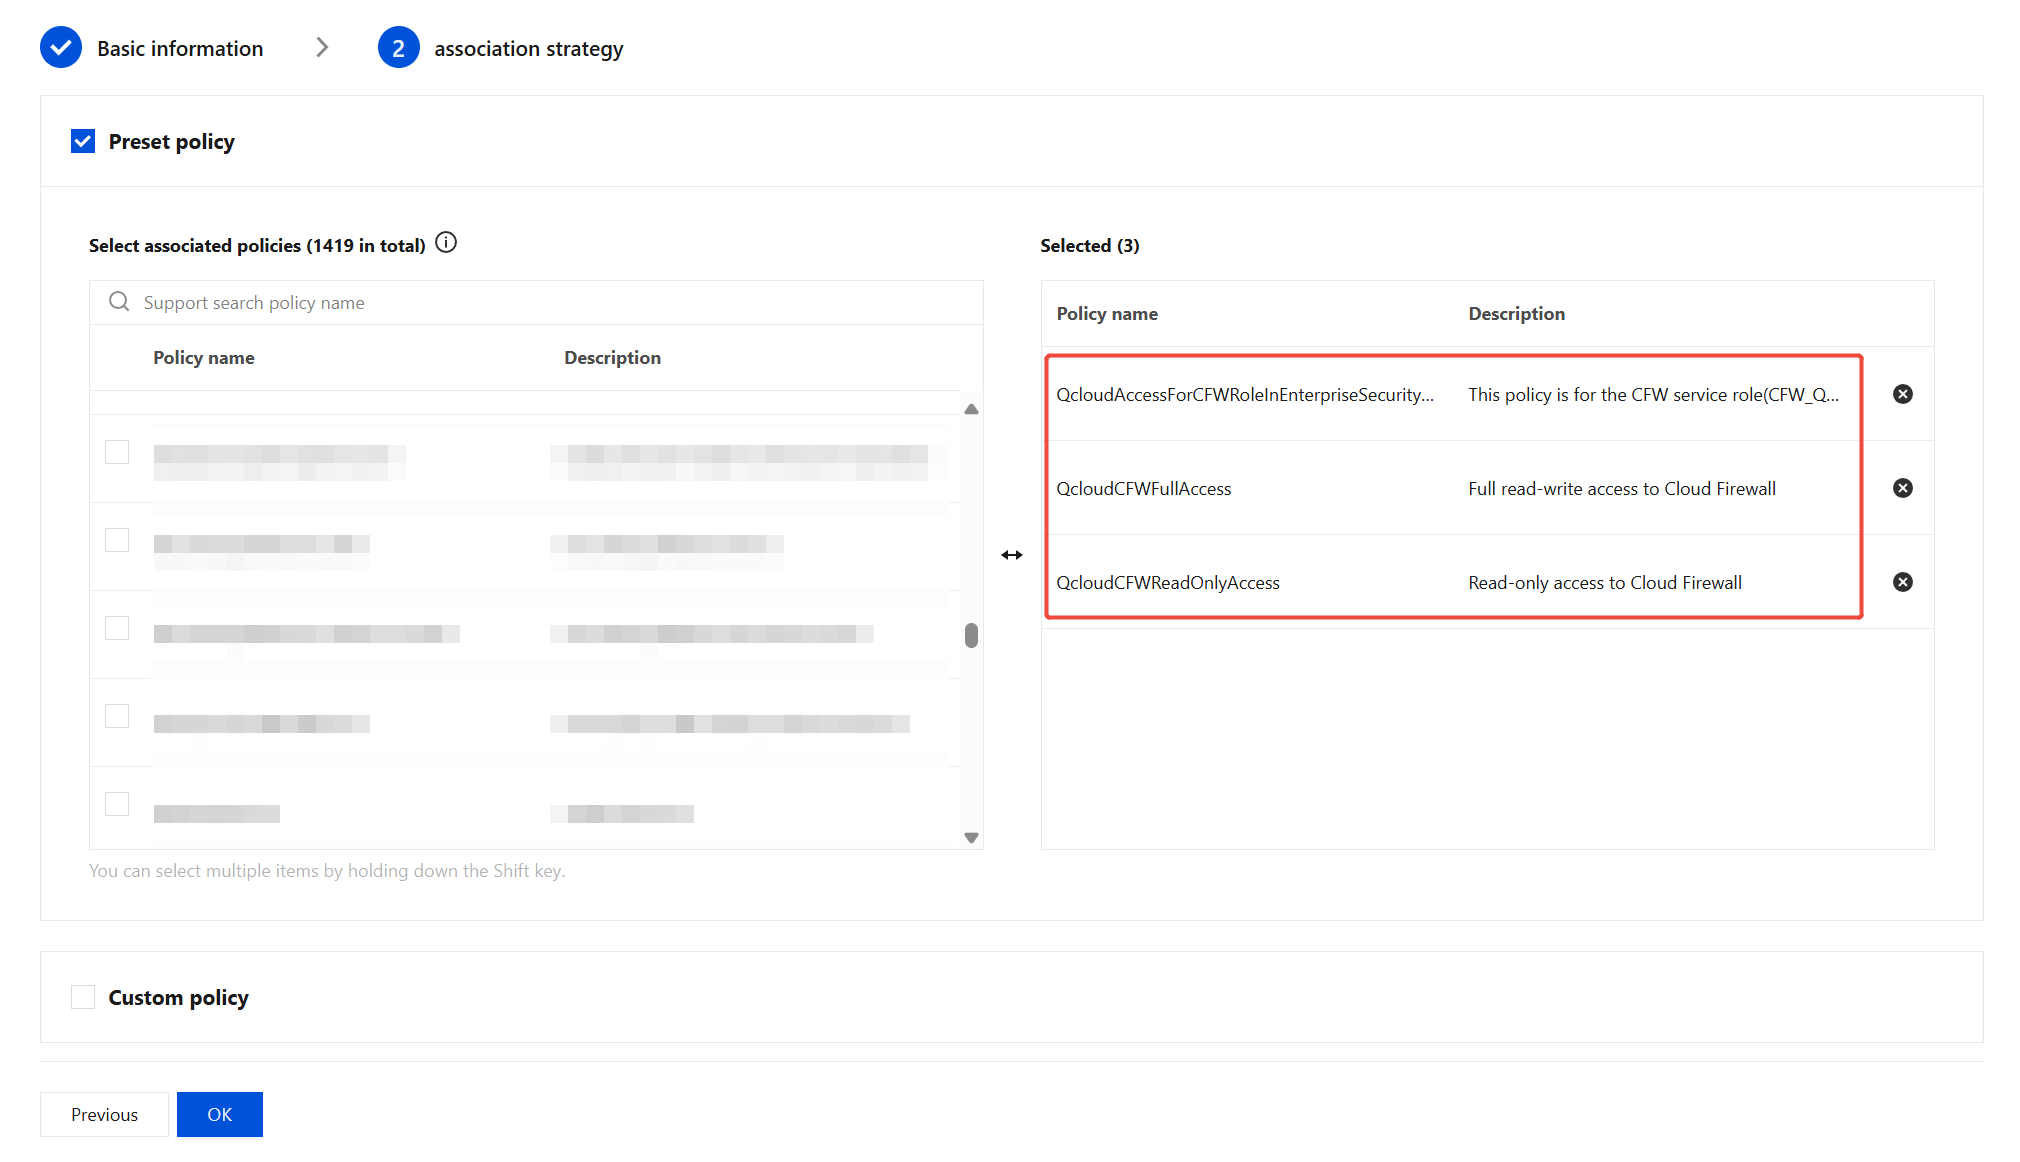
2.2 Select Preset Policy, choose the QcloudCFWFullAccess, QcloudCFWReadOnlyAccess, and QcloudAccessForCFWRoleInEnterpriseSecurityGroup permissions, and click OK.
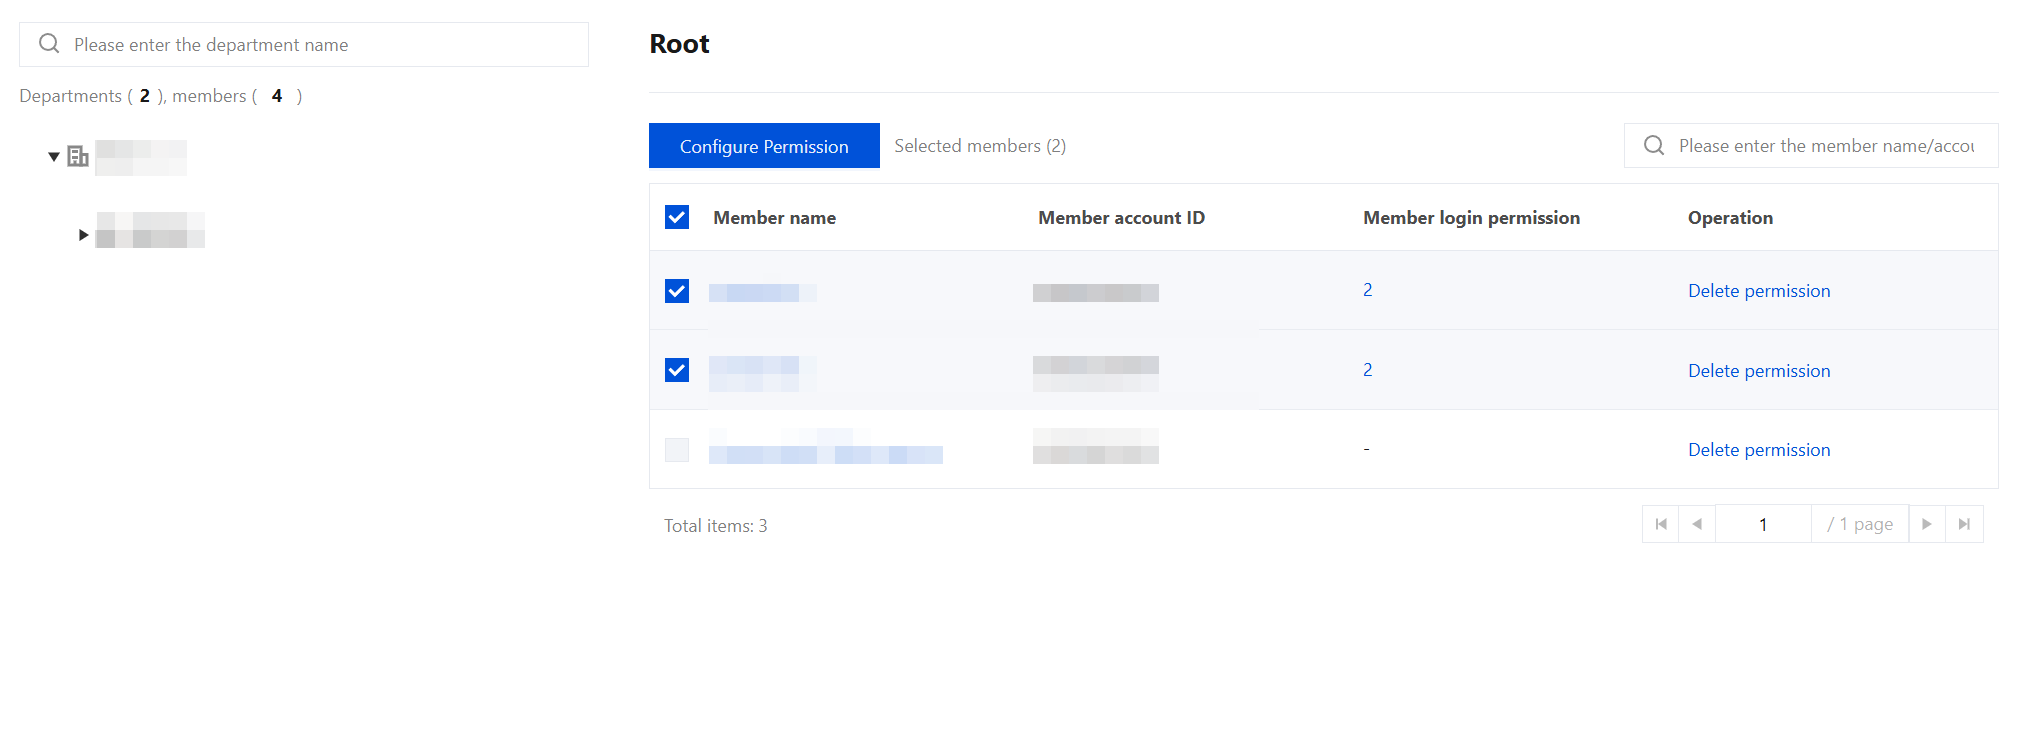
3. In the left sidebar of the TCO console, choose Multi-Member Authorization Management > Member Permission Configuration. Select the accounts that require impersonation login (multiple selections allowed) and click Configure Permission.
4. Select the permission you just configured (for example,
fwmuse) and click Next.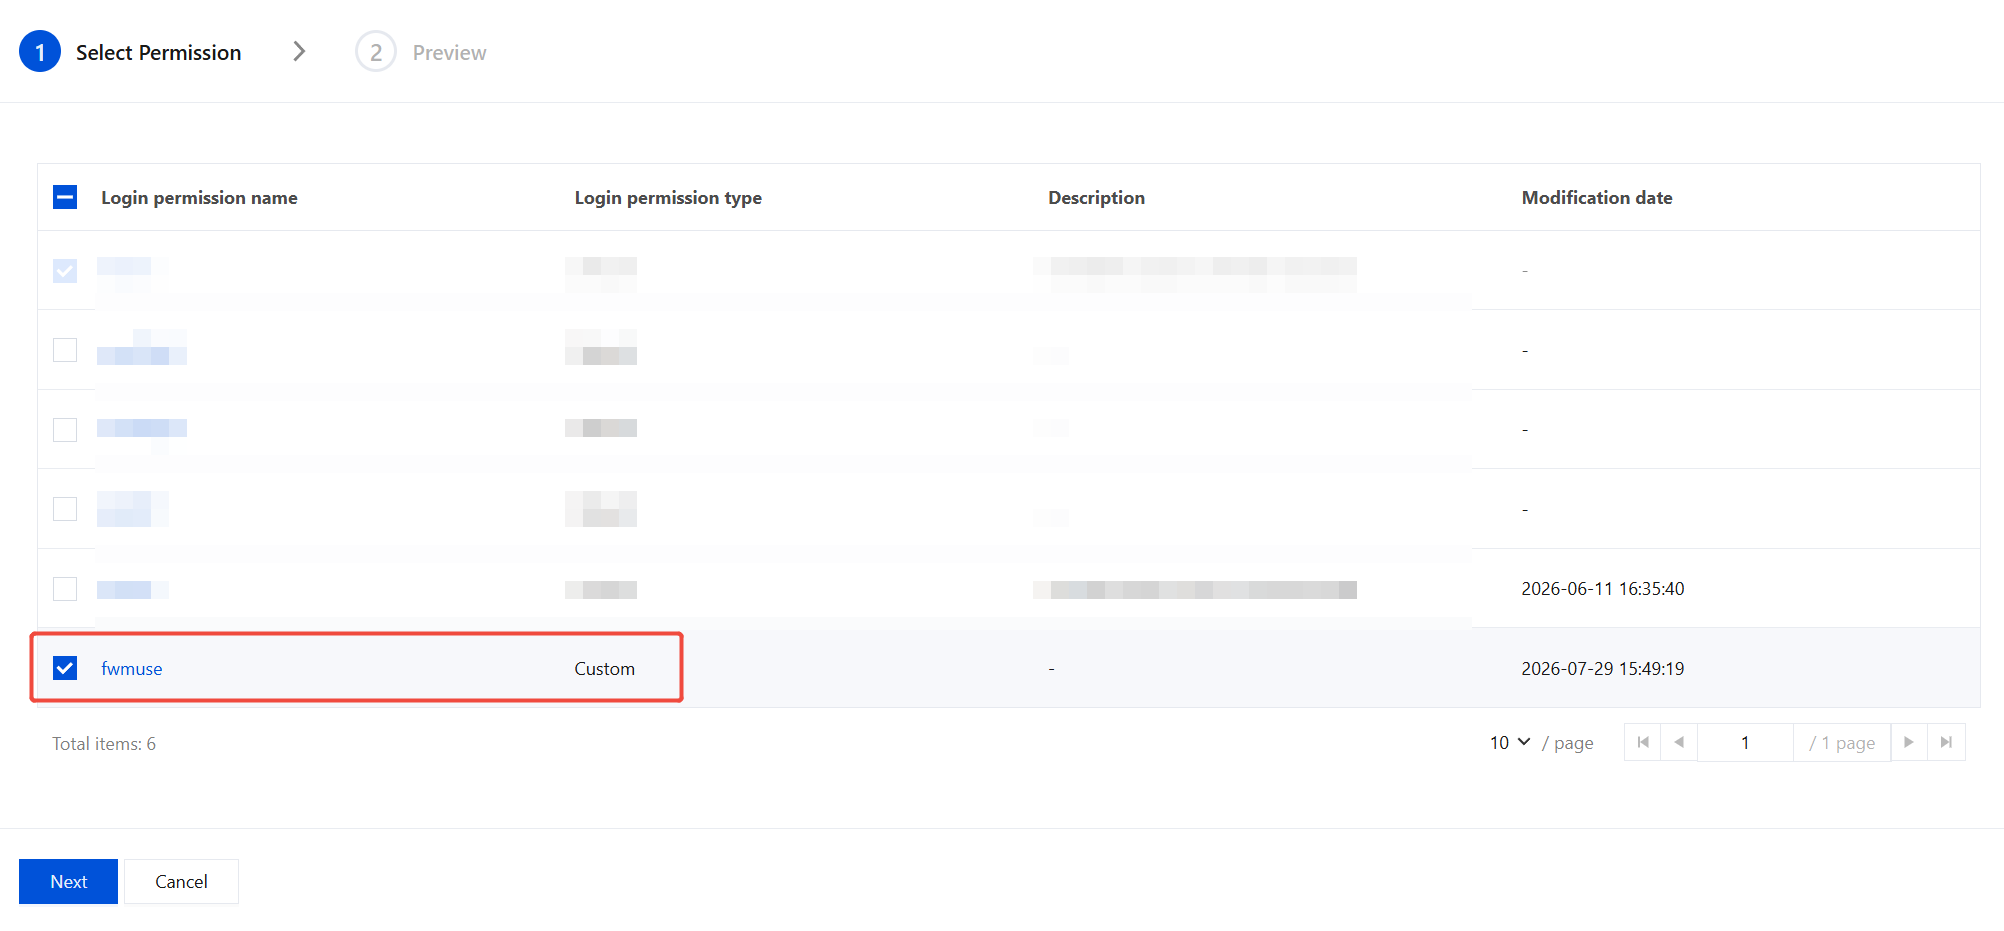
5. After confirming the preview is correct, click Complete.
6. In the left sidebar of the TCO console, choose Multi-Member Authorization Management > Add Sub-User Authorization and click Add Authorization.
6.1 Select the member accounts that require impersonation login. For Login Permission, select the permission you just configured (for example,
fwmuse). It is recommended to enter fwmuse for the Authorization Policy Name. Click Next.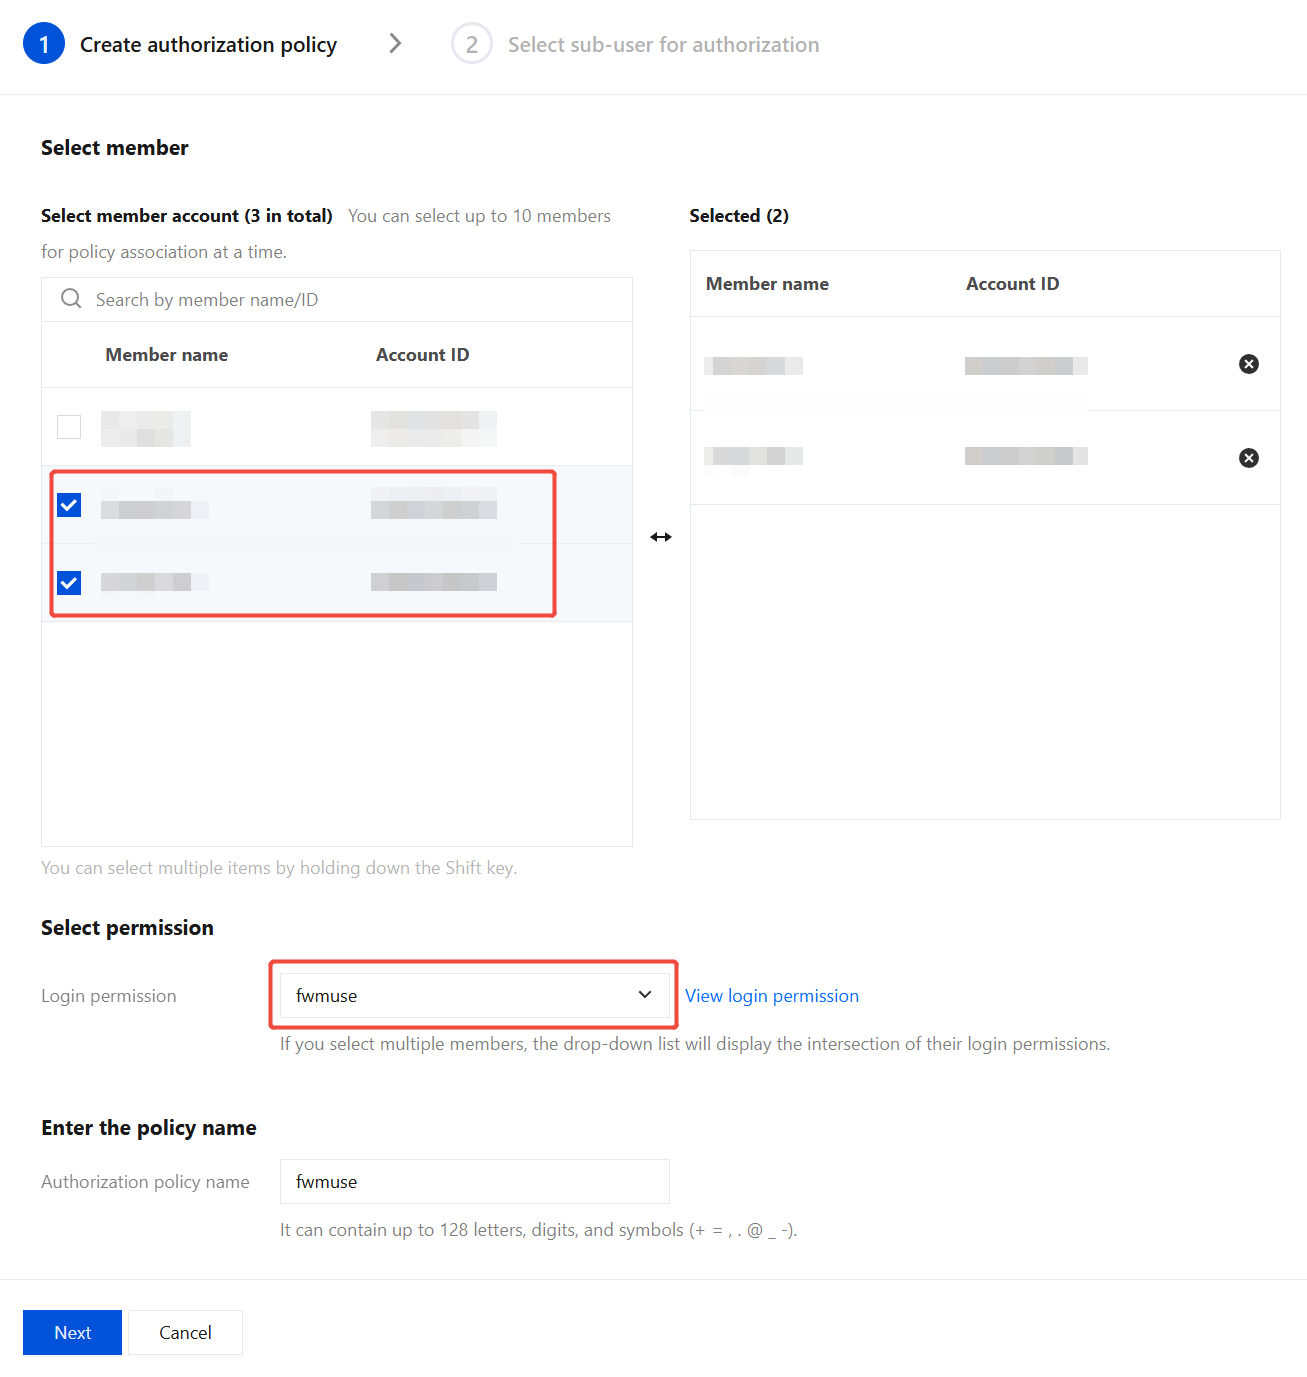
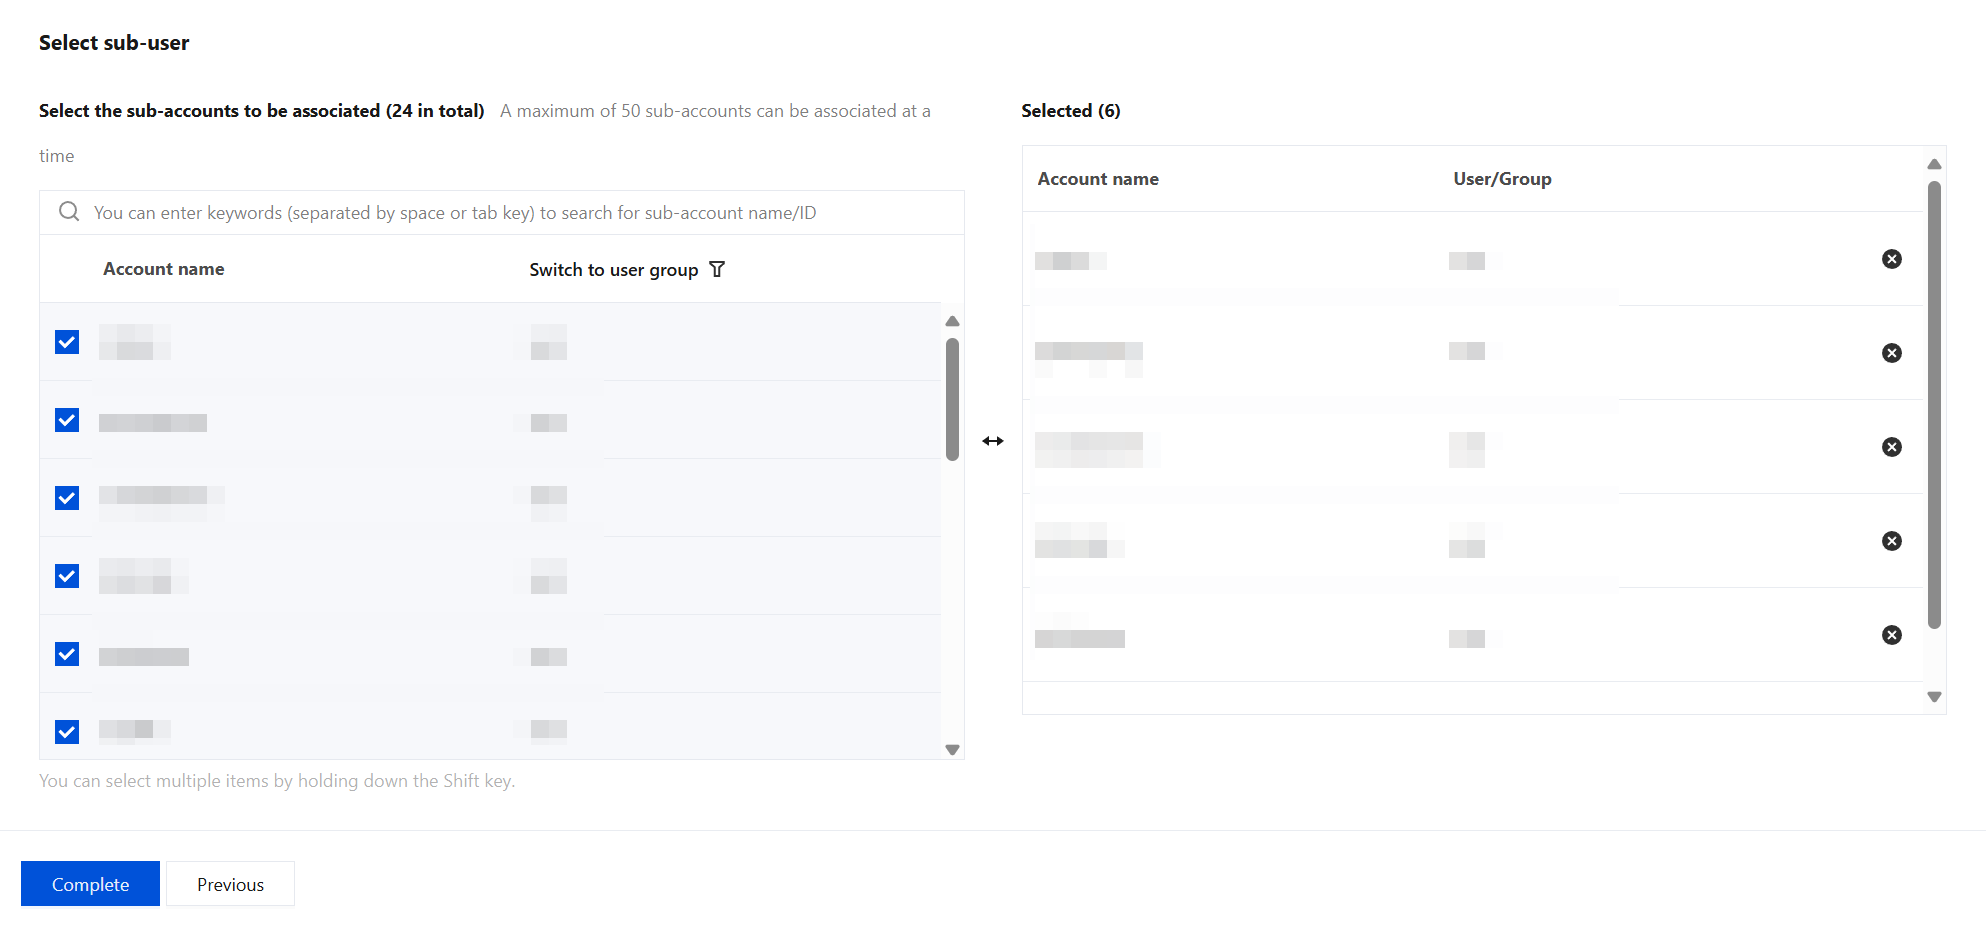
6.2 Select the administrator sub-accounts that require sign-in (multiple selections allowed) and click Complete.
Note:
For detailed operations and operations such as revoking authorization, see Authorizing Sub-Users to Log in to Member Accounts.
Operation Steps
Note:
Taking impersonation login to CFW as an example, the operation for impersonation login to VPC is the same.
1. Log in to the FWM console using an administrator sub-account. In the left sidebar, select Member Management.
2. Locate the target account in the member list. Click Sign in to Cloud Firewall in the Operation column.
3. In the login account dialog box, click Login Member Account. You will be redirected to the corresponding member account's CFW console.
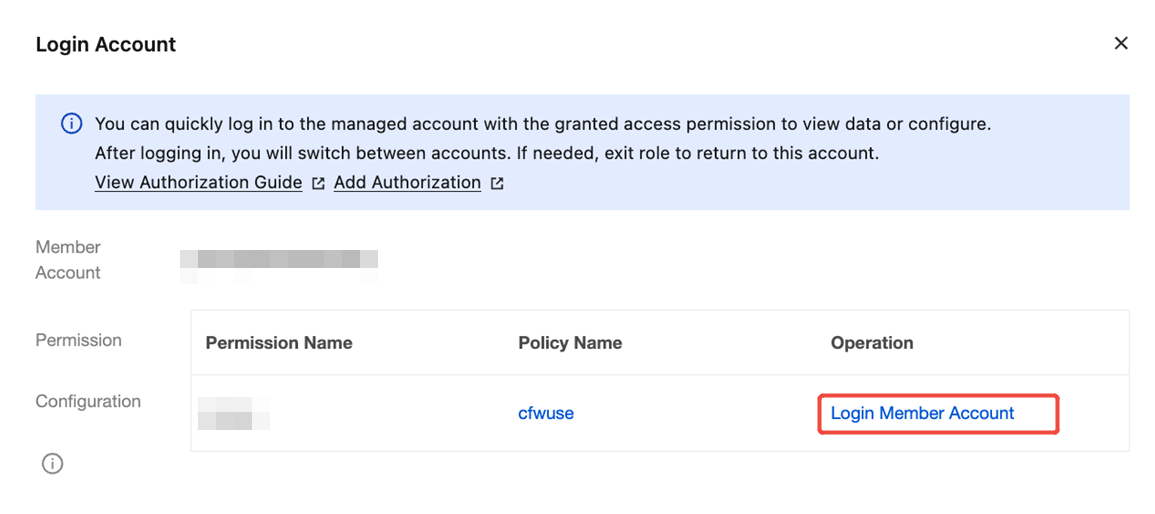
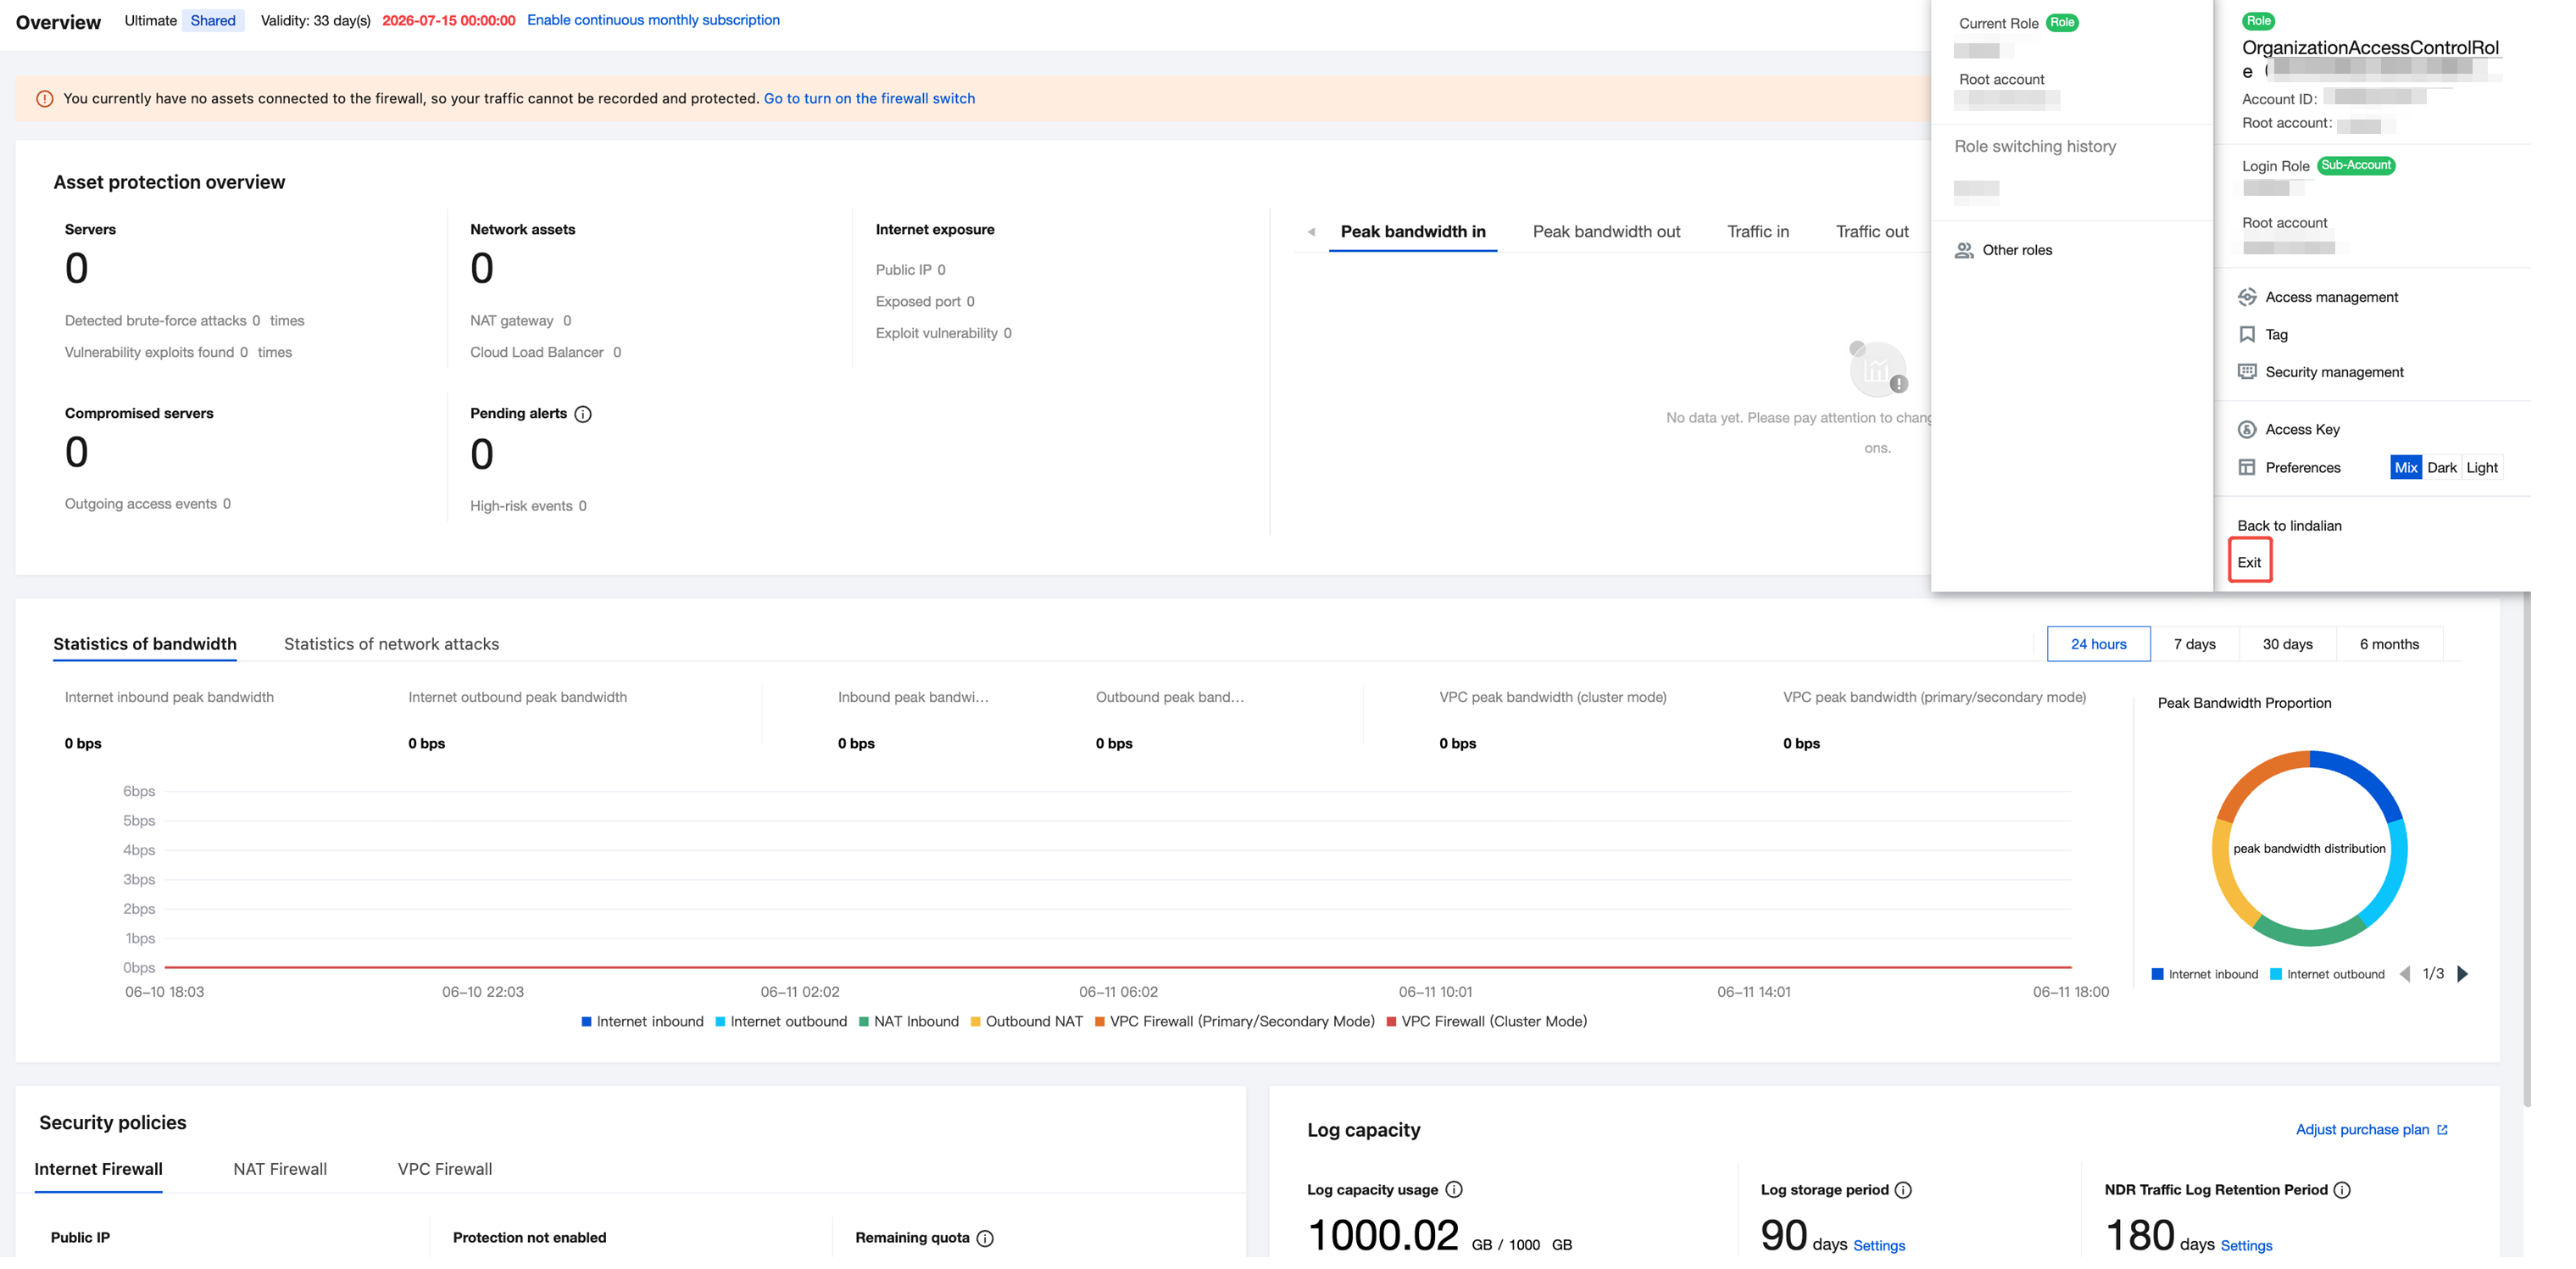
4. In the avatar in the upper-right corner, click Exit to return to your original account.
Help and Support
Was this page helpful?
You can also Contact sales or Submit a Ticket for help.
Help us improve! Rate your documentation experience in 5 mins.
Feedback