简单模式压测
Download
聚焦模式
字号
前言
简单模式压测主要使用交互式 UI 组合 GET、POST、PUT、PATCH、 DELETE 等请求来压测场景,本文将详细介绍它的基本用法。
创建简单模式压测场景
1. 登录 腾讯云可观测平台。
2. 在左侧菜单栏中单击云压测 > 测试场景。
3. 在测试场景页面单击新建场景。
4. 在创建测试场景页面选择“简单模式”压测类型,并单击开始,创建压测场景。创建完成后,可进行下列操作。
添加 HTTP 请求
在场景编排模块,输入请求描述和请求地址,即可添加 HTTP 请求。
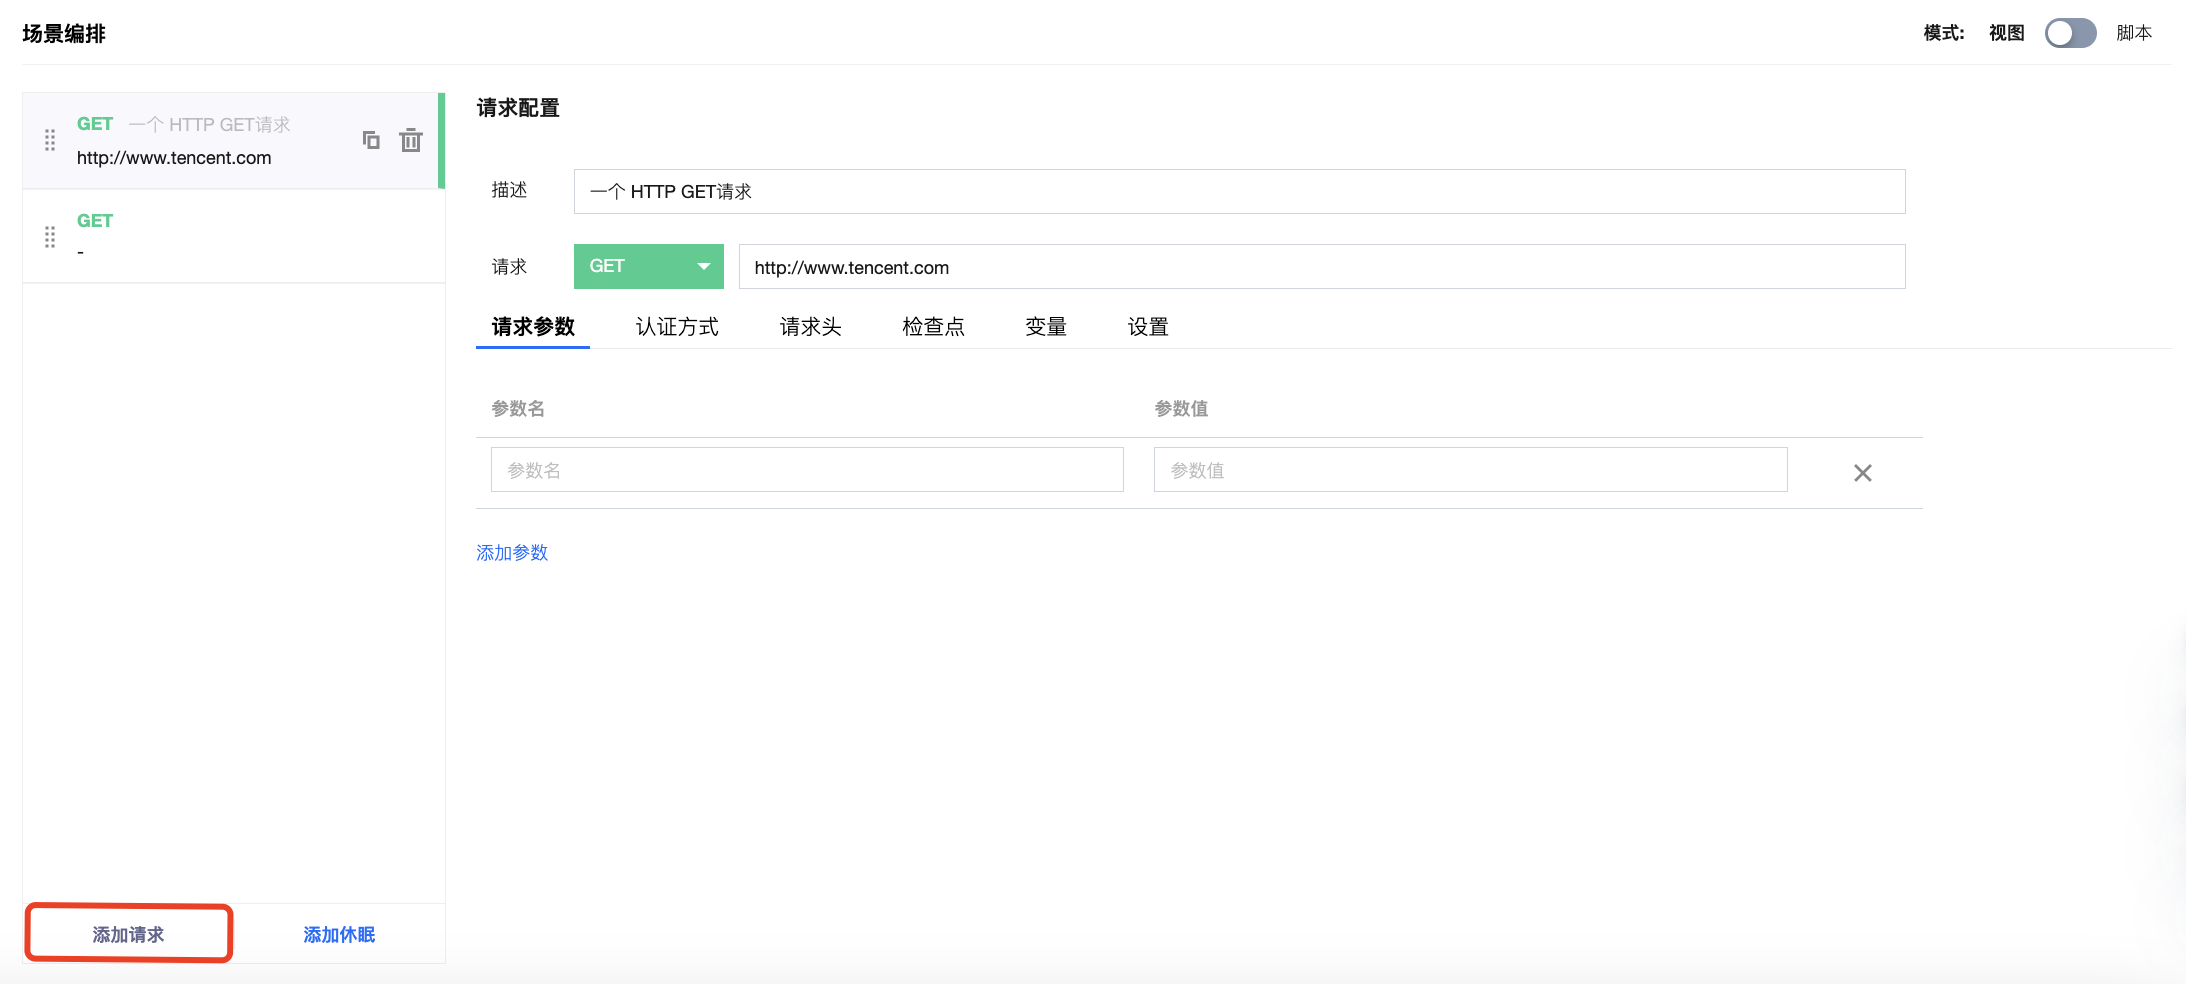
构建 HTTP 请求
基本信息
以一个 HTTP Get 请求为例,您可以配置其 URL、请求参数(URL query string)、认证方式、请求头、检查点等。
使用变量
在构建请求时,除了直接输入数据,您也可以先创建出“可用变量”,然后再在请求中引用该变量。
您可使用以下几种类型的变量:
自定义变量:在请求的“自定义变量”中输入变量名和变量值,则新建请求后,请求的“可用变量”栏会展示该变量,供您在需要输入参数的地方,以
${xx} 的形式引用。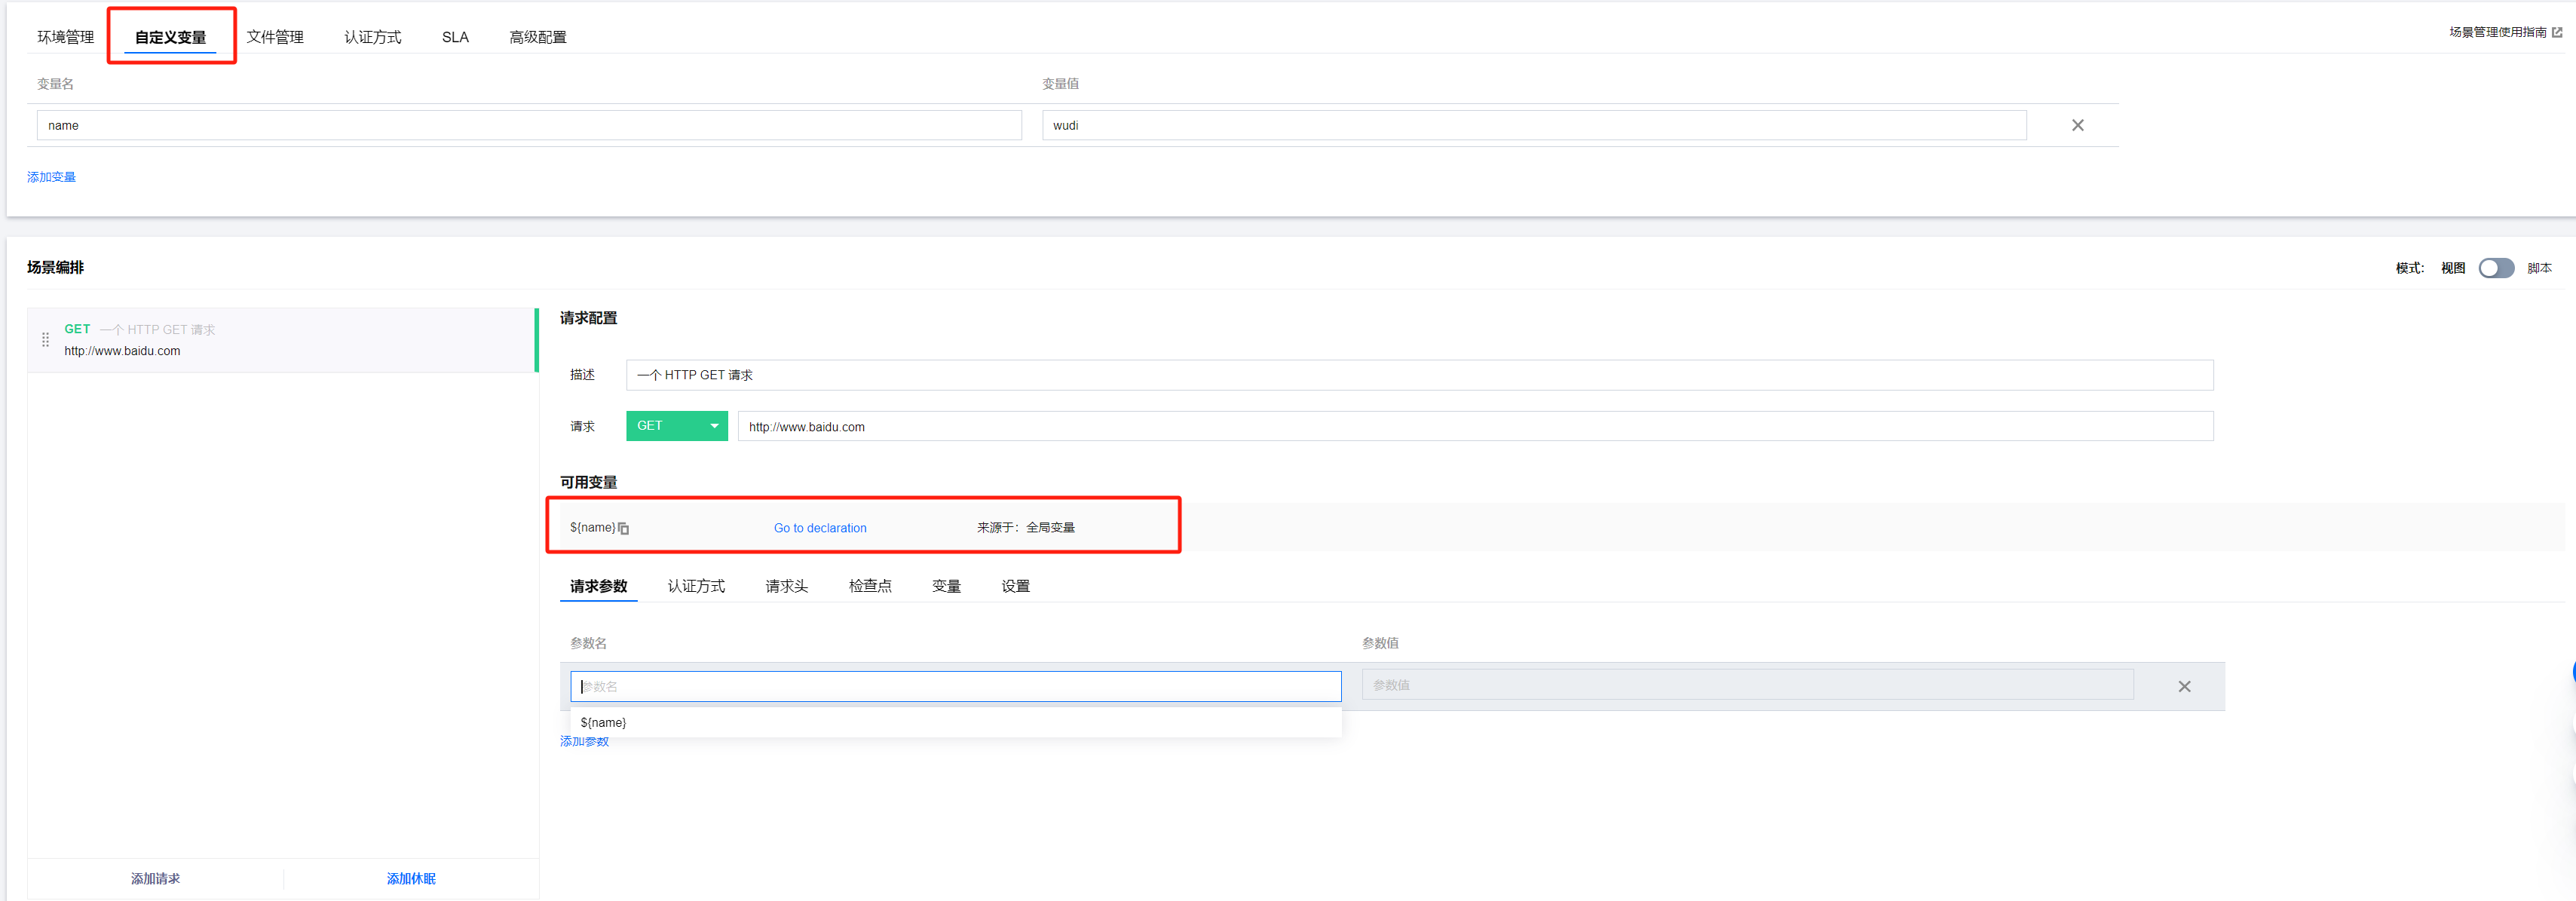
在设置自定义变量值时,除了直接输入数据,还可以用 
{{xx}} 的形式,由函数计算得来。支持原生 JS 对象及函数调用,具体可参考 JS 原生内置对象。例如引用 Math 生成随机数,如下图所示:从参数文件中获取:上传 csv 文件,并从中获取“可用变量”,供您在需要输入参数的地方,以
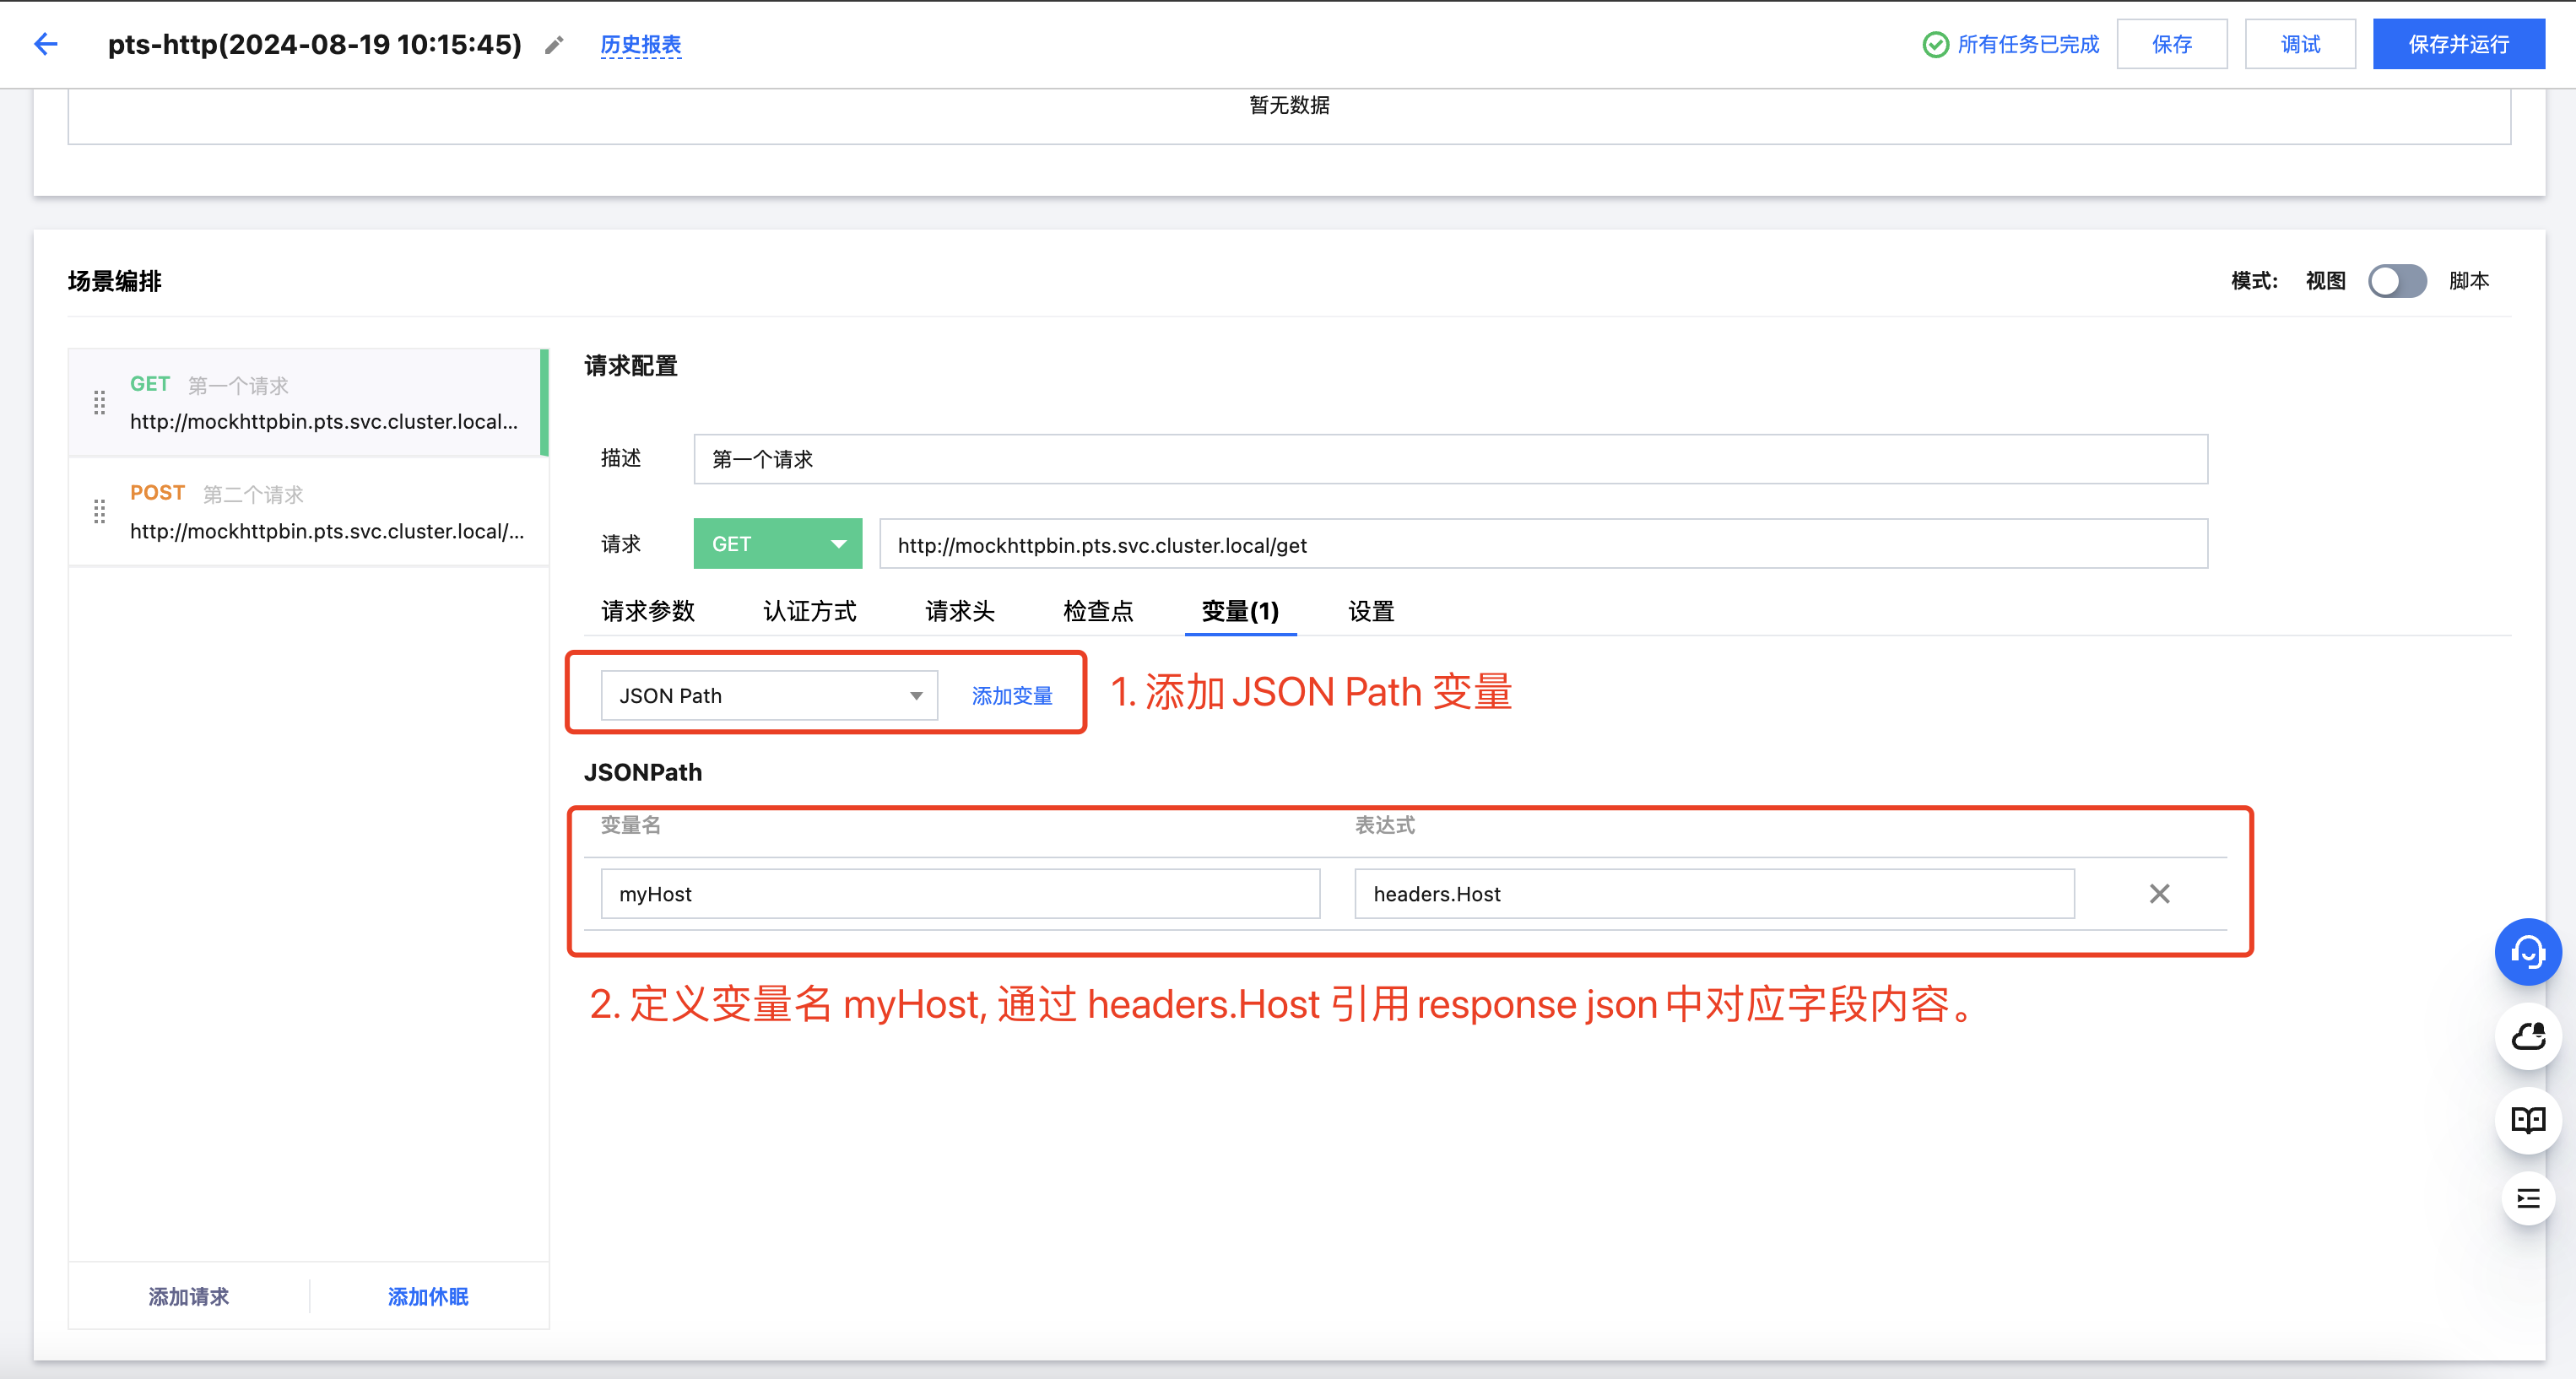
${xx} 的形式引用。关于参数文件的上传和使用,请参见 使用参数文件。从前序请求中获取:可以从前序请求的响应中提取相关字段,生成可用变量,在后序请求的参数中引用该变量。
例如:第一个请求的响应体为 JSON 格式,响应内容如下:
{"args": {},"headers": {"Accept": "*/*","Accept-Encoding": "gzip","Connection": "keep-alive","Host": "mockhttpbin.pts.svc.cluster.local","User-Agent": "PTSEngine","X-Pts-Request-Id": "a19df018-555c-45a3-9eae-cc3cfc1d539a"},"origin": "127.0.0.1","url": "http://mockhttpbin.pts.svc.cluster.local/get"}
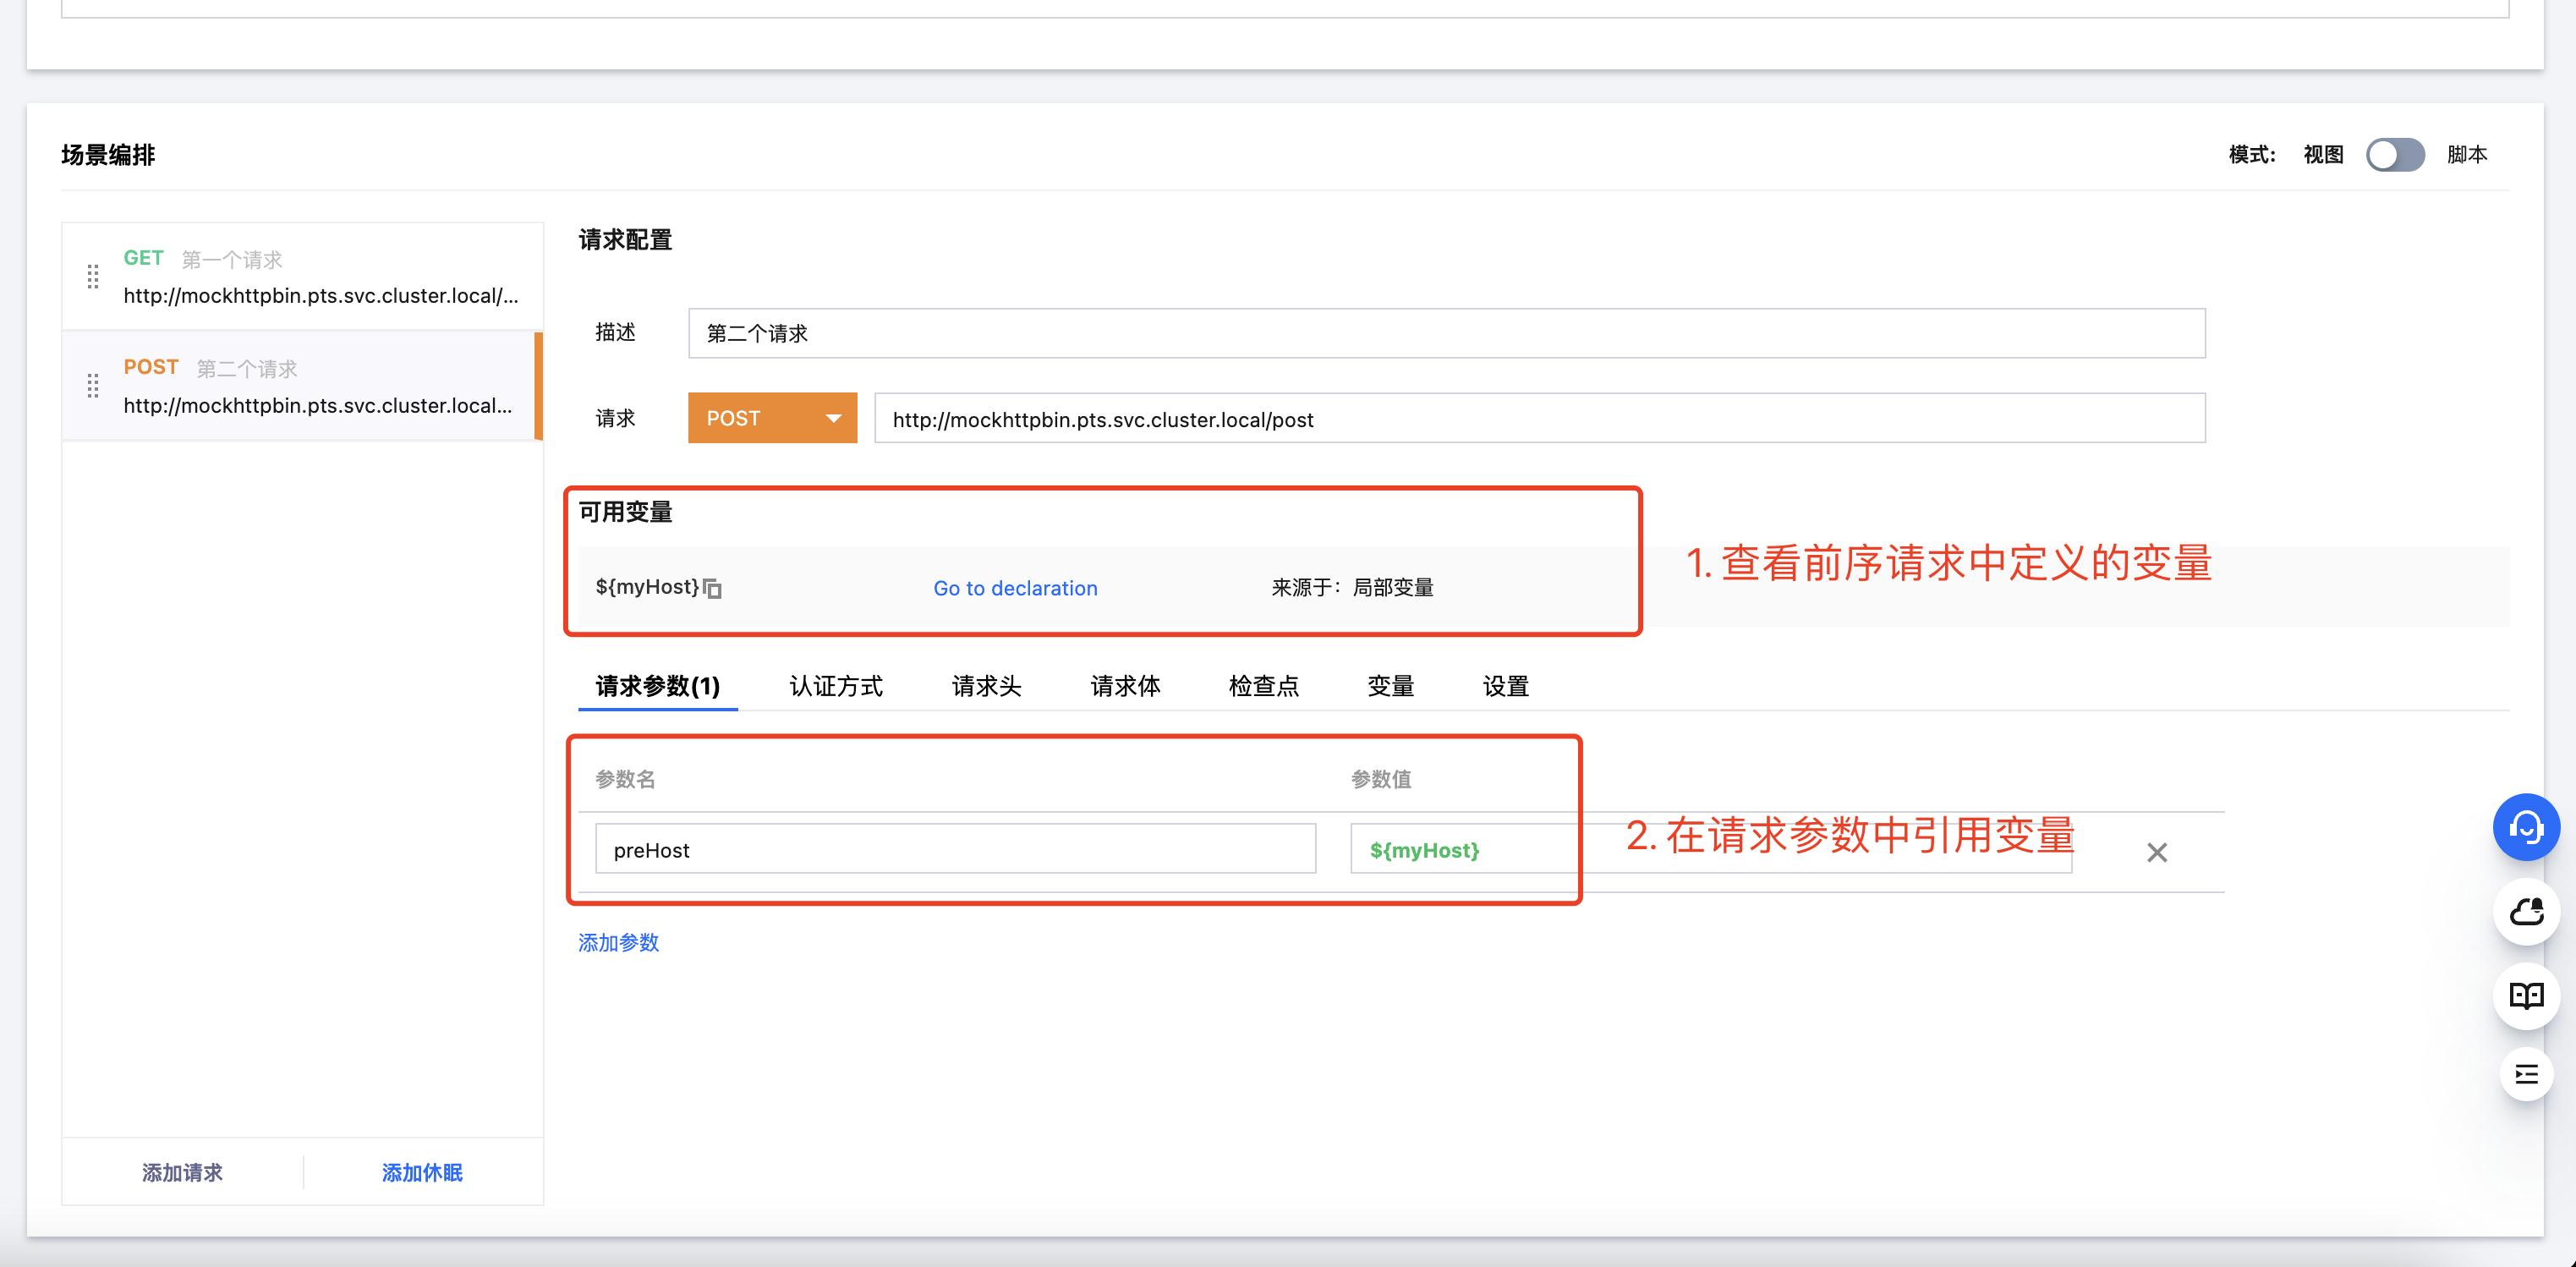
提取响应体中的 headers.Host,作为一个变量,变量名为 myHost,在下一个请求中使用。
则在后序请求中,即可以在请求的任意地方,以
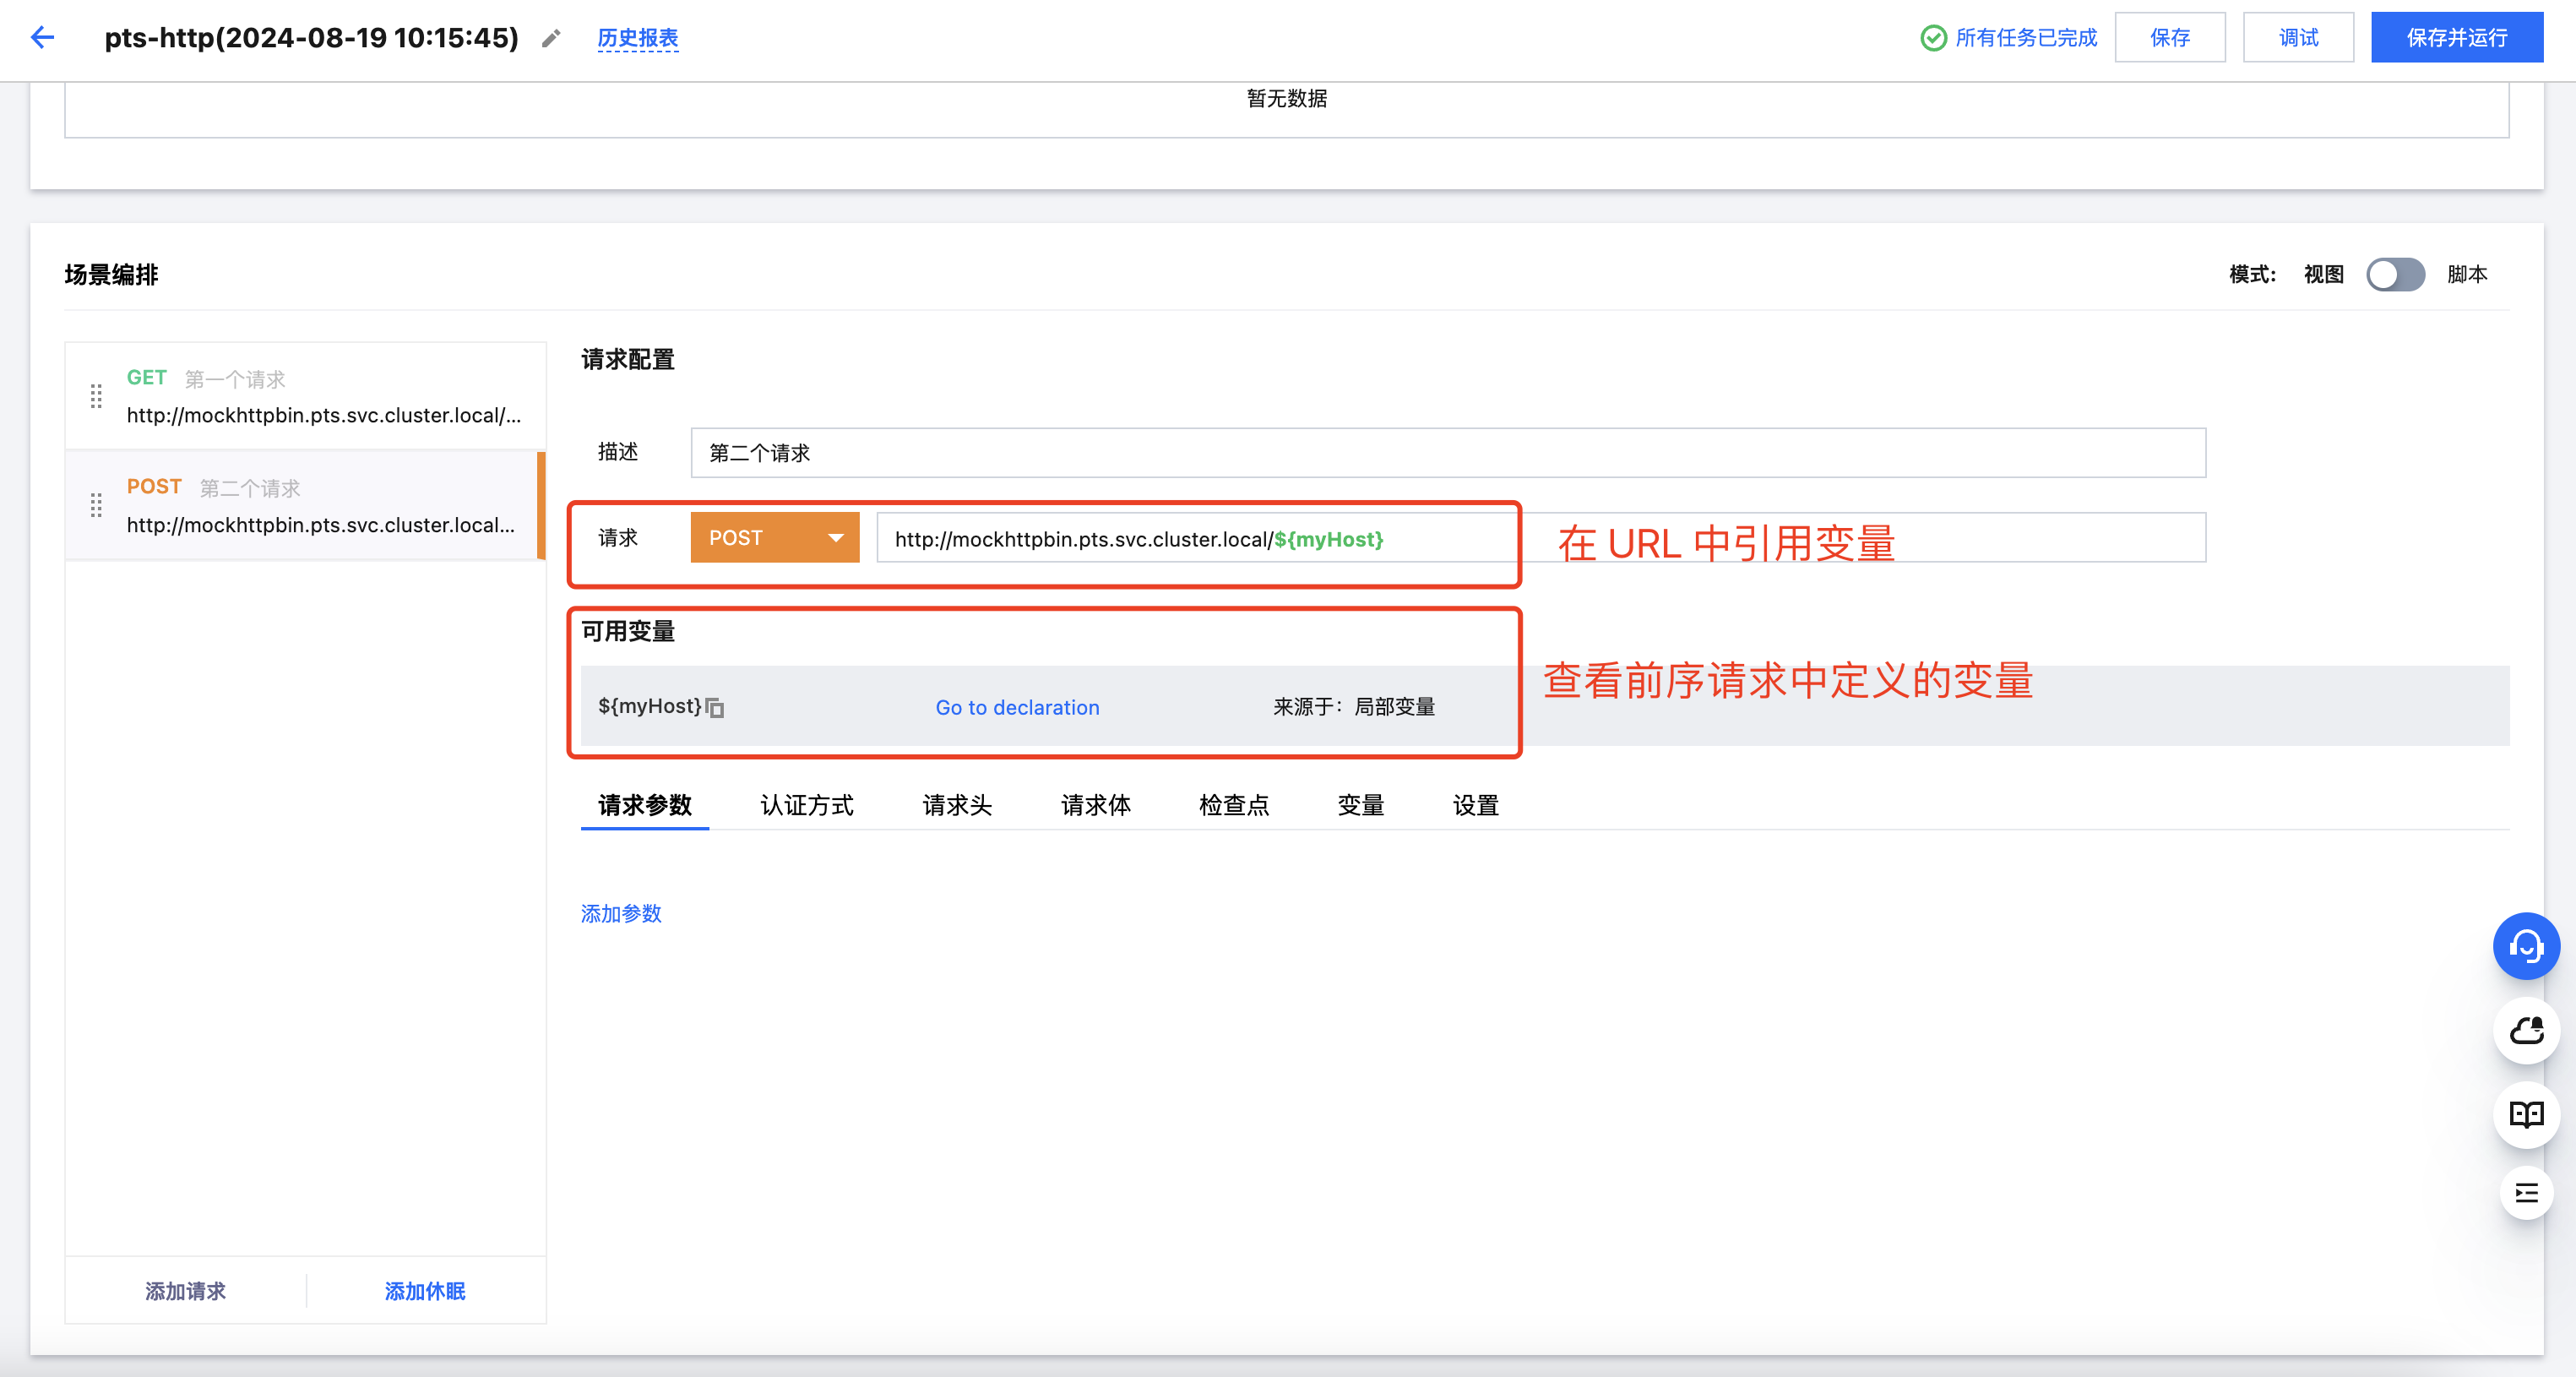
${xx} 的形式引用该变量。例如,在请求参数与请求 URL 中引用变量:在请求参数中引用变量:
在请求 URL 中引用变量:
检查点配置
通过检查点可以校验请求响应内容是否符合预期。例如有一个请求,response status code 为 200, 响应内容如下:
{"args": {},"headers": {"Accept": "*/*","Accept-Encoding": "gzip","Connection": "keep-alive","Host": "mockhttpbin.pts.svc.cluster.local","User-Agent": "PTSEngine","X-Pts-Request-Id": "a19df018-555c-45a3-9eae-cc3cfc1d539a"},"origin": "127.0.0.1","url": "http://mockhttpbin.pts.svc.cluster.local/get"}
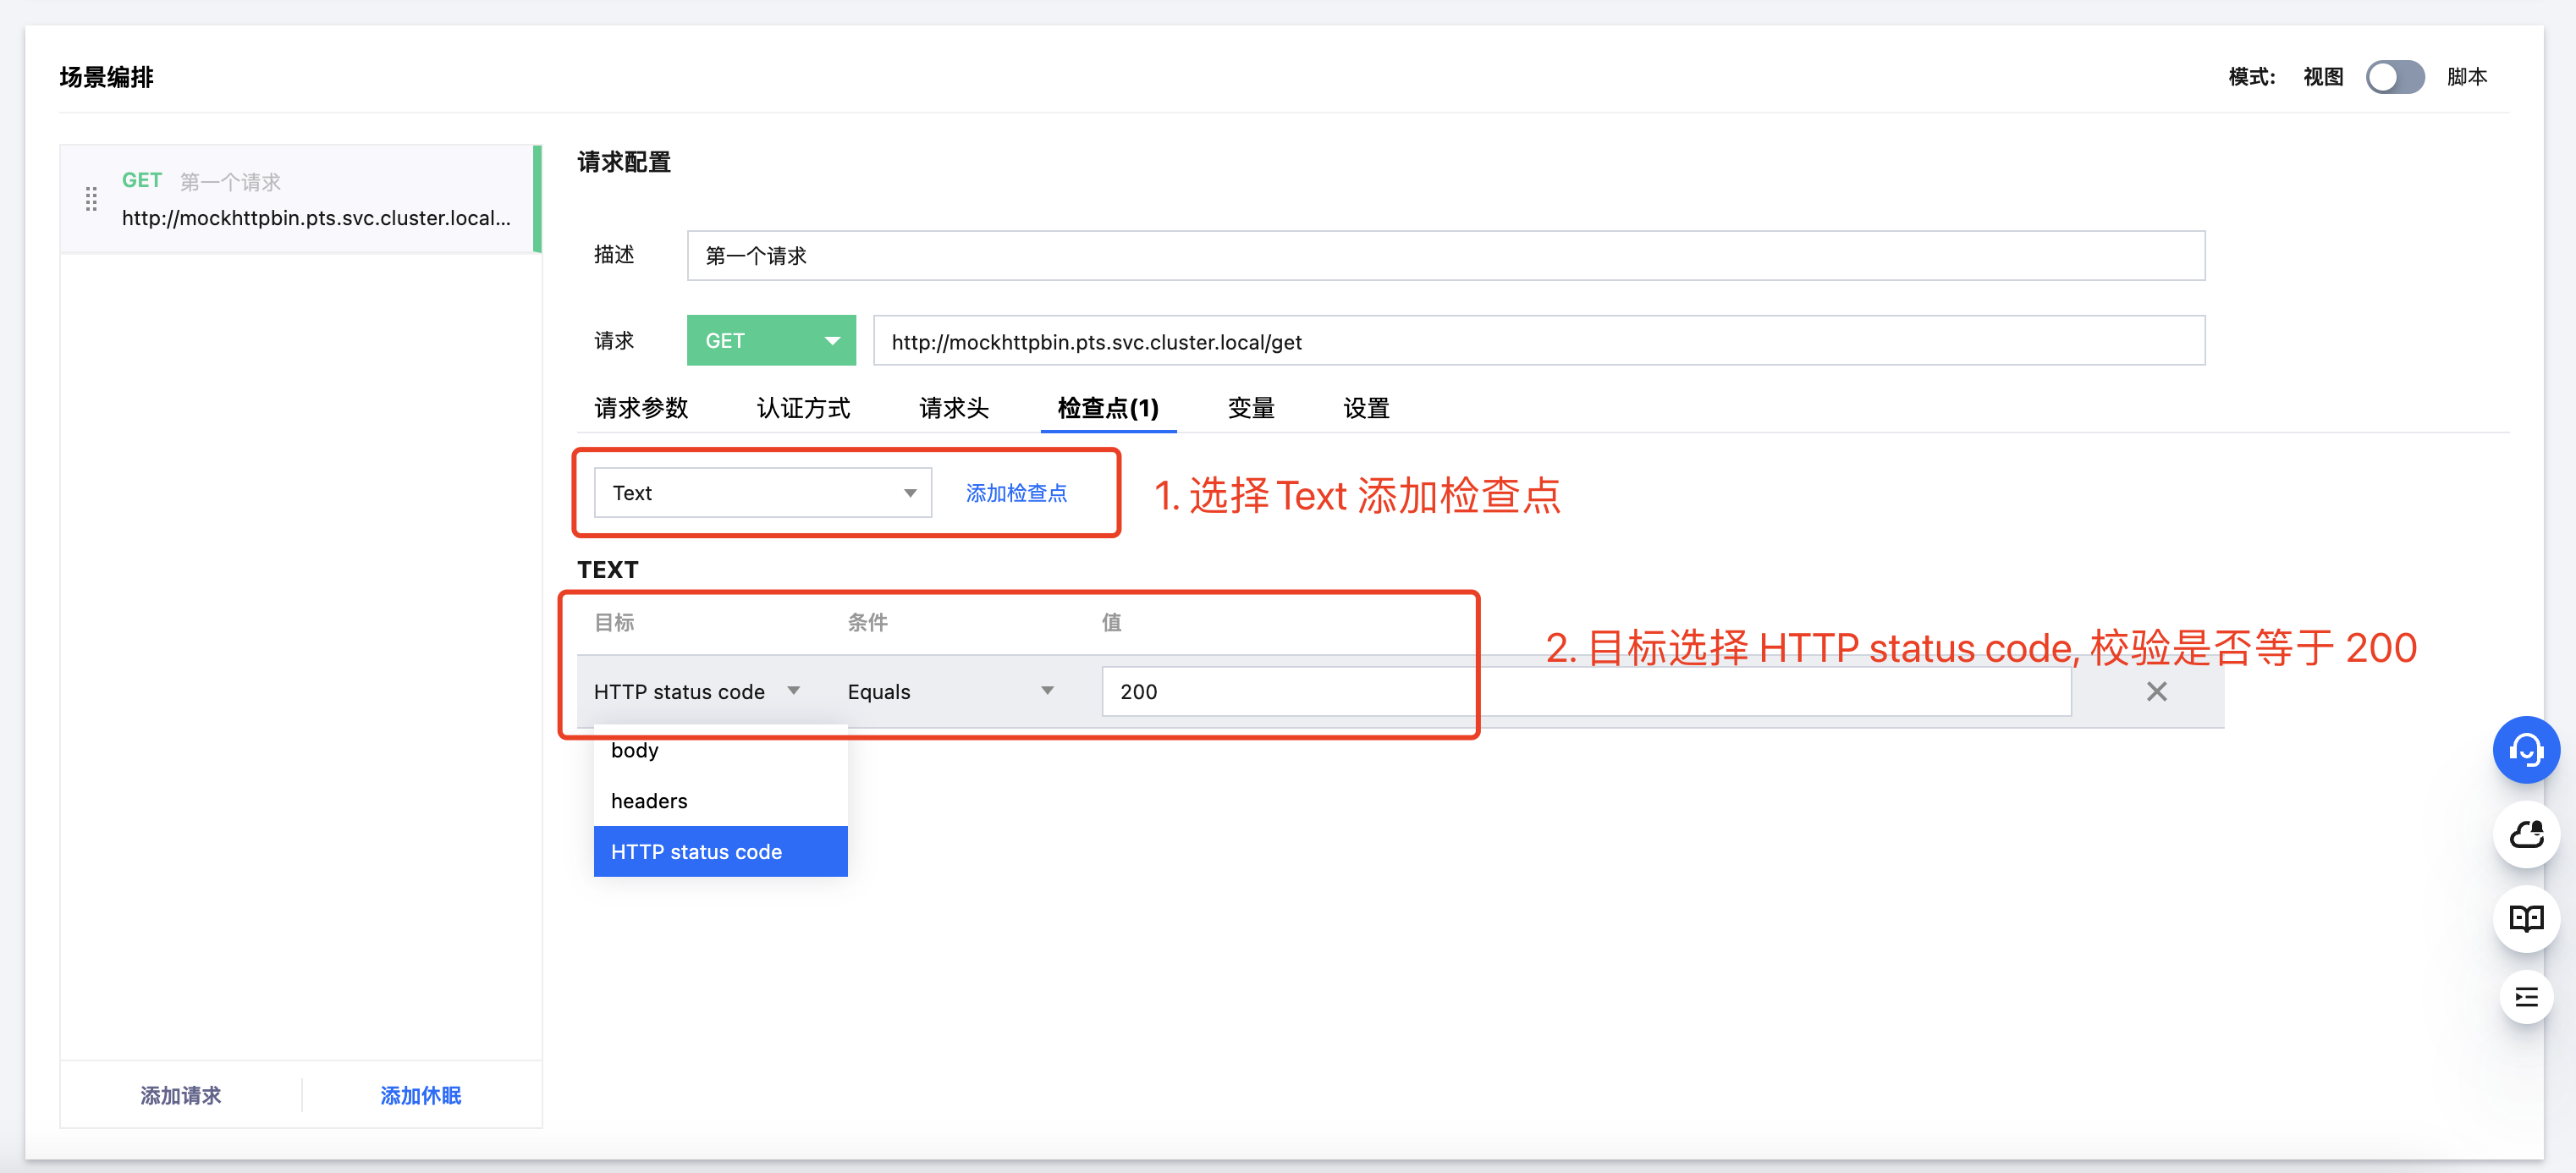
检查 response status code 是否为 200:
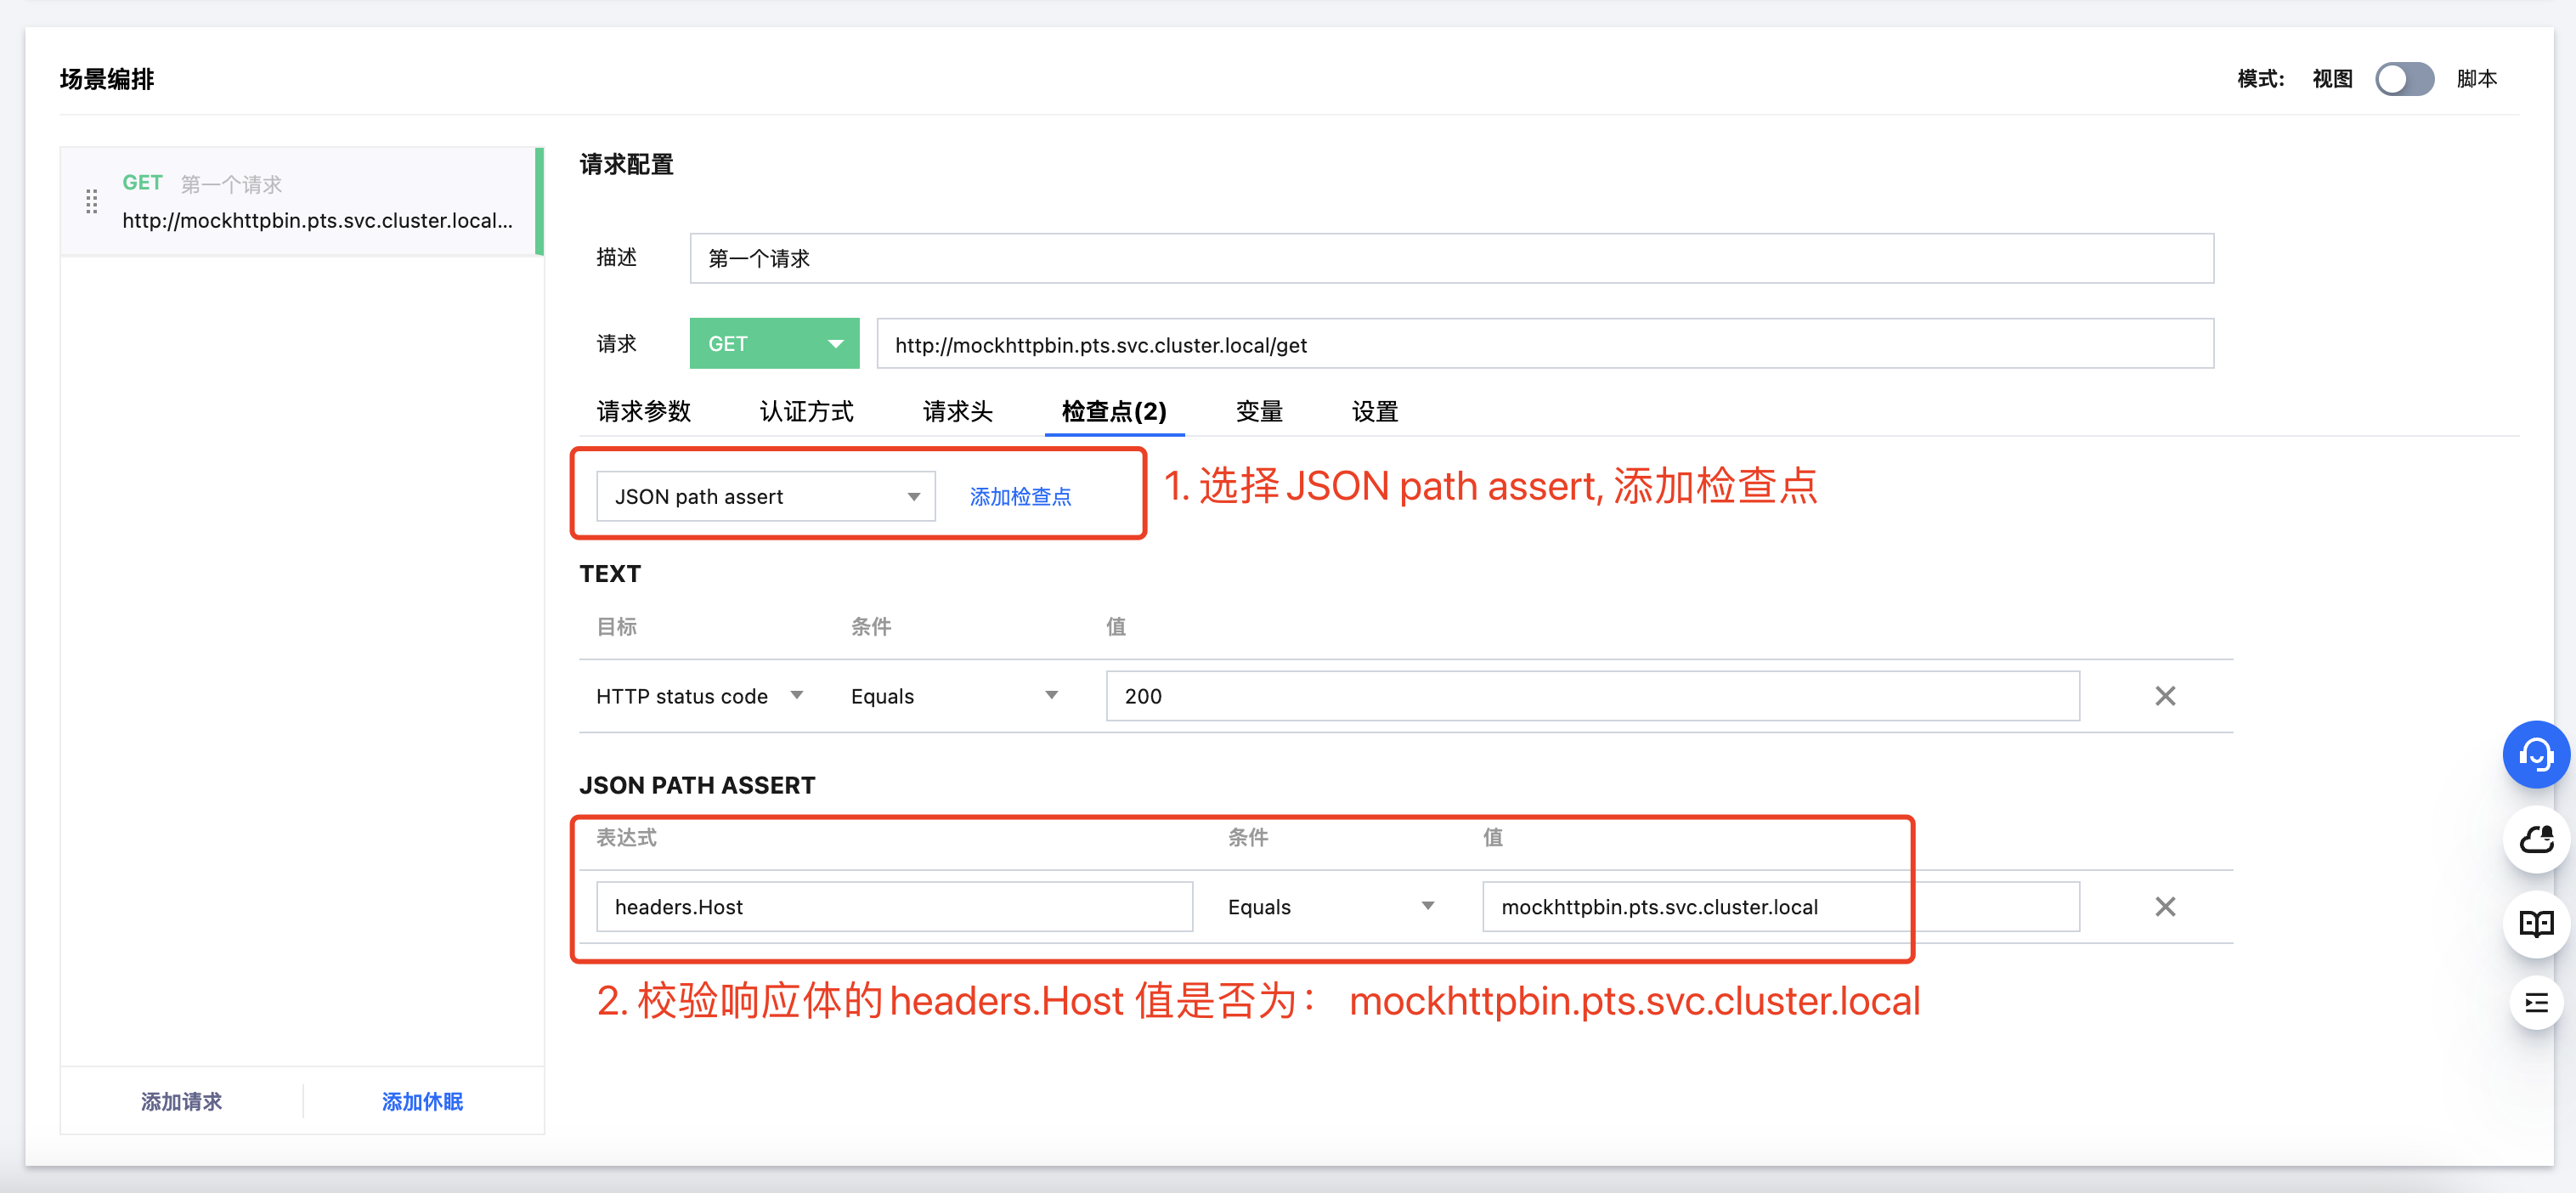
检查响应体某个字段是否符合预期:
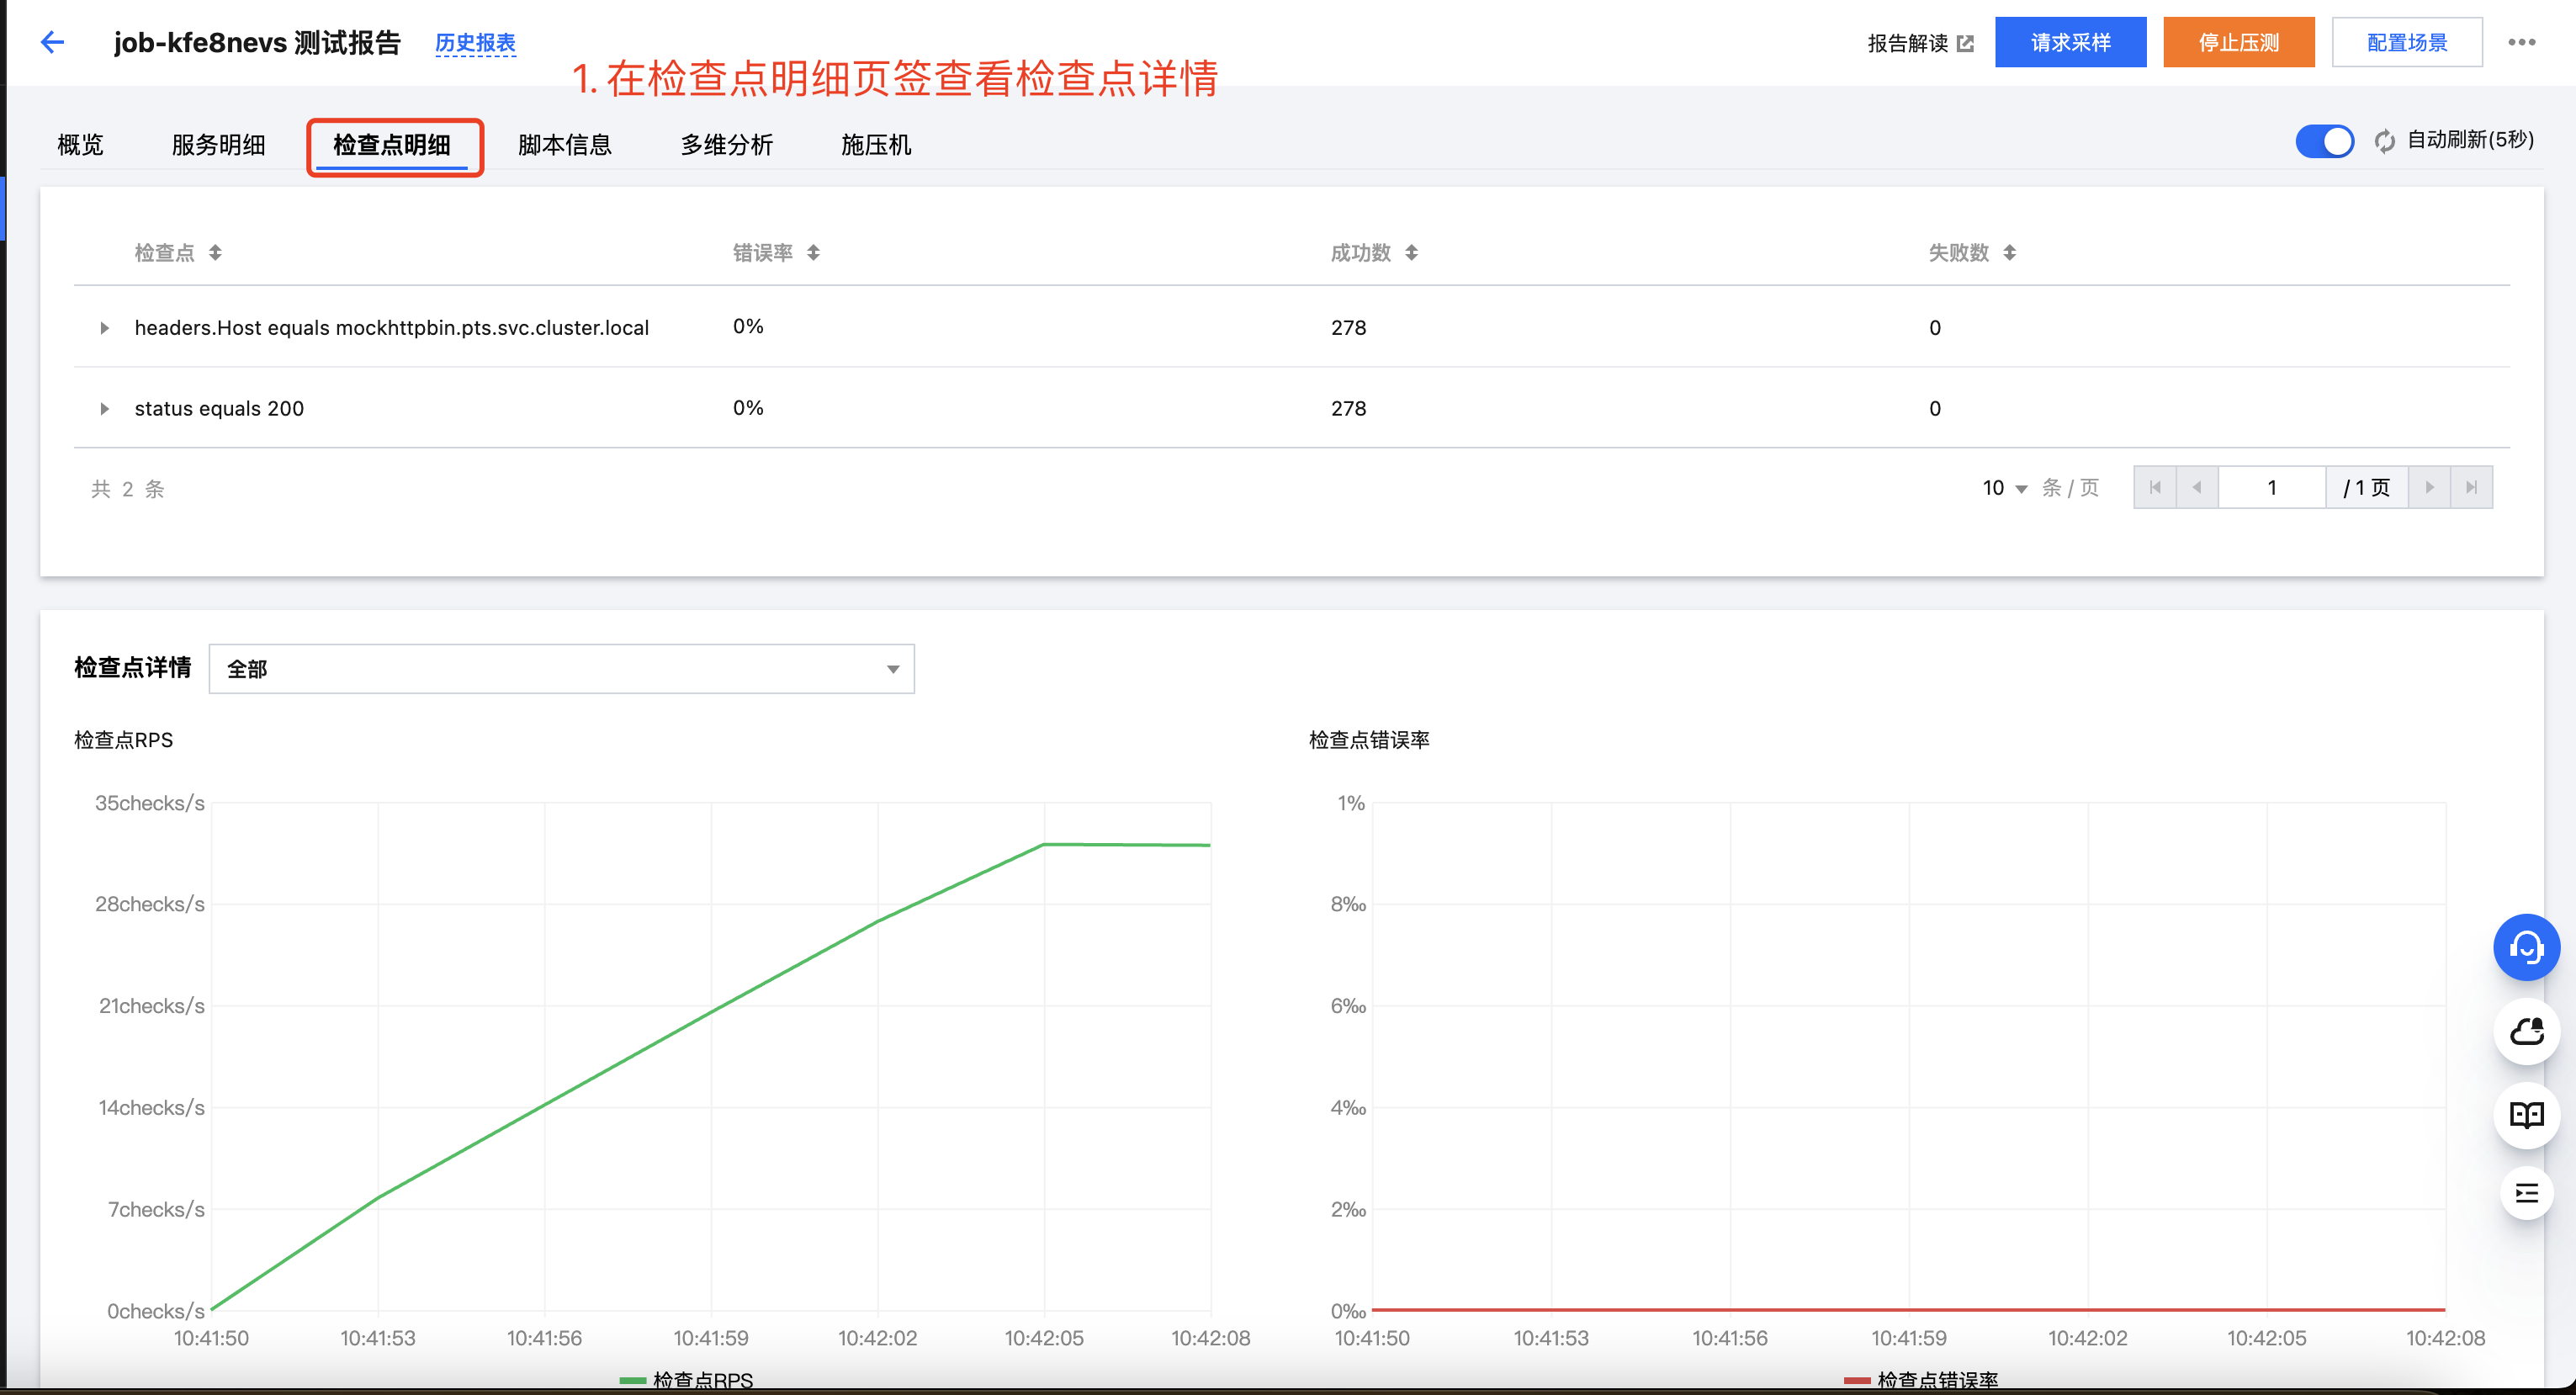
如果检查响应体为 JSON 格式,校验响应体的 headers.Host 字段是否等于 "mockhttpbin.pts.svc.cluster.local"
单击右上角保存并运行启动压测后,在生成的压测历史报告中,您就可以观测到检查点的情况:
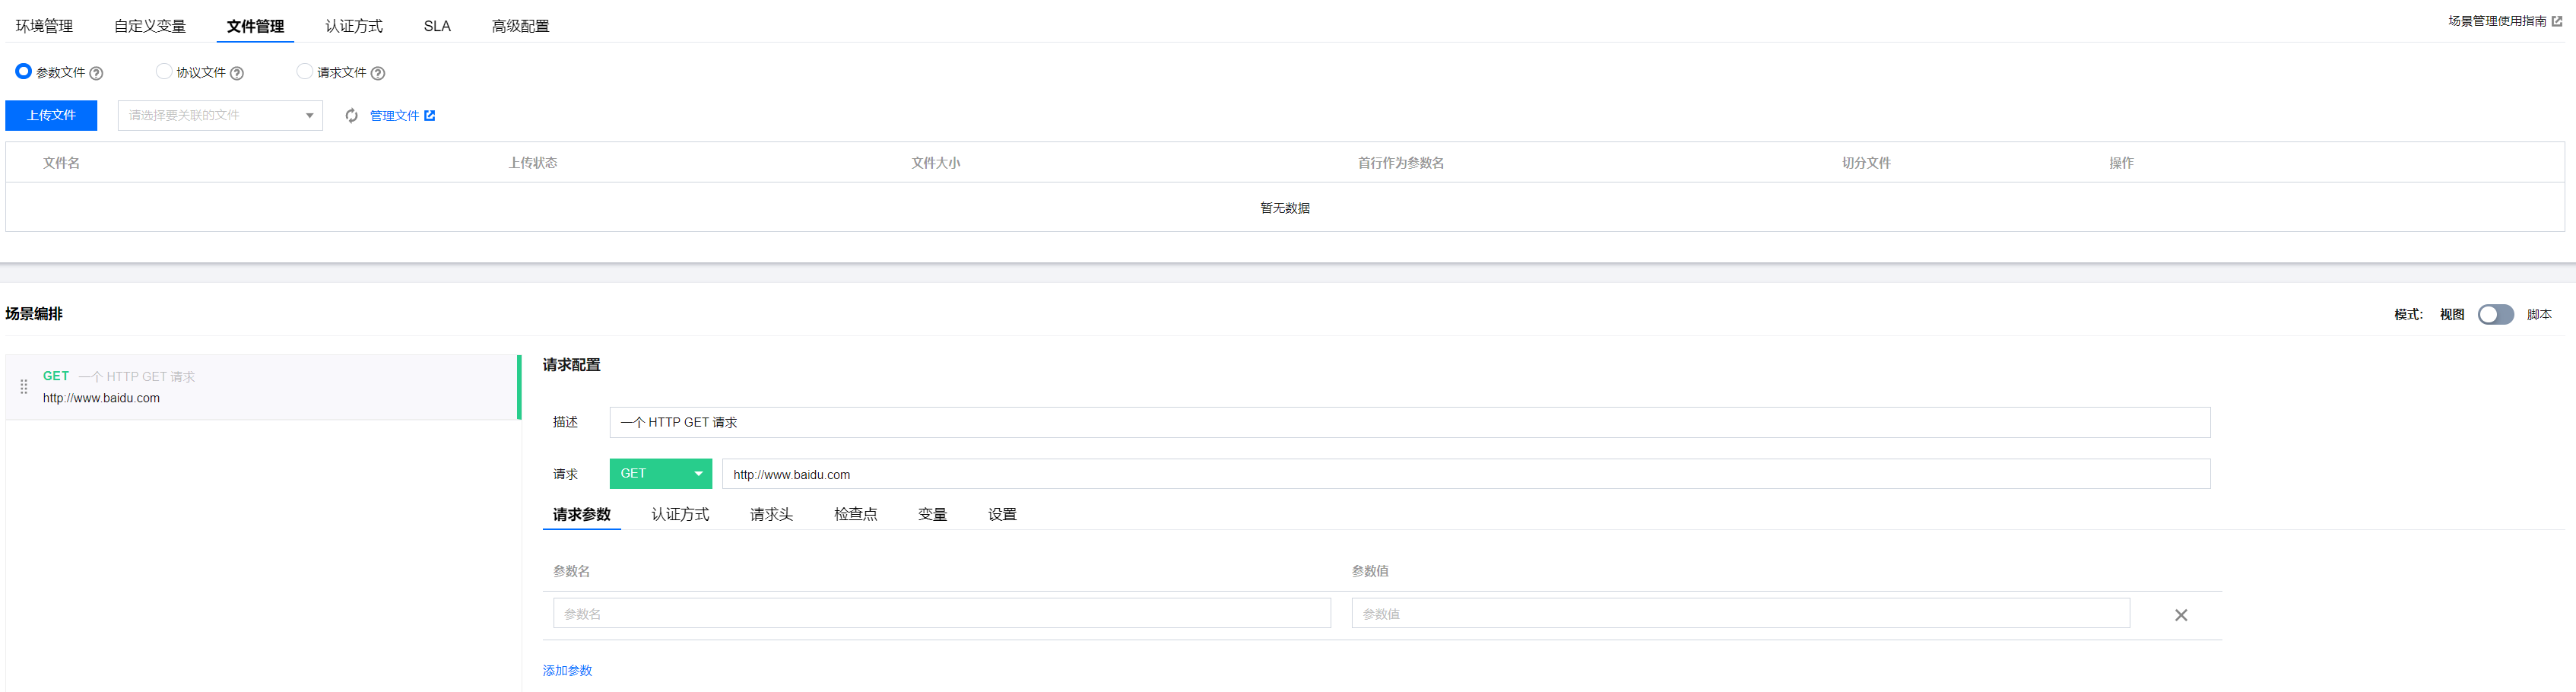
文件依赖
在压测场景里,您可上传以下几种类型的文件,提供压测执行时的状态数据:
参数文件:以 csv 文件的形式,动态提供测试数据。也即,场景被每个并发用户(VU)执行时,会获取参数文件里的每行数据,作为测试数据的值,供脚本里的变量引用。具体使用方法参见:使用参数文件。
请求文件:构建您的请求所需的文件,如需要上传的文件。具体使用方法参见:使用请求文件。
协议文件:请求序列化所需要用到的文件。具体使用方法参见:使用协议文件。
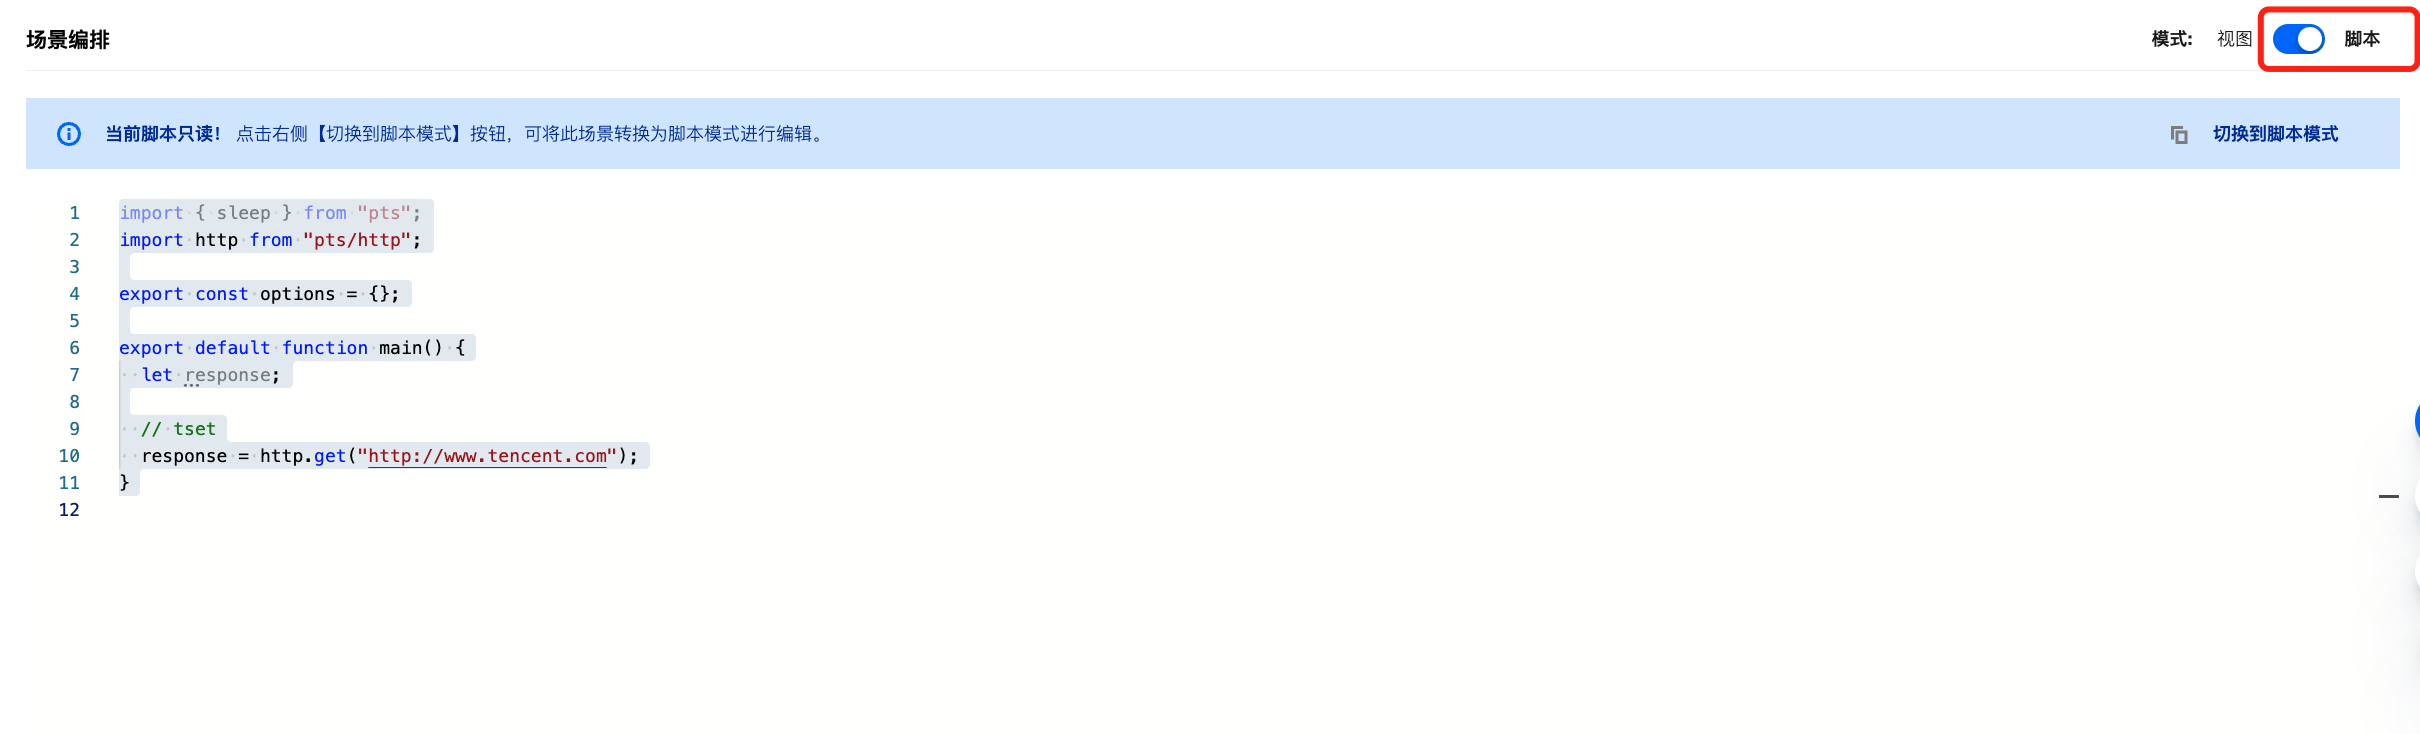
模式切换
若需看到场景详情,您可一键切换到脚本视图,该视图为只读模式:
若需直接修改脚本,可单击切换到脚本模式,编辑脚本内容。
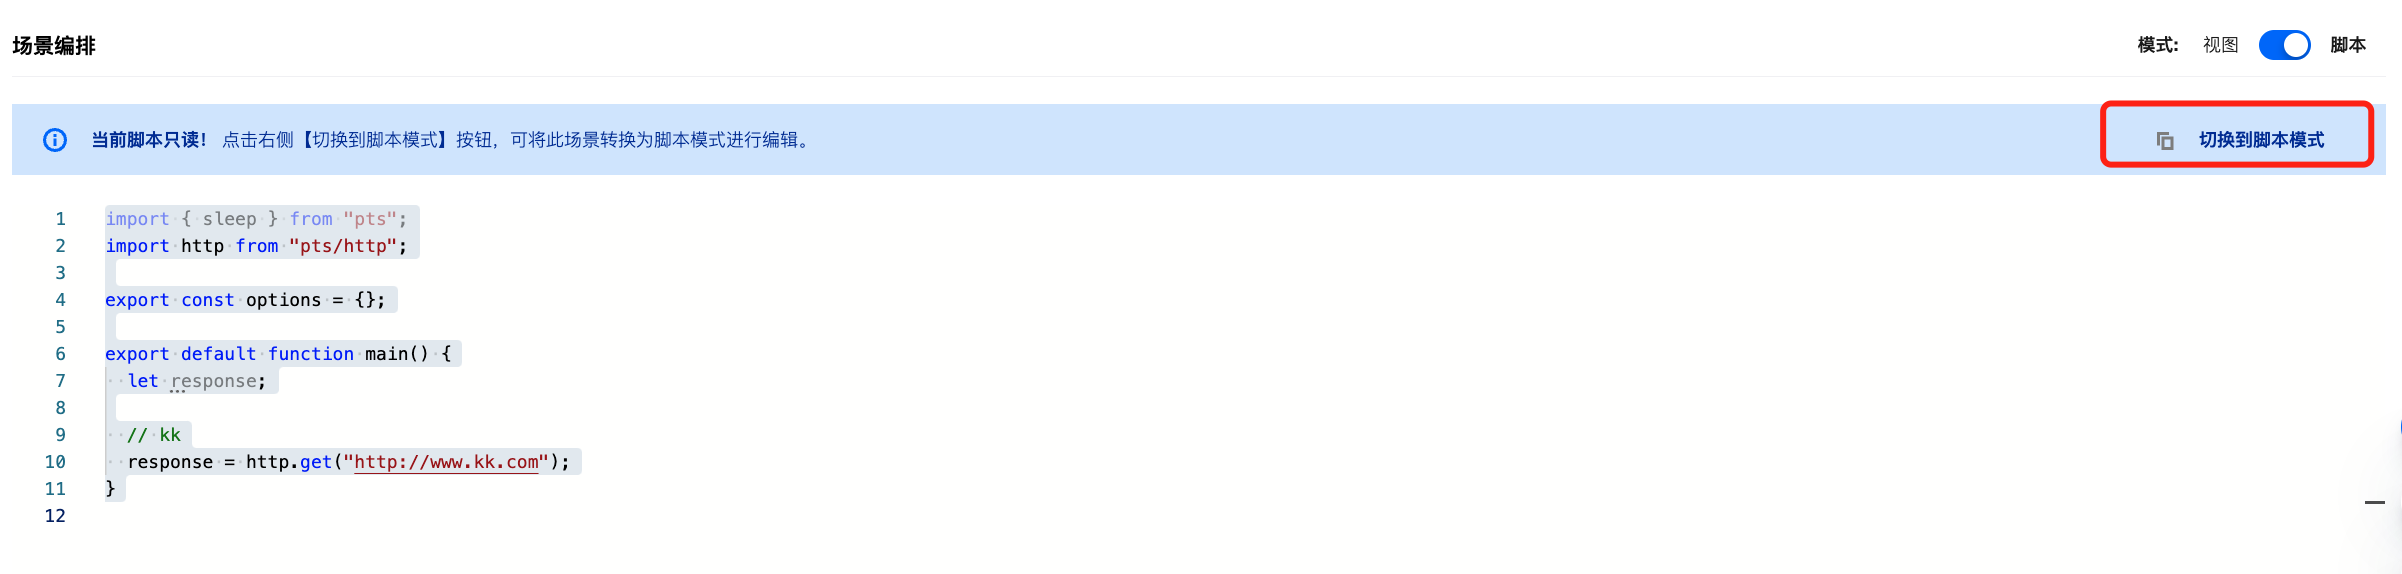
注意:
切换到脚本模式后,无法再回退到简单模式。
文档反馈