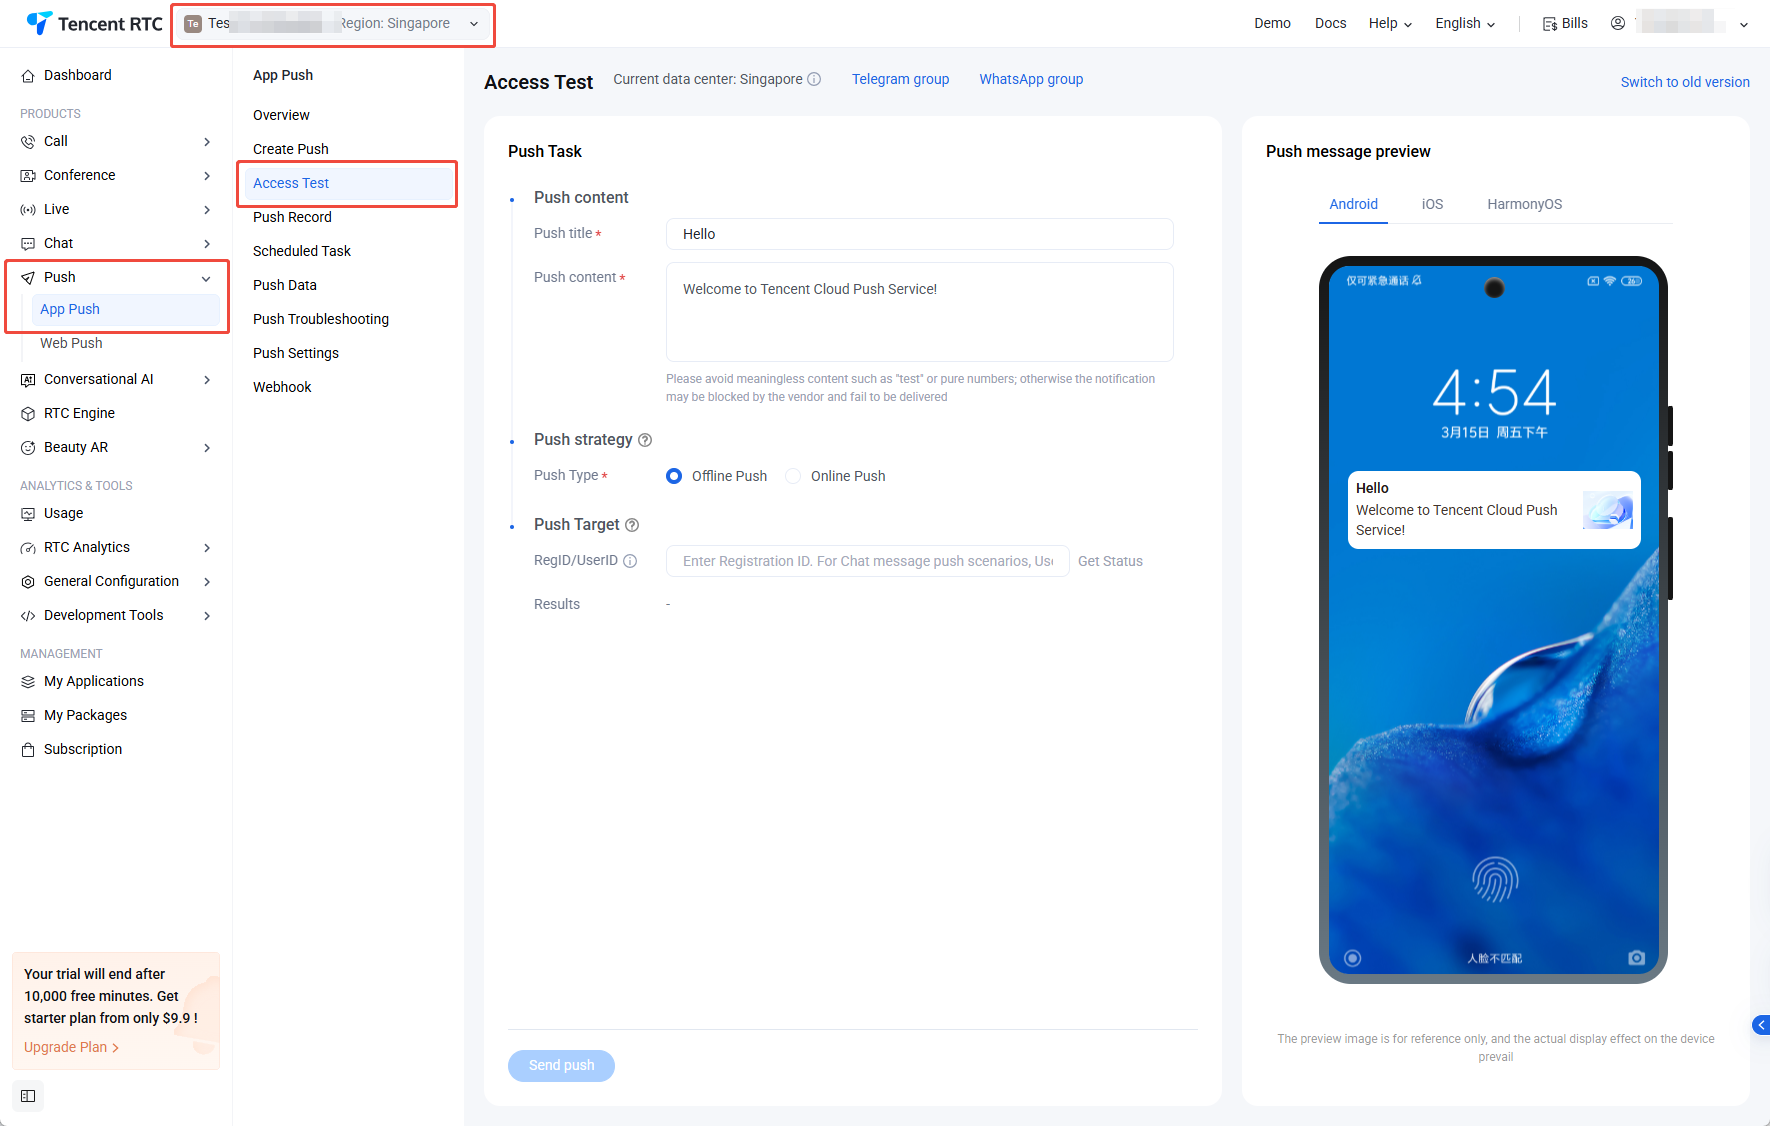
This tool allows you to query issues related to the failure to receive offline messages.
1. Log in to the Chat console, select Push > App Push > Access Test in the left sidebar, and choose the target application at the top.
2. Enter the Push content. Provide the Push title and Push content, then preview the message in the panel on the right.
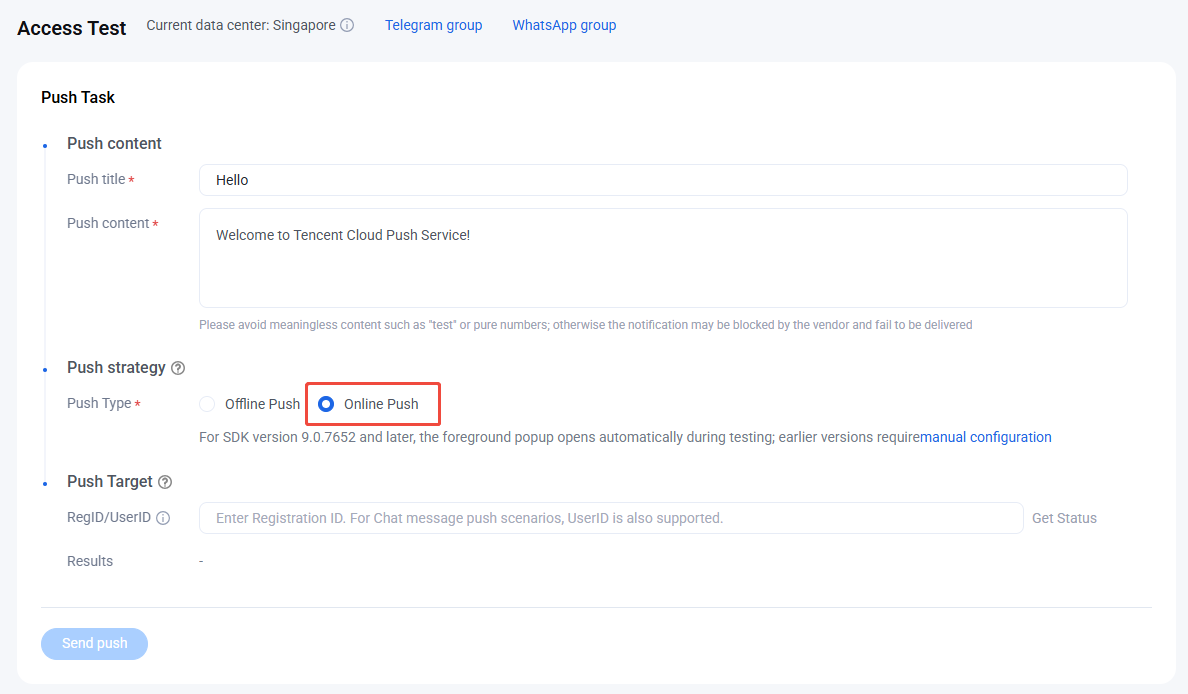
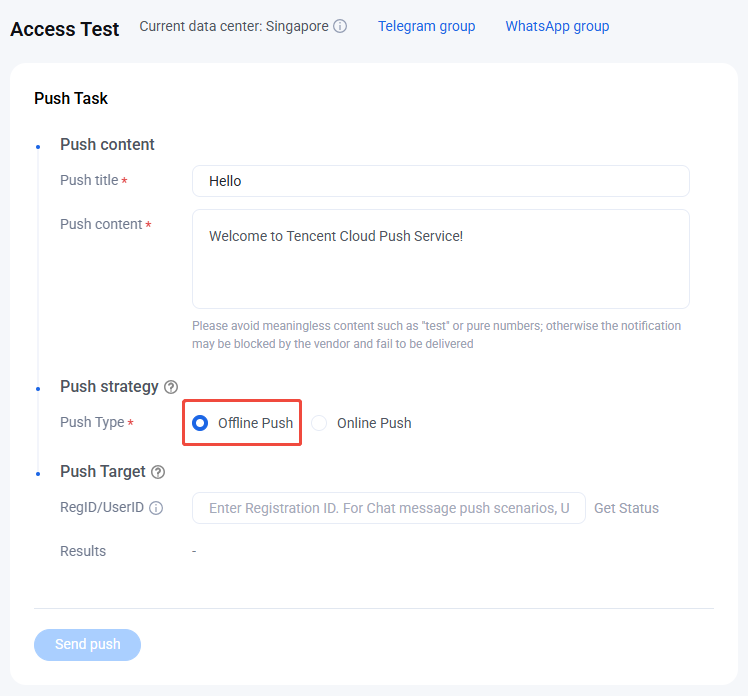
3. Select push type, option Online push or Offline Push.
Online Push
Offline Push
Select online push, then enter the RegID/UserID.
Select Offline Push, enter the RegID/UserID, click Get Status, and review the test result.
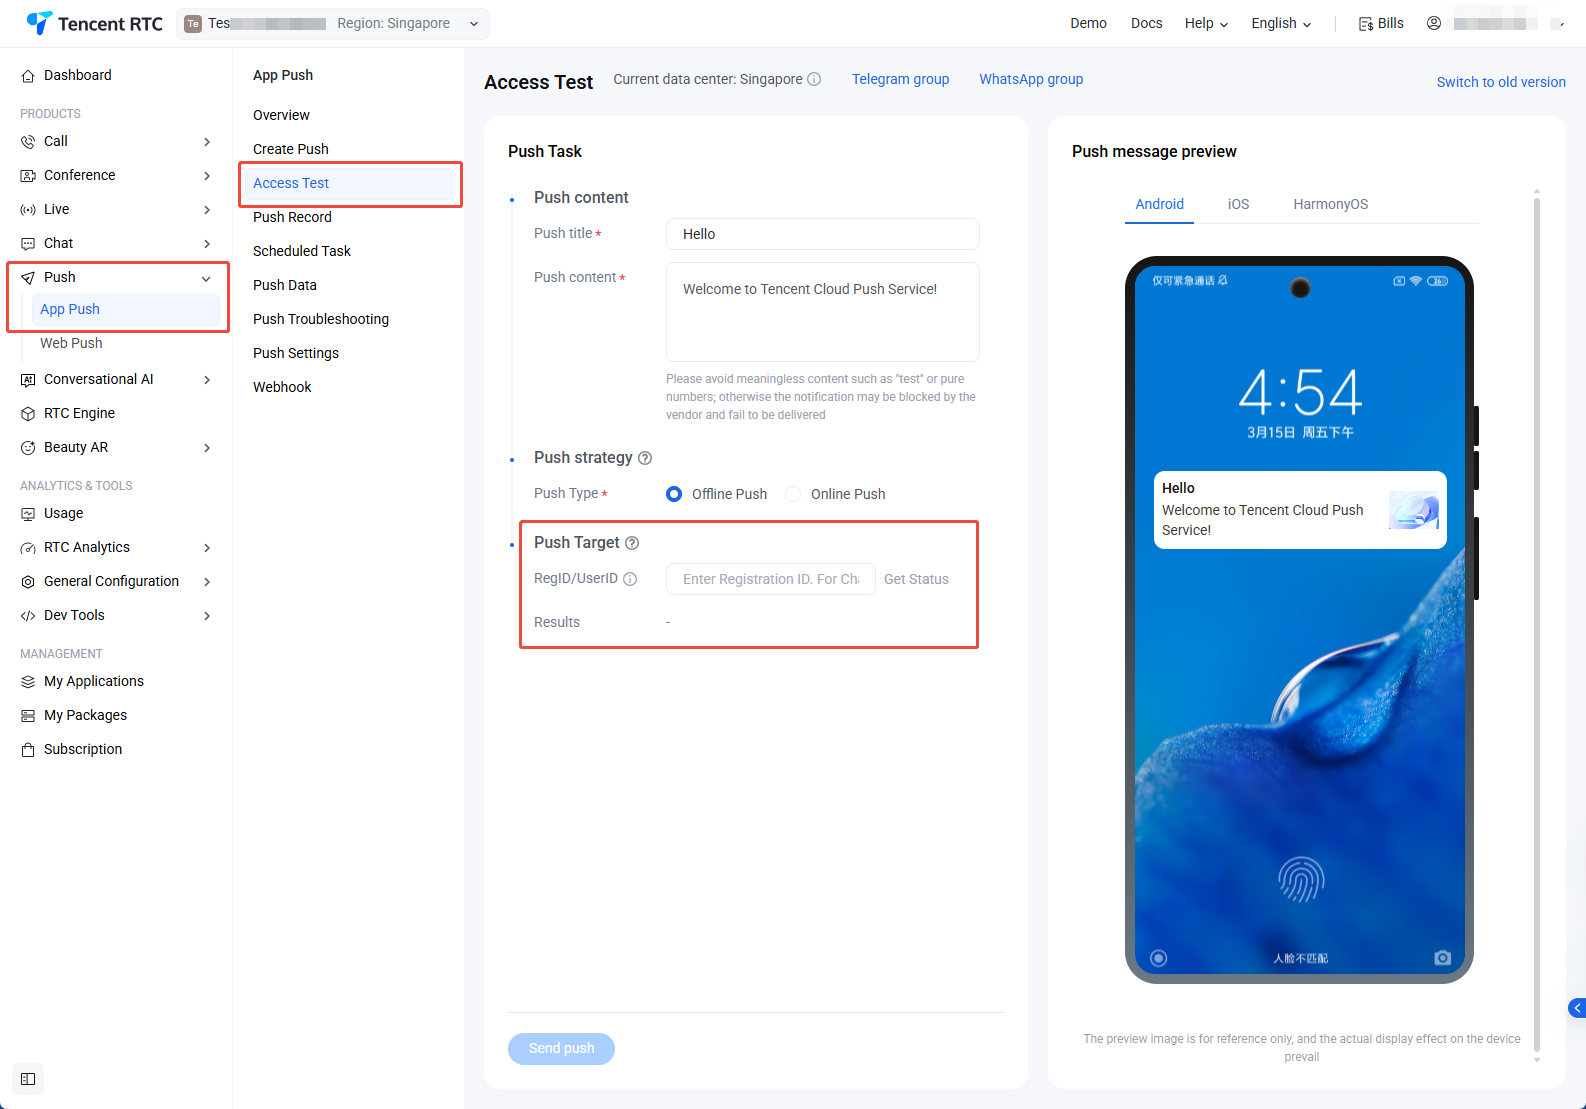
4. Specify the Push Target and check its status. Enter the RegID/UserID, click Get Status, and view the test result.
Note:
If the test result returns an error, you cannot proceed to the next step.
5. Click Send Push to send the message.
User Status Check Tool
This tool automatically obtains the user’s client status and checks whether the user is ready to receive offline push messages.
1. Log in to the Chat console, select Push > App Push > Access Test in the left sidebar, and choose the target application at the top.
2. In the Push Target area, enter the RegID/UserID.
3. Click Get Status to view information such as the current status and client type of the RegID/UserID.
4. If you are prompted that the UserID is ready to receive offline push messages, you can log in with a different UserID on another device to send one-to-one text messages to the current UserID to check whether it can receive the messages.
UserSig Generation and Verification
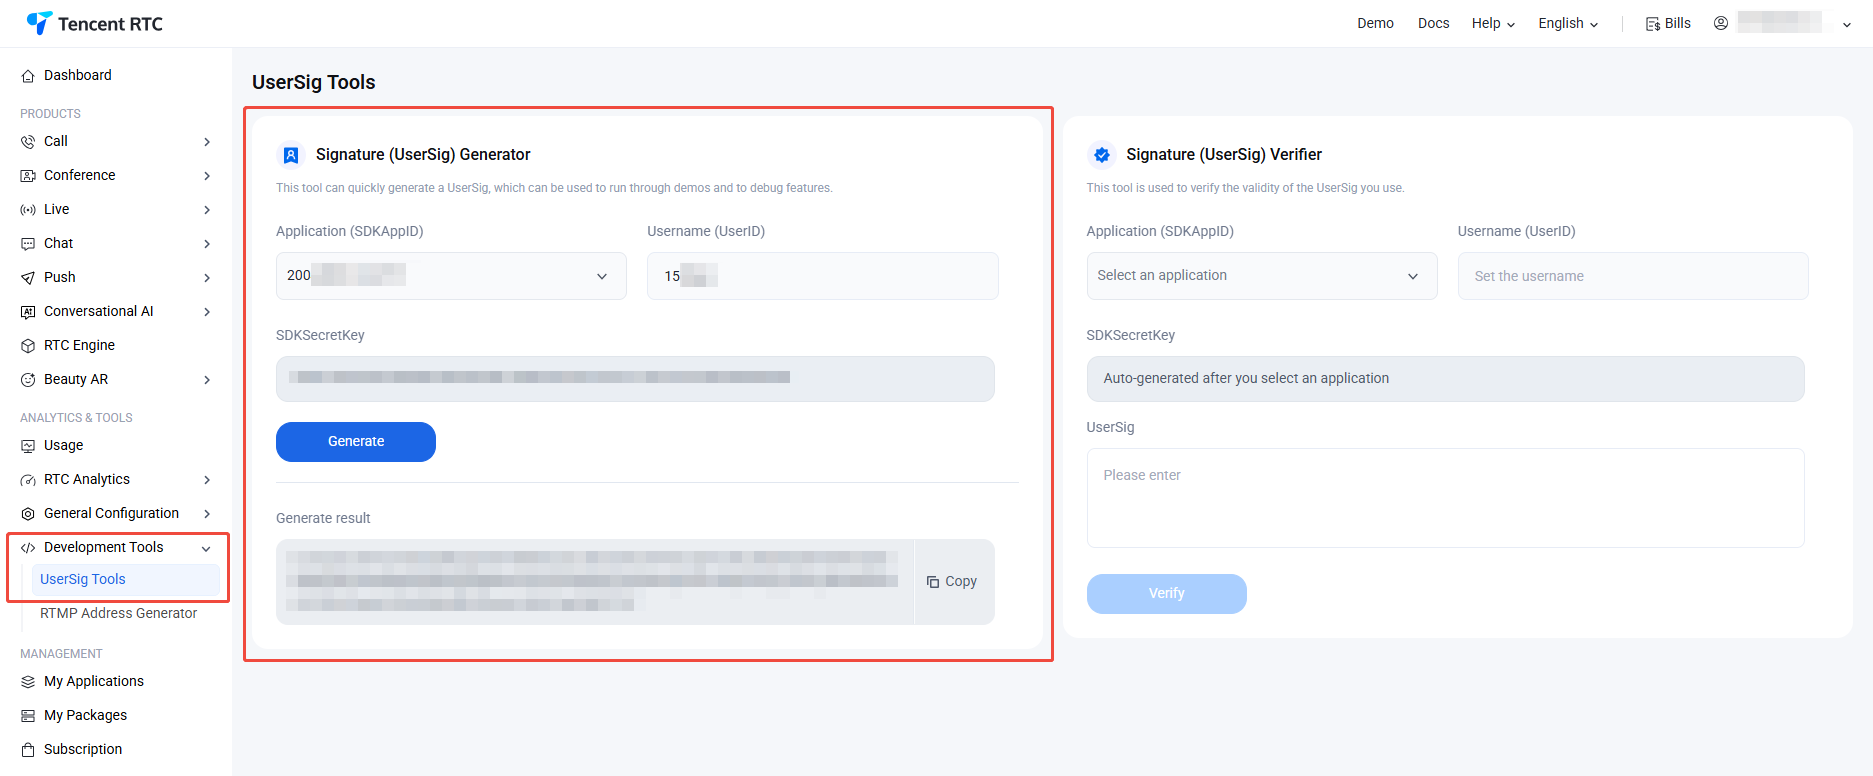
Signature (UserSig) Generator
The system automatically obtains the key of the current app. After entering the UserID, you can use this tool to quickly generate a signature (UserSig) to run through demos and debug features locally. If you need to generate a UserSig for online services, see Generating UserSig on the Server.
2. In the Signature (UserSig) Generator area, select an application, manually input UserID.
3. Click Generate to generate a signature, which expires after 180 days.
4. Click Copy to copy the signature and then paste and save the signature.
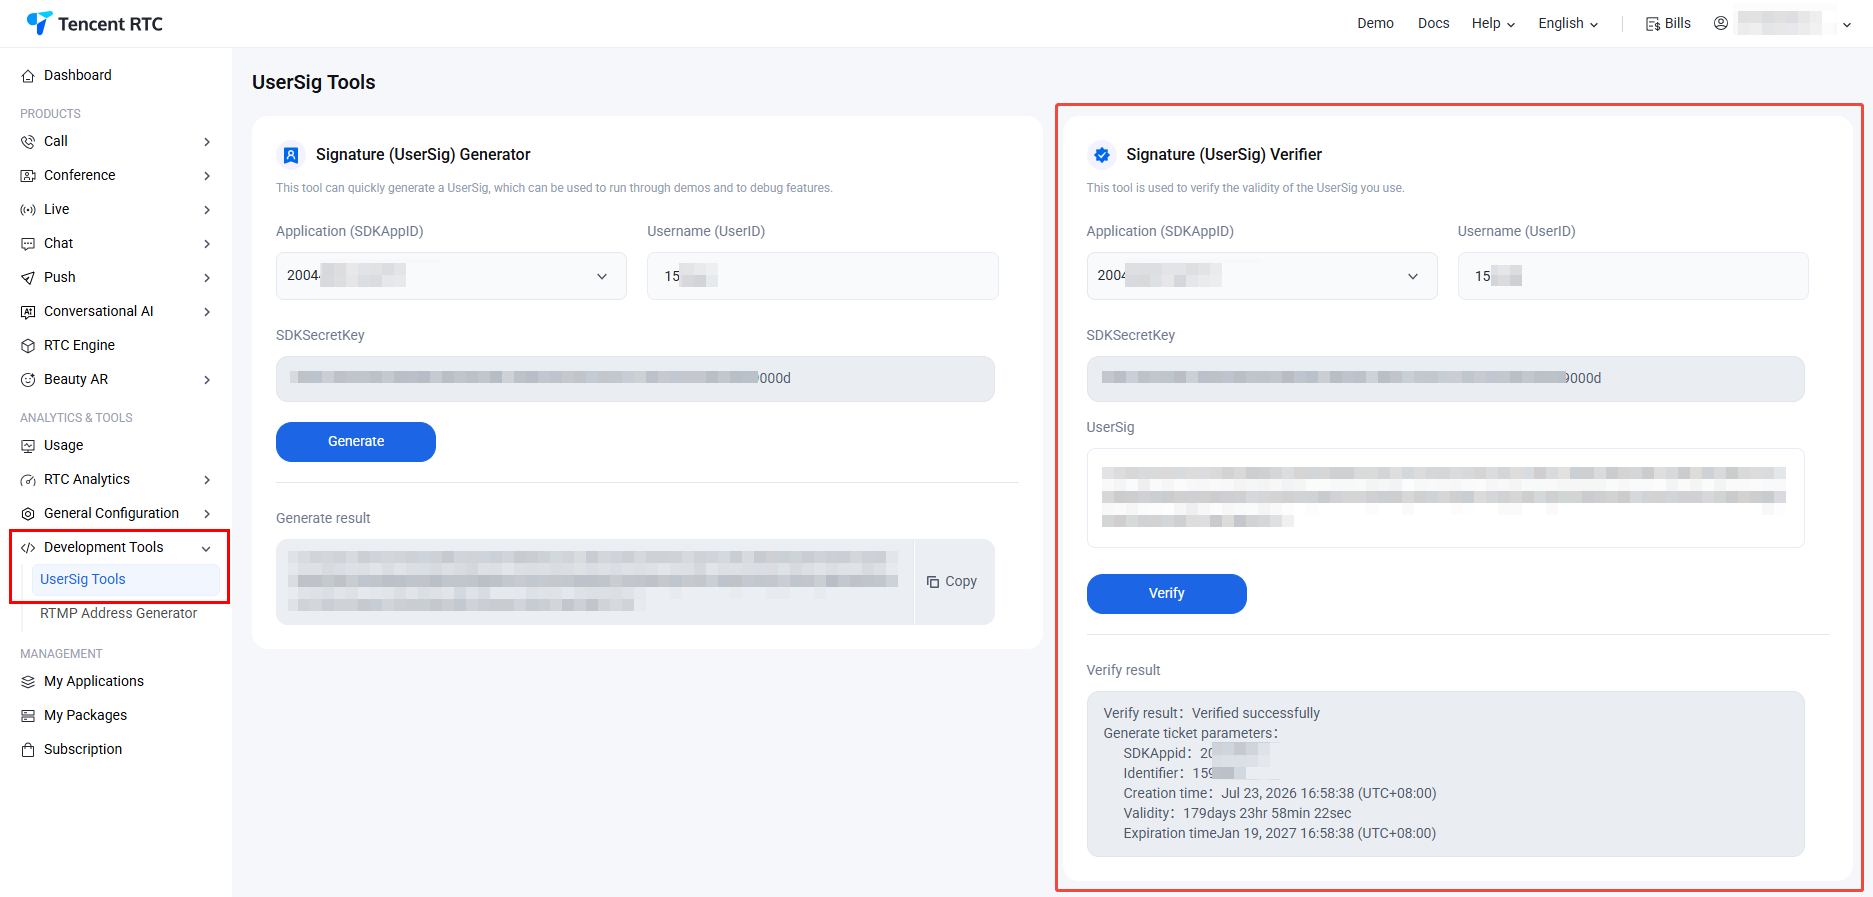
Signature (UserSig) Verifier
The system automatically obtains the key of the current app. After entering the UserID and UserSig, you can use the tool to quickly check the validity of the UserSig.
2. In the Signature (UserSig) Verifier area, select an application, manually input UserID and UserSig.
3. Click Verify to see the verification result.
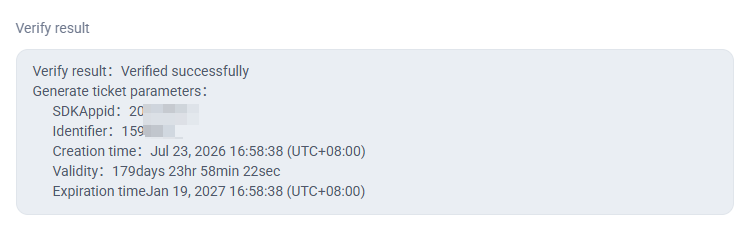
If verification succeeds, you can view the SDKAppID, UserID, generation time, service time, and expiration time of the UserSig in the verification results.
If verification fails, you can view the cause of failure and solution in the verification results.
Self-Troubleshooting Logs
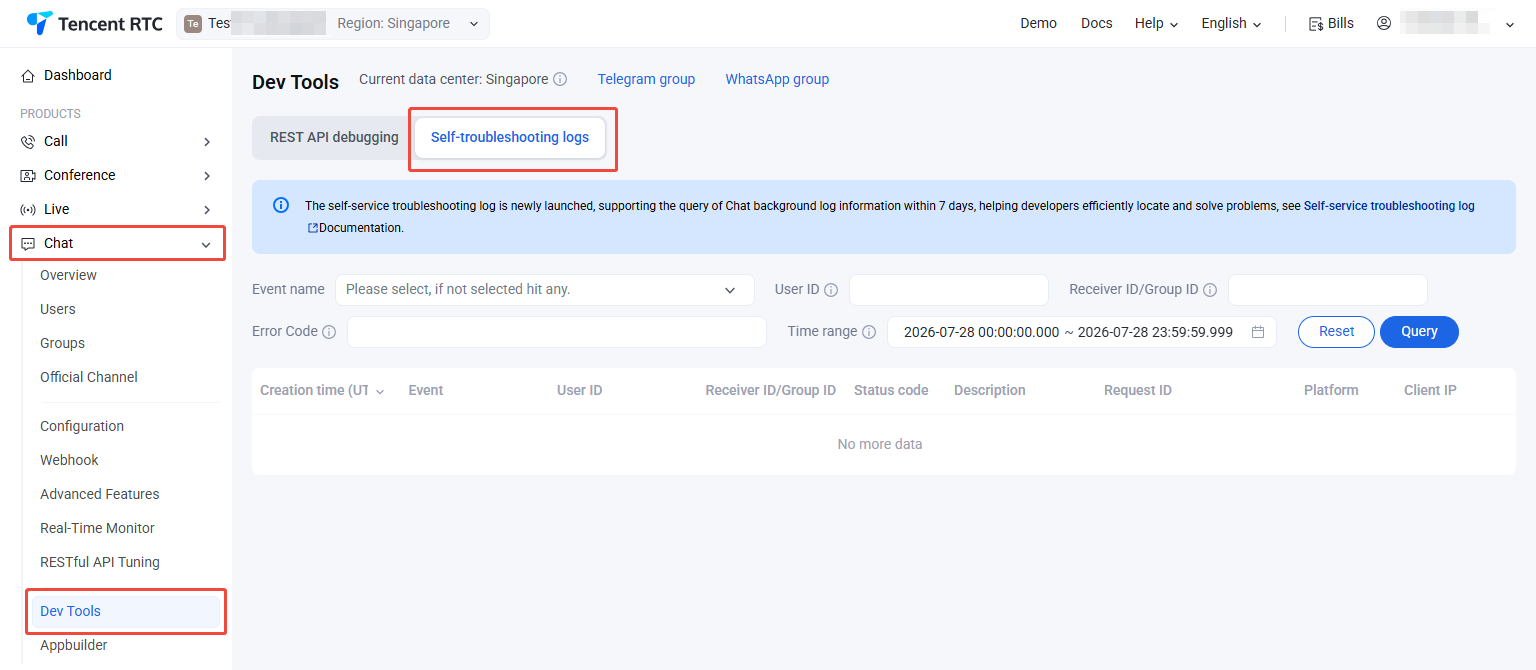
Tencent Cloud Chat console provides self-troubleshooting feature to allow developers to query the backend log information of Chat in the last three days to quickly locate and solve issues.
Event name (Optional): Select events for querying.
UserID (Optional): Enter username (UserID), which is the UserID of the message sender.
Receiver/Group ID (Optional): Enter target conversation ID. For a one-to-one chat, it is the UserID of the message receiver. For a group chat, it is the GroupID of the group.
Error codes (Optional): Enter error codes. For error code descriptions, see Error Codes.
Time range (Required): Select the time range of logs to be queried. Logs in the last three days can be queried.