Renewing an SSL certificate is equivalent to applying for a new certificate in the console, so you need to install and deploy the new certificate to your server. The new certificate does not affect the usage of the existing one.
Note:
If you want to modify the certificate information, apply for a new one.
After renewal, a new certificate will be issued. Replace the website certificate with the new certificate. For information about how to install a certificate, see Certificate Installation.
Advantages of Renewal
Renewing the existing certificate holds the following advantages over purchasing a new one:
Simplifying renewal procedure
Instead of entering the application information again, you only need to confirm the original certificate application data pulled automatically by the system and proceed to the payment process. After making the payment, upload the confirmation letter and wait for review.
Prolonging certificate validity after renewal
After renewal, the remaining available time of the original certificate and an extra 1 to 90 days roll to the validity time of the new certificate for free. You will not experience any loss in certificate validity period due to renewal.
Certificate Renewal Procedure
1. Going to the certificate renewal page
1. A quick renewal feature will be enabled 30 days before your certificate expires. On the Certificate Management page of the SSL Certificate Service console, click Quick Renewal in the Operation column of the certificate you want to renew.
2. On the pop-up window, confirm the information and click Renew Now to enter the renewal page.
2. Confirming the renewal information and make the payment.
1. When renewing a certificate, you do not need to enter the certificate information again. A new certificate will be generated after renewal, so you need to create a CSR file for the new certificate.
You can automatically generate a CSR file through the system (this option is recommended, and the CSR and private key can be generated).
Or, upload a CSR file (no private key can be generated with this option).
2. After confirming the information, select the renewal period, and click Quick Payment to go to the payment page.
3. Confirm the certificate information and click Purchase for payment.
3. Confirming the certificate application
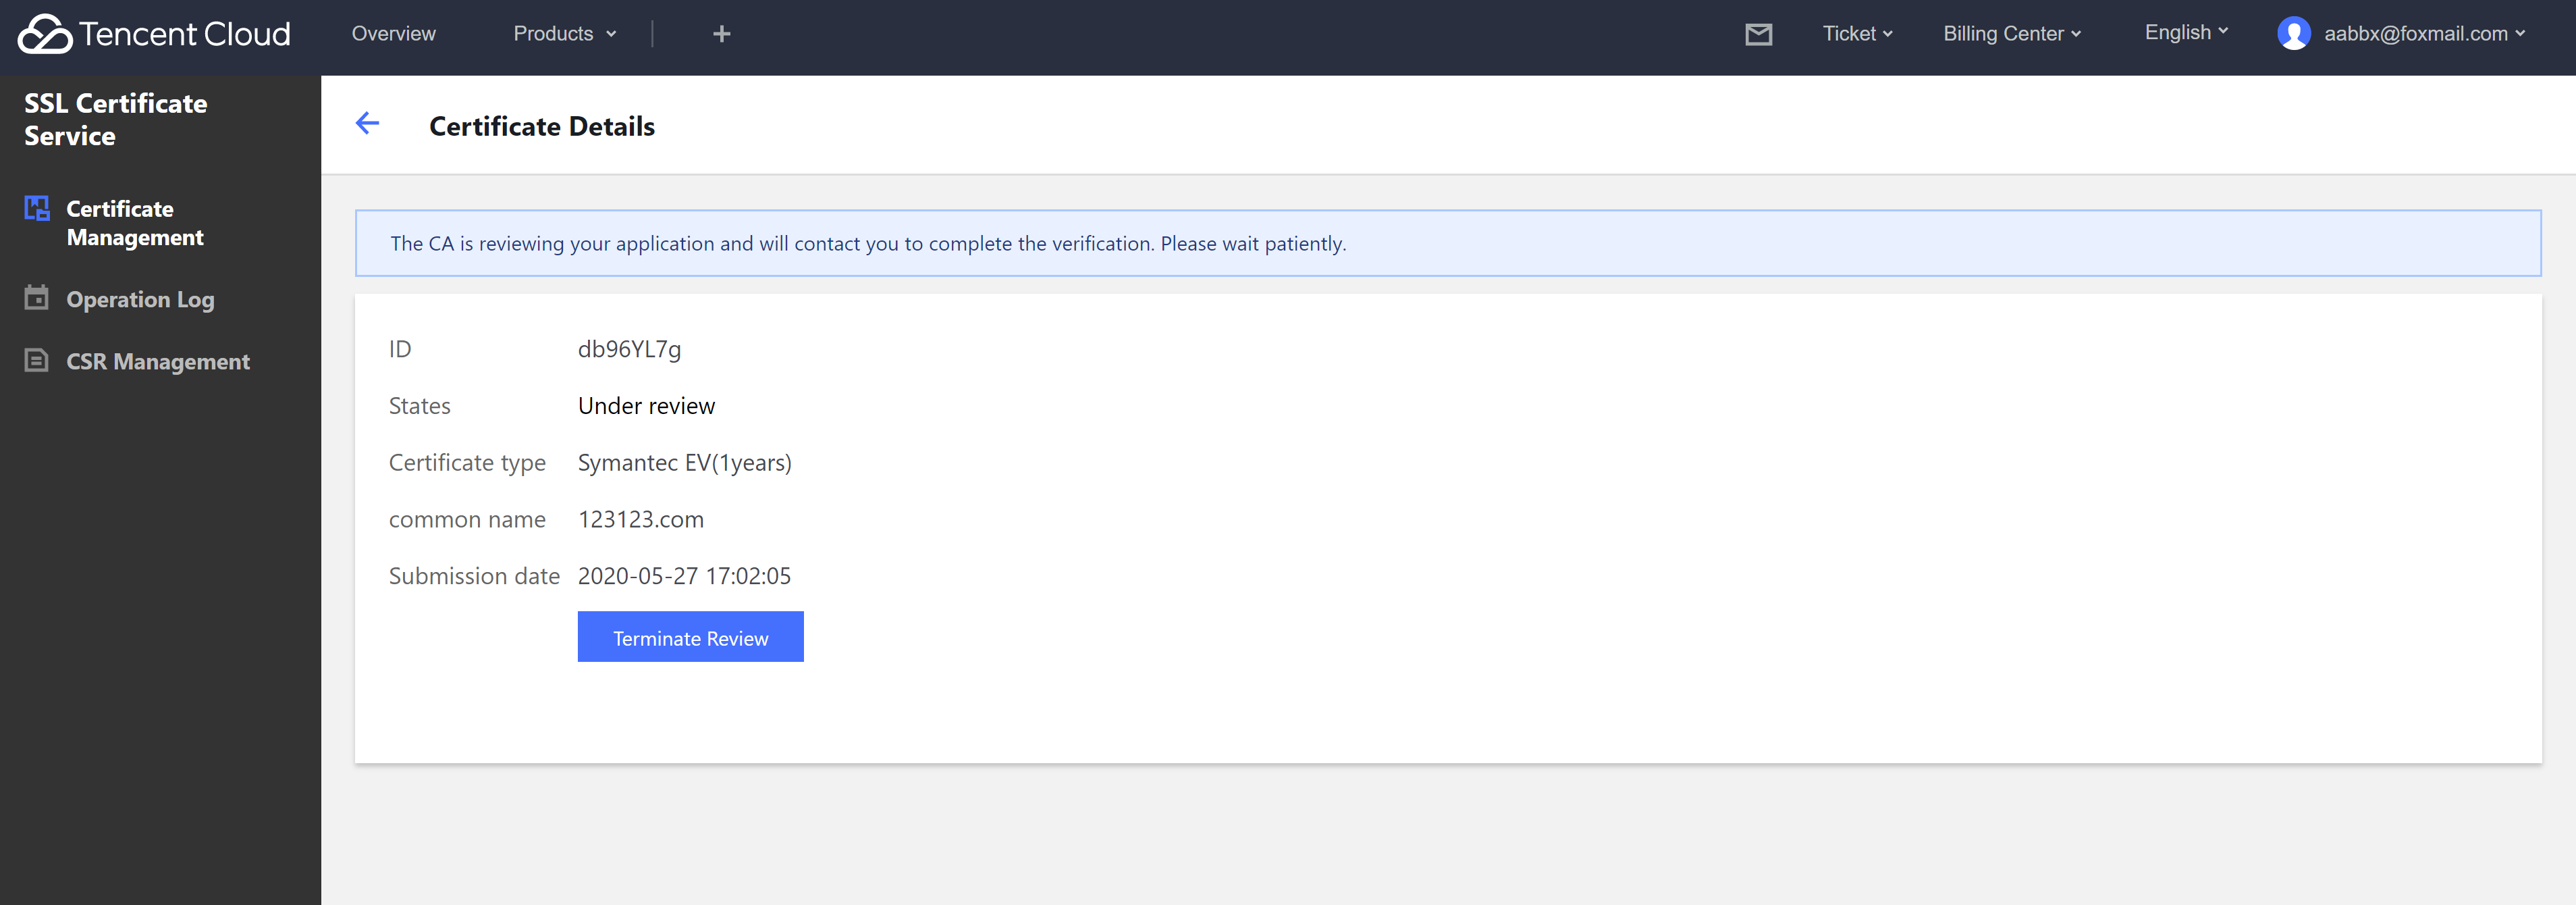
For an OV/EV paid certificate, upload the confirmation letter and wait for review.
1. After you complete payment, on the Certificate Management page in the SSL Certificate Service console, you can find a new certificate with the status of Pending confirmation letter upload in the certificate list. Click Upload confirmation letter to go to the confirmation letter details page.
2. Click Download Confirmation Letter as prompted, fill in the information, and seal the letter. Scan the confirmation letter to a file and click Upload for Review, as shown in the following figure.
3. After you submit the confirmation letter, the certificate status changes to Pending verification. Wait for the reviewer to verify your information by phone and confirm the domain information email.
Note:
For OV certificates, certificate issuance takes 3 to 5 business days. For EV certificates, certificate issuance takes 5 to 7 business days.
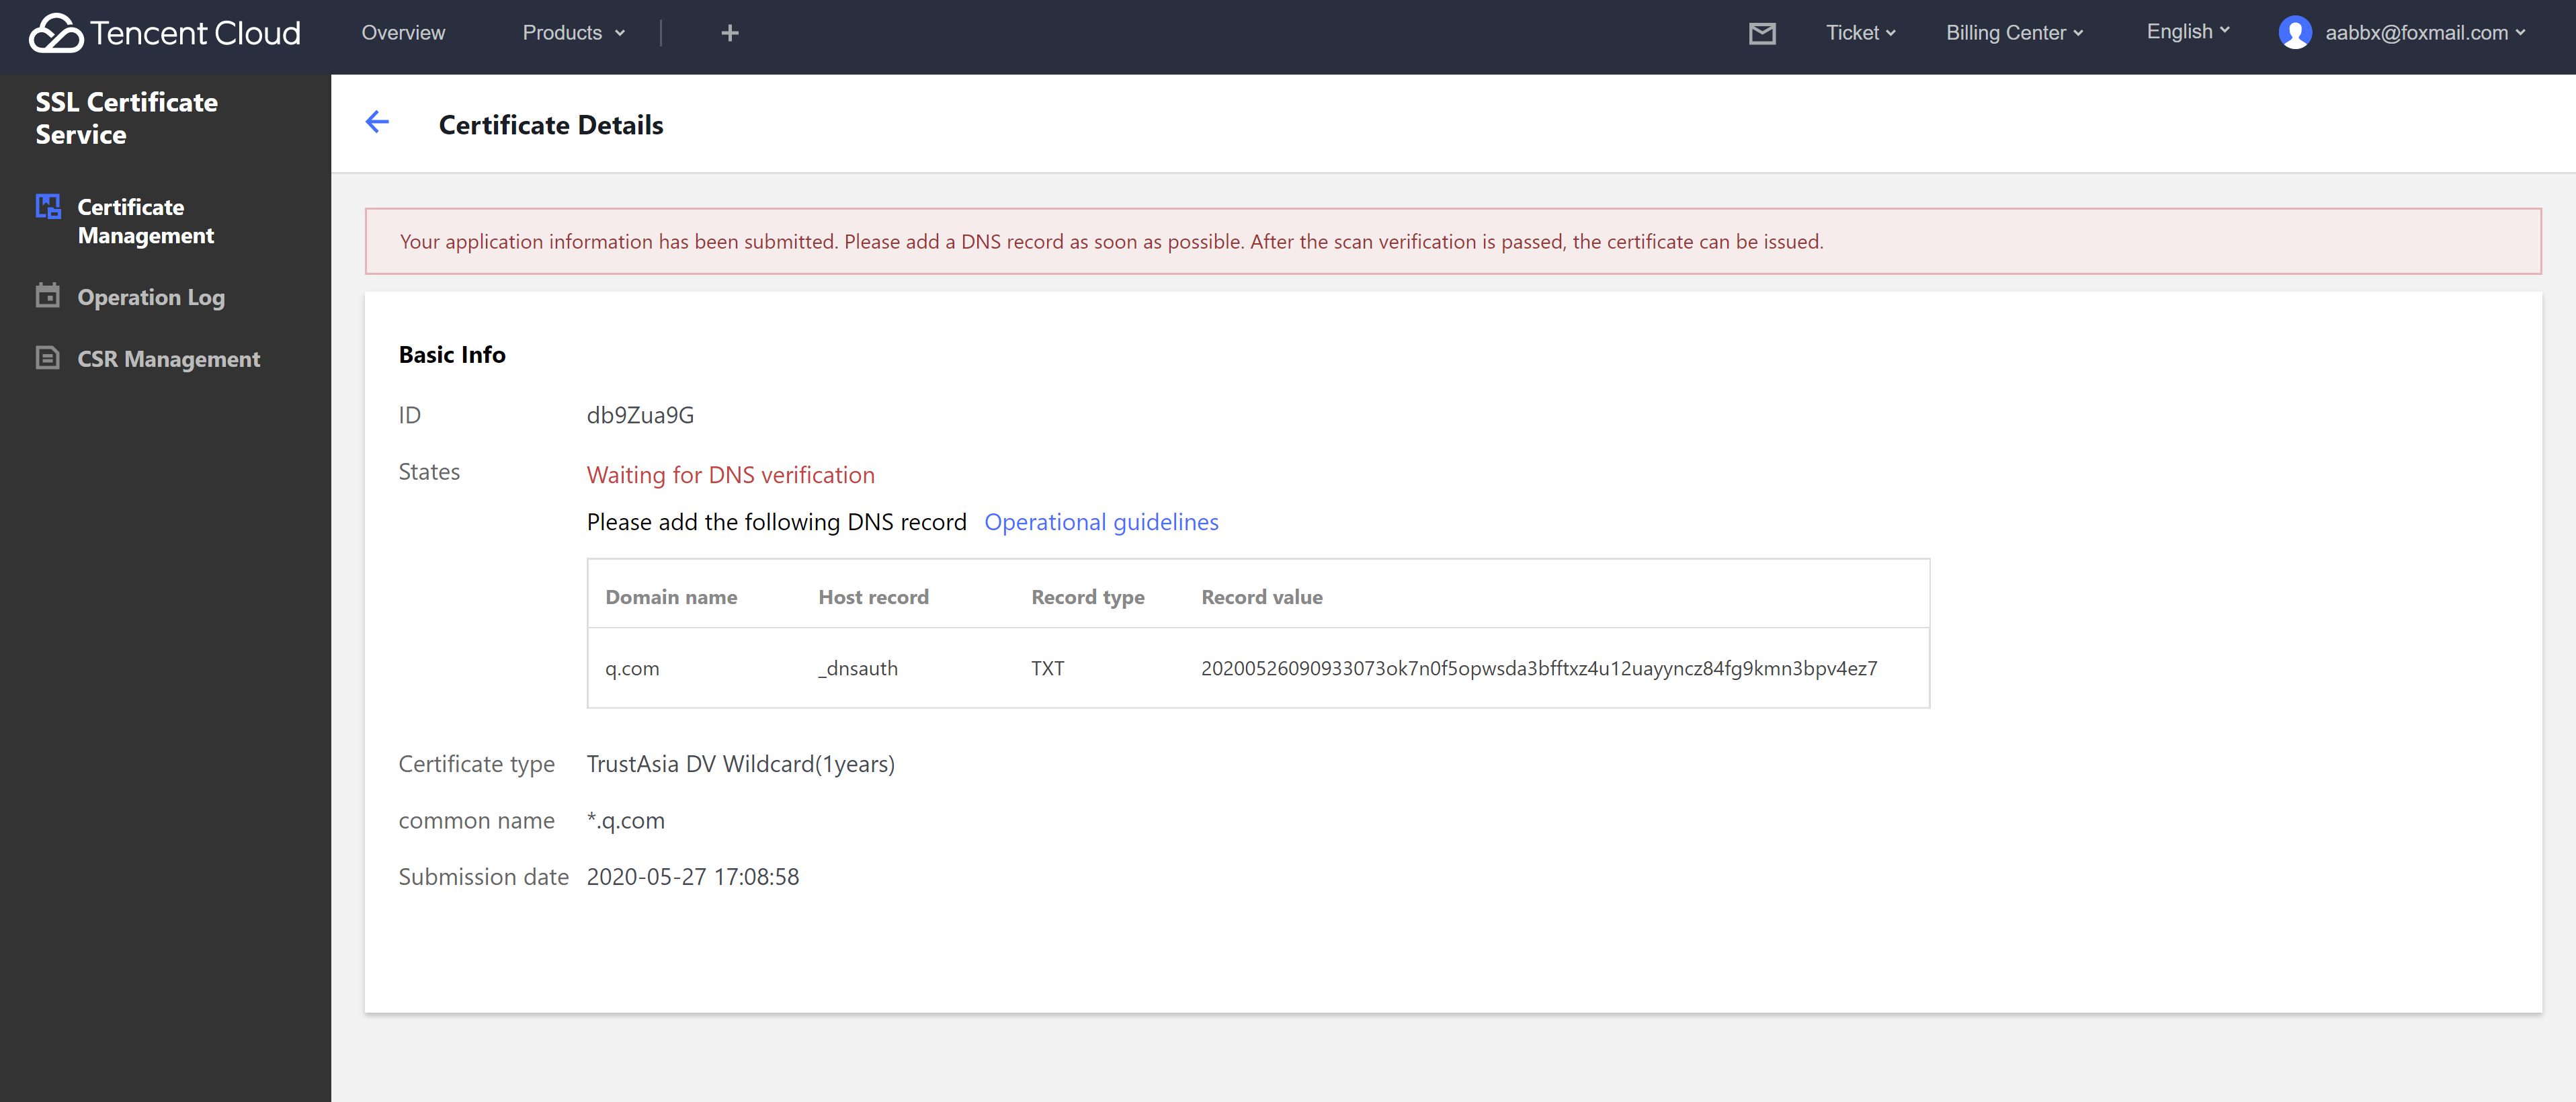
For paid DV certificates, verify the domain name.
1. After you complete payment, on the Certificate Management page of the SSL Certificate Service console, you can find a new certificate with the status of Pending verification in the certificate list. Click Details to go to the Certificate Details page.
2. The DNS verification value is displayed on the Certificate Details page. Add this DNS record and wait for scan and verification by the CA. The certificate will be issued after approval.
Note:
Issuance of DV certificates takes 10 minutes to 24 hours.
Certificate Installation
After the certificate is issued, install the certificate based on your server type. For more information about certificate installation, see the following:
If there is no certificate installation tutorial for the sever you use, go to the Tencent Cloud MARKET, search for certificate installation services, and select a vendor for certificate installation service.