Cloud Native API Gateway Connection
Baixar
Modo Foco
Tamanho da Fonte
Step 1: Confirm Cloud Native API Gateway configuration
If your Web service has enabled Tencent Cloud Cloud Native Gateway, you can access domain protection in the Cloud Native Gateway WAF instance. Please log in to the API Gateway console to confirm whether you are using Cloud Native Gateway.
Note:
Different WAF versions support varying numbers of domains. For details, refer to WAF Plans and Versions.
Cloud Native Gateway currently only supports enabling allowlist for new purchases in the microservices scenario, specifically as the service access layer for Polaris (North Star). Other scenarios do not support new access. When accessing the console in non-aforementioned scenarios, users will be redirected to the Polaris (North Star) console. If you have a new purchase requirement, please submit a ticket. For more details, see API Gateway product documentation.
Step 2: Add Domain and Bind Cloud Native API Gateway
1. Log in to the WAF console. At the top of the left sidebar, switch the console to the region where your instance resides (Chinese mainland/Non-Chinese mainland).
2. In the left sidebar, choose Connection Management > Domain Onboarding.
3. On the Domain names page, click Add domain, enter the relevant configuration parameters, and click OK.
Field Description
Associated instance: Select the Cloud-native type and the corresponding Cloud-native WAF instance name.
Domain name: In the domain input box, enter the domain to protect, for example,
test.com.Traffic source: Select Cloud Native Gateway.
Use proxy: Select whether to use proxy services such as Anti-DDoS, CDN, or Cloud Acceleration based on your actual business requirements.
Select No: Requests received by WAF come directly from the client. WAF uses the IP address that establishes the connection with the client as the client IP address.
Select Yes: Requests received by WAF come from other layer-7 proxy services. To obtain the real client IP address for security analysis, you need to configure the client IP address determination method:
First IP in X-Forwarded-For
Network layer remote_ip (prevent XFF forgery)
IP in the specified header
Note:
It is recommended to store the client IP address in a custom Header within your business application and configure the corresponding Header field in WAF. This approach reduces the risk of attackers bypassing WAF protection rules by forging the XFF field, thereby enhancing business security.
Outside Mainland China: Select based on actual requirements.
Protected Object Group: Select the protected object group corresponding to the bound web rule template. The custom web rule template takes effect automatically.
Remarks: Enter remarks for the domain name (optional) to facilitate subsequent management and identification of the domain's purpose.
Tag: Configure resource tags for access domains. Tags can be assigned based on tag keys and values. After tags are configured, you can search for and filter domain names by tags in the domain list. Tags can also be used for billing and permission management.
Click Add Tag to add a new tag key-value pair.
You can use the Key-Value Clipboard to batch paste existing tag key-value pairs.
The system supports quickly selecting previously used tags from the Historical Records.
4. After clicking OK, you will return to the Domain Access page where you can view information such as the protected domain name, Gateway Instance ID, and name.
5. Log in to API Gateway console. On the Instances page, click the target instance ID.
6. In the Instance Details page, click Security Protection > WAF protection. In the Protected Domain Names module, click Add domain.
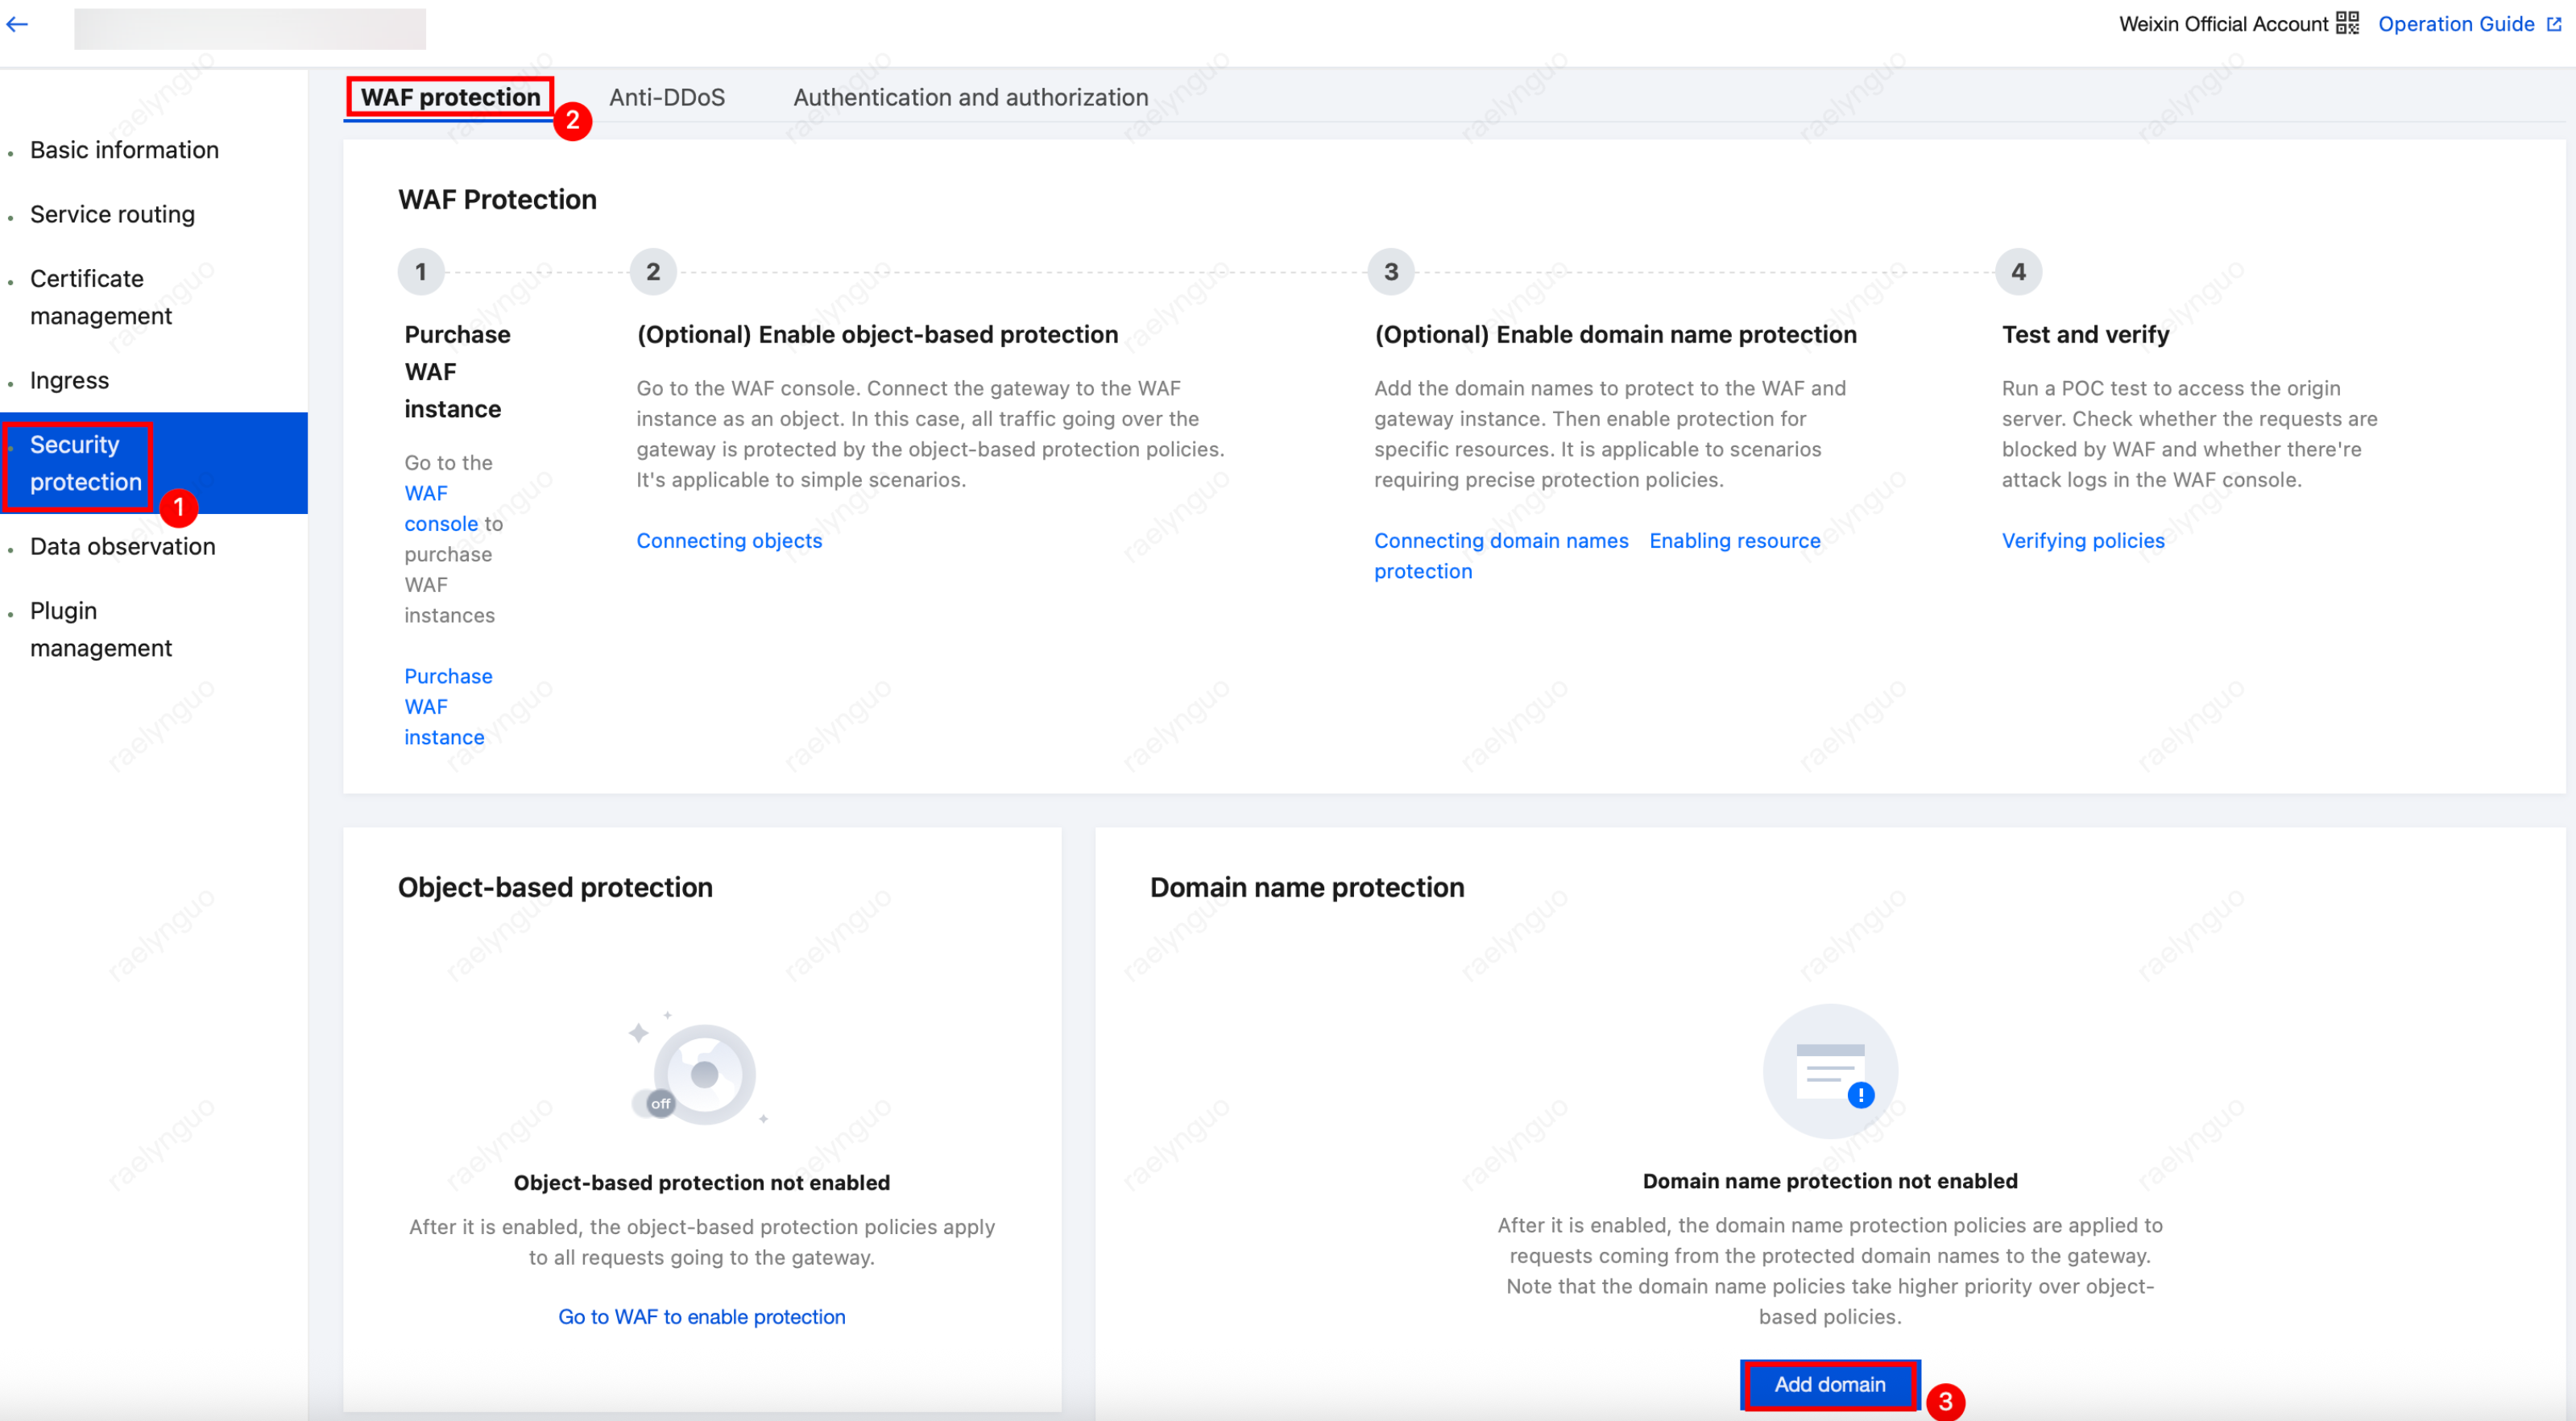
7. In the Add Domain window, select or enter a domain name that has been connected to WAF. You can choose domain names already added in Certificate Management or manually enter a domain name for addition.
8. Click Confirm to confirm that the WAF-protected domain name is added.
Note:
Ensure that the WAF-protected domain name is connected to WAF. Otherwise, requests from the domain name cannot be sent for review.
9. For more operations, see API Gateway product documentation.
Step 3: Verification Test
1. Log in to API Gateway console, click instance ID, in the left sidebar, select security protection.
2. Confirm that the domain protection status is partially enabled or fully enabled on the Security Protection page.
3. Enter the URL
http://test.com/?test=alert(123) (a request simulating a Web attack) in your browser and access it. The browser returns a block page, indicating that the WAF protection feature is functioning normally.Note:
test.com is the example domain name in this case. Replace it with the actual domain name you added.
Ajuda e Suporte
Esta página foi útil?
Você também pode entrar em contato com a Equipe de vendas ou Enviar um tíquete em caso de ajuda.
comentários