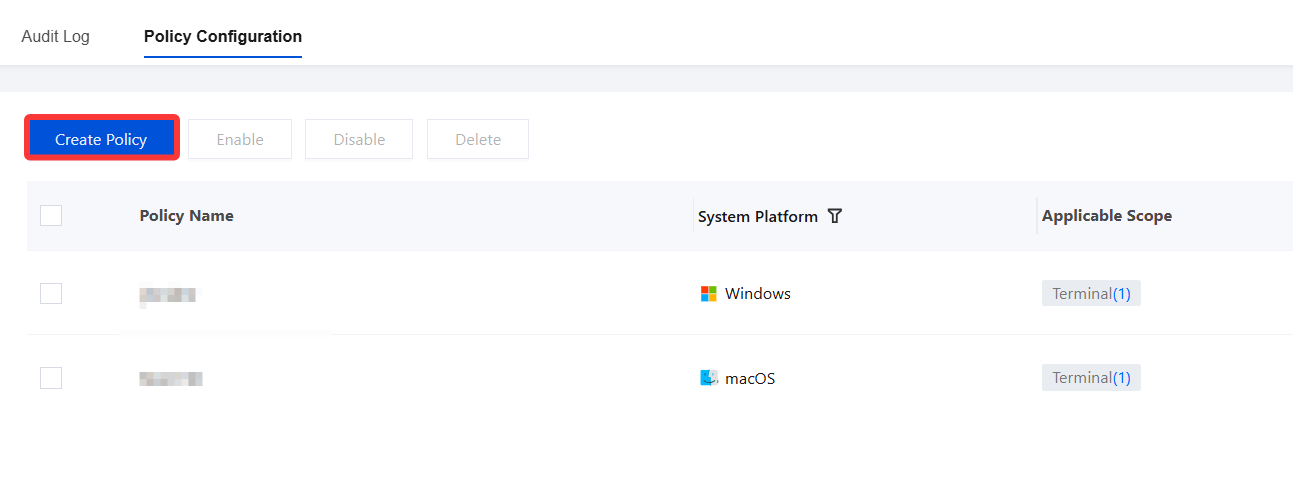
2. On the System Reinforcement page, select Policy Configuration and click Create Policy.
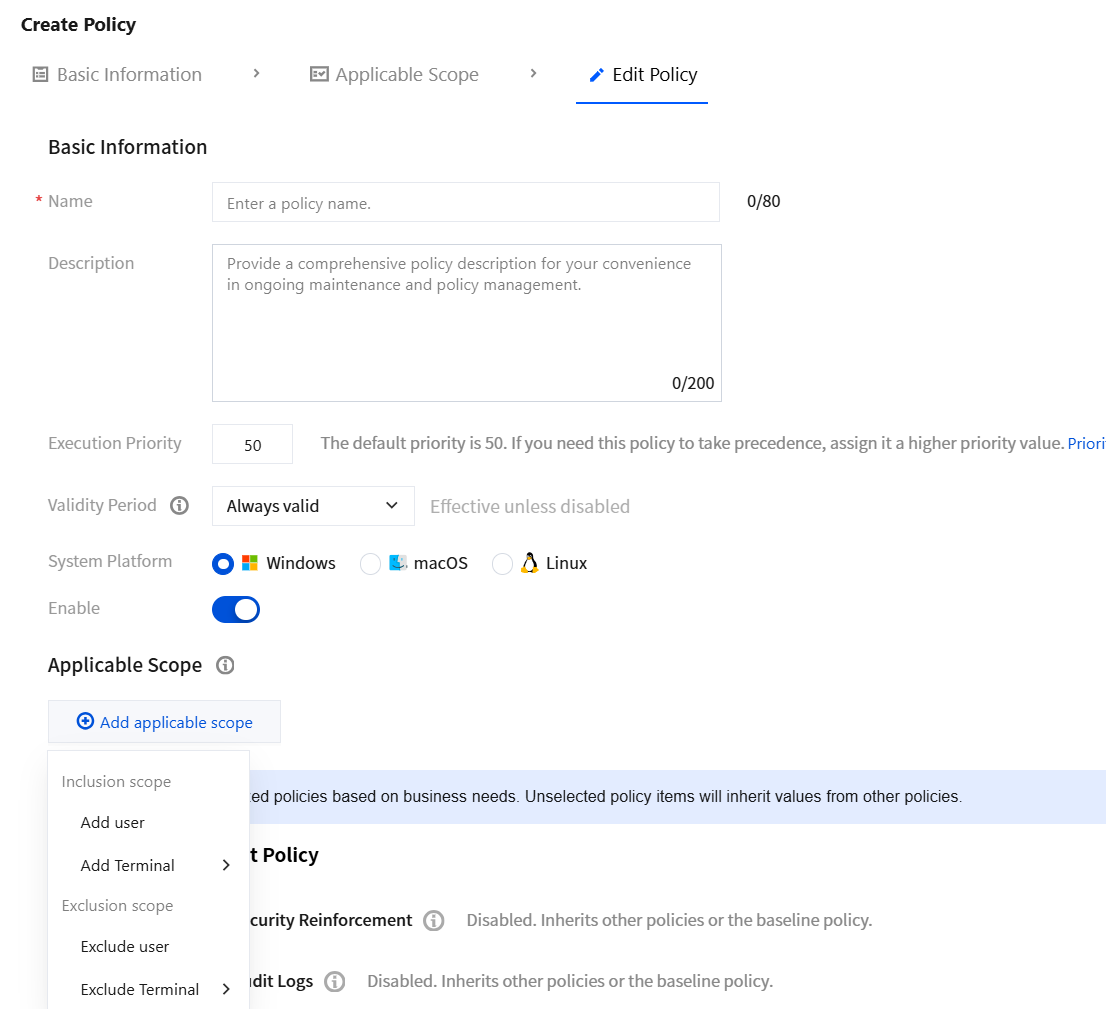
3. On the Create Policy page, configure the relevant parameters.
3.1 Enter the policy name and parameters such as the policy description.
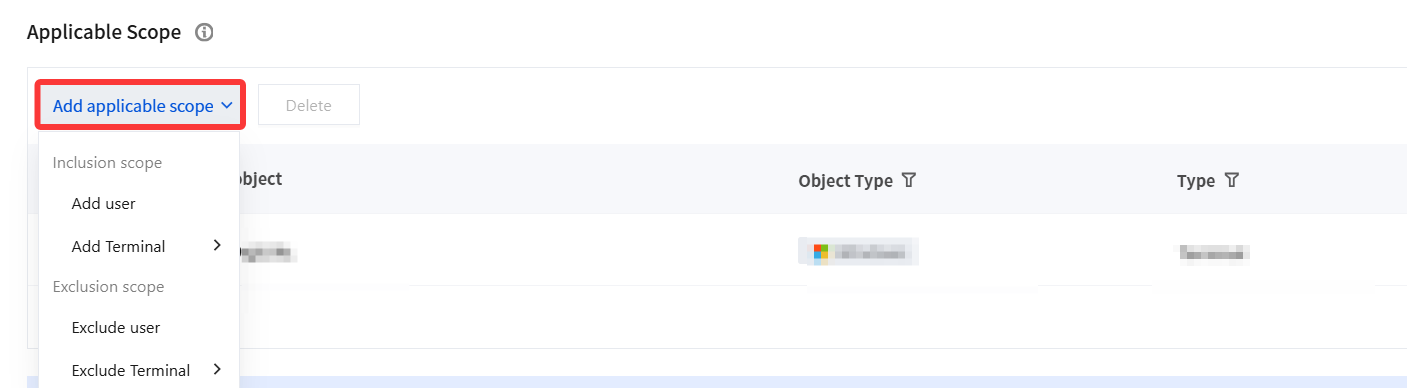
3.2 Click Add applicable scope, select the names of users/terminals to be controlled or excluded, and click OK.
4. Based on your actual needs, select the following security reinforcement policy and click Save.
System Account Security Reinforcement
1. Configure a hardening policy for terminals to verify the length, validity period, and complexity of computer system account passwords, thereby improving account security.
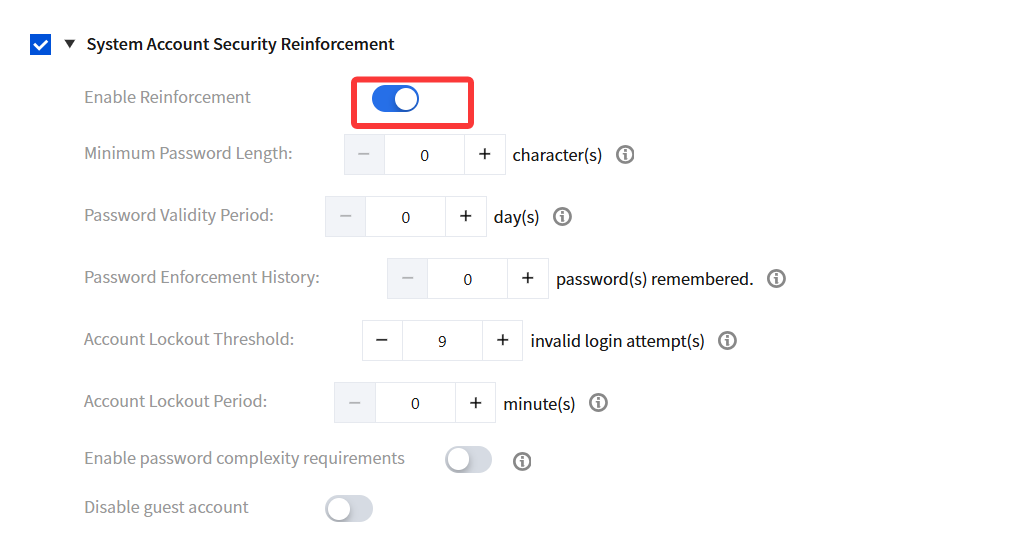
2. Select System Account Password Hardening, enable hardening, and configure the relevant parameters.
Parameter
Description
Minimum password length
The maximum password length on Windows 7 is 14 characters.
If the password exceeds 14 characters, the Windows 7 client extracts 14 characters as the password by default. This applies only to non-domain accounts.
If the password length is set to 0, the password length is not limited and the password can be left empty.
Password validity period
If the password validity period is set to a value greater than 0, you are forced to change the password when it expires.
If the password validity period is set to 0, the account password remains valid indefinitely and users are not forced to change it.
Enforce password history
If the enforced password history setting is greater than 0, the new password cannot be the same as the corresponding number of previous passwords.
If the enforced password history setting is set to 0, the new password can be the same as any previous password.
Account lockout threshold
If the account lockout threshold is greater than 0, the account lockout period must be greater than or equal to the reset time of the local group policy.
If the account lockout threshold is set to 0, the account remains locked after being locked. In this case, log in with the Administrator account of the terminal to unlock the locked standard account.
Note:
A third-party application may call the system login API and cause the account to be locked. In this case, the account cannot be used to log in. Proceed with caution.
Account lockout duration
If the account lockout period is greater than 0, the account lockout period must be greater than or equal to the reset time of the local group policy.
If the account lockout period is set to 0, the account remains locked after being locked. In this case, log in with the Administrator account of the terminal to unlock the locked standard account.
Enable password complexity requirements.
If this policy is enabled, passwords must meet the following minimum requirements.
It cannot contain the user's account name or any part of the user's name that consists of more than two consecutive characters.
It must contain at least six characters.
It must contain three of the following four character types: English uppercase letters (A to Z), English lowercase letters (a to z), 10 basic digits (0 to 9), and non-alphabetic characters (such as !¥#%). Complexity requirements are enforced when passwords are changed or created.
Disable Guest account
Disable the Guest account.
3. After the configuration is completed, click Save.
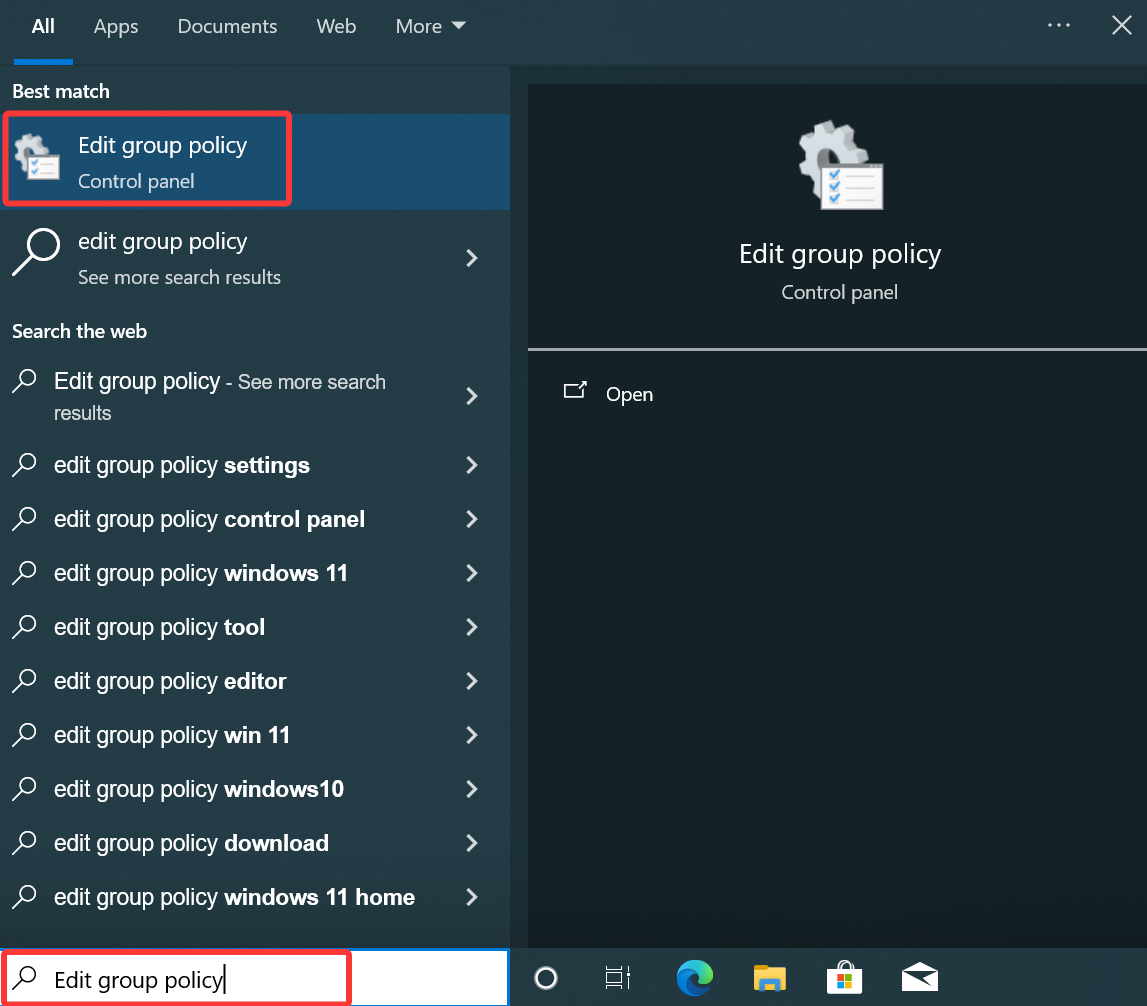
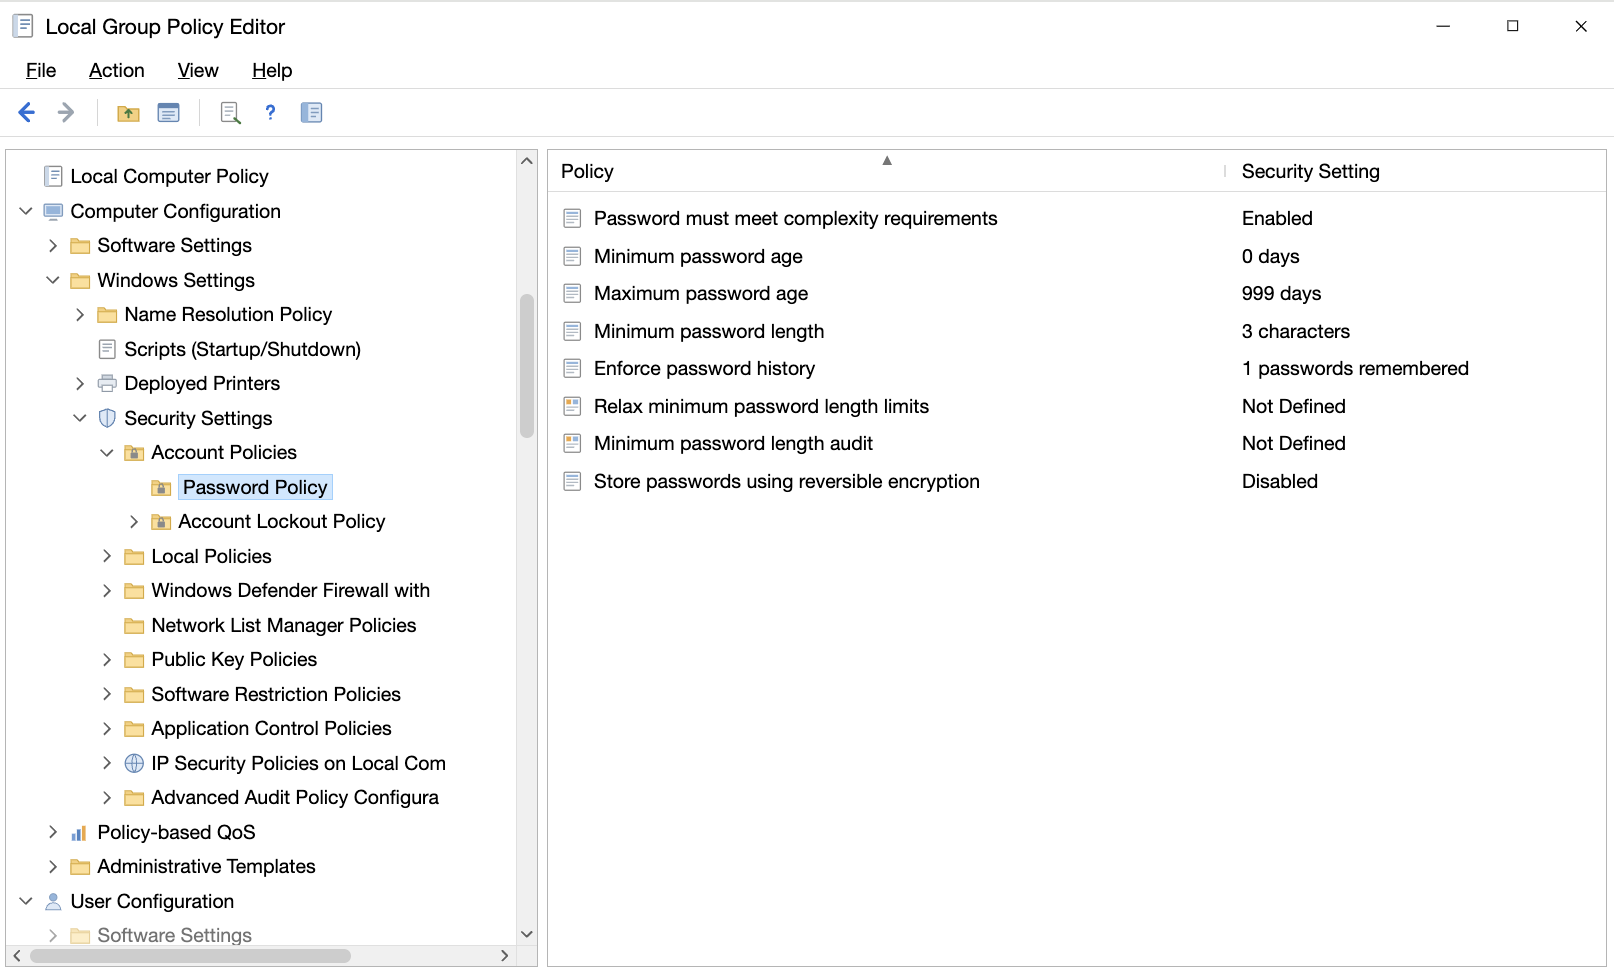
4. On the terminal machines in this group, check the account password status through "Edit group Policy".
5. See the figures below:
System Security Audit Logs
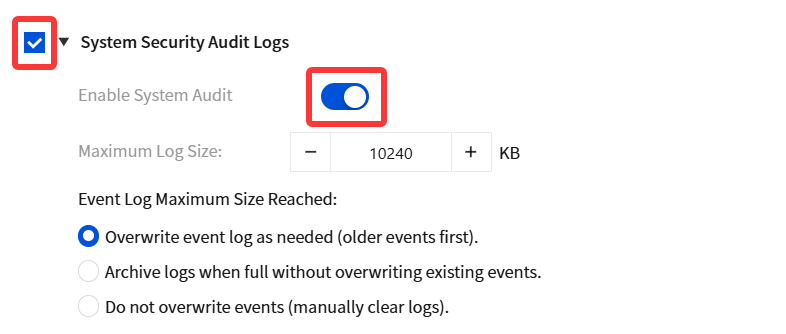
1. Select system security audit logs, enable system auditing, and configure the relevant parameters.
2. After the configuration is completed, click Save.
3. For terminal machines in this group, when system audit logs reach the maximum event log size, they are overwritten according to the configured rules.
Screen Saver Method
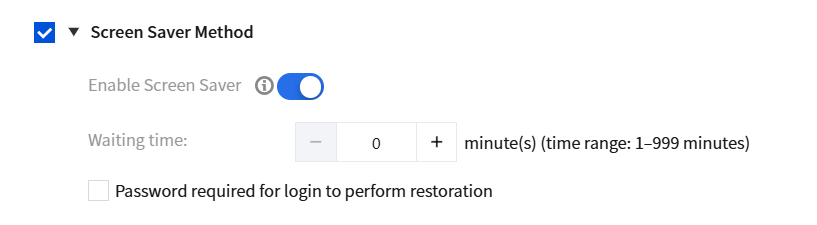
1. Select the screen saver mode, enable the screen saver, and configure the relevant parameters.
2. After the configuration is completed, click Save.
3. For terminal machines in this group, the screen saver time is set to a specific value in minutes. If no operation is performed on a terminal for ** minutes, the terminal enters screen saver mode.
If you select password login upon recovery, password authentication is required for subsequent operations before you can log in to the desktop.
Note:
If you do not select "Password login upon recovery", the system enters screen-off sleep mode. Touching the keyboard or other input devices will restore the desktop.
If you select "Password login upon recovery", the system enters lock-screen sleep mode (similar to pressing the Windows logo key + L). When you touch the keyboard or other input devices, you are required to enter the startup password to access the computer desktop.
Selecting "Password login upon recovery" requires that the computer has a startup password. If the computer has no password, you can enter the system without entering a password, and selecting "Password login upon recovery" has no effect.
Terminal Automatic Shutdown
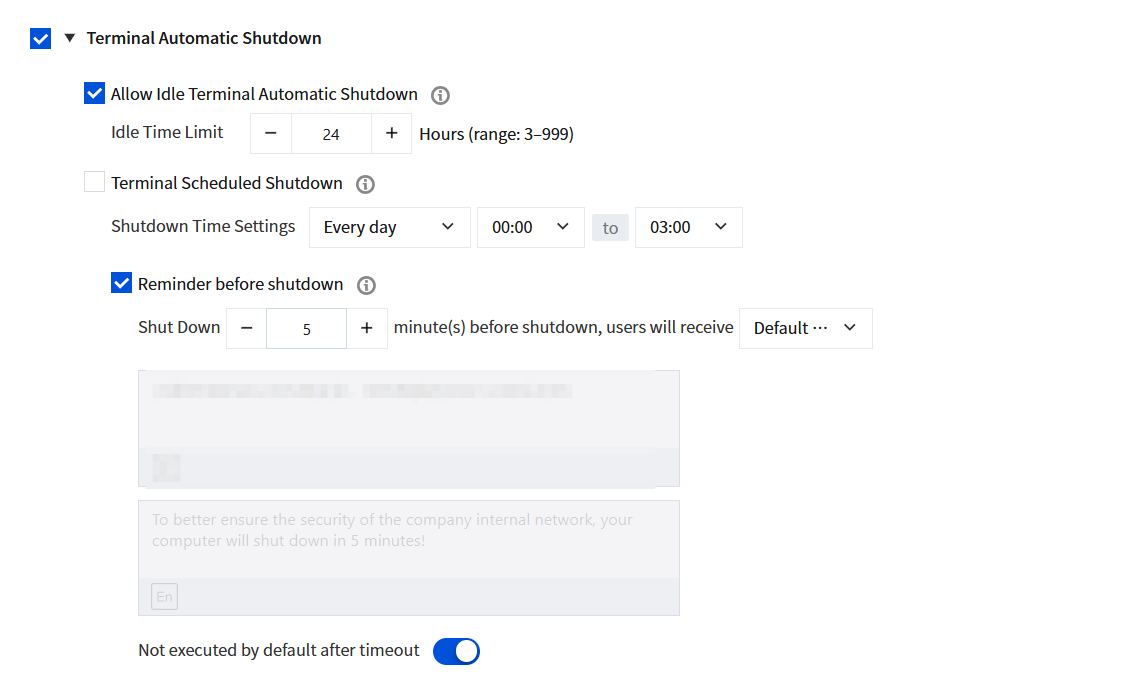
1. Set the automatic shutdown time for the terminal.
Parameter Name
Description
Allow idle terminals to automatically power off.
When this feature is enabled, administrators can set an idle time limit for terminals. If a terminal remains idle beyond the limit, it will automatically shut down, allowing administrators to power off unattended or long-idle machines.
Idle definition: If no keyboard or mouse activity is detected within the configured period, the idle timer starts. Video playback and background downloads do not exit the idle state.
Scheduled terminal shutdown
This feature is applicable to administrators for automatically powering off unattended terminals. After it is enabled, the terminal automatically powers off at the specified time according to the policy.
Remind Before Shutdown or Not
When this feature is enabled, the user is prompted X minutes before shutdown.
When this feature is disabled, the system will force a shutdown without any prompt.
2. Configure terminal auto-shutdown rules. For example:
3. After the configuration is completed, click Save.
4. Terminals in this group will automatically shut down if they remain idle for more than 24 hours.
Default Share and Service Control
1. Protect the sharing and service features of managed clients from intrusion.
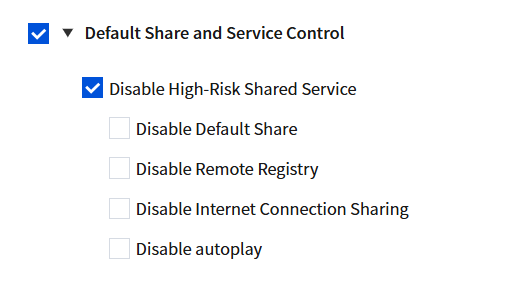
2. Select Default Sharing and Service Control, select Disable High-Risk Sharing Services, and configure the related parameters.
Parameter
Description
Disable default sharing
Terminals in this group will disable default sharing.
Disable remote registry
Other devices cannot access the terminal through the remote registry.
Disable Internet connection sharing
Terminals in this group disable Internet Connection Sharing.
Disable AutoPlay
Terminals in this group disable AutoPlay. For example, when a USB flash drive is connected, AutoPlay is disabled.
3. After completing the addition, click Save.
Remote Desktop Port
1. Set the Remote Desktop port for the terminal.
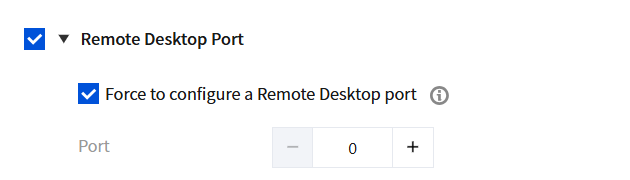
2. Select Remote Desktop Port, select Force Remote Desktop Port Configuration, and configure the related parameters.
Note:
If the firewall policy is not allowed, the port configuration will fail.
3. After completing the addition, click Save.
4. If the port is set to 8080, the Remote Desktop port for terminals in this group will also be set to 8080. Verify that the value of HKEY_LOCAL_MACHINE\\SYSTEM\\CurrentControlSet\\Control\\TerminalServer\\WinStations\\RDP-Tcp\\PortNumber on the client is 8080 and that the Remote Desktop feature works properly.
System Account Management
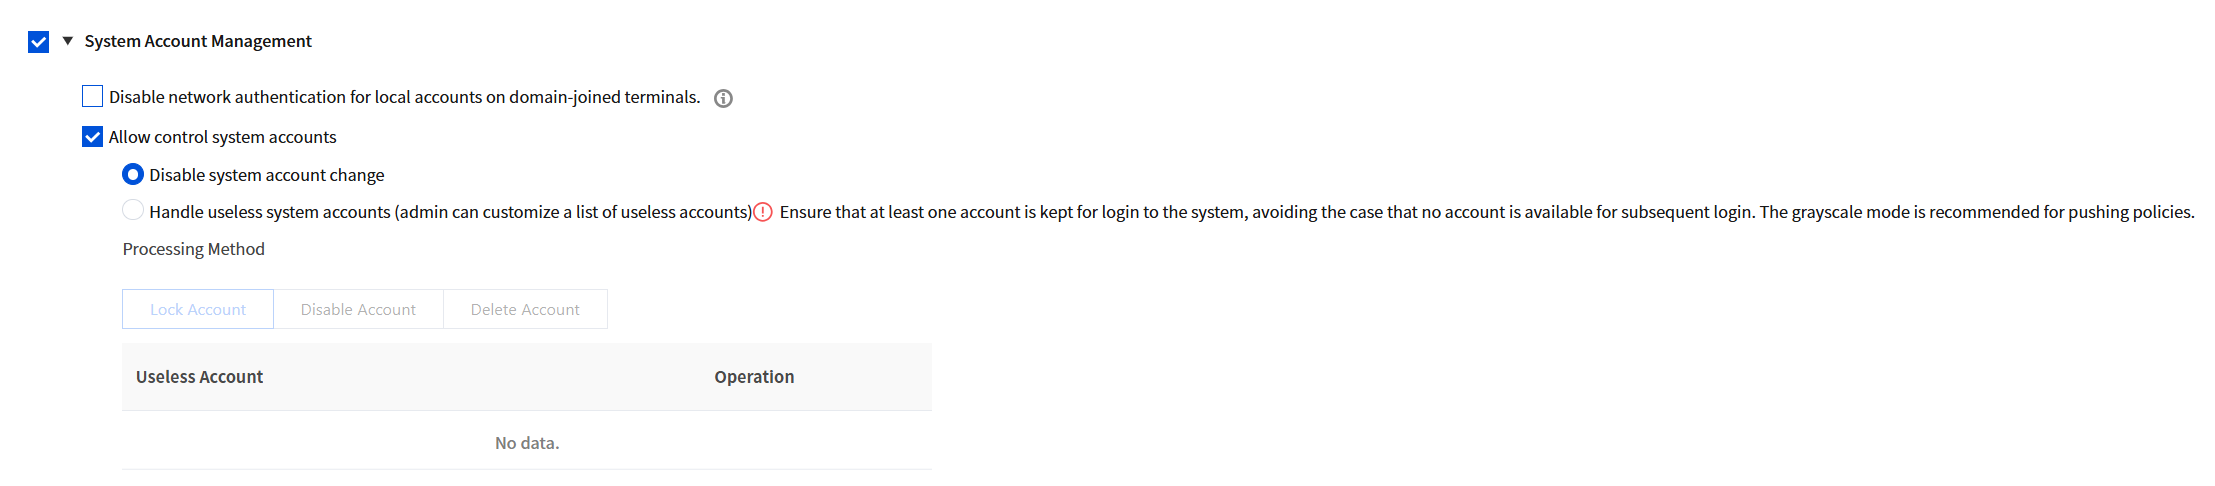
1. Select System Account Management and configure the relevant parameters.
Parameter
Description
Disable network authentication for local accounts on domain-joined terminals.
Supports disabling network authentication for local accounts on domain-joined terminals, preventing large-scale terminal compromise caused by password leakage.
Allow Control of System Accounts.
Allow control of system accounts and configure system account management rules.
Disable system account changes: managed system accounts cannot be arbitrarily modified.
Process unused system accounts (administrators can customize the list of unused accounts).
Lock the account.
Disable the account.
Delete the account.
2. After completing the addition, click Save.
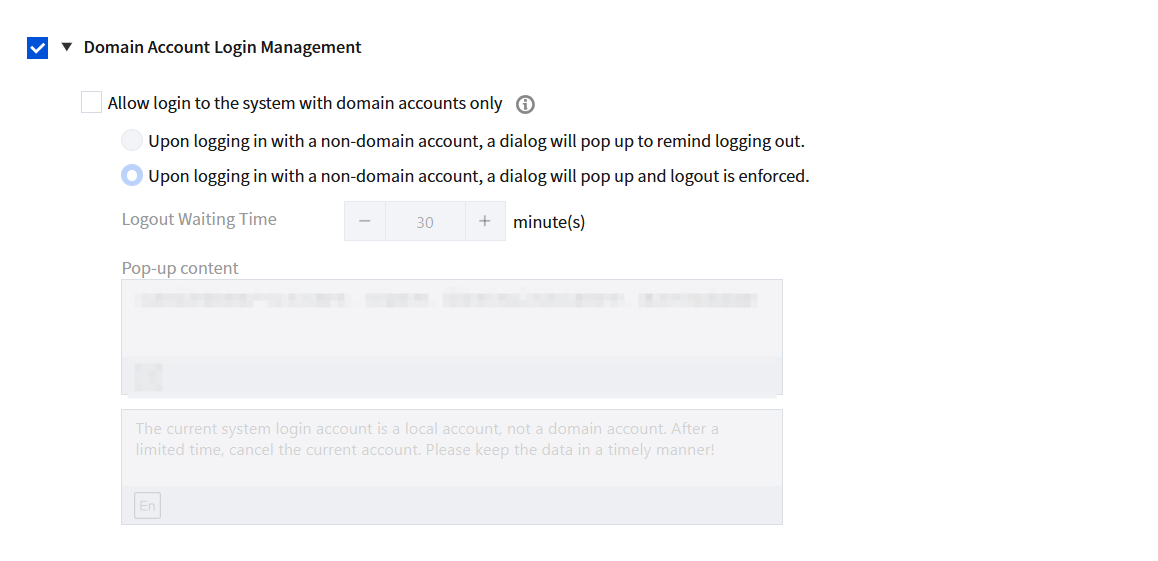
Domain Account Login Management
1. Login prompt and logout for non-domain accounts on the client.
2. Select domain account login control, select the option to allow only domain account logins to the system, and configure the relevant parameters.
Parameter
Description
Show a pop-up reminder to log out when a non-domain account is used for login.
If the terminal machine is not domain-joined, the rule does not take effect (regardless of whether a domain account is used).
If the PC is logged in with a domain account, it is not affected.
If the PC is logged in with a non-domain account, a pop-up will prompt for logout.
The popup content supports customization.
Show a pop-up notification and automatically log out when a non-domain account is used for login.
If the terminal machine is not domain-joined, the rule does not take effect (regardless of whether a domain account is used).
If the PC is logged in with a domain account, it is not affected.
If the PC is logged in with a non-domain account, a pop-up will prompt that the current system login account is a local account, not a domain account, and that the current account will be logged out after a limited time. Please save your data promptly. The system will also automatically log out after ** minutes.
The popup content supports customization.
3. After completing the addition, click Save.
Security Reinforcement Policy Description File for Manual Client Installation
Note:
This is a macOS feature and is not available on Windows.
The policy takes effect only after the MDM file is configured. After the description file is installed, restart the terminal.
The MDM file supports automatic delivery or manual installation of the security reinforcement policy description file by the client.
1. After this policy is selected, the policy is delivered directly to the client, which then pulls the description file. No MDM certificate configuration is required.
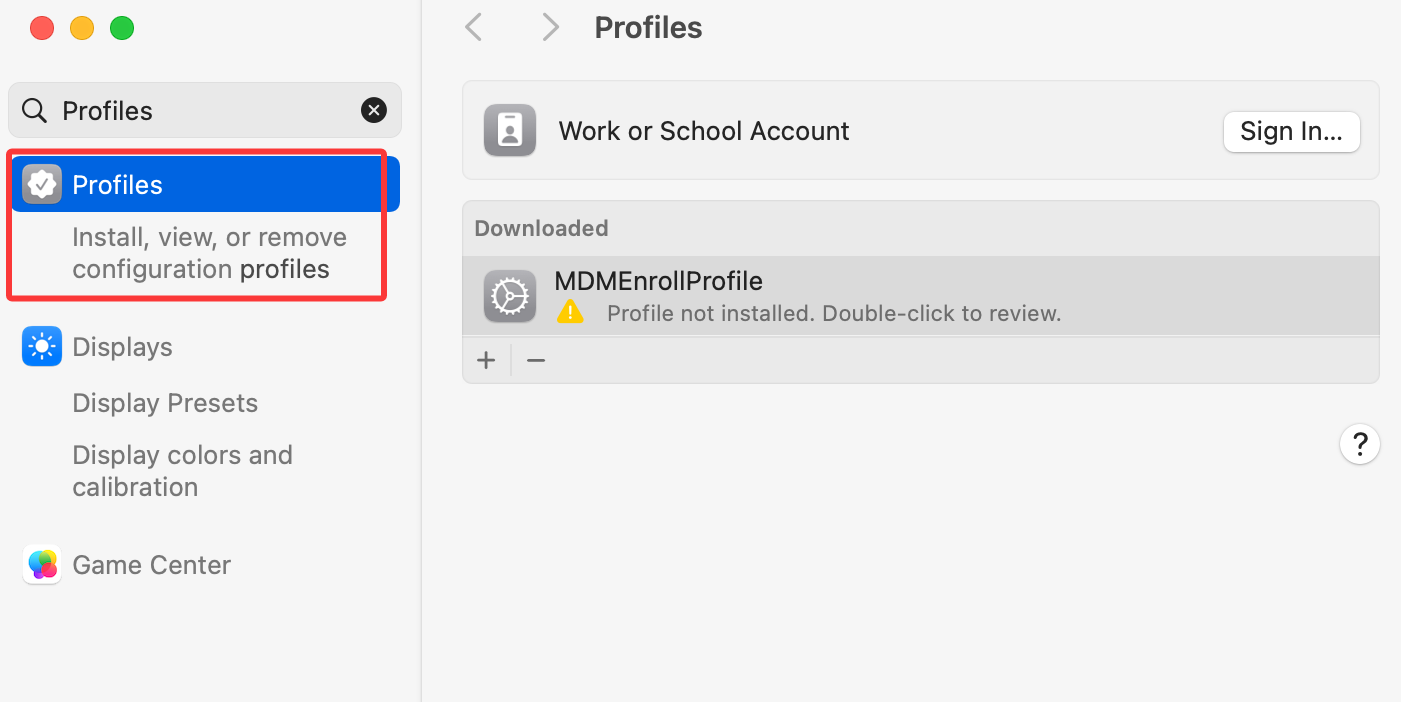
2. Enter the system, search for the Profiles, select MDMEAP and double-click it, then manually install the security reinforcement policy description file.
Disable Preferences Settings
Note:
This is a macOS feature and is not available on Windows.
The policy takes effect only after the MDM file is configured. After the description file is installed, restart the terminal.
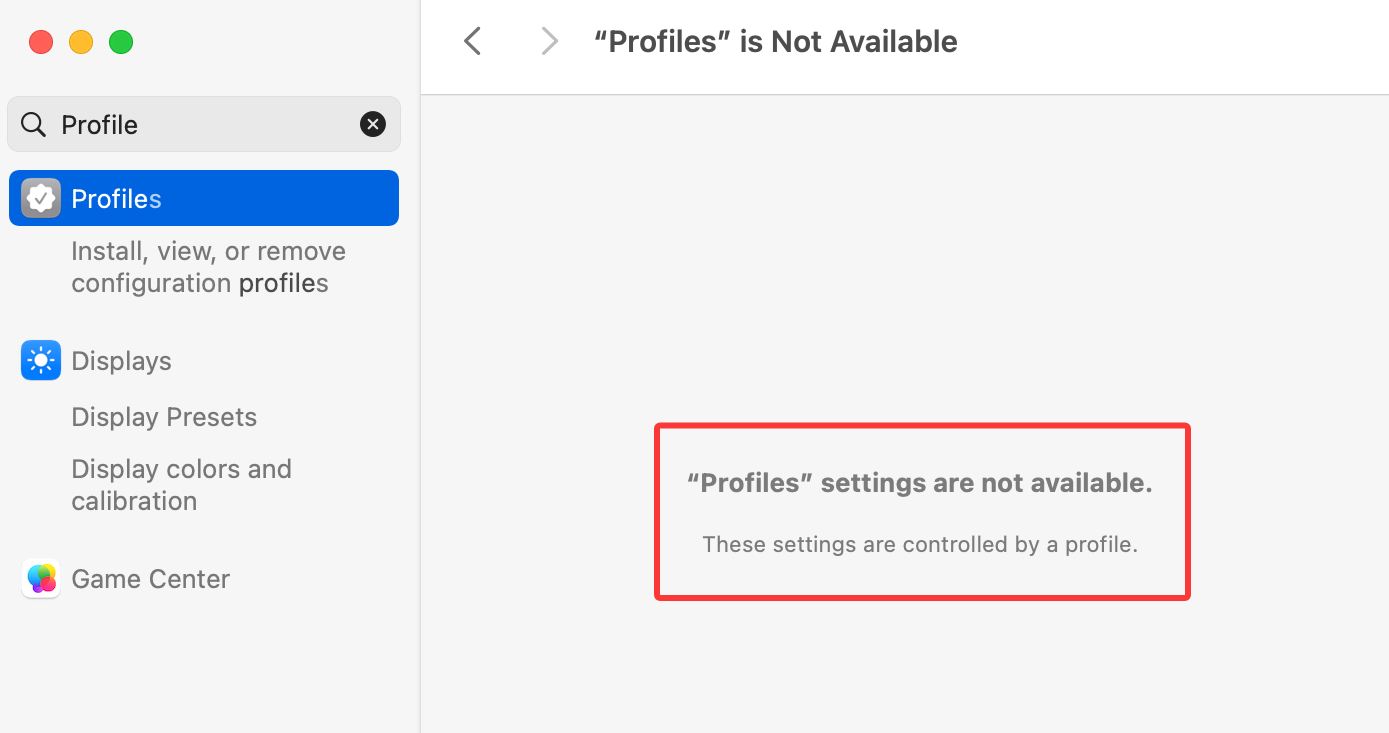
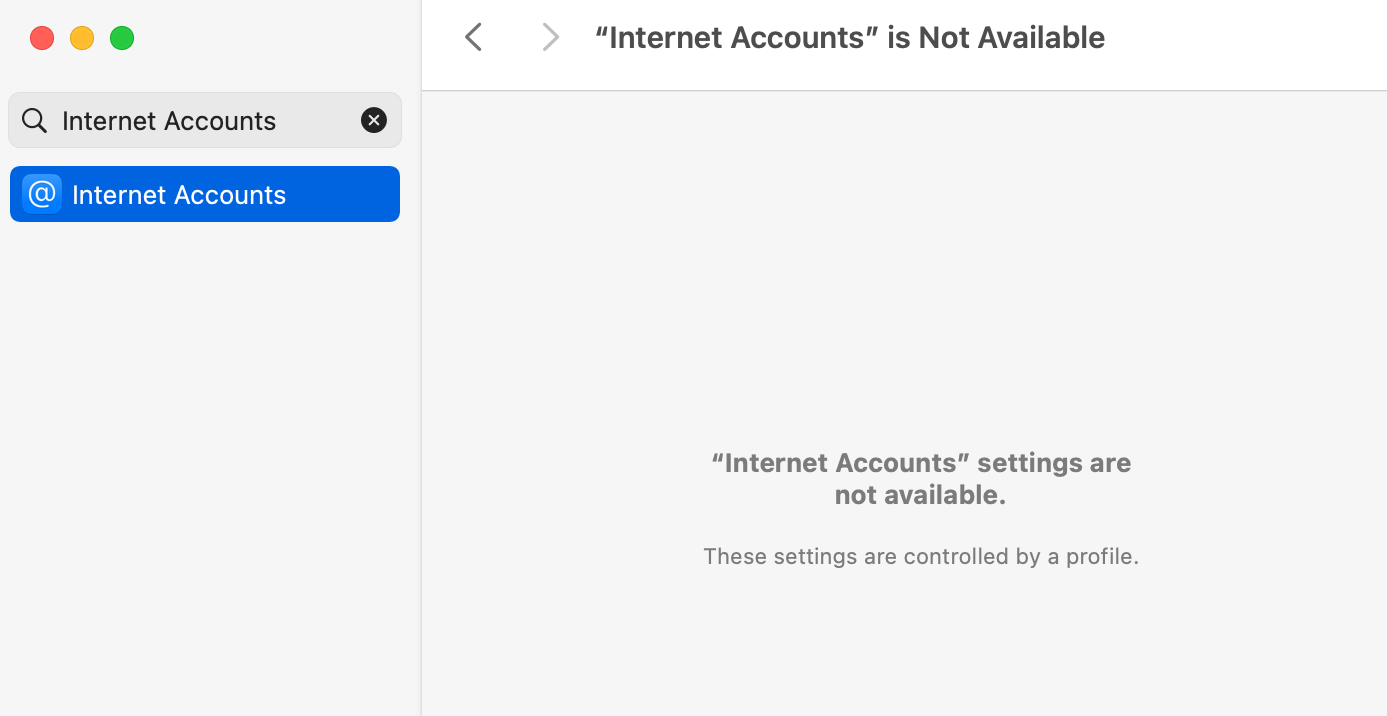
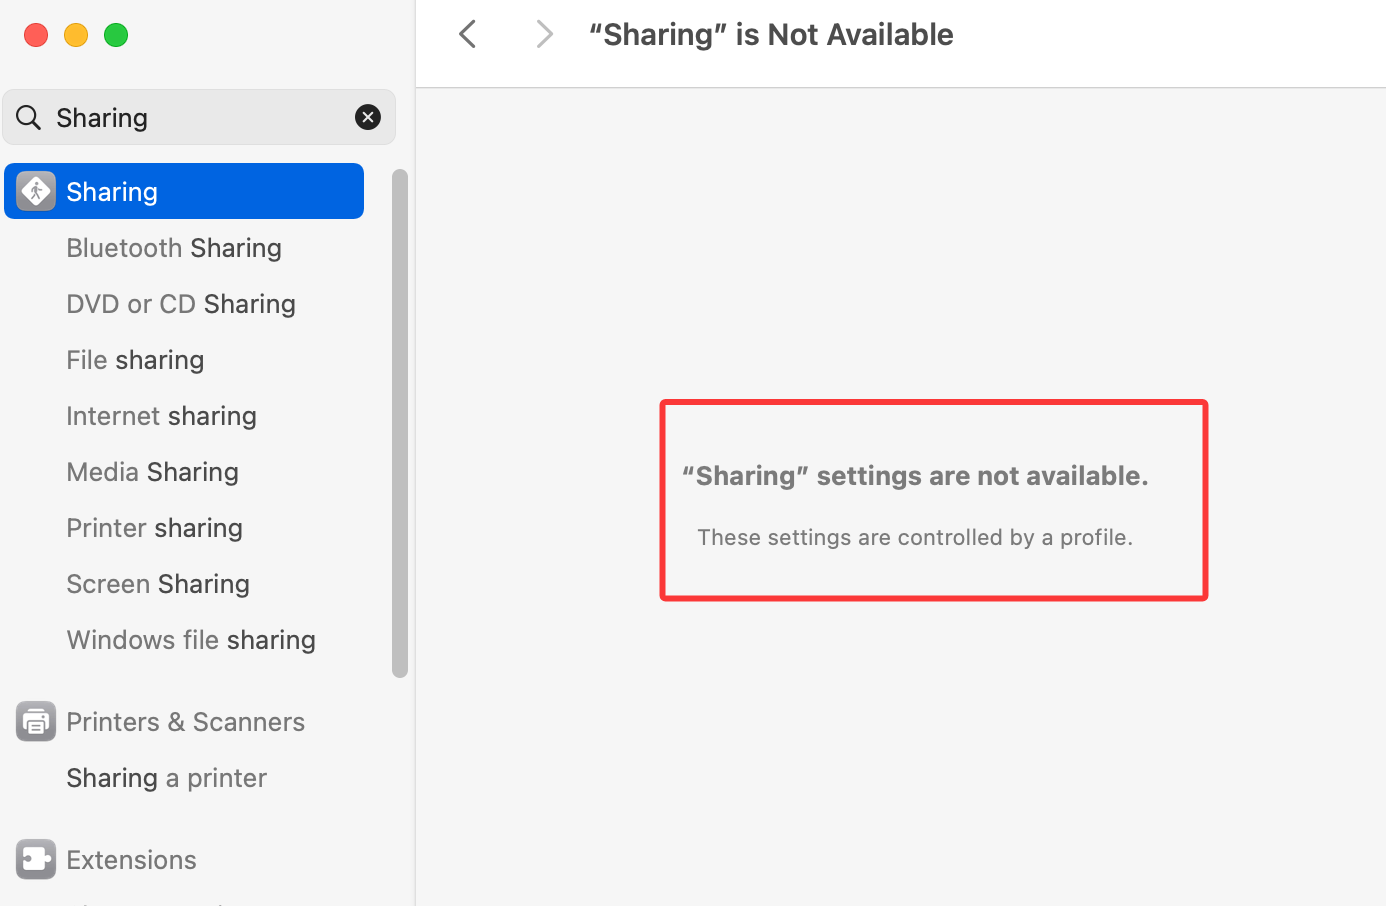
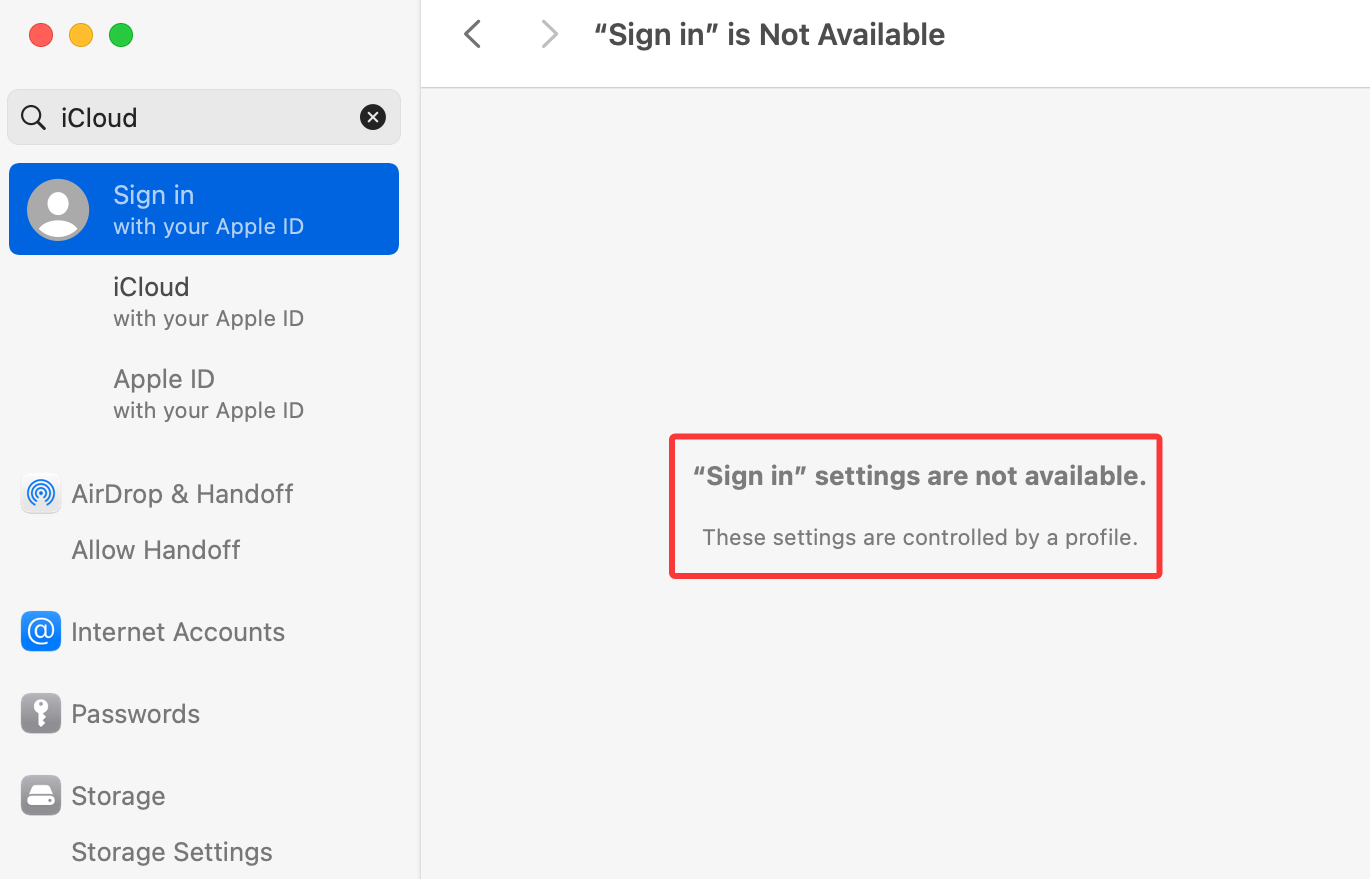
1. After you select this policy and deliver it to the client, the description file, internet accounts, sharing, and iCloud will be disabled and become unavailable.
2. Description file: When you search for the description file on the computer, a message appears indicating that the "Description File" setting is unavailable.
3. Internet accounts: When you search for internet accounts on the computer, a message appears indicating that the "Internet Accounts" setting is unavailable.
4. Sharing: When you search for sharing on the computer, a message appears indicating that the "Sharing" setting is unavailable.
5. iCloud: When you search for iCloud on the computer, a message appears indicating that the "Login" setting is unavailable.
Disable Shared Services
Note:
This is a macOS feature and is not available on Windows.
The policy takes effect only after the MDM file is configured. After the description file is installed, restart the terminal.
1. Select this policy and deliver it. After the terminal receives the policy, the selected sharing services will be disabled.
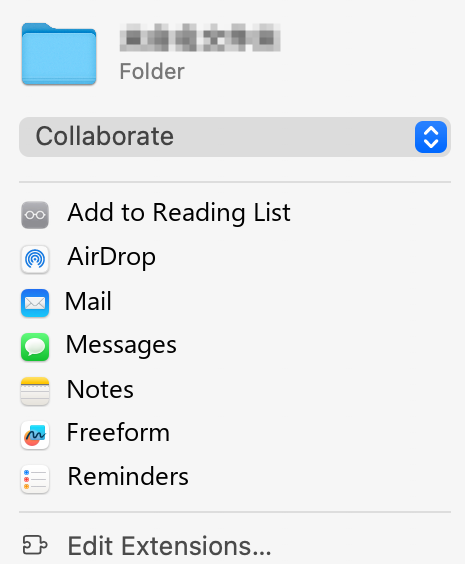
2. Before disabling, the computer supports the sharing feature.
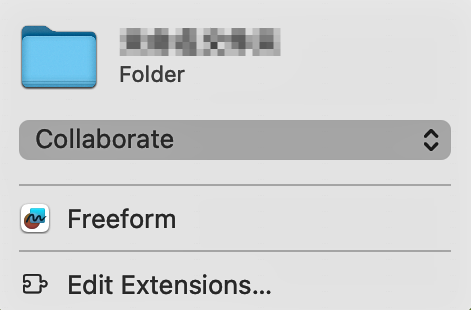
3. After the feature is disabled, the sharing feature becomes unavailable. When you click Sharing, only information, reminders, and edit extensions are displayed.
Disable System Function
Note:
This is a macOS feature and is not available on Windows.
The policy takes effect only after the MDM file is configured. After the description file is installed, restart the terminal.
1. Select this policy and deliver it. After the client receives the policy, the selected system features will be disabled.
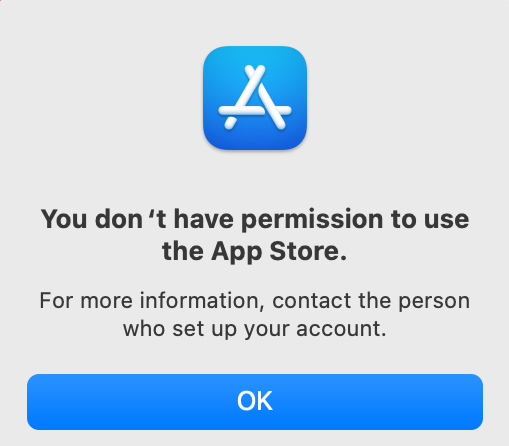
2. App Store: When you open App Store on the computer, a message appears indicating that you do not have permission to use it.
3. iTunes File Sharing: When you open iTunes on the computer, a message appears indicating that you do not have permission to use it.