Building a Simple Notification Scenario: A Practical Tutorial
Baixar
Modo Foco
Tamanho da Fonte
Overview
This document aims to help you quickly start with AI Voice Agent and implement its application in outbound scenarios, providing process guidance from preparation to call data analysis. You can learn about product features through Introducing AI Voice Agent. This article includes the following content: preparation, simple notification scenario Intelligent Agent setup, outbound call task creation, and call data analysis.
Prerequisites
1. Log in to Tencent Cloud and create a Voice application.
2. Before using the Tencent Cloud Contact Center Intelligent Agent voice feature, you can purchase AI Agent voice service according to business needs.
3. Calling an AI Agent outbound requires number access SIP Trunk.
4. After completing application creation and purchase, go to the management panel page.
Build a Simple Notification Scenario Agent
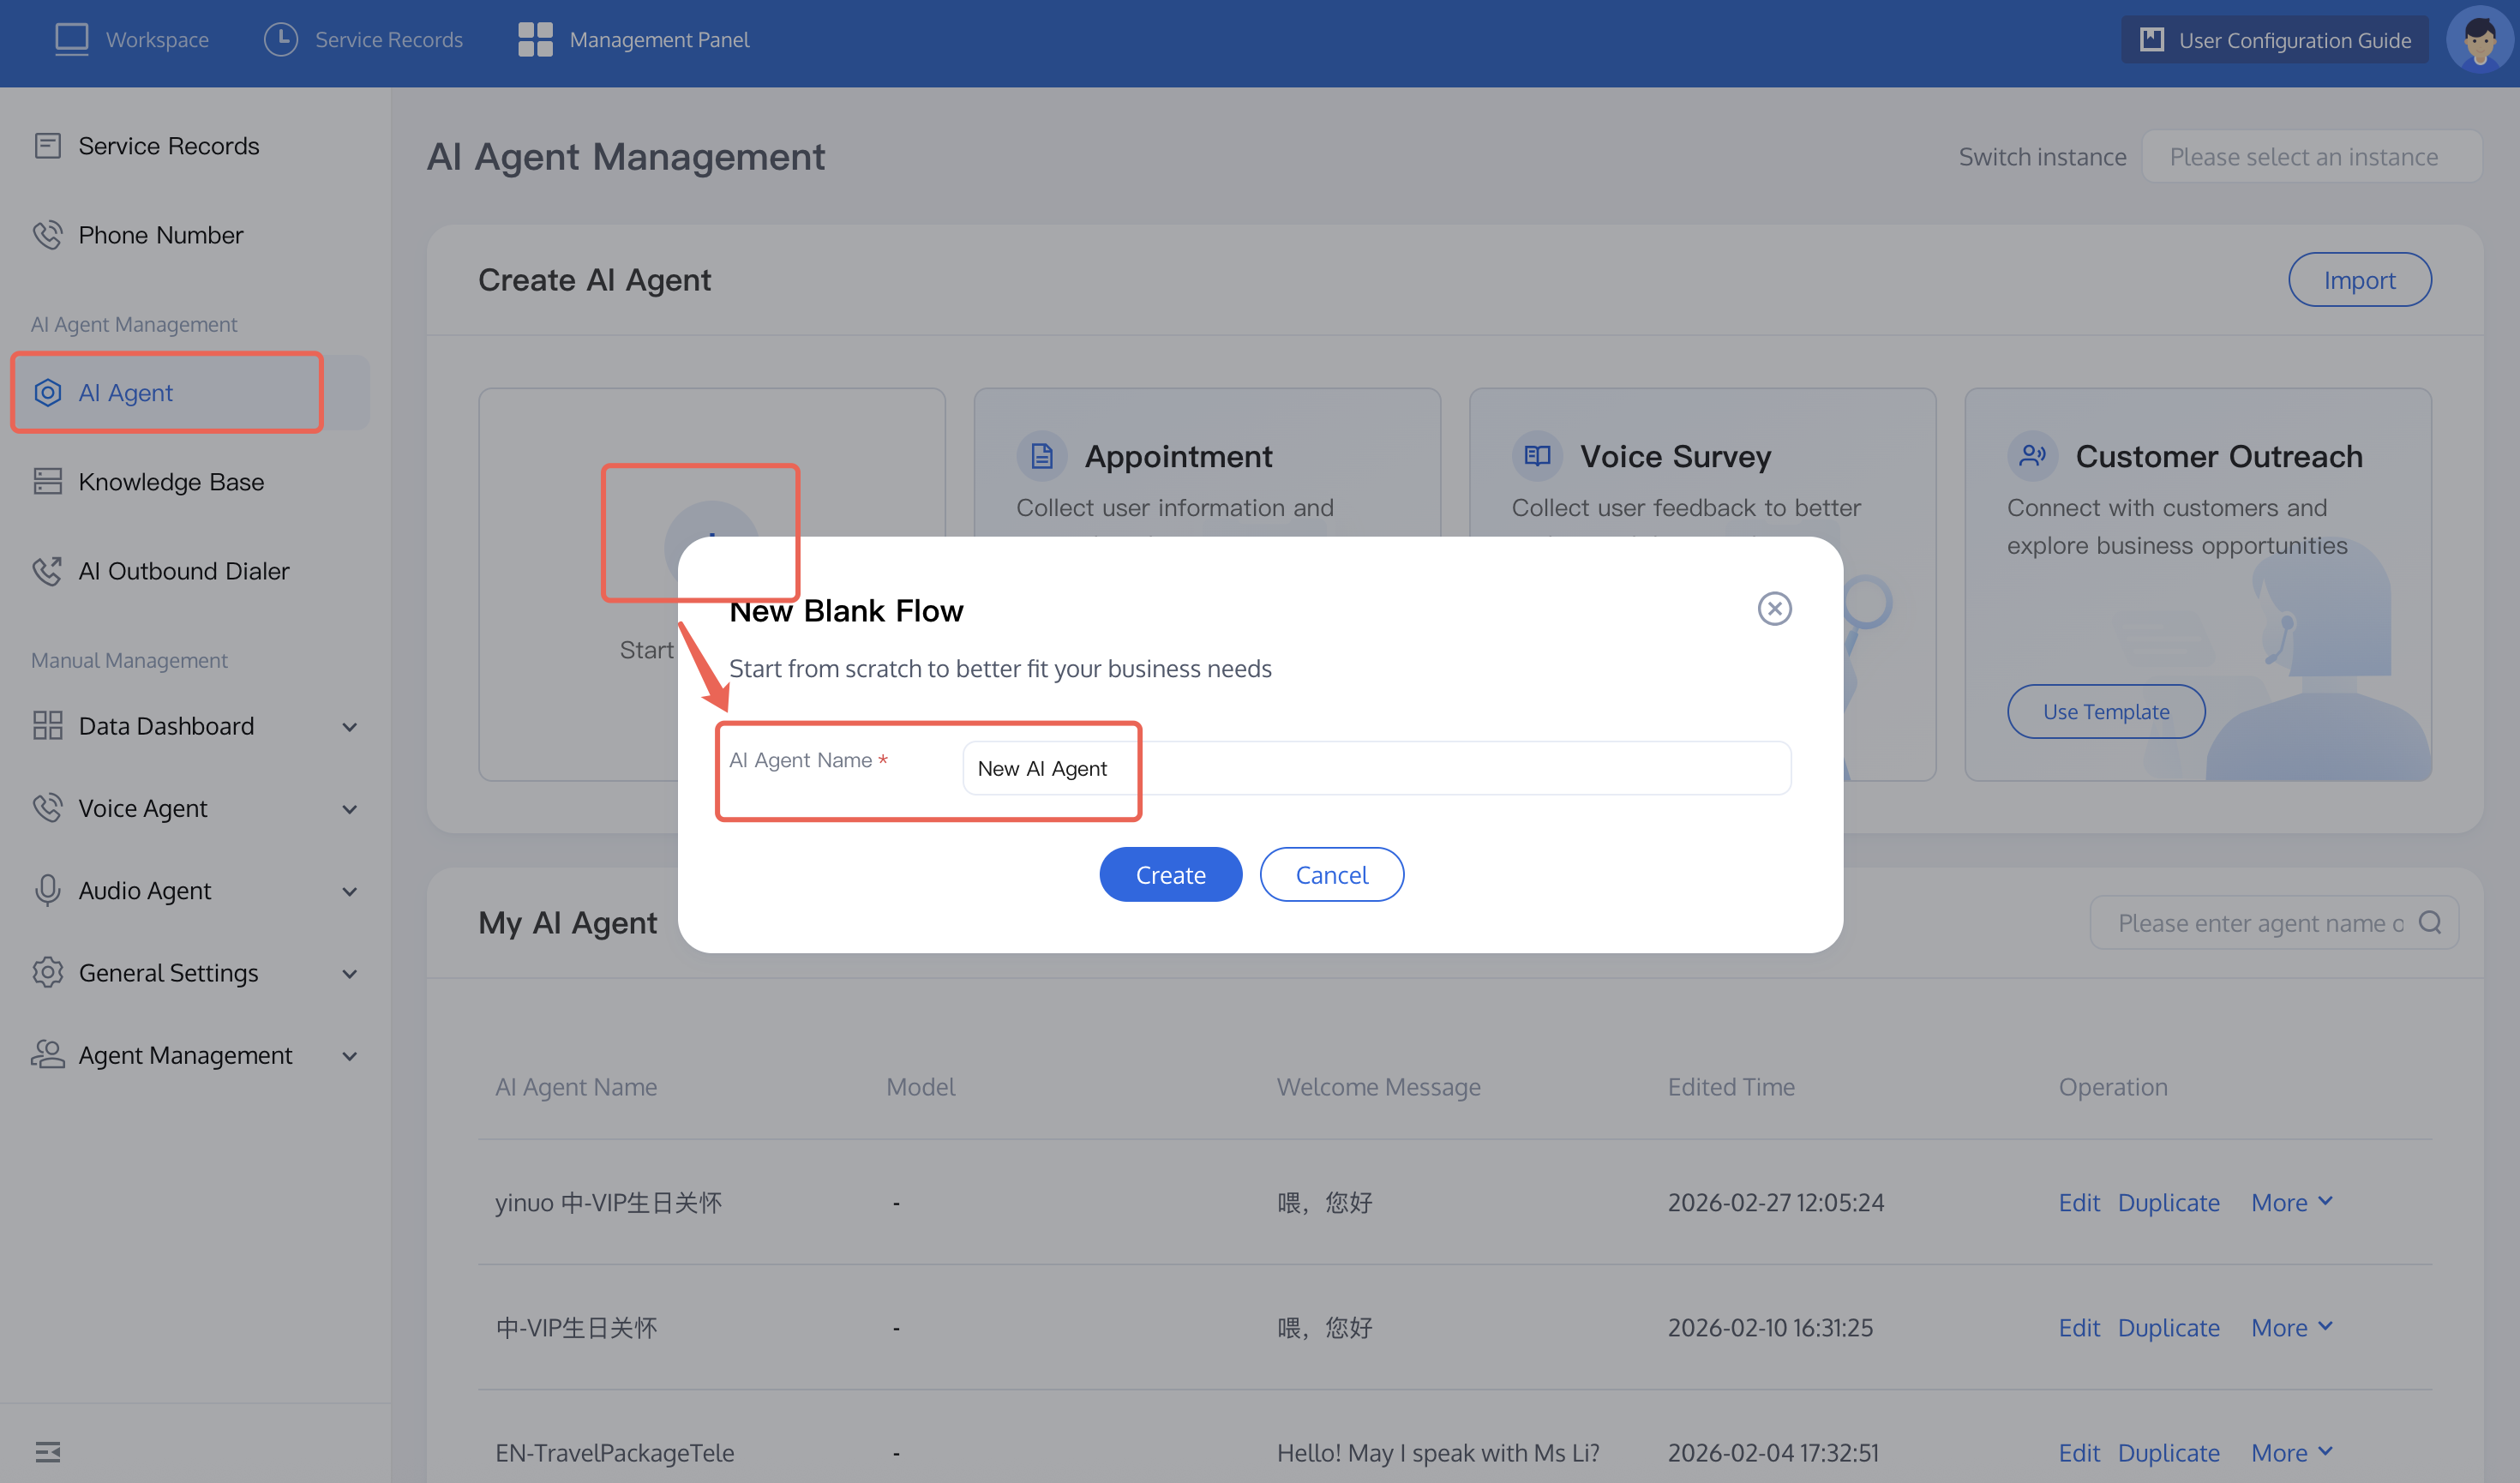
1. Create an AI Agent: Click AI Agent Management on the left side of the management console, then click Create a New AI Agent. Fill in the AI Agent name (for example: Simple Notification) in the pop-up. The system will automatically create a blank process canvas for you.
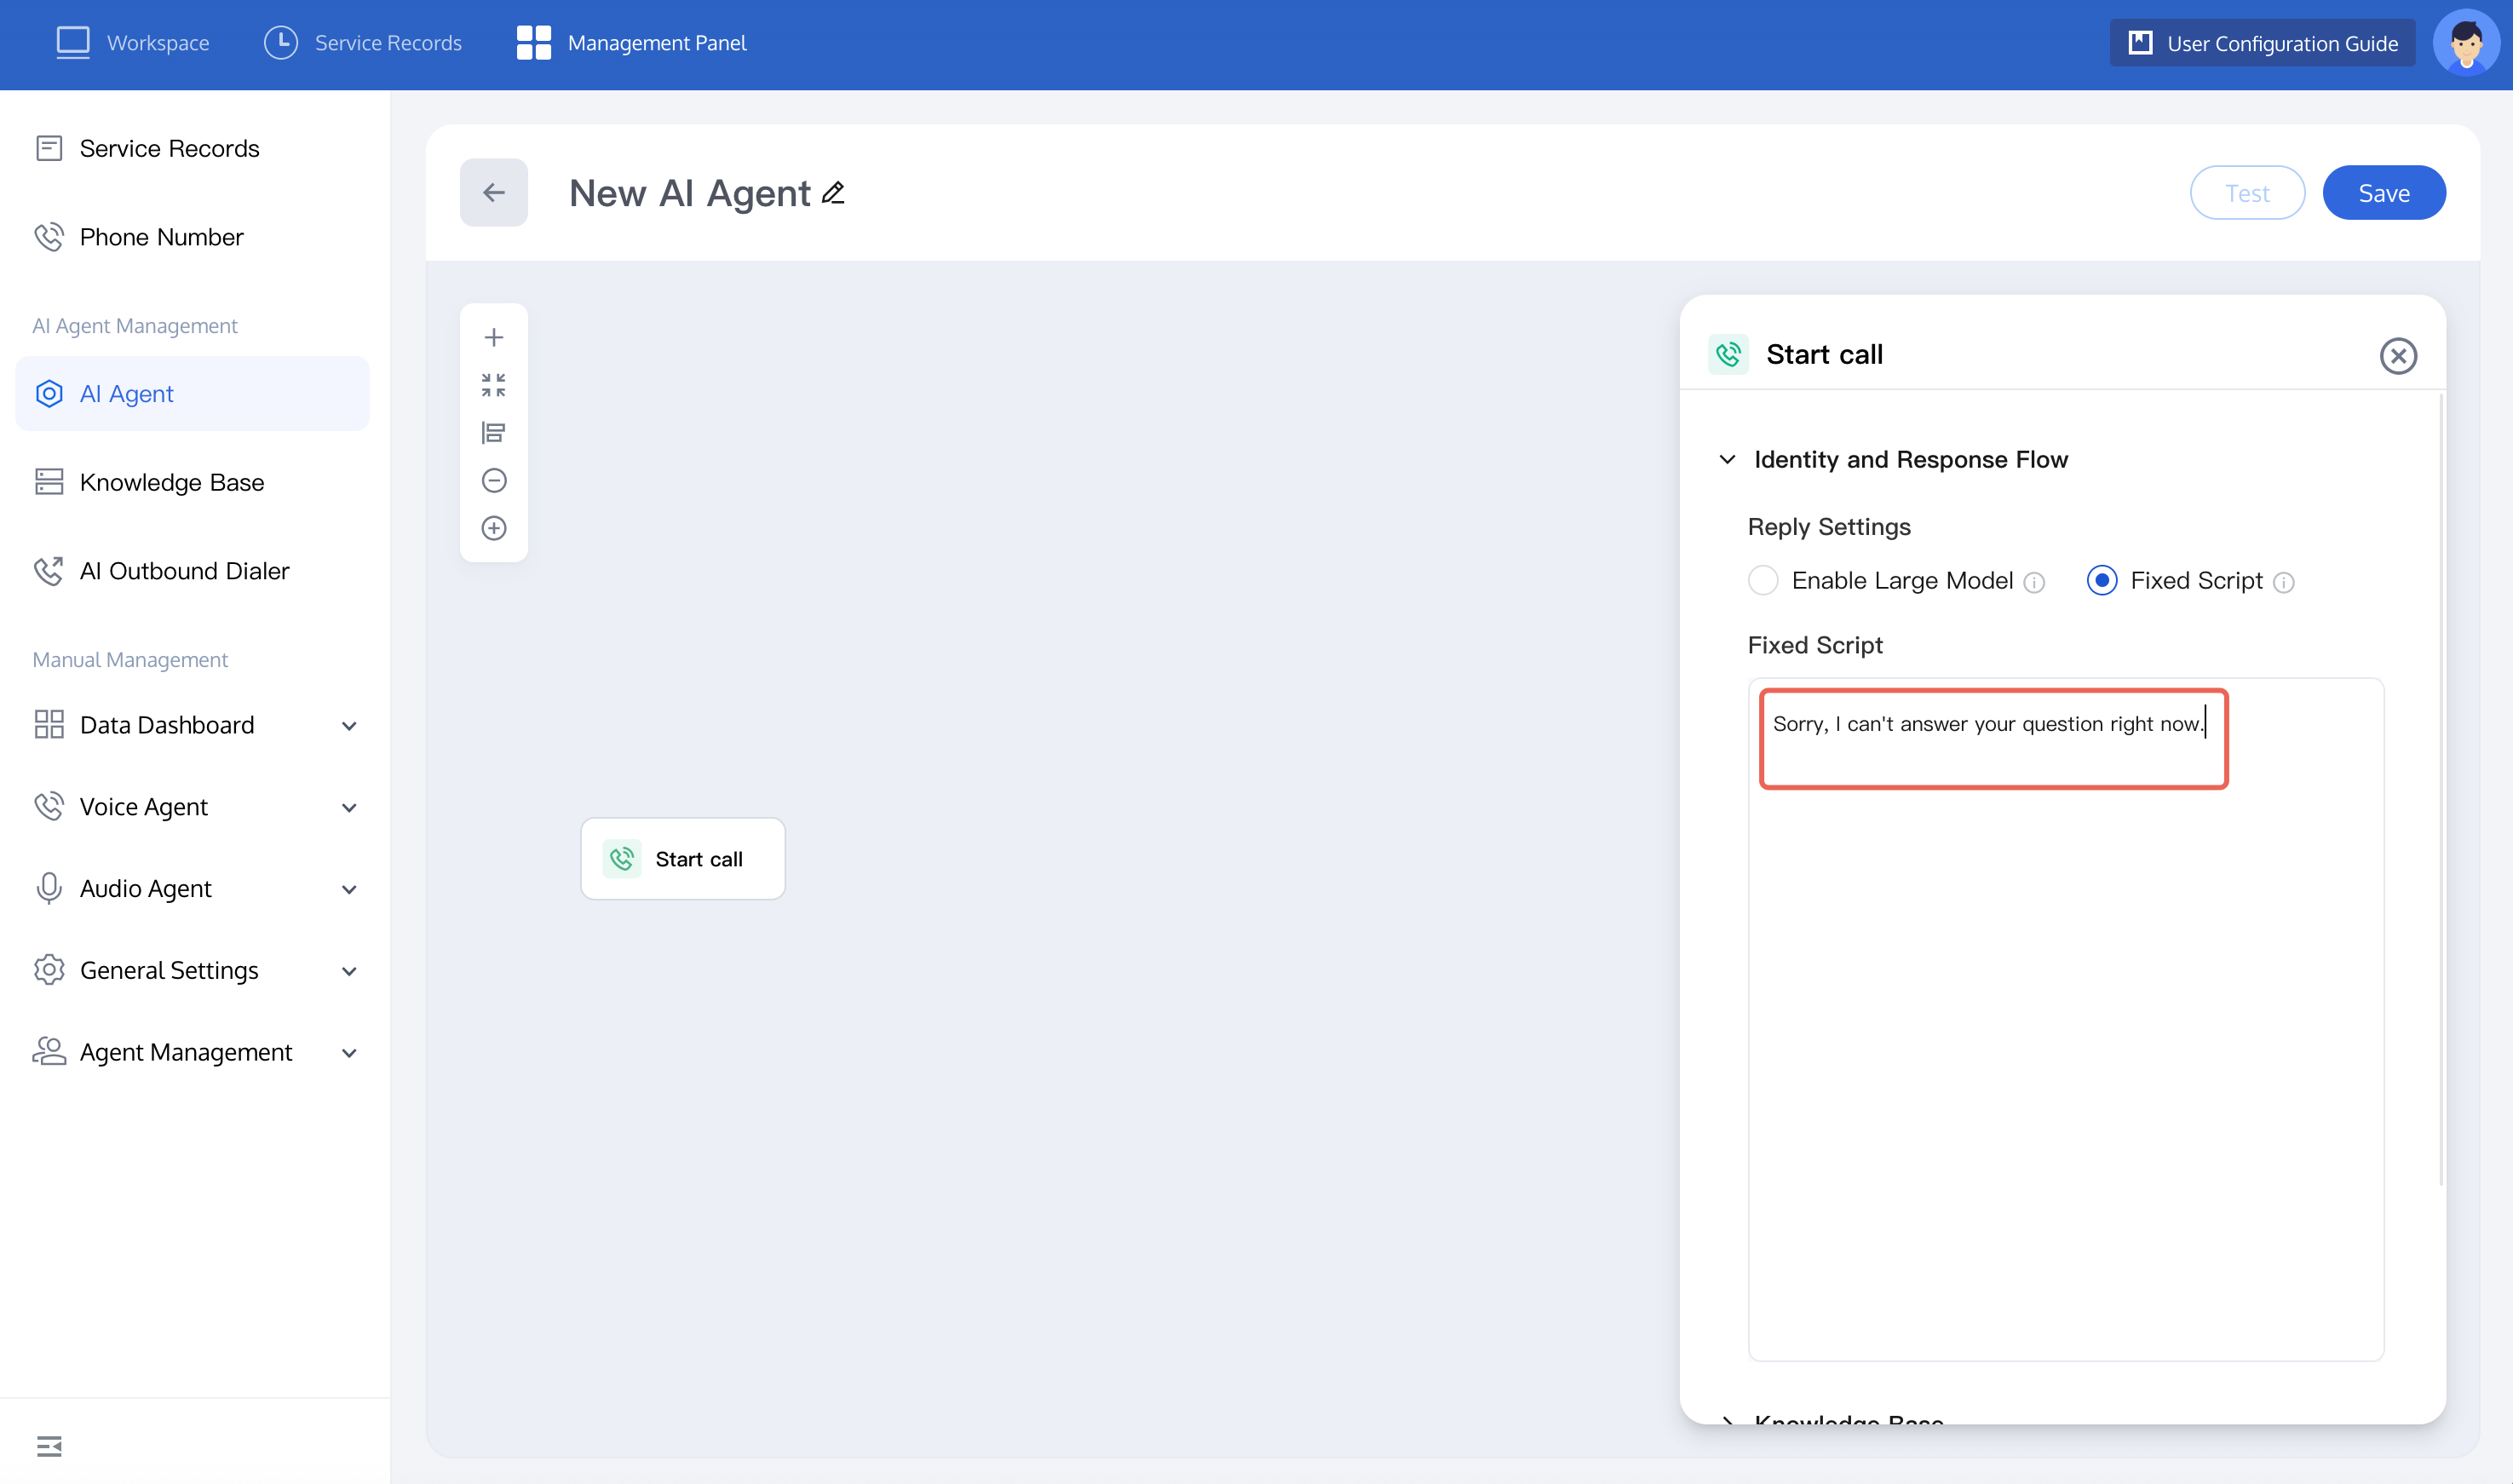
2. Next, take a logistics company notifying users of package arrival at the station as an example to build an AI Agent. Since this scenario does not require dialogue with users, just select fixed script.
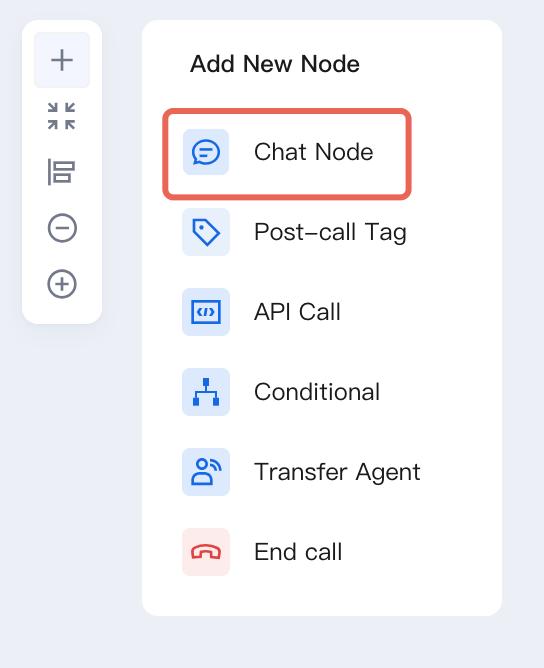
3. Click the plus sign in the upper-left corner to add a dialogue node.
Refer to the image, enter your custom script and set the user reply category, connect the start call node with the newly added dialogue node, and disable the Listen to User Reply button.
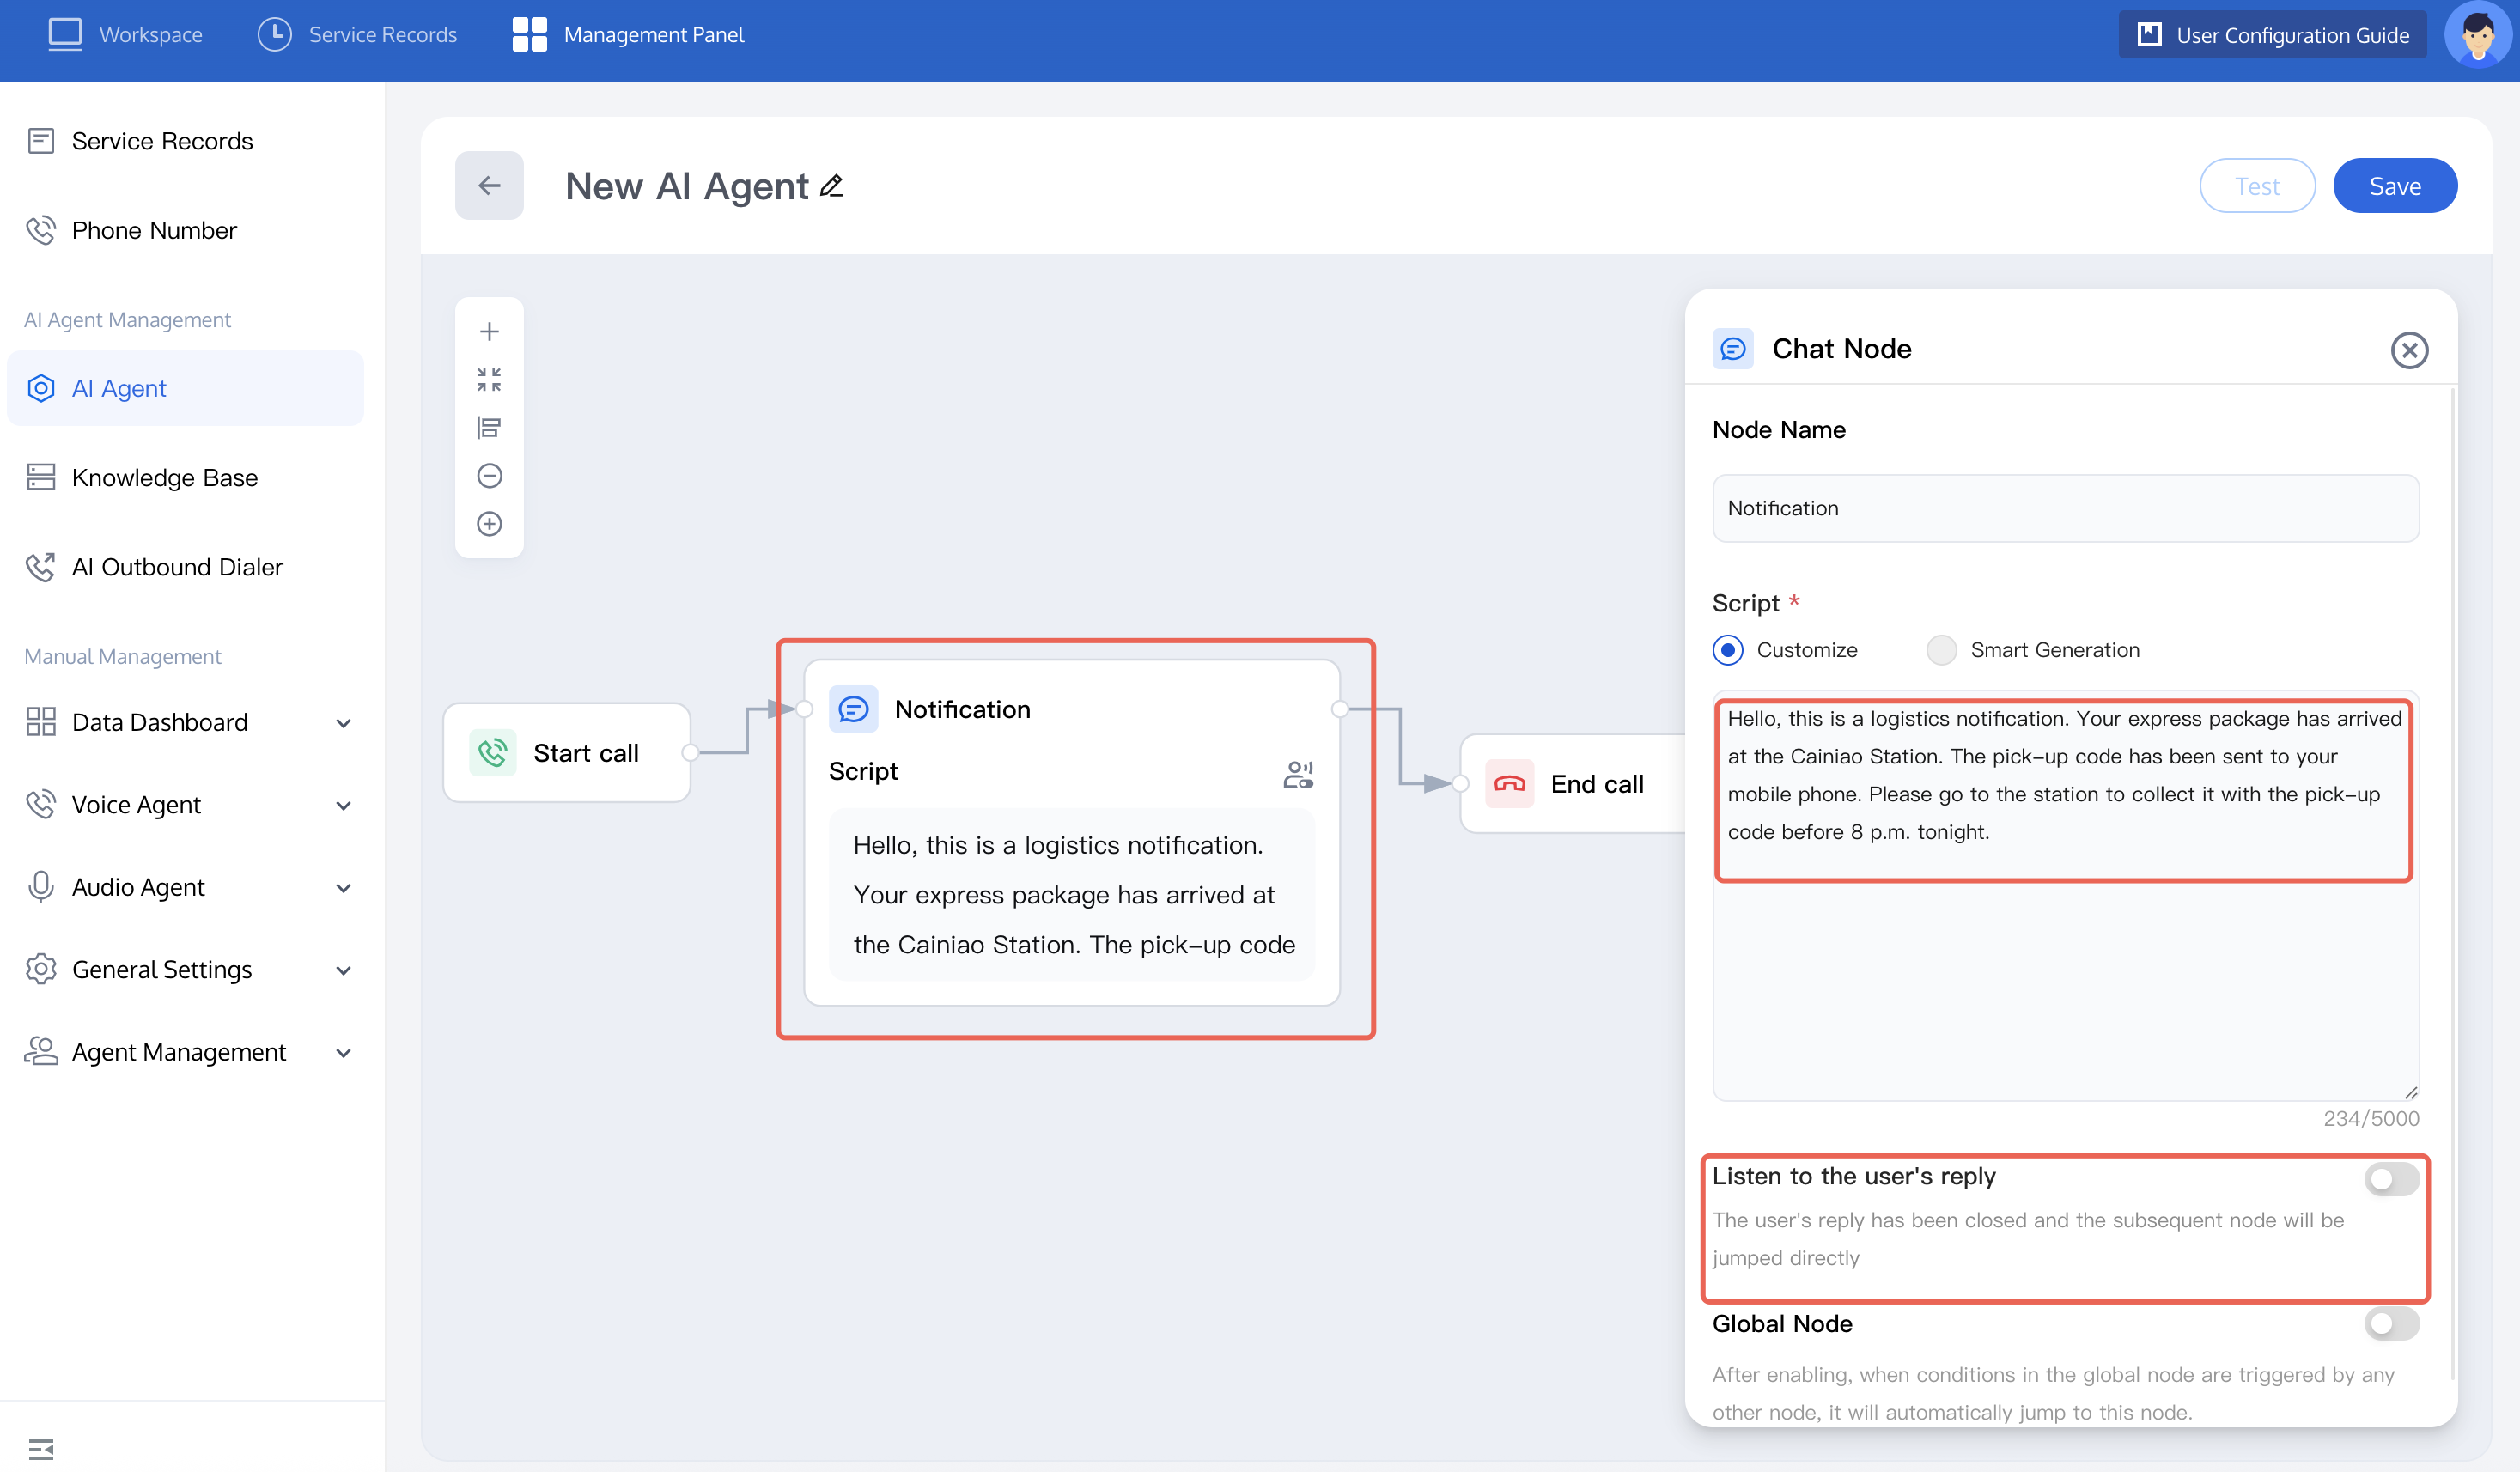
4. Click the plus sign in the upper-left corner to add an End Call node, then connect the user reply category node to the End Call node.
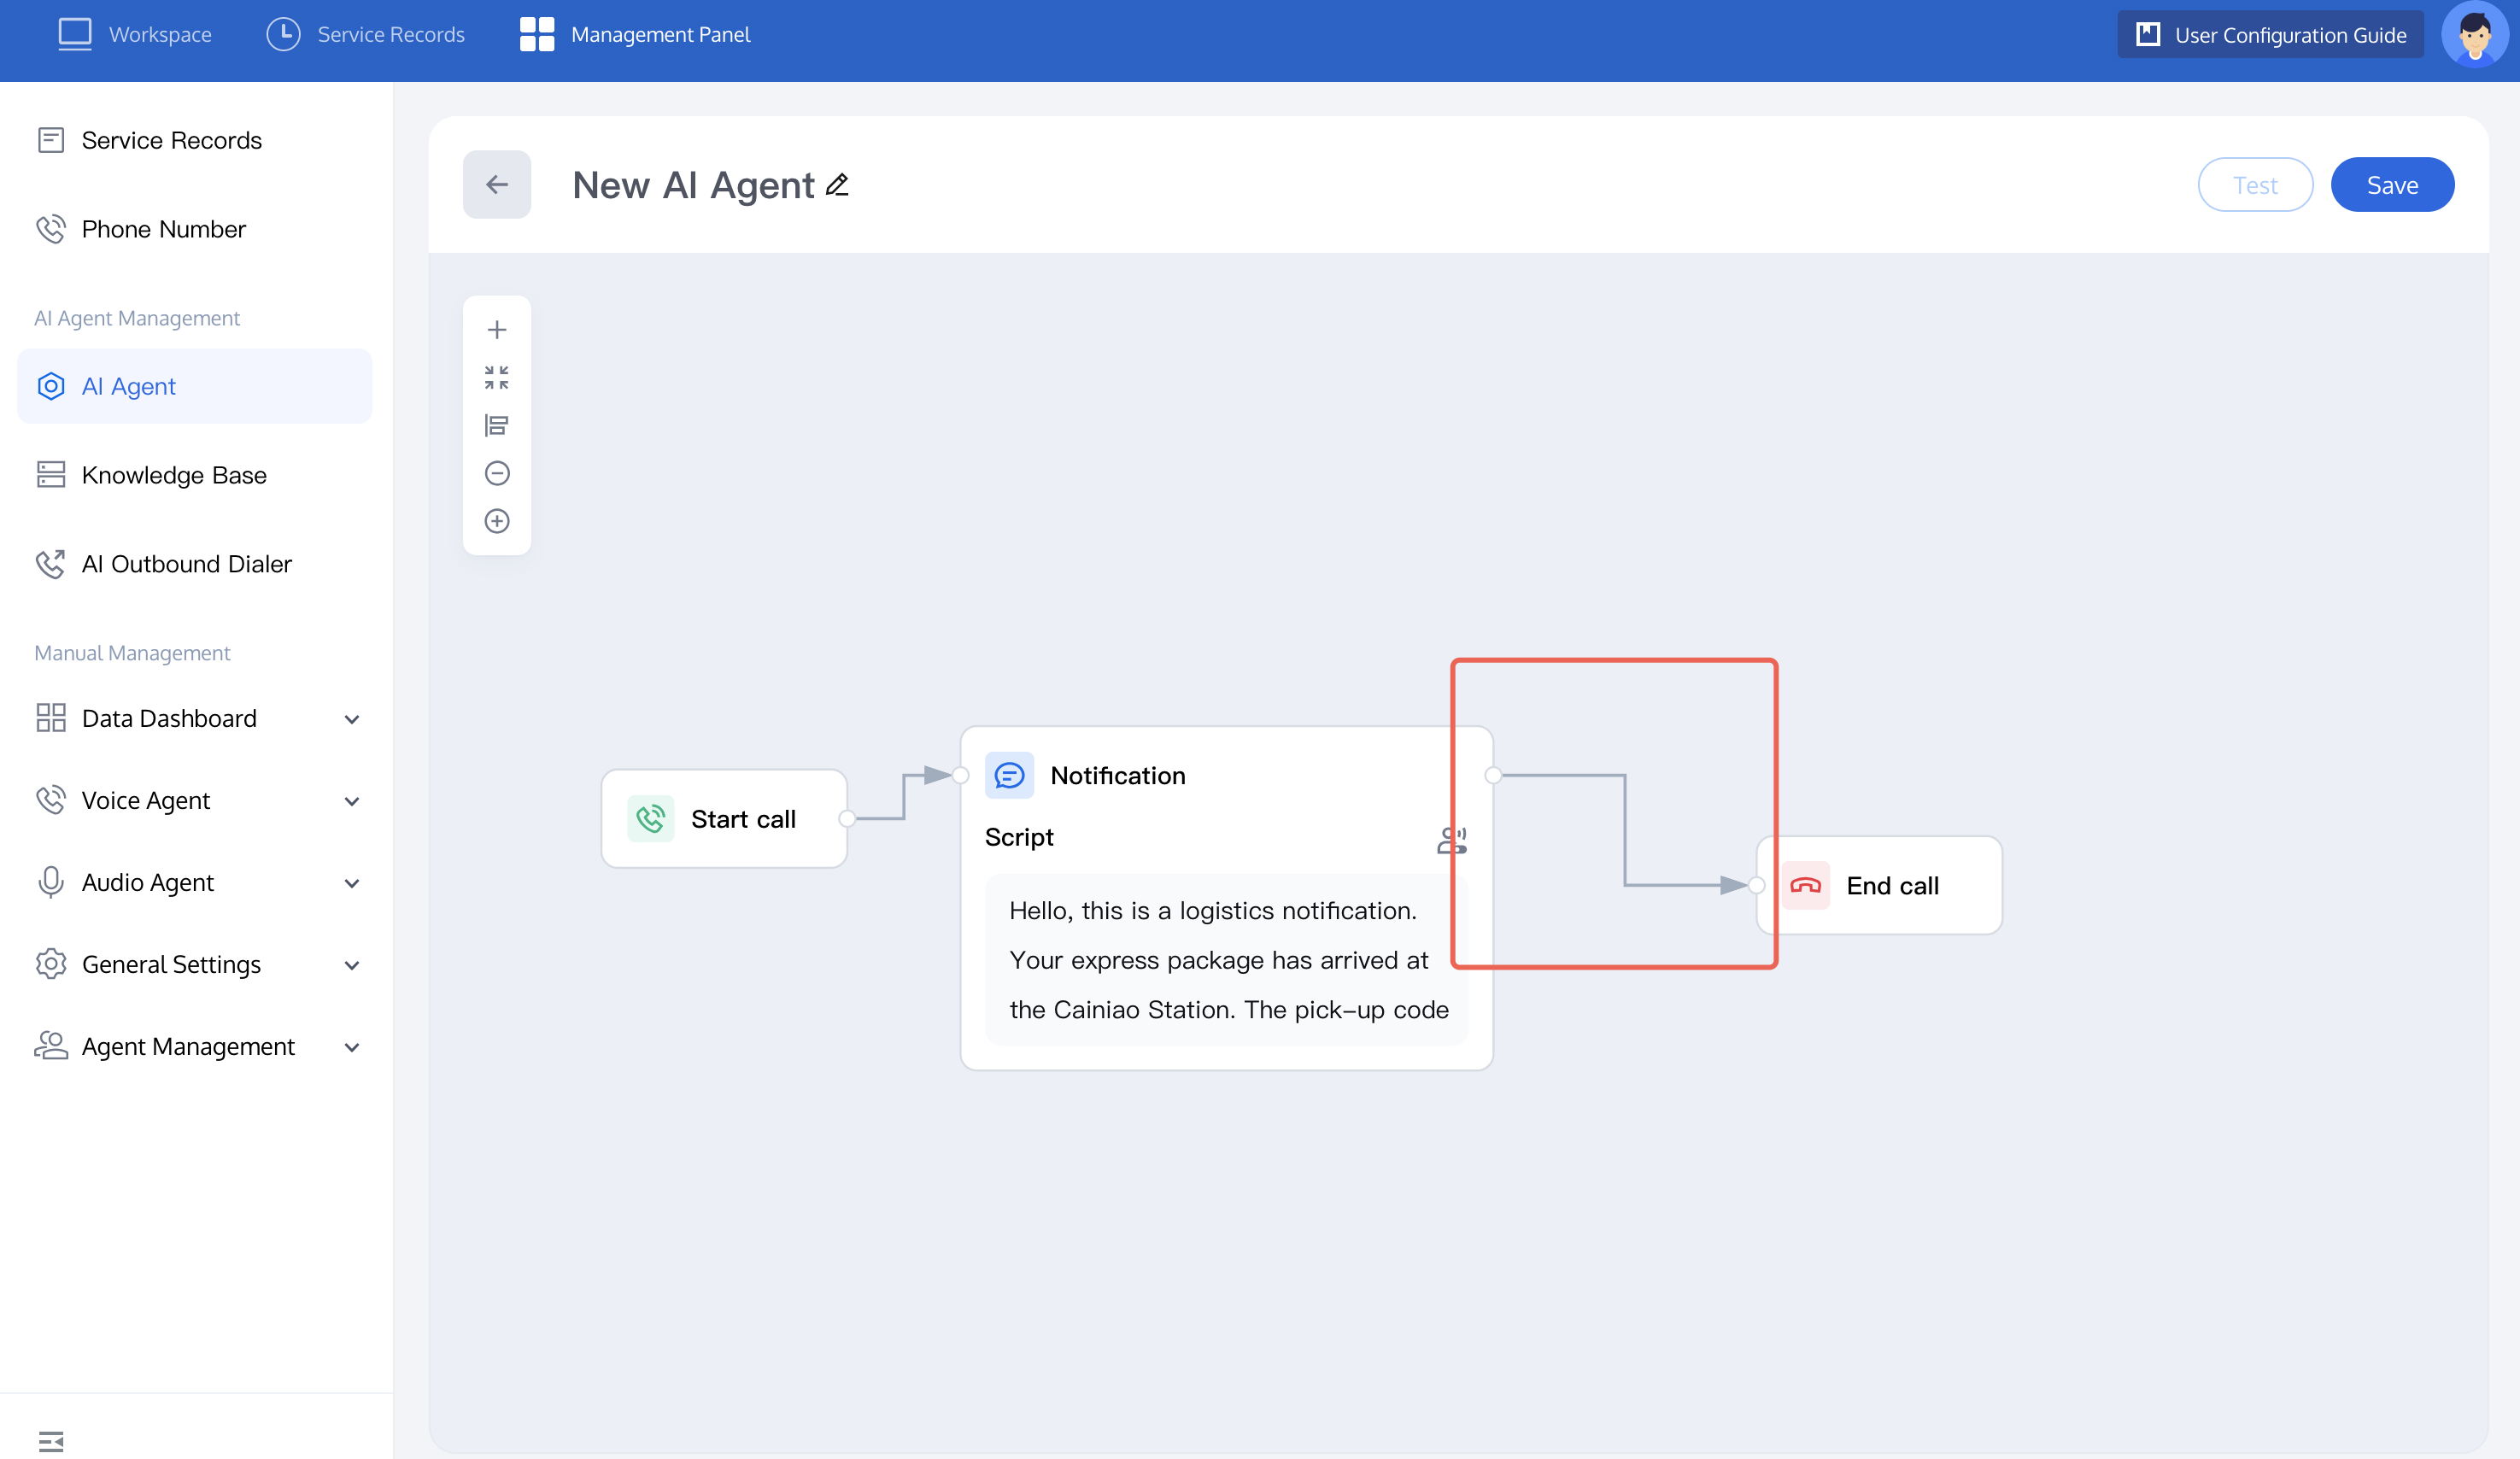
5. If you want to learn more about each node feature, you can refer to the node introduction. After setup is complete, you can test the conversation effect of this AI Agent. For specific operations, refer to Test Conversation Effect.
Creating an Outbound Call Task
1. After creating a customer operation outbound call Intelligent Agent, you can create outbound call tasks according to business needs (Create a single Intelligent Agent call or Create a bulk automatic outbound call task).
2. Variable Substitution: When uploading the called list, you can set variable columns to provide personalized scripts for different users, such as addressing them by surname and gender (such as Mr. Li and Ms. Wang). When creating the AI Agent, set the variable name you want to replace. The variable format is
${variable name}, for example, ${name}, ${gender}. You can create different variables based on your business needs.For specific operations, refer to the figure below:
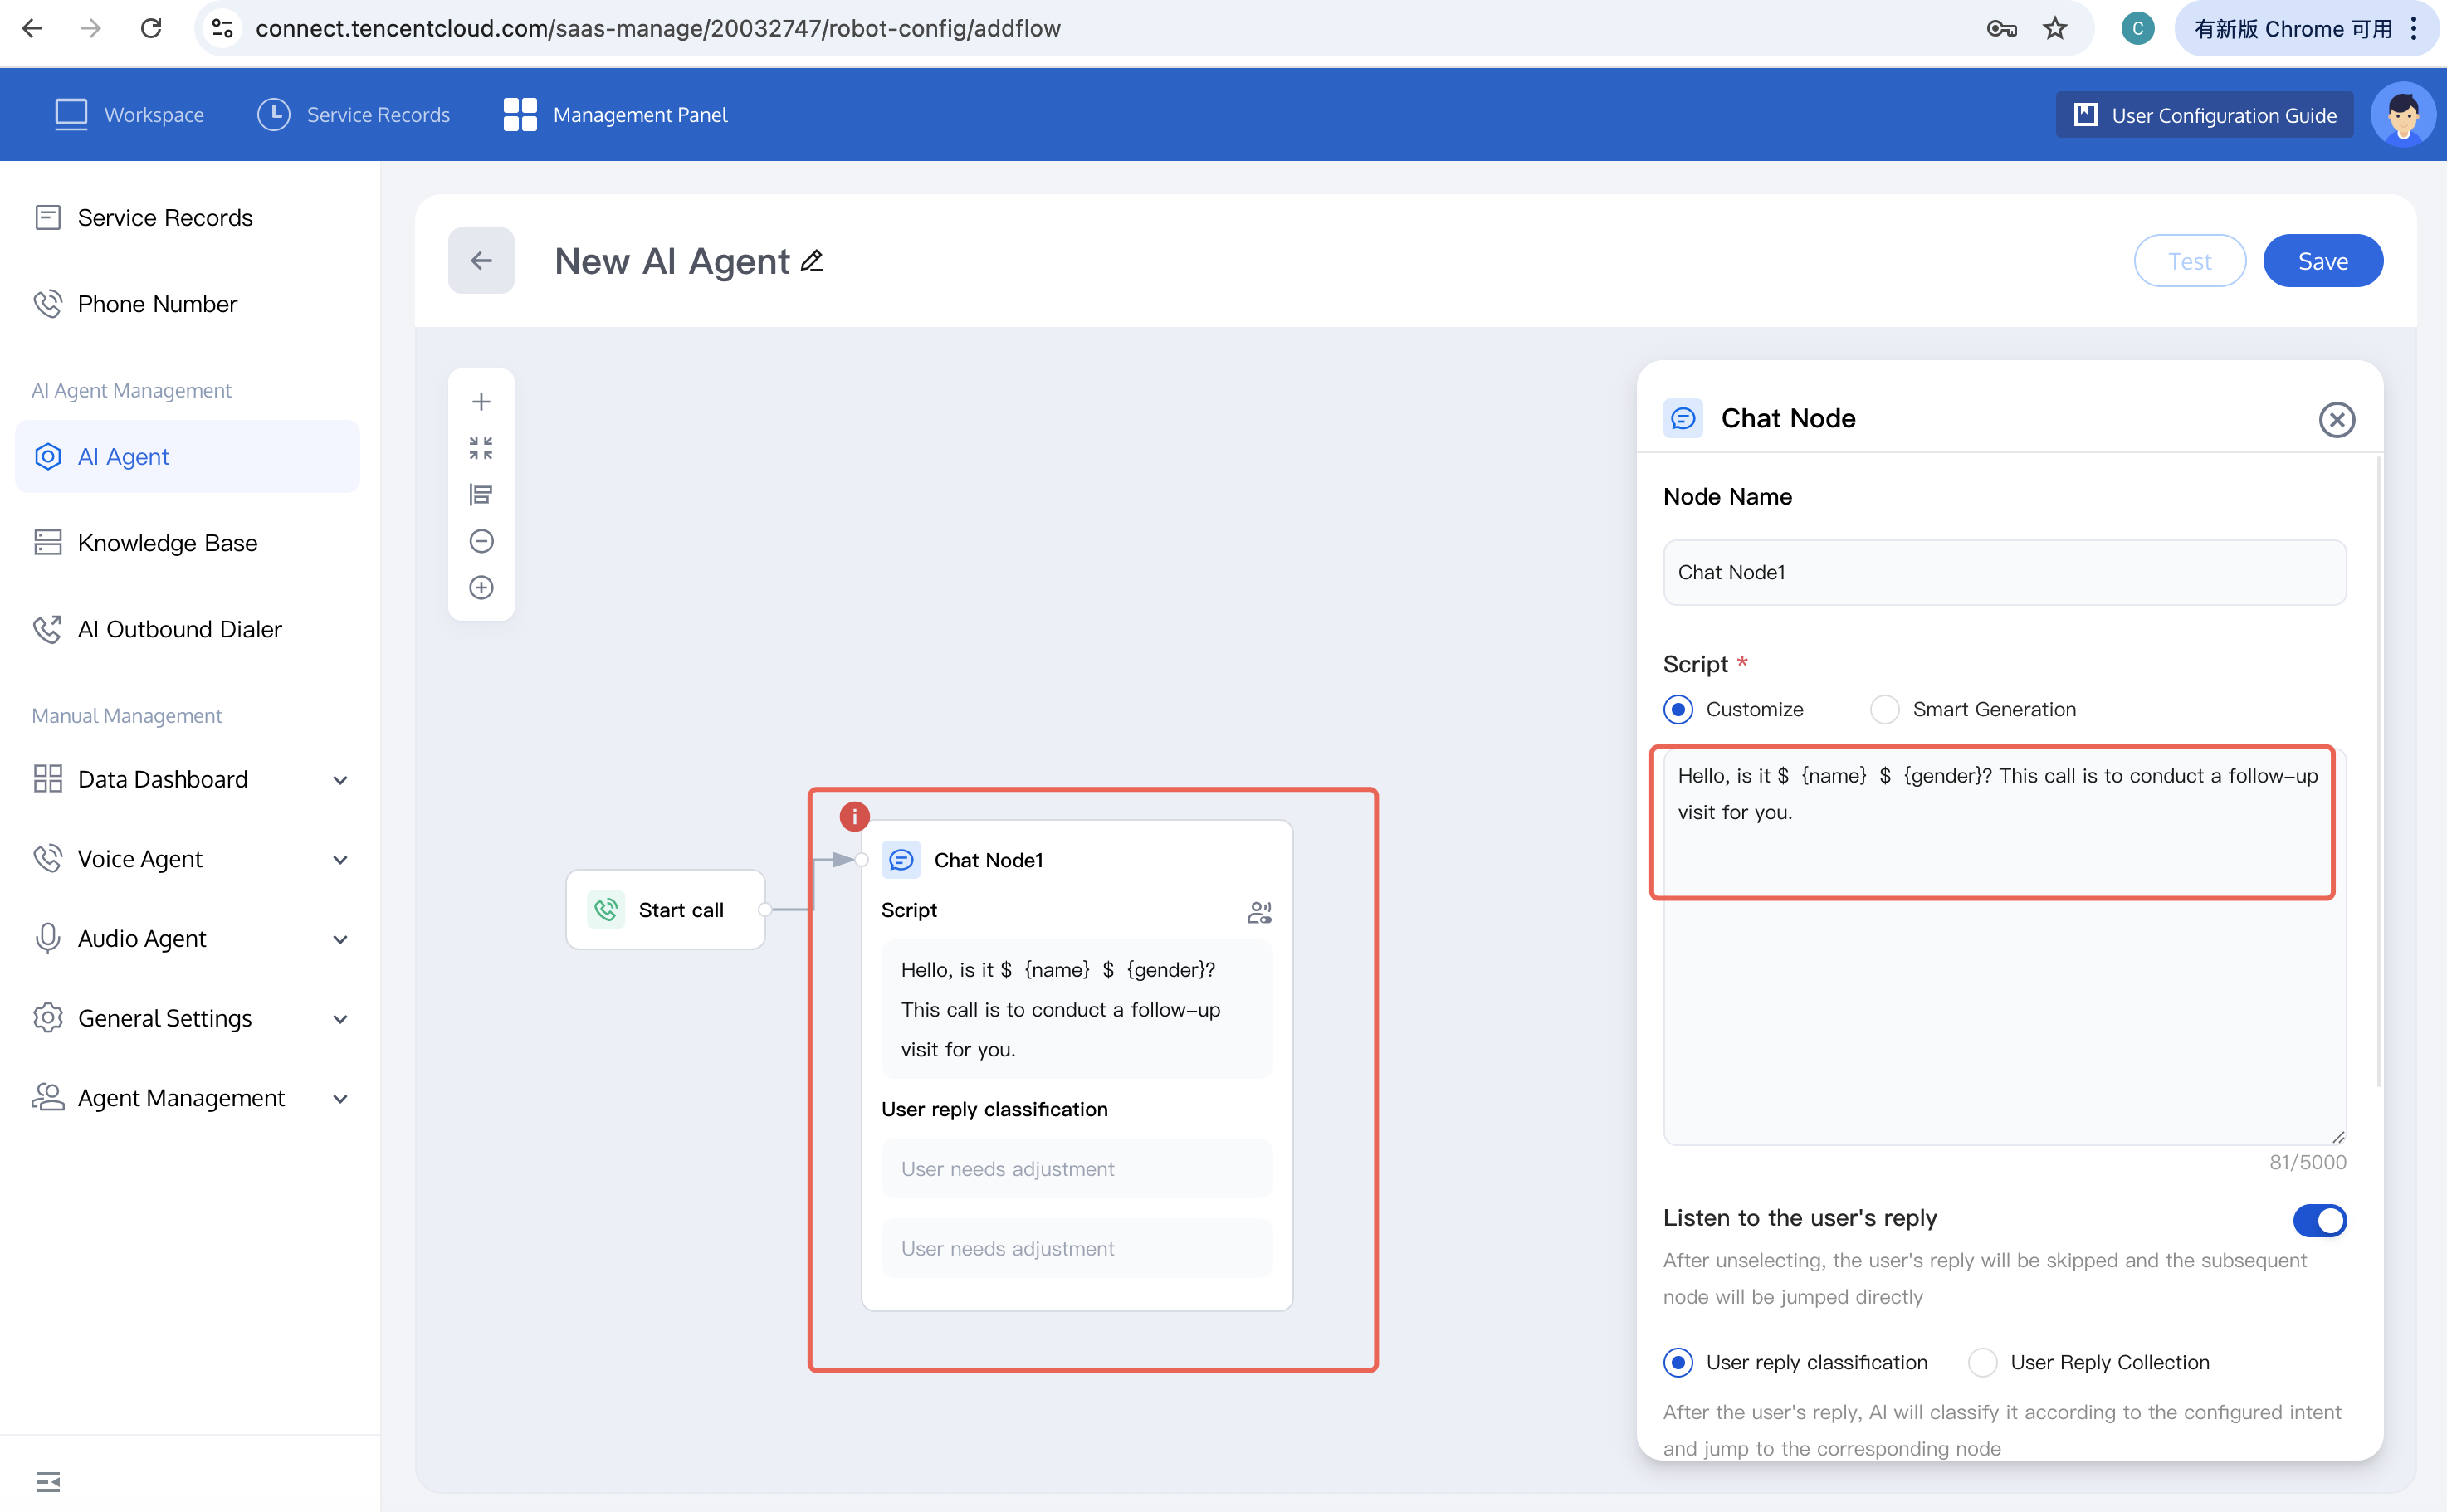
When editing the called list, you need to enter the variable name and variable value, for example,
name: Li; gender: Mr..
Effect: The broadcast script for this node is: Hello, is this Mr. Li? I'm calling to conduct a follow-up with you.
Call Data Analysis
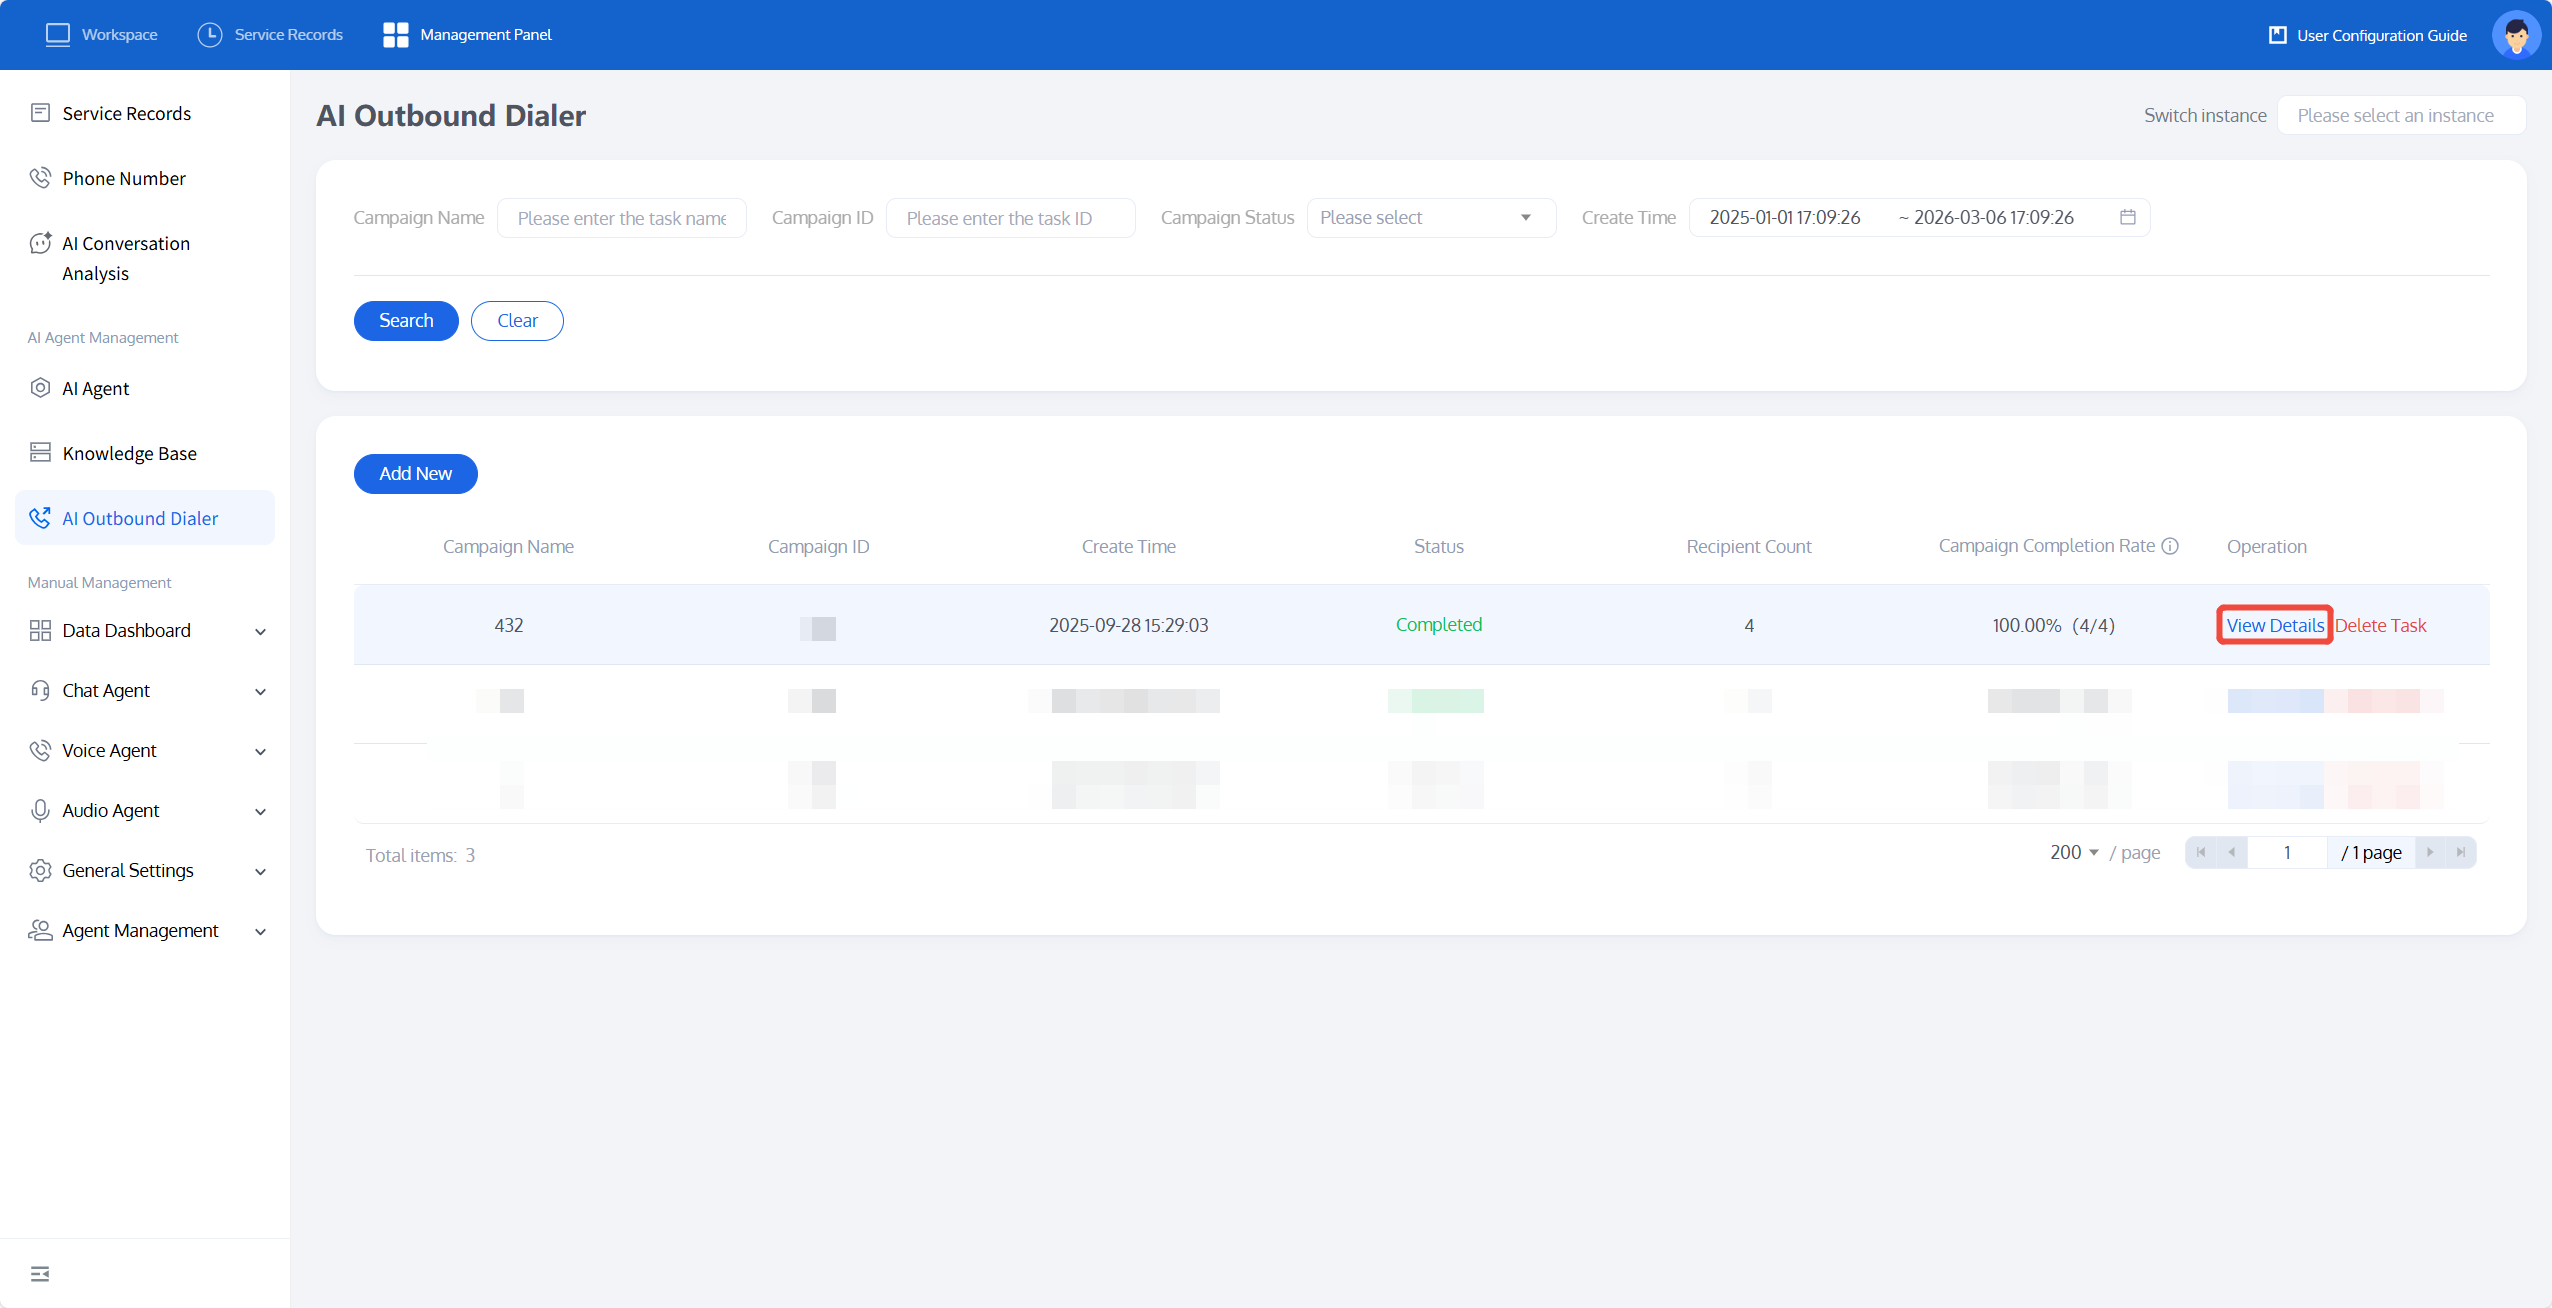
After creating and executing an AI Agent outbound task, you can view the dialogue data:
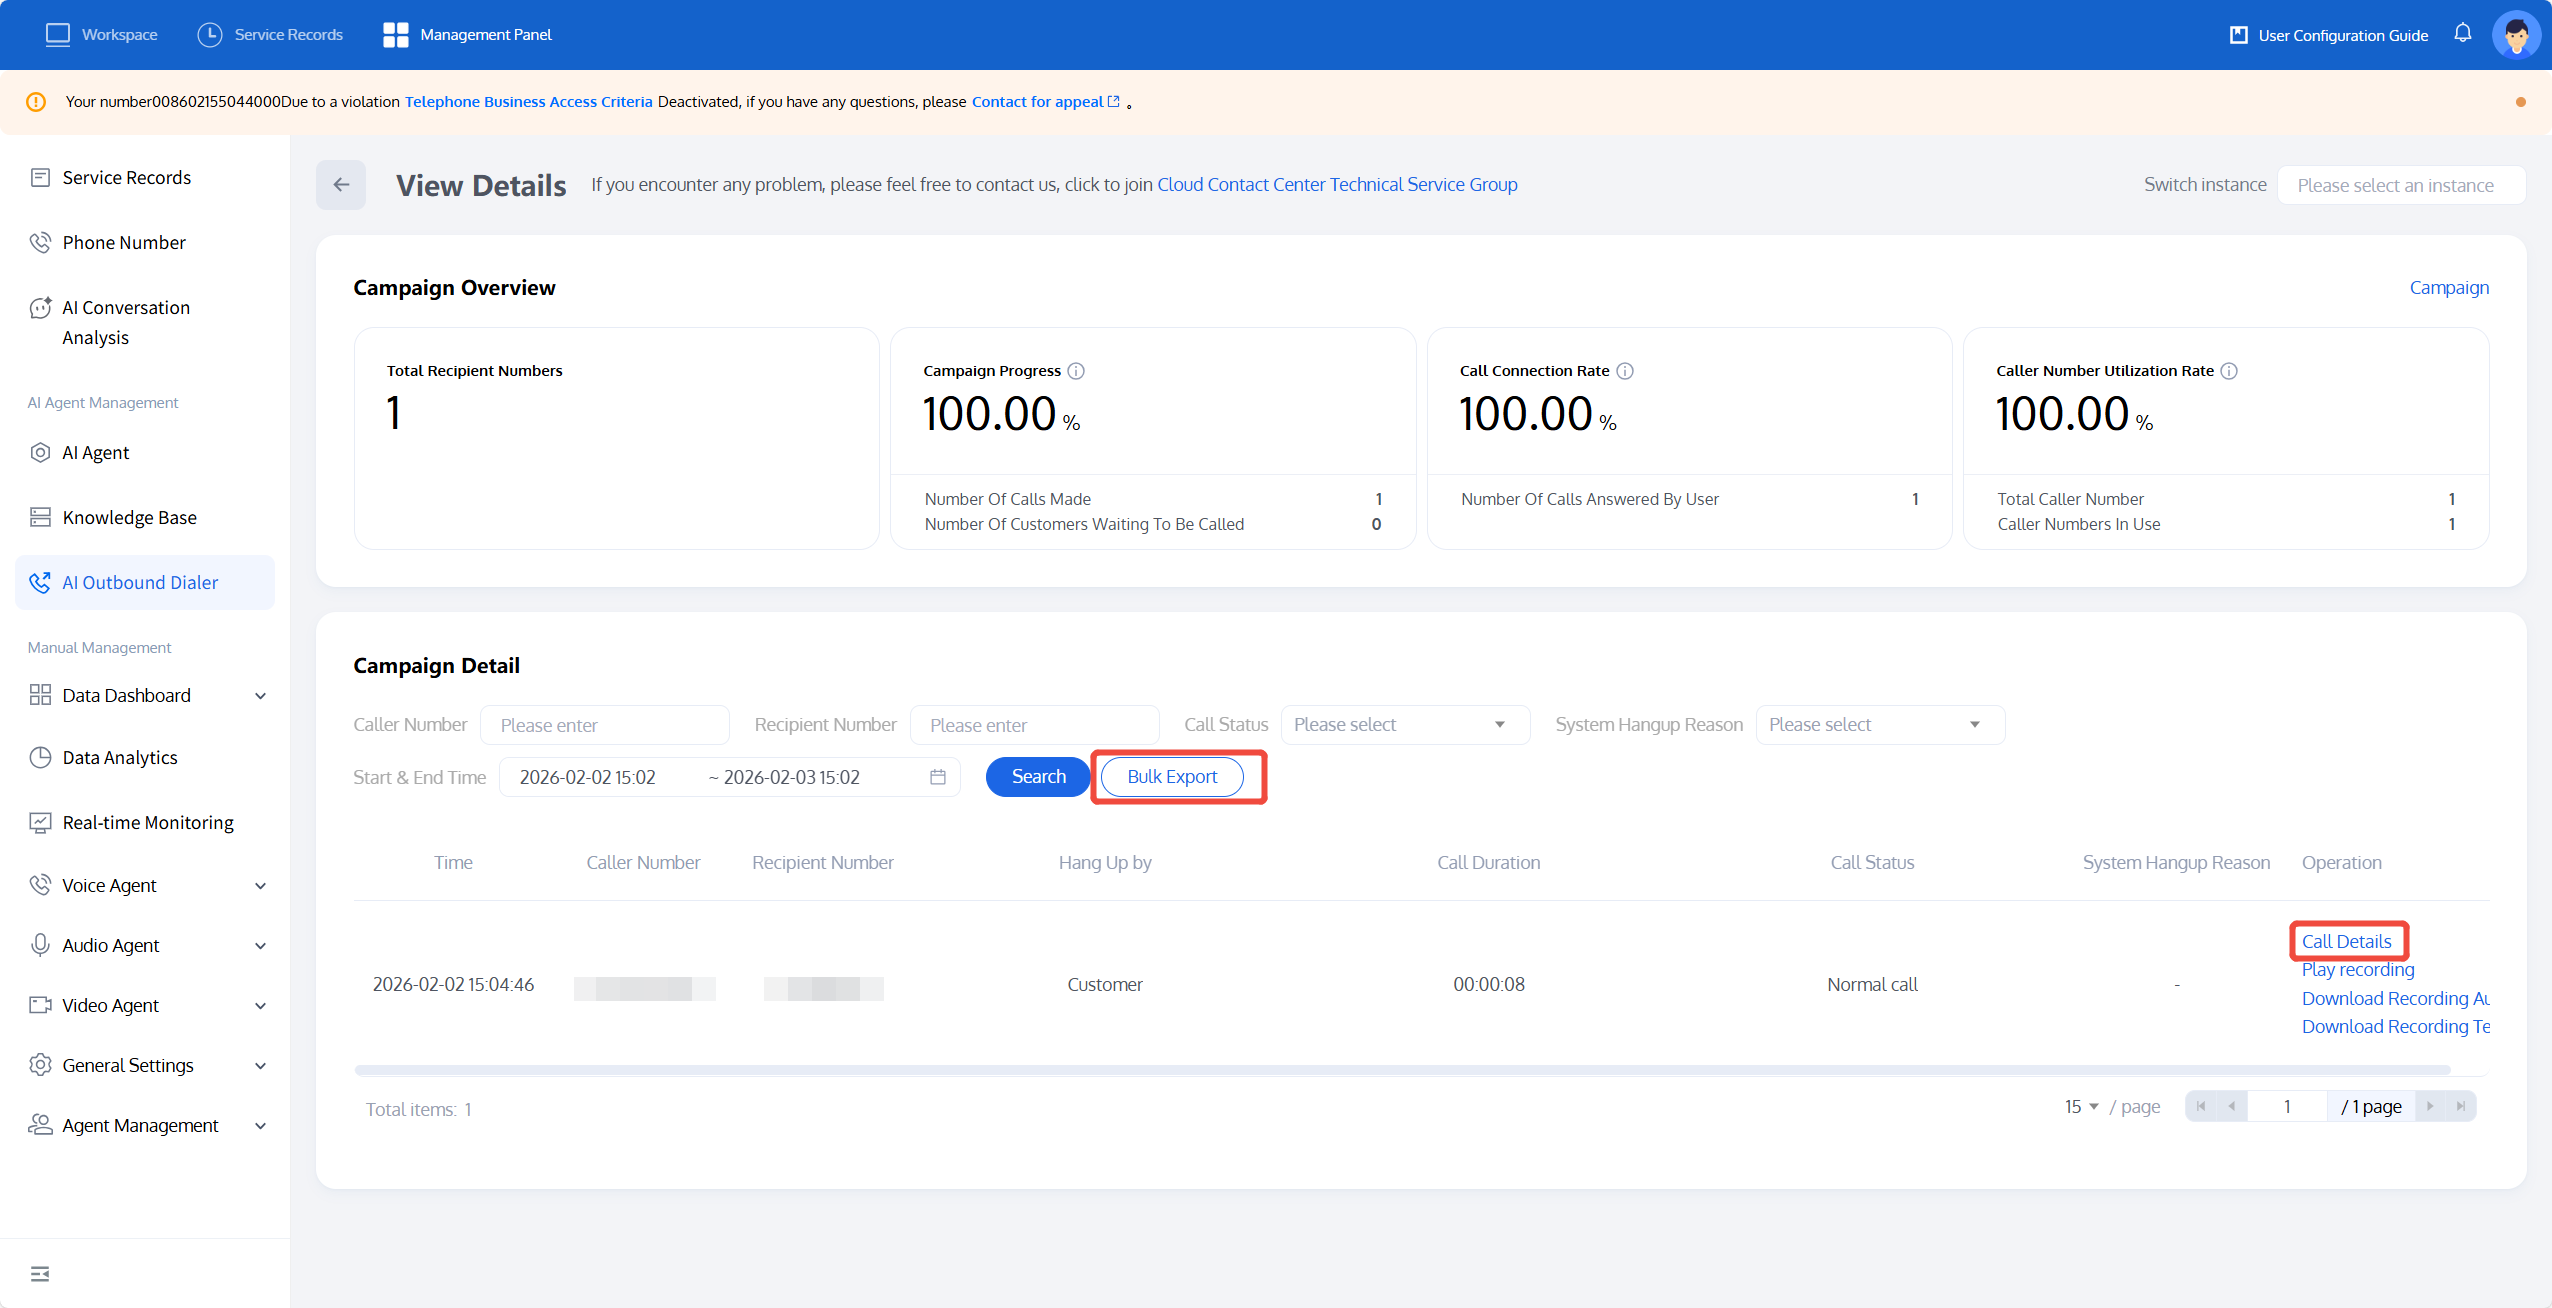
Click View Details to go to the specific task details page.
You can view the answer rate of this outbound task and the connection status of each call, and identify the reasons for unanswered calls.
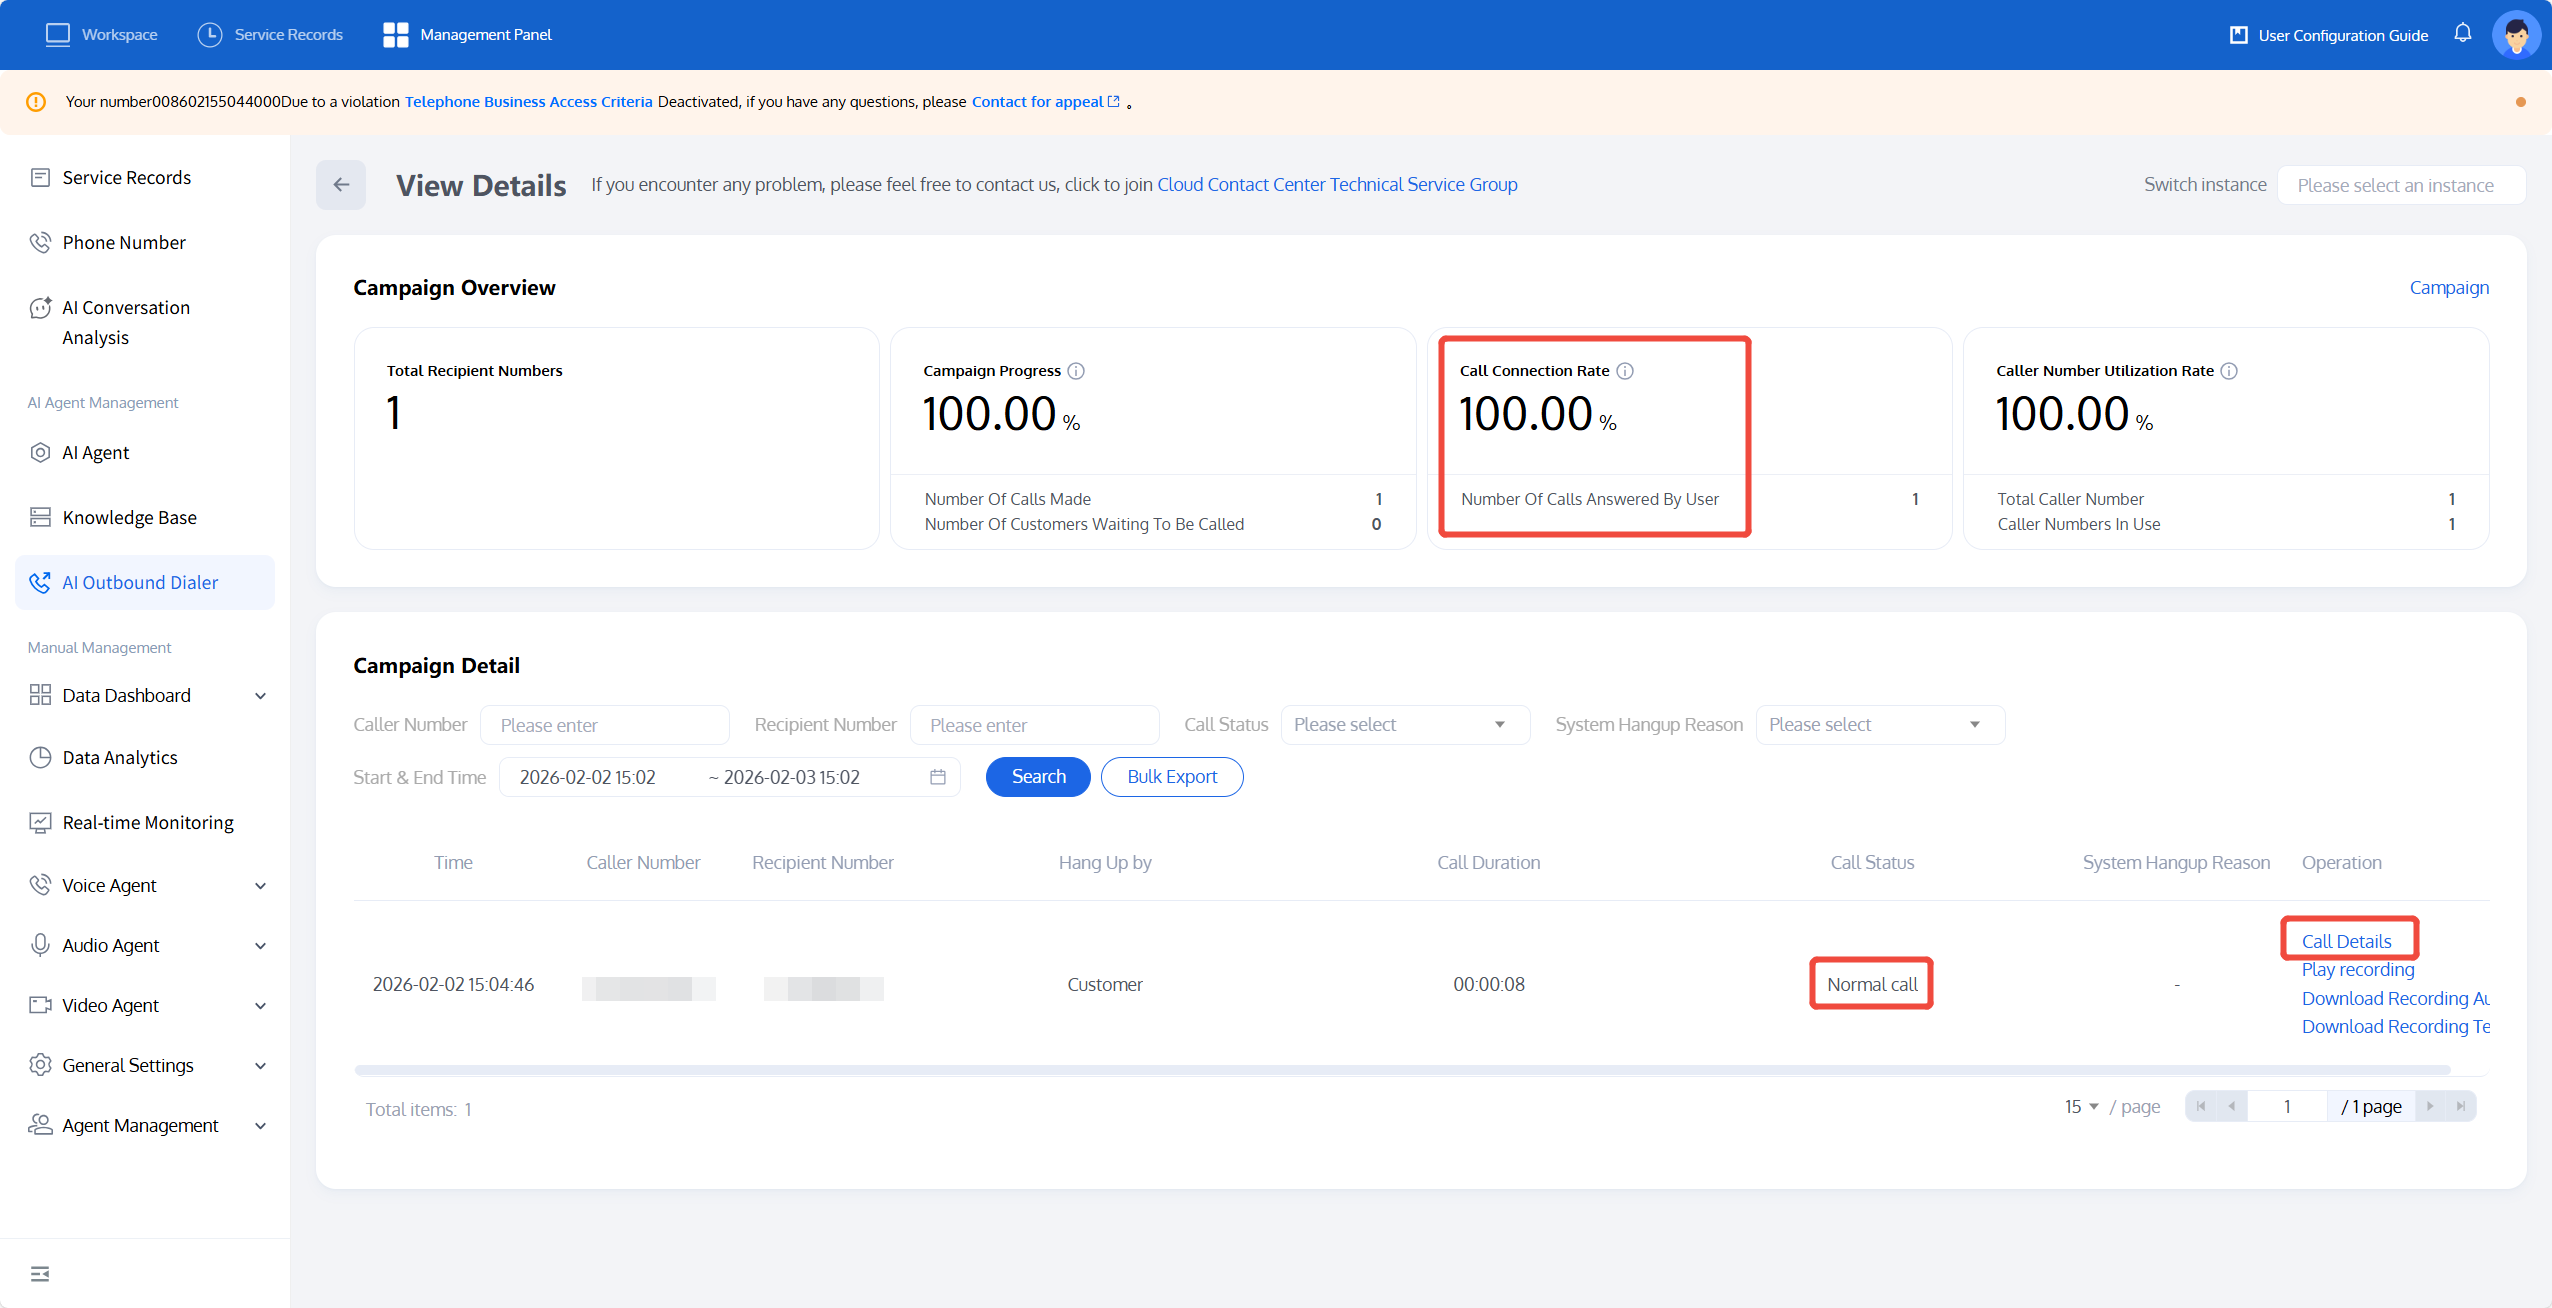
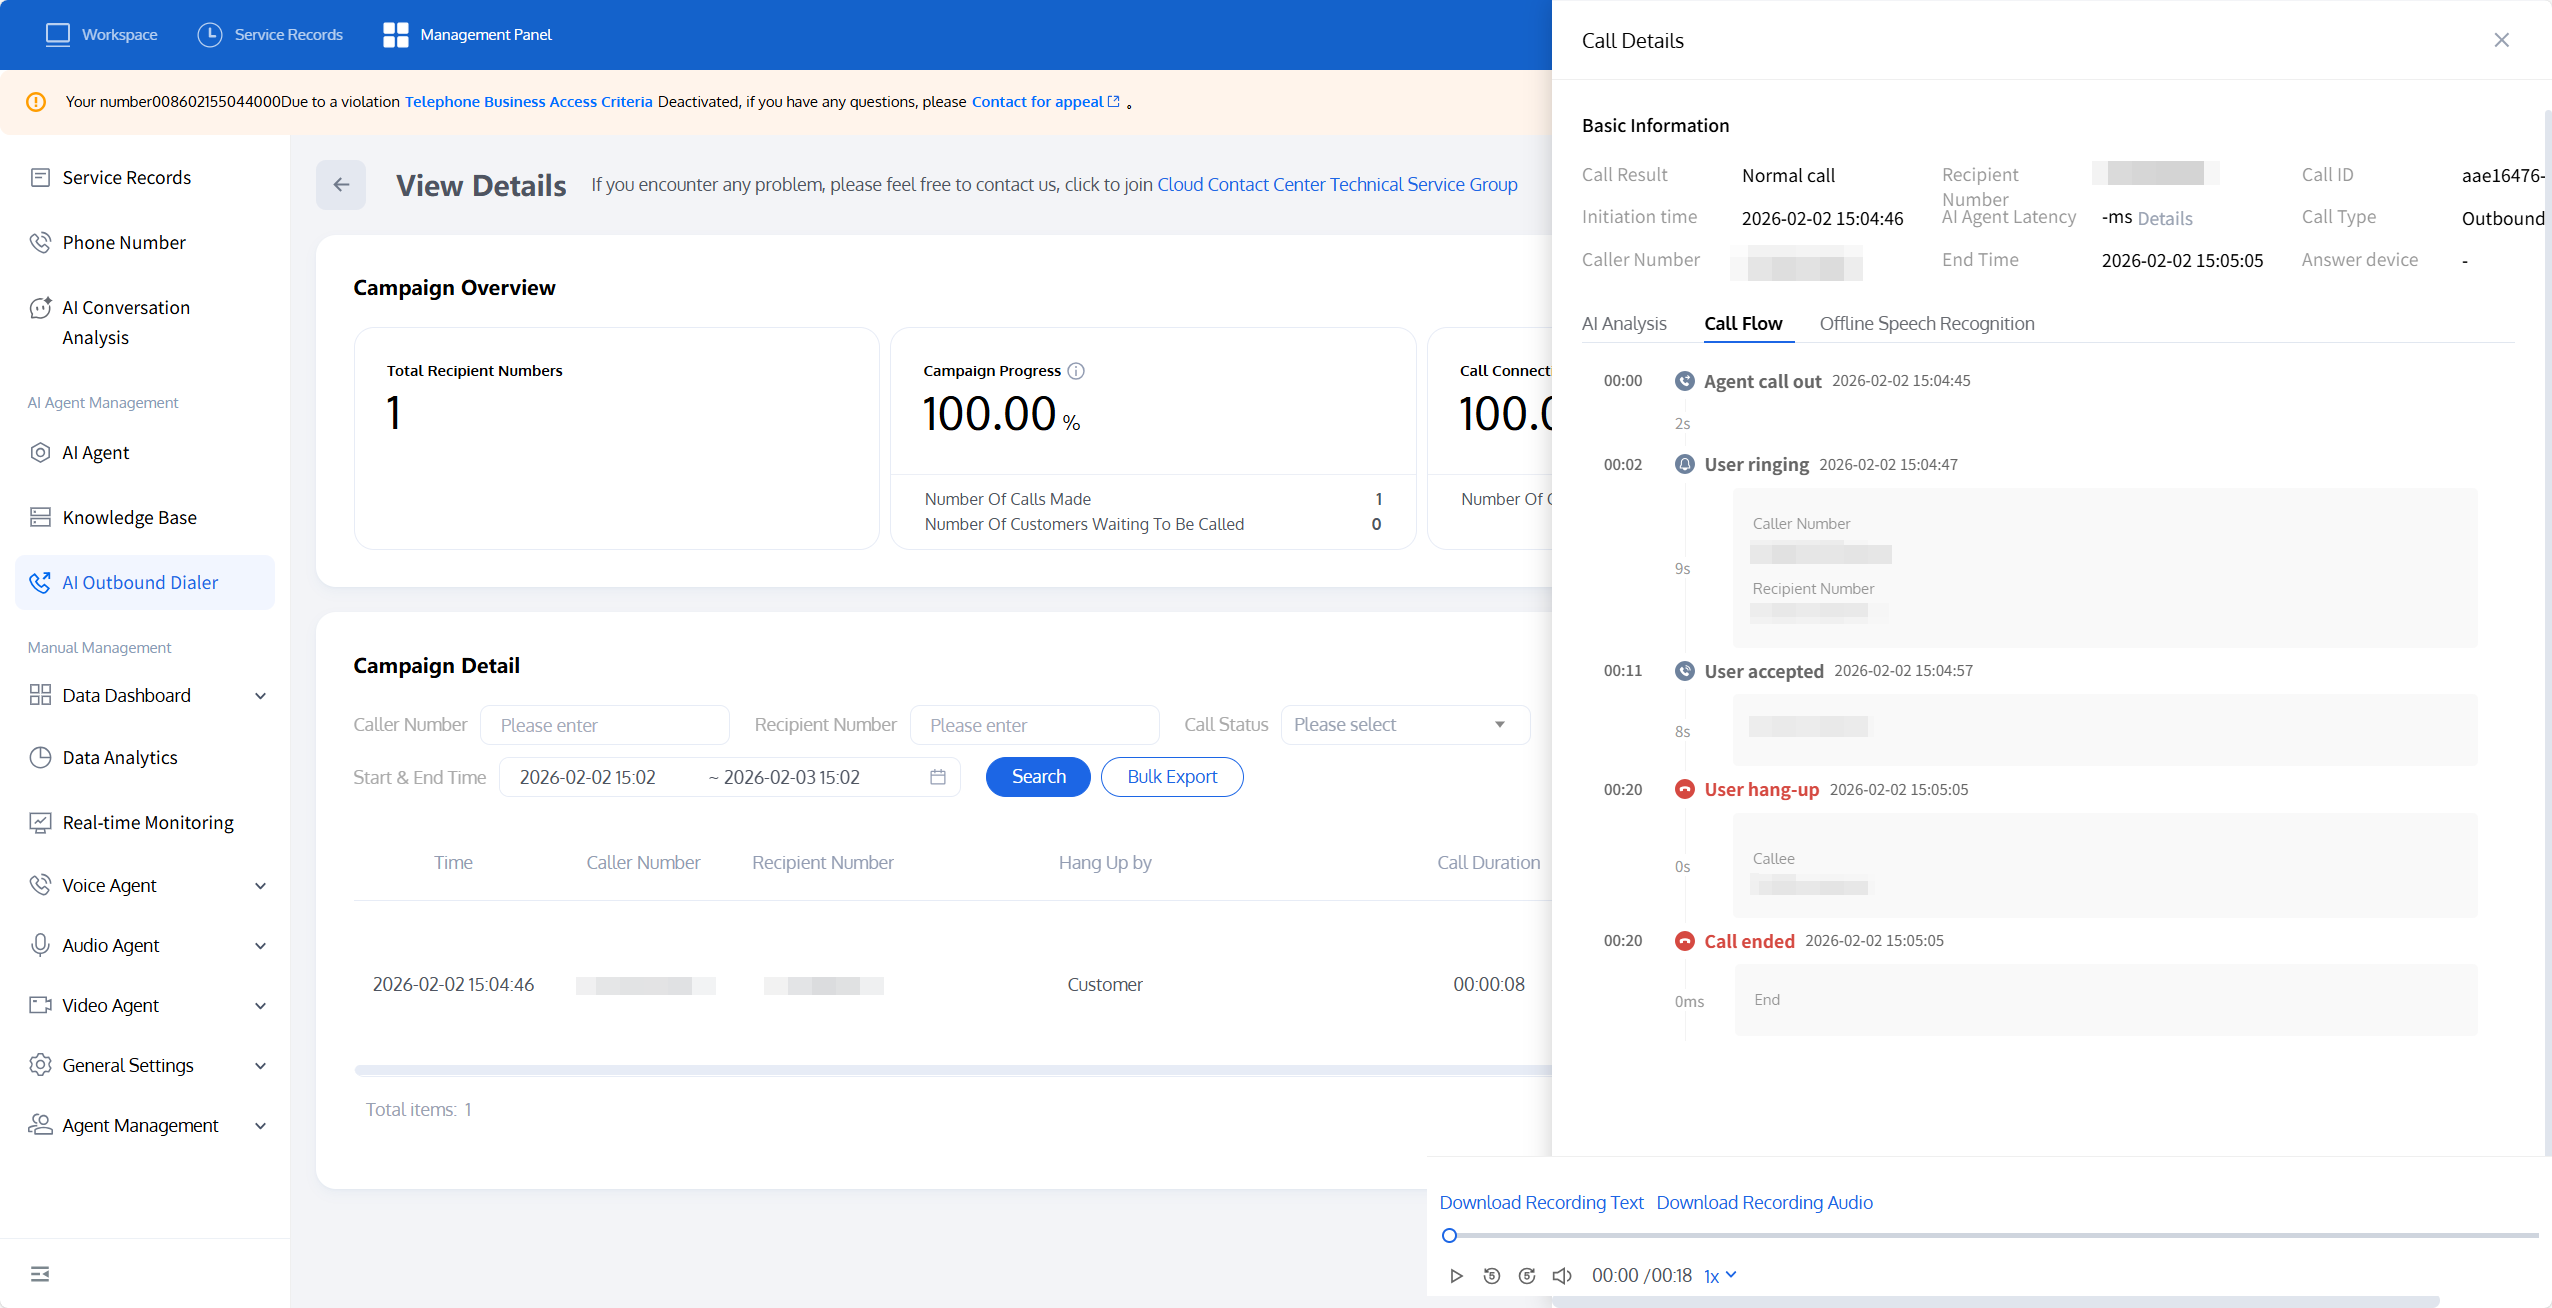
Click Call Details for a specific call record to view detailed information about that call.
The detailed information includes Conversation Analytics (post-call Tag status for that call), Call Flow, and ASR (call transcript).
You can also click Batch Export to view all call information under this outbound task. An example of the exported content is shown in the figure below:

Related Guidelines
Select the corresponding path based on your deployment method:
First time using? You can deploy a usable AI Agent in just five minutes create a conversation flow or integrate an external model.
Want to learn about our dialogue flow nodes? Go to Dialogue Nodes.
Want to build a knowledge base for your dialogue flow? Go to Build Your Knowledge Base.
How to test your model? Refer to Test Dialogue Workflow.
Want to configure a voice AI Agent with your own model? Go to Integrate External Model, Edit Dialogue Content, Configure Voice Interaction, and Add Call Control.
Want to see application scenarios? Try Voice Notification, Lead Mining, Feedback Collection, or Customer Support.
How to make outbound and inbound calls with an AI Agent? Refer to AI Agent Outbound or AI Agent Inbound.
Want to view data logs? Refer to Call Records, Call Recordings, Latency.
How to create and view post-call Tags? Refer to Post-Call Tags (Created via Dialogue Flow) or Post-Call Tags (Created via External LLM).
Ajuda e Suporte
Esta página foi útil?
Você também pode entrar em contato com a Equipe de vendas ou Enviar um tíquete em caso de ajuda.
comentários