Platform Management
Baixar
Modo Foco
Tamanho da Fonte
Resource management
Purpose
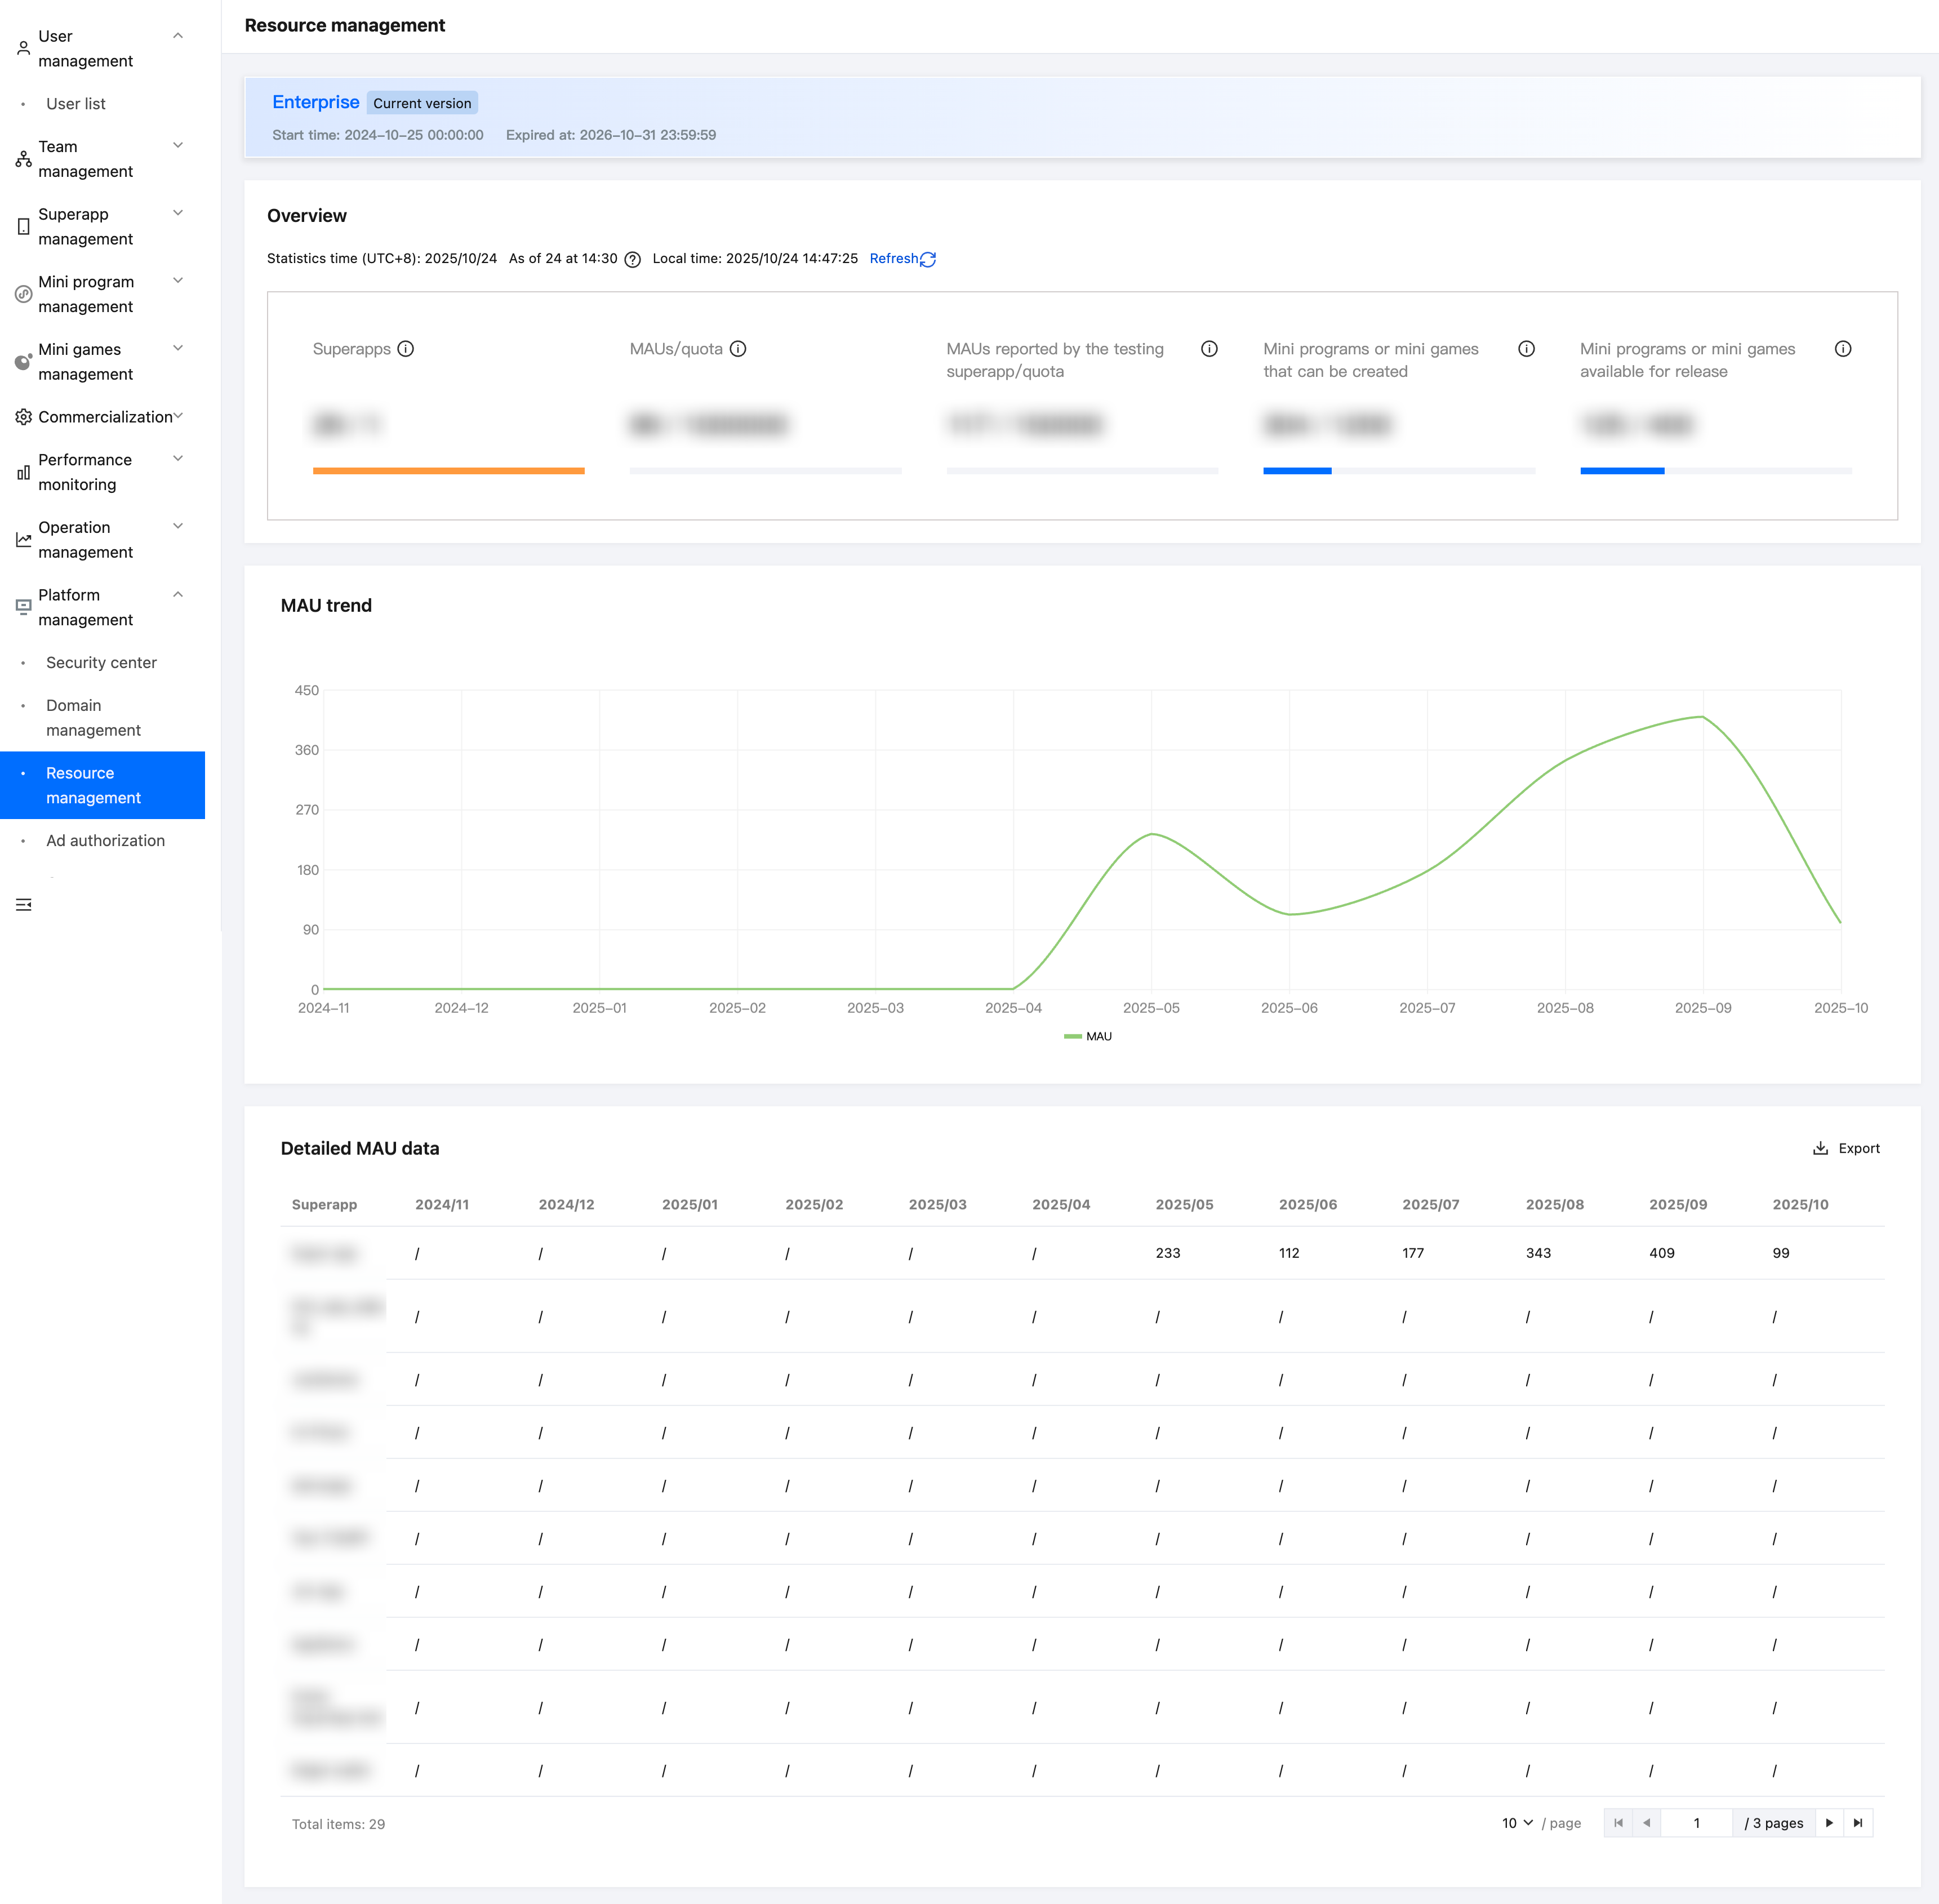
The super admin and the platform admin can check resource usage for the current plan in the resource management module.
Roles and permissions
Feature | Role | Super admin | Platform admin |
Resource management | ✓ | ✓ |
Super admin/Platform admin: Has access to the resource management module.
Sections
Edition
The current SAS edition name, along with its activation time and expiration time.

Overview
Latest data today, based on Beijing time (UTC +8).
Statistical metrics and descriptions:
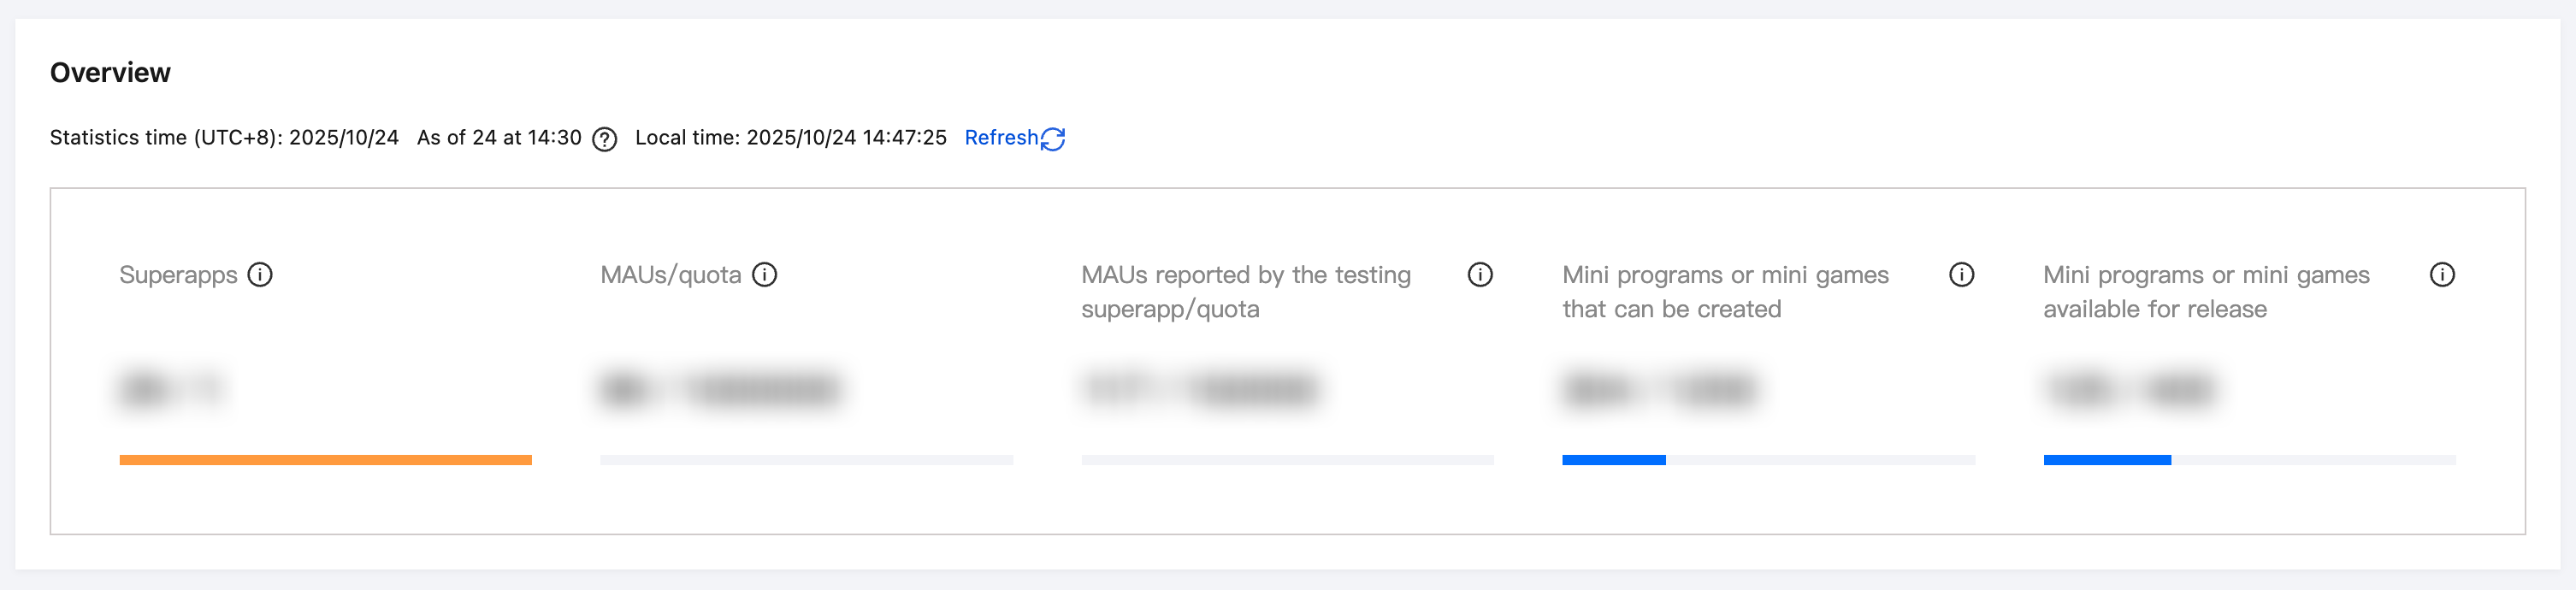
Superapps: Created superapps / creation limit.
MAUs / quota:
Parameter description: MAUs reported by the production superapp this month / free quota.
Calculation rule for MAUs: Each MAU is counted based on the GUID of the superapp, with each GUID counting as one MAU. MAUs are generated when users open a mini program or mini game for the first time in a given month.
Billing description: Once the free quota is used up, additional MAUs will be charged. For detailed billing information, seeBilling Overview.
MAUs reported by the testing superapp / quota:
Parameter description: MAUs reported by the testing superapp this month / available quota.
Restriction: After the reported MAU reaches the limit, new users will no longer be able to open mini programs or mini games within superapps using non-production package names.
Mini programs or mini games that can be created: Created mini programs or mini games / creation limit.
Mini programs or mini games available for release: Mini programs or mini games available for release / release limit.
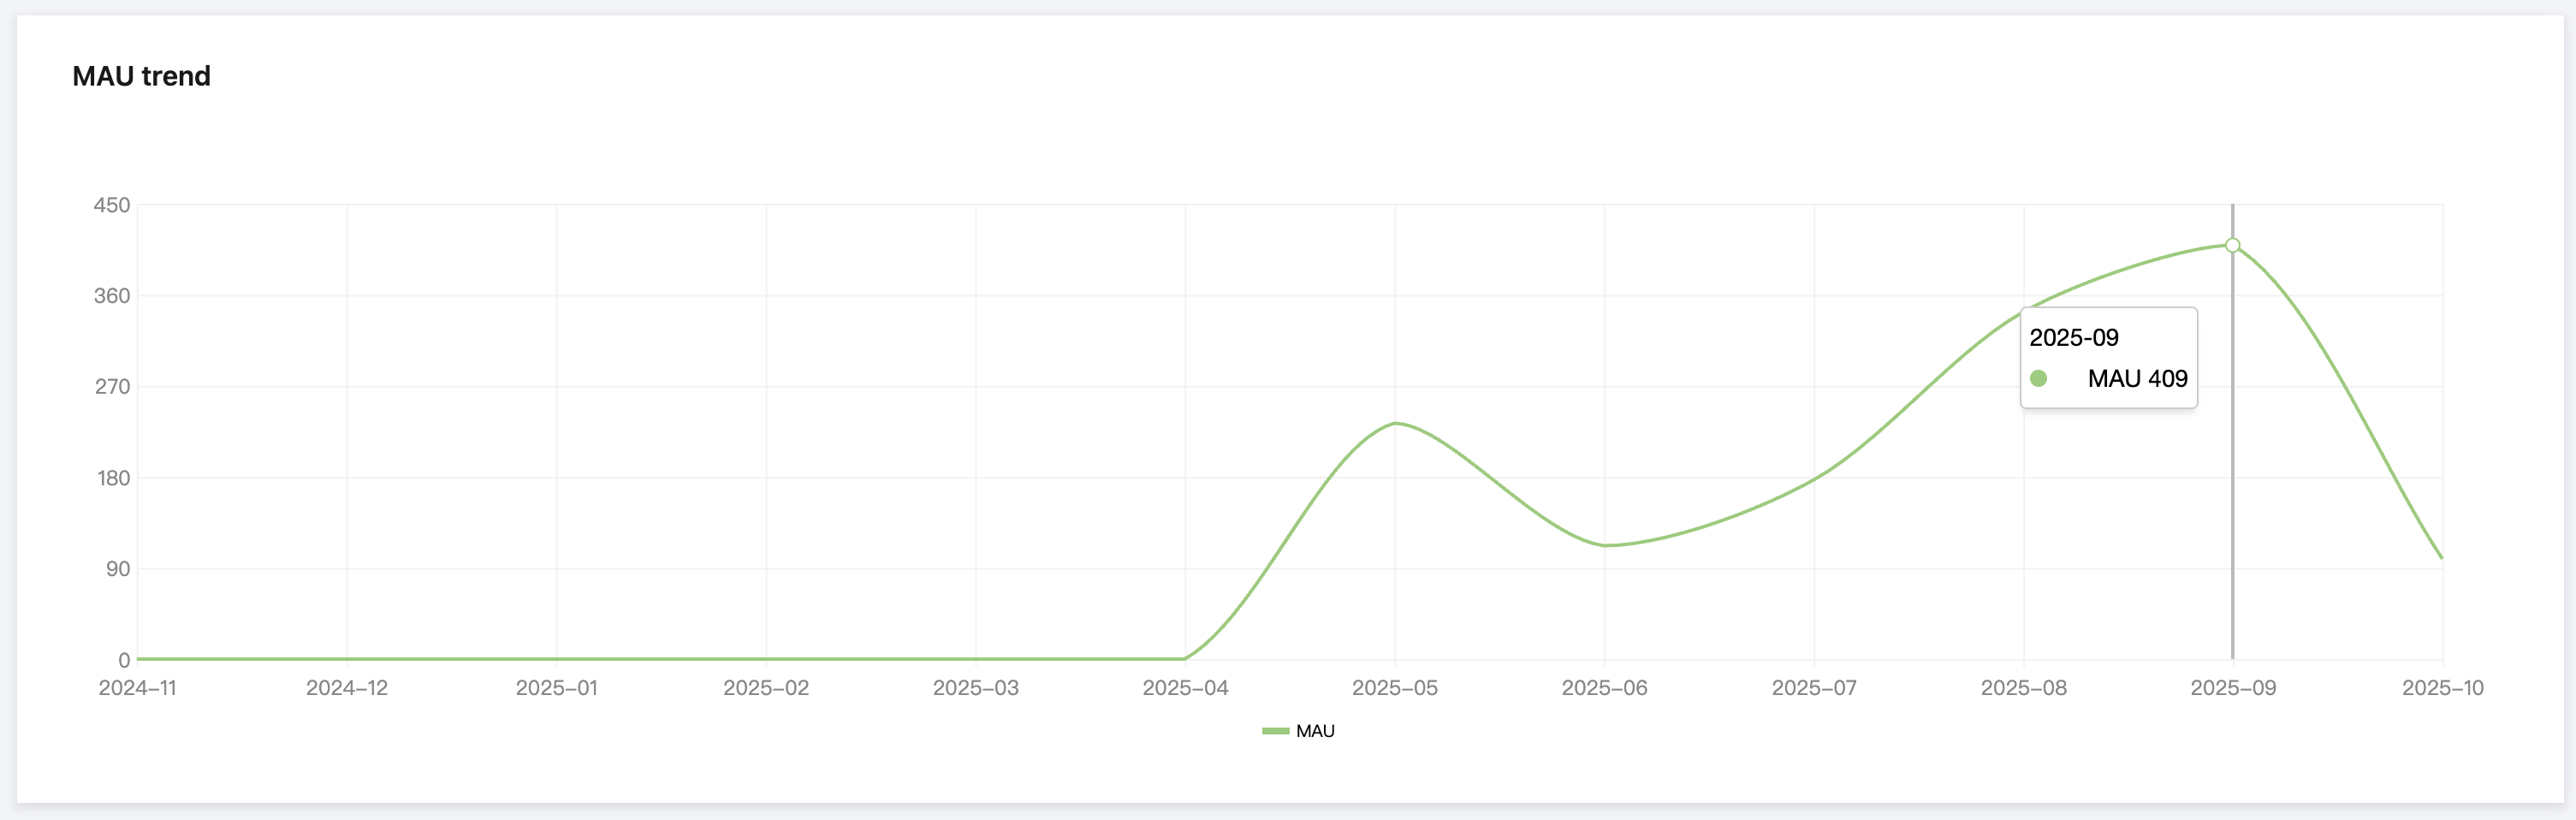
MAU trend
Daily MAU changes within the selected time range, based on Beijing Time (UTC +8).
Domain management
Purpose
The super admin and the platform admin can add/remove mini program domains to/from the allowlist/blocklist, affecting all mini programs. The super admin and the platform admin can also add secondary domain names using wildcards. For example,
https://www.tencent.com can be changed to tencent.com or .tencent.com.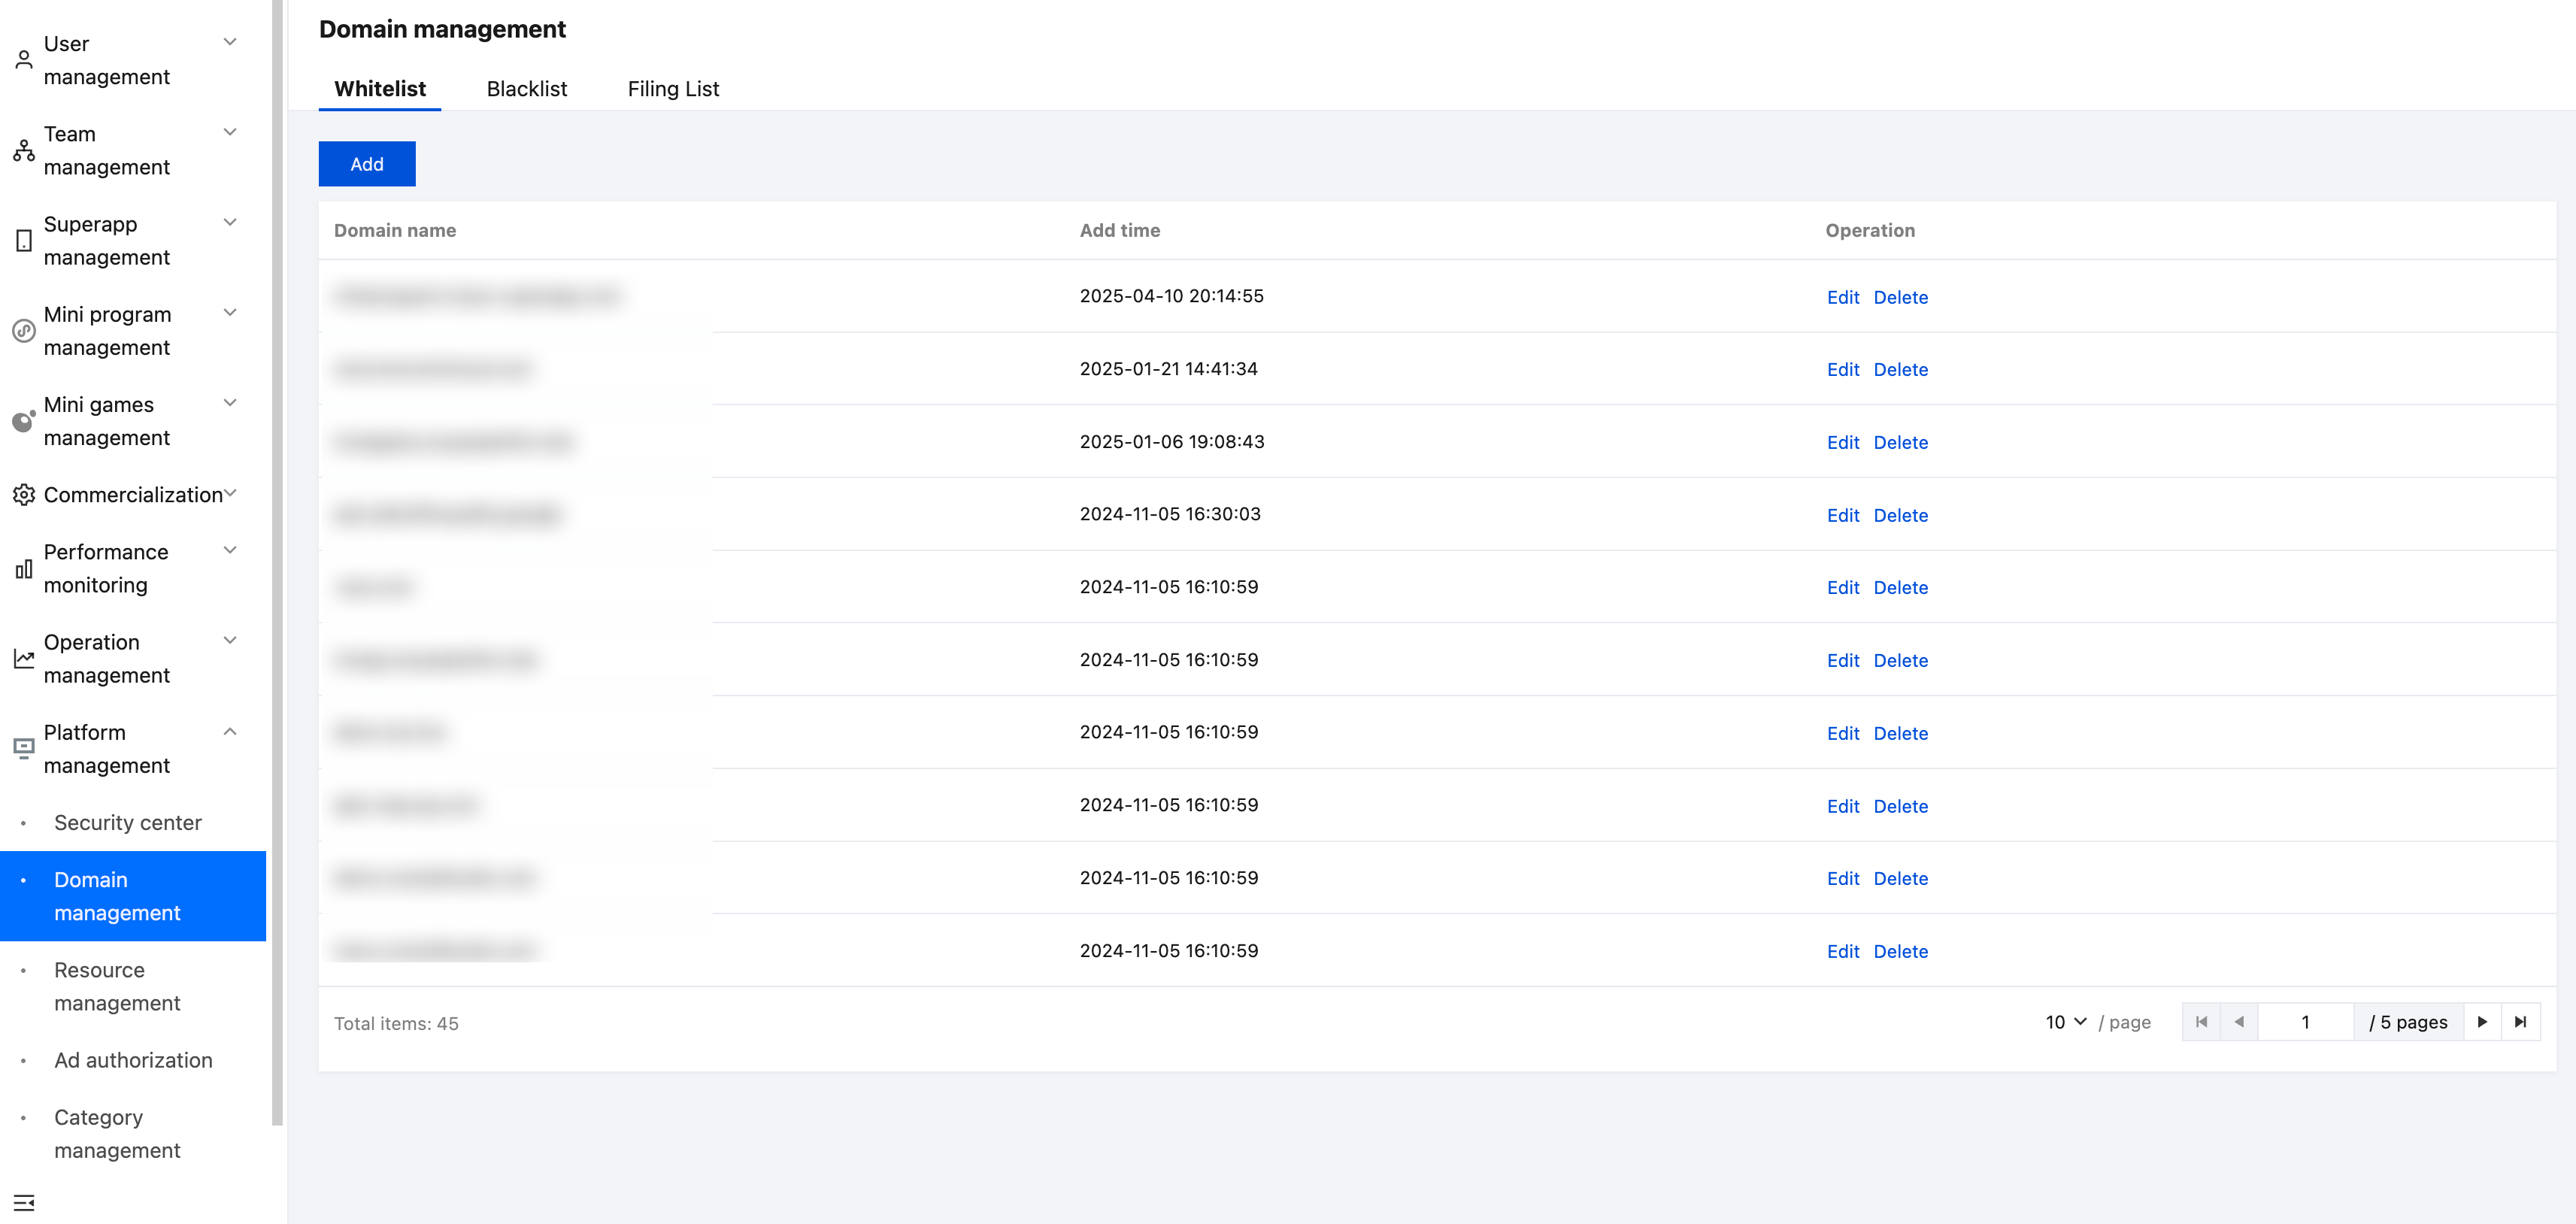
Roles and permissions
Feature | Role | Super admin | Platform admin |
Domain management | ✓ | ✓ |
Super admin/Platform admin: Has permissions for the domain management module.
How to use
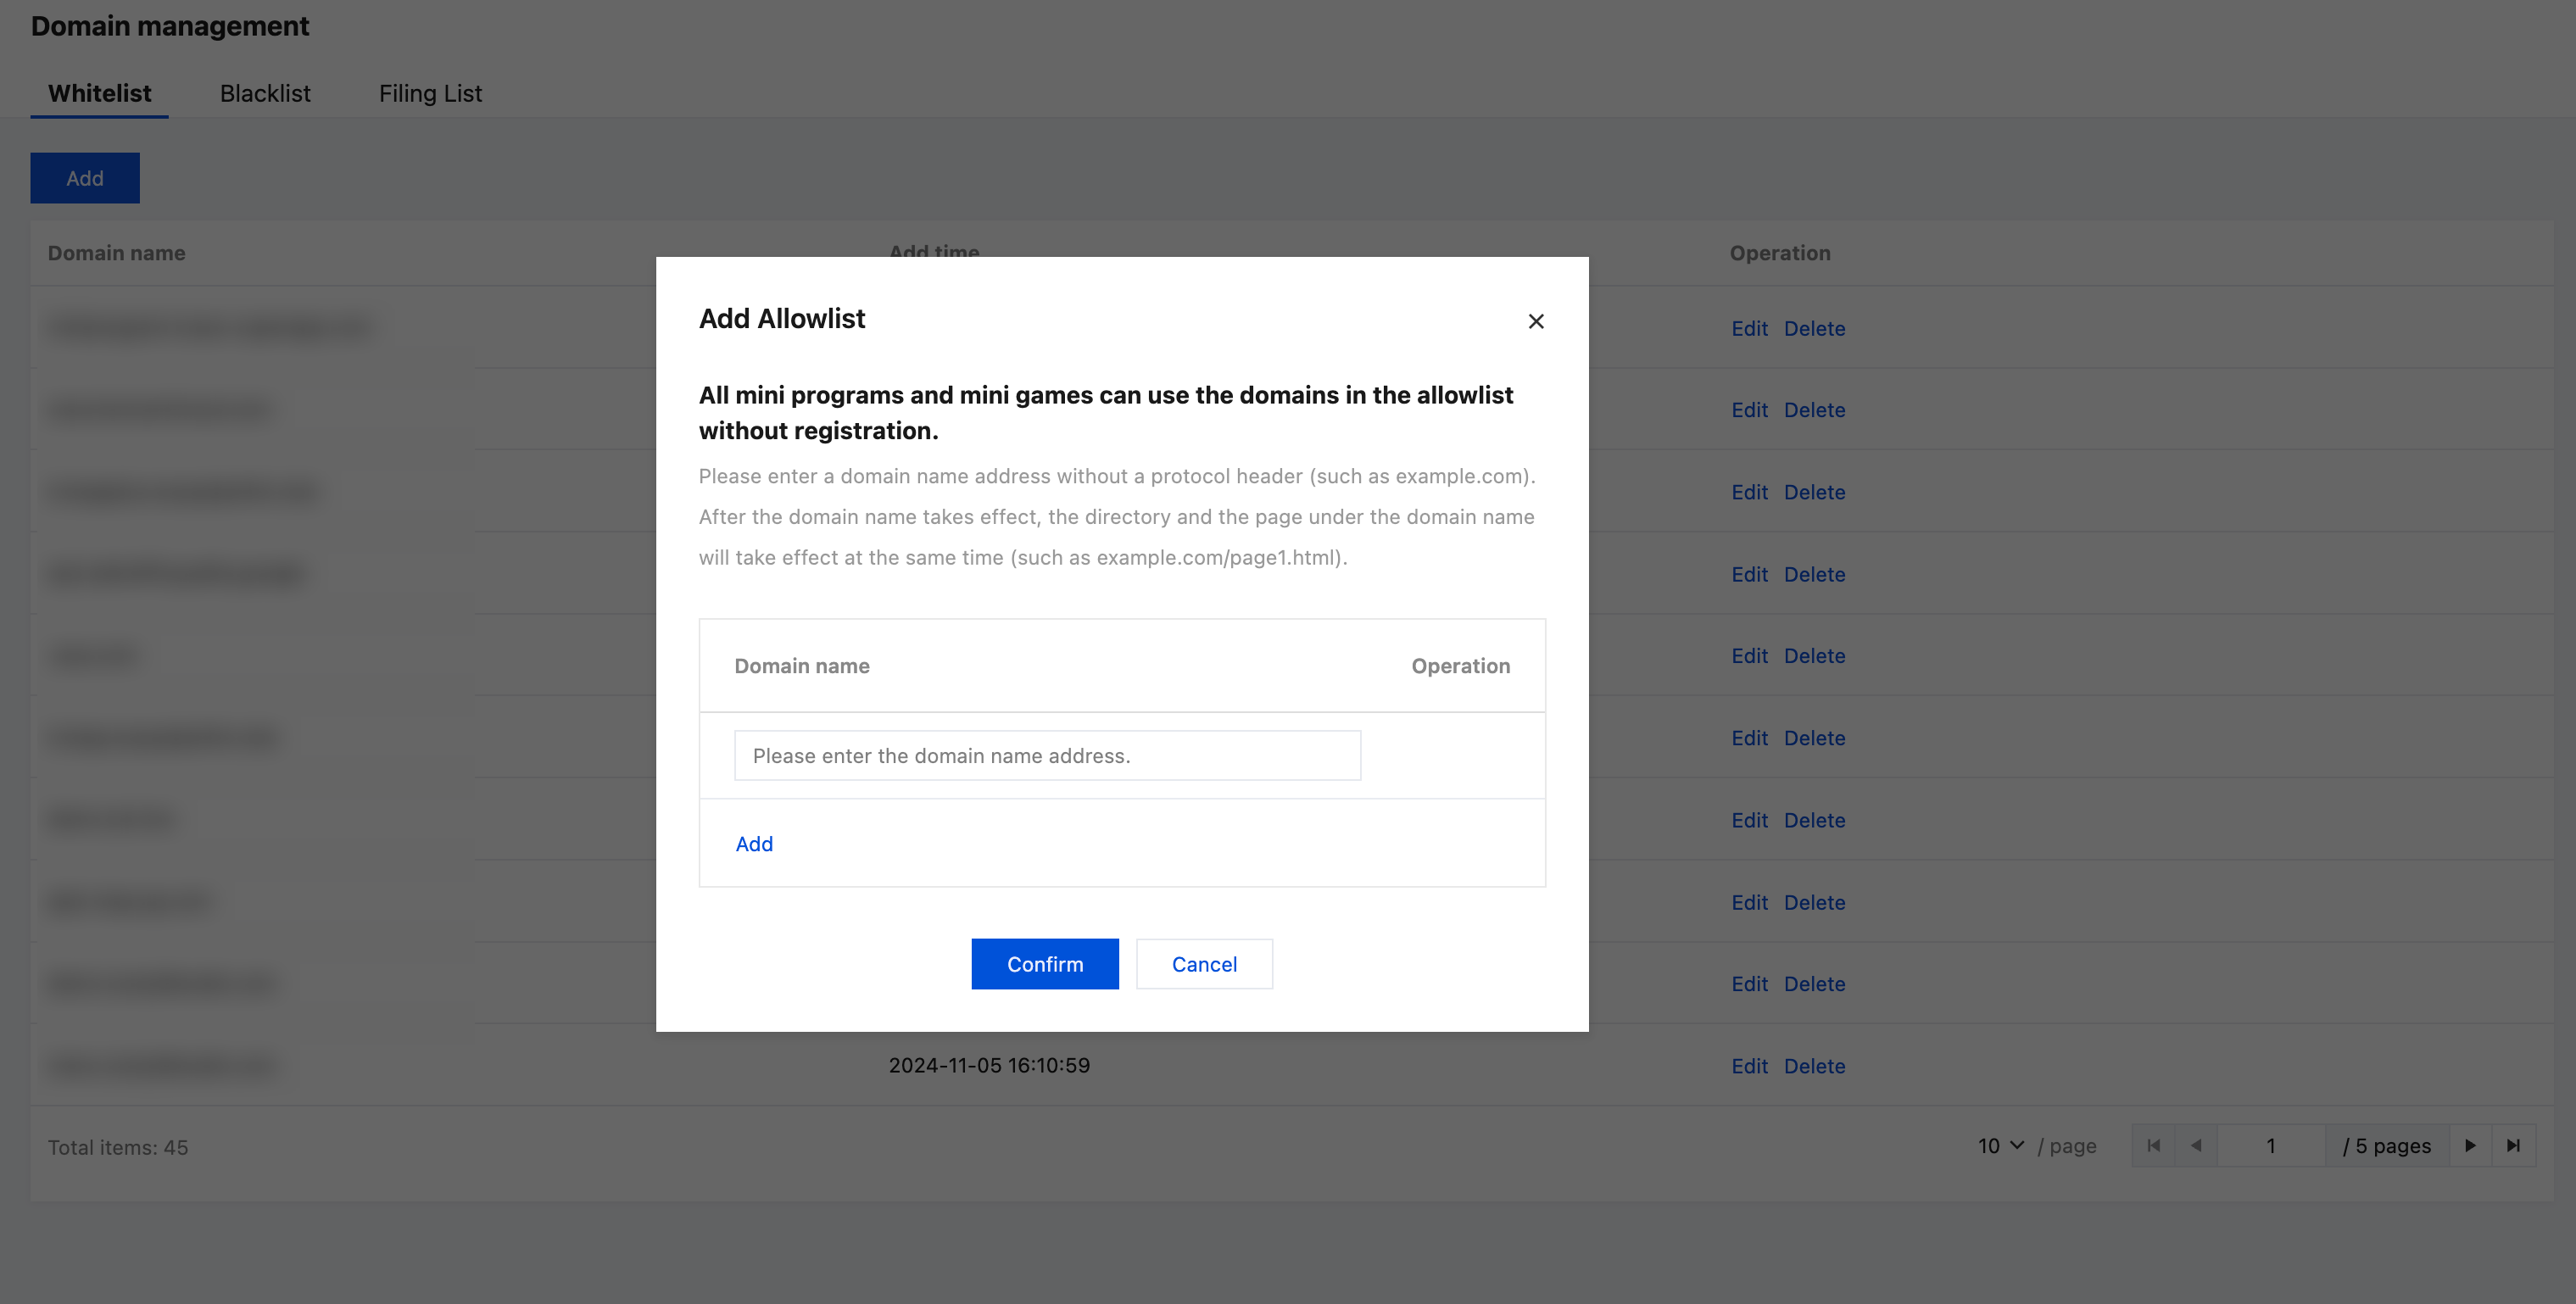
Filter: Select the allowlist or blocklist at the top to view the managed domains.
Add: Add domains to the allowlist or blocklist.
Custom categories
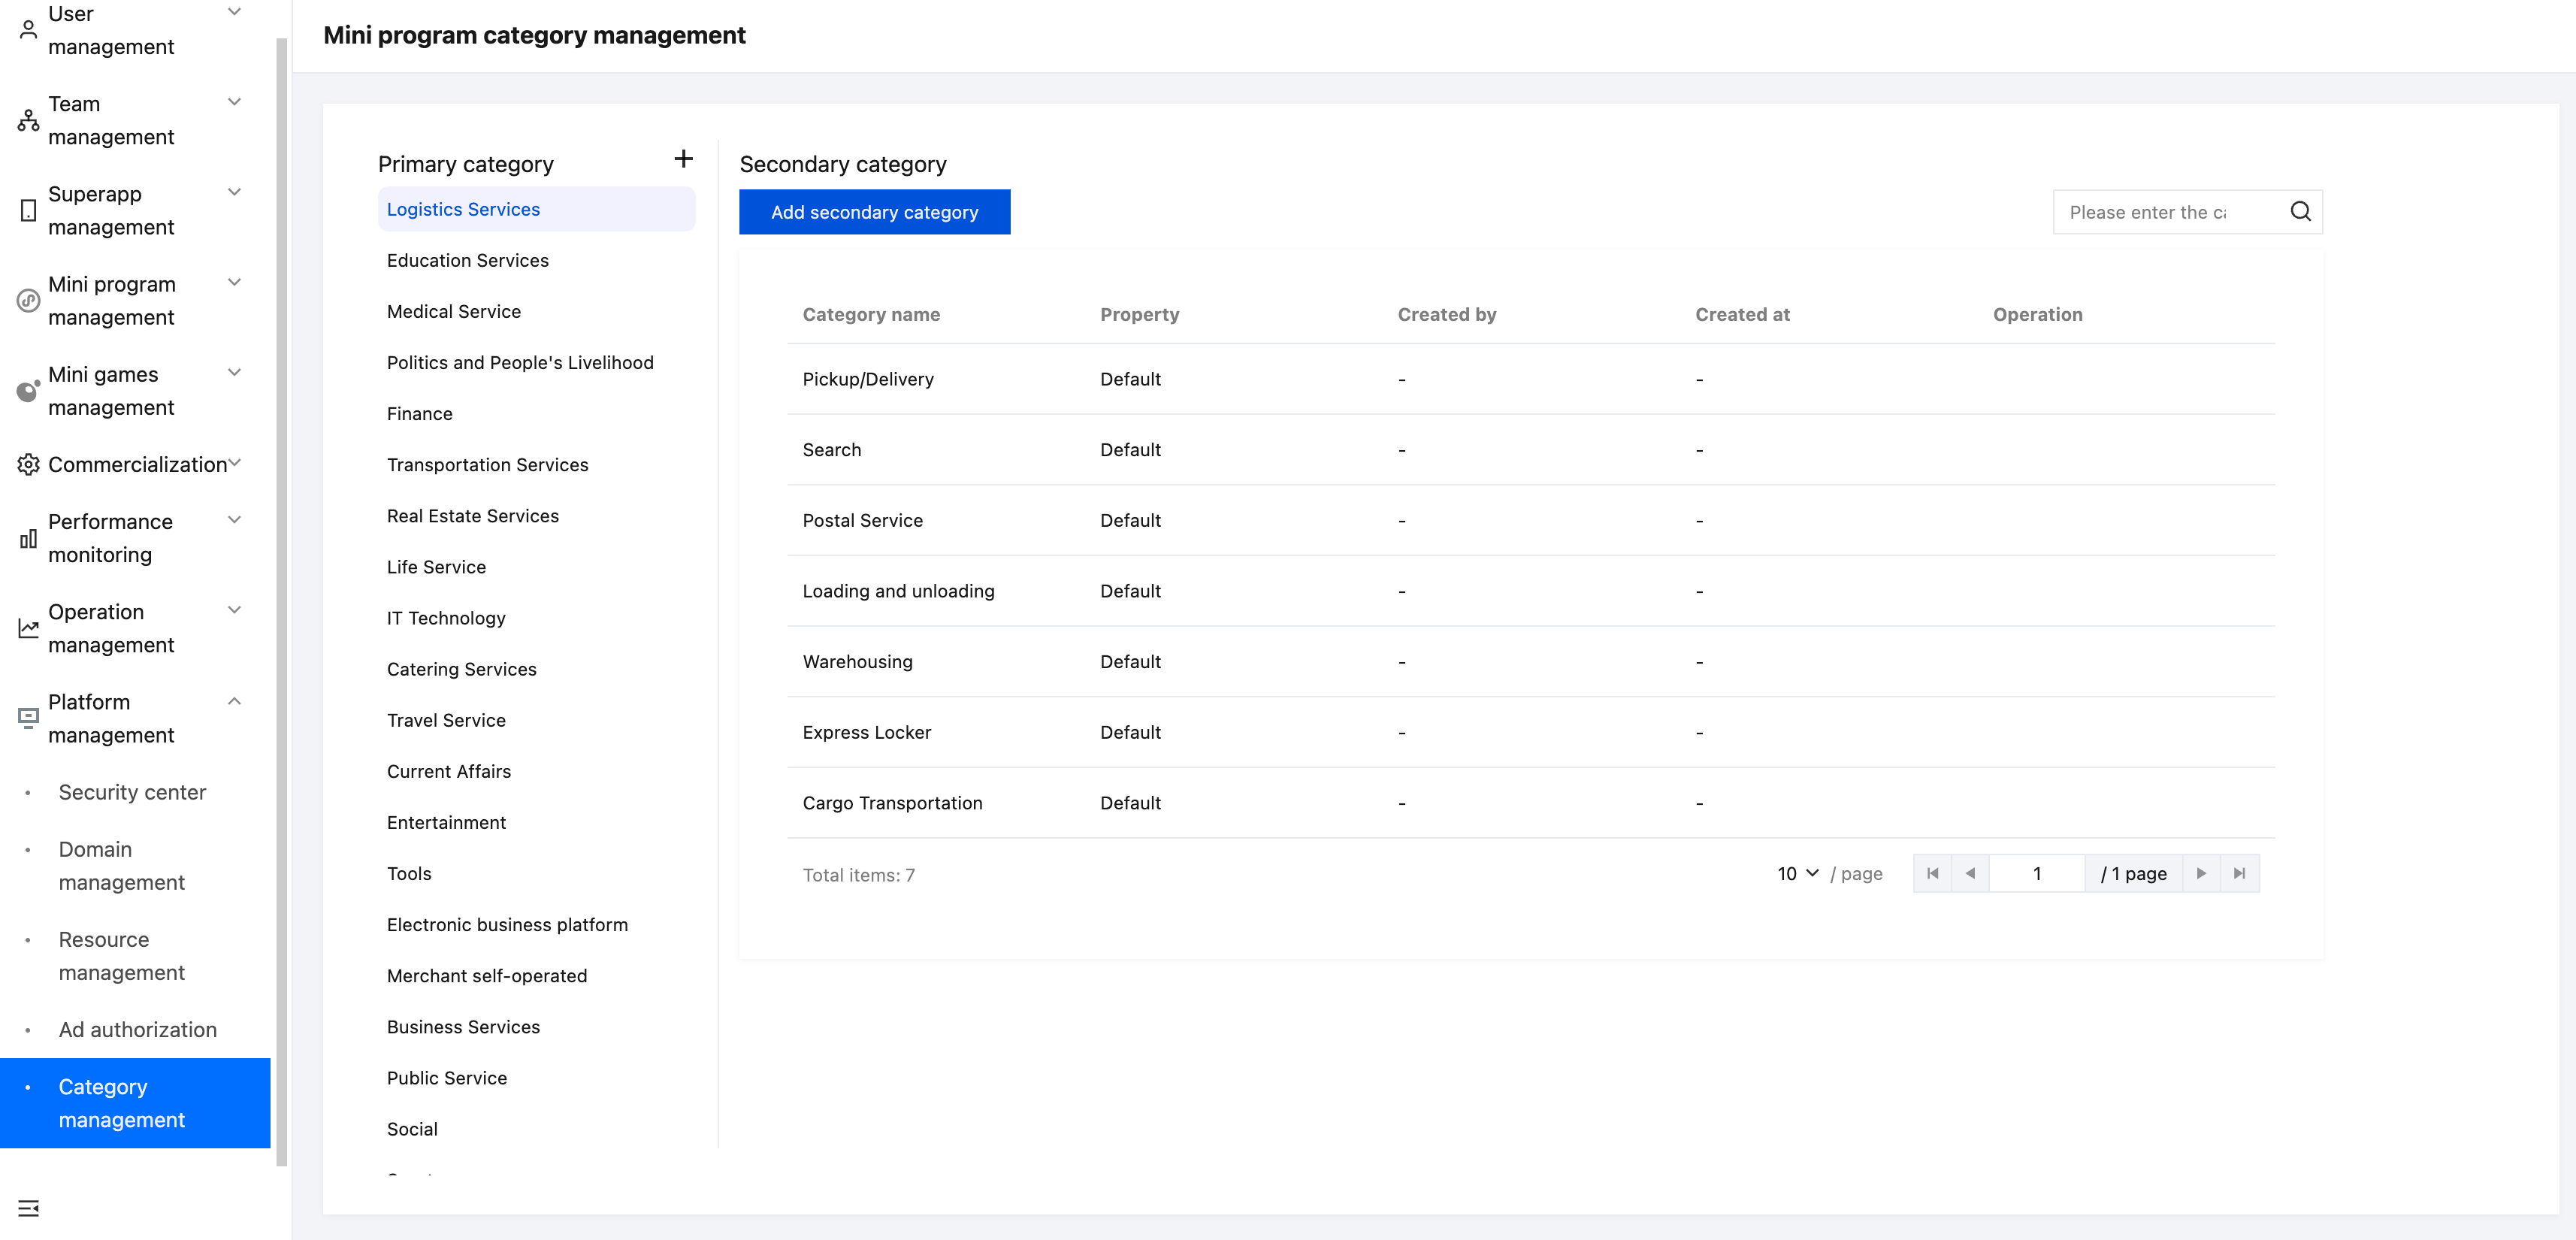
SAS provides a default list of mini program categories. When creating a mini program, you can assign a category to it. If the system's categories don't meet your needs, manually add primary and secondary categories for your mini programs.
Feature overview
Under Platform management - Category management, you can view the system's default list of mini program categories. The super admin or platform admin can customize primary categories or add custom secondary categories under a primary category.
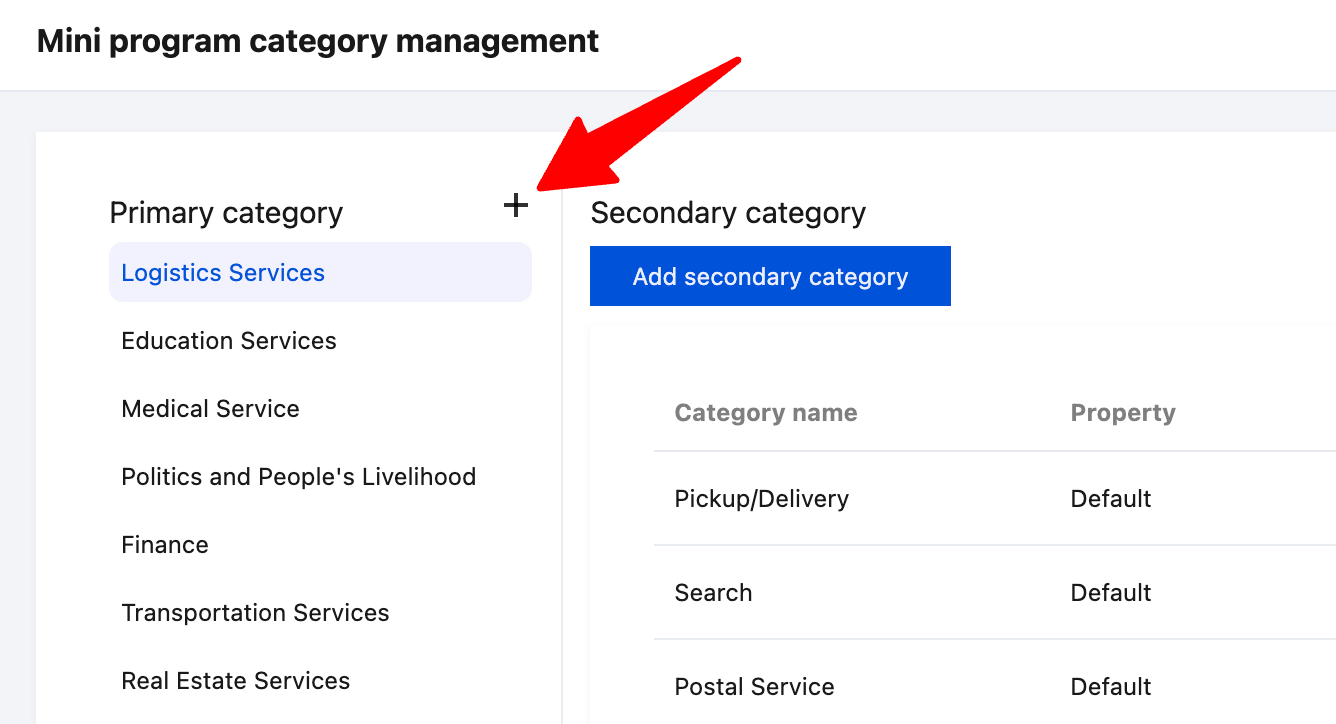
To add a primary category
Click + in the upper right corner of the primary category list to open the window for adding a category.
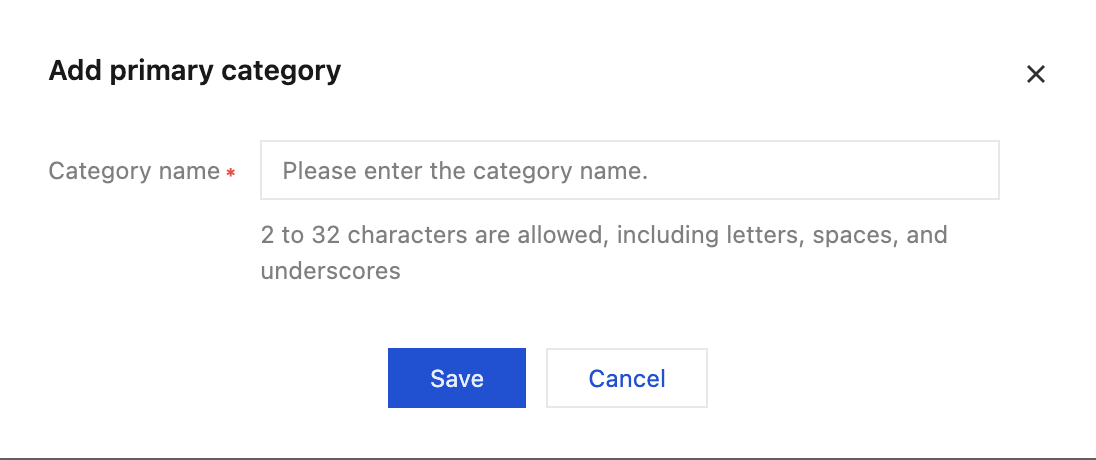
Enter the primary category name (2-32 characters allowed, including letters, spaces, and underscores), then click Save.
To add a secondary category
Click Add secondary category to open the window for adding a category.
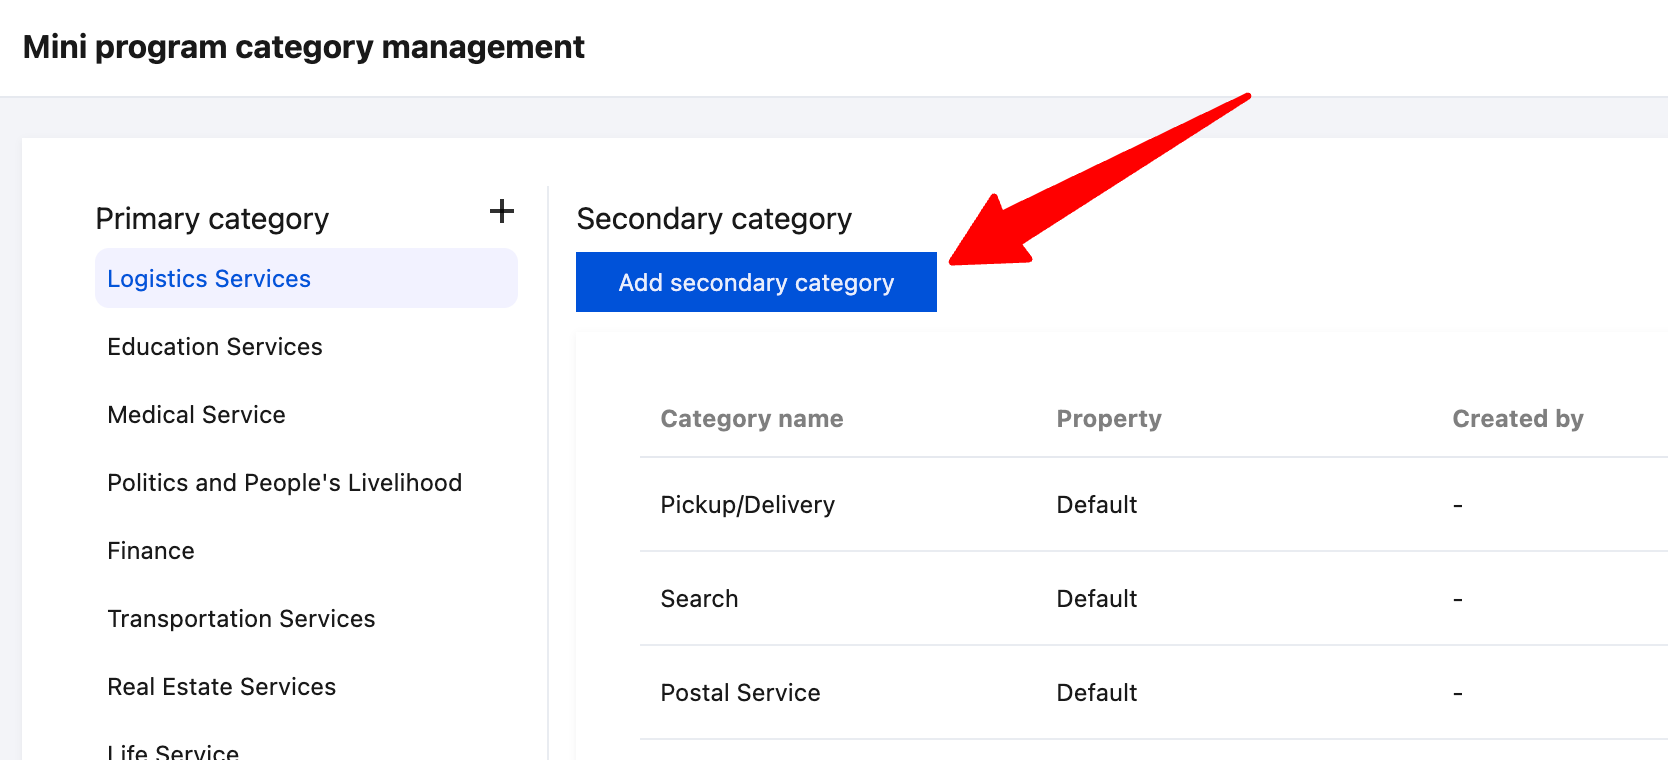
Select the primary category (by default, this will be the primary category currently selected in the left-side list).
Enter the secondary category name (2-32 characters allowed, including letters, spaces, and underscores), then click Save.
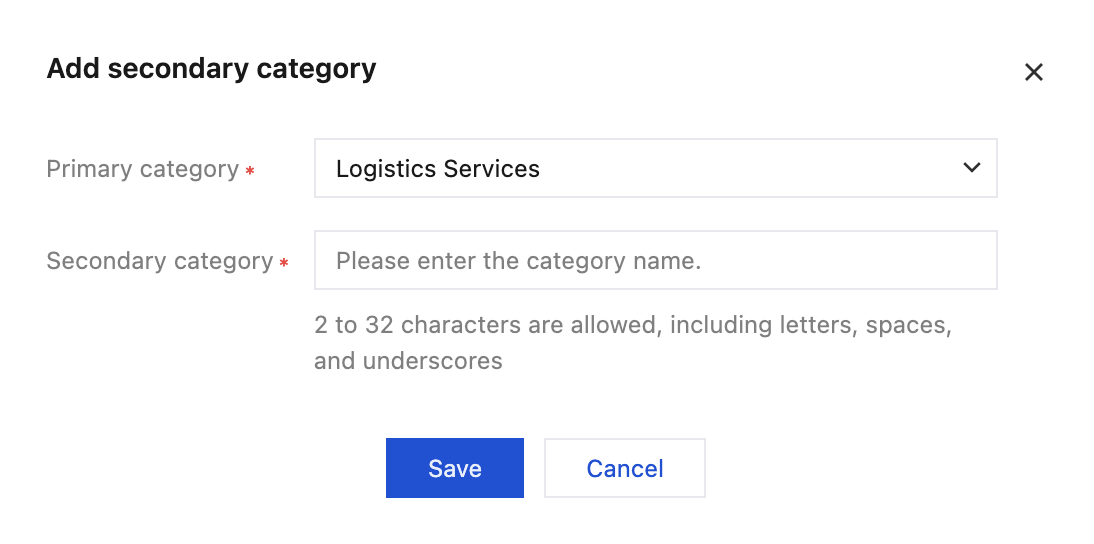
Once you've added custom categories, you can assign mini programs to these custom categories when creating or editing mini program information.
Authorization management
Purpose
Platform administrators can use the Authorization Management module to uniformly issue, maintain, and revoke the authorization credentials required for "mini program agency operation / agency development" to service provider teams, as well as to review renewal requests initiated by service providers. The module contains two sub-pages: authorization management and renewal management.
Authorization management
The authorization account management page displays all authorization credentials issued by the platform in a list view, and supports keyword search and filtering by authorization status. There are five authorization statuses in total: not authorized, authorized, authorization expired, secret key created (not authorized), and invalidated.
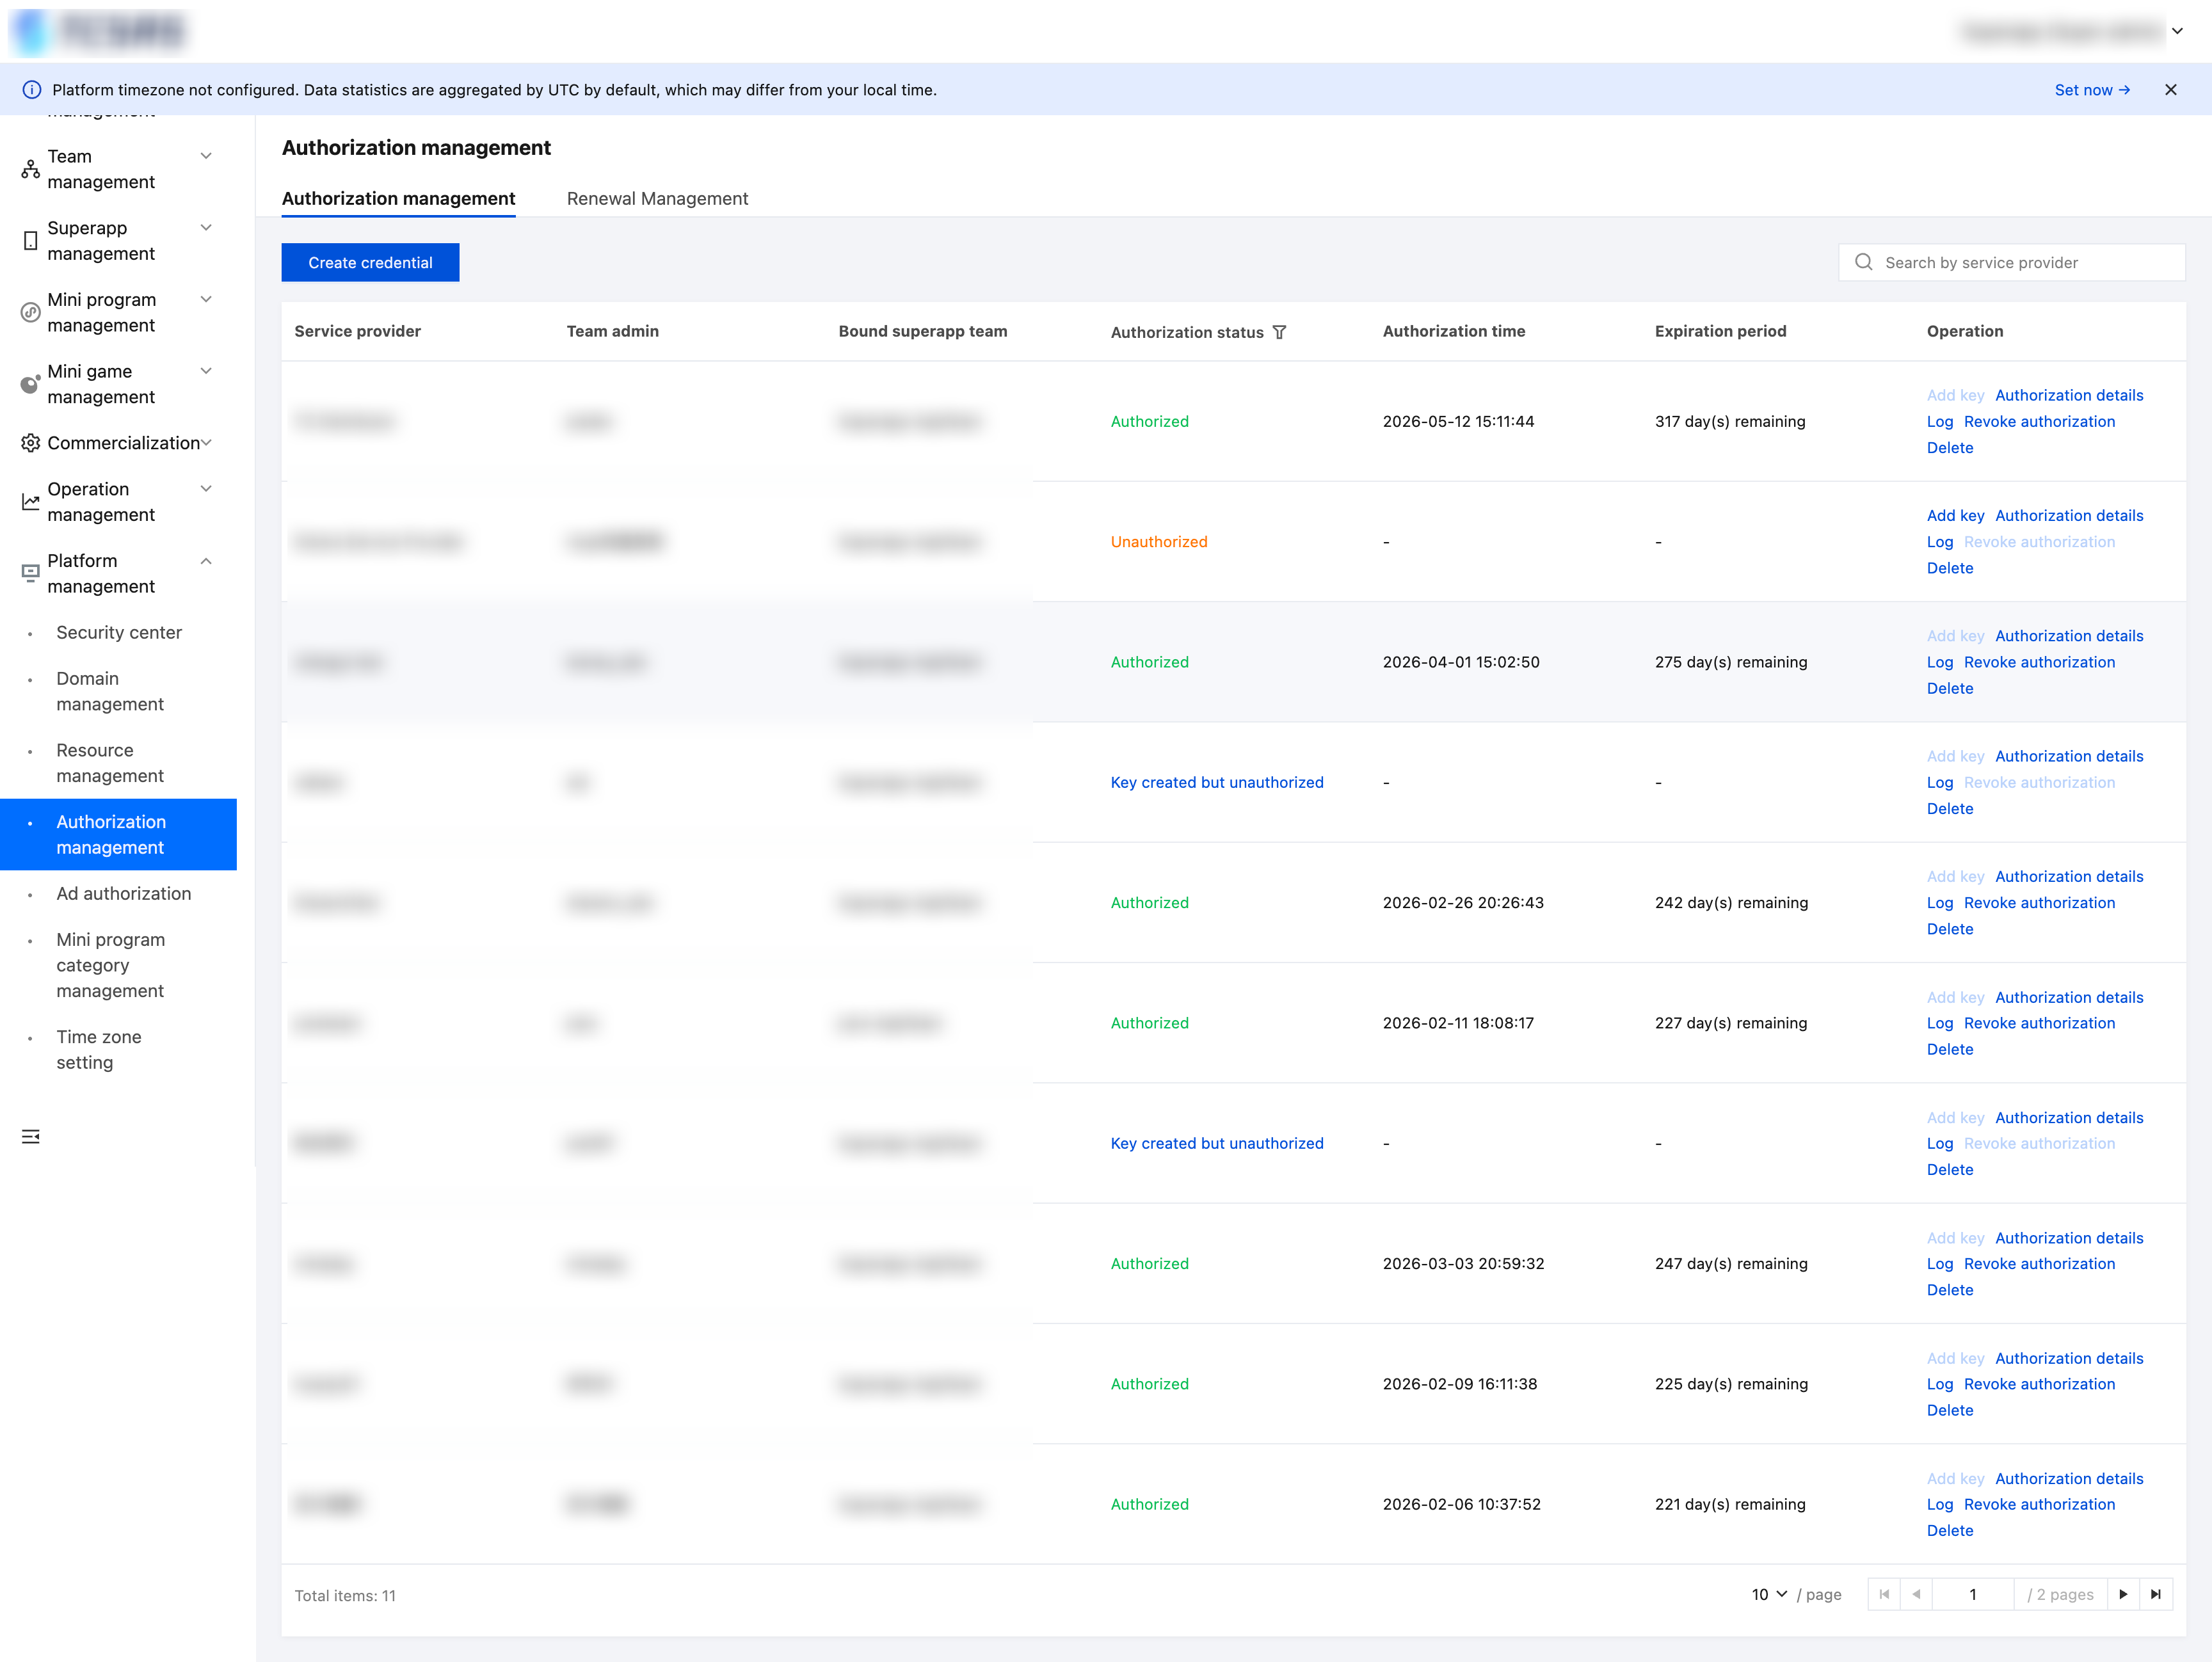
Create credential
Click the "Create credential" button in the upper right corner of the list, and select a service provider team in the pop-up dialog (the drop-down list shows the superapp team bound to the service provider team). After saving, a new authorization record is generated for the service provider with an initial status of "not authorized".
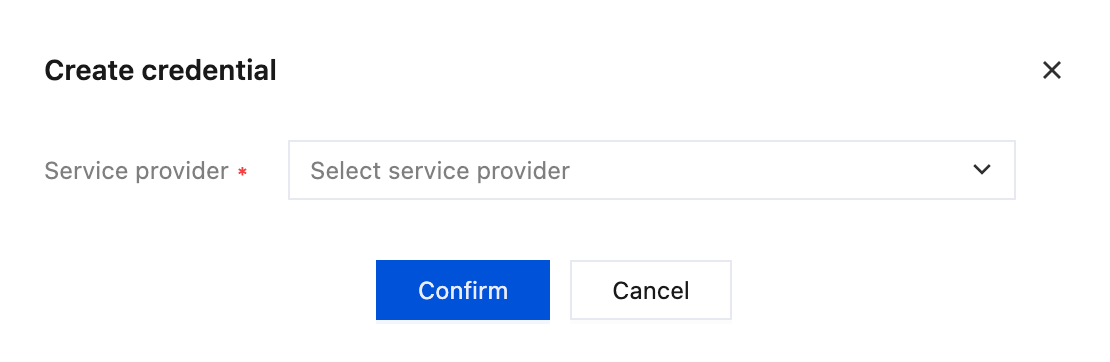
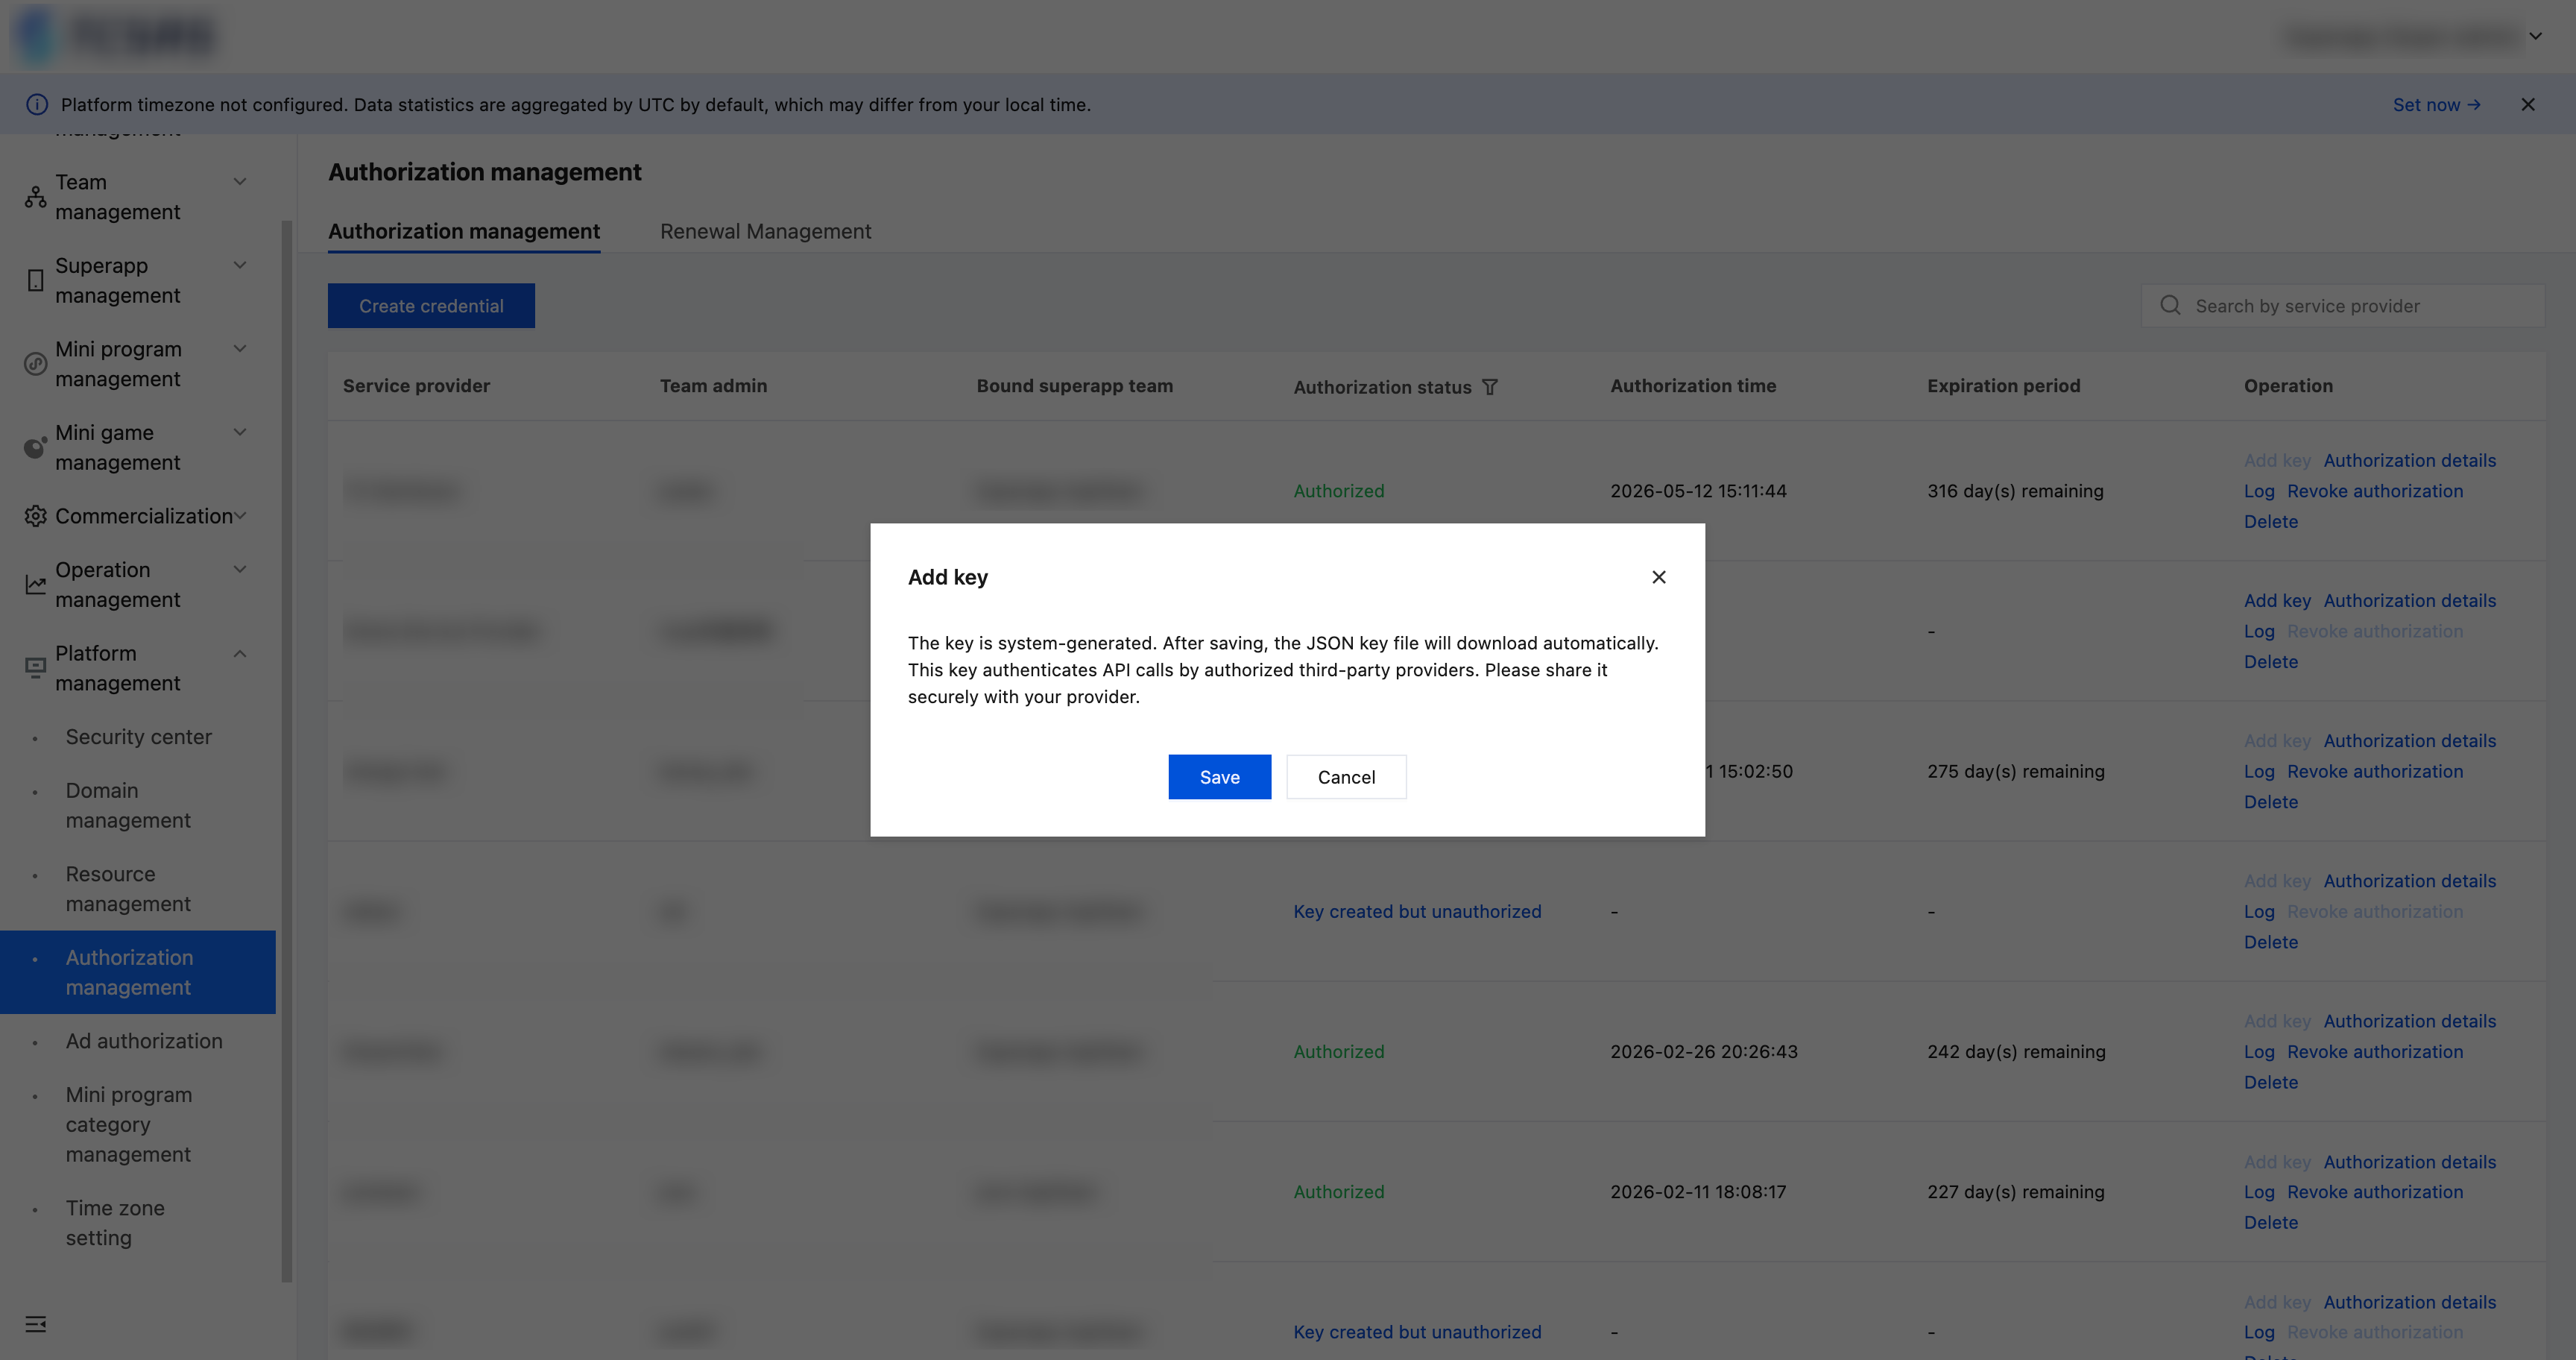
Add key
For records in the "not authorized" or "invalidated" status, click "Add key" in the action column to generate SecretID / SecretKey credentials. The service provider is responsible for saving them and completing the subsequent authorization activation process.
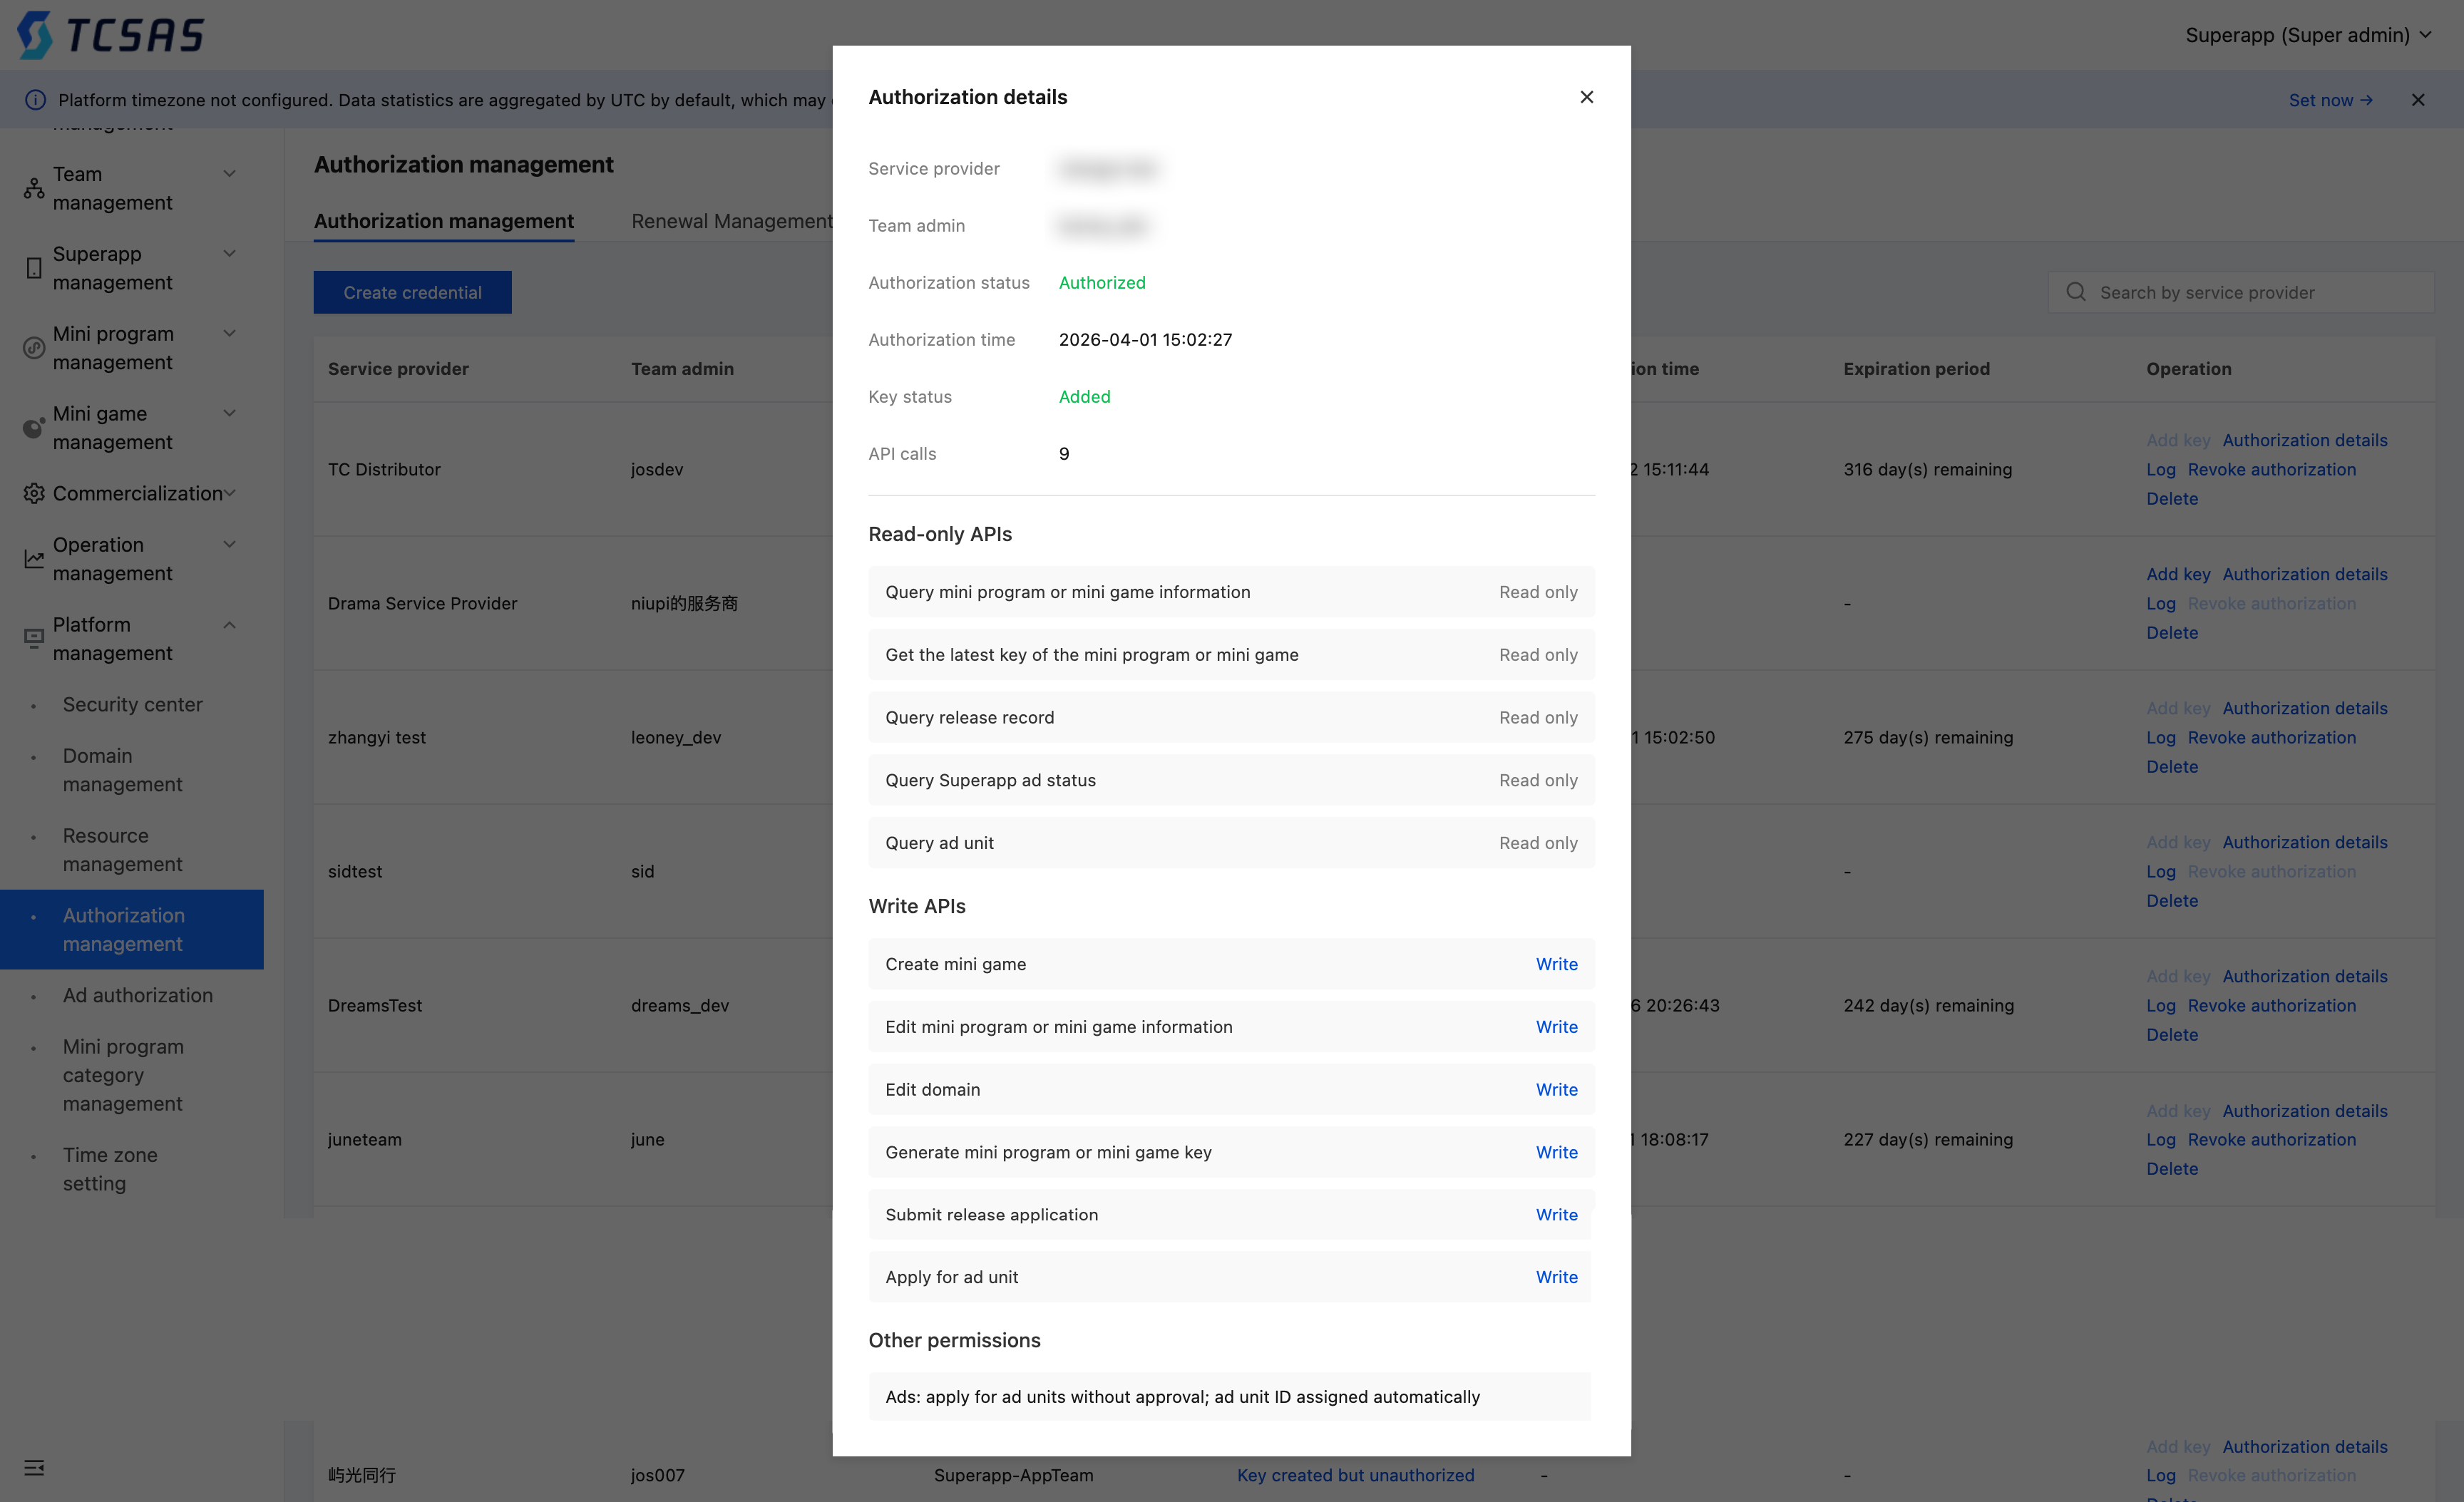
Authorization details
Click "Authorization details" in the action column to view the full information of an authorization, including: service provider name, bound team, team administrator, authorization status, authorization time, number of callable APIs, as well as the detailed lists of read and write APIs.
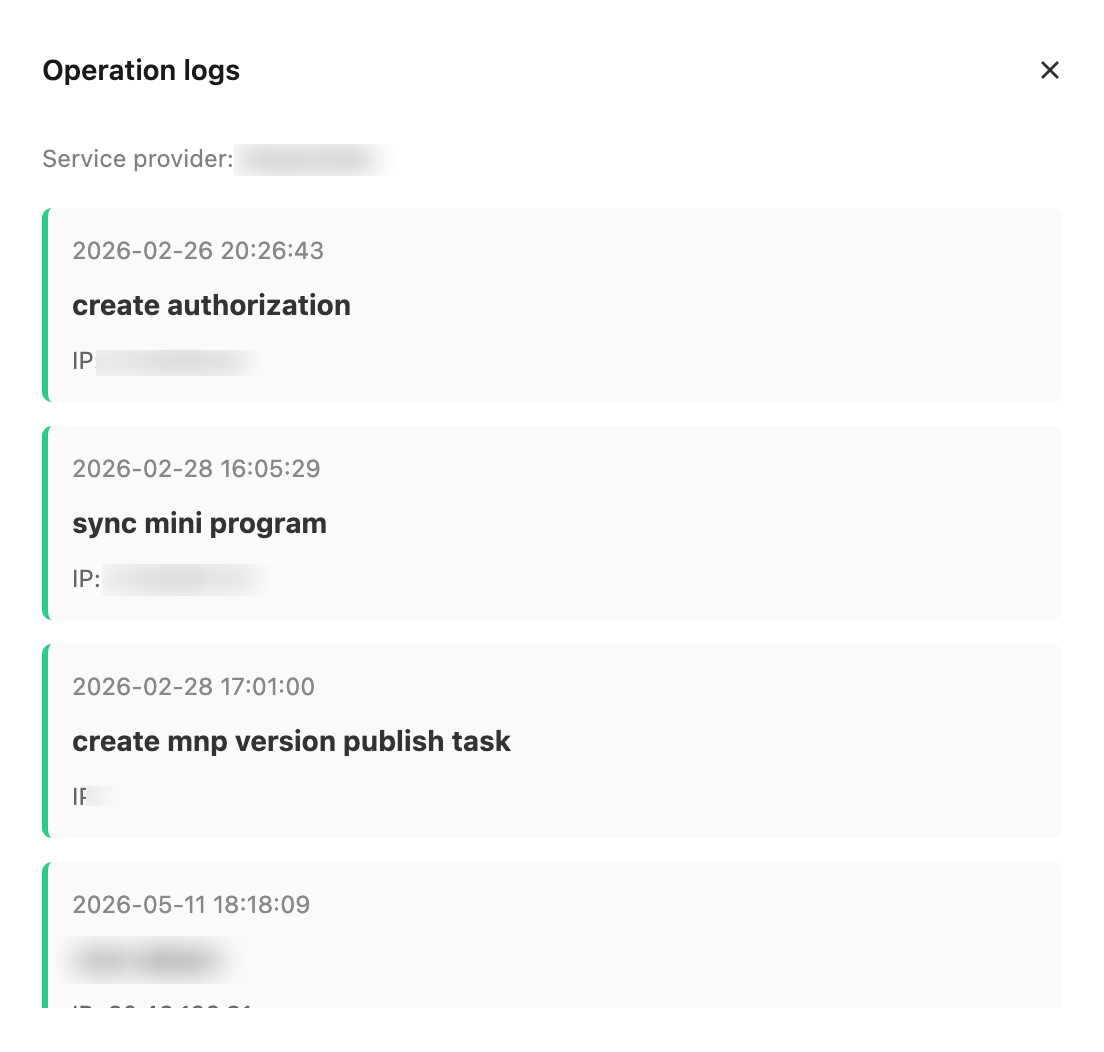
Log
Click "Log" in the action column to view the historical change records of the authorization, making it easy to trace key events such as authorization, revocation, and renewal.
Revoke authorization
For records in the "Authorized" status, click "Revoke authorization" to immediately terminate the service provider's calling permission. After revocation, the credentials are no longer usable and the status changes to "Invalidated".
Delete
For authorization records that are no longer needed, click "Delete" to completely remove the credential from the list.
Note:
"Revoke authorization" immediately removes the service provider's calling permission but retains historical records, while "Delete" removes the record as well. Please choose carefully to avoid misoperations that may affect live services.
Renewal management
Renewal management is used to centrally handle "extend authorization validity" requests initiated by service providers. The list is sorted in reverse chronological order by request time and supports filtering by approval status: Pending, Approved, and Rejected.
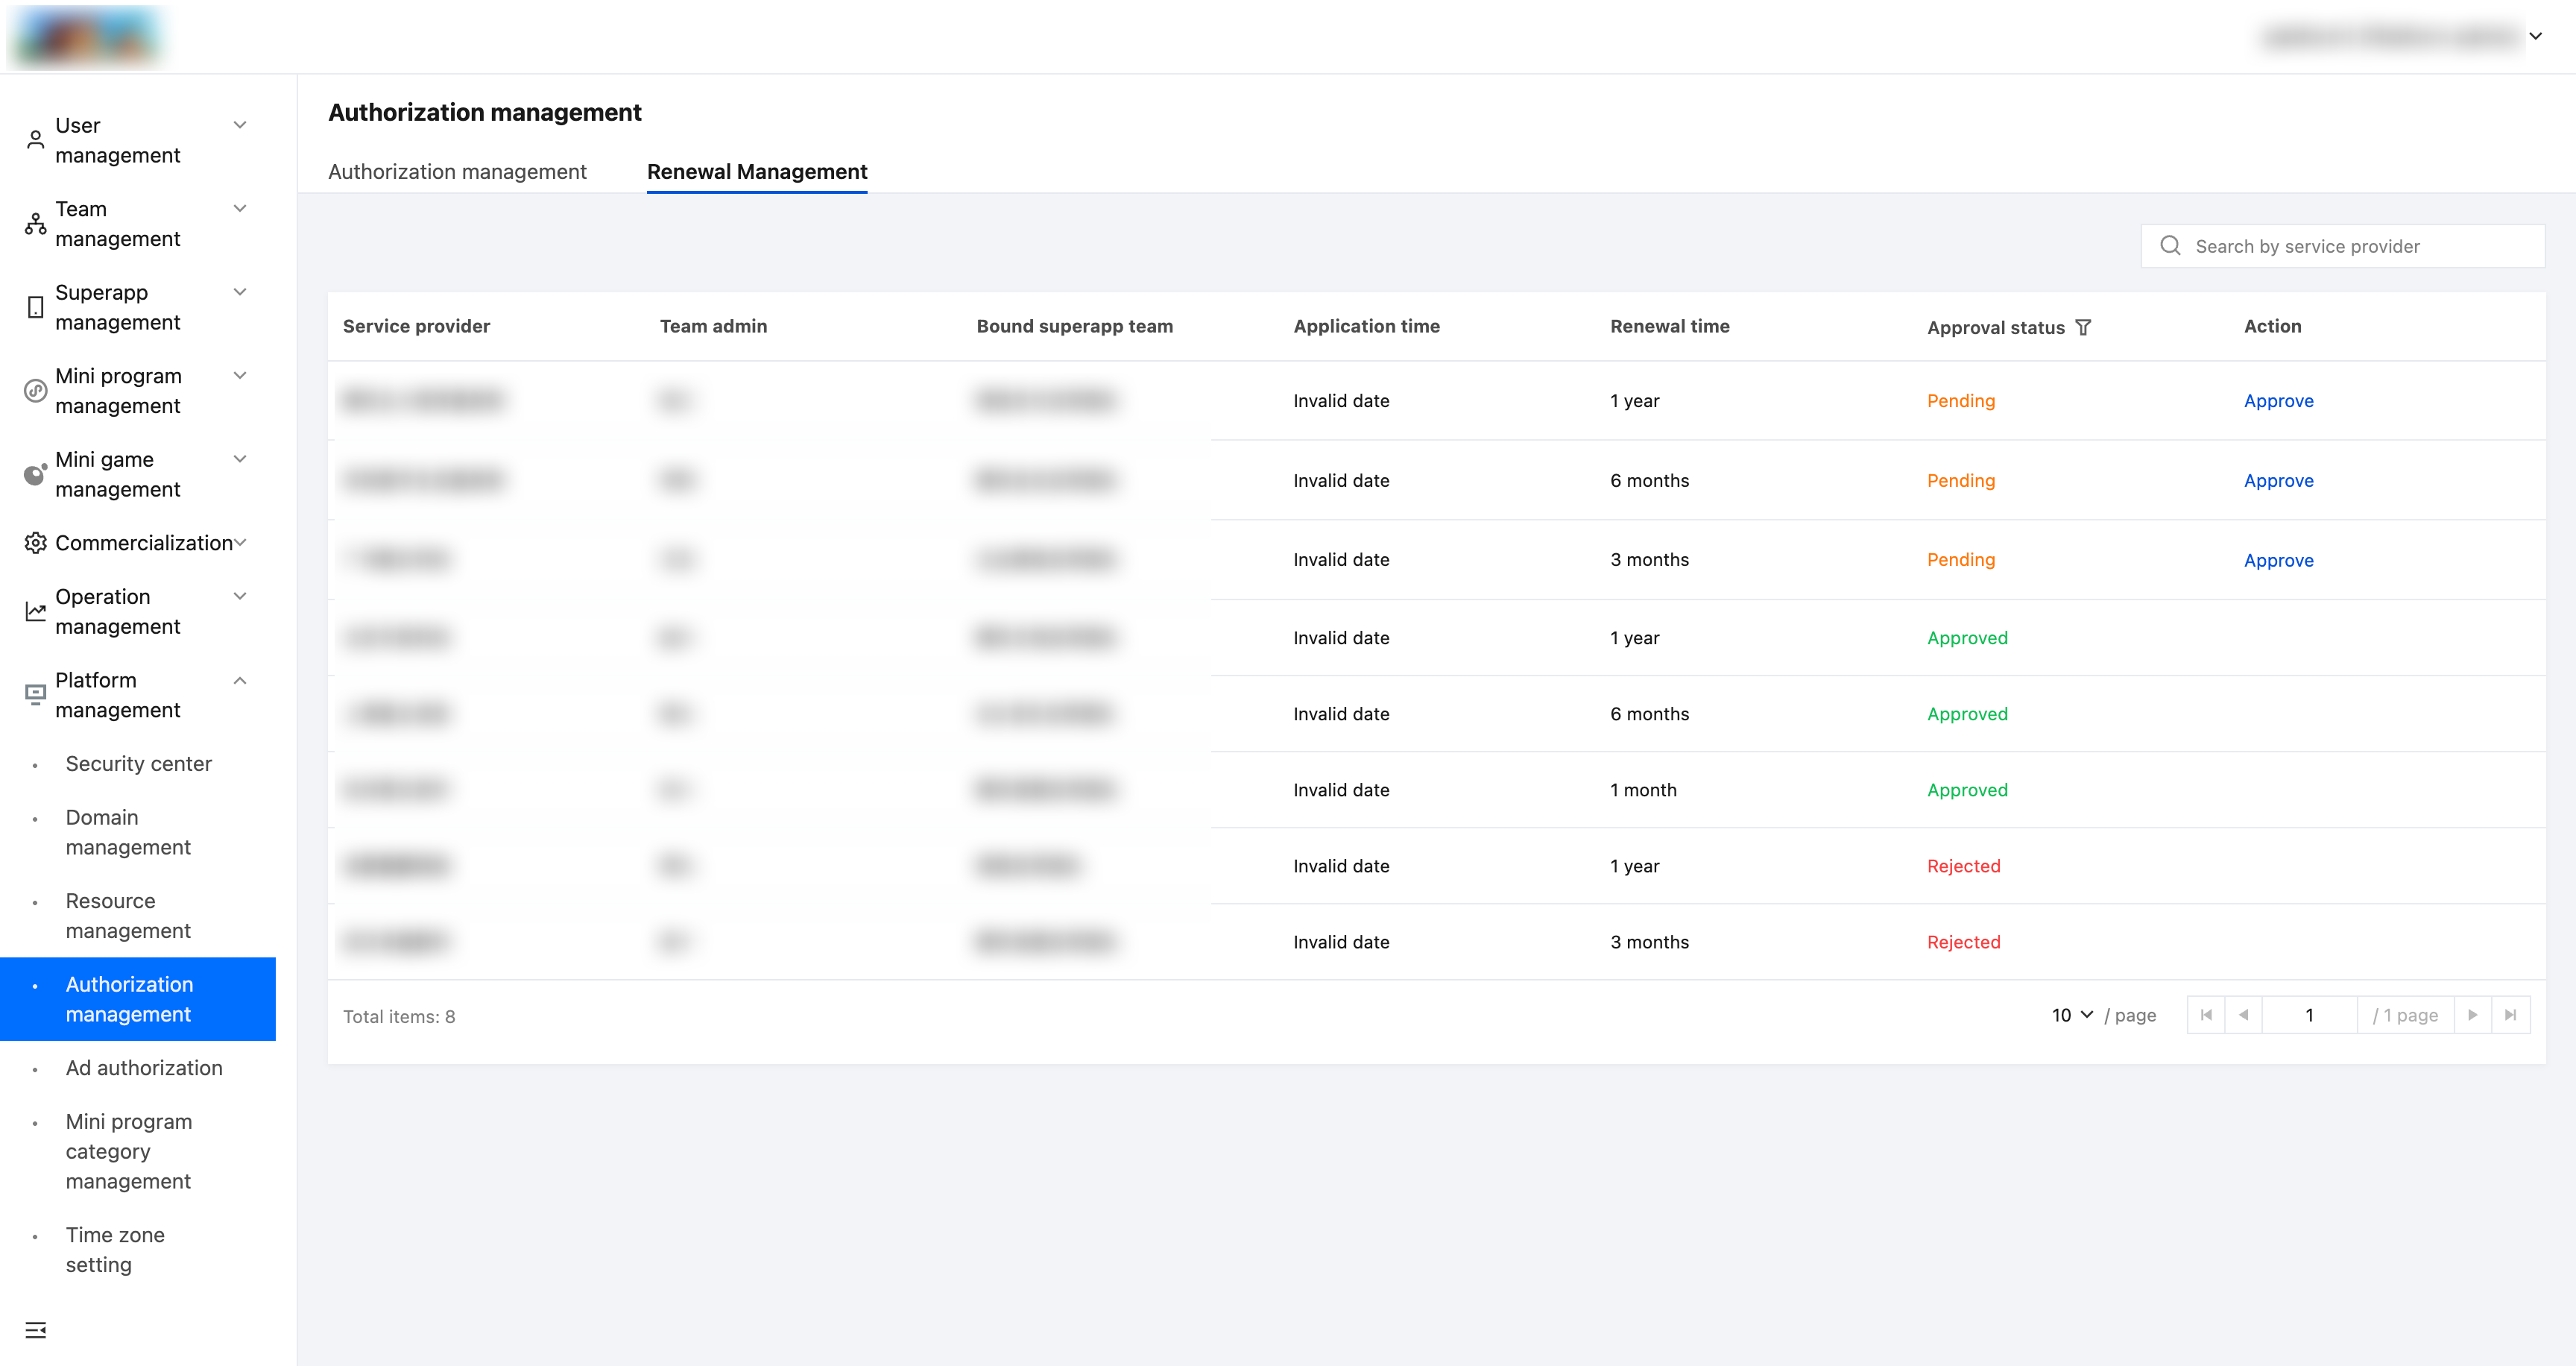
View renewal request
The list displays the key information of each request: service provider team, team administrator, bound superapp team, request time, and the requested renewal duration (e.g., 1 month / 3 months / 6 months / 1 year).
Approve renewal
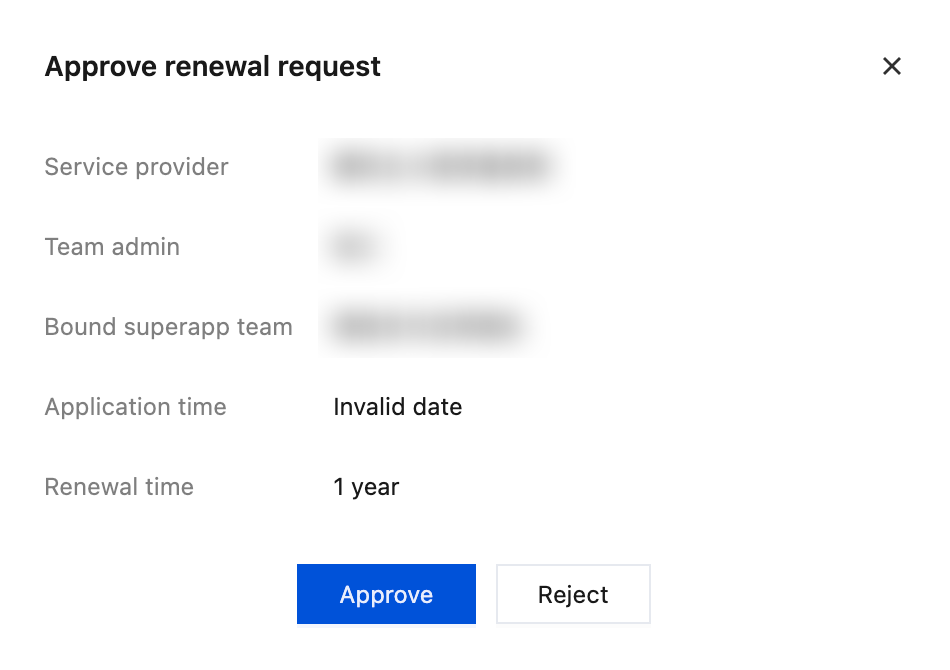
For records in the "Pending" status, click "Approve" to open the approval dialog:
The dialog displays read-only information including the service provider team, team administrator, bound superapp team, request time, and requested renewal duration.
Click "Approve" to approve the renewal, and the authorization validity period will be extended by the requested duration.
Click "Reject" to trigger a secondary confirmation. Once confirmed, the requests is set to "Rejected" and the original authorization validity period remains unchanged.
Note:
Renewal requests are initiated by the service provider on their side, and the platform administrator is only responsible for approval. Once approved or rejected, the decision cannot be undone. If any adjustment is needed, please ask the service provider to submit a new request.
Time zone settings
Purpose
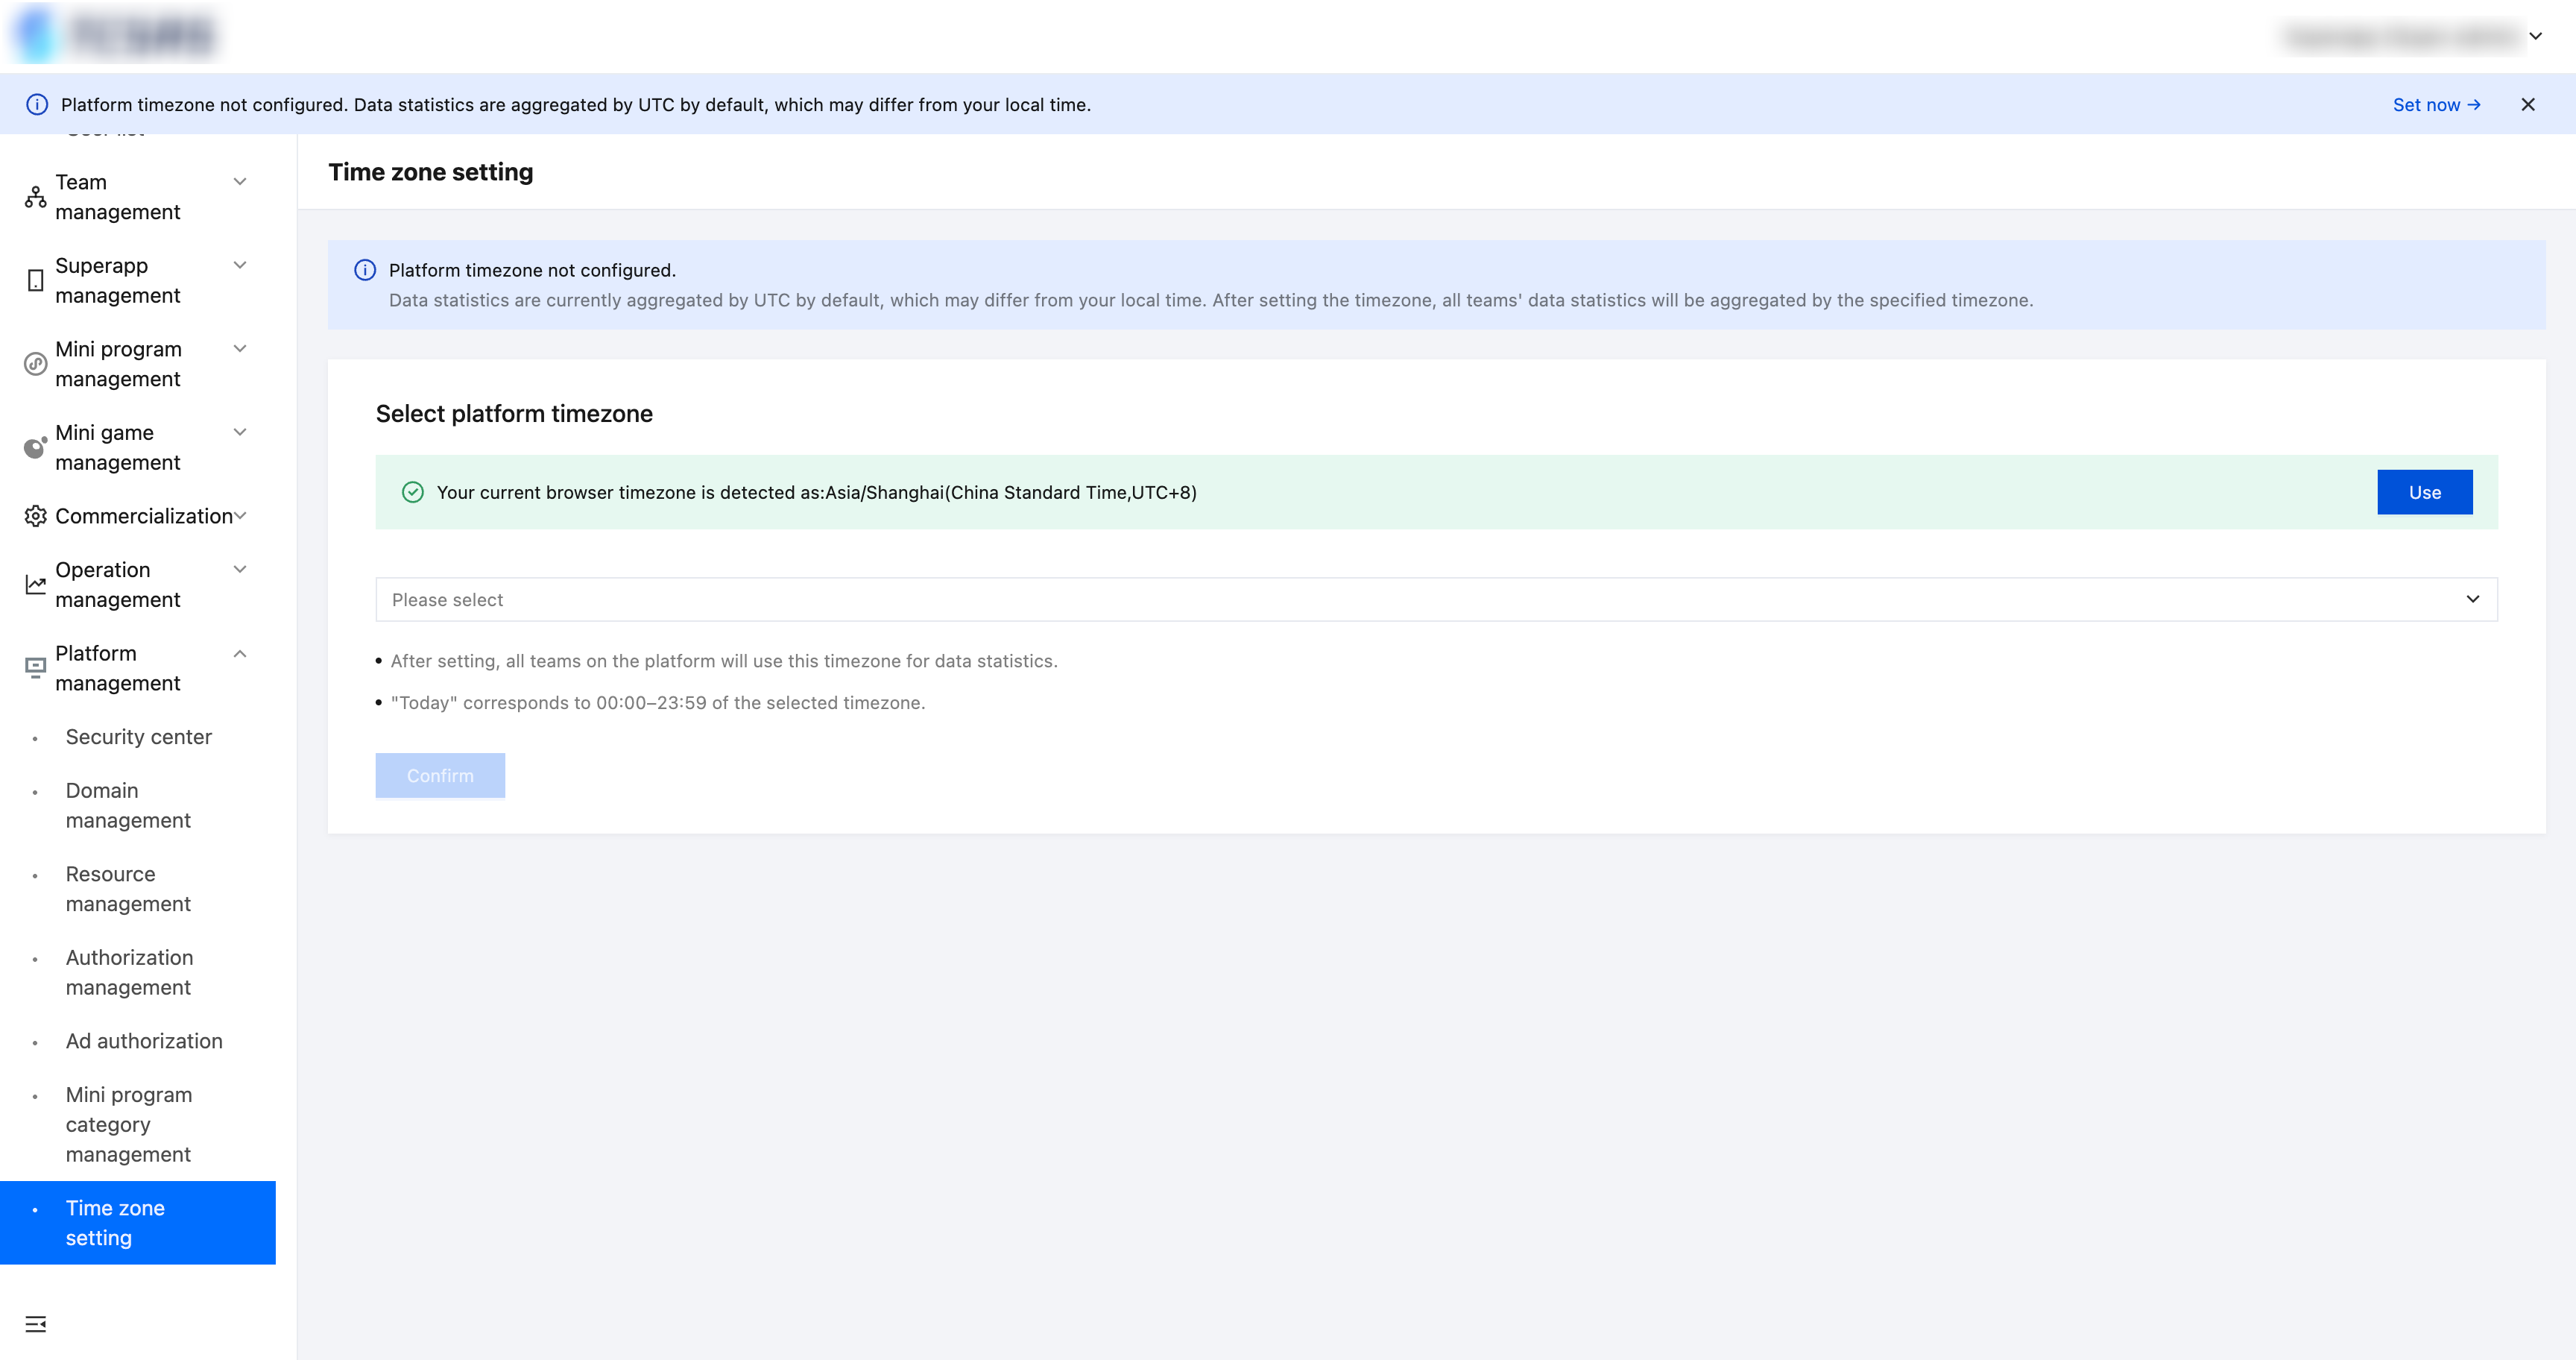
Navigate to "Platform management - Time zone settings." If the time zone has not yet been configured, a notification will appear at the top of the page: "The platform time zone has not been configured; current data statistics are aggregated based on UTC by default, which may differ from your local time." You can use "Time Zone Settings" to establish a unified baseline time zone for the entire platform. Once configured, data statistics for all teams—as well as time-based filters such as "Today," "Last 7 Days," and "Last 30 Days"—will be aggregated according to this time zone, facilitating data alignment across teams.
Set time zone
Browser time zone detection
The page automatically detects the time zone of your current browser; you can simply click the "Use this time zone" button to quickly select it.
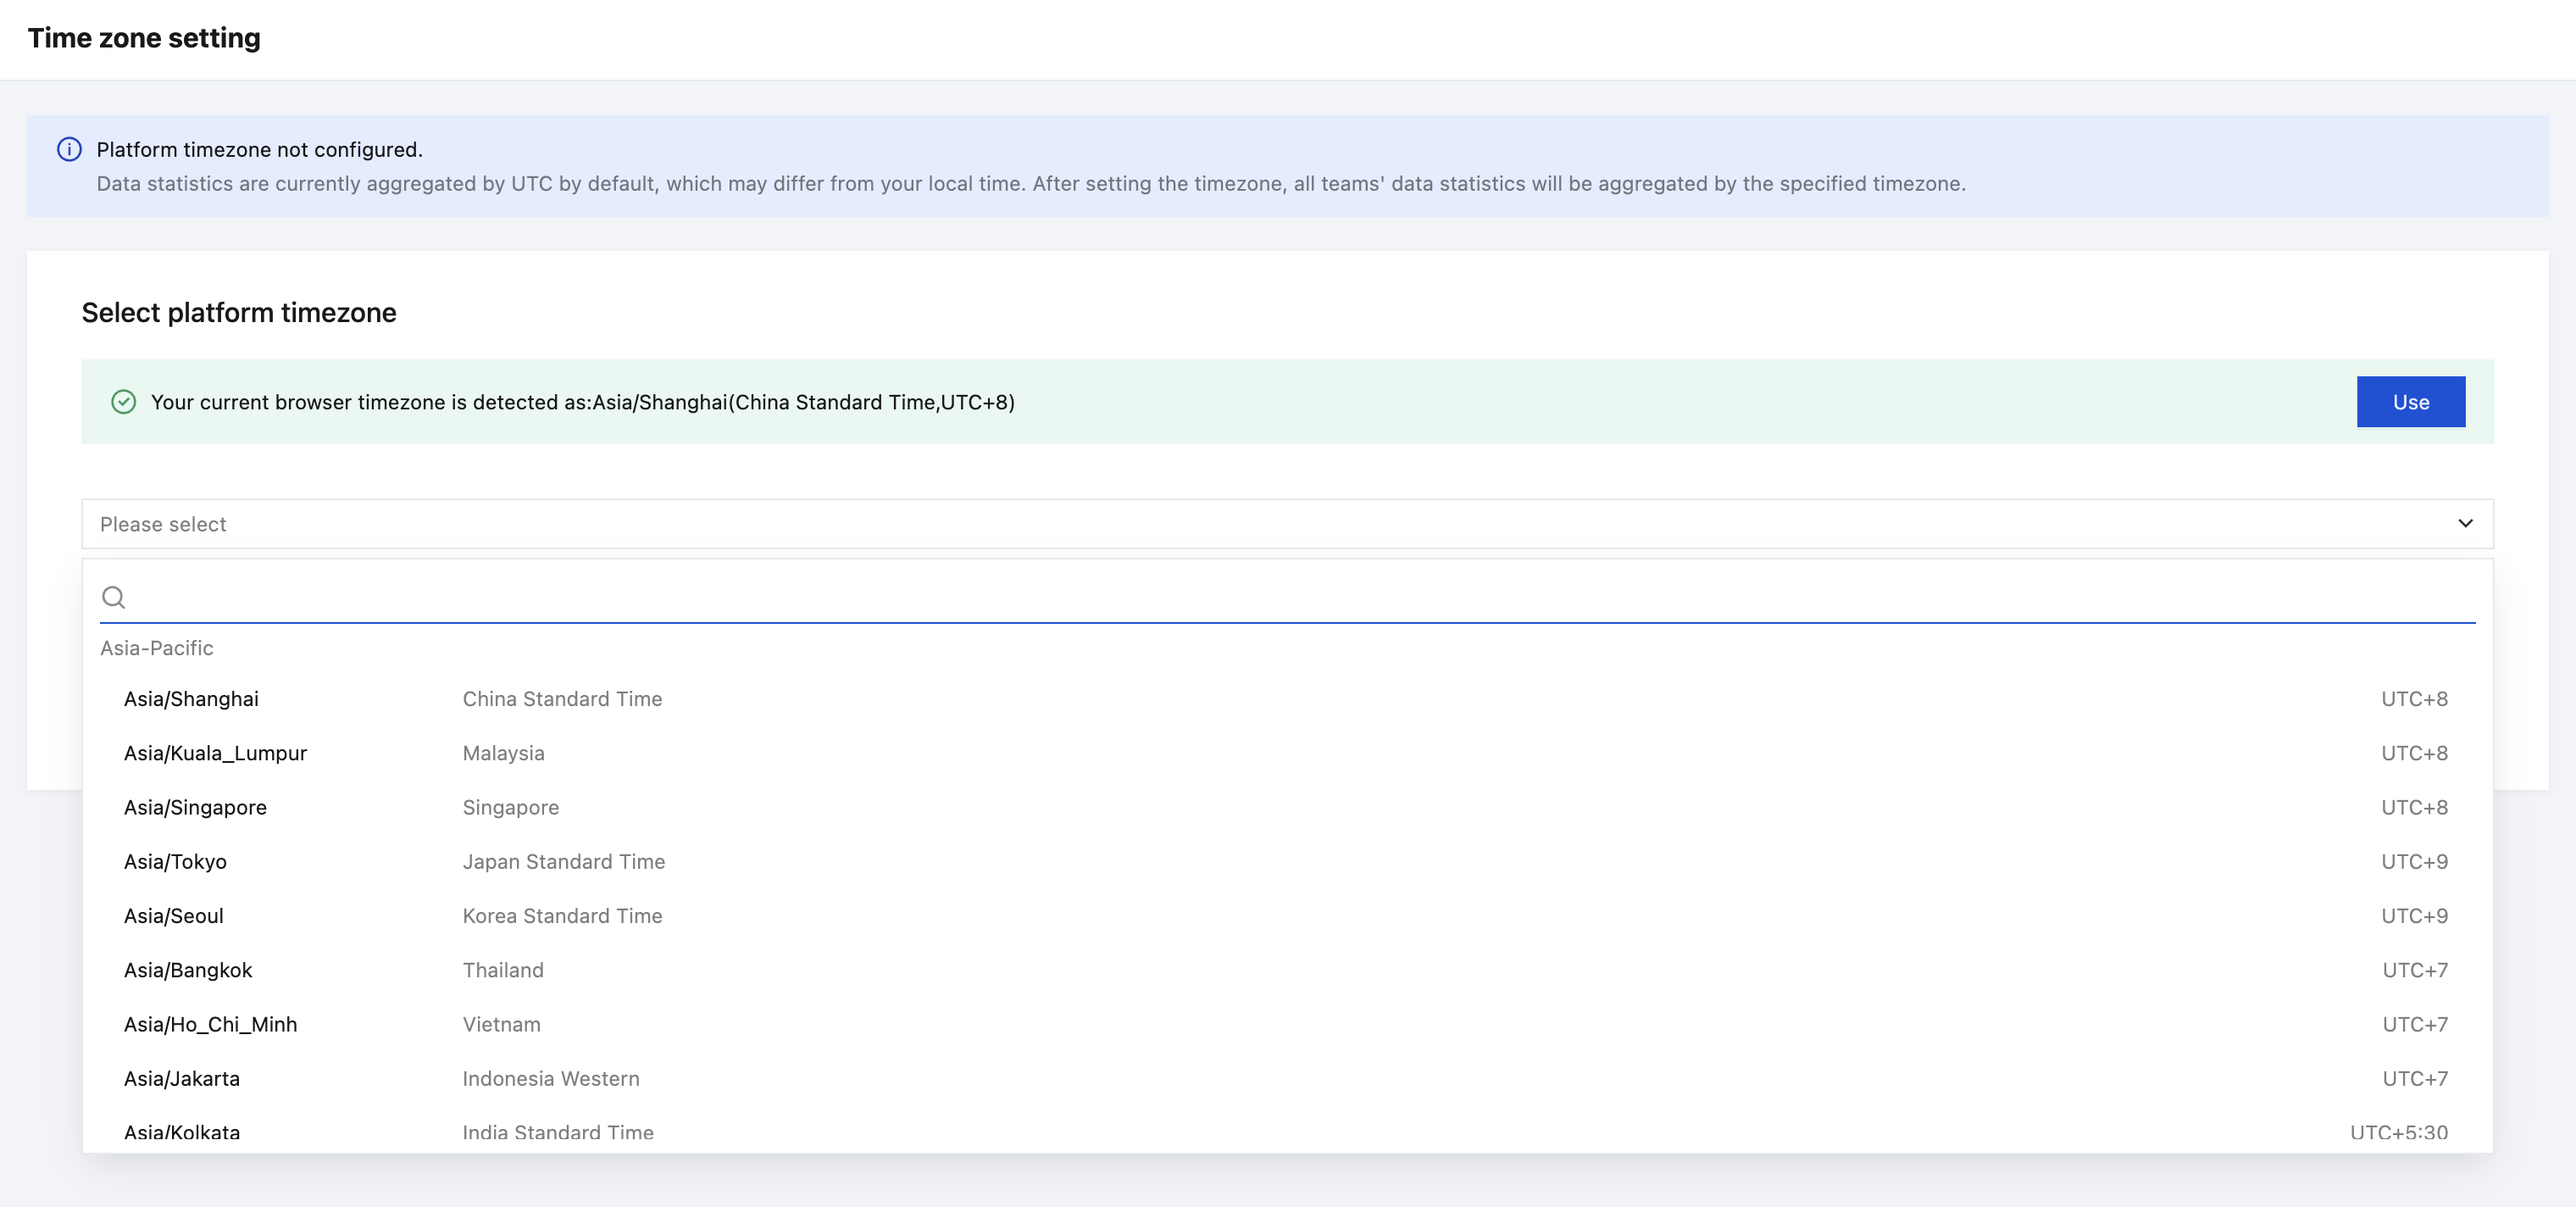
Select time zone
You can manually select or search for a time zone using the drop-down menu.
Note:
1. Once the time zone is set, the change is immediately recorded in the platform configuration; however, data aggregation based on the new time zone takes effect starting at 00:00 the following day. Data for the current day and prior days continues to be aggregated based on the original UTC+0 setting, so comparisons spanning the day the setting was changed may show discrepancies.
2. Data from third-party sources (such as Google AdMob) continues to use the time zone selected when the third-party account was created and is unaffected by the platform's time zone setting.
Ajuda e Suporte
Esta página foi útil?
Você também pode entrar em contato com a Equipe de vendas ou Enviar um tíquete em caso de ajuda.
comentários