TUIKit Flutter is a Flutter UI component library built on the Chat SDK. It provides a complete solution for instant messaging features, including chat, conversation lists, and contact management. This guide walks you through manual integration and core feature implementation.
Key Concepts
TUIKit offers a full suite of instant messaging UI components, built on the AtomicXCore data layer, allowing you to construct various functional pages.
Chat Component Layer: Functional components built on base components and AtomicXCore, which you can embed into your existing app pages.
Base Component Layer: General UI capabilities and basic interactive components, providing a stable and reusable interface foundation for the Chat Component Layer and business apps.
AtomicXCore (Data Layer): Handles data management and business logic, including various Stores and Managers.
Prerequisites
Flutter >= 3.29.0, Dart >= 3.7.0, Kotlin >= 1.9.
Android Studio Ladybug | 2024.2.1 or higher, Android Gradle plugin 7.3.1 or higher, JDK 17.
Xcode 12.0 or higher.
A valid Tencent Cloud account and Chat application. See Service Activation to obtain the following from the console:
SDKAppID: The Chat application's unique identifier.
SecretKey: The application's SecretKey.
Note:
This project currently supports manual integration only; pub.dev integration is not available.
To maintain a stable build environment, strictly follow official compatibility requirements:
For compatibility between Gradle, Android Gradle Plugin, JDK, and Android Studio, refer to the official Android documentation: Release Notes.
For version mapping between Kotlin, Android Gradle Plugin, and Gradle, refer to the official Kotlin documentation: Kotlin-Gradle Plugin Compatibility.
1. Copy the entire component directory into your Flutter project. For example, flutter_demo is your sample project, and TUIKit_Flutter is the component source code you downloaded:
2. Add the component to your project's pubspec.yaml file:
tencent_chat_uikit:
path: ../TUIKit_Flutter/chat/uikit
Note:
You can modify the tuikit_atomic_x dependency in chat/uikit/pubspec.yaml to depend on the online version from pub.
To upgrade, obtain the latest component code from GitHub and overwrite your local TUIKit_Flutter directory.
If you make private modifications that conflict with the remote repository, manually merge and resolve conflicts.
Project Configuration
Add the required permission configuration for iOS. Open ios/Podfile and add the following code at the end of the file:
If you do not have a Gradle global configuration file ~/.gradle/init.gradle, skip this step. If it exists and contains allprojects.repositories, you can remove the related content or delete ~/.gradle/init.gradle (backup recommended) to avoid runtime errors.
Configure JDK 17 (Android only): In your project (for example, under chat/demo), add org.gradle.java.home to gradle.properties to set the JDK 17 path. Replace with your actual JDK 17 full path. Example:
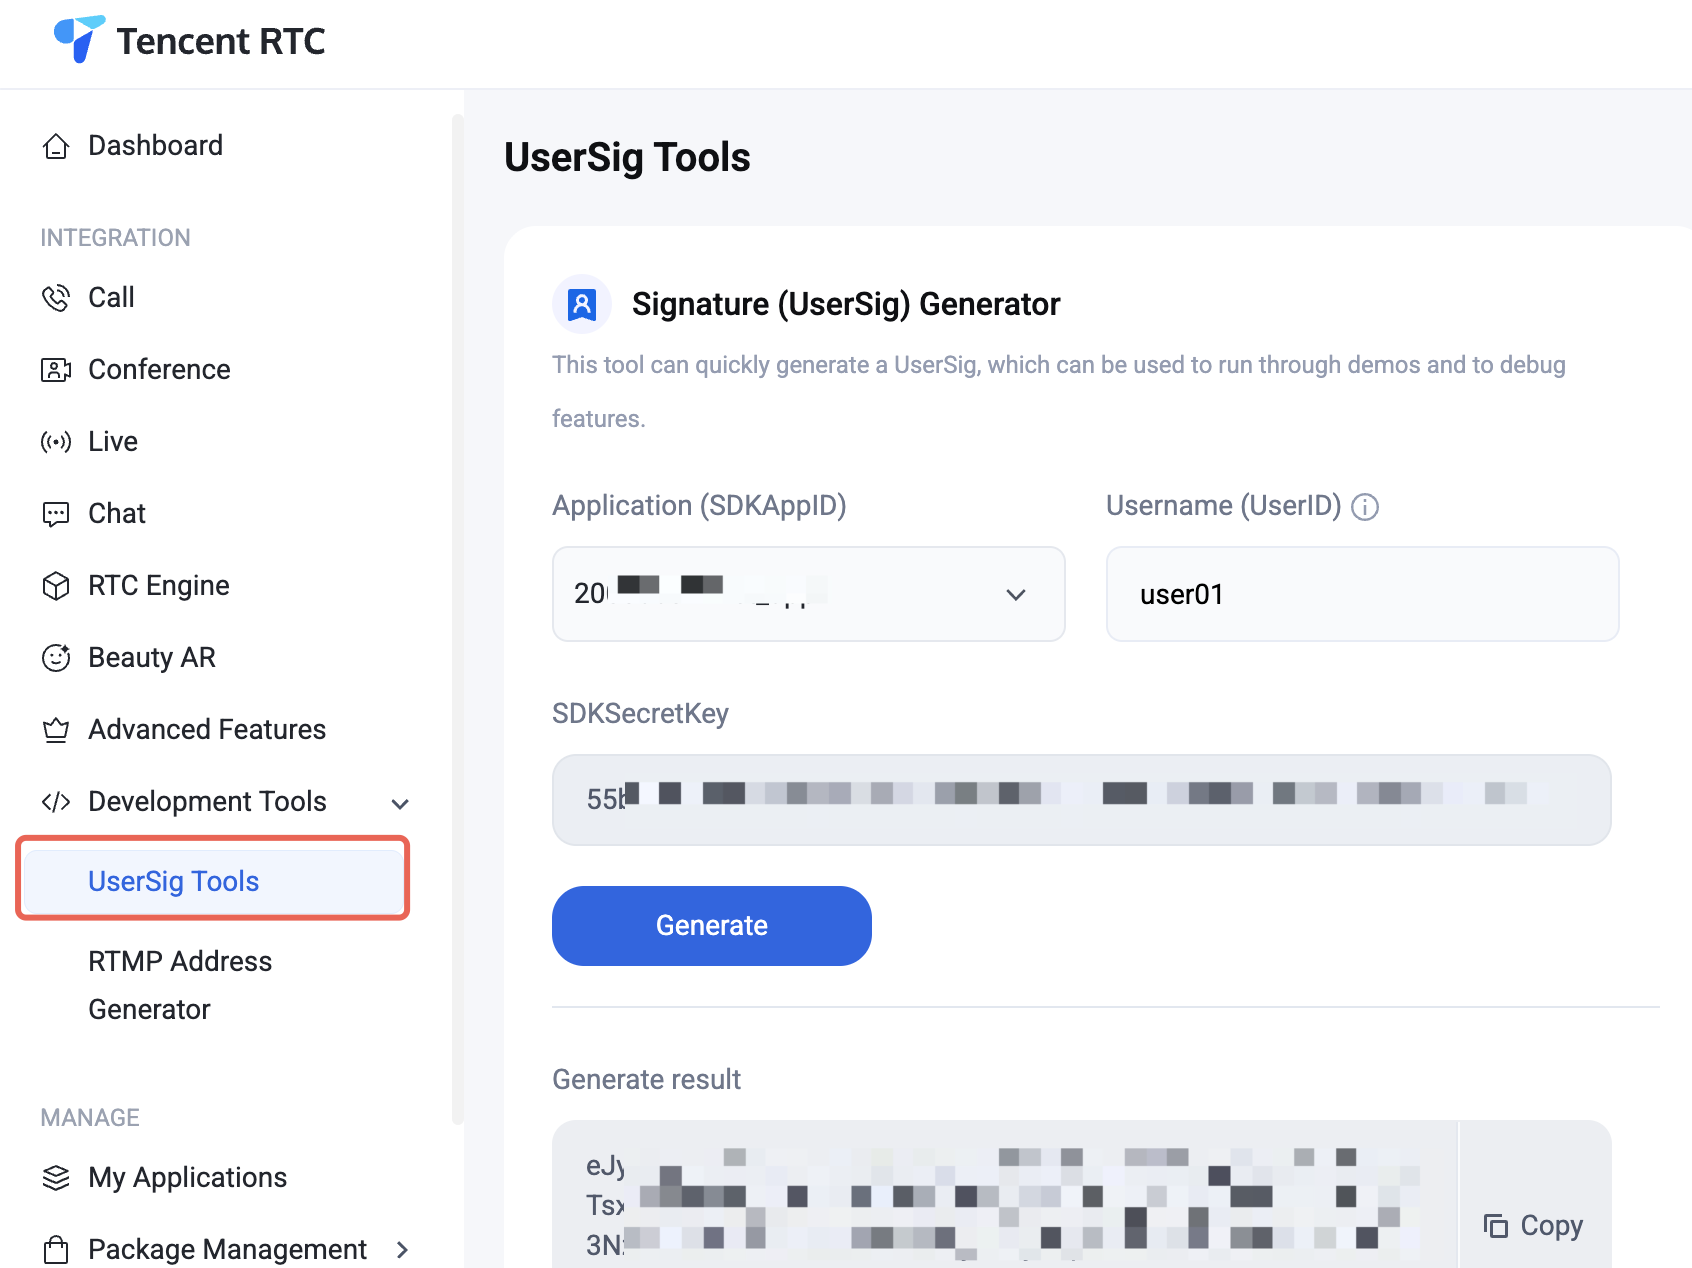
In the Tencent RTC Console, obtain the UserSig for a given UserID for login authentication.
Step 2: User Login
Authenticate before using any component features. Call the login API and pass in the SDKAppID, userID, and userSig you obtained above:
final result = await LoginStore.shared.login(
sdkAppID: SDKAPPID,
userID: userID,
userSig: userSig,
);
if(result.errorCode ==0){
// Login successful, you can navigate to chat or conversation page
}else{
// Login failed, show error dialog
}
Caution:
In production, generate UserSig on your server. When UserSig is needed, your app should request a dynamic UserSig from your business server for authentication. See Server-side UserSig Generation.
Step 3: Build Conversation List Page
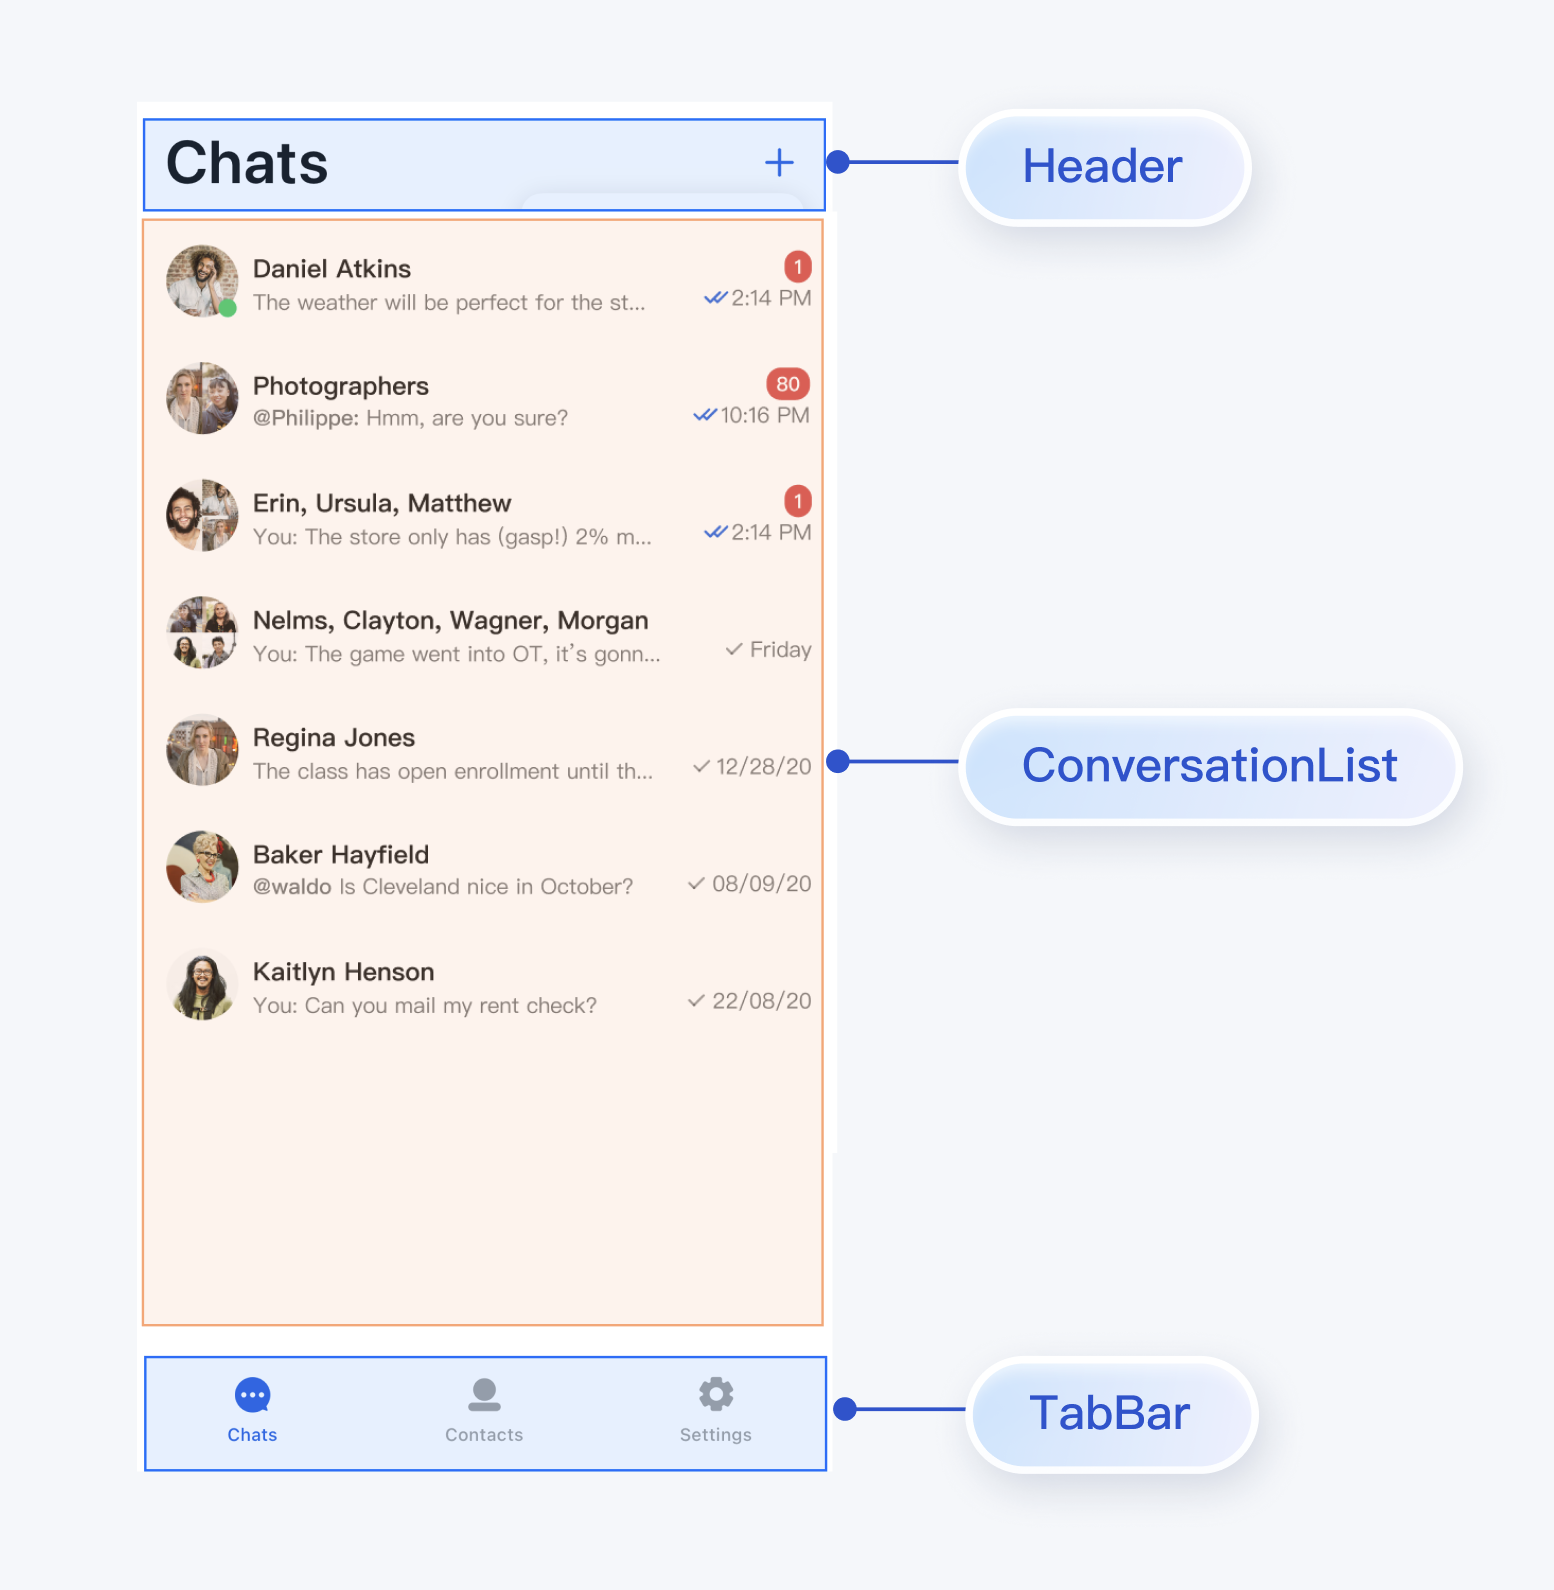
Use the ConversationList component from TUIKit Flutter to build a conversation list page. ConversationList provides:
Displays the user's conversation list, including C2C Chat and Group conversations.
Supports user actions on conversations: pin, delete, clear messages, and more.
You can integrate ConversationList into an existing app page or create a new conversation list page. Example UI:
To wrap ConversationList as a conversation list page, see chat/uikit/lib/src/pages/conversations_page.dart. ConversationsPage does the following:
1. Adds an AppBar above ConversationList.
2. Implements conversation cell click events.
3. Supports creating conversations and Groups:
3.1 Taps the button in the upper right to create a new conversation or Group.
3.2 Selects friends from the contact list to start a C2C Chat.
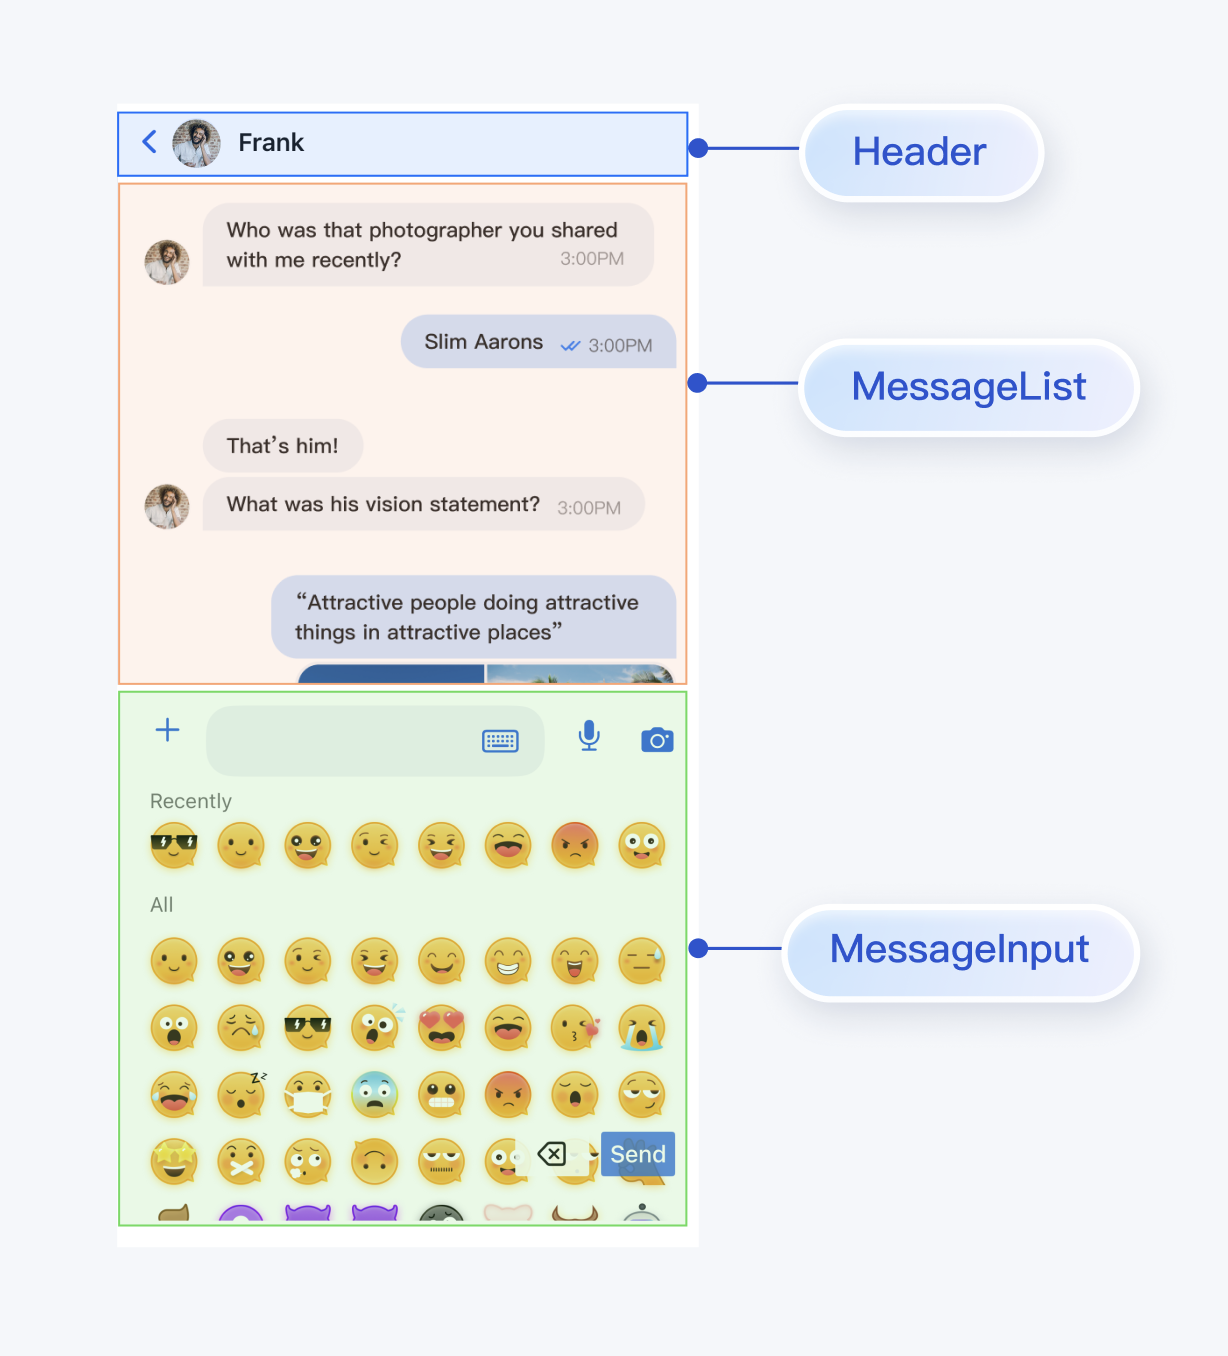
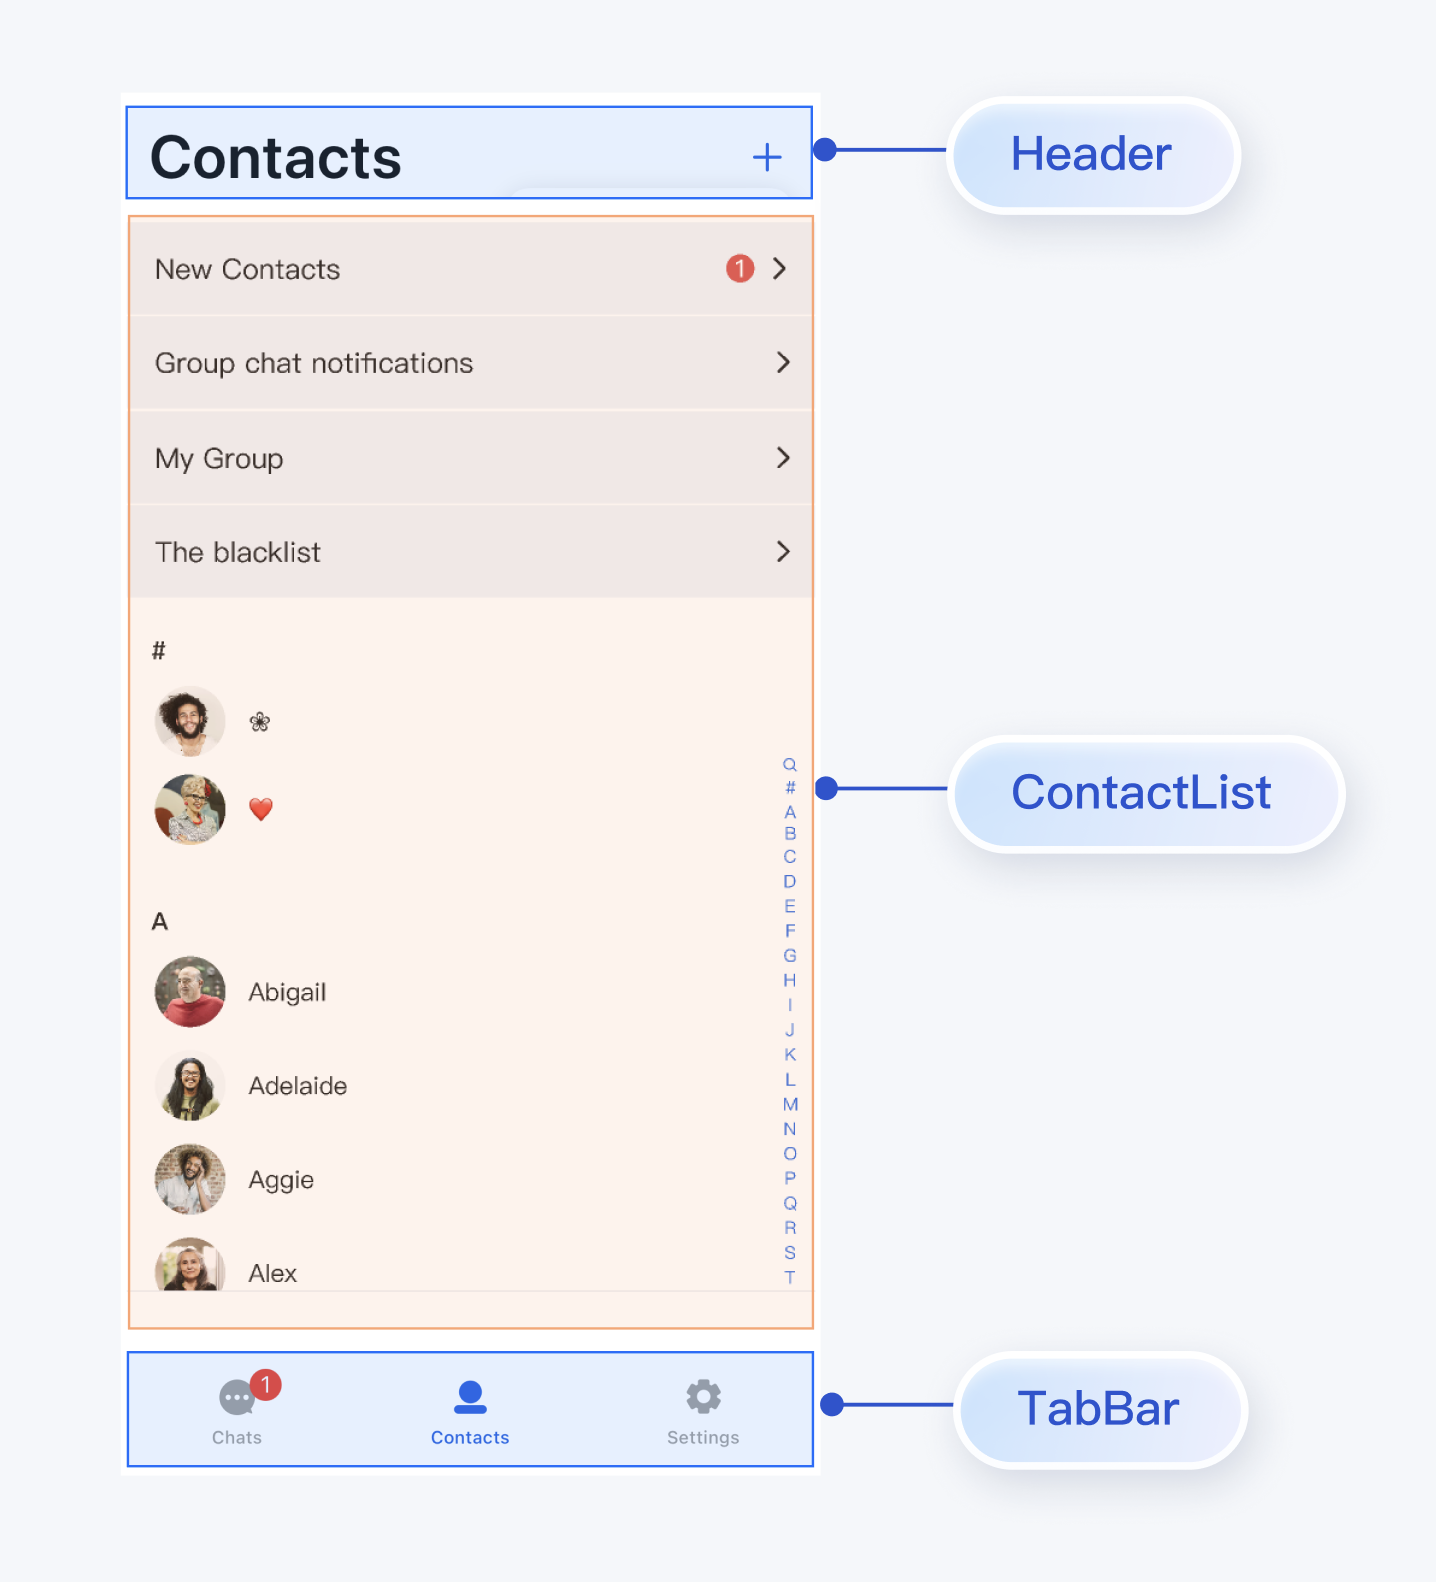
ConversationsPage, ChatPage, and ContactsPage provide default user click events. You can customize these events to control navigation between pages:
Page
Webhook
Recommended Navigation Logic
ConversationsPage
onConversationClick: (conversation) {}
Triggered when a conversation in the list is clicked; recommended to navigate to the chat page (ChatPage).
ContactsPage
onContactClick: (ContactInfo contactInfo) {}
Triggered when a contact cell is clicked; recommended to navigate to the user info page (C2CChatSetting).
ContactsPage
onGroupClick: (ContactInfo contactInfo) {}
Triggered when a Group cell is clicked; recommended to navigate to the Group chat page (ChatPage).
ChatPage
onUserClick: (String userID) {}
Triggered when a user's avatar or nickname in a message is clicked; recommended to navigate to the user info page (C2CChatSetting).
ChatPage
onChatHeaderClick: () {}
Triggered when the avatar in the navigation bar is clicked; recommended to navigate to the user info page (C2CChatSetting) or Group info page (GroupChatSetting).
ChatPage
onBackClick: () {}
Triggered when the back button is clicked; recommended to return to the previous page.
Refer to the webhook descriptions and code above to implement navigation logic between pages.
FAQs
What should I do if I encounter errors with theme_state and atomic_localizations after integrating the tuikit_atomic_x component?
The component supports theme color and internationalization string switching. Wrap the root widget in your project's main.dart file with ComponentTheme, and add AtomicLocalizations.delegate to the localizationsDelegates of MaterialApp. See the Demo's main.dart file in the source code for reference.
What should I do if login fails with a signature error?
Check that SDKAppID and UserSig are correct, and verify that the UserSig has not expired. Refer to the user authentication configuration above to regenerate the UserSig.
Contact Us
If you have any questions or suggestions during integration or use, feel free to Contact Us to submit feedback.