Use Cases
The combination of Anti-DDoS Premium EIP and the Enterprise Edition Anti-DDoS Package delivers Tbps-level DDoS protection capabilities, effectively mitigating large-scale traffic attacks. Tencent Cloud WAF provides an integrated application solution that combines WAF with Anti-DDoS Premium EIP, enabling customers to achieve deep synergy between network-layer and application-layer security protection for their business operations. Prerequisites
A DDoS Anti-DDoS Package, Bandwidth Package have been purchased, and a High-Defense EIP has been created. For details, refer to the Creating an Anti-DDoS EIP. If you encounter issues binding the WAF, please contact our Technical Support Team via the Contact Us. Operation Steps
Step 1: Configure the Web Application Firewall
First, you need to integrate your protected domain with WAF. For detailed instructions, refer to SaaS WAF Connection. Step 2: Activate EIP
1. To use the High-Defense EIP service, go to the T-Sec_Anti-DDoS Purchase to purchase the Enterprise Edition Anti-DDoS Package. Step 3: Bind EIP to WAF
After activating the EIP, you need to bind WAF in the Public IPs Console to enable the EIP to obtain the WAF instance with the assigned VIP. 2. In the public IP page top section, select the region of the EIP you want to bind to a cloud resource, and in the operation column of the corresponding EIP, click More > Bind.
3. In the pop-up Bind Resource window, select Web Application Firewall, and below select the WAF instance, click OK.
4. In the pop-up "Confirm Binding" prompt box, click OK to complete the binding with the WAF instance.
5. After completing the WAF instance binding in the EIP console, you can view related information in the WAF console Instance Management: If the instance is bound to a High-Defense EIP, DDoS Protection Status below the instance type will display High-Defense EIP Bound.
Hover here to view the High-Defense EIP address, click View Details to jump to the EIP console.
After binding a High-Defense EIP, the bandwidth is borne by the EIP. The bandwidth specification limit is not displayed. The business bandwidth on the VIP is normally statistically calculated in the background, the bandwidth range takes effect normally, and unbinding is supported through the EIP console. After unbinding, the bandwidth is automatically displayed.
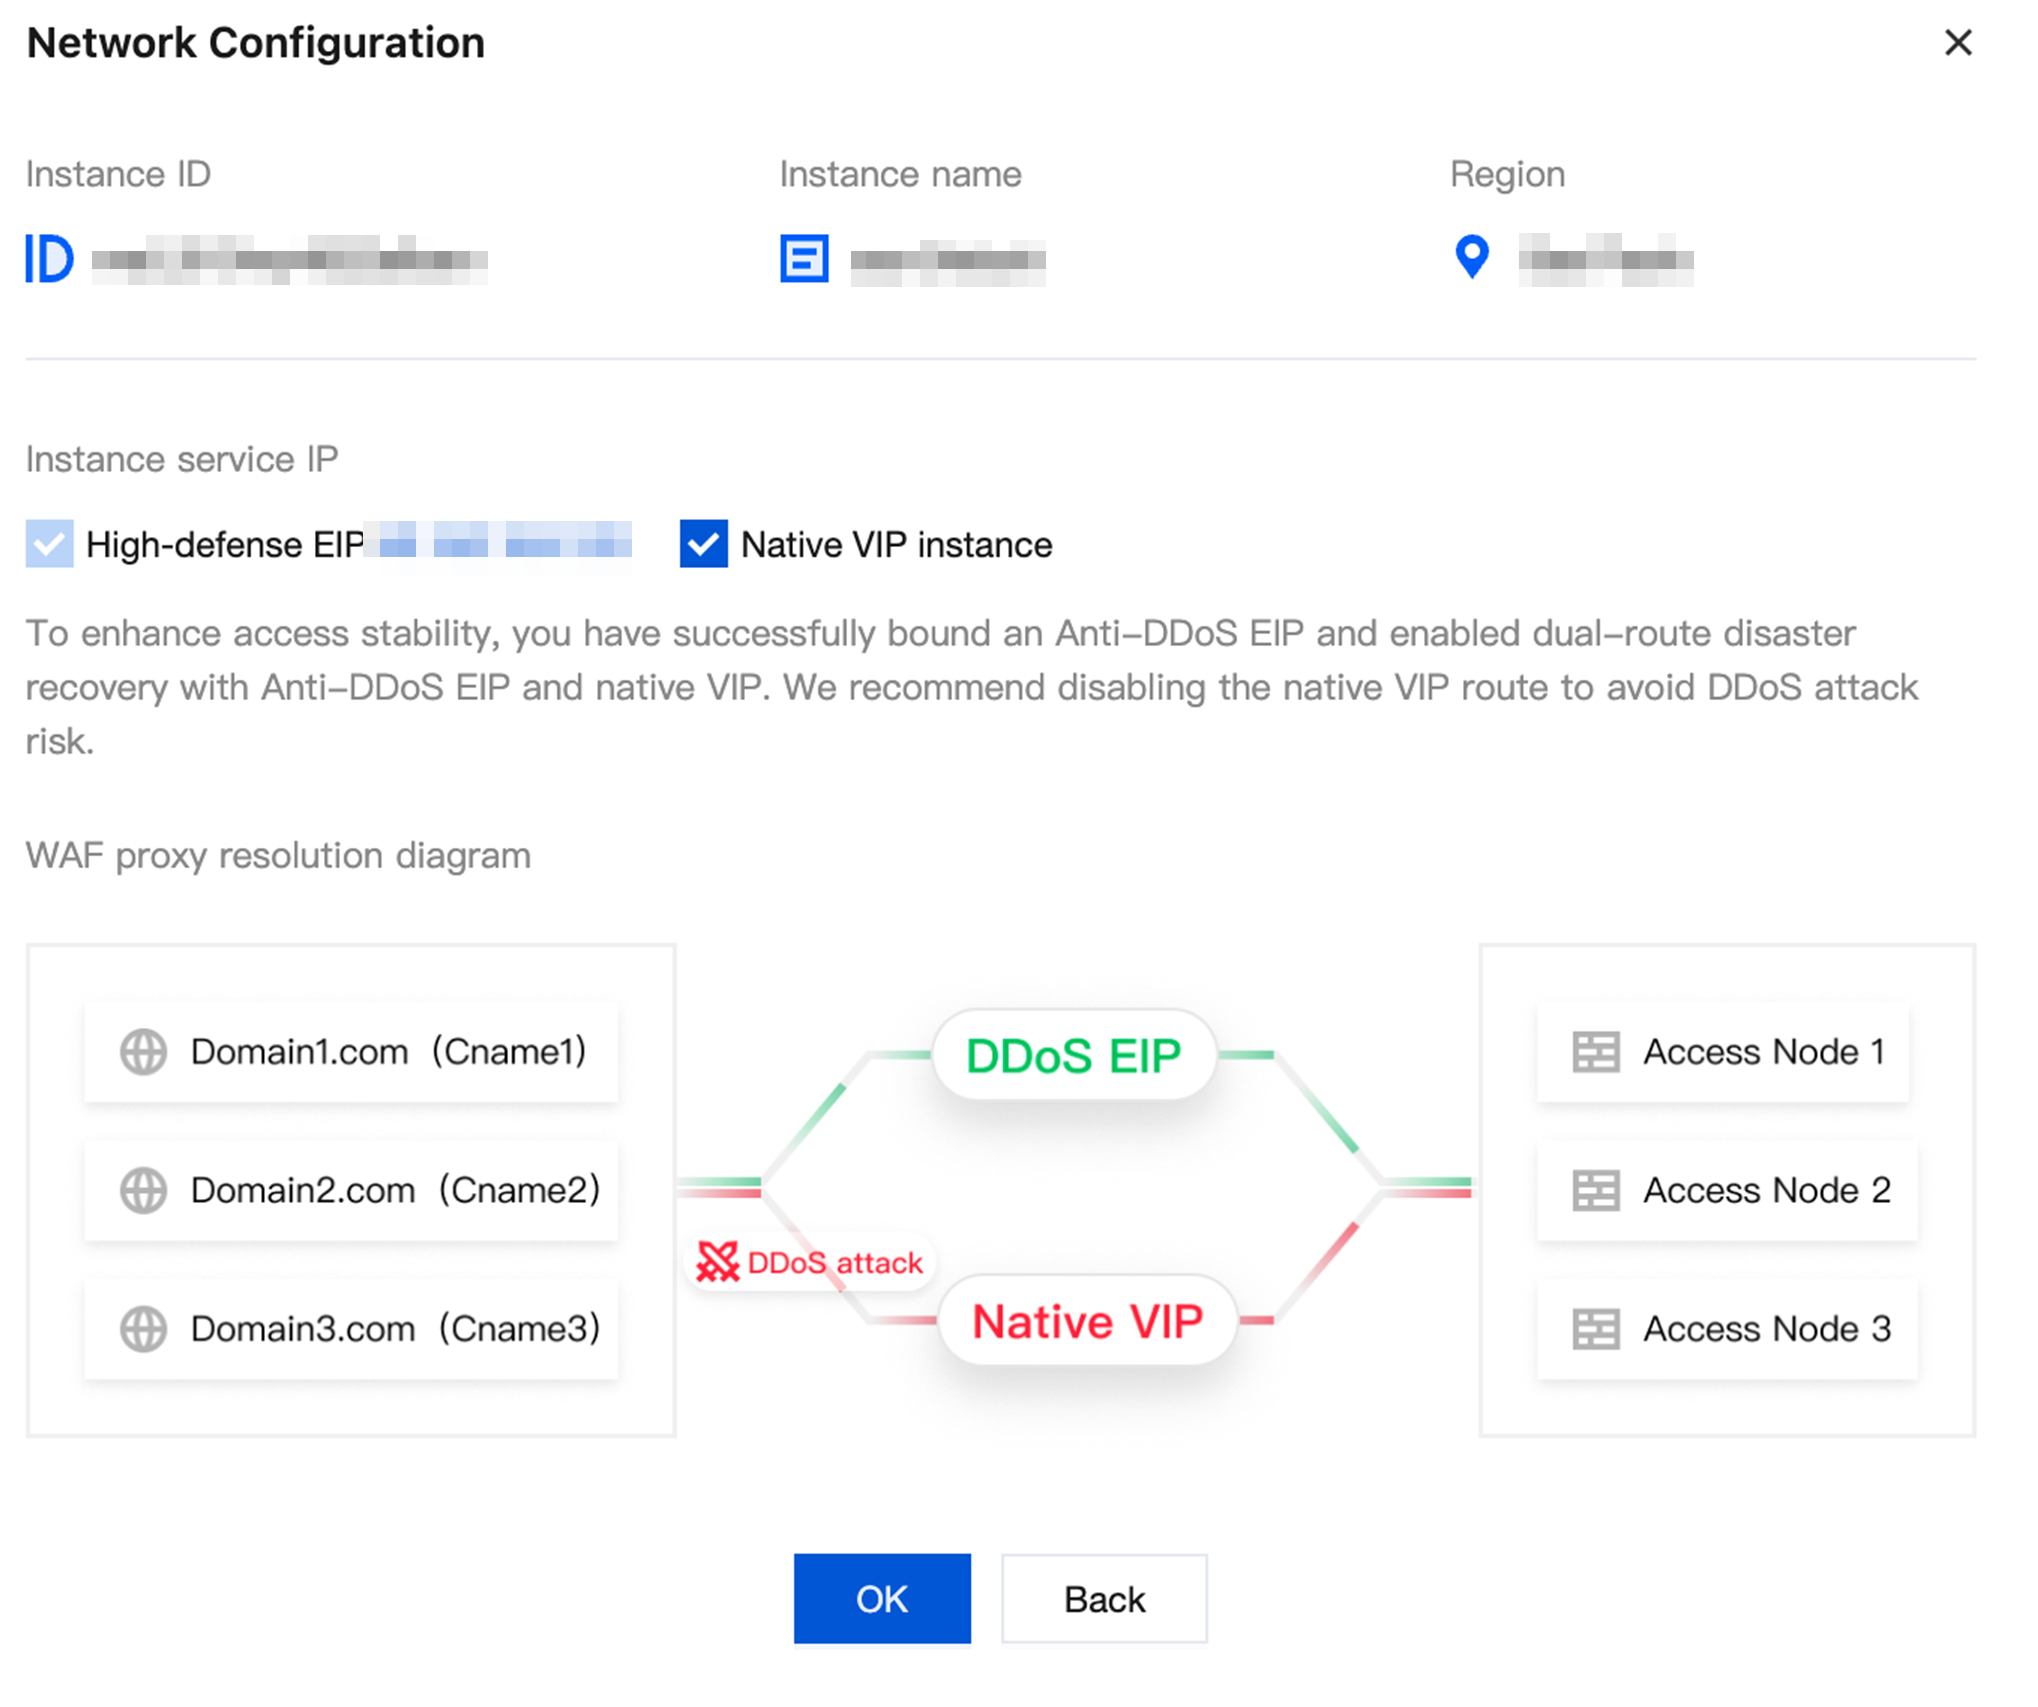
6. On the Instance Management, for instances bound to a High-Defense EIP, you can configure network settings. 7. Click Network Configuration to open the Network Configuration popup. By default, WAF enables dual-line disaster recovery for both the High-Defense EIP and the native VIP. Here, you can disable the native VIP line to avoid exposing DDoS attack risks.