Implementing Todo Application with Spring Boot and SCF
Download
포커스 모드
폰트 크기
마지막 업데이트 시간: 2024-12-02 16:35:34
Overview
Spring Boot is a framework provided by the Pivotal team to simplify the initial build and development of new Spring applications. It uses specific configuration methods, so you don't need to define template-based configuration items.
You have prepared the development environment and tools as instructed in Notes on Java.
Directions
Using an HTTP-triggered function
SCF provides template functions. You can use an HTTP-triggered function as follows to quickly create a todo application and add, delete, modify, and query todos.
Note:
This template is for demonstration only. Todo data is actually stored in the instance cache instead of being persistently stored.
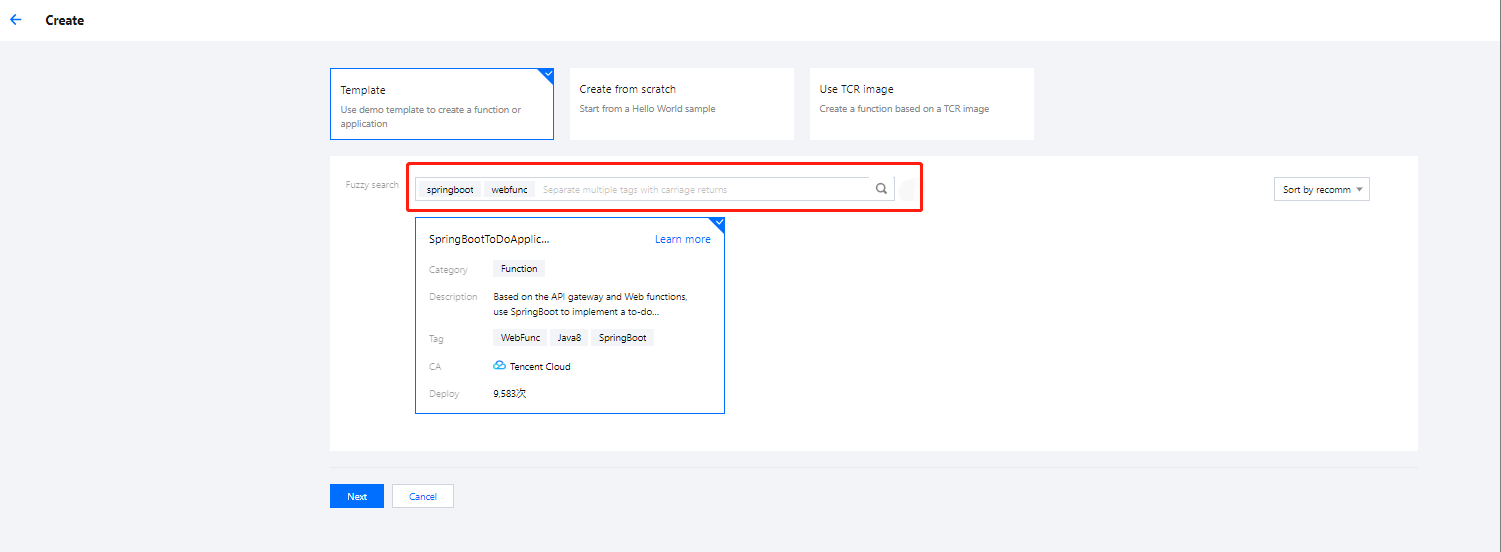
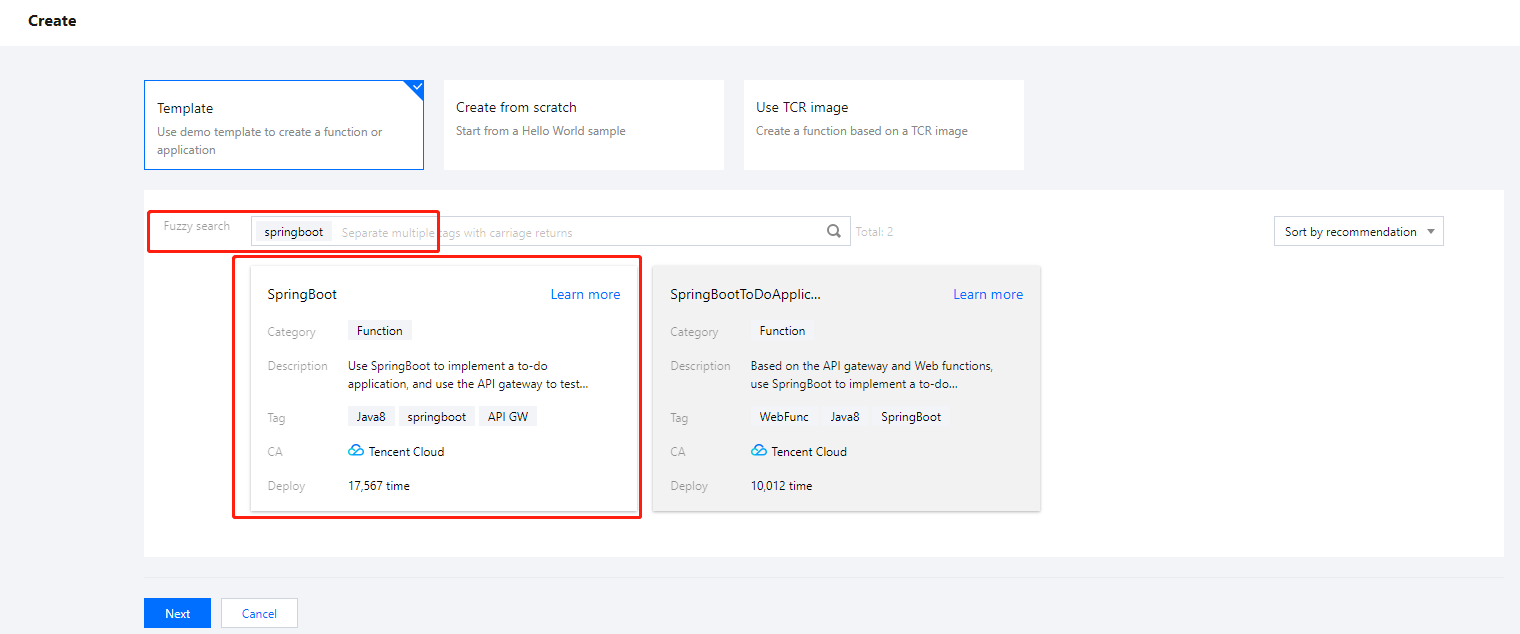
3. On the Create page, select Template and search for springboot and webfunc. In the search results, select SpringBootToDoApplication and click Next, as shown in the following figure:
4. Keep the default configuration and click Complete to complete the function creation.
Testing a function
On the Function Code tab, follow the steps below to initiate a simulated request based on the test template. In this way, you can try out the CRUD features of the todo application.
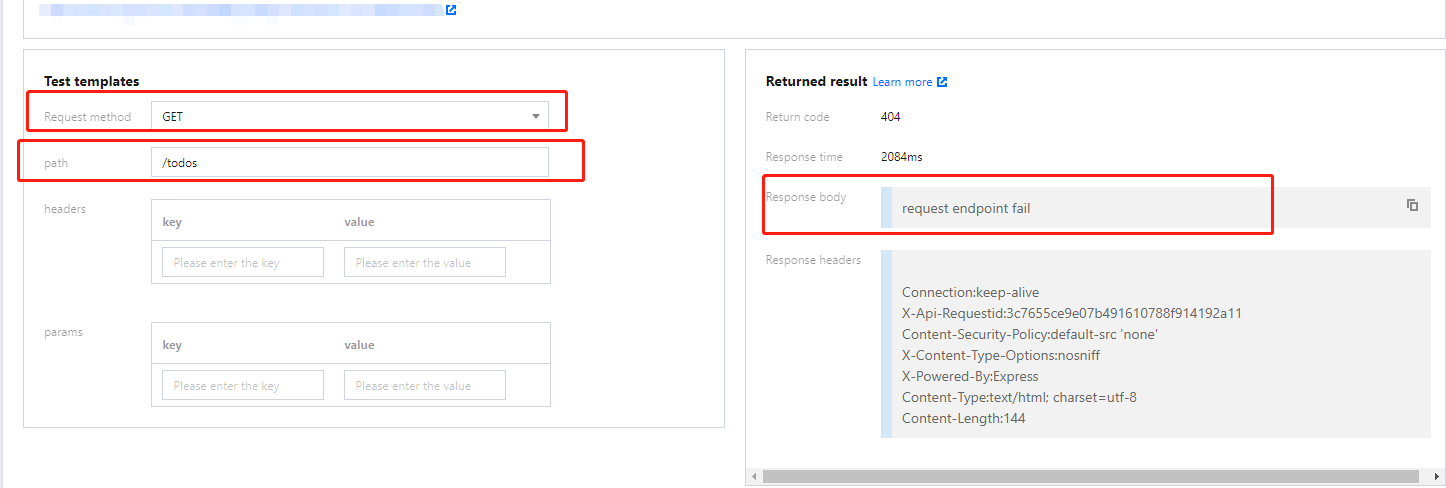
Query the todo list:
Select GET as the request method, enter /todos for path, click Test, and you will see the current todos in the response body as shown below:
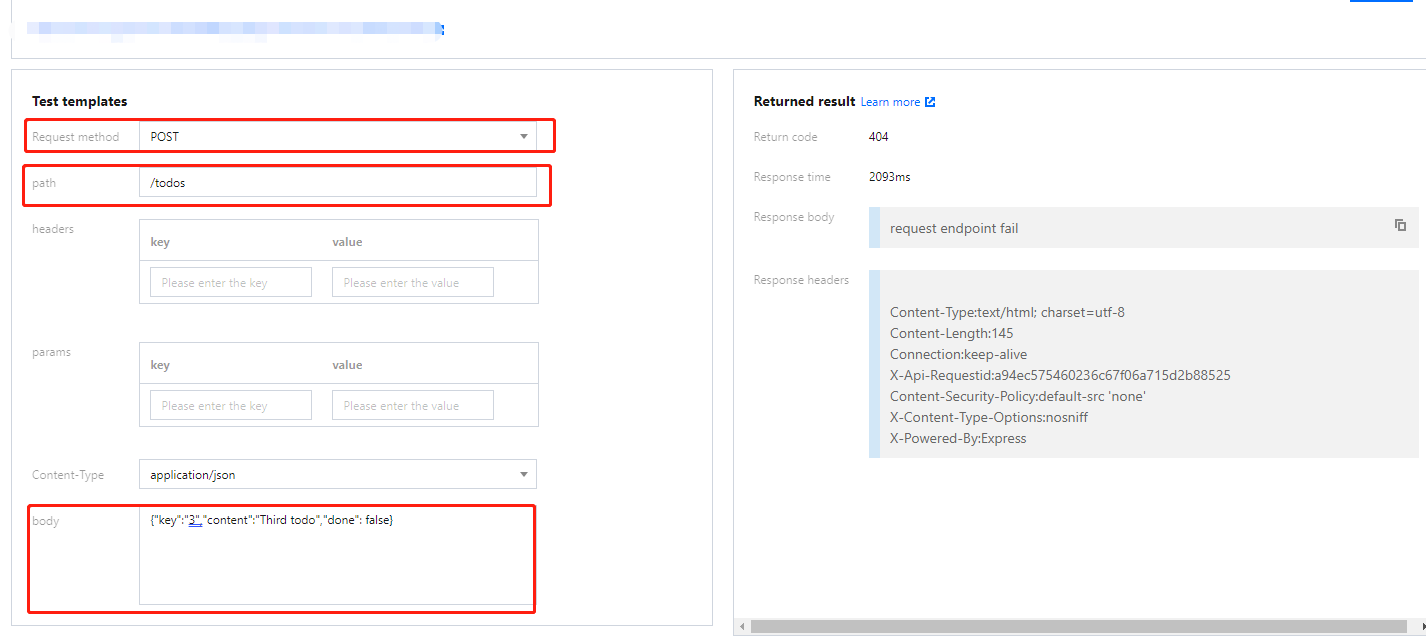
Add a todo:
Select POST as the request method, enter /todos for path and {"key":"3","content":"Third todo","done": false} for body, and click Test to add a todo as shown below:
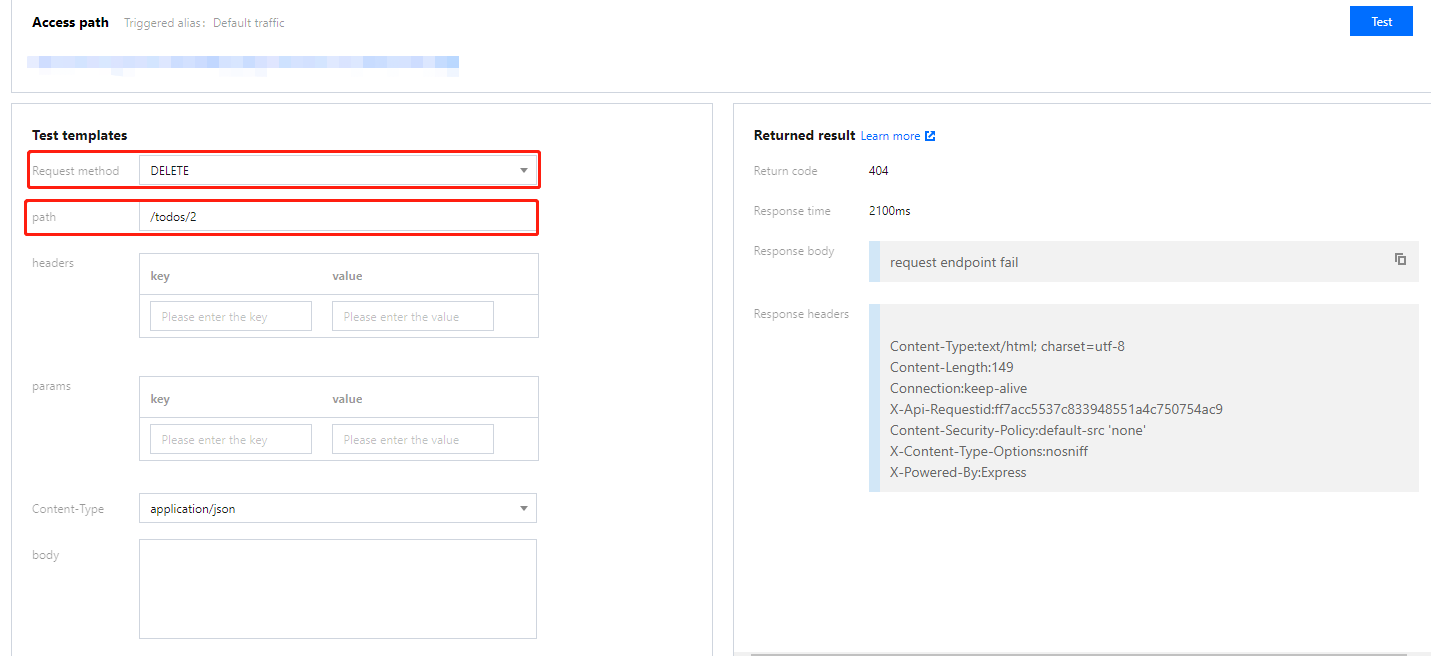
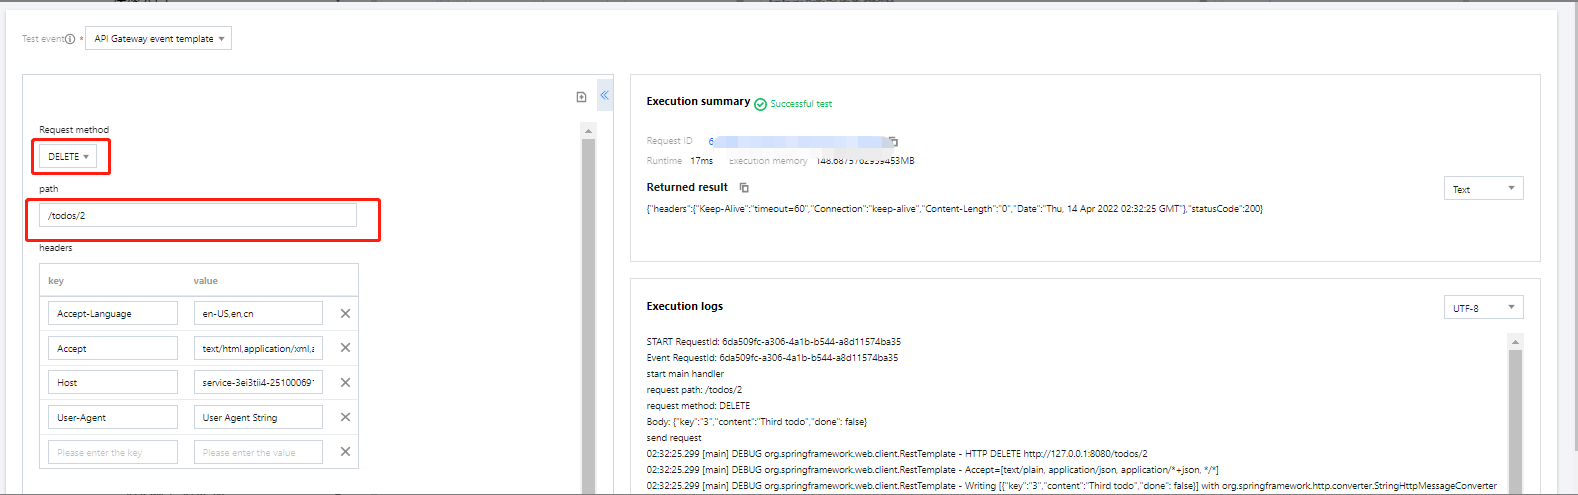
Delete a todo:
Select DELETE as the request method, enter /todos/2 for path (to delete the todo whose key is 2 for example), and click Test as shown below:
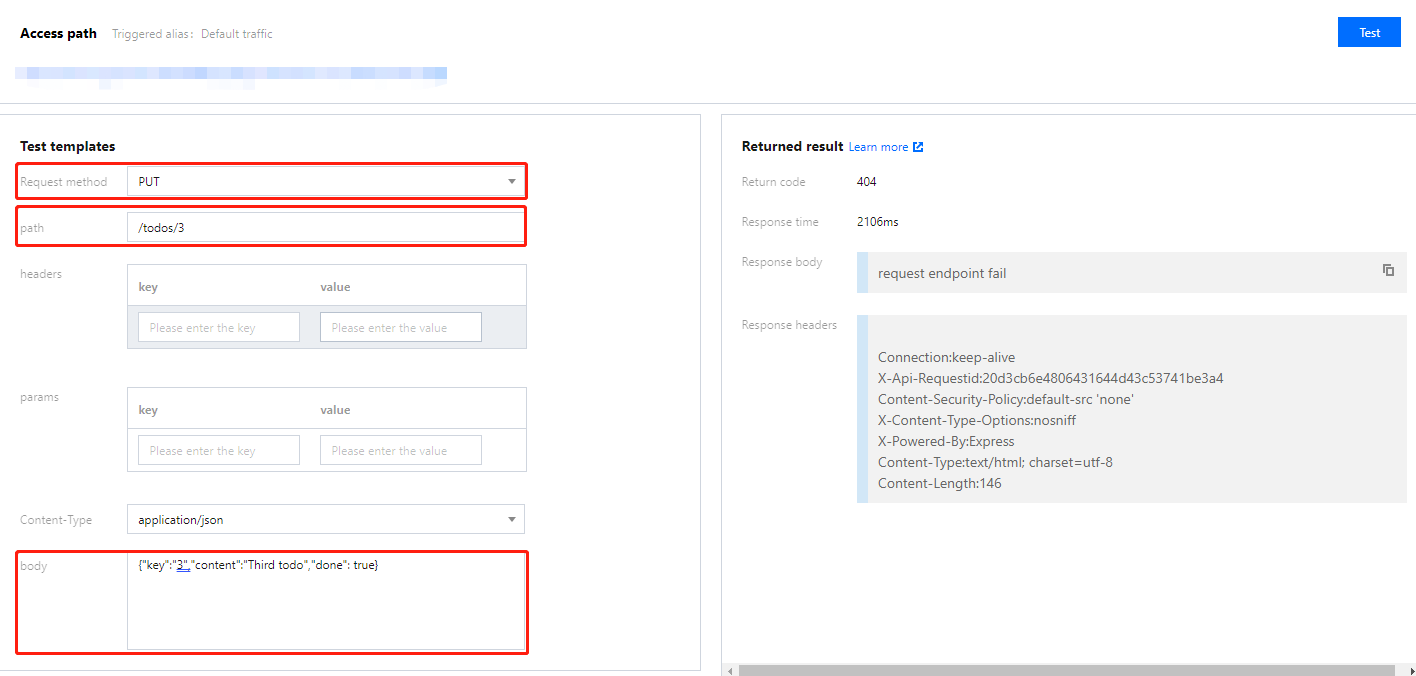
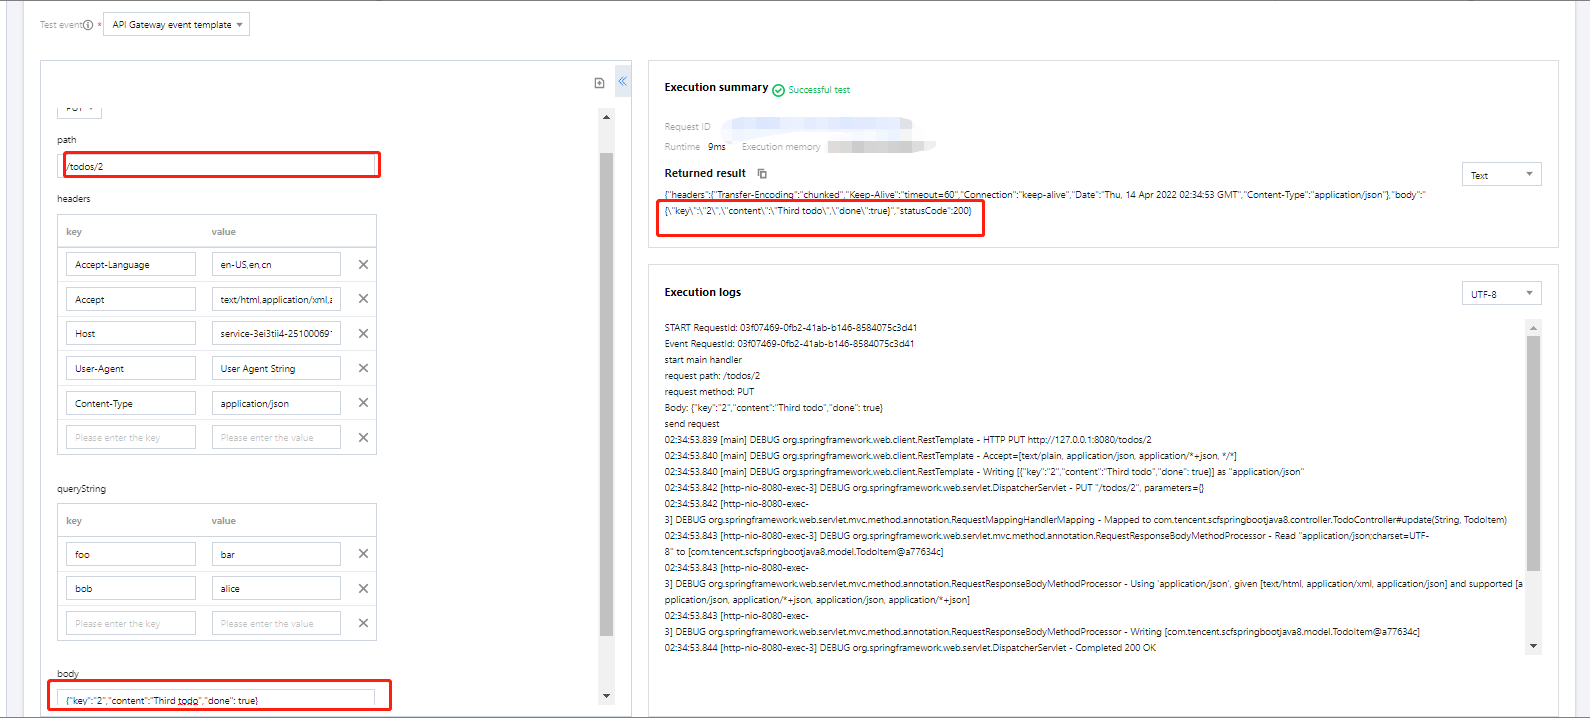
Modify a todo:
Select PUT as the request method, enter /todos/3 for path (to mark the todo whose key is 3 as completed for example), enter {"key":"3","content":"Third todo","done": true} for body, and click Test as shown below:
Sample codes
In the Creating a function step, you can also modify the function template based on your business needs. On the Create page, click Learn more in the upper-right corner of the selected template card. On the pop-up page, click Download Template Function to get the source code of the template function.
You can migrate a native Spring Boot project to an HTTP-triggered function as follows:
Make sure that the Spring listening port is 9000 (the specified listening port of the SCF HTTP-triggered function).
Compile the JAR package.
Download the code and run the following compilation command in the Webfunc-Java8-SpringBoot directory:
gradle build
After the compilation, you can get the JAR package in the build/libs directory. Select the JAR package whose suffix is -all.
Prepare the executable file scf_bootstrap to start the web server. Below is the sample file content:
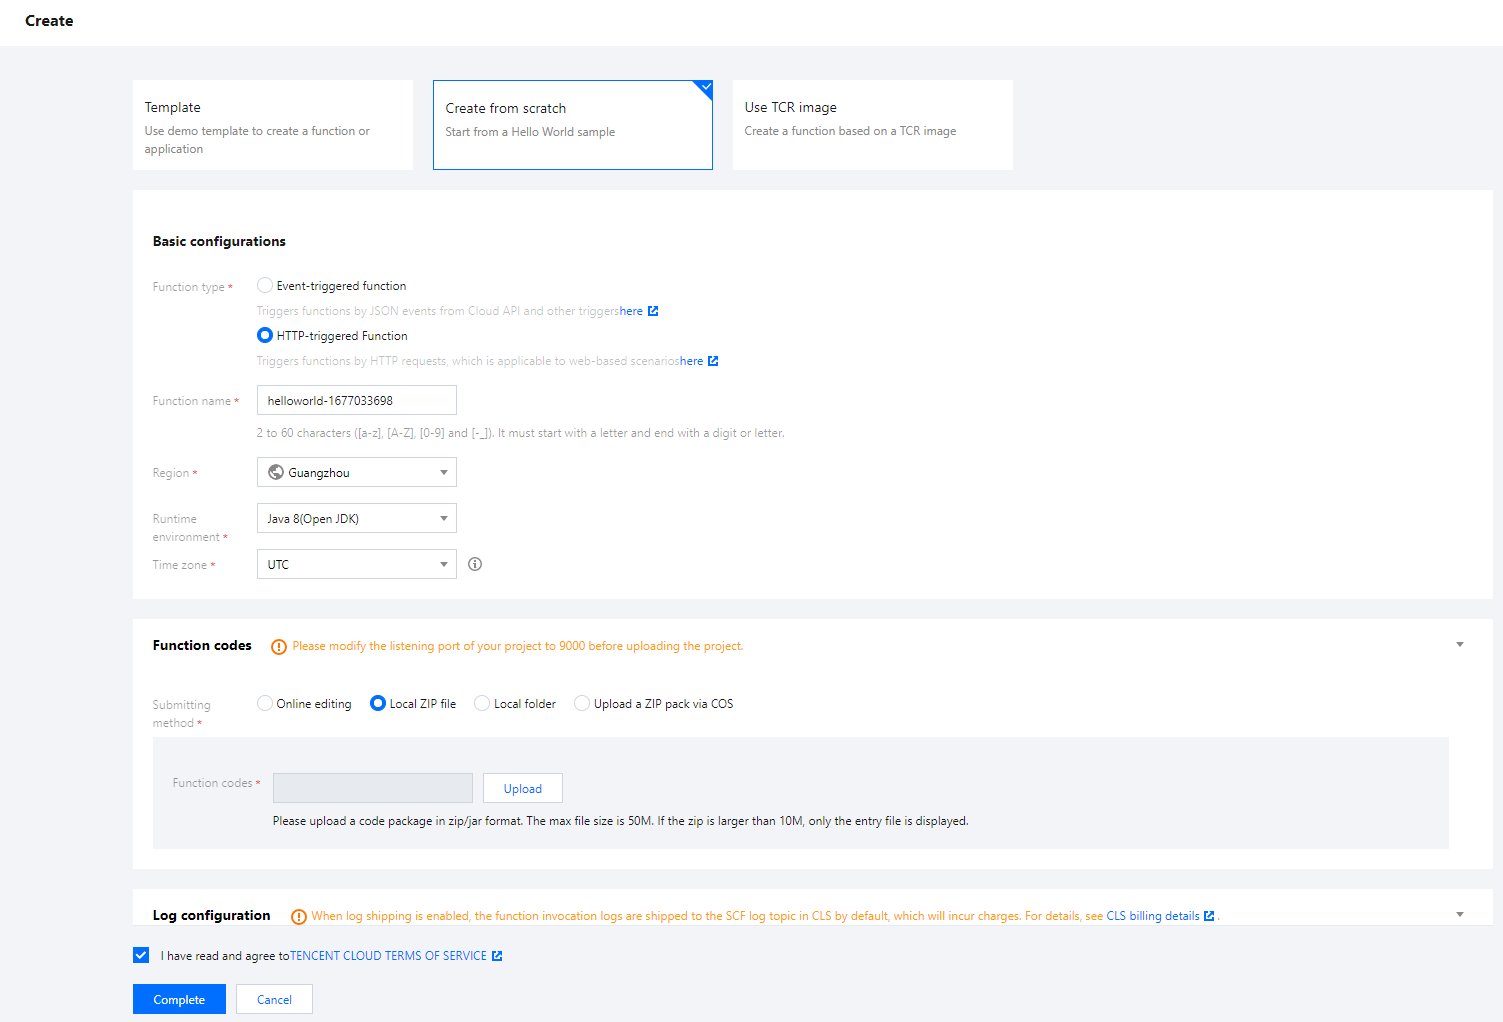
1.3 On the Create page, select Create from scratch and configure the following parameters:
Function type: Select HTTP-triggered Function.
Runtime environment: Select Java 8.
Submitting method: Select Local ZIP file.
Function codes: Click Upload and select the ZIP package.
1.4 Keep the default values for other parameters and click Complete to complete the function creation, as shown below:
Using an event-triggered function
SCF provides template functions. You can use an event-triggered function as follows to quickly create a todo application and add, delete, modify, and query todos.
Note:
This template is for demonstration only. Todo data is actually stored in the instance cache instead of being persistently stored.
3. On the Create page, select Template and search for springboot. In the search results, select SpringBoot and click Next.
4. Keep the default configuration and click Complete to complete the function creation.
Creating a trigger
Note:
If you have created an API Gateway trigger during function creation, simply check whether its configuration is the same as that described below.
1. After creating a function, on the Trigger management tab, click Create trigger.
2. Configure the following trigger parameters in the pop-up window, keep the default values for other parameters, and click Submit.
Trigger method: Select API Gateway trigger.
Integration response: Set to Enable.
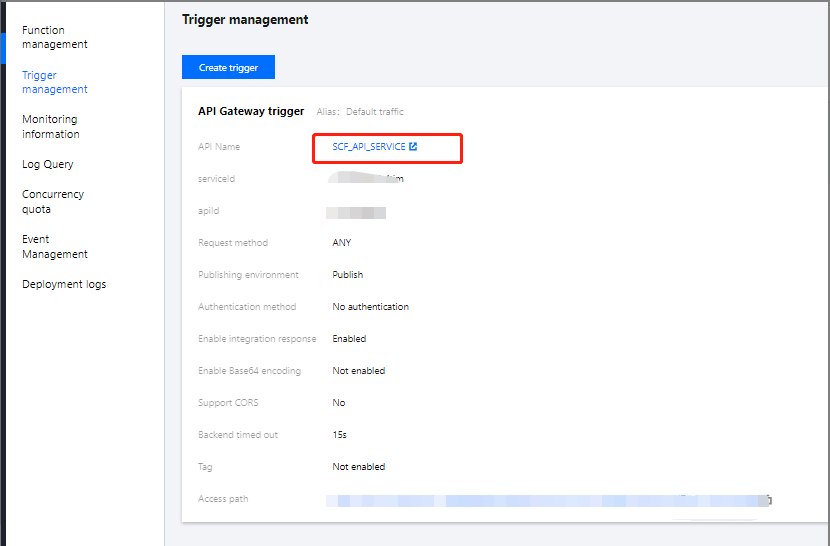
3. After the creation, you need to adjust the API Gateway trigger parameters. Click API Name to enter the API Gateway console for subsequent operations, as shown below:
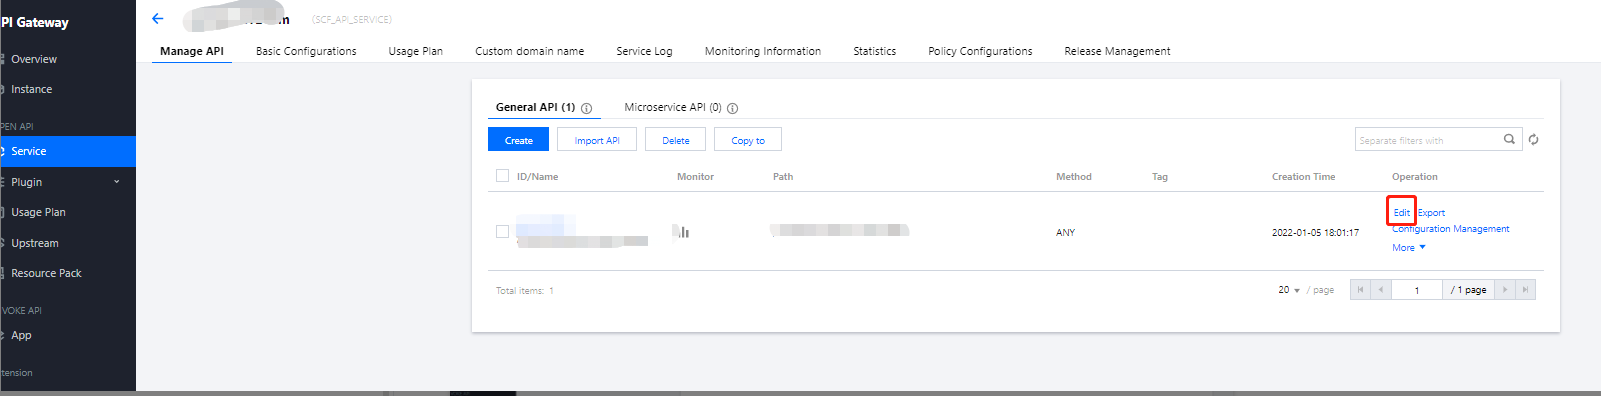
4. In the API Gateway console, find the API used by the function and click Edit in the Operation column, as shown below:
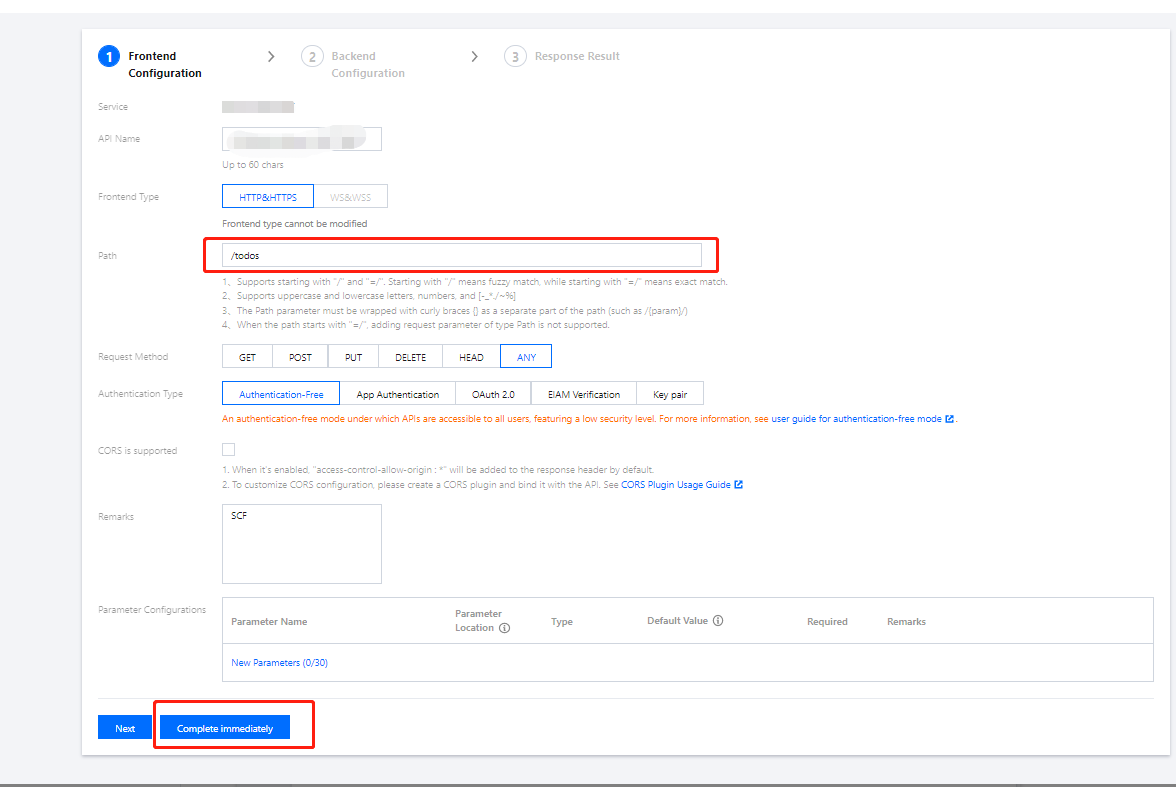
5. On the Frontend Configuration page, change the value of path to /todos, click Complete immediately, and release the service as prompted, as shown below:
Testing a function
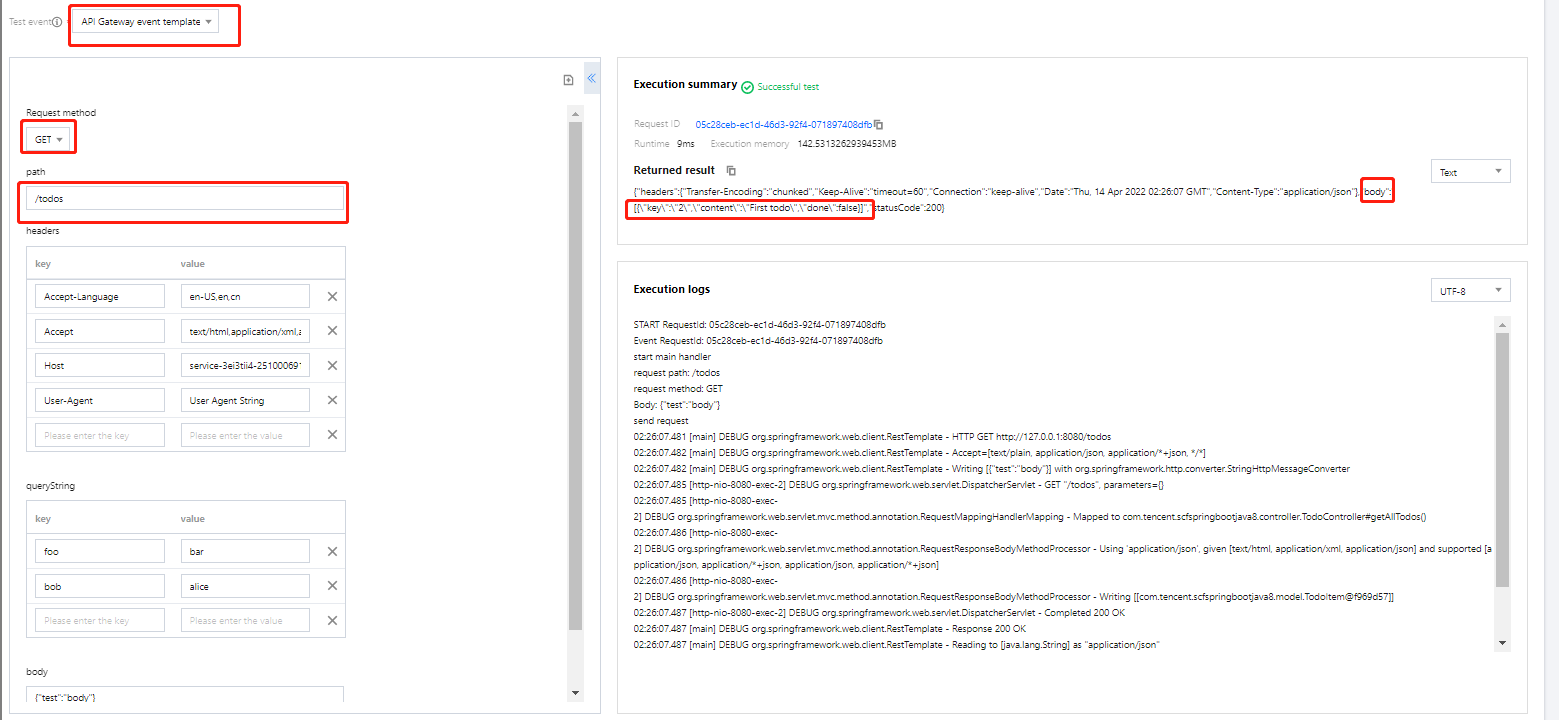
On the Function Code tab, follow the steps below to initiate a simulated request based on the Api Gateway event template. In this way, you can try out the CRUD features of the todo application.
Query the todo list:
Select GET as the request method, enter /todos for path, click Test, and you will see the current todos in the response body as shown below:
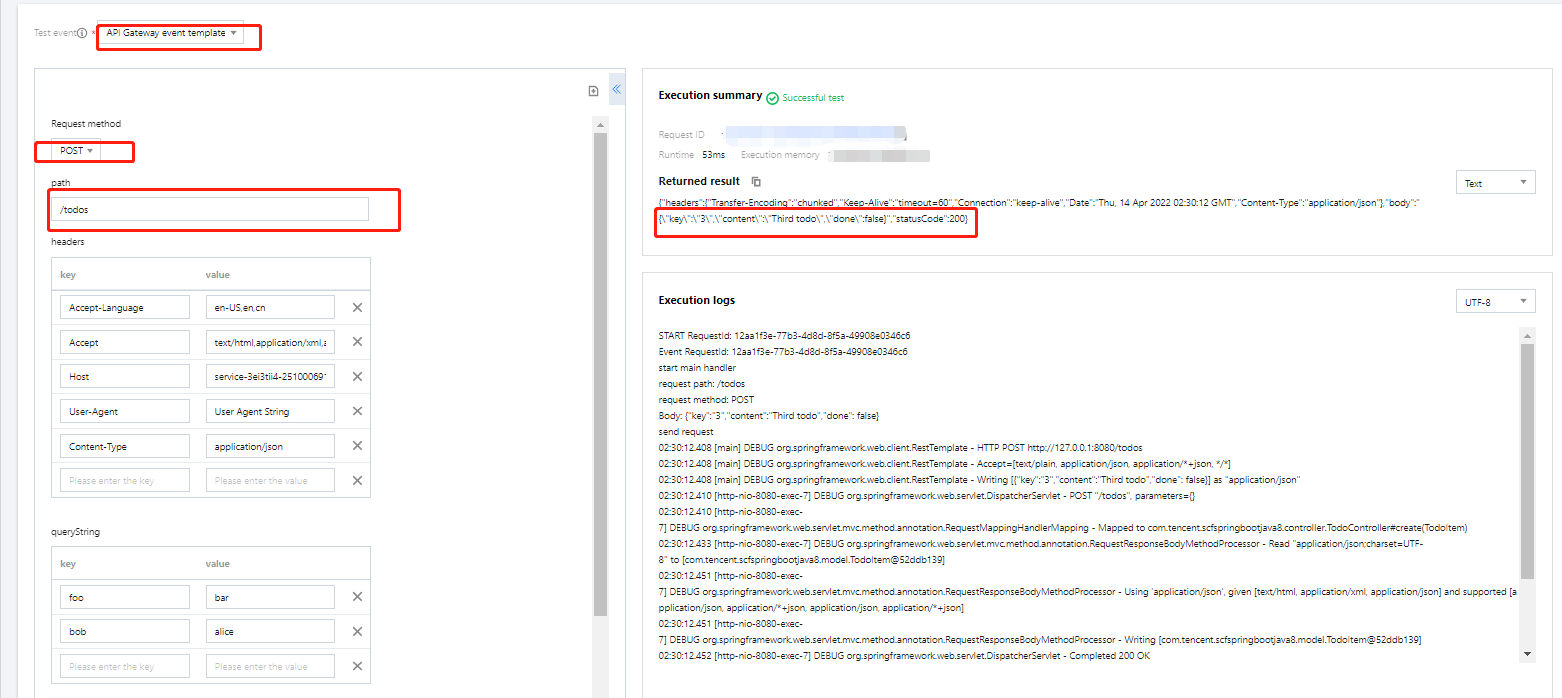
Add a todo:
Select POST as the request method, enter /todos for path , Content-Type: application/jsonfor headers and {"key":"3","content":"Third todo","done": false} for body, and click Test to add a todo as shown below:
Delete a todo:
Select DELETE as the request method, enter /todos/2 for path (to delete the todo whose key is 2 for example), and click Test as shown below:
Modify a todo:
Select PUT as the request method, enter /todos/2 for path (to mark the todo whose key is 2 as completed for example), enter {"key":"2","content":"Third todo","done": true} for body, and click Test as shown below:
Sample codes
In the Creating a function step, you can also modify the function template based on your business needs. On the Create page, click Learn more in the upper-right corner of the selected template card. On the pop-up page, click Download Template Function to get the source code of the template function.
You can configure as follows:
Add the ScfHandler class, which is used to receive event triggers and forward messages to the Spring service. After receiving a response from the Spring service, the function will return the response to the invoker. The project structure after the ScfHandler class is added is shown below:
.
├── src
| └── main
|| ├── java
||| └── com.tencent.scfspringbootjava8
|||| ├── controller
|||| ├── model
|||| └── repository
||||| ├── ScfHandler.java
||||| └── ScfSpringbootJava8Application.java
|| └── resources
Compile the JAR package
Download the code and run the following compilation command in the root directory:
gradle build
After the compilation, you can get the JAR package in the build/libs directory. Select the JAR package whose suffix is -all.
Deploy the generated JAR package to SCF as follows:
1.3 On the Create page, select Create from scratch and configure the following parameters:
Function type: Select Event-triggered function.
Runtime environment: Select Java 8.
Submitting method: Select Local ZIP file.
Execution: Enter com.tencent.scfspringbootjava8.ScfHandler:: mainHandler.
Function codes: Click Upload and select the ZIP package.
1.4 Keep the default values for other parameters and click Complete to complete the function creation, as shown below: