This document describes how to import data from Elasticsearch to Cloud Log Service (CLS), including one-time import of historical data and continuous import of new data, to enable subsequent operations such as query analysis, log shipping, and consumption.
Prerequisites
An available self-built Elasticsearch cluster or Tencent Cloud Elasticsearch Service (ES) cluster exists.
The Elasticsearch cluster version is 6.x or later.
A logset and log topic have been created. For detailed operations, see Logset and Log Topic.
The configured Elasticsearch account must have the following permissions:
monitor: Used to view version information, check the existence of indexes, and obtain the number of indexes.
create_doc: Used for scroll operations.
Operation Steps
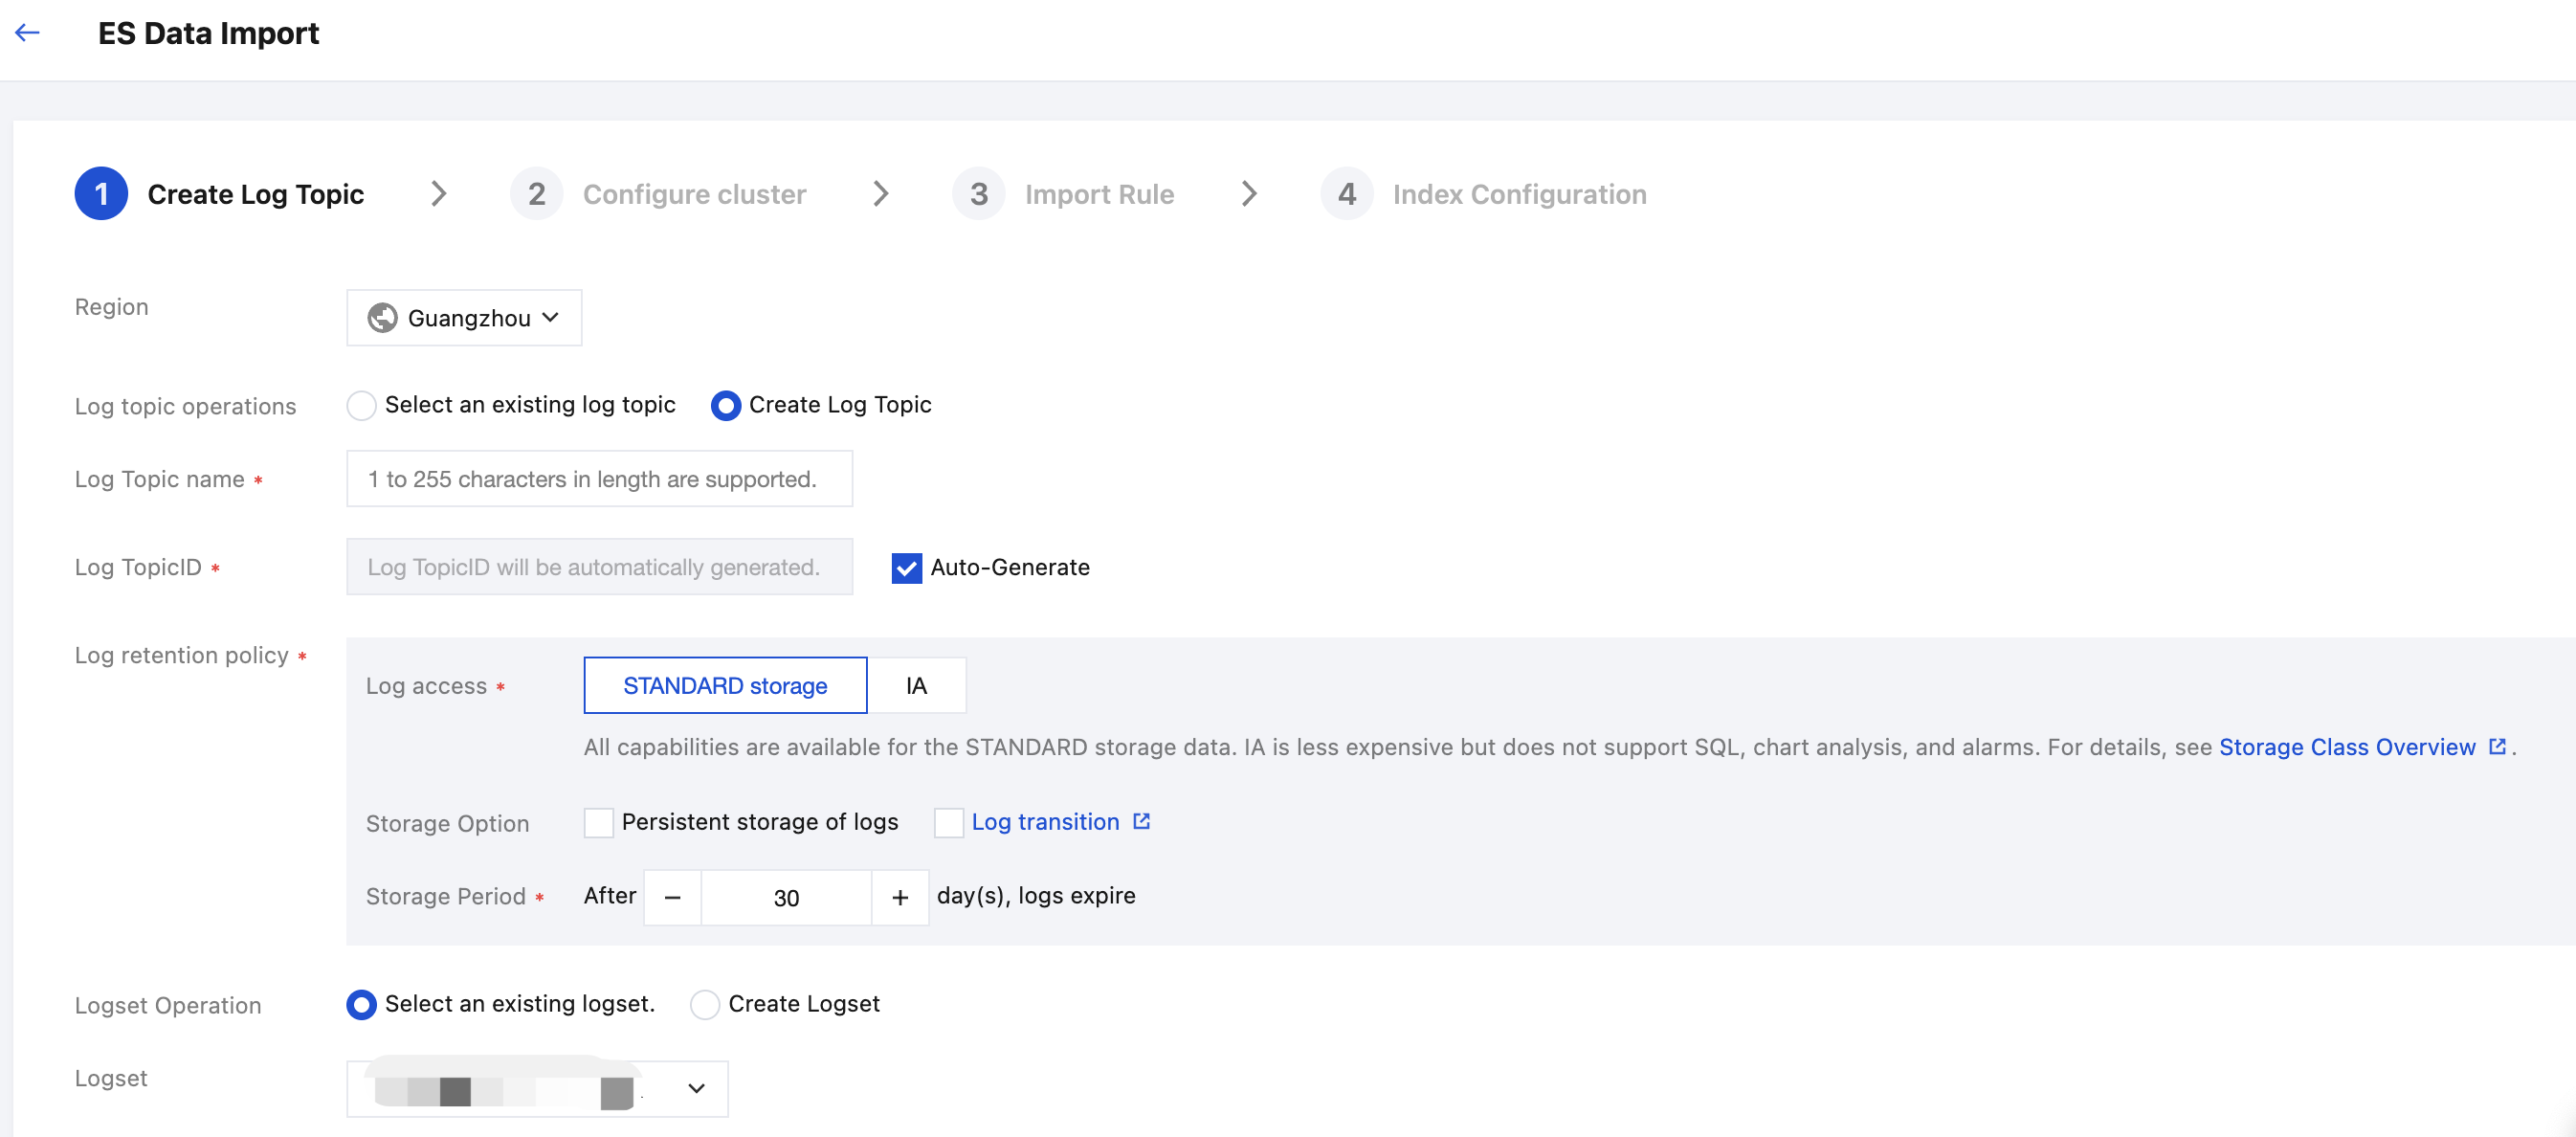
Step 1: Selecting a Log Topic
Creating a Log Topic
Using an Existing Log Topic
To select a new log topic, perform the following steps:
2. In the left sidebar, select Log Topic. Then, select the log topic you want to ship and click its name to access the log topic management page.
3. Select the Collection Configuration tab, and click Add in the ES Data Import section.
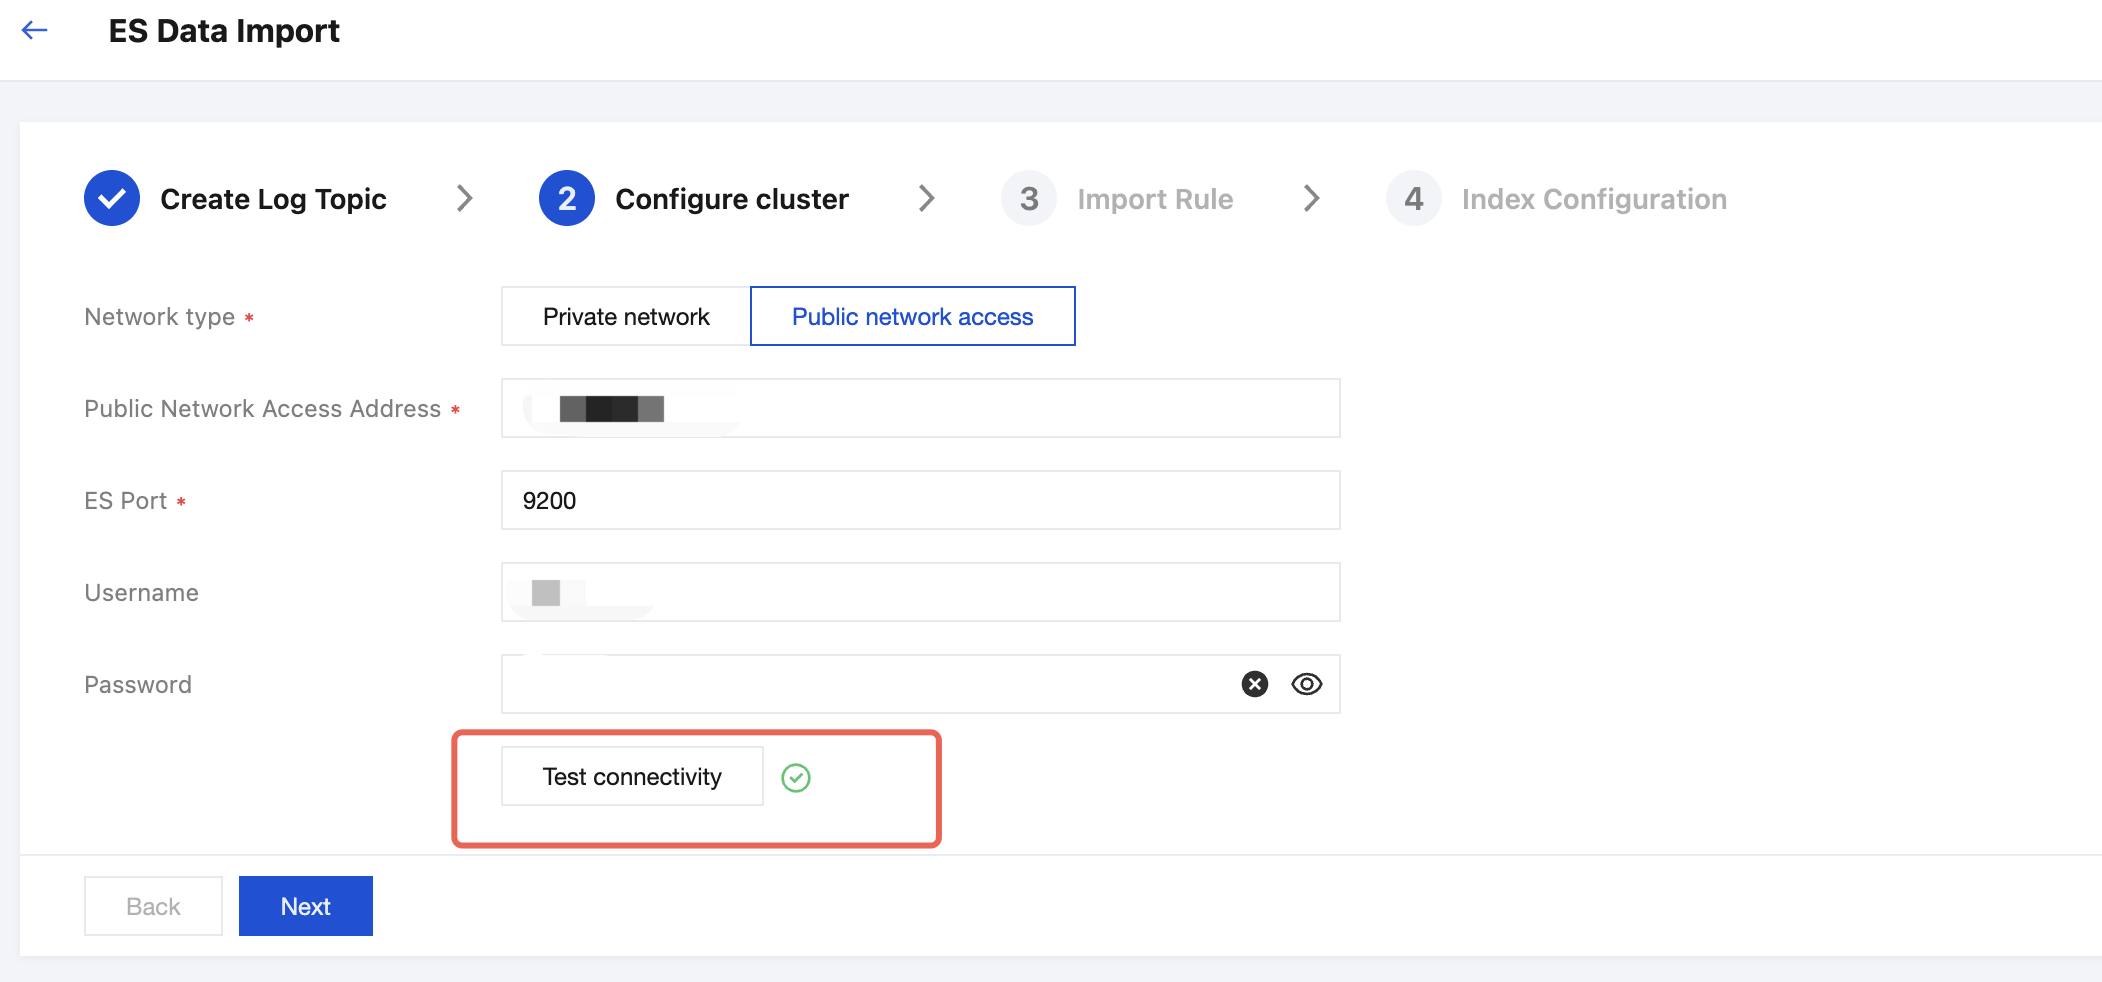
Step 2: Configuring Basic Information of the Elasticsearch Cluster
1. Access method: You can choose to access your Elasticsearch cluster through the Private network address or Public network address.
2. Based on the selected access method, configure the corresponding parameters as described below:
Public network access
Private Network Access
Parameter
Required
Description
Public Network Access Address
Yes
The service address of the Elasticsearch cluster. Specify an IP address or a domain name.
ES Port
Yes
The access port of the Elasticsearch cluster. Generally, the port is 9200.
Username
No
Elasticsearch username.
This setting is required only if user authentication is enabled for the Elasticsearch cluster.
Password
No
Elasticsearch user password.
This setting is required only if user authentication is enabled for the Elasticsearch cluster.
Parameter
Required
Description
Network service type
Yes
If the access method is via the private network address, you need to specify the network service type of the target Elasticsearch cluster.
CVM
CLB
Network(VPC)
Yes
When the network service type is selected as CVM or CLB, you need to select the VPC instance where the CVM or CLB instance is located.
Private Network Access Address
Yes
The service address of the Elasticsearch cluster. Specify an IP address or a domain name.
ES Port
Yes
The access port of the Elasticsearch cluster. Generally, the port is 9200.
Username
No
Elasticsearch username.
This setting is required only if user authentication is enabled for the Elasticsearch cluster.
Password
No
Elasticsearch user password.
This setting is required only if user authentication is enabled for the Elasticsearch cluster.
3. After completing the cluster configuration, click the button for testing connectivity. If a success message is displayed, the Elasticsearch cluster is accessible.
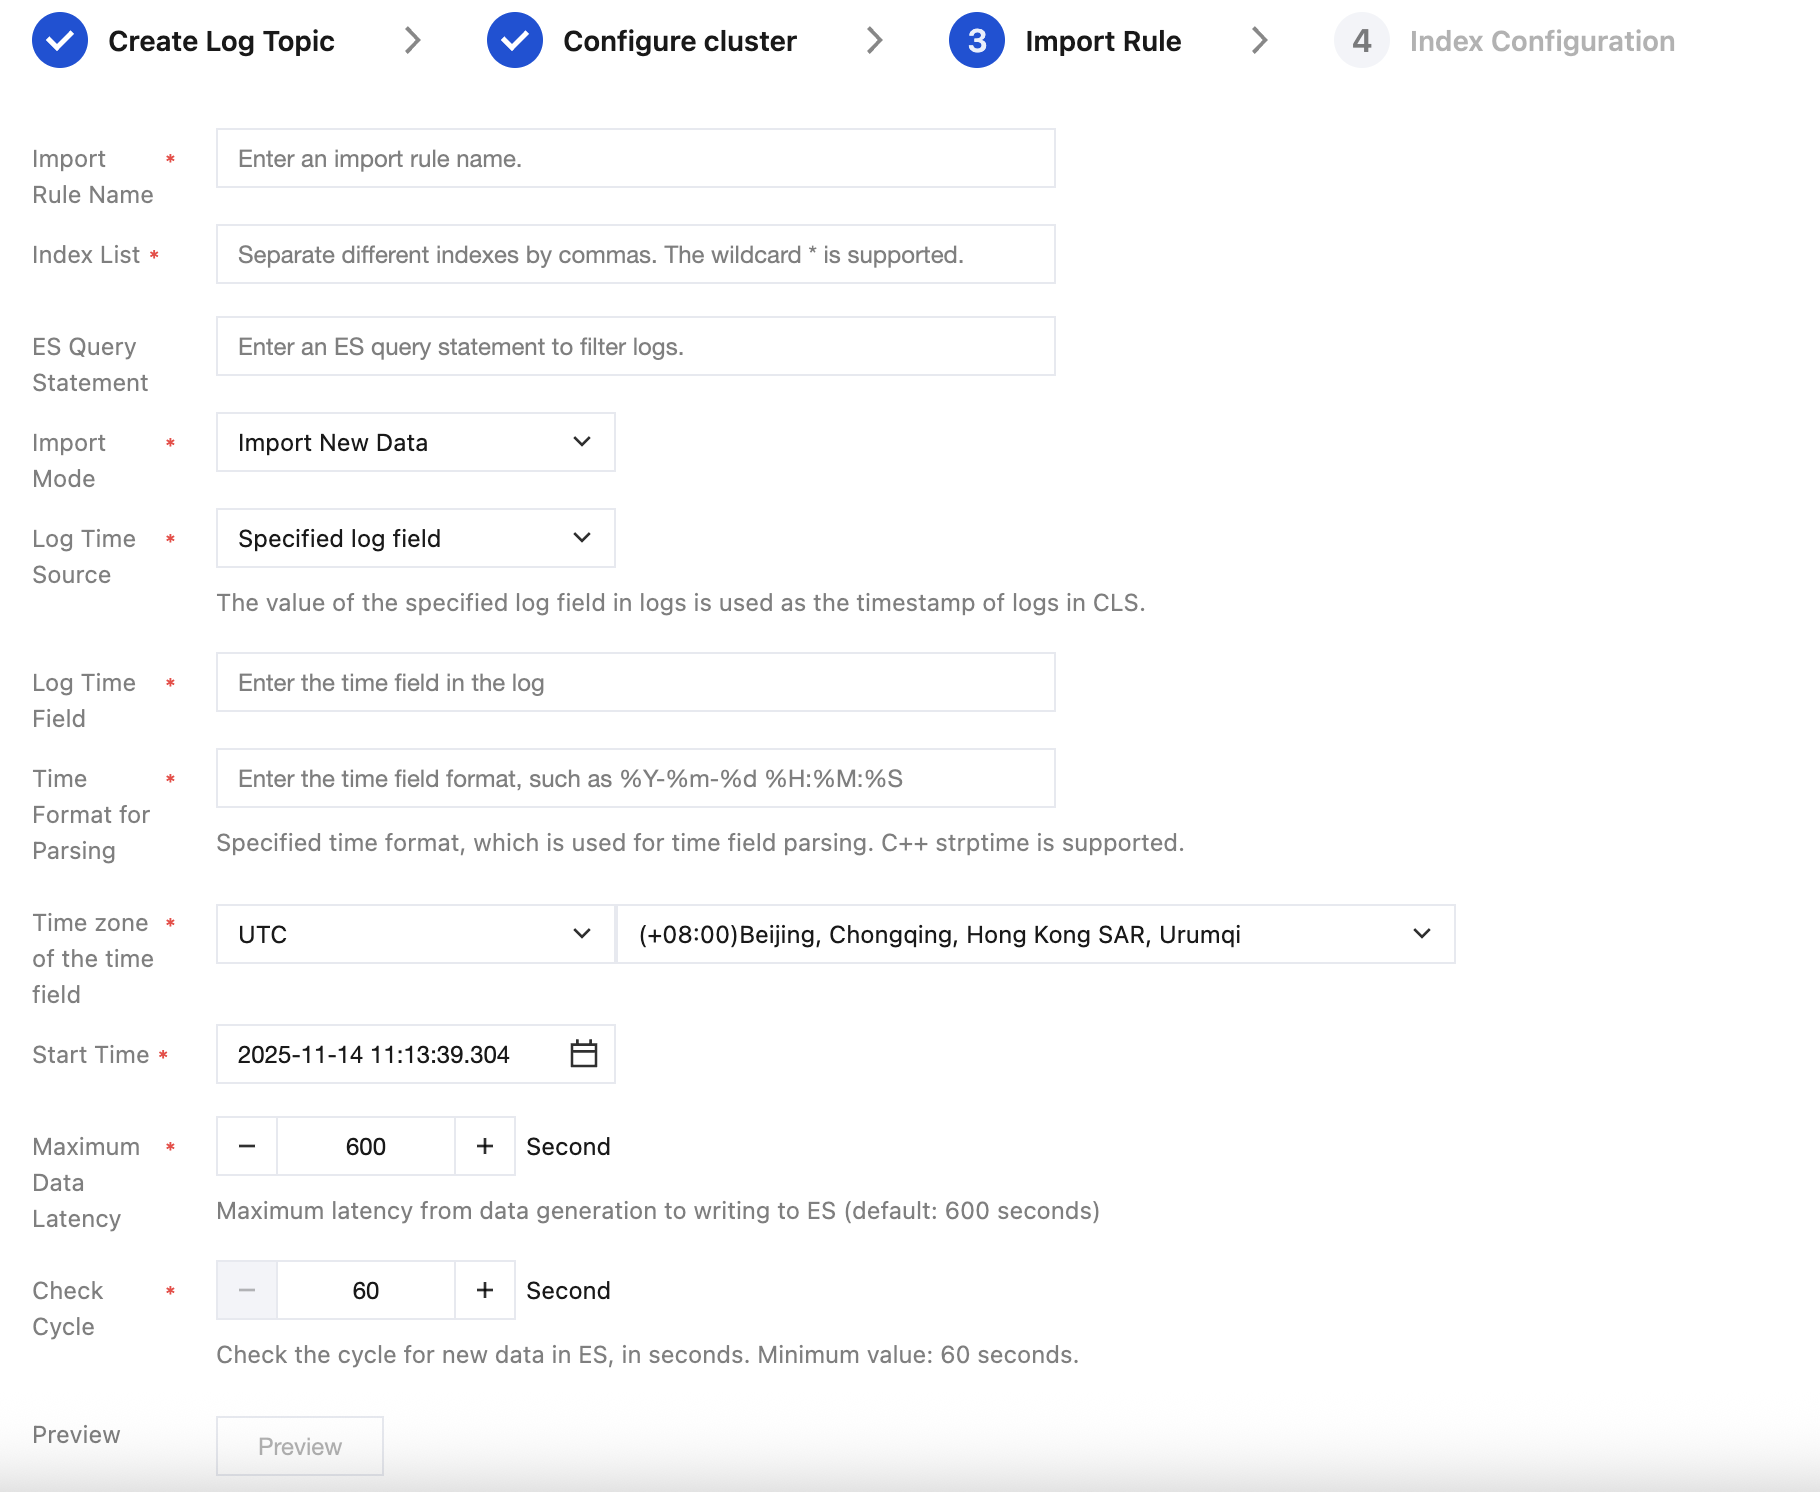
For details about the configuration items, see the table below.
Parameter
Description
Import Rule Name
The name of the imported configuration.
Index List
The indexes to be imported. Separate multiple indexes with commas (,), such as index1,index2,index3. A maximum of 200 indexes are supported.
ES Query Statement
The query statement used to filter data. Only data that meets the query conditions will be imported to CLS. Specify * or leave it blank to import all data without filtering.
The query statement must comply with the Elasticsearch query_string format. For more details, see Query string query.
Import Mode
Supports importing historical data or new data:
Import Historical Data: The task will be completed after data import is finished.
Import New Data: The import task will run continuously.
If you select Import New Data, you must specify a time field.
Log Time Source
Supports selecting Log Collection Time and Specify Log Fields.
Log Collection Time: The time when logs are imported to CLS is used as the log timestamp.
Specify Log Fields: Specify the field name representing time in the log. The value of this field will be used as the log timestamp.
Note:
When the collection time is used as the time field, sorting by _id needs to be enabled for the Elasticsearch cluster.
Log Time Field
This field is required only when Log Time Source is Specify Log Fields. Specify the field name representing time in the log. The value of this field will be used as the log timestamp.
Note:
The specified time field needs to be of the keyword type. If the time field type is text, nested, object, or binary, sorting will not be supported, thus resulting in data import failure.
Time Format for Parsing
After confirming the time field in the log, you need to further specify the time format to parse the value of the time field. For details, see Configuring the Time Format.
Time zone of the time field
After confirming the time field and format in the log, you need to select one of the following two time zone standards:
UTC (Coordinated Universal Time)
GMT (Greenwich Mean Time)
Import Time Range
Specify the time range of logs to import. This configuration is only valid if a time field is set.
Start Time
This option is available only when the import mode is set to Import New Data. Specify the start time for data import.
Maximum Data Latency
Specify the maximum latency from data generation to writing to Elasticsearch. The default value is 600s, and the maximum value is 3600s.
This configuration is valid only when the import mode is set to Import New Data.
If the set value is smaller than the actual latency, some data cannot be imported from Elasticsearch to CLS.
Check Cycle
Check cyclel for new data in Elasticsearch. The default value is 300s, and the minimum value is 60s.
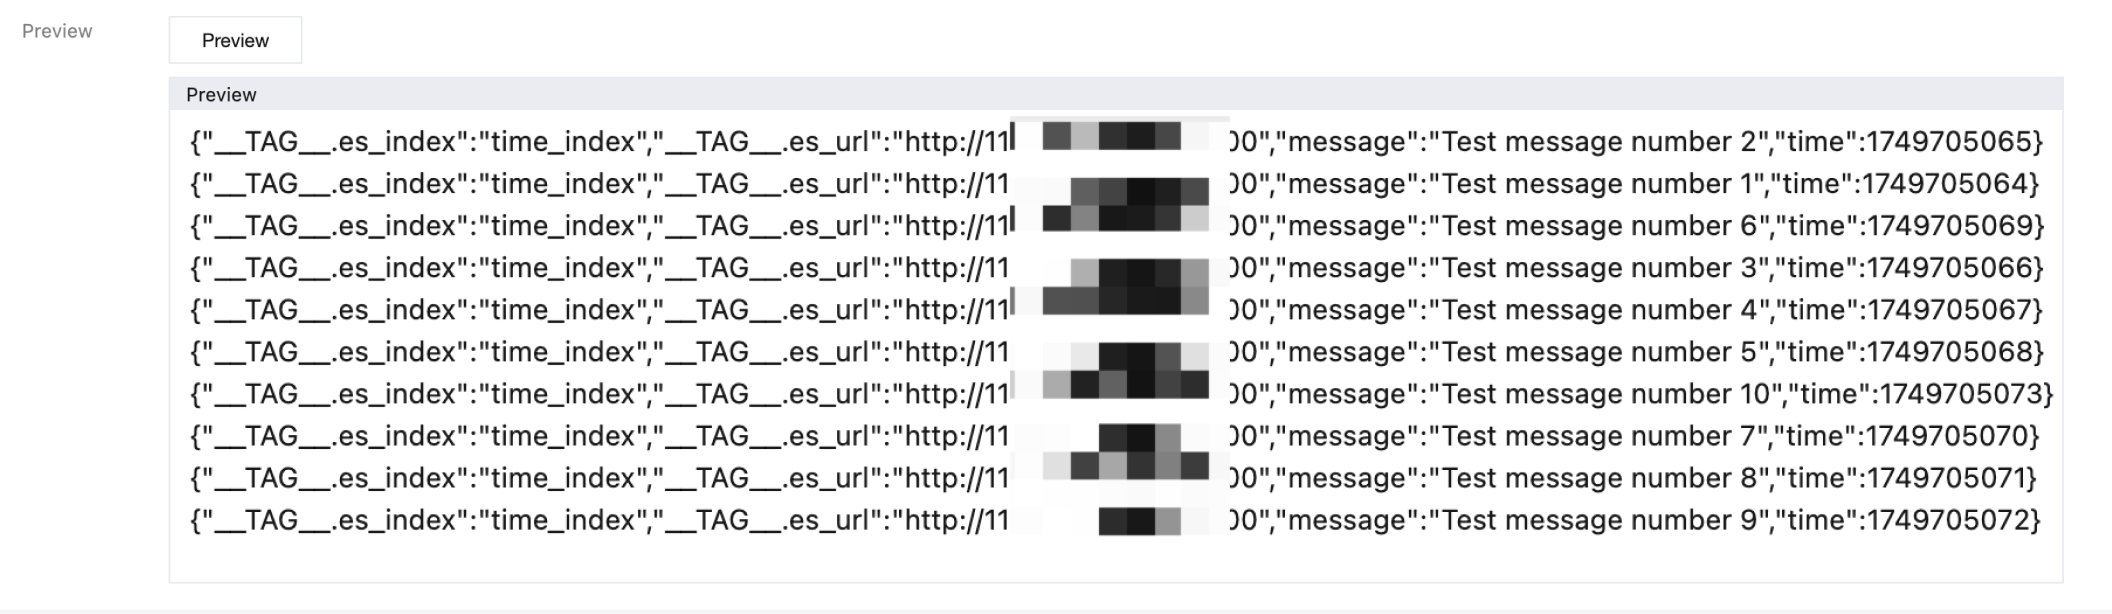
2. After configuring the settings, click Preview to view the data import results based on the current configuration. If the previewed data does not meet expectations, modify the configuration and try again.
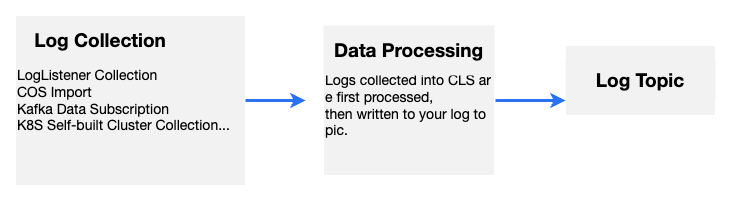
If you need to further process the collected CLS logs, such as structuring, masking, or filtering, before writing them into the log topic, you can click Data Processing at the bottom of the page, add data processing, and then configure the index.
Data processing will incur fees. For more details, see Billing Overview.
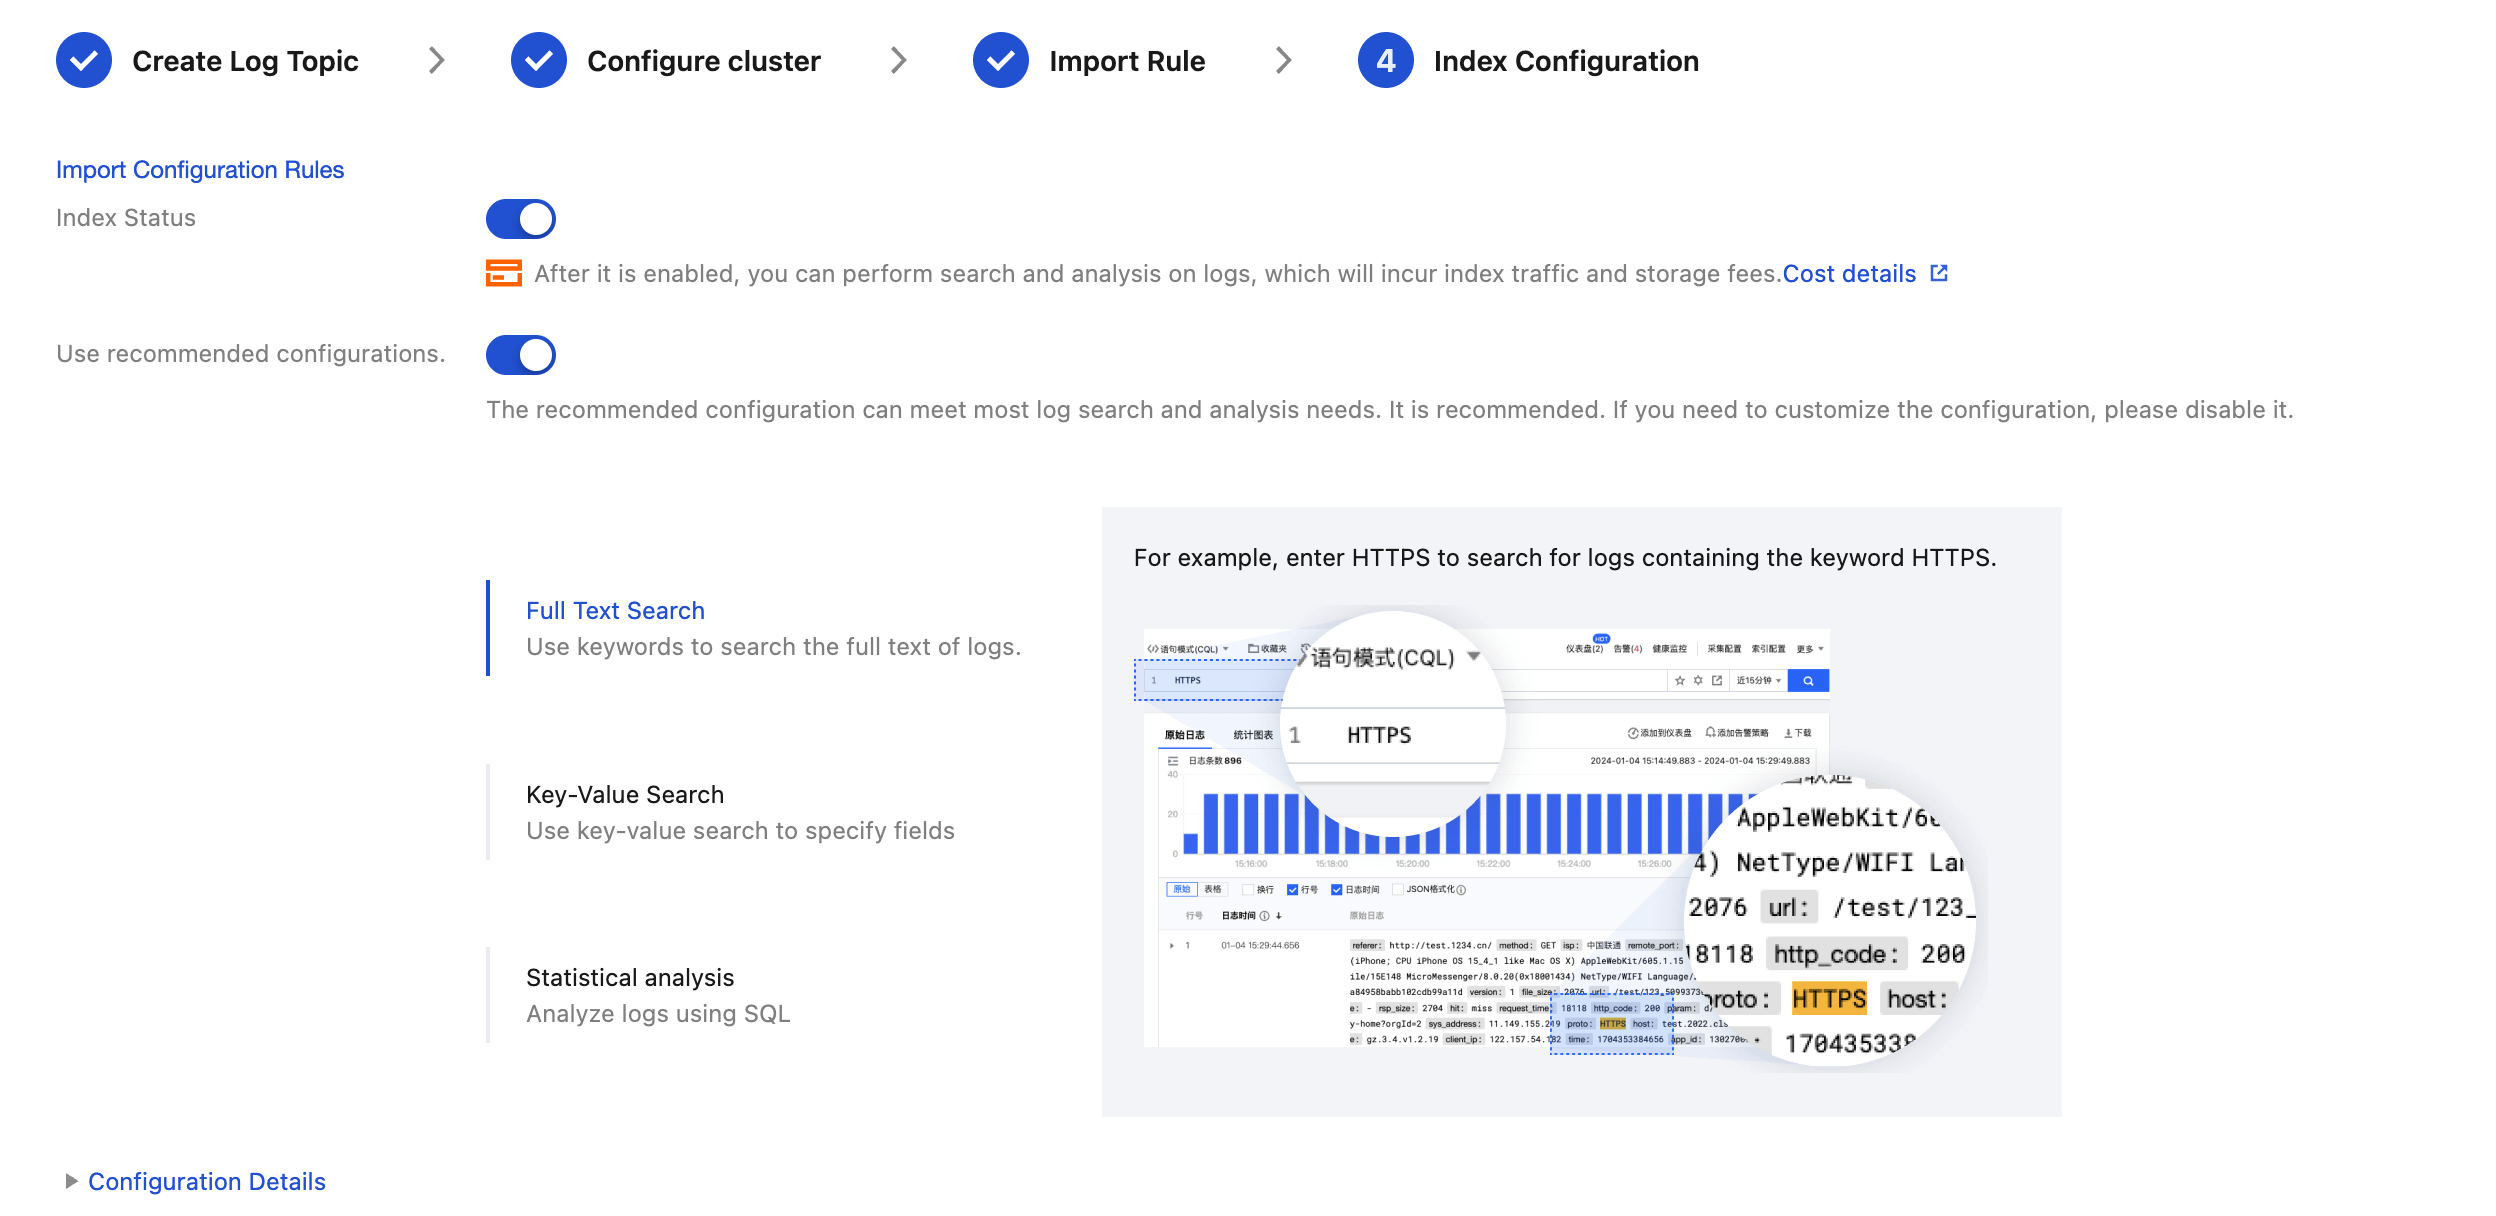
Step 4: Checking Index Configuration
On the Index Configuration page, configure the following information. For configuration details, see Index Configuration.
Note:
Index configuration must be enabled before you can perform searches.
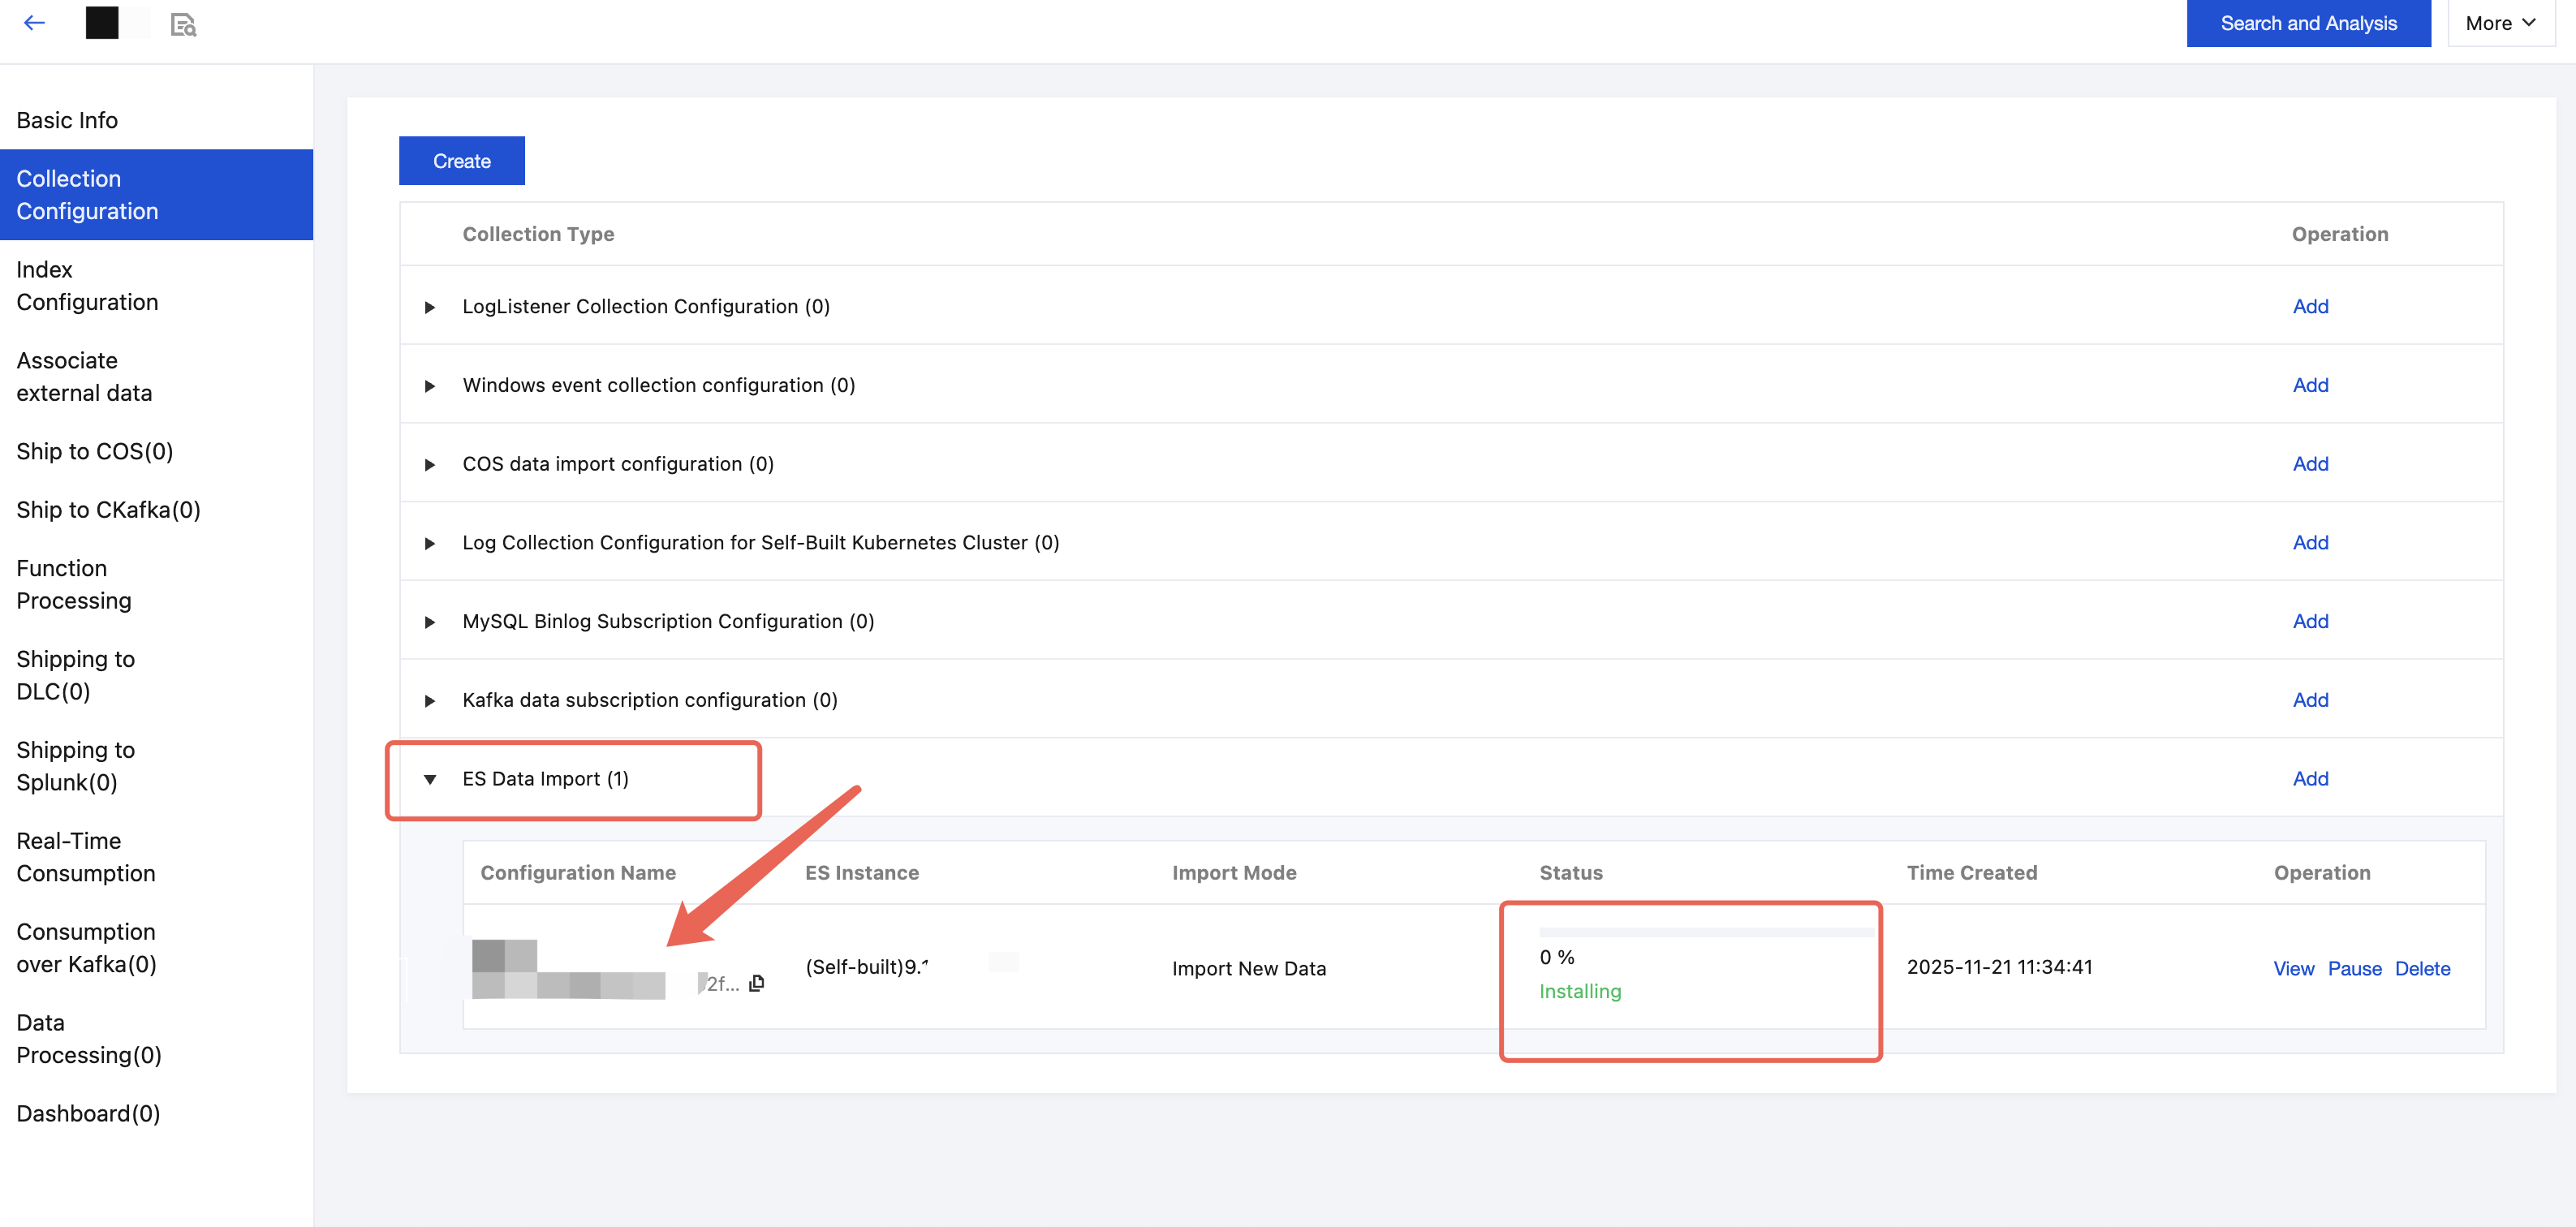
Step 5: Viewing Elasticsearch Import Tasks
After completing the Elasticsearch import task, you can find all created Elasticsearch import tasks on the Collection Configuration tab on the log topic details page.
Step 6: Searching and Analyzing Logs
After completing the Elasticsearch import task, you can start using log search and analysis, as well as advanced features like dashboard alarms.