Tencent Cloud provides Virtual Private Cloud (VPC), a platform for hosting TencentDB instances. You can launch Tencent Cloud resources in a VPC, such as TencentDB instances. A common scheme is to share data between a TencentDB instance and a web server running in the same VPC. This document uses this scheme to create a VPC and add a TencentDB instance to it.
Below describes how to add CVM and TencentDB for MySQL instances in the same VPC to interconnect cloud resources over the private network.
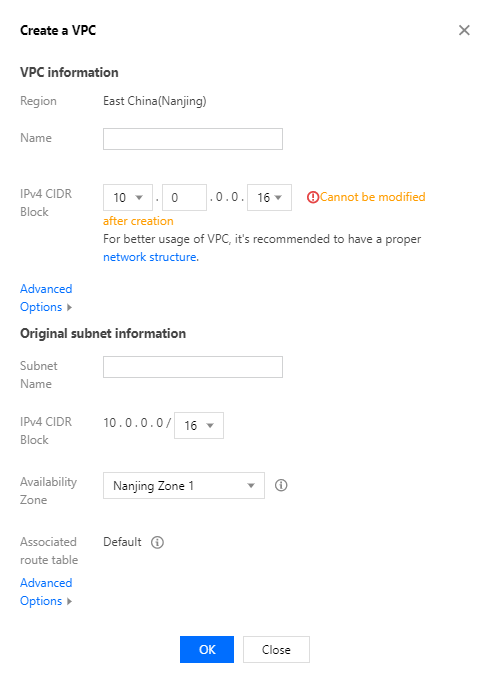
Step 1. Create a VPC
A VPC has at least one subnet, and Tencent Cloud service resources can only be added in a subnet.
2. Select the region of the VPC at the top of the list and click Create.
3. Enter the VPC information and the initial subnet information, and click OK. The CIDRs of the VPC and subnet cannot be modified after creation.
The VPC CIDR can be any of the following IP ranges. If you want two VPCs to communicate with each other over the private network, their CIDRs should not overlap.
10.0.0.0 - 10.255.255.255 (mask range between 11 and 28)
172.16.0.0 - 172.31.255.255 (mask range between 11 and 28)
192.168.0.0 - 192.168.255.255 (mask range between 16 and 28)
The subnet CIDR must be within or the same as the VPC CIDR.
For example, if the IP range of a VPC is 192.168.0.0/16, then that of its subnets can be 192.168.0.0/16, 192.168.0.0/17, etc.
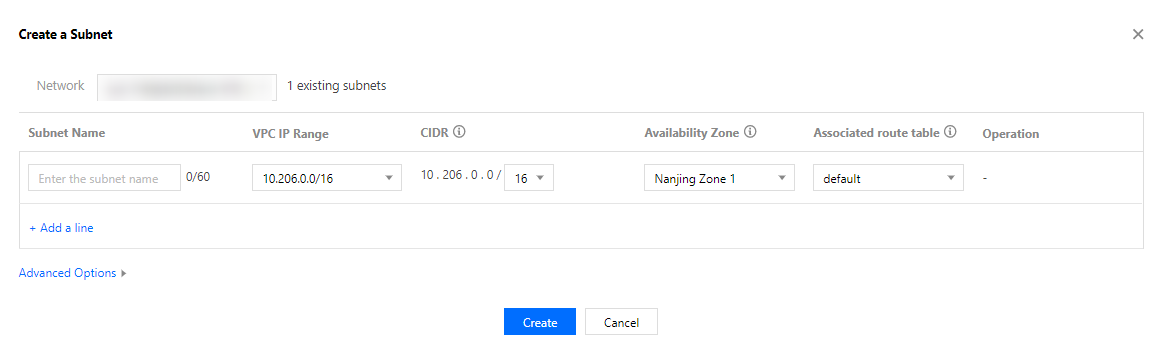
Step 2. Create a subnet
You can create one or more subnets at a time.
2. Click Subnet on the left sidebar to enter the management page.
3. Select the region and VPC in which the subnet is to be created and click Create.
4. Enter the subnet name, CIDR, AZ, and associated route table.
5. (Optional) Click +New line to create multiple subnets at a time.
6. Click Create.
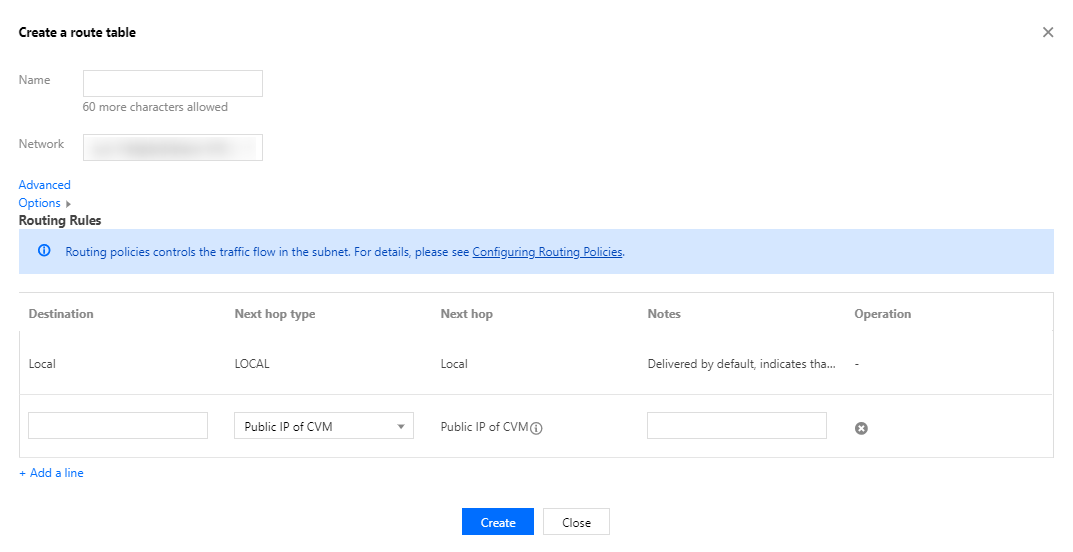
Step 3. Create a route table and associate it with a subnet
You can create a custom route table, edit its routing policy, and associate it with a specified subnet. The route table associated with a subnet is used to specify the outbound routes for the subnet.
1. Log in to the VPC console and select Route Tables on the left sidebar.
2. Select the region and VPC at the top of the list and click Create.
3. In the pop-up dialog box, enter the name, network, routing rules and click Create. Return to the route table list to view the newly created route table.
4. Click Subnet on the left sidebar, select the subnet to be associated with the route table, and click More > Change route table in the Operation column to associate it.
Step 4. Add a CVM instance
2. Click Subnet on the left sidebar to enter the management page.
3. Select the target subnet, click the icon in the CVM column to add a CVM.
4. Complete the purchase of the CVM instance as instructed on the page. For more information, see Purchasing Channels. Step 5. Add a TencentDB instance
New database
2. In the Network section on the purchase page, select the previously created VPC and the corresponding subnet, and add the new TencentDB instance to the VPC.
Existing database
1. In the instance list, click an instance ID or Manage in the Operation column to enter the instance management page. 2. In the Network section on the details page, switch to the corresponding VPC.