This document describes how to switch the database proxy network in the TencentDB for MySQL console.
Prerequisites
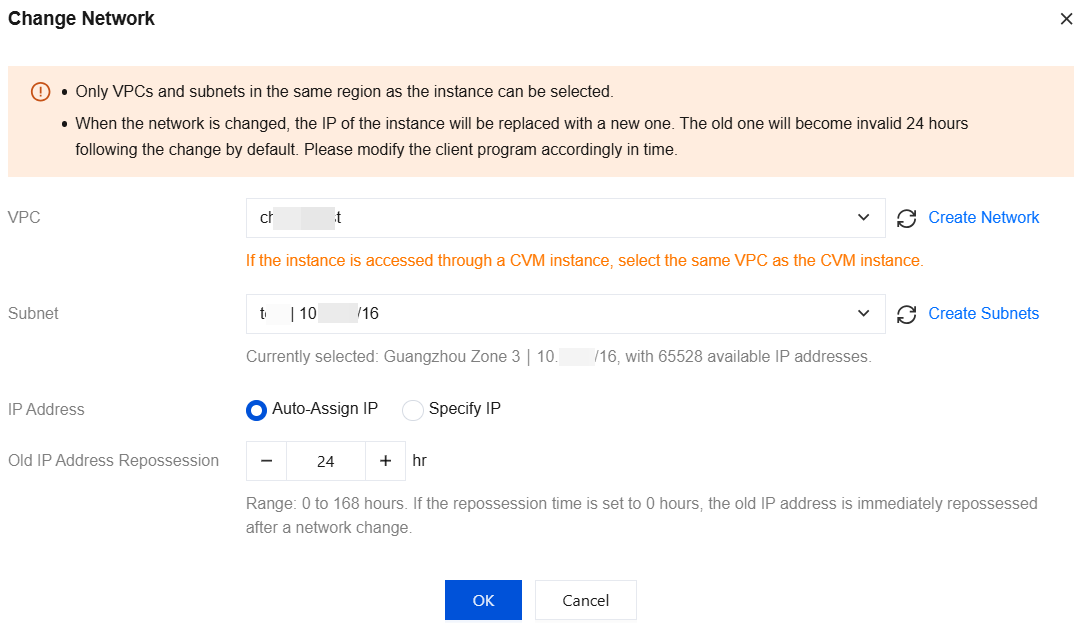
Notes
Switching the network may cause the change of the instance database proxy IP. The old IP will be retained for 24 hours by default and up to 168 hours. Then, it will become invalid. Therefore, modify the IP on the client promptly.
If Valid Hours of Old IP is set to 0 hours, the IP is released immediately after the network is changed.
You can only select a VPC in the region of the MySQL instance, but you can choose a subnet in any AZ and view its IP range.
When you add multiple access addresses for the database proxy, you can set and modify the network for each of them.
Directions
1. Log in to the TencentDB for MySQL console. Select a region on the top, and click the instance ID to enter the instance management page. 2. On the instance management page, select the Database Proxy tab.
3. On the database proxy page, choose Overview > Connection Address > Network and then click the edit icon.
4. In the pop-up dialog box, select a new network and click OK.
Set Valid Hours of Old IP to 0–168 hours.
Select Auto-Assign IP or Specify IP.
5. After successfully changing the network, you can view the new network under Connection Address.