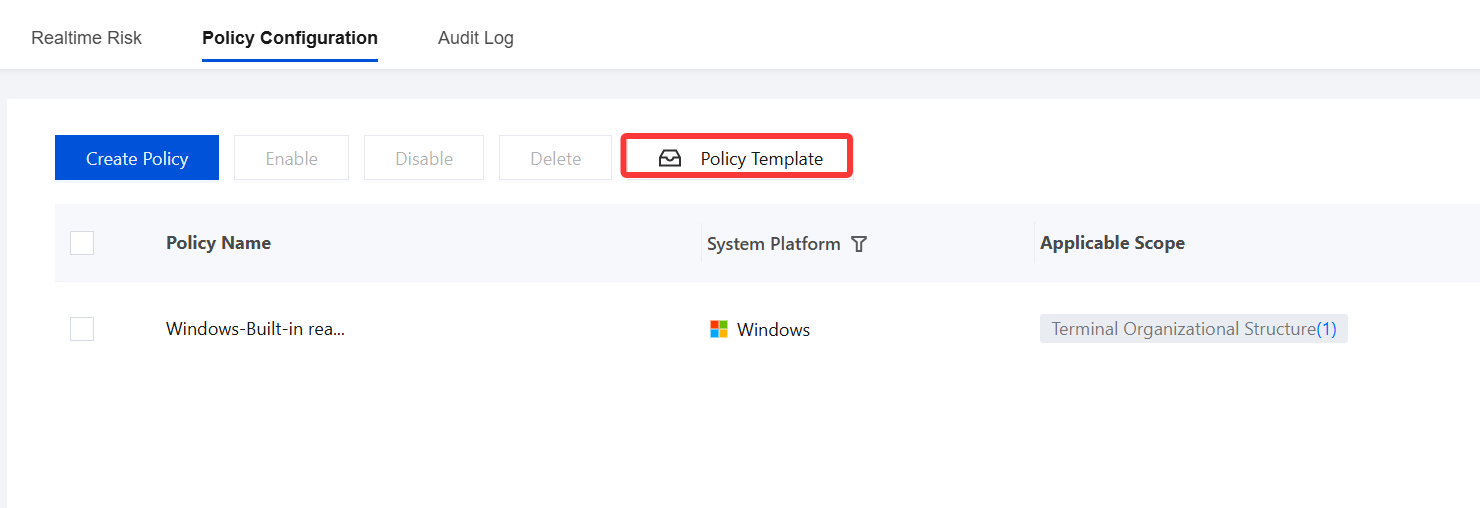
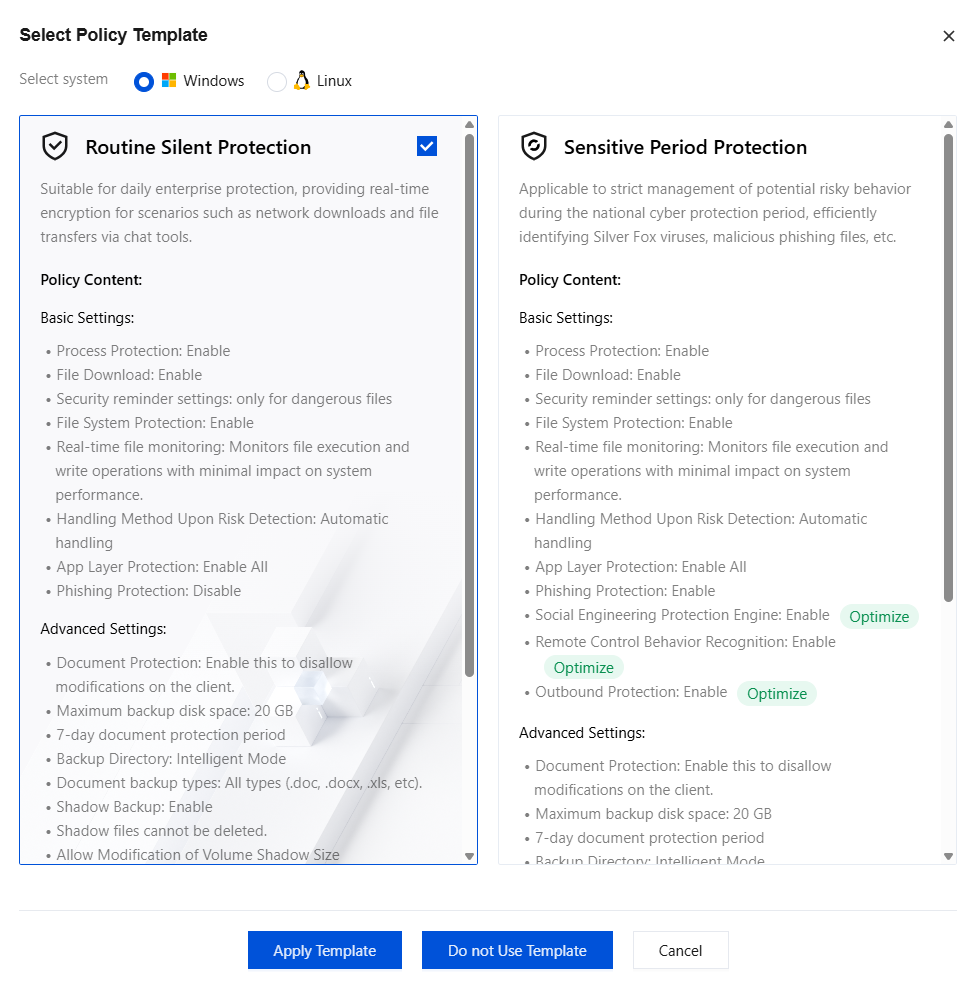
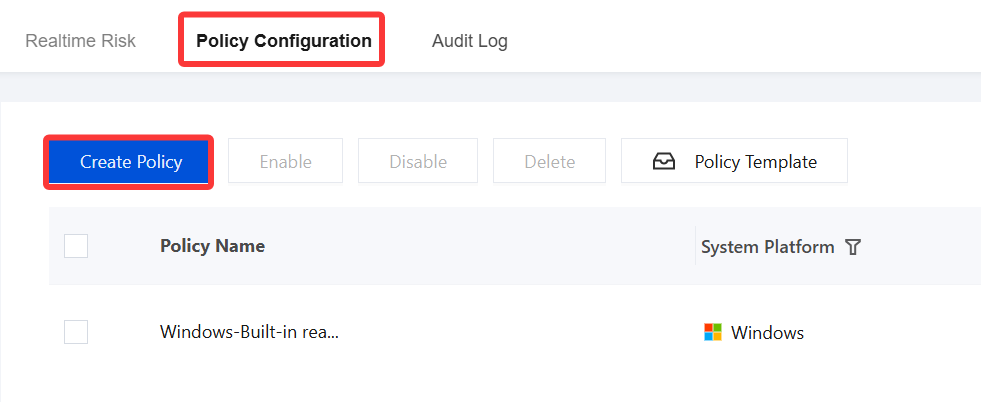
2. Select Daily Silent Protection or Protection for Sensitive Periods, and then click Apply Template.
Daily Silent Protection: Suitable for routine enterprise protection management, it can perform strict real-time protection on scenarios such as network downloads and chat tool file transfers.
Protection for Sensitive Periods: Suitable for use during national cyber defense drills, it strictly controls and protects against potentially dangerous behaviors and effectively identifies threats such as Silver Fox viruses and phishing malware.
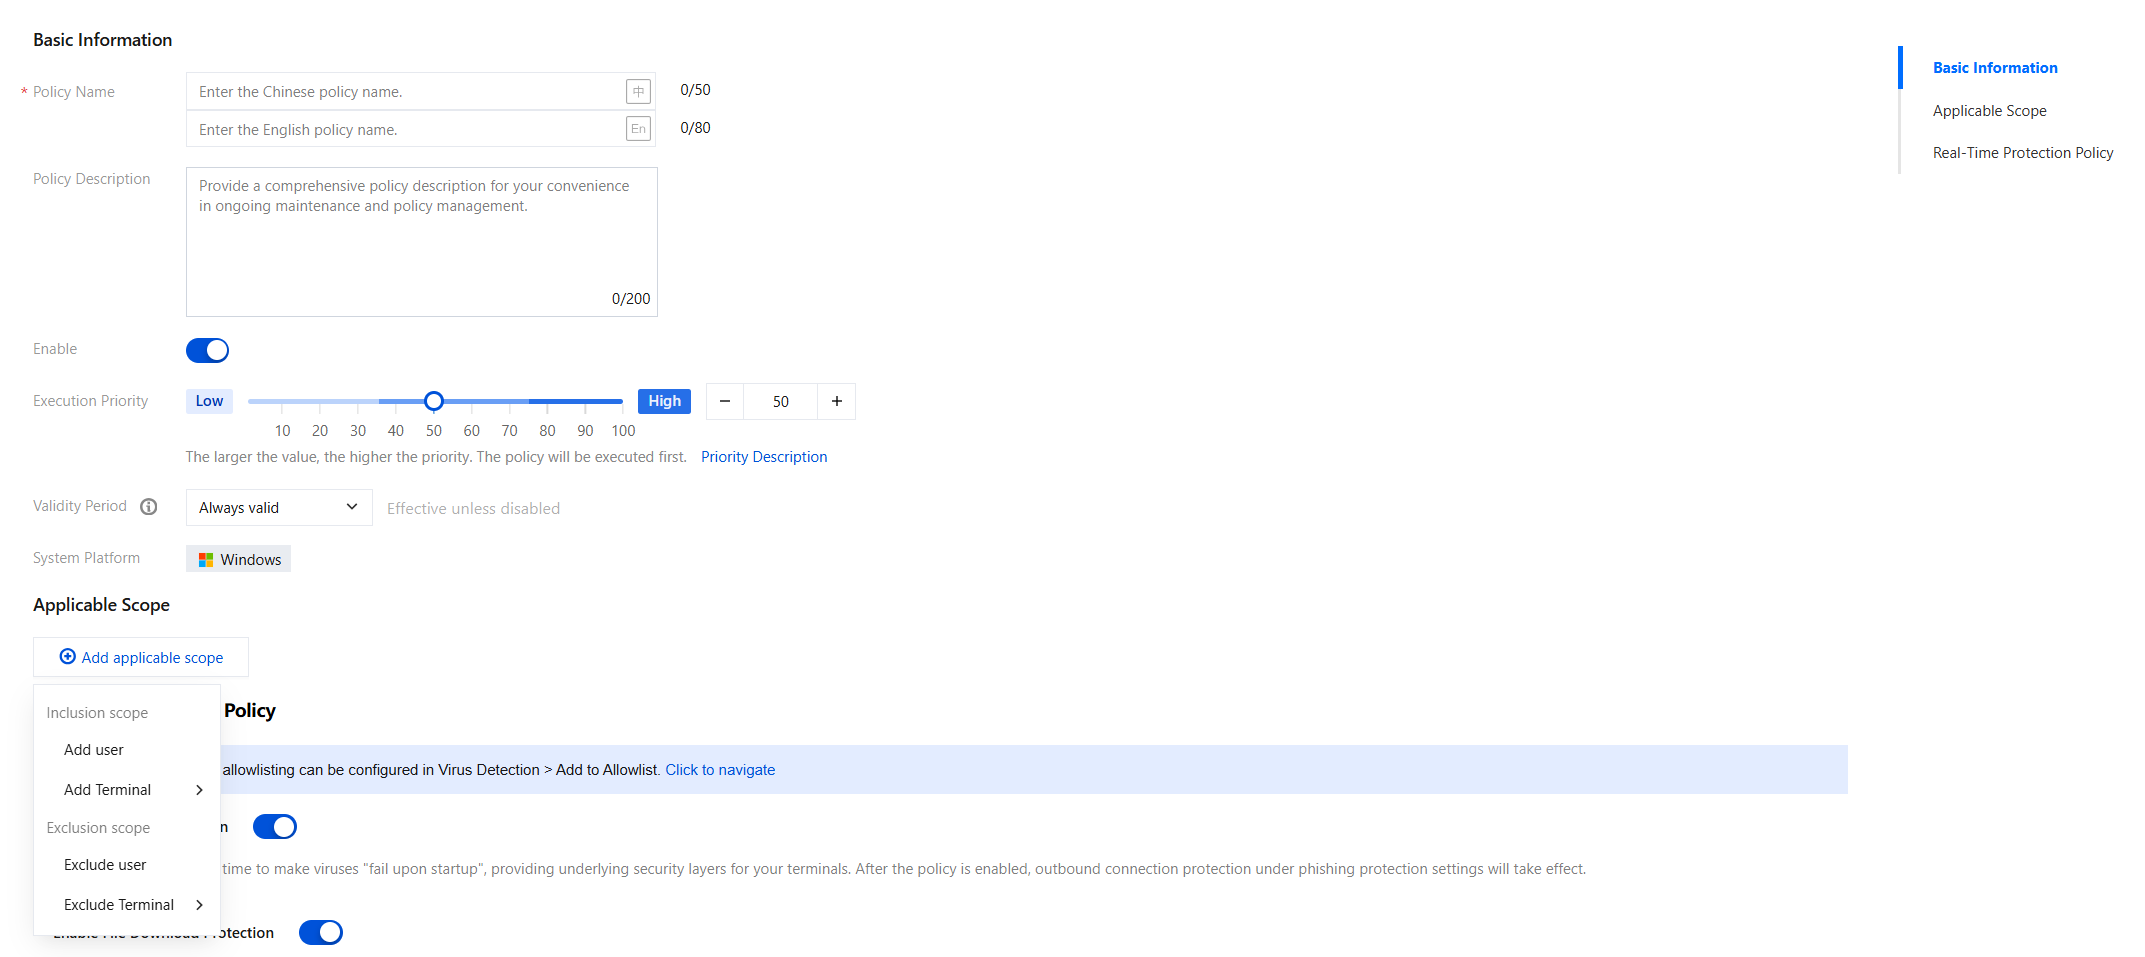
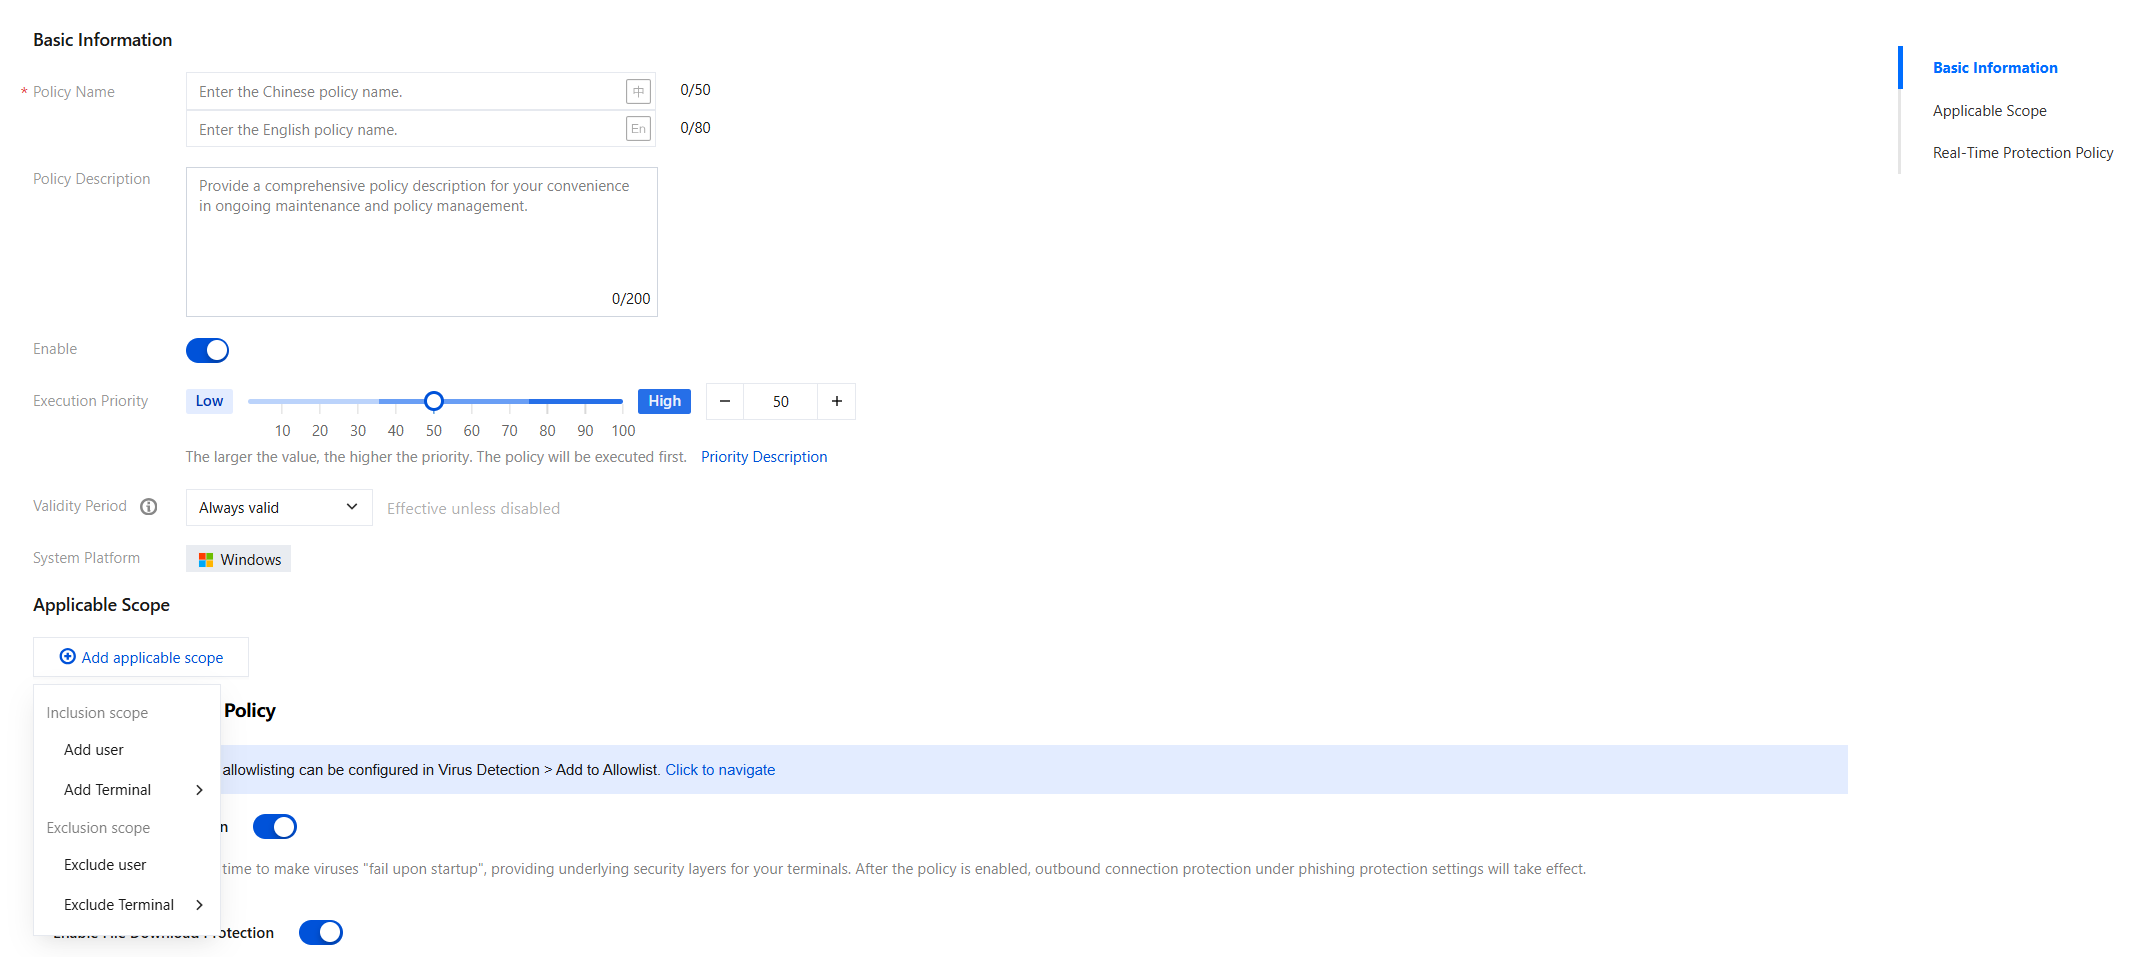
3. On the policy editing page, enter the policy name, policy description, priority, and other parameters. Click Add Applicable Scope, select the user/terminal scope to be controlled or excluded, and then click OK.
4. After configuring the above parameters, click Save. Other related settings can follow the system default recommended configuration.
2. On the policy editing page, enter the policy name, policy description, priority, and other parameters. Click Add Applicable Scope, select the user/terminal scope to be controlled or excluded, and then click OK.
3. Based on your needs, configure the following real-time protection policy. After configuration, click Save.
Enable Process Protection
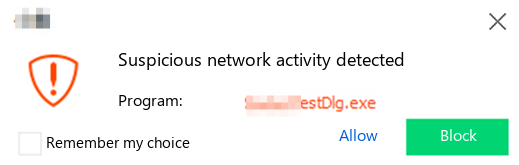
Kill dangerous processes in real time to make viruses "fail upon startup", providing an underlying security layer for your terminals. Click Enable Process Protection.
After process protection is enabled, the following is an example of a client pop-up that appears when a dangerous process exists:
Enabling File Download Protection
Enable the File Download Protection switch to automatically scan all network-downloaded files.
Monitor and protect files downloaded from browsers on terminals with iOA installed. Strengthen the detection and blocking capabilities for files downloaded through browsers and other channels against Silver Fox tactics, including phishing samples distributed via fake download sites and white-plus-black attack methods.
Provide security reminders for all downloaded files: pop-up reminders are classified into three types: "Unknown", "Safe", and "Risky".
Note:
We recommend configuring the policy to "Provide security reminders for all downloaded files". This configuration can identify the security/unknown status of files. However, unknown files also need to be protected against, as their suspiciousness may be high.
Provide security reminders only for dangerous files: only "Risky" files trigger pop-up reminders.
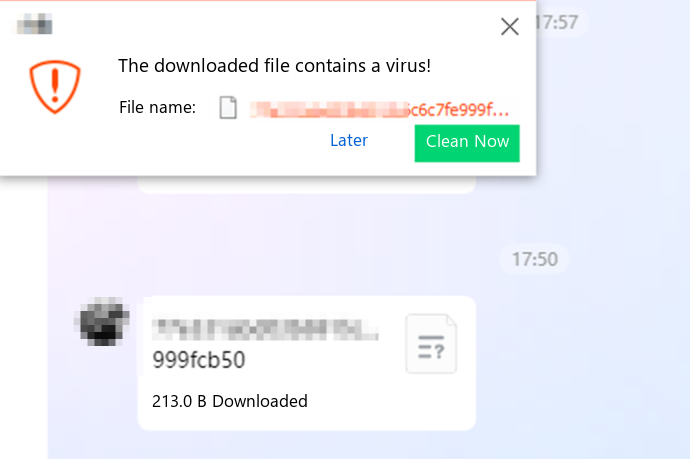
The following is an example of a client pop-up that appears when a downloaded file or dangerous file exists:
Enabling File System Protection
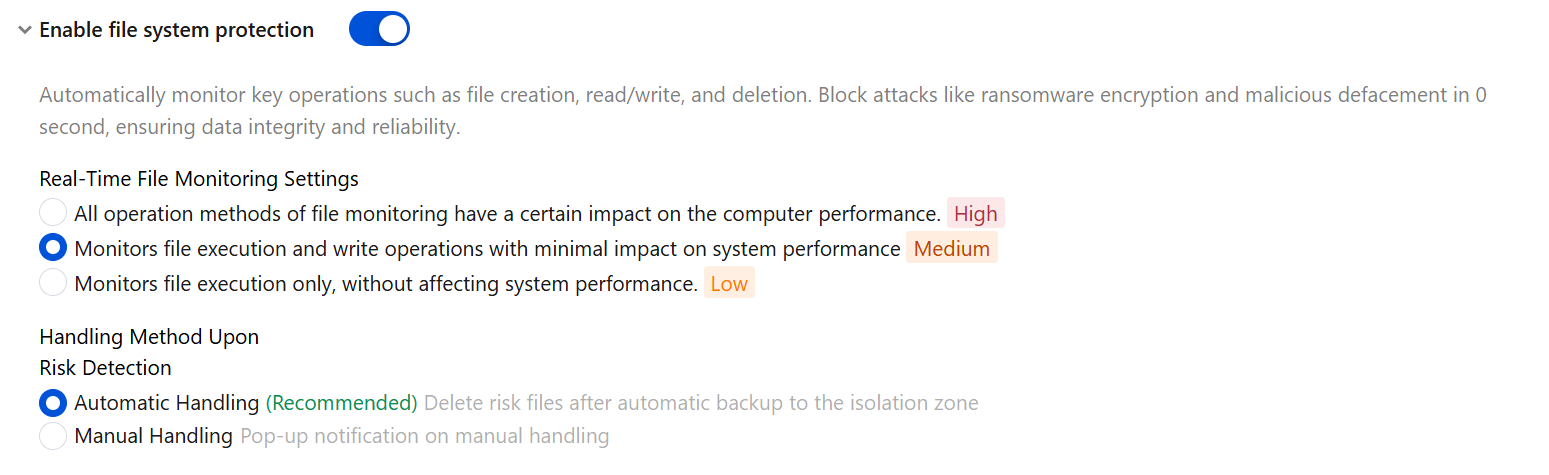
Enable the File System Protection switch to automatically monitor key file operations such as creation, read/write, and deletion.
For the protection level of local file operations on the client, a higher level means more operation behaviors are monitored, but it also causes greater read/write performance consumption (impact on IO operations or disk read/write speed).
Automatically monitor key operations such as file creation, read/write, and deletion. Block attacks like ransomware encryption and malicious tampering in 0 seconds, ensuring data integrity and trustworthiness.
Handling method when risks are detected: Automatic handling is recommended, which automatically backs up risky files to the isolation zone and then deletes them.
Note:
It is recommended to keep the real-time file monitoring setting at the medium level, which can block most execution and modification behaviors while allowing read-only behaviors. If the setting is set to "Low", protection against file modification becomes ineffective. If the setting is set to "High", read operations are also monitored in addition to execution and write operations. Generally, read-only operations are less harmful, but the impact on performance is greater.
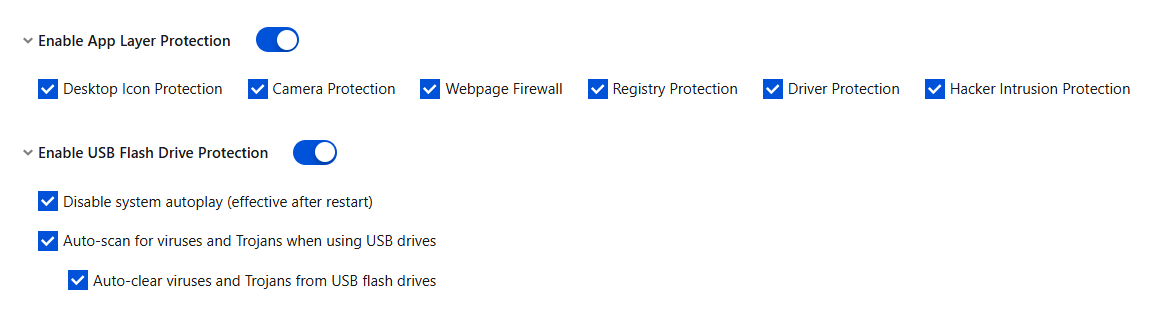
Enabling Application Layer Protection
Enable the following protection features: desktop icon protection, camera protection, web firewall, registry protection, driver protection, hacker intrusion protection, and USB drive protection.
Attention:
It is recommended to enable all other basic protection features. Disabling any one of them may result in a loss of protection capability.
USB drive protection: a behavior control and protection policy for terminals with iOA installed after a USB drive is inserted.
Disable system AutoPlay (takes effect after restart): This operation prevents the system from automatically executing autorun files after a USB drive or removable hard disk is inserted.
When a USB drive is used, it is automatically scanned for viruses and Trojans. After the USB drive is inserted, the system automatically scans it for risks and displays a pop-up alert or automatically removes any risks found.
Automatically remove viruses and Trojans from USB drives: For risks detected by the automatic scan of USB drives when they are in use, configure whether to remove them automatically. If this option is selected, viruses and Trojans on the USB drive are automatically removed. If this option is not selected, a pop-up alert is displayed, and manual removal is required.
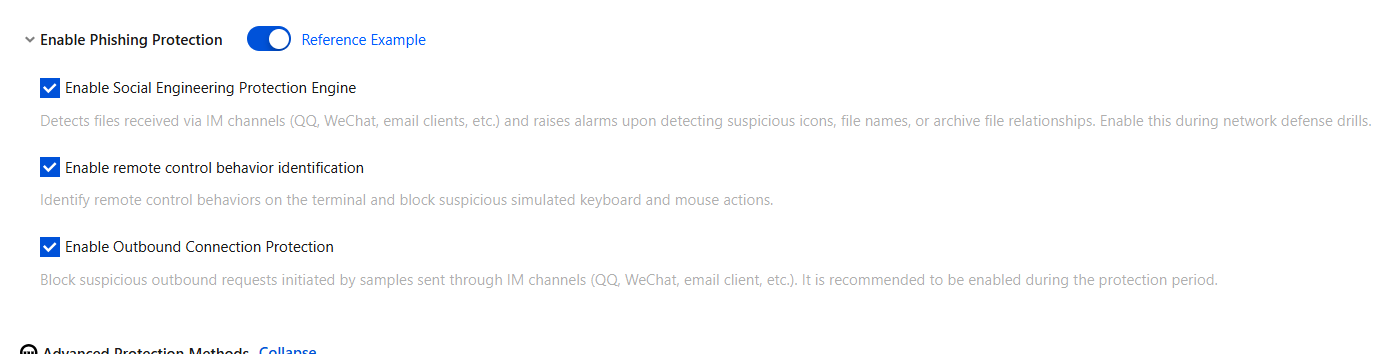
Enabe Phishing Protection
Enable the phishing protection switch and customize the social engineering protection engine, remote control behavior identification, and outbound connection protection capabilities. Phishing protection can take proactive defense measures to block tactics such as defense evasion and persistence that Silver Fox often exploits through legitimate software processes. It also identifies disguised installation packages of well-known software used by Silver Fox based on their installation behavior, safeguarding system security.
Enable the social engineering protection engine: After the social engineering protection engine is enabled, external files received or downloaded from channels such as email, communication tools, and browsers are detected for the use of social engineering deception techniques, effectively improving protection against attacks such as phishing and watering hole attacks.
Remote control behavior identification: identifies remote control behaviors on terminals and blocks suspicious simulated keyboard and mouse actions.
Enable outbound connection protection: blocks suspicious network requests initiated by samples that land from IM channels (QQ, WeChat, email clients, and so on).
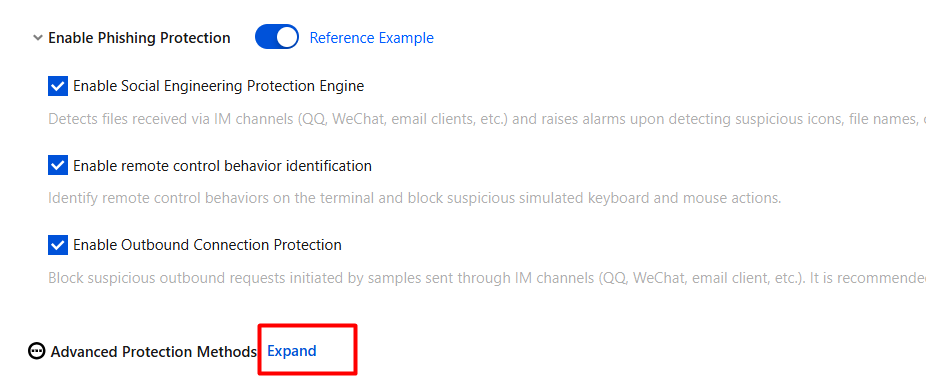
Advanced Protection Methods
Configure the following advanced protection methods as needed, and click Expand.
Enabling Document Protection
Click Enable Document Protection to protect documents from hacker attacks and support recovery of accidentally deleted documents through document backup.
Enable Document Protection: blocks ransomware from encrypting files.
Allow the client to modify Document Protection: After this option is enabled, users can enable or disable the document protection feature on the client. The document backup settings still follow the settings on the console.
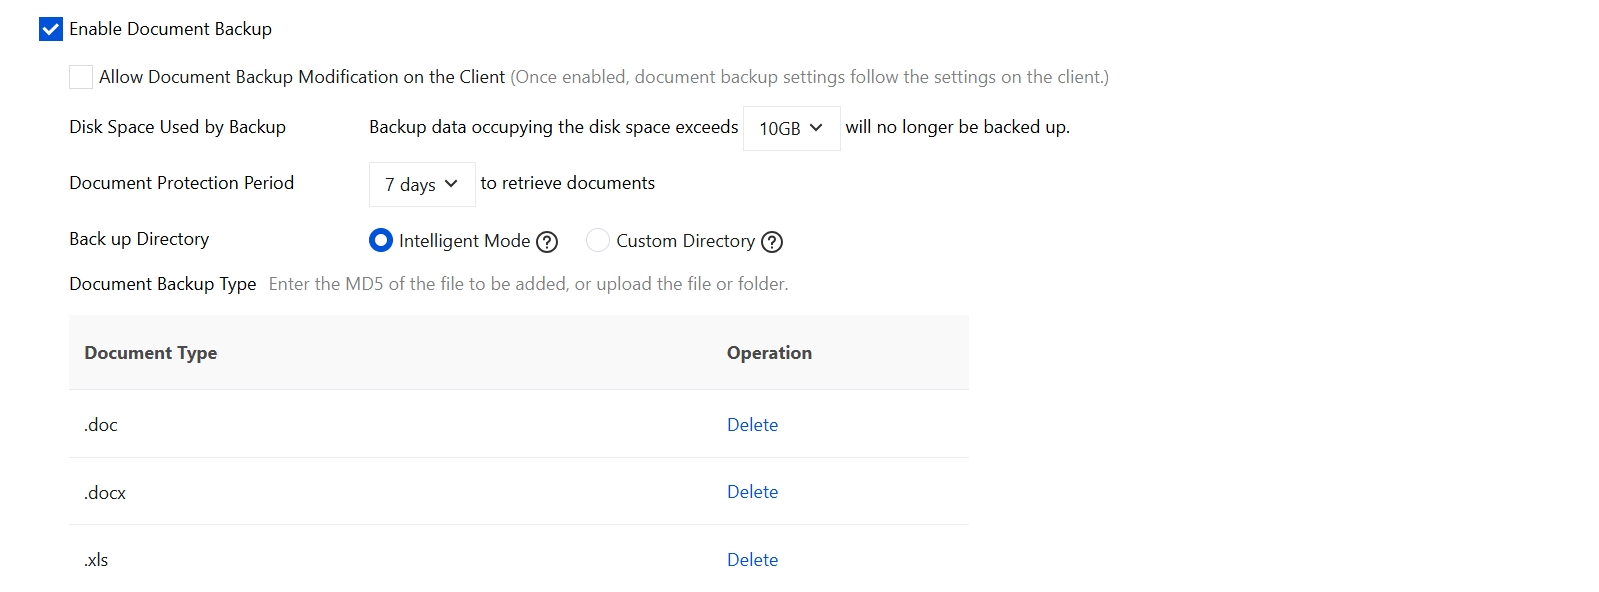
Enable Document Backup: select to enable/disable document backup.
Allow the client to modify document backup: Once enabled, document backup settings follow the settings on the client.
Disk space occupied by backups: Set the upper limit of disk space occupied by backups based on actual conditions.
Document protection period: documents within the recovery time range.
Backup directory: Smart mode: Backs up the entire disk except filtered directories. Custom directory: You can add important document directories to back up on the client.
Document backup type: Click Add/Delete to add or delete document backup types. Files larger than 100 MB will not be backed up.
Enable shadow backup protection: When this option is selected, deletion/modification of shadow copy files is allowed (by default, the option to allow modification of the shadow copy size is selected).
Configuration Example 1: Recovering Accidentally Deleted Documents
1. Load Document Guardian.
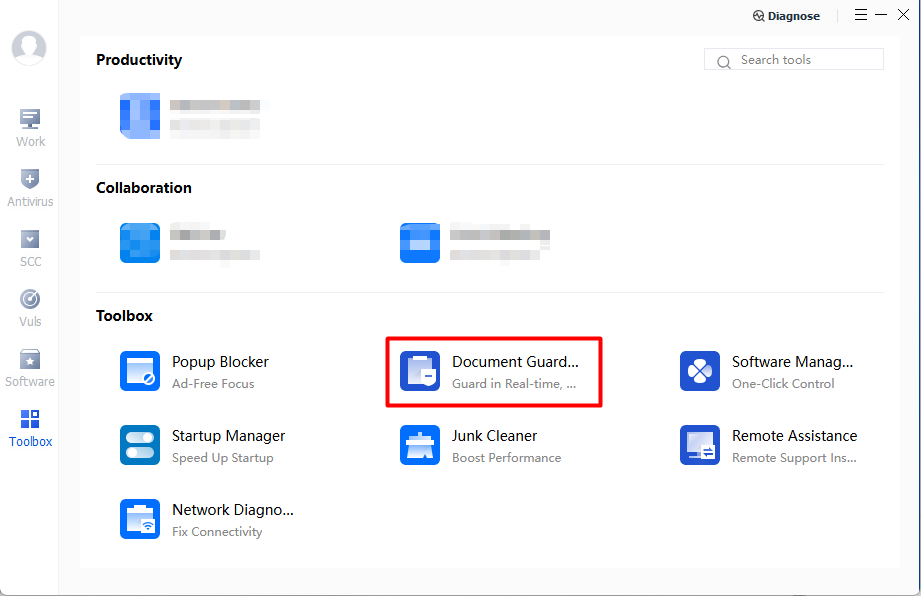
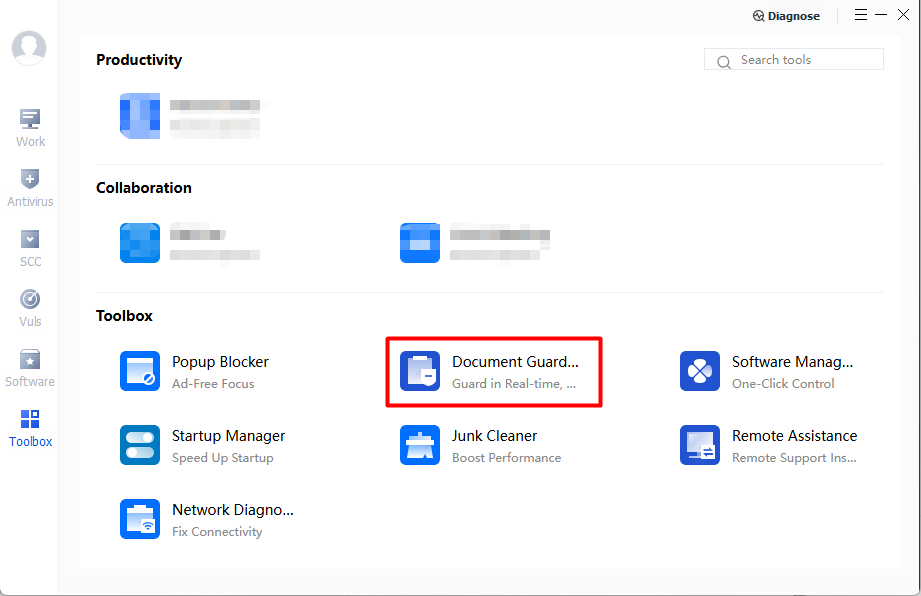
1.1 In the client, click Document Guardian.
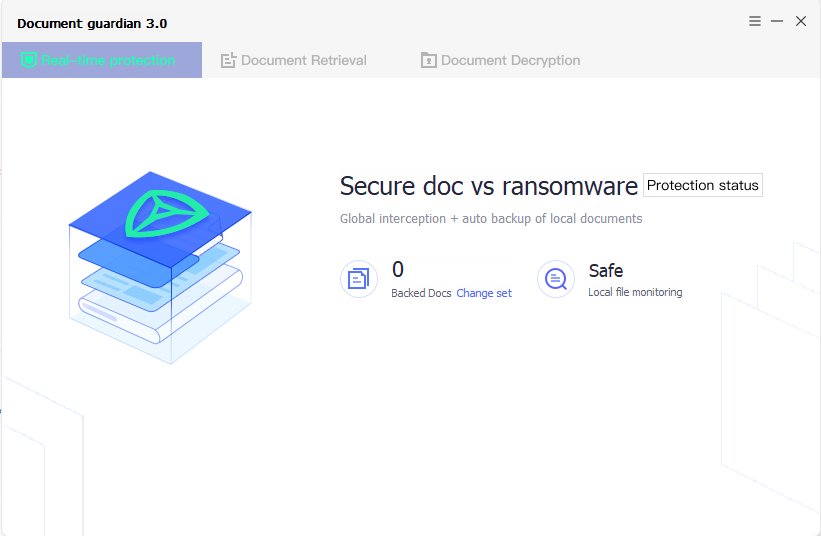
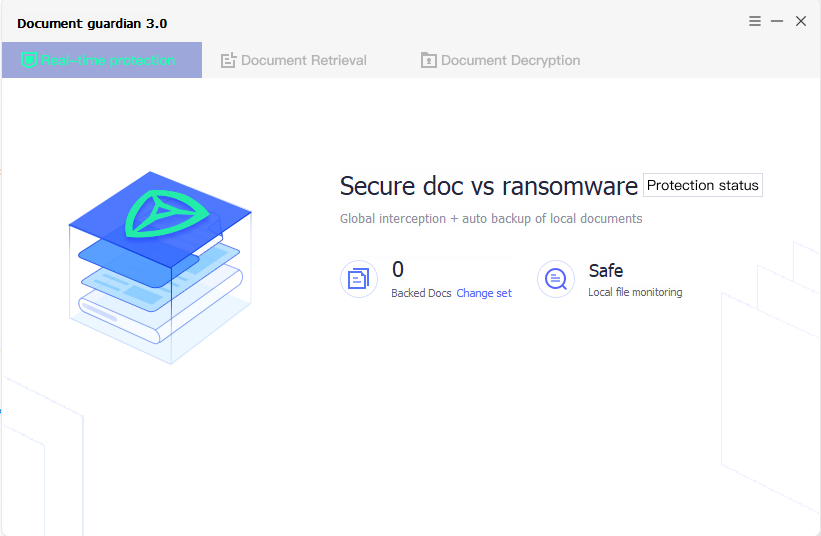
1.2 After loading is complete, the following page appears.
2. Create a .txt document.
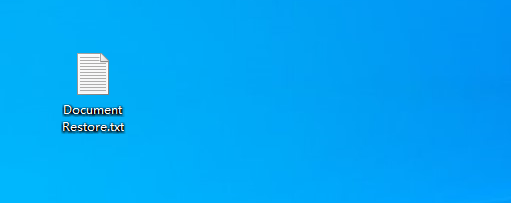
2.1 Document name: Document Restore.txt.
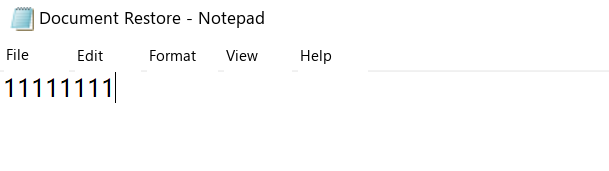
2.2 Document content: 11111111.
3. Delete Document Restore.txt, and then delete it again from the recycle bin.
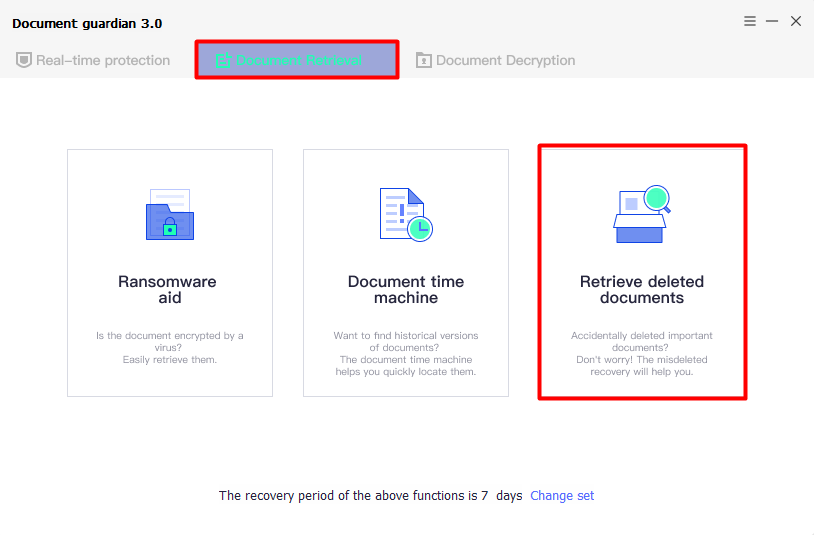
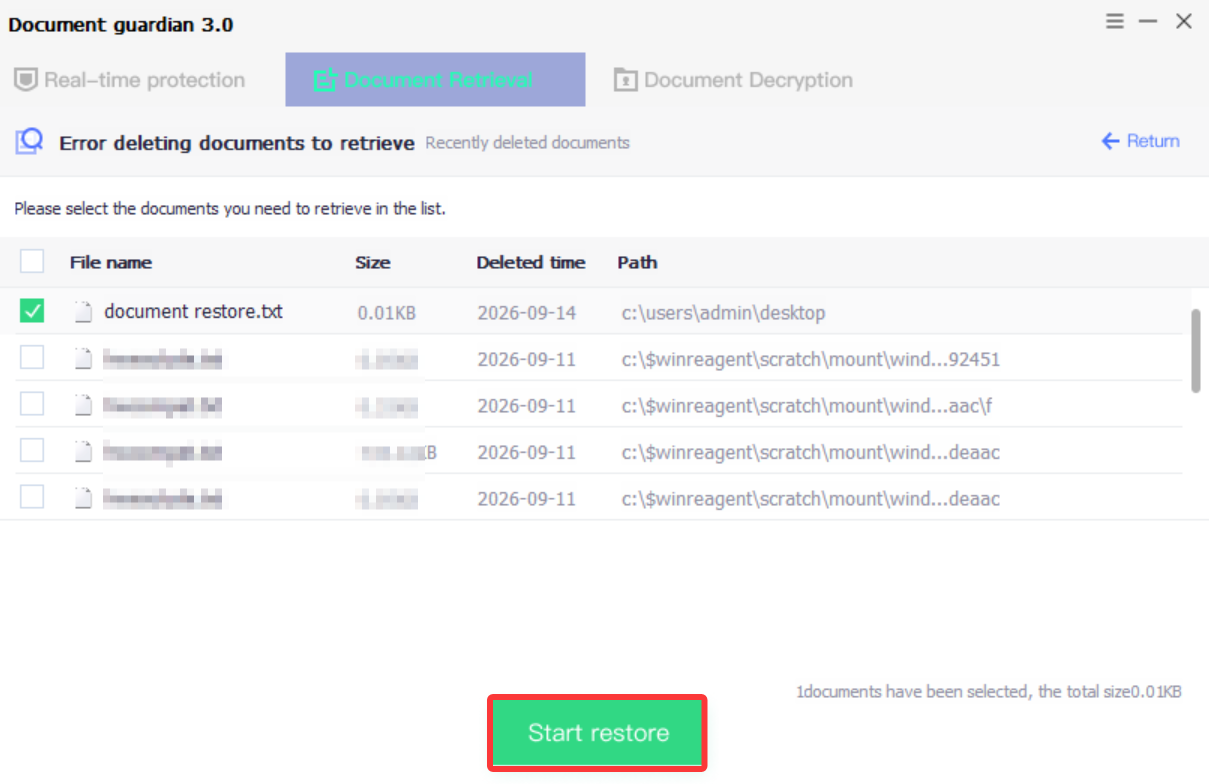
4.2 Select the documents to be recovered, and click Start Restore.
5. Verification: Open the restored document and check whether its content matches the content before deletion.
Configuration Example 2: Recovering Previous Document Versions
1. Load Document Guardian.
1.1 In the client, click Document Guardian.
1.2 After loading is complete, the following page appears.
2. Create a .txt document.
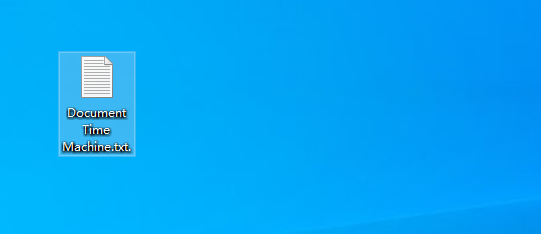
2.1 Document name: Document Time Machine.txt.
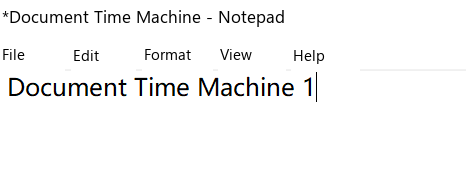
2.2 Document content: Document Time Machine 1.
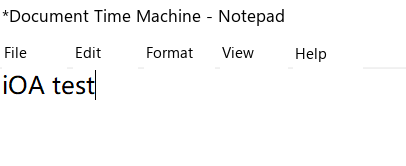
3. Modify and save the document content. Change the document content from Document Time Machine 1 to iOA test, and click Save.
4. Recover a previous version of the document.
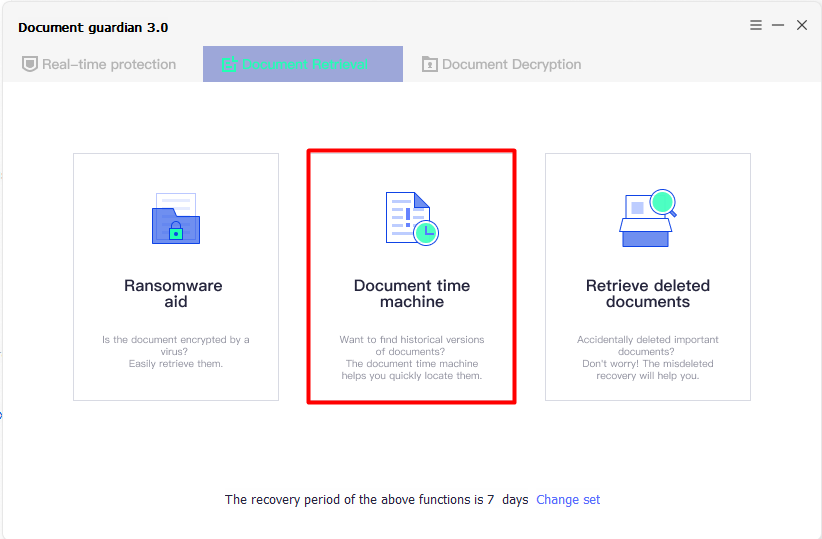
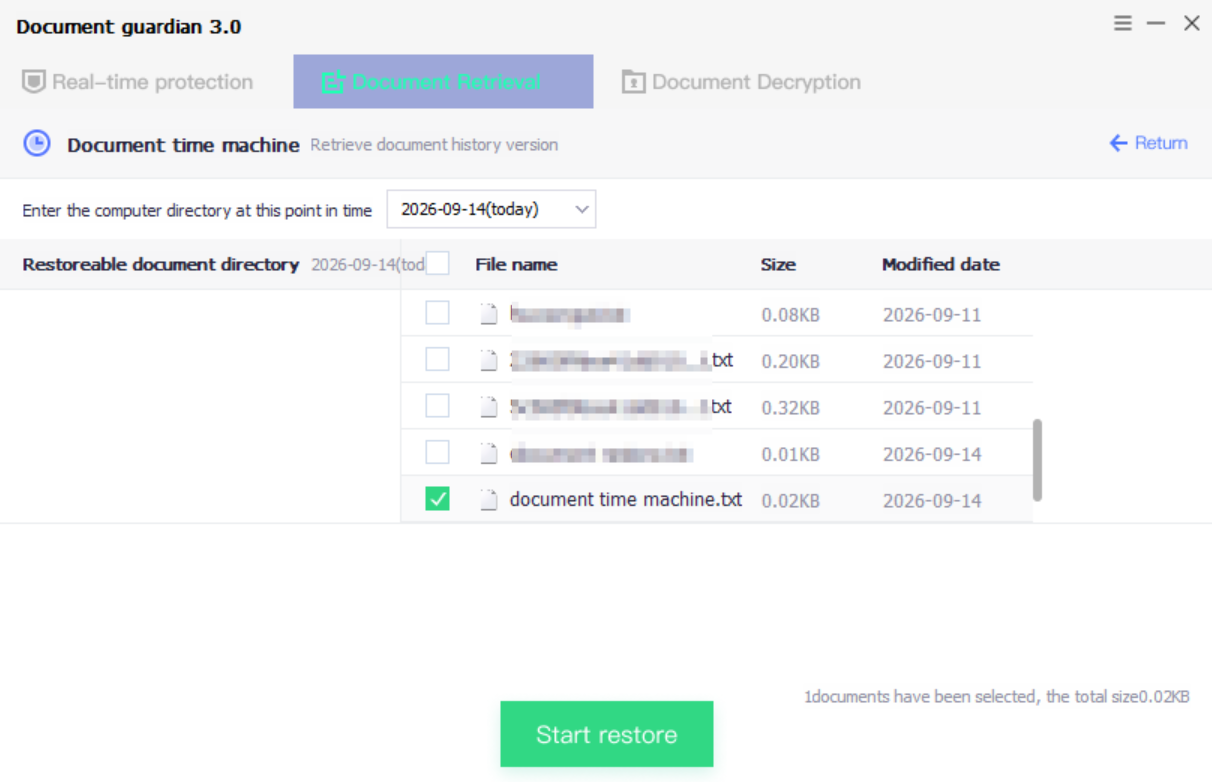
4.1 In Document Guardian 3.0, click Document Recovery > Document Time Machine.
4.2 Select the documents to be restored, and click Start Restore.
5. Verification: Open the restored document and check whether its content matches the content before deletion.
Lateral Movement Protection
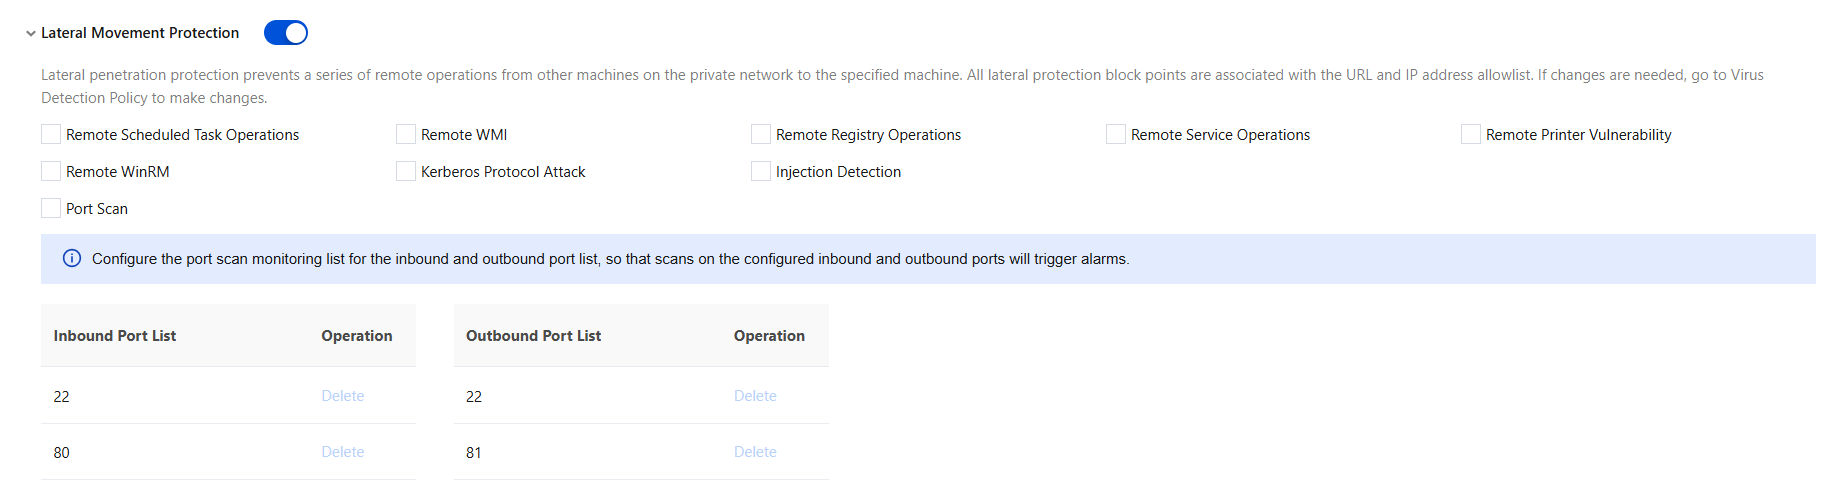
Lateral movement protection can prevent a series of remote operations from other machines on the private network against specified machines.
Note:
All horizontal protection block points are associated with the URL and IP allowlists. To change these settings, go to Virus Detection > Policy Settings.
Remote scheduled task operations: Prevent other machines on the private network from creating scheduled tasks on this machine.
Remote WMI: Prevent other machines on the private network from executing WMI commands on this machine.
Remote registry operations: Prevent other machines on the private network from modifying the registry on this machine.
Remote service operations: Prevent other machines on the private network from creating services on this machine.
Remote printer vulnerability: Prevent other machines on the private network from connecting to printers on this machine.
Remote WinRM: Prevent other machines on the private network from executing WinRM commands on this machine.
Kerberos protocol attacks: Prevent attacks that exploit the Kerberos protocol within a domain environment.
Injection detection: Detect suspicious local process injection behaviors.
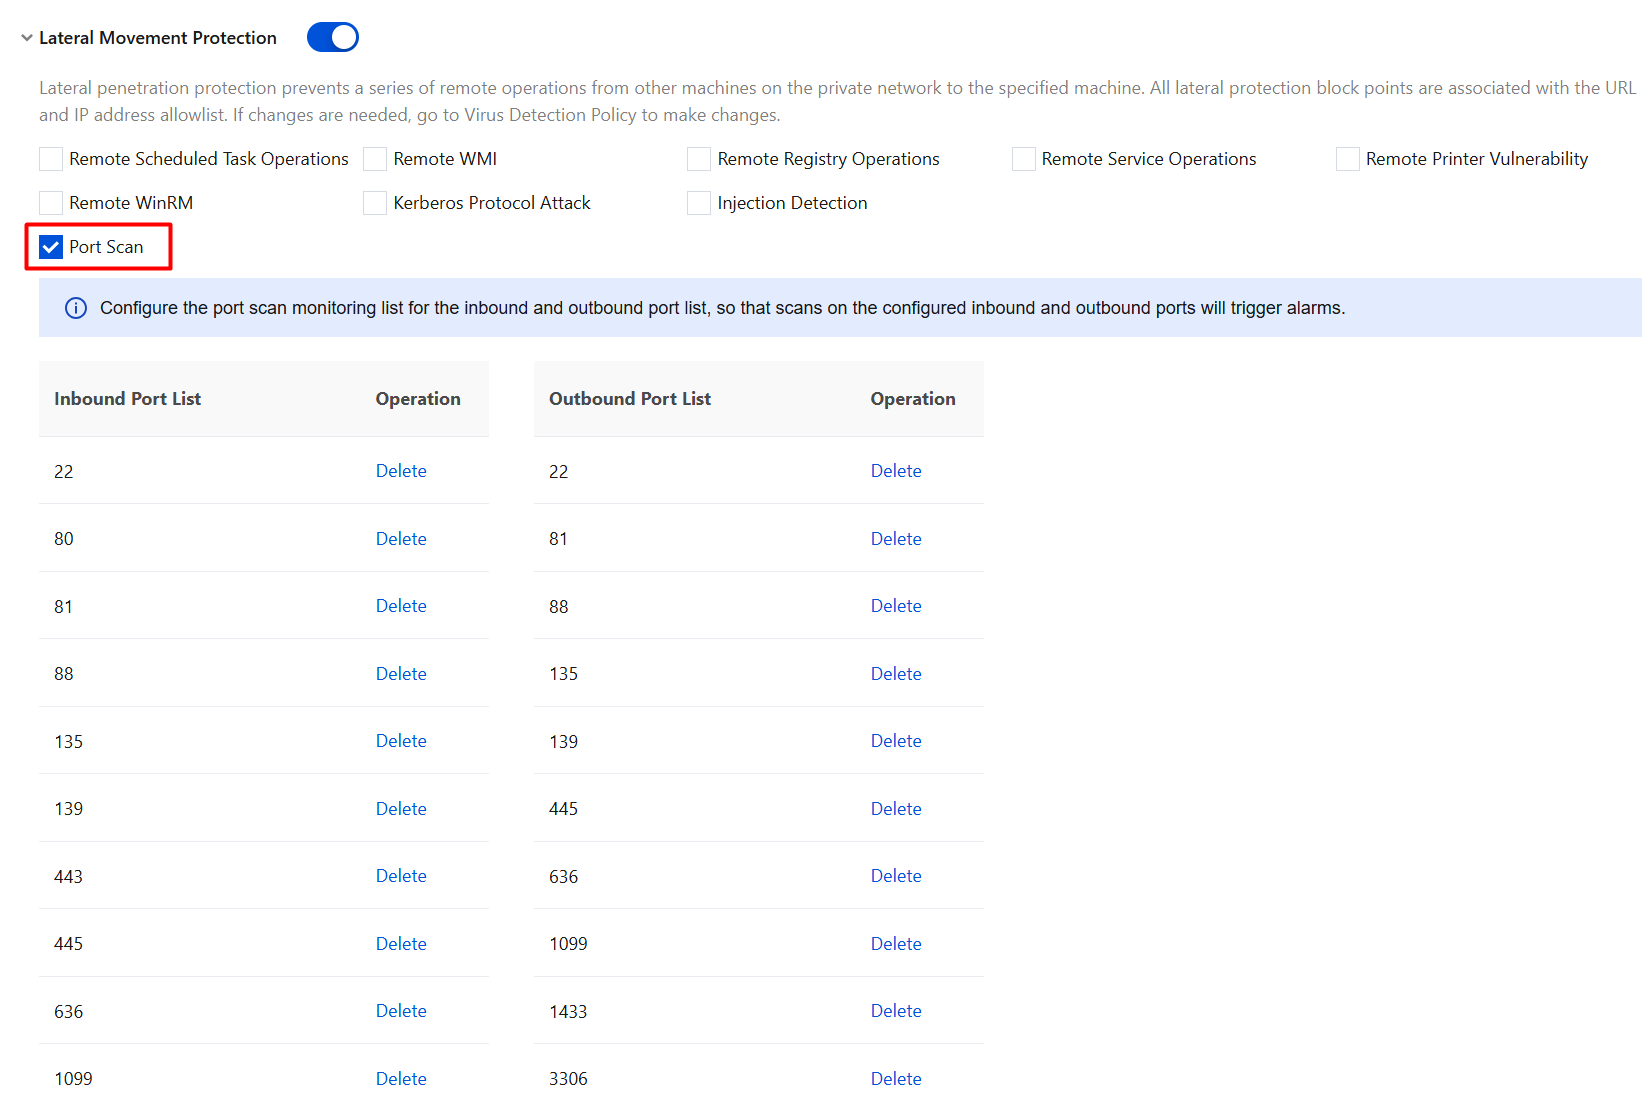
Port scanning: You need to configure the port scanning monitoring list in the inbound port list and outbound port list. Alarms will be triggered for the configured inbound and outbound port scanning behaviors.
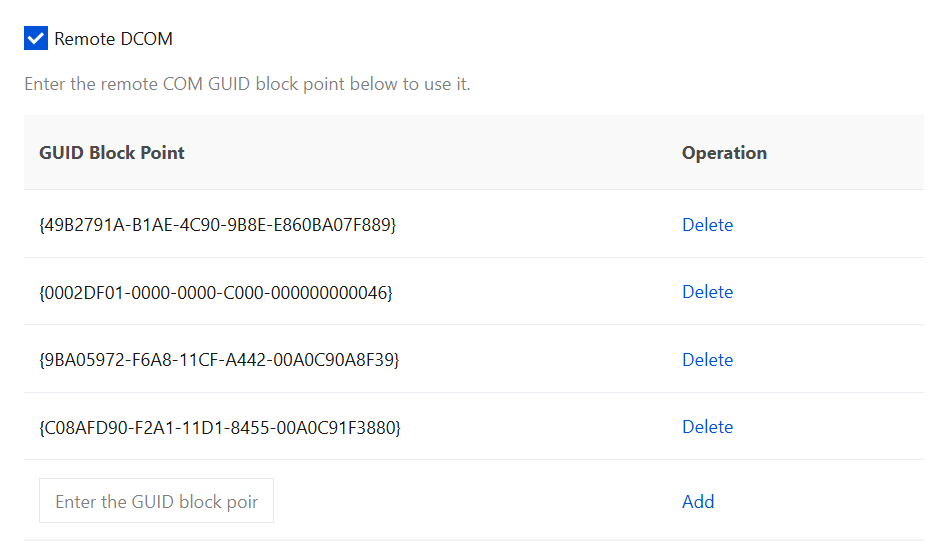
Remote DCOM: A Globally Unique Identifier (GUID) is a 128-bit binary numeric identifier generated by an algorithm. Enter the GUID block points for remote COM below to use this feature.
Attention:
Users are not advised to configure this on their own, as configuring remote DCOM requires certain security expertise. The following four defaults are common DCOM attack techniques and already meet general requirements.
GUID:49B2791A-B1AE-4C90-9B8E-E860BA07F889
dcom component: MMC20.Application
GUID:9BA05972-F6A8-11CF-A442-00A0C90A8F39
dcom component: ShellWindows
GUID:C08AFD90-F2A1-11D1-8455-00A0C91F3880
dcom component: ShellBrowserWindow
GUID:0002DF01-0000-0000-C000-000000000046
dcom component: InternetExplorer
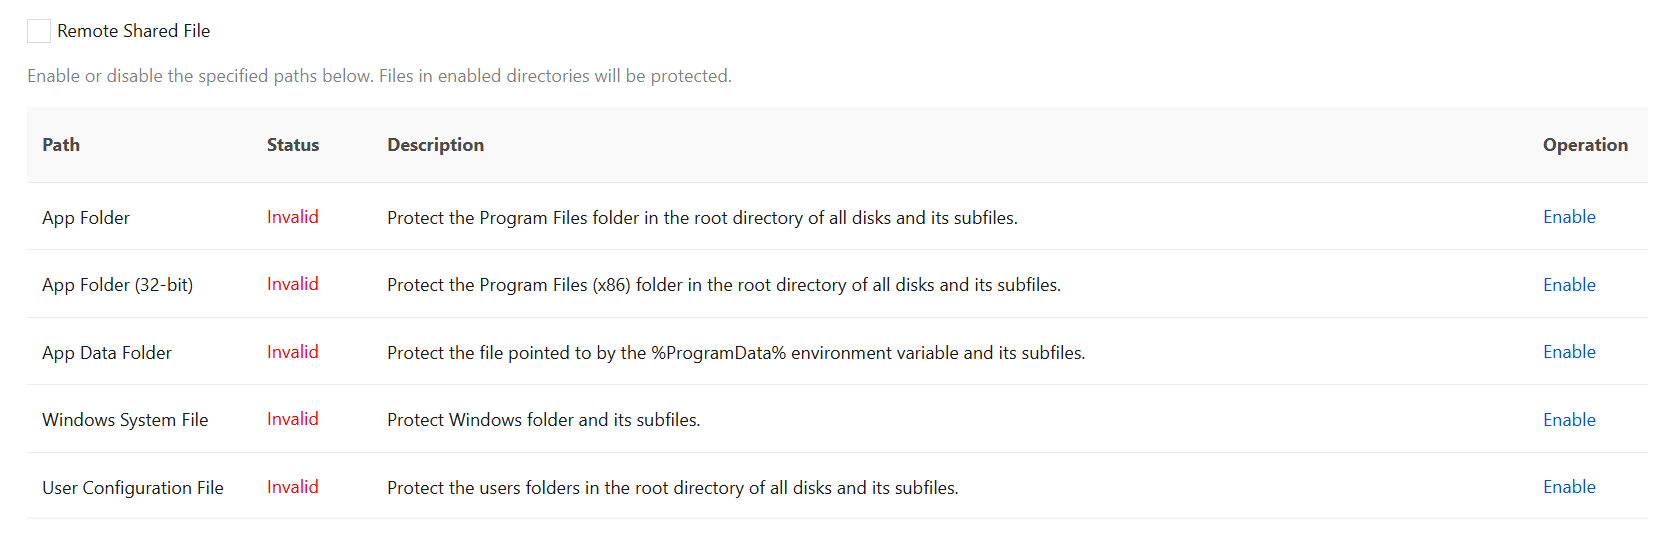
Remote shared file: Enable or disable specified paths below. Files in enabled directories will be protected.
Terminal Deception
It supports deploying ransomware decoys to terminals and automatically generating decoy files in specified directories to lure attackers to initiate attacks, thereby protecting real network assets and triggering alarms.
Enable Deception-based Protection Against Ransomware
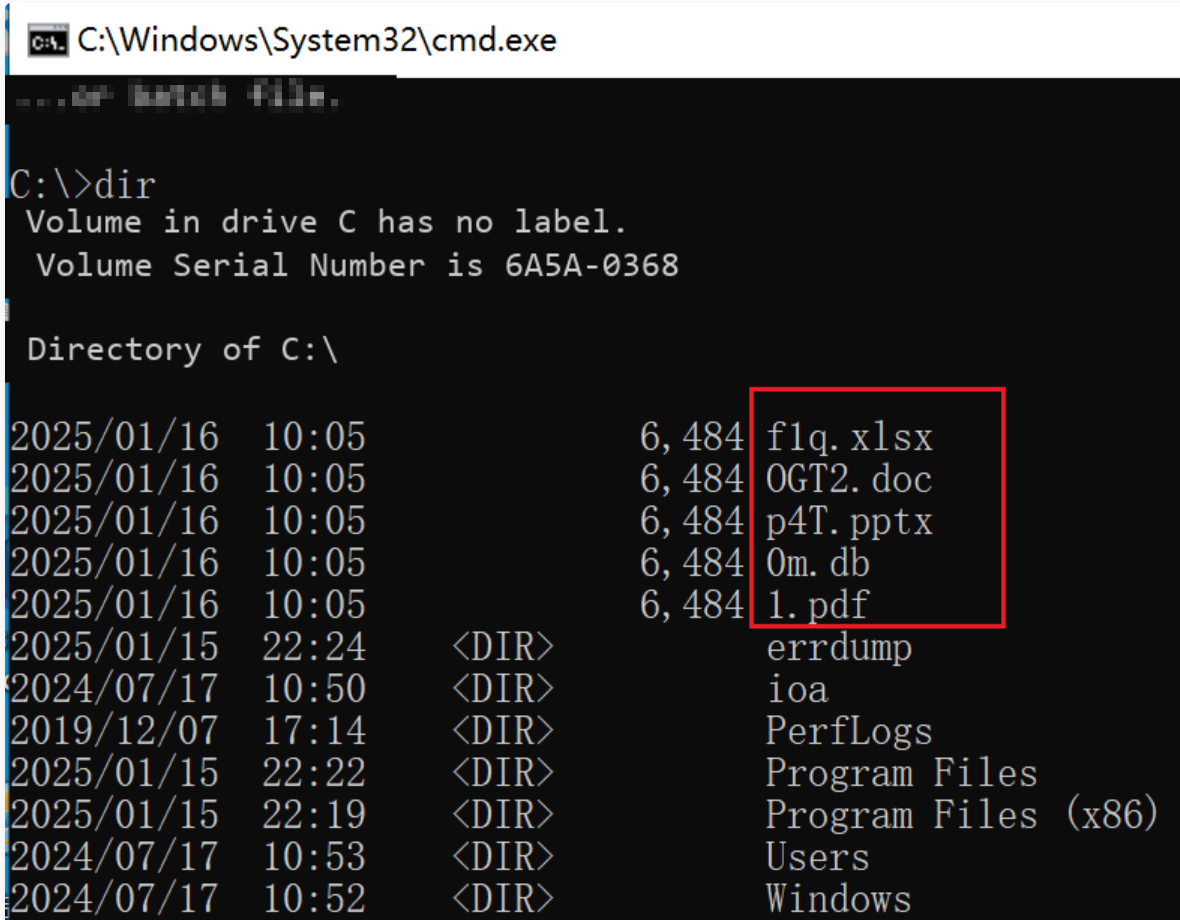
The system automatically generates a ransomware decoy file in the specified directory. If a user deletes or modifies the file, an alarm is automatically triggered.
1. Select Enable Deception-based Protection Against Ransomware.
2. The system automatically generates decoy files at random in the root directory of the drive.
3. An attacker performs operations such as deleting or modifying decoy files.
4. The iOA system administrator goes to Terminal Intrusion Prevention > Real-time Protection > Real-time Risks. On the Real-time Risks page, filter Terminal Deception to view alarm information.
Vulnerability Exploitation Protection
It supports defense against various exploit attacks. Once a network intrusion attack is detected, an alarm is triggered.
Attention:
After it is enabled, it may affect the network performance of the terminal. Operate with caution. After it is enabled, perform thorough testing and verification to confirm that there are no exceptions before gradually expanding the scope of impact.
Enabling Password Brute-Force Defense
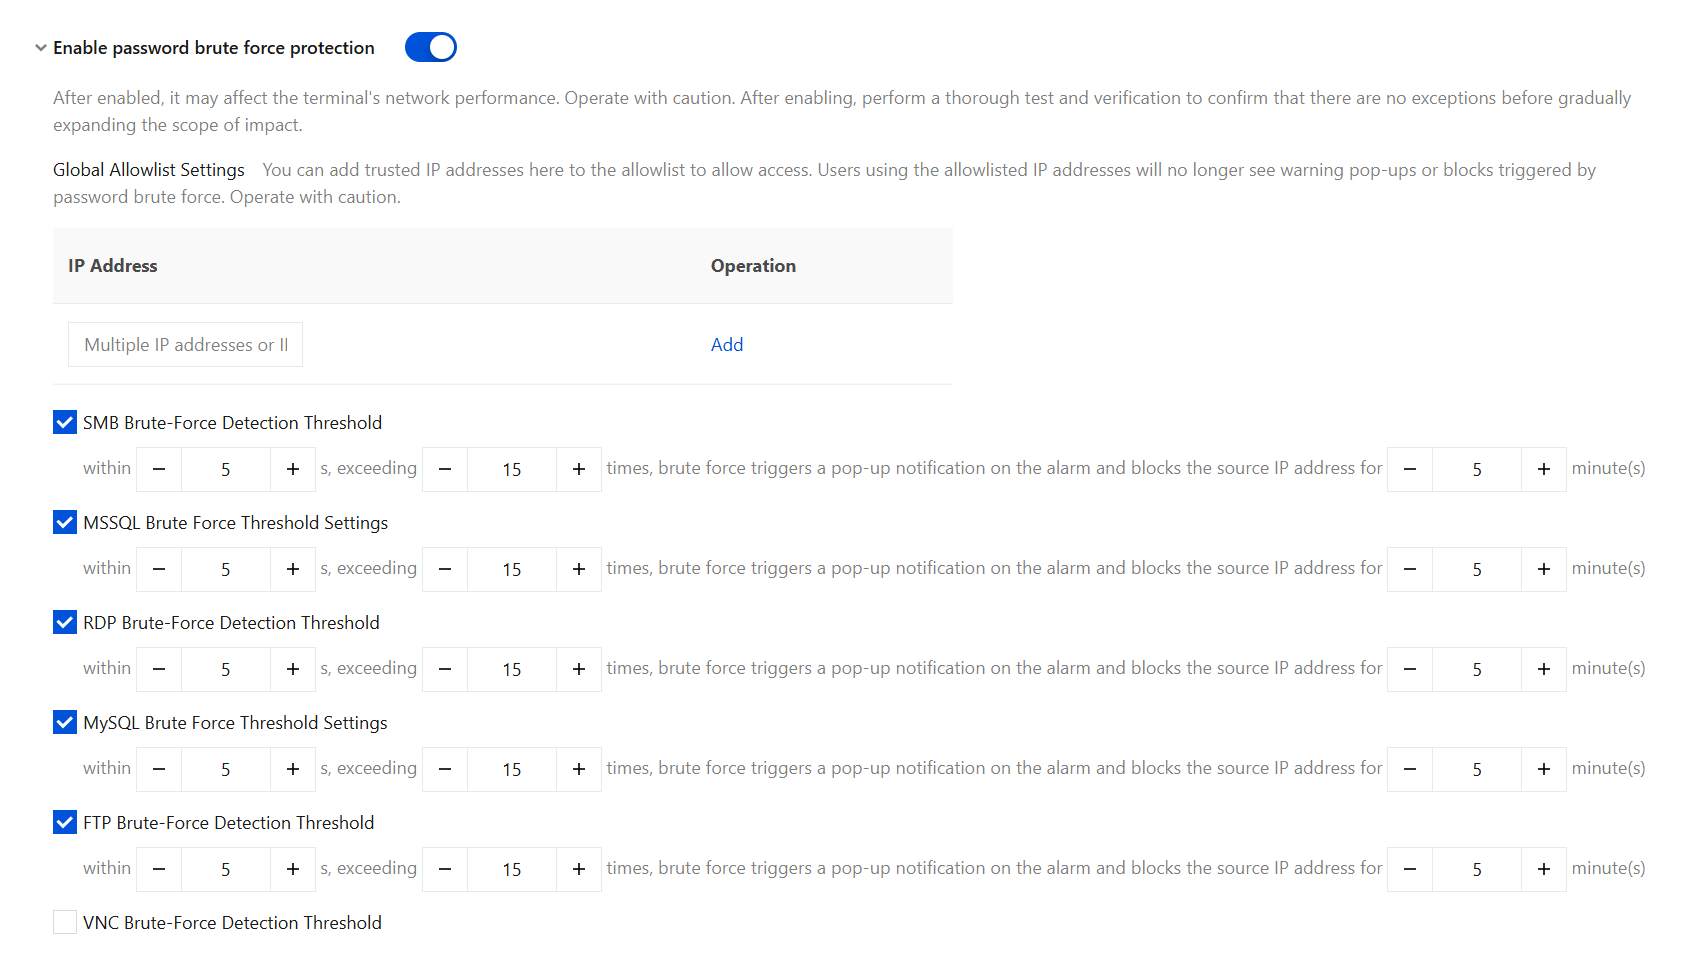
You can selectively enable it based on the enterprise's protection security level. It is generally recommended to enable it, and brute-force threshold settings are supported.
Note:
After enabling, it may have some impact on the terminal's network performance. Operate with caution. After enabling, perform thorough testing and verification. After confirming that there are no exceptions, gradually expand the impact scope through canary deployment.
FAQs
What Is the Execution Logic for Multiple Policies?
A user may match multiple policies. In this case, the system merges these policies for them to take effect. If policy items configured in different policies conflict, the system determines how to execute the policies by priority.
For example, if policies A and B are both configured and both match terminal X, where policy A enables "Document Protection" and "Phishing Protection", and policy B enables only "Phishing Protection", then since "Document Protection" has no policy conflict, the document protection policy item for terminal X takes effect according to policy A. However, since "Phishing Protection" has a policy conflict, the phishing protection policy item for terminal X takes effect according to the policy with higher priority between policies A and B.
What Is the Logic for Execution Priority?
The larger the priority number, the higher the execution priority of the policy.
The configurable priority range is 1 to 100.
Priorities can be the same. In this case, the system executes policies based on its built-in preferred policy.
What Is the Logic of System Built-in Preferred Policies?
The system's built-in preferred comparison dimensions include: policy control objects, policy strictness, and policy creation time.
Policy control object: The more precise the granularity, the higher the priority. Individual terminal/user > custom group > organizational structure.
Policy strictness: The stricter the configuration within a policy item, the higher the priority.
Policy creation time: The more recently a policy is created, the higher priority it has for execution.
For detailed policies, refer to the user manual, or contact us.