The Enterprise Security Group (New) provides a unified Access Control management page. Rules are configured as a four-tuple of Access Source + Access destination + Destination port + Protocol. The system then converts them into traditional security group rules and deploys them to the security groups bound to the target instances.
Core Features
It operates independently of the Internet Firewall. It remains fully functional even when the Internet Firewall is not enabled or when bandwidth is insufficient.
Define rules based on source and destination. The system then converts and deploys them to the target instances, eliminating the need for manual configuration on each instance.
A single rule, by default, generates security group rules for both inbound and outbound directions. To implement unidirectional control, you can add specific keywords in the rule description.
The source and destination support multiple types, including IP address/CIDR, region, asset instance, asset group, resource Tag, DNS domain, and parameter template. These types can also be combined symmetrically.
When the access source or destination type is IP address, the system automatically associates the IP address if the entered IP address matches a cloud asset. For example, entering 0.0.0.0/0 associates all public IP address assets.
The configuration interface aligns with common Access Control List usage habits.
Supported Assets
The Enterprise Security Group (New) supports managing the following asset types:
Asset Type
Description
Cloud Virtual Machine
CVM instance
ENI
ENI instance
CLB
CLB Instance
Cloud Databases and Middleware
Includes cloud databases TDSQL, TDSQL-C, MySQL, MariaDB, SQL Server, PostgreSQL, Redis, MongoDB, Elasticsearch Service (ES), and message queue CKafka
TKE
Supports regular nodes, native nodes, and super nodes.
Lighthouse Firewall
Lighthouse firewall instance
Note:
When adding a rule, you can also select Virtual Private Cloud (VPC) or Subnet as the source or destination. Once matched, the rule will apply to eligible assets within the specified subnet or VPC.
Viewing Security Group
1. Log in to the CFW console. In the left-side navigation pane, choose Access Control > Enterprise Security Group (New).
2. On the Enterprise Security Group (New) page, click Security group details.
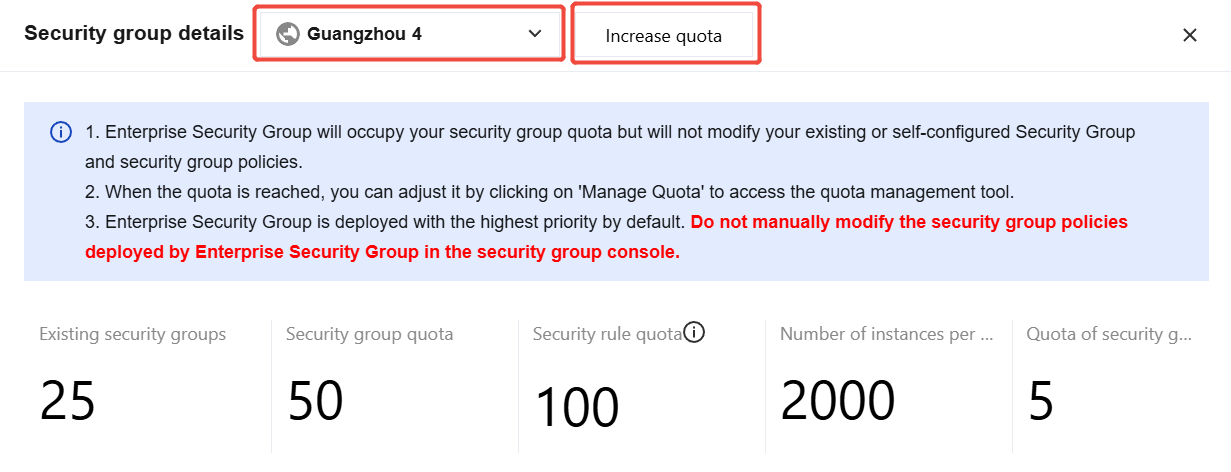
3. On the Security Group Visualization page, you can view the quota information for instances in each region. When a quota reaches its limit, click Increase quota to go to the increase quota tool for adjustment.
4. On the Security Group Visualization page, you can view the Associated instances, Security group list, and Security group rules sections below.
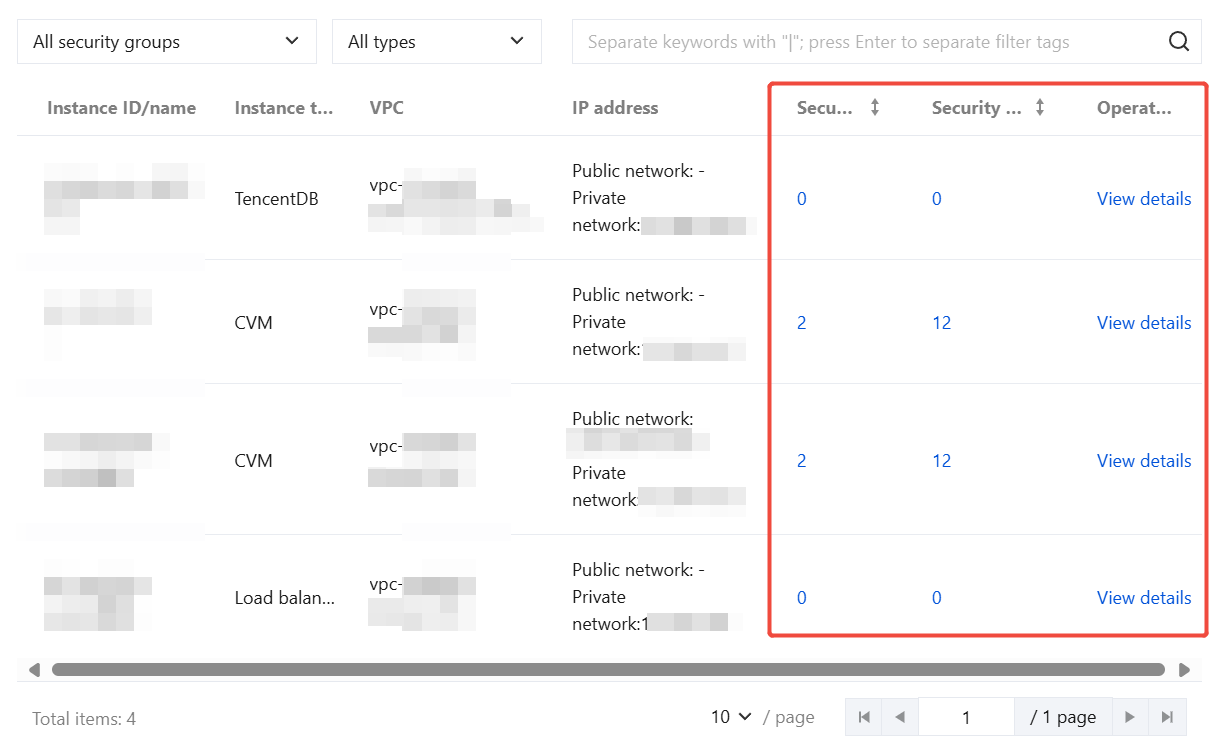
Associated instances: Displays all instance information in the current region. Clicking the number in the Security Group or Security Group Rules column redirects you to the security group list or security group rule details page for the corresponding instance.
Click View details to redirect to the instance details page.
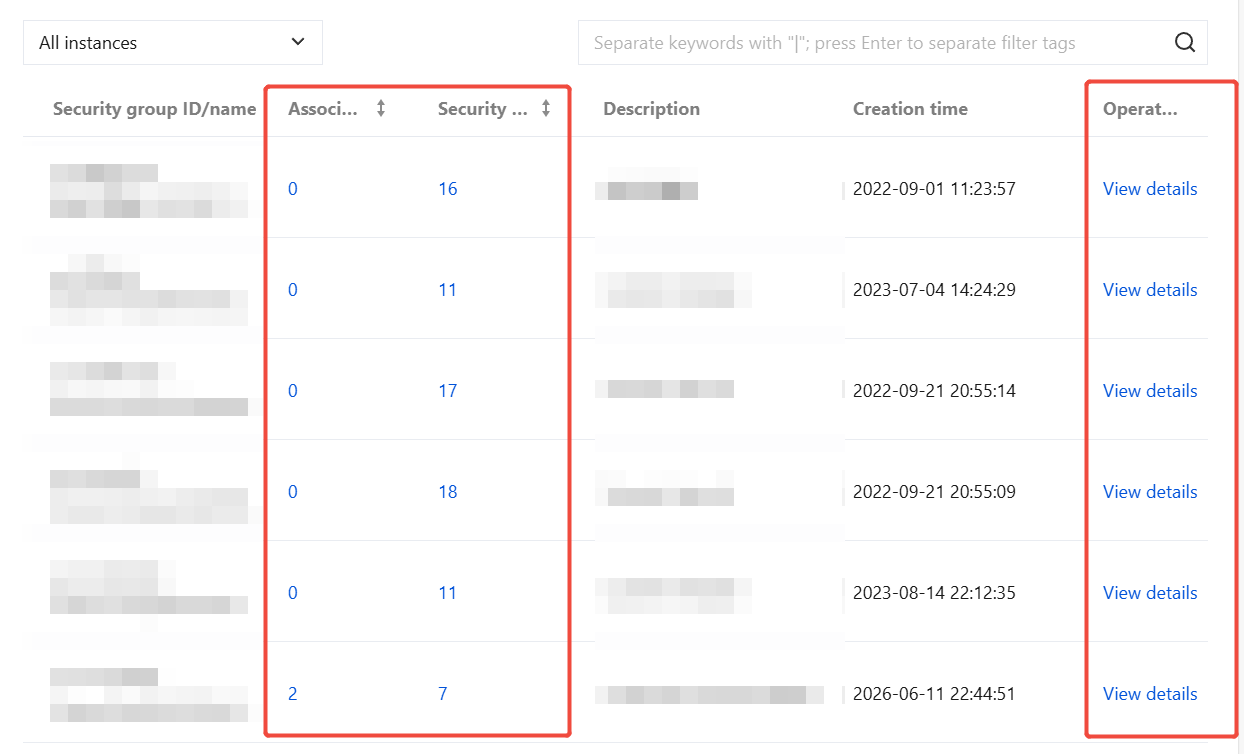
Security group list: Displays all security group list information in the current region. Clicking the number in the Associated Instances or Security Group Rules column redirects you to the security group list or security group rule details page for the corresponding instance.
Click View details to redirect to the VPC console security group details page.
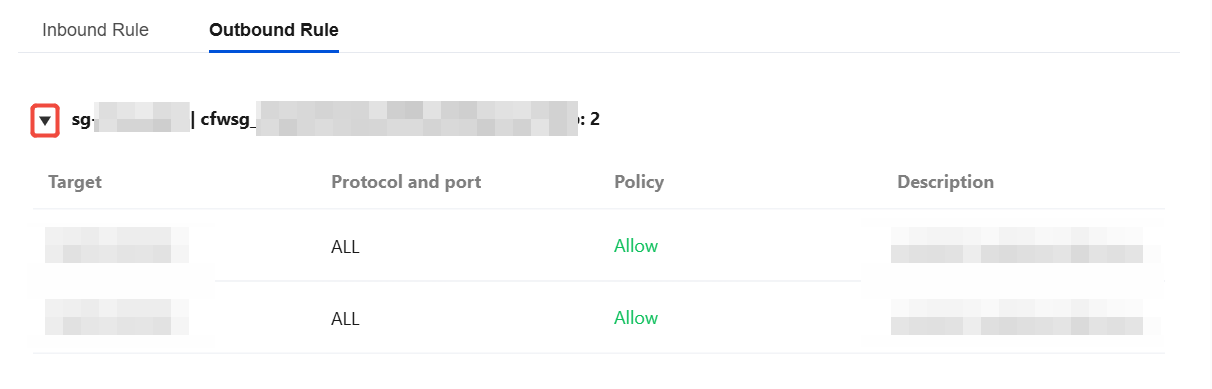
Security group rules: Displays the inbound and outbound rules of all security groups in the current region. Click
to view rule details. You can also verify whether the Enterprise Security Group has been deployed successfully.
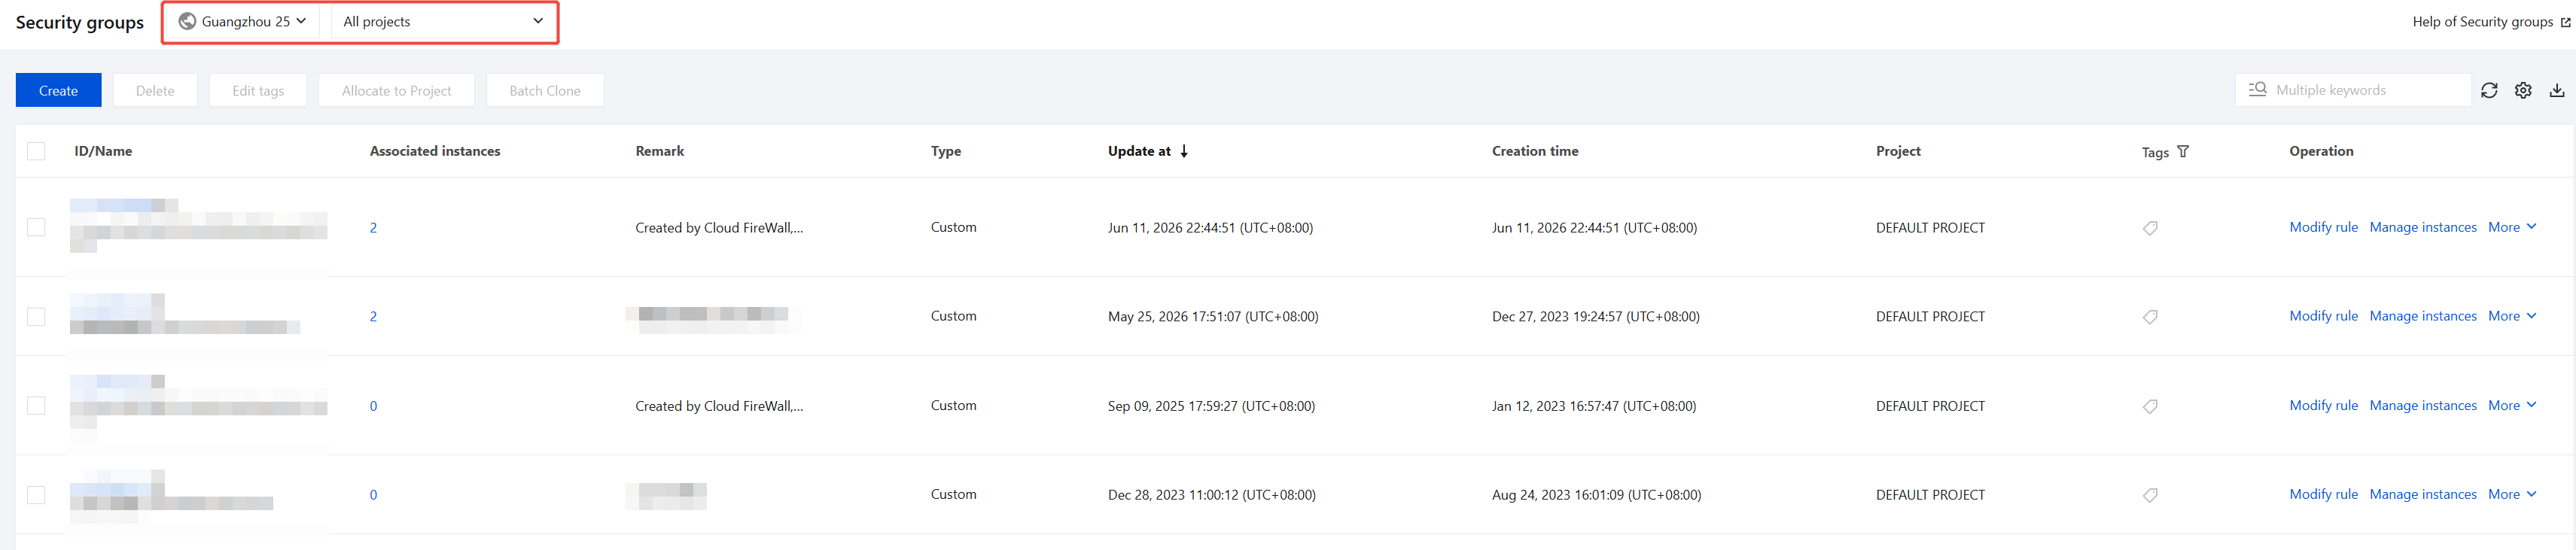
5. Log in to the VPC console. In the left-side navigation pane, choose Security > Security Groups, and then select the target region and project.
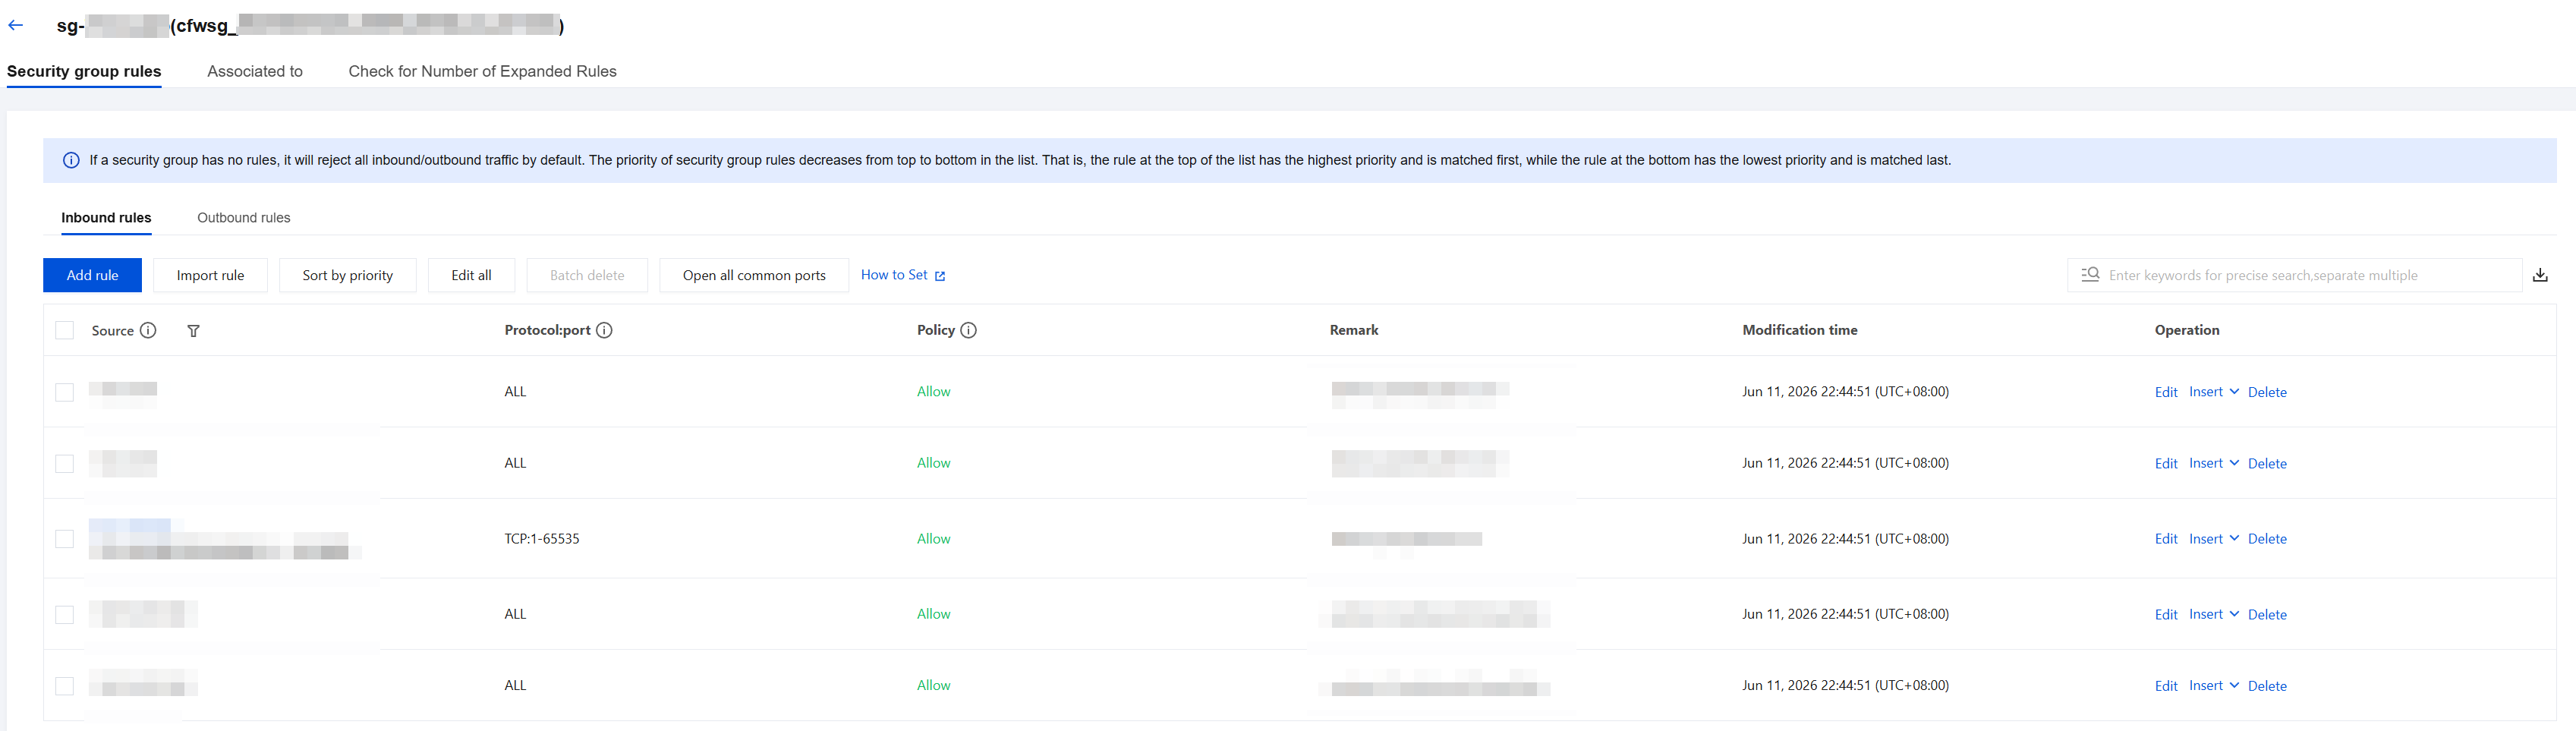
6. Click the ID/Name of any security group to view its corresponding inbound rules, outbound rules, and associated instances.
Viewing Log
1. Log in to the CFW console. In the left sidebar, choose Access Control > Enterprise Security Group (New).
2. On the Enterprise Security Group (New) page, you can view recent operation logs and security group change logs:
Click Details to view details of this operation record or security group change log.
Click Operation logs > View operation logs to view detailed operation records.
Click Security group change logs > All change logs to redirect to Log Service > Operation logs > Access control, where you can view all security group change logs.
Note:
As log delivery takes approximately one minute, log updates may experience a slight delay.
Add Rule
1. Log in to the CFW console. In the left sidebar, choose Access Control > Enterprise Security Group (New).
3. Click Add rule and configure the following parameters.
Advanced Settings:
Port protocol type:
Custom: Manually enter the destination port and select the protocol.
Port Protocol Template: Select the required template from existing templates. For details about custom port protocol templates, see Creating a Template.
Rule priority:
Earliest: Set the priority to 1.
Last: Set the priority to the current maximum value.
Custom: Customize rule priorities. Only the priority of the first rule can be edited. The priorities of subsequent rules will increase sequentially.
Priority: This field is editable only when Advanced Settings > Rule Priority is set to Custom. Priorities are numbered starting from 1, with a lower number indicating a higher priority. After an adjustment, the priorities of other rules are shifted sequentially.
Access source:
IP Address: Enter any IPv4 address or CIDR, for example, 10.10.10.10 or 10.10.10.10/24. Separate multiple entries with English commas.
Note:
When 0.0.0.0/0 is entered, all public IP addresses are associated. When a CIDR is entered, the rule applies only to public IP addresses within that CIDR block.
Parameter Template: Select the required template from existing templates. For details about custom parameter templates, see Creating a Parameter Template.
Asset Instance: Select a specific instance as the access source.
Asset Group: Select a custom asset group as the access source.
Resource Tag: Match by resource tag. The public IP addresses of instances under the tag will be matched by the rule.
Resource Region: Select a specific region as the access source.
Access destination:
IP Address: This rule applies only to public IP addresses on the cloud. When a CIDR is entered, all public IP addresses within that CIDR block are associated. Separate multiple entries with English commas.
DNS Resolution Match: Dynamically matches IP addresses based on the current DNS resolution results of the domain name.
Note:
Wildcard domain name resolution is not supported. Domain name resolution is supported only through Tencent Cloud DNS. A/AAAA/CNAME record types are supported for domain name resolution. Each domain name resolution consumes one quota for a parameter template IP address object (ipm).
Parameter Template: Select the required template from existing templates. For details about custom parameter templates, see Creating a Parameter Template.
Asset Instance: Select a specific instance as the access destination.
Asset Group: Select a custom asset group as the access destination.
Resource Tag: Match by resource tag. The public IP addresses of instances under the tag will be matched by the rule.
Resource Region: Select a specific region as the access destination.
Destination Port: Supports single port numbers, '/' based port ranges, and comma-separated discrete port values.
Destination Port Instance
Description
-1/-1
Indicates all ports.
80
Indicates port 80.
80,443,3389
Indicates that the rule takes effect on ports 80, 443, and 3389.
80/443
Indicates that the rule takes effect on all ports from 80 to 443.
80/443,3389
Indicates that the rule takes effect on all ports from 80 to 443 and on port 3389.
Protocol: ANY, TCP, UDP, and ICMP are supported.
Policy:
Allow: Permit traffic that hits a rule.
Reject: Block traffic that hits a rule.
Scope: Security groups and Lighthouse firewalls.
Description: Used to describe the rule, with a maximum of 100 characters.
4. After configuring a single rule, you can quickly add other rules using the following methods:
Click
in the operation bar to add a new row below the current rule and automatically copy all its content.
Click
below to add a new row at the bottom of the rule list and automatically copy the content of the last rule.
5. Click Save to complete the configuration. Whether the rule is deployed to target assets after being saved depends on the Automatic publish switch:
When the switch is enabled: Each rule operation automatically triggers a deployment process, which actually binds the rule to the target security group.
When the switch is disabled: Rule operations are only written to the rule list and are not automatically deployed. You must manually trigger the deployment process by clicking Pubish now after confirmation.
Note:
The rule will take effect on the target assets within 1 to 3 minutes after deployment is completed.
The switch status does not affect existing rules and only applies to rule operations performed after the switch is toggled.
When the switch is disabled, you can click Preview after saving rule modifications to view the impact of these changes on various assets in the pop-up window.
Managing Rule
1. Log in to the CFW console. In the left sidebar, choose Access Control > Enterprise Security Group (New).
2. On the Enterprise Security Group (New) page, select the IPv4 or IPv6 type as needed. You can perform the following operations on existing rules:
Switch Operation: Click the switch in the Enabled Status column to toggle the rule's enabled state. New rules are automatically enabled after being saved.
Basic Operations: In the Operation column, click Edit, Add one above, or Delete to perform the corresponding operation on the rule.
Sort: Rules are sorted in ascending order of priority value by default (a smaller value indicates a higher position and a higher priority).
a. Click Sort, and hover the mouse over any blank area in the rule row that needs adjustment.
b. When the cursor changes to a draggable state, hold down the left mouse button and drag it up or down to the target position.
c. After completing the adjustments, click Save to apply them.
Note:
Rules above in the list have higher priority than those below. After the sorting operation is performed by dragging, no need to manually set values; saving will automatically update the priorities.
Bulk Operations: Click More actions to perform Delete all, Disable all, or Enable all on all rules.
Batch Operations: Select the rules for which you want to perform batch operations, click More actions, and then you can perform Batch delete, Batch disable, Batch enable, or Add automation task on the selected rules. For details about the Add Automation Task operation, see TAT > Add Automation Task.
Import Rules: Click Import rule to import a file from your local device. This feature supports downloading the import template, exporting existing rules, specifying the import location, configuring the rule backup method, and setting the enabling method after import.
Export Rules: Click
above the rule list. In the dialog box that appears, select Export All or Export matched results and specify the search conditions. Then, click Export.
Backup and Rollback: For details, see the Rule Backup document.
Access Control Rules
1. Log in to the CFW console. In the left sidebar, select Access Control, and then click Access control rules in the upper-right corner.
2. In Access Control Settings, set the default enablement status for new rules when adding, inserting, or importing rules:
Enabled by default: New rules are enabled after import.
Disabled by default: New rules are disabled after import and must be enabled manually.