Monitoring and alarming are essential for ensuring the reliability and availability of your business when you use Cloud Log Service (CLS). This document provides guidance on how to configure a heartbeat alarm policy for CLS LogListener, allowing you to promptly detect exceptions on the LogListener collector.
Operation Steps
Step 1: Creating an Alarm Policy
2. Click Create Policy to go to the new policy page. Configure the following information in sequence:
Policy Name: Define a custom name for the policy.
Remarks: Add custom remarks for the policy.
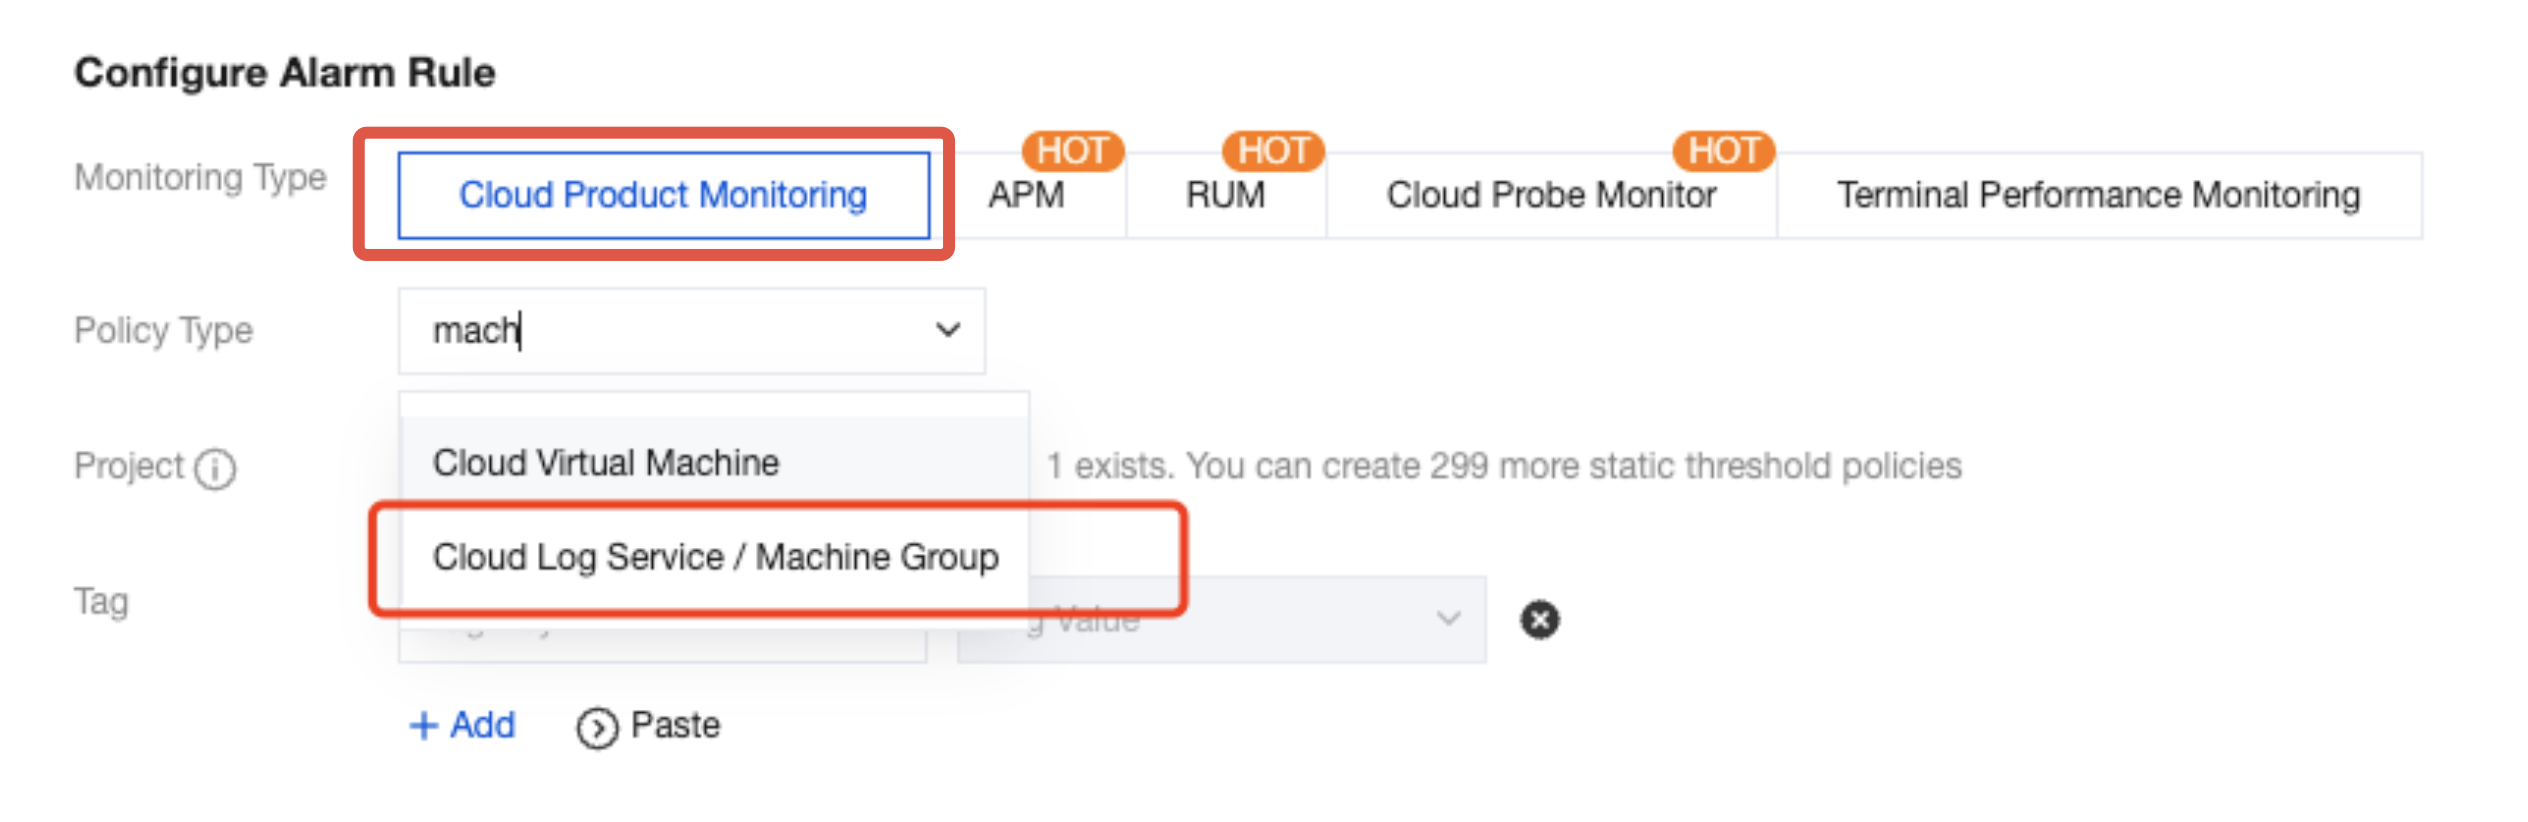
Monitoring Type: Select Cloud Product Monitoring.
Policy Type: Search for and select Cloud Log Service / Machine Group.
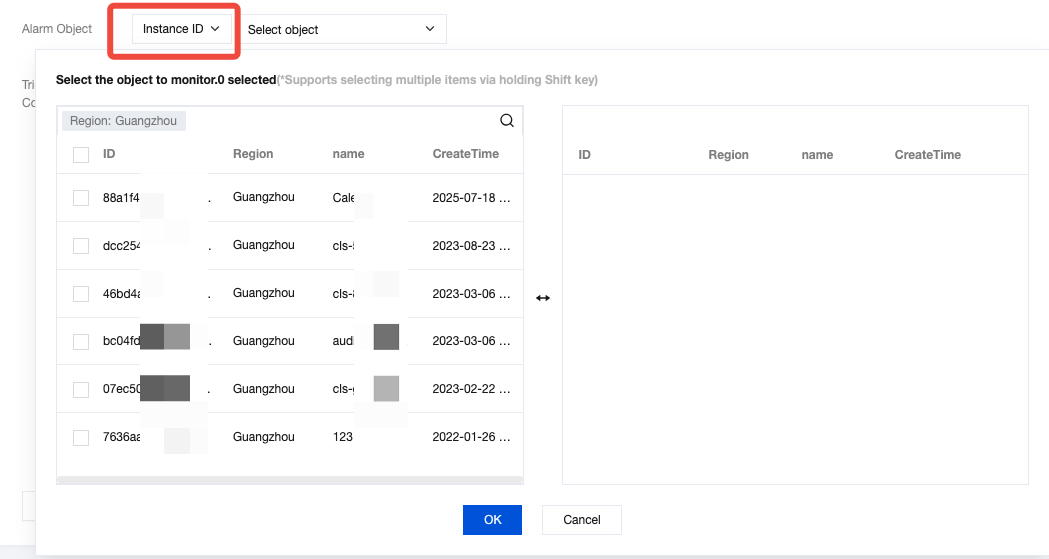
Tag: Select tags for the policy to facilitate tag-based management. You can associate multiple tags with a single policy. To create a tag, see Creating Tags. Alarm Object: You can filter alarm objects by instance ID, instance group, or all available objects.
Instance ID: Filter target alarm objects based on the machine group ID.
Instance Group: Filter target alarm objects based on machine group classification. You can also click Create instance group:
On the Instance Group page, click Create.
Configure basic information: Customize the Group Name, set Group Type to CLS - machine group, and then select the machine groups you want to include.
Click Save to complete the creation.
All Objects: Use all your machine groups as alarm objects.
Configure alarm trigger conditions:
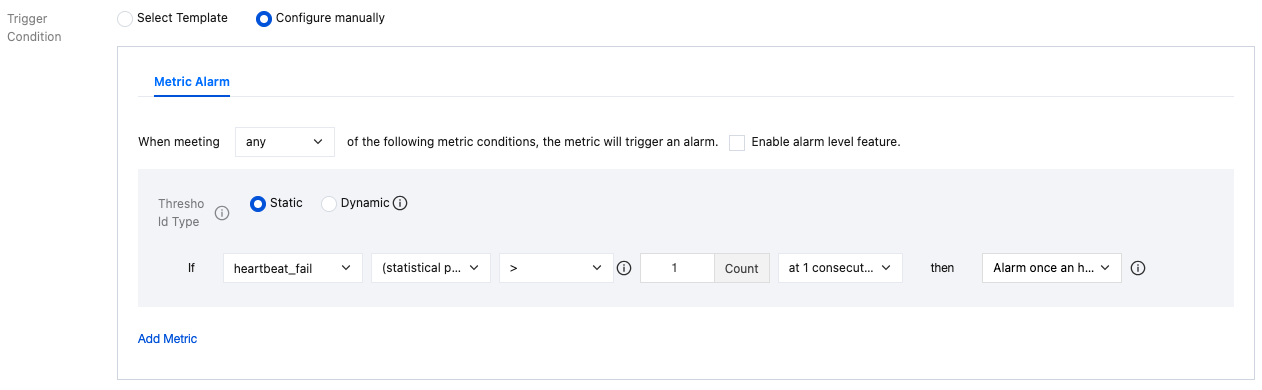
CLS reports the number of machine groups with normal or abnormal heartbeat status to TCOP. After you select the monitoring type and policy type, the system automatically applies commonly used trigger conditions for the corresponding cloud product’s alarm policy. You can also customize metric-based alarms. The configuration details are as follows:
|
Alarm Metric | You can select key metrics of the corresponding cloud product as alarm metrics. |
Statistical Granularity | Time interval for collecting and analyzing monitoring data. |
Threshold | Metric-based alarms support two types of thresholds: static and dynamic. Static thresholds include fixed static thresholds and period-over-period static thresholds. You can select the comparison relationship and threshold value based on your business needs. When you configure metric-based alarms, the static threshold is selected by default. Dynamic thresholds are suitable for scenarios where the business system exhibits clear periodic fluctuations or sudden spikes and drops in data. |
Alarm Level | When the alarm level feature is enabled, you can configure alarms at three levels: Serious, Warn, and Note. This feature is currently supported only for Cloud Product Monitoring and Application Performance Management (APM). |
Continuous Monitoring Data Points | Specify the number of continuous monitoring data points that should meet the condition before an alarm is triggered. |
Alarm Frequency | When an alarm is triggered, you can define how frequently notifications are sent. Notification frequency options include specify frequency for repeated notifications and exponentially increasing notifications by cycle. Specify frequency for repeated notifications: If the alarm is not cleared within 24 hours, the system will send notifications at the specified frequency, such as every 1 hour or every 2 hours. If the alarm remains uncleared after 24 hours, notifications will be sent once per day. (Once the alarm is cleared, the notification cycle will reset.) Note: If the notification frequency is configured as "only alarm once", a notification will be sent only when the alarm is first triggered and again when it is cleared during its lifecycle. Exponentially increasing notifications by cycle: Based on a fixed 5-minute base interval, alarm notifications are sent at exponentially increasing time intervals (first interval, second interval, third interval, and so on). The interval between notifications becomes progressively longer, helping to reduce repeated alarms and minimize unnecessary disturbances. |
Triggering Conditions | When multiple alarm trigger conditions are configured, they can be evaluated based on any, all, or composite logic. The triggering conditions are as follows. Any: The alarm is triggered when any one of the configured conditions reaches its threshold. All: The alarm is triggered only when all configured conditions reach their thresholds. Composite: The alarm is triggered when composite alarm conditions are met. Composite rules support logical expressions using AND and OR operators. |
Example 1: When the number of heartbeat exceptions is greater than or equal to 1 for 2 consecutive statistical periods (each lasting 1 minute), an alarm is triggered. According to the alarm policy, it is triggered every 5 minutes.
Example 2: When the number of normal heartbeats falls below 100 for 2 consecutive statistical periods (each lasting 1 minute), an alarm is triggered. According to the alarm policy, it is triggered every 5 minutes.
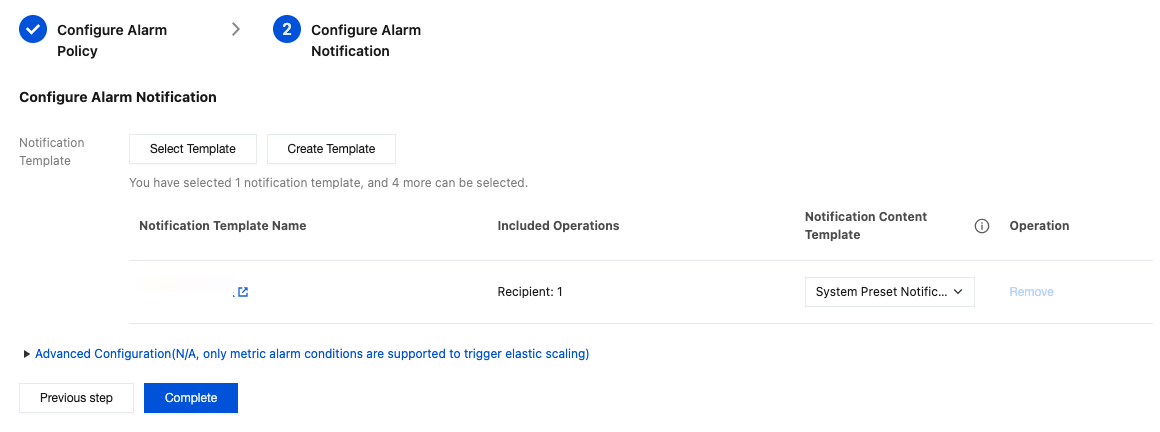
3. After completing the configuration, click Next step: Configure Alarm Notification.
Step 2: Configuring an Alarm Notification
You can select an existing notification template or create one to receive alarm messages. For guidance on creating a template, see Creating a Notification Template. Note:
The alarm channel specifies the alarm recipients (individuals or recipient groups). Alarm messages can be successfully received only if the recipient’s mobile number and email address have been verified.
Step 3: Receiving an Alarm
Tencent Cloud monitors according to the configured alarm policy. When the trigger conditions are met, alarm messages will be sent through the specified alarm channel.
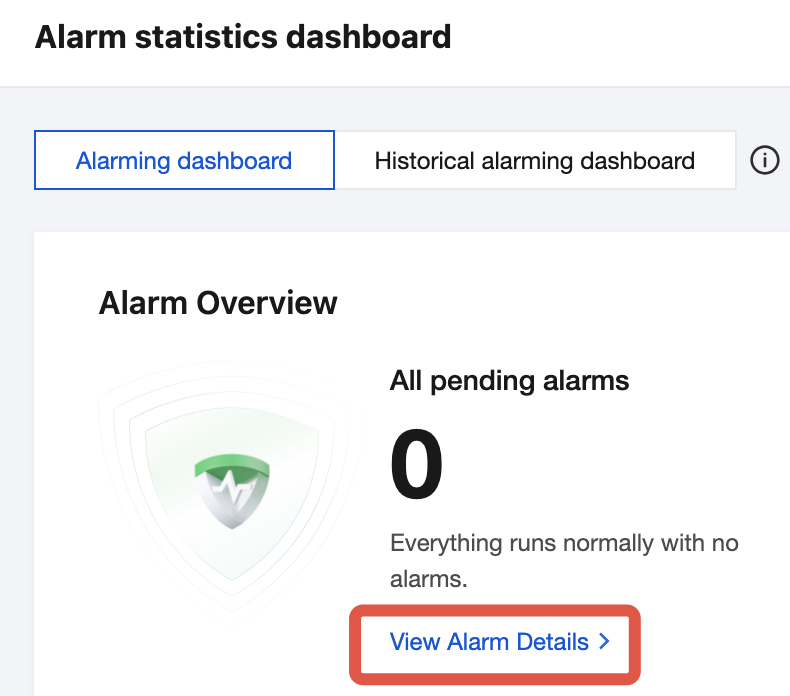
Step 4: Viewing the Alarm History
2. In the left menu bar, choose Alarm Management > Alarm Dashboard to view the alarm dashboard. Under View Alarm Details, you can view historical information about triggered alarms, including the start time, duration, and other relevant details.