릴리스 노트
Incremental Migration Tool
포커스 모드
폰트 크기
This article guides you on how to configure an incremental migration strategy. Once configured, when a requested file is not found in the VOD service, the system will pull the file from the specified migration source, return it to the requester, and simultaneously store it in the VOD storage. This strategy is suitable for scenarios like migrating hot files progressively. You can customize the settings based on your needs.
Preparations
1. A Professional Edition application must be available. For creating one, refer to the Quick Start.
2. A valid migration source must be configured.
Operation Steps
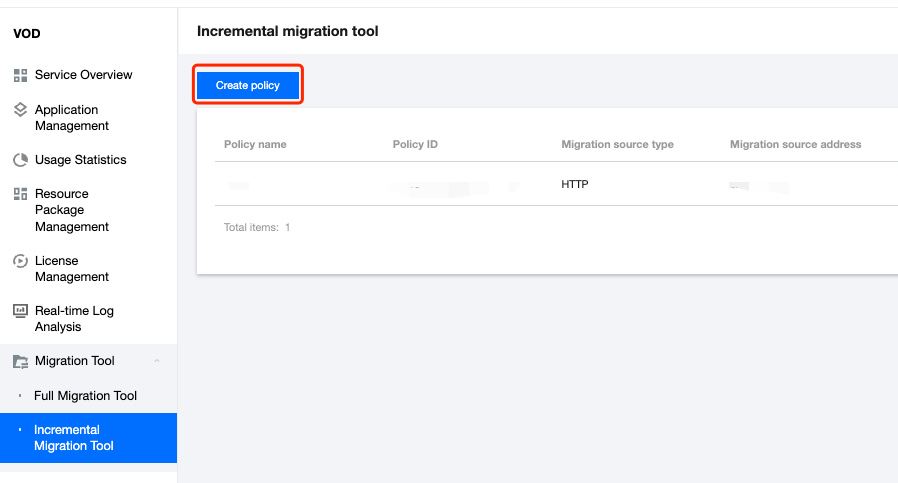
1. Log in to the VOD Console. Navigate to Migration Tool in the left sidebar. Select Incremental Migration Tool and click Create Policy to configure migration parameters.
2. Set the Migration Task Name. Name requirements:
Length: 1 to 100 characters.
Allowed characters: Chinese, English letters, digits (0-9), and hyphens (-).

3. Configure the Migration source information.
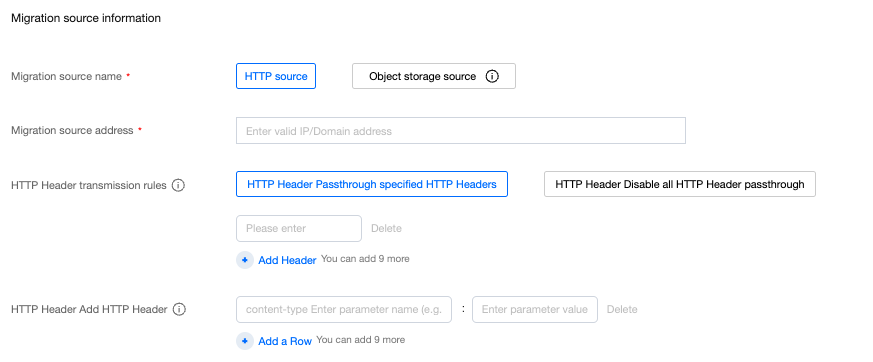
Migration source name: Currently supports HTTP sources only (object storage sources will be supported later).
Migration source address:
Enter the domain name or IP address (port numbers are allowed, e.g., example.com:8080).
Do NOT include prefixes like http:// or https://.
HTTP Header Forwarding Rules:
Forward specific HTTP Headers: Specify up to 10 headers to forward.
Block all HTTP Headers: Disable forwarding entirely.
Add custom HTTP Headers: Define Key-Value pairs (up to 10) to inject into requests sent to the source.
4. Configure the Migration Target
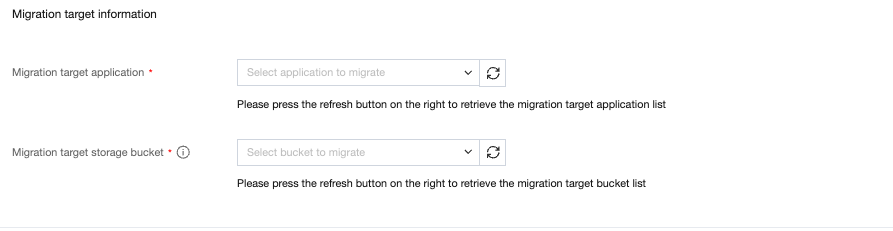
Target Application:
Select a Professional Edition application.
Click the Refresh button next to the dropdown to update the list if a newly created app is missing.
Target Storage Bucket: Choose a bucket under the selected application.
Note:
Each bucket supports only 1 active incremental migration policy.
5. Click Confirm to finalize the setup.
Related Documentation
If you need to schedule cleanup of incrementally migrated files, you can refer to the storage strategy to configure a scheduled cleanup policy.
If you need to migrate all files in one go, you can refer to the full migration tool to configure the full migration policy.
피드백