Release Notes
Product Announcements
yum.yum install mariadb-server mariadb -y
systemctl start mariadb
drupal).mysqladmin -u root -p create drupal
drupal is the name of the database used by the Drupal service.mysql -u root -p
GRANT SELECT, INSERT, UPDATE, DELETE, CREATE, DROP, INDEX, ALTER, CREATE TEMPORARY TABLES, LOCK TABLES ON drupal.* TO 'username'@'localhost' IDENTIFIED BY 'password';FLUSH PRIVILEGES;exit
username and password are the database username and password used by the Drupal service, respectively.yum.yum install httpd -y
service httpd start
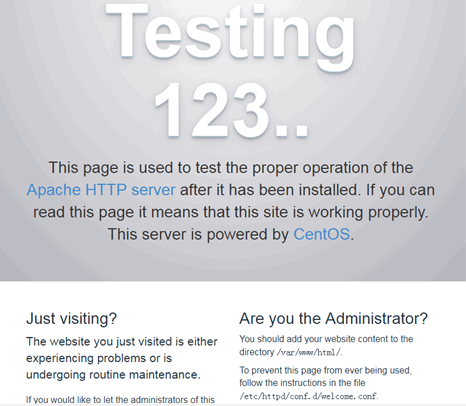
http://115.xxx.xxx.xxx/ in your local browser (where 115.xxx.xxx.xxx is the public IP of your CVM instance). If the following page appears, Apache has started successfully.
yum.yum install php php-dom php-gd php-mysql php-pdo -y
/var/www/html directory of the CVM instance to check whether PHP is successfully installed. Below is the sample code:<?php phpinfo(); ?>
service httpd restart
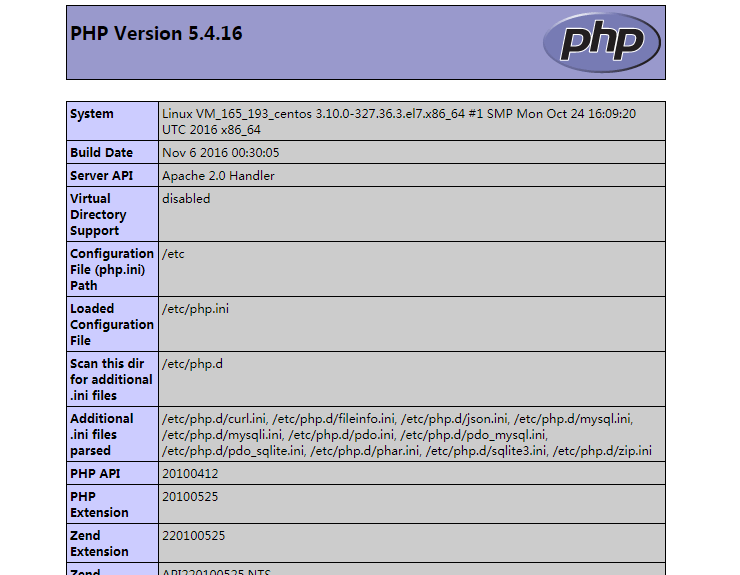
http://115.xxx.xxx.xxx/info.php in your local browser (where 115.xxx.xxx.xxx is the public IP of your CVM instance). If the following page appears, PHP has been installed successfully.
wget http://ftp.drupal.org/files/projects/drupal-7.56.zip
unzip drupal-7.56.zipmv drupal-7.56/* /var/www/html/
cd /var/www/html/wget -P profiles/standard/translations http://ftp.drupal.org/files/translations/7.x/drupal/drupal-7.56.zh-hans.po
sites directory belongs.chown -R apache:apache /var/www/html/sites
service httpd restart
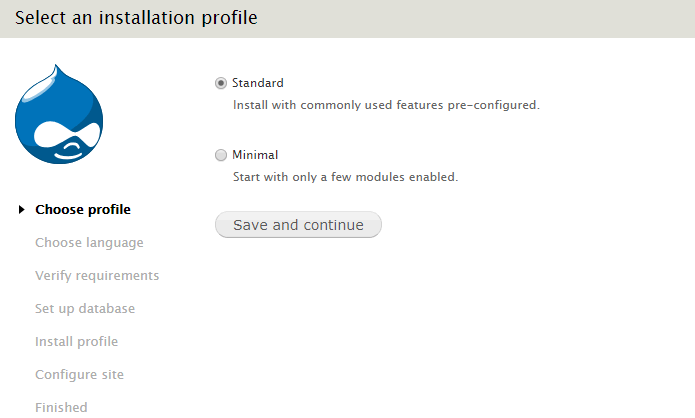
http://115.xxx.xxx.xxx/ in your local browser (where 115.xxx.xxx.xxx is the public IP of your CVM instance) to go to the installation page of Drupal, select the version to be installed, and click Save and continue.
http://115.xxx.xxx.xxx/ (where 115.xxx.xxx.xxx is the IP address of your CVM instance) to customize the website.Was this page helpful?
You can also Contact sales or Submit a Ticket for help.
Help us improve! Rate your documentation experience in 5 mins.
Feedback