Configure IAP to authenticate programmatic access to CLB's domain and path
Download
フォーカスモード
フォントサイズ
Identity Aware Platform (IAP) binds to the CLB listener via domain names and paths, enabling authentication and permission control for HTTPS programmatic traffic passing through the CLB listener. This document will describe how to authenticate the domain names and paths already added to CLB by using IAP.
Prerequisites
You have successfully created an HTTP or HTTPS listener, and the domain name can be normally accessed. For more information, please refer to Getting Started with CLB.
Directions
Step 1: Confirm the CLB Domain Name Configuration
This document takes the protection
www.example.com domain name as an example.1. Log in to the CLB console and click Instance Management in the left sidebar.
2. On the Instance Management page, select the region. In the instance list, click the Operation column on the right side of the target instance, then select Configure Listener.
3. In the HTTP/HTTPS Listener area on the Listener Management tab, click + on the left of the target listener to view domain name details.
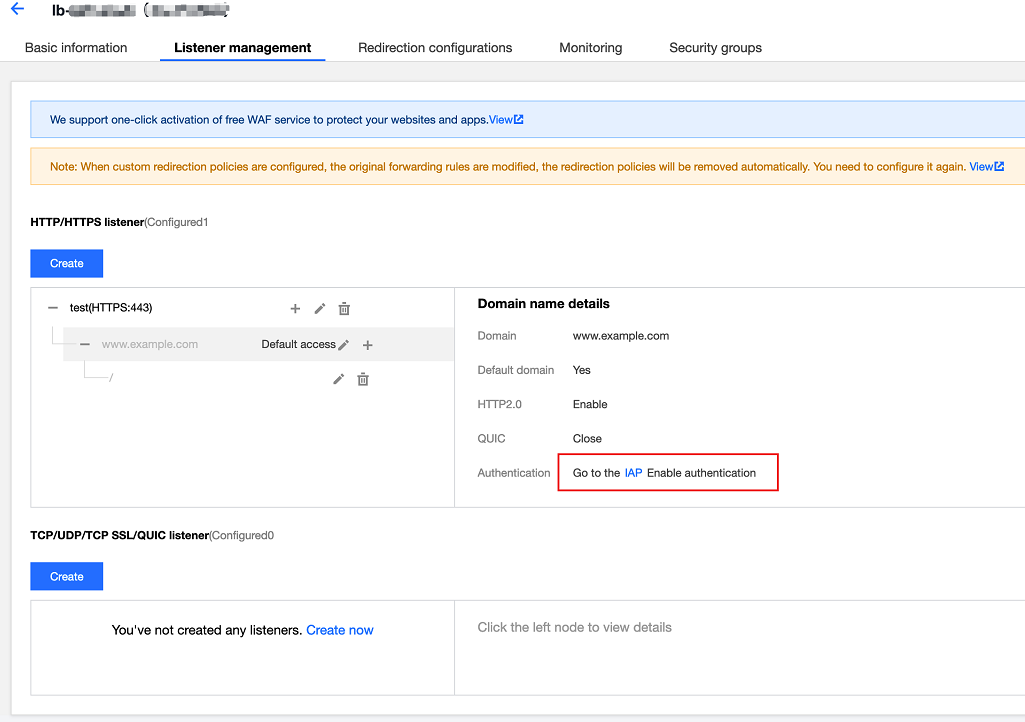
4. Check the CLB domain name configuration: The CLB instance ID is "lb-****", the listener name is "test", and the domain name monitored by the listener forwarding rule is
www.example.com. The details page on the right provides a link to the IAP configuration.Step 2: In the IAP, Enable or Disable the Authentication Feature for the Domain Name and Path
By clicking the IAP link in Step 1, you can enter the IAP configuration page, where you can enable or disable the IAP feature for the domain name and path under the CLB instance.
1. Log in to IAP console and select Instance Management in the left sidebar.
2. On the Instance Management page, select CLB Instance > Listener > URL, to enable/disable IAP.
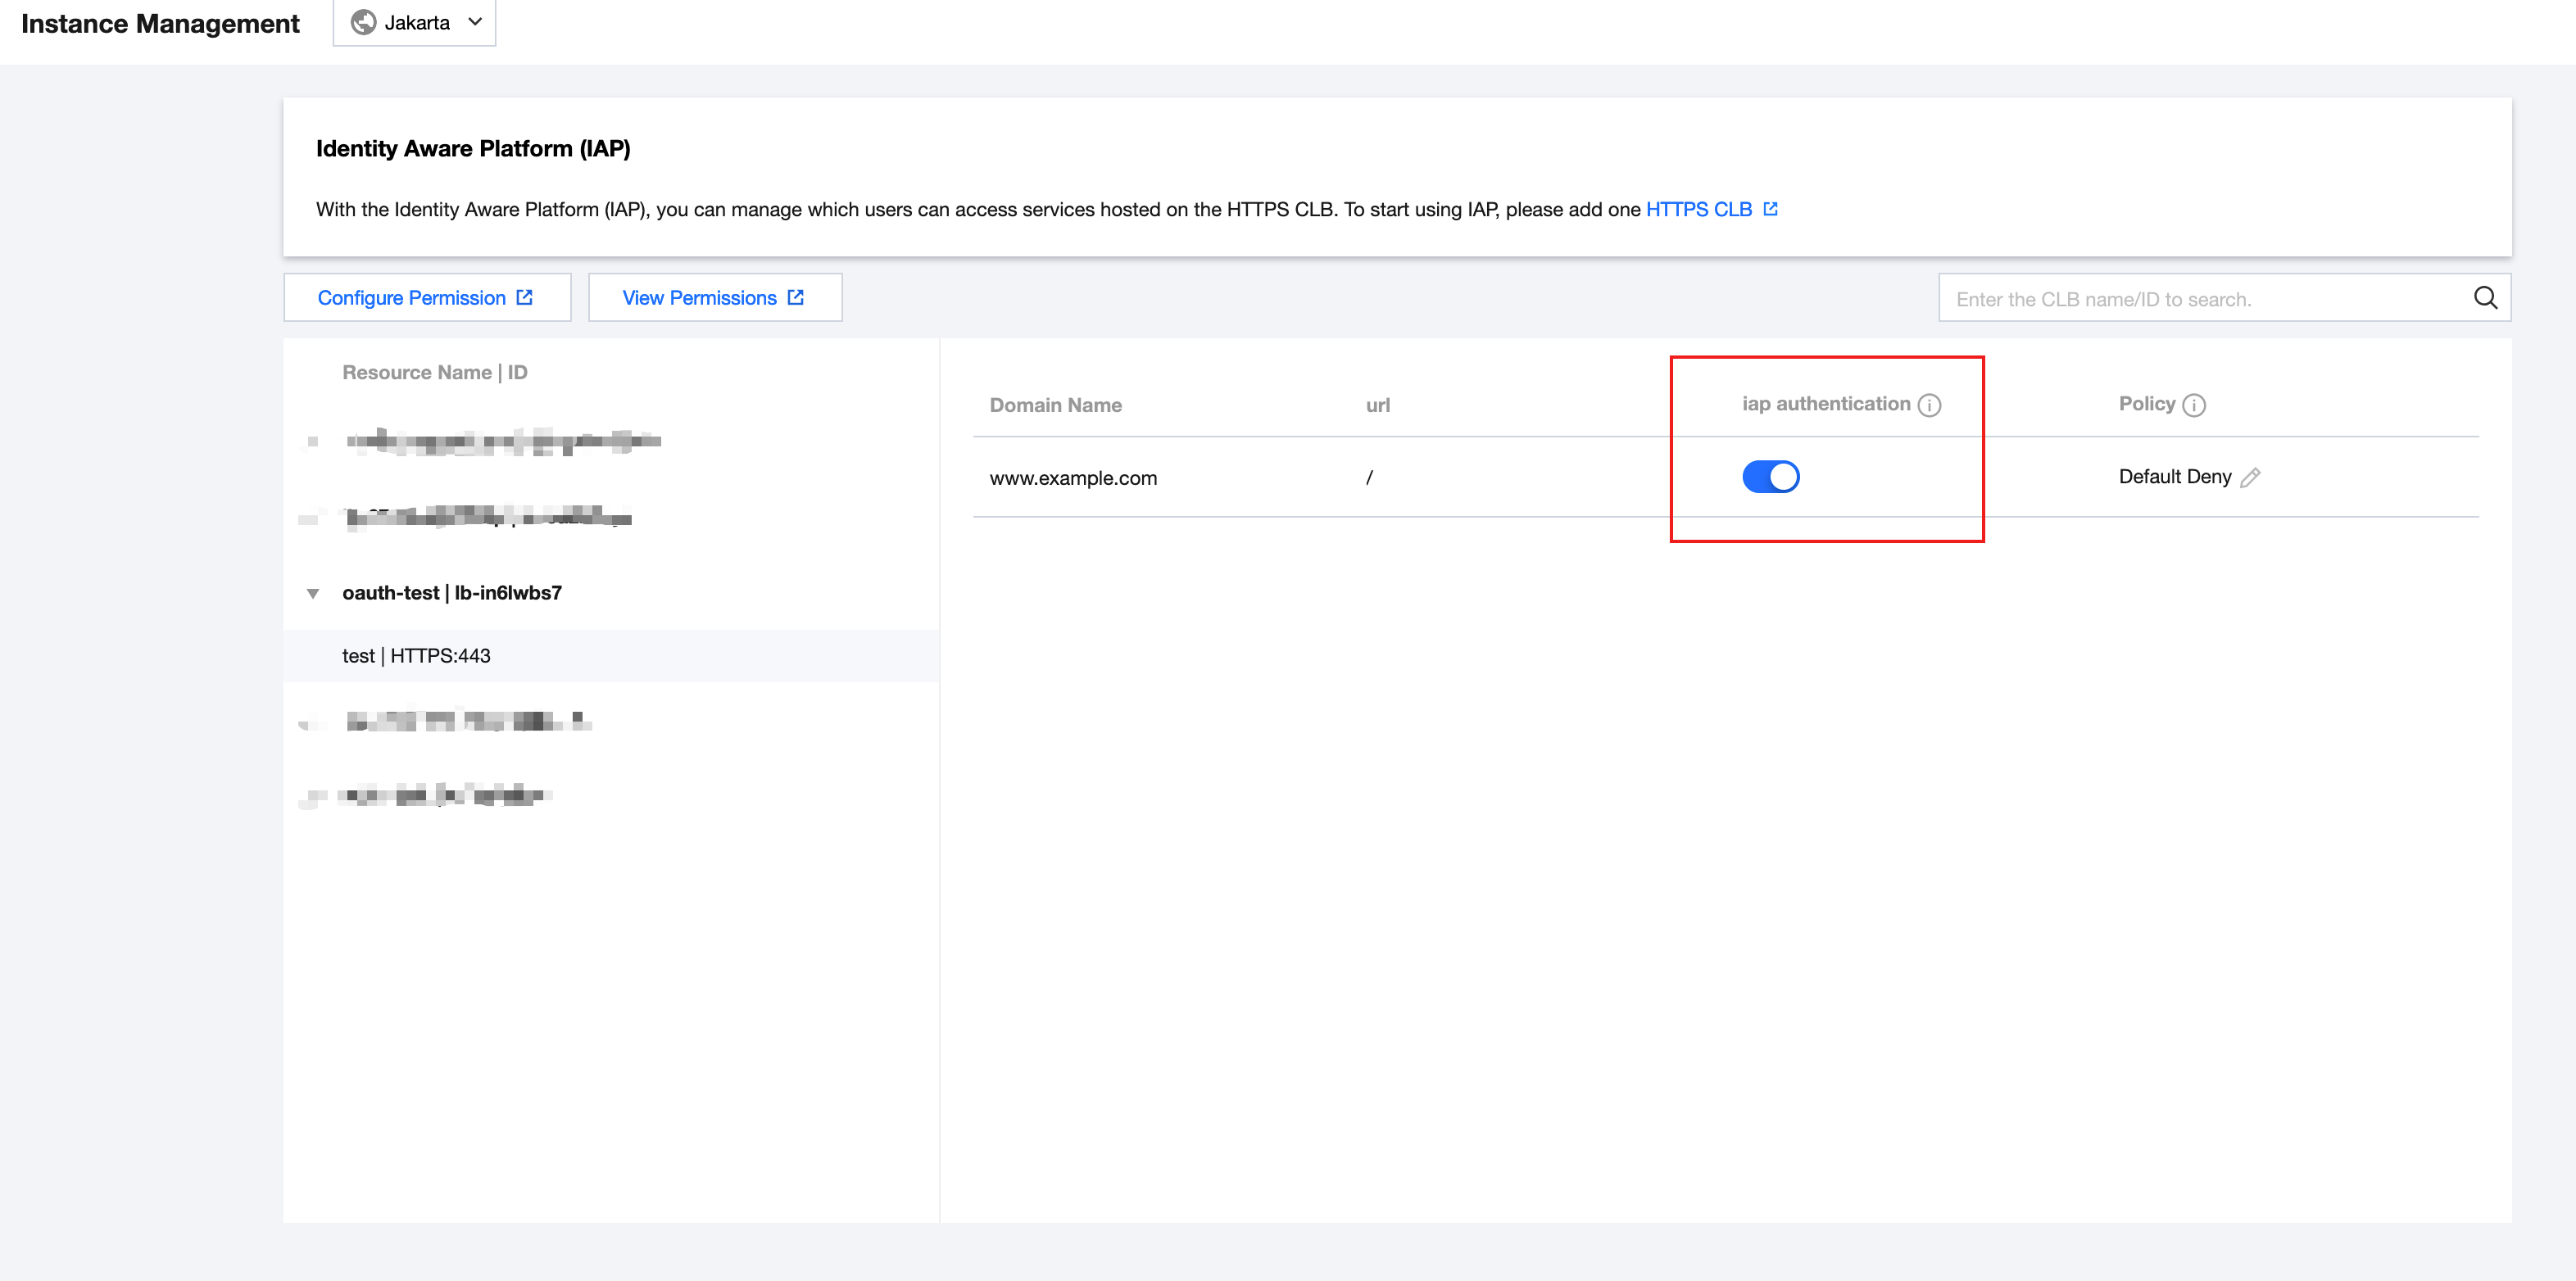
Field Description
Domain name: The domain name that needs IAP configuration
www.example.com.URL: The specific path
/.IAP Authentication: The switch for IAP authentication.
Policy: The forwarding behavior of CLB when the IAP authentication service is unavailable.
Note:
It is "Reject" by default. When the IAP service is unavailable in extreme cases, CLB will block customer requests.
Step 3: Navigate to CAM to Configure the Relevant Policies
This document uses the configuration of authentication for
www.example.com/ as an example.1. Log in to the CAM console. In the left navigation bar, click Policies.
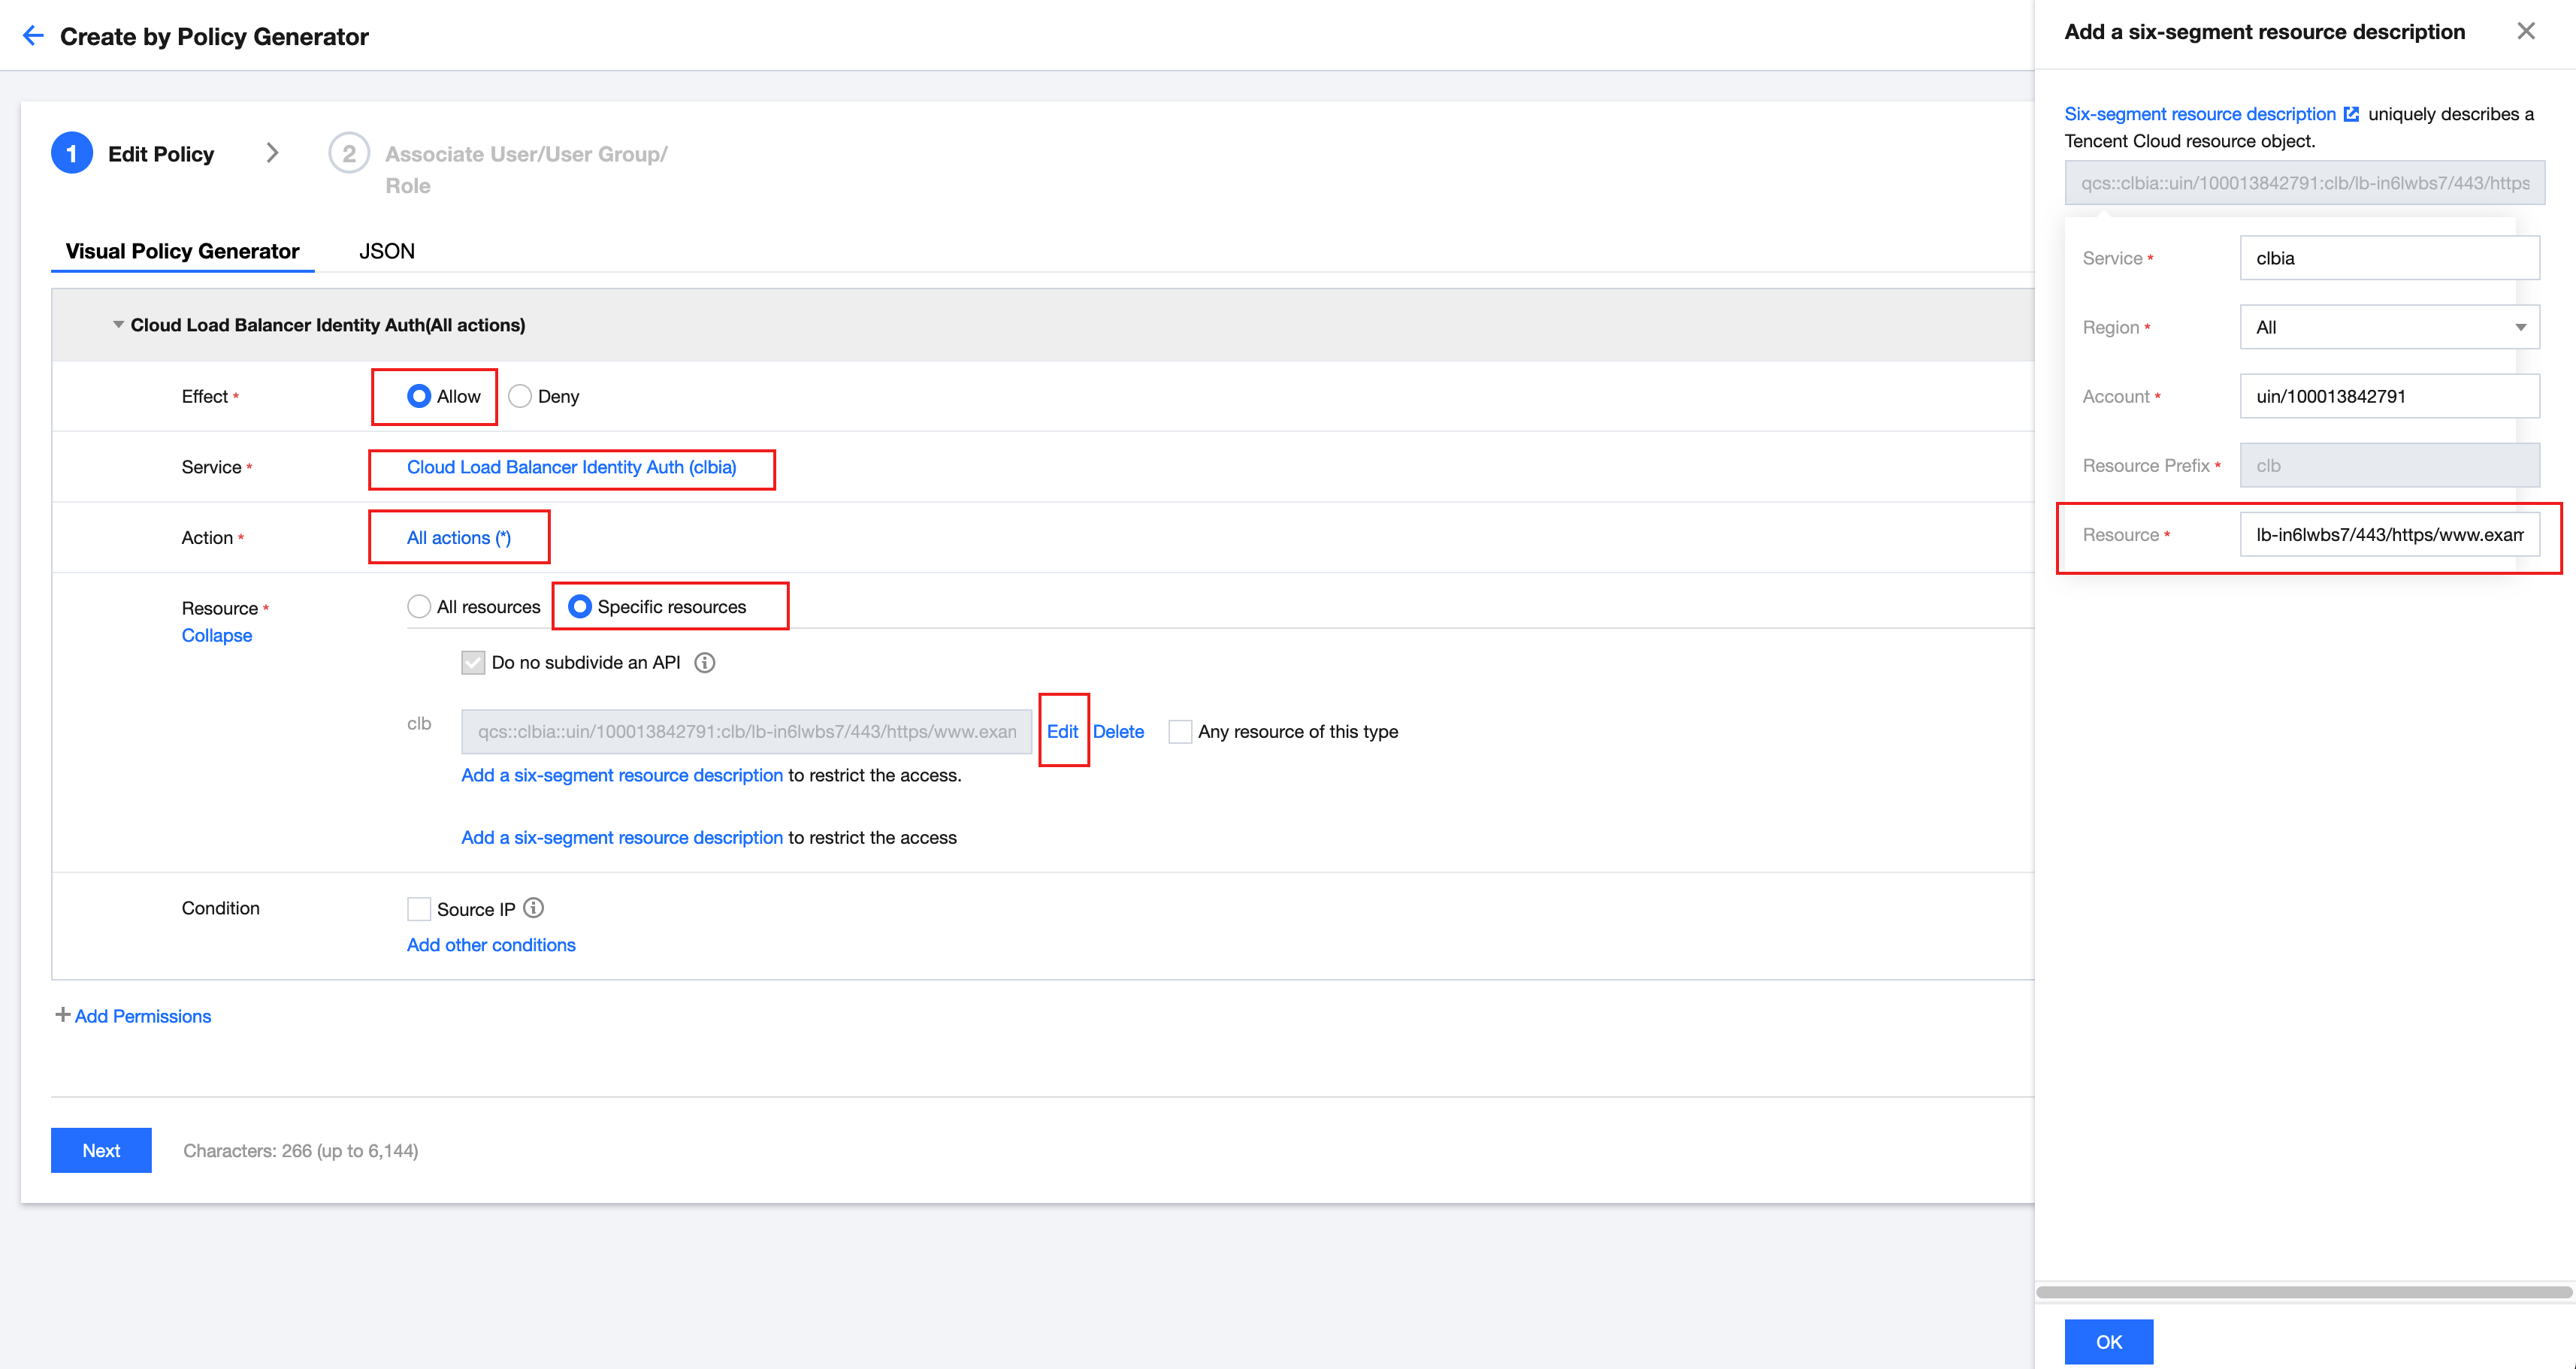
2. On the Policies page, click Create Custom Policy.
3. On the Create Custom Policy tab, select Allow for the effect, select Cloud Load Balancer Identity Auth(clbia) for the service, and select All for the action. Fill in resource content based on the 6-Segment Resource Description format.
The generated policy JSON format is as follows:
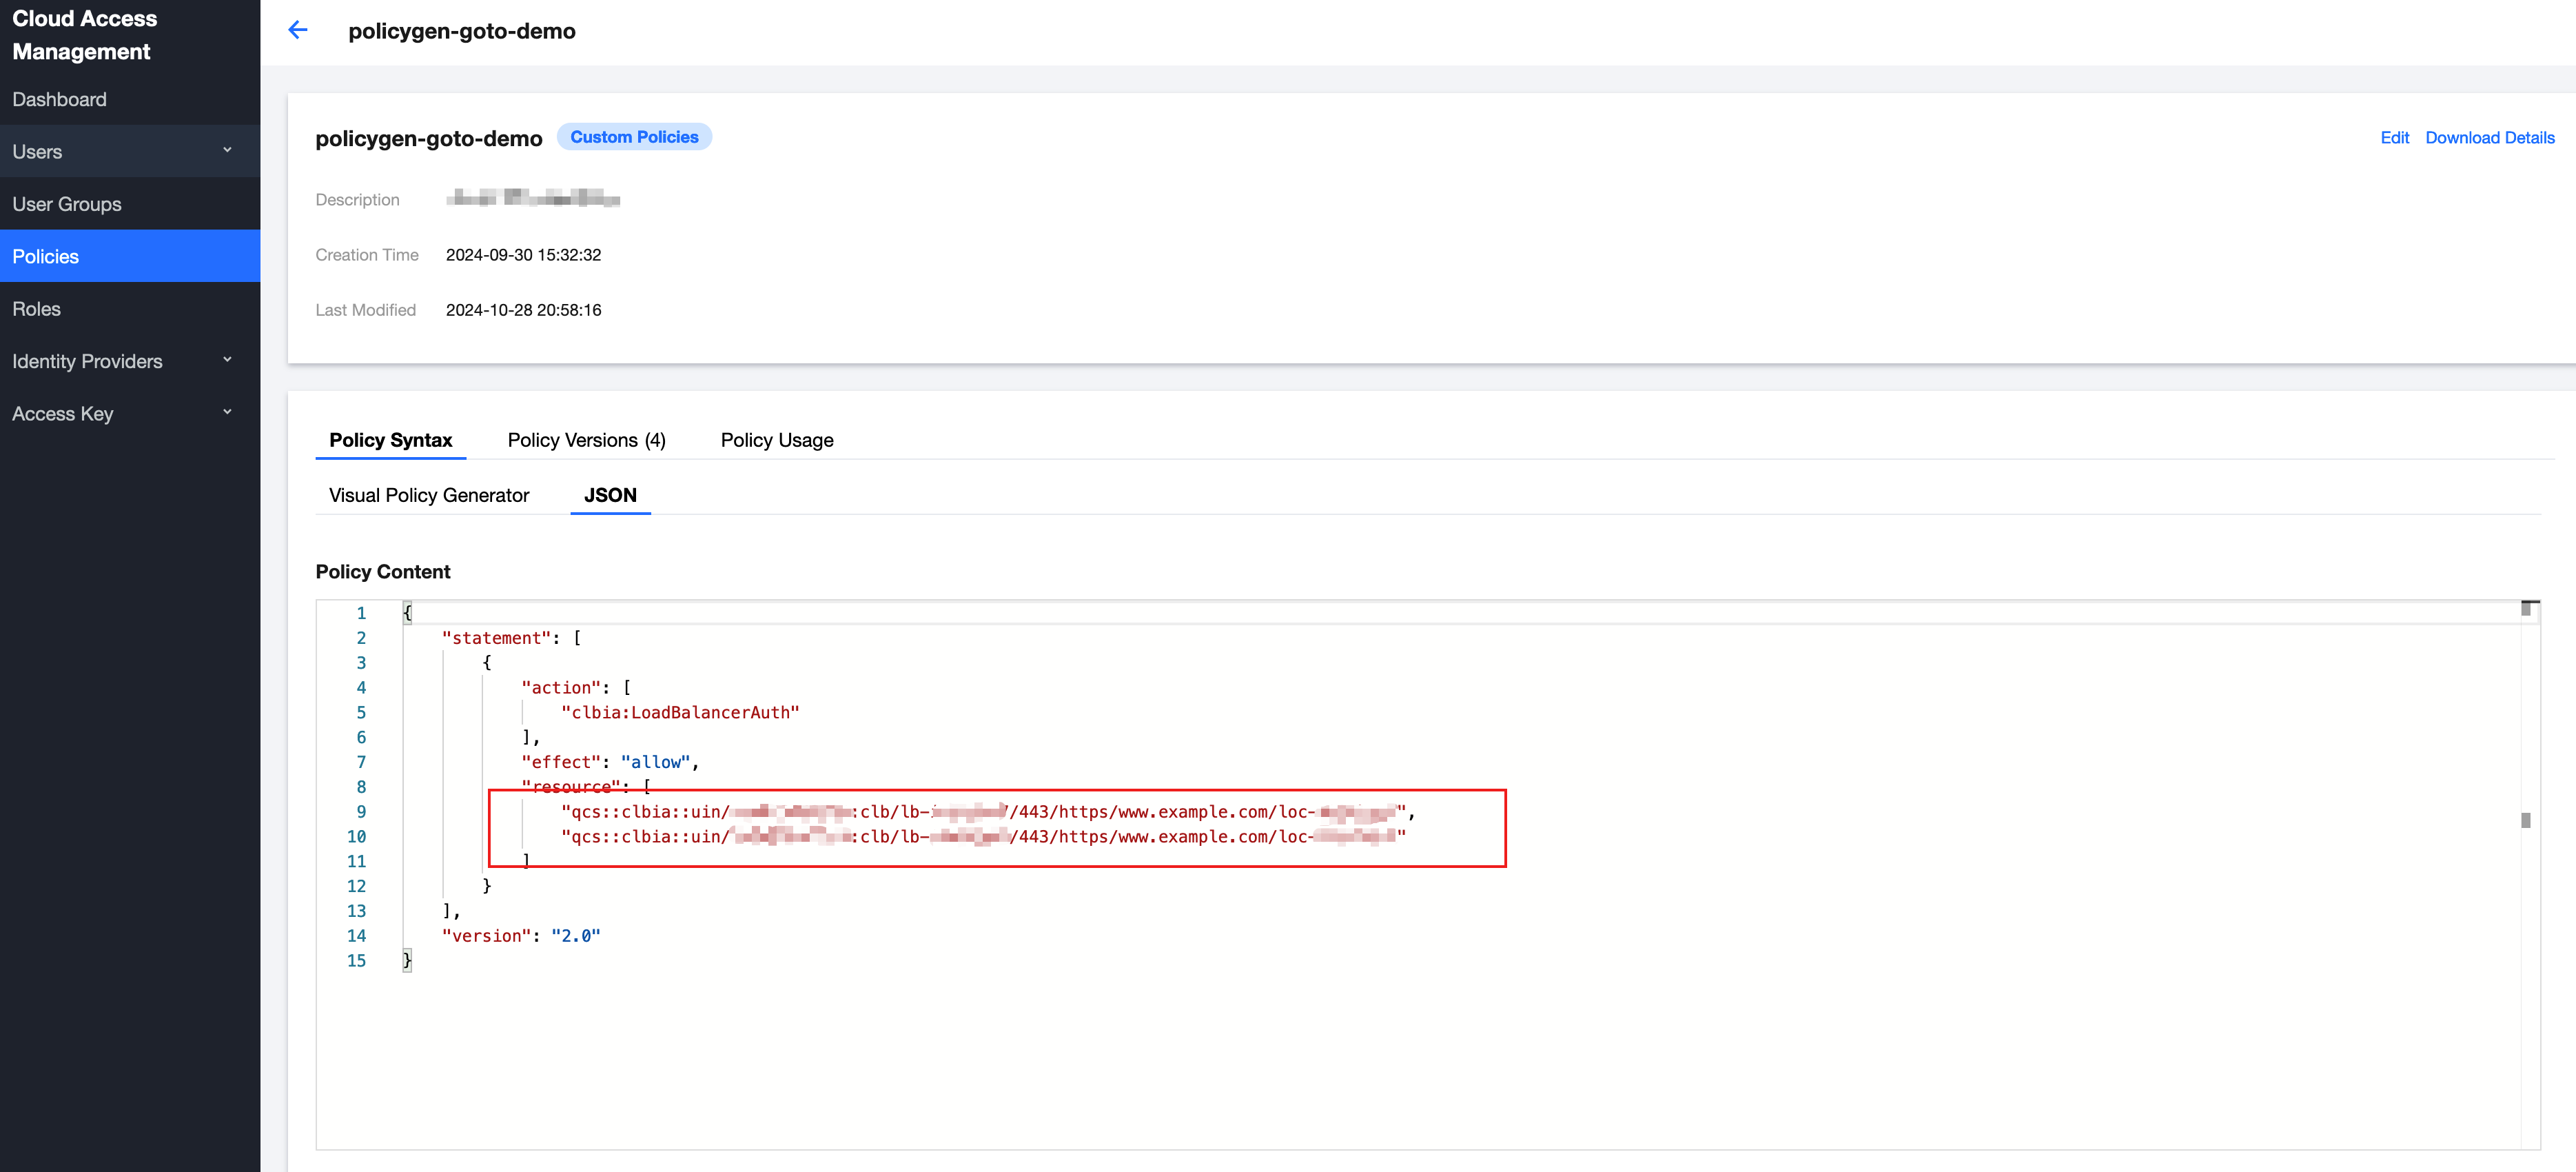
Field Description:
CLB Six-Segment Resource Description: qcs::clbia:${region}:uin/${uin}:clb/${loadbalancerid}/${vport}/${protocol}/${domain}/${uLocationId}
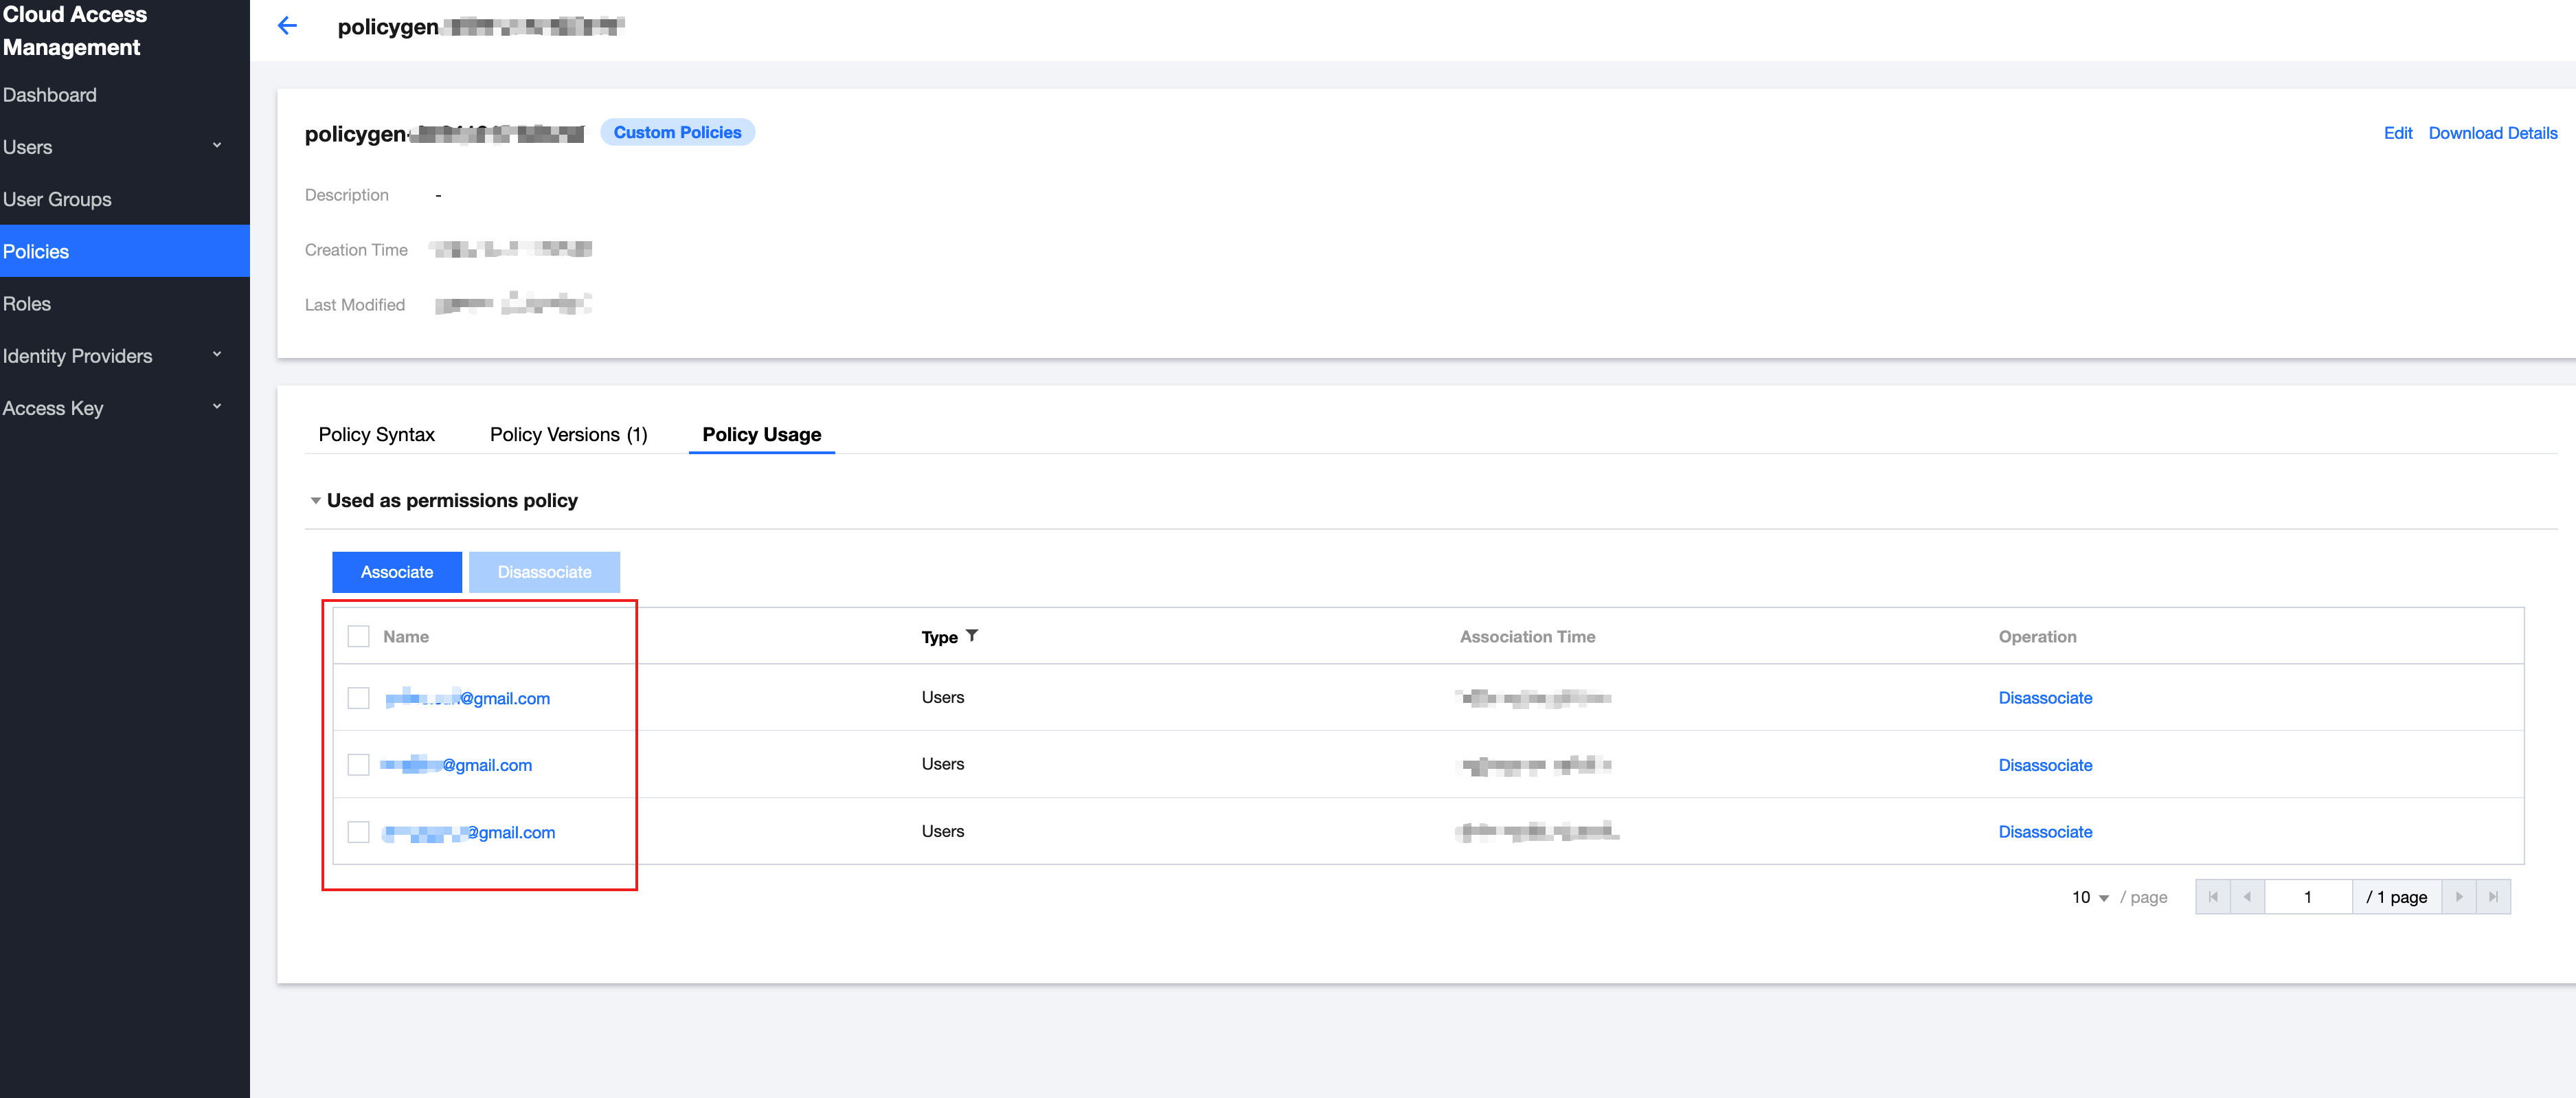
Step 4: Associate the Policy with a User or User Group
1. On the Policy Management page, select Policy Usage.
2. Associate users or user groups.
Step 5: Validate the Result
Note:
Python SDK is used in this example.
1. Install or upgrade the SDK:
pip install tencentcloud-simple-sign
2. Call the SDK in the program and send the request:
When sending a request, you need to include the "Tencent-Proxy-Authorization:" field in the HTTP header. This field is generated by using the sign method in the SDK. The definition of this method is as follows:
Below is a complete example of sending a GET request to CLB. In actual use, you only need to replace SECRET_ID, SECRET_KEY, HOST, and timestamp with your actual configuration values. If you are using temporary credentials, you also need to pass TOKEN when calling the sign method.
import requestsfrom simple_sign.sign import signSECRET_ID = "your_secret_id"SECRET_KEY = "your_secret_key"TOKEN = "your_token" # only for temporary keyHOST = "test.com"hour = 3600expiration = hour * 2now = int(time.time())sig = sign(SECRET_ID, SECRET_KEY, HOST, now, now + expiration, TOKEN)url = "https://www.example/"headers = {'Tencent-Proxy-Authorization:': sig,'Host': HOST}response = requests.get(url, headers=headers, verify=False)print(sig)print(response.status_code)print(response.text)
3. By initiating the request from the program by the above SDK, you can receive a normal response code 200, which indicates that the IAP authentication feature is functioning correctly.
Note:
www.example.com is the domain name used in this example. You need to replace this domain name with the actual domain name you have added.
フィードバック