网站业务接入
Download
聚焦模式
字号
本文档介绍了网站类业务用户将业务接入 DDoS 高防 IP 实例并验证转发配置的详细操作步骤。
前提条件
在添加转发规则前,您需要成功购买 中国大陆 DDoS 高防 IP 实例 或 境外 DDoS 高防 IP 实例。
在修改业务域名 DNS 信息前,您需要成功购买域名解析产品,例如腾讯云的 DNSPod。
操作流程

操作步骤
配置转发规则
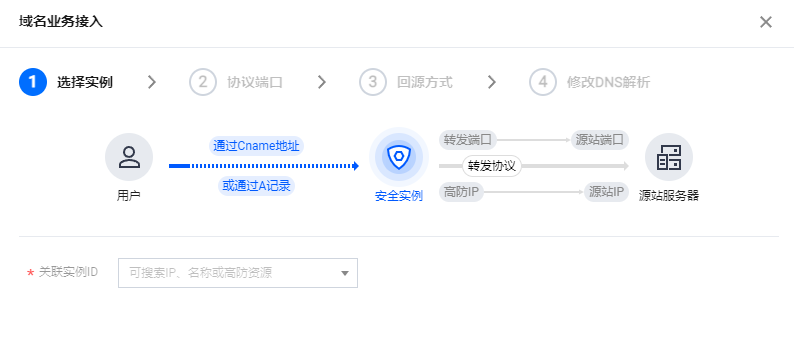
1. 登录 DDoS 防护(新版)控制台,在左侧目录中,单击业务接入 > 域名接入。
2. 在域名接入页面,单击开始接入。

3. 在域名业务接入页面,选择关联实例 ID,单击下一步:端口协议。
说明:
支持多选,多实例同步接入。
4. 选择转发协议和证书,填写业务域名,单击下一步:回源方式。

5. 选择回源方式,填写源站 IP+端口或源站域名。单击下一步:修改 DNS 解析。
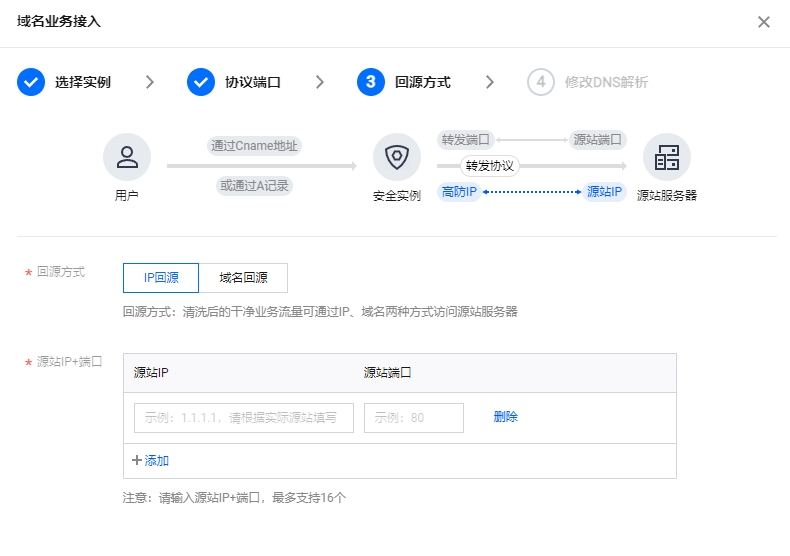
说明:
备用源站:当源站转发异常会自动切换转发至备用源站。
仅支持标准协议端口
(http:80、https:443)。支持泛域名。
6. 单击完成,即可完成接入规则。
说明:
放行回源 IP 段
为了避免源站拦截 DDoS 高防 IP 的回源 IP 而影响业务,建议在源站的防火墙、Web 应用防火墙、IPS 入侵防护系统、流量管理等硬件设备上设置白名单策略,将源站的主机防火墙和其他任何安全类的软件(如安全狗等)的防护功能关闭或设置白名单策略,确保高防的回源 IP 不受源站安全策略的影响。
1. 登录 DDoS 防护(新版)控制台,在左侧导航中,单击云上防护实例。
2. 在云上防护实例页面,选择目标实例,单击实例 ID。

3. 在基本信息页面,查看回源 IP 段。

本地验证配置
转发配置完成后,DDoS 高防 IP 实例的高防 IP 将按照转发规则将相关端口的报文转发到源站的对应端口。
为了最大程度保证业务的稳定,建议在全面切换业务之前先进行本地测试。具体的验证方法如下:
1. 修改本地 hosts 文件,使本地对于被防护站点的请求经过高防。下面以 Windows 操作系统为配置本地 hosts 文件。
打开本地计算机
C:\\Windows\\System32\\drivers\\etc 路径下的 hosts 文件,在文末添加如下内容:<高防 IP 地址> <被防护网站的域名>
2. 例如高防 IP 为10.1.1.1,域名为
www.qqq.com ,则添加:10.1.1.1 www.qqq.com
保存 hosts 文件。在本地计算机对被防护的域名运行 ping 命令。当解析到的 IP 地址是 hosts 文件中绑定的高防 IP 地址时,说明本地 hosts 生效。
说明:
若解析到的 IP 地址依然是源站地址,可尝试在 Windows 的命令提示符中运行
ipconfig /flushdns 命令刷新本地的 DNS 缓存。3. 确认 hosts 绑定已经生效后,使用域名进行验证。若能正常访问则说明配置已经生效。
说明:
修改 DNS 解析
注意:
高防资源将提供 CNAME,请将 DNS 解析地址修改为该 CNAME 高防资源。CNAME 解析目的高防 IP 将不定期更换。(不涉及三网资源)。
文档反馈