快速入门
Download
聚焦模式
字号
本文聚焦腾讯云桌面,将详细介绍如何快速创建实例并访问云桌面,助您轻松开启云桌面之旅。
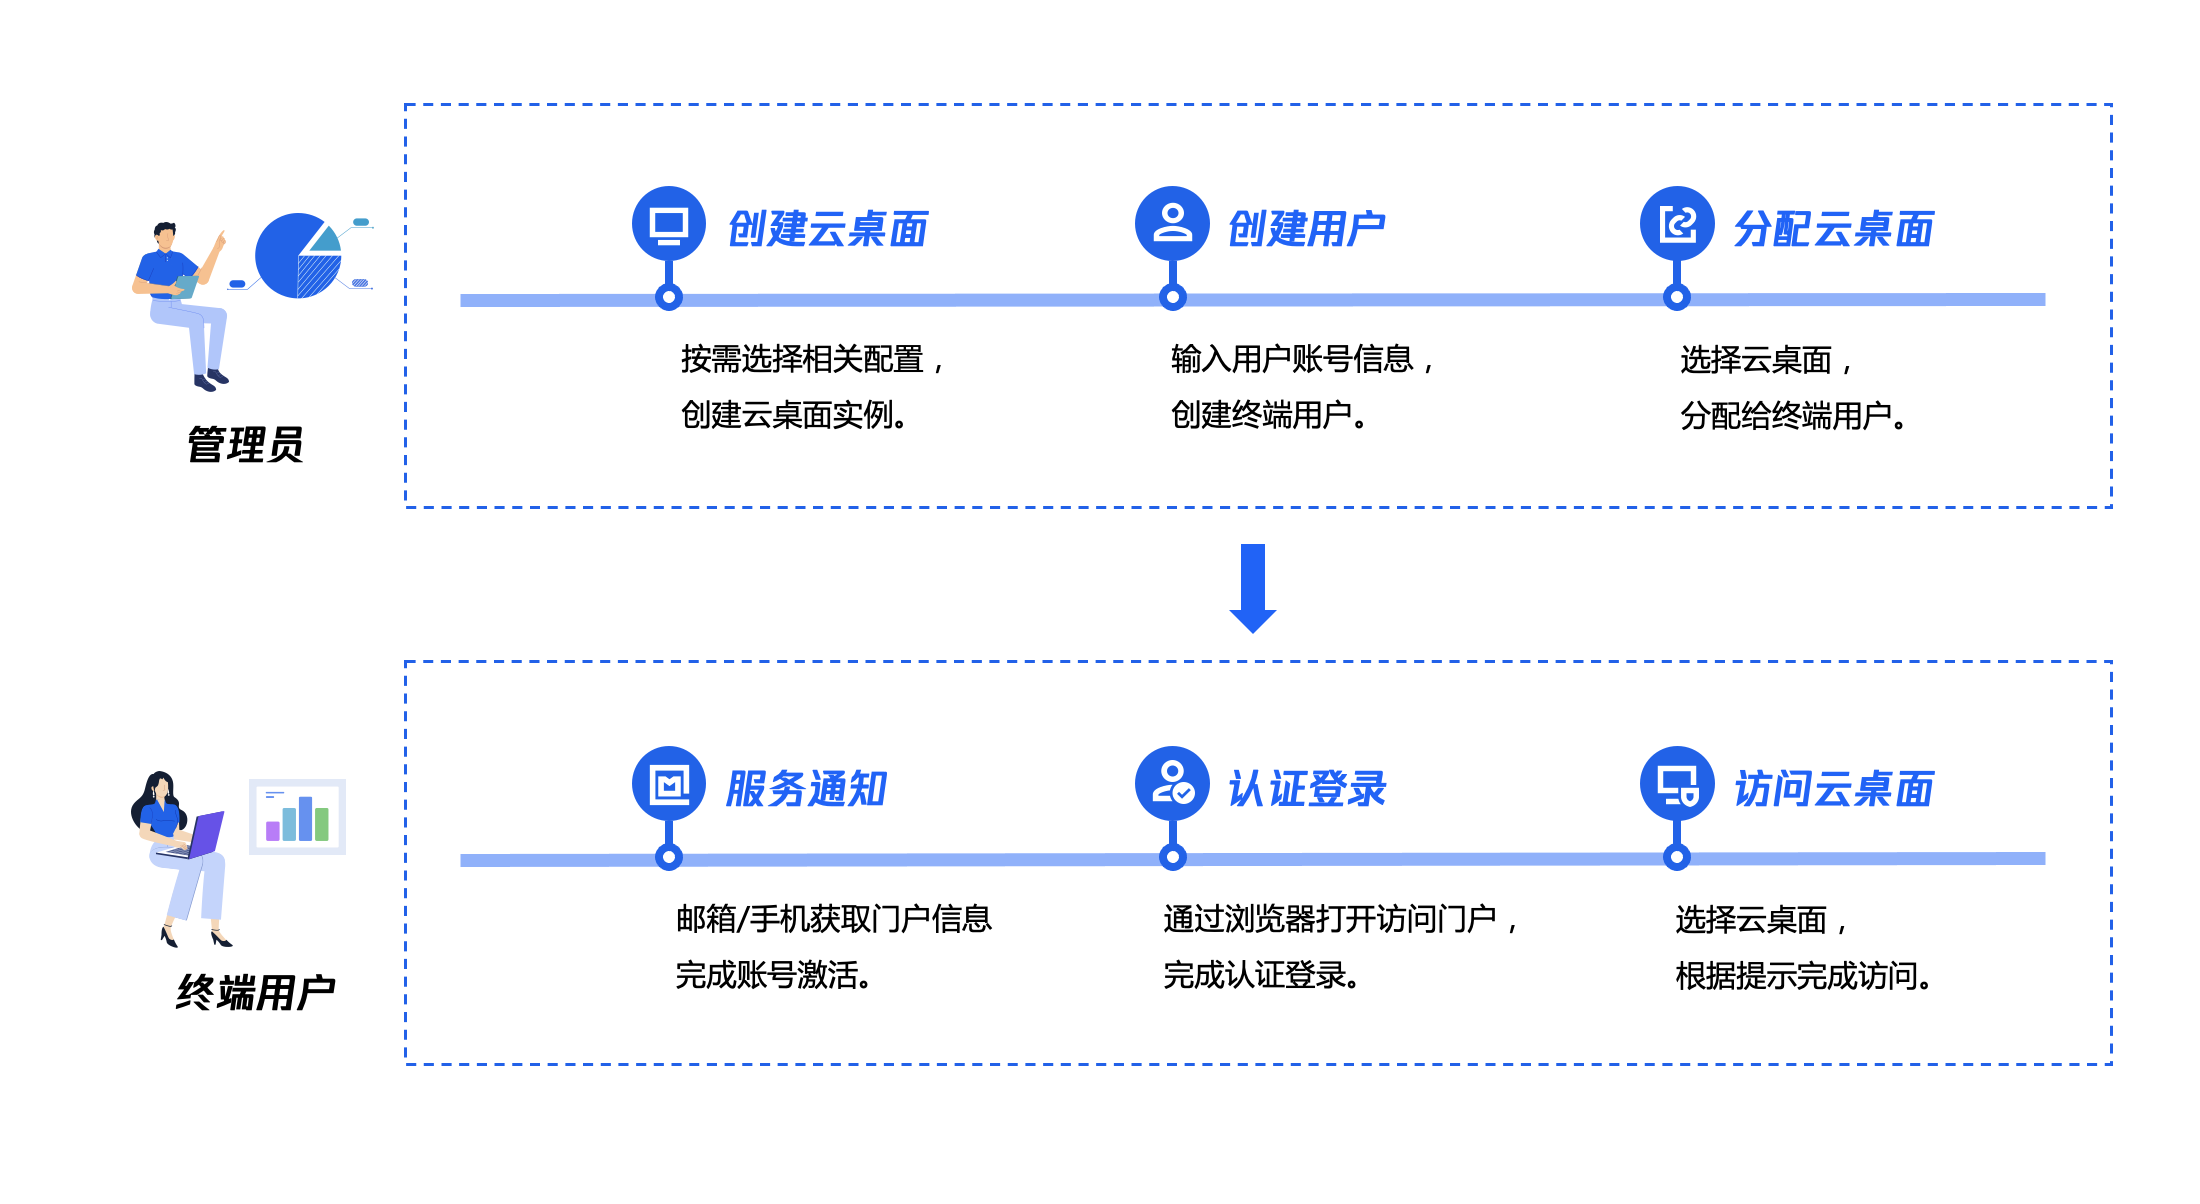
流程概览
根据工作职责和使用需求的不同,云桌面的用户可以进行以下分类:
人员类型 | 说明 |
管理员 | 云桌面资源的管理者,通过控制台统一管理云桌面资源,包括云桌面创建、分配、销毁退还和策略管理等资源全生命周期管理。 |
终端用户 | 云桌面资源的使用者,通过浏览器登录访问门户,获取云桌面资源并使用。 |
管理员快速配置云桌面服务
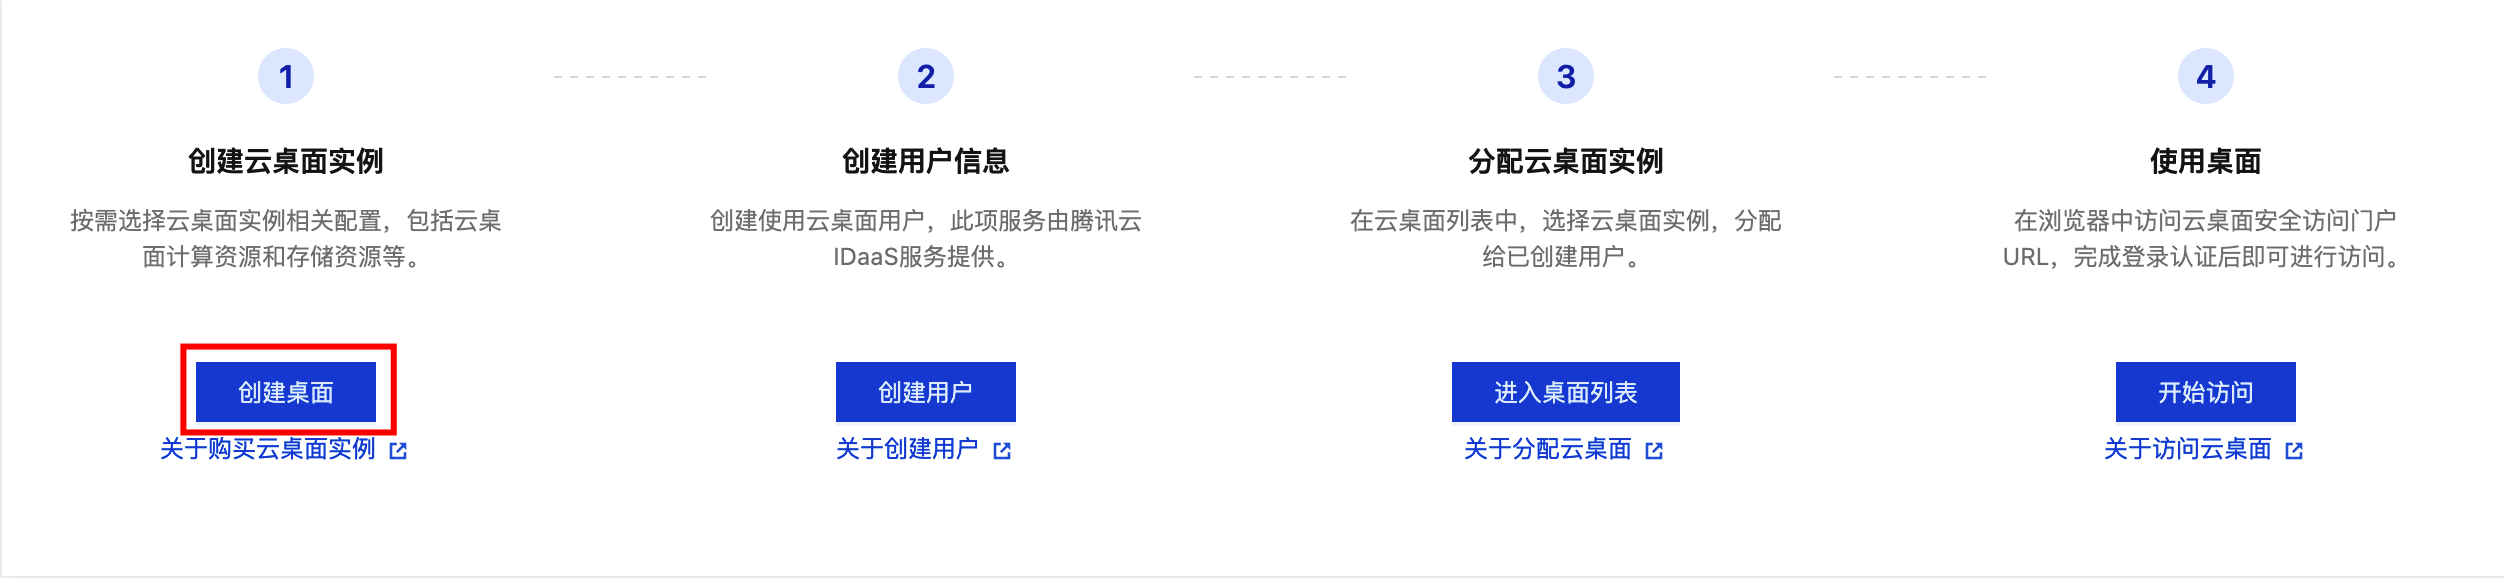
步骤1:创建云桌面实例
步骤2:创建用户信息
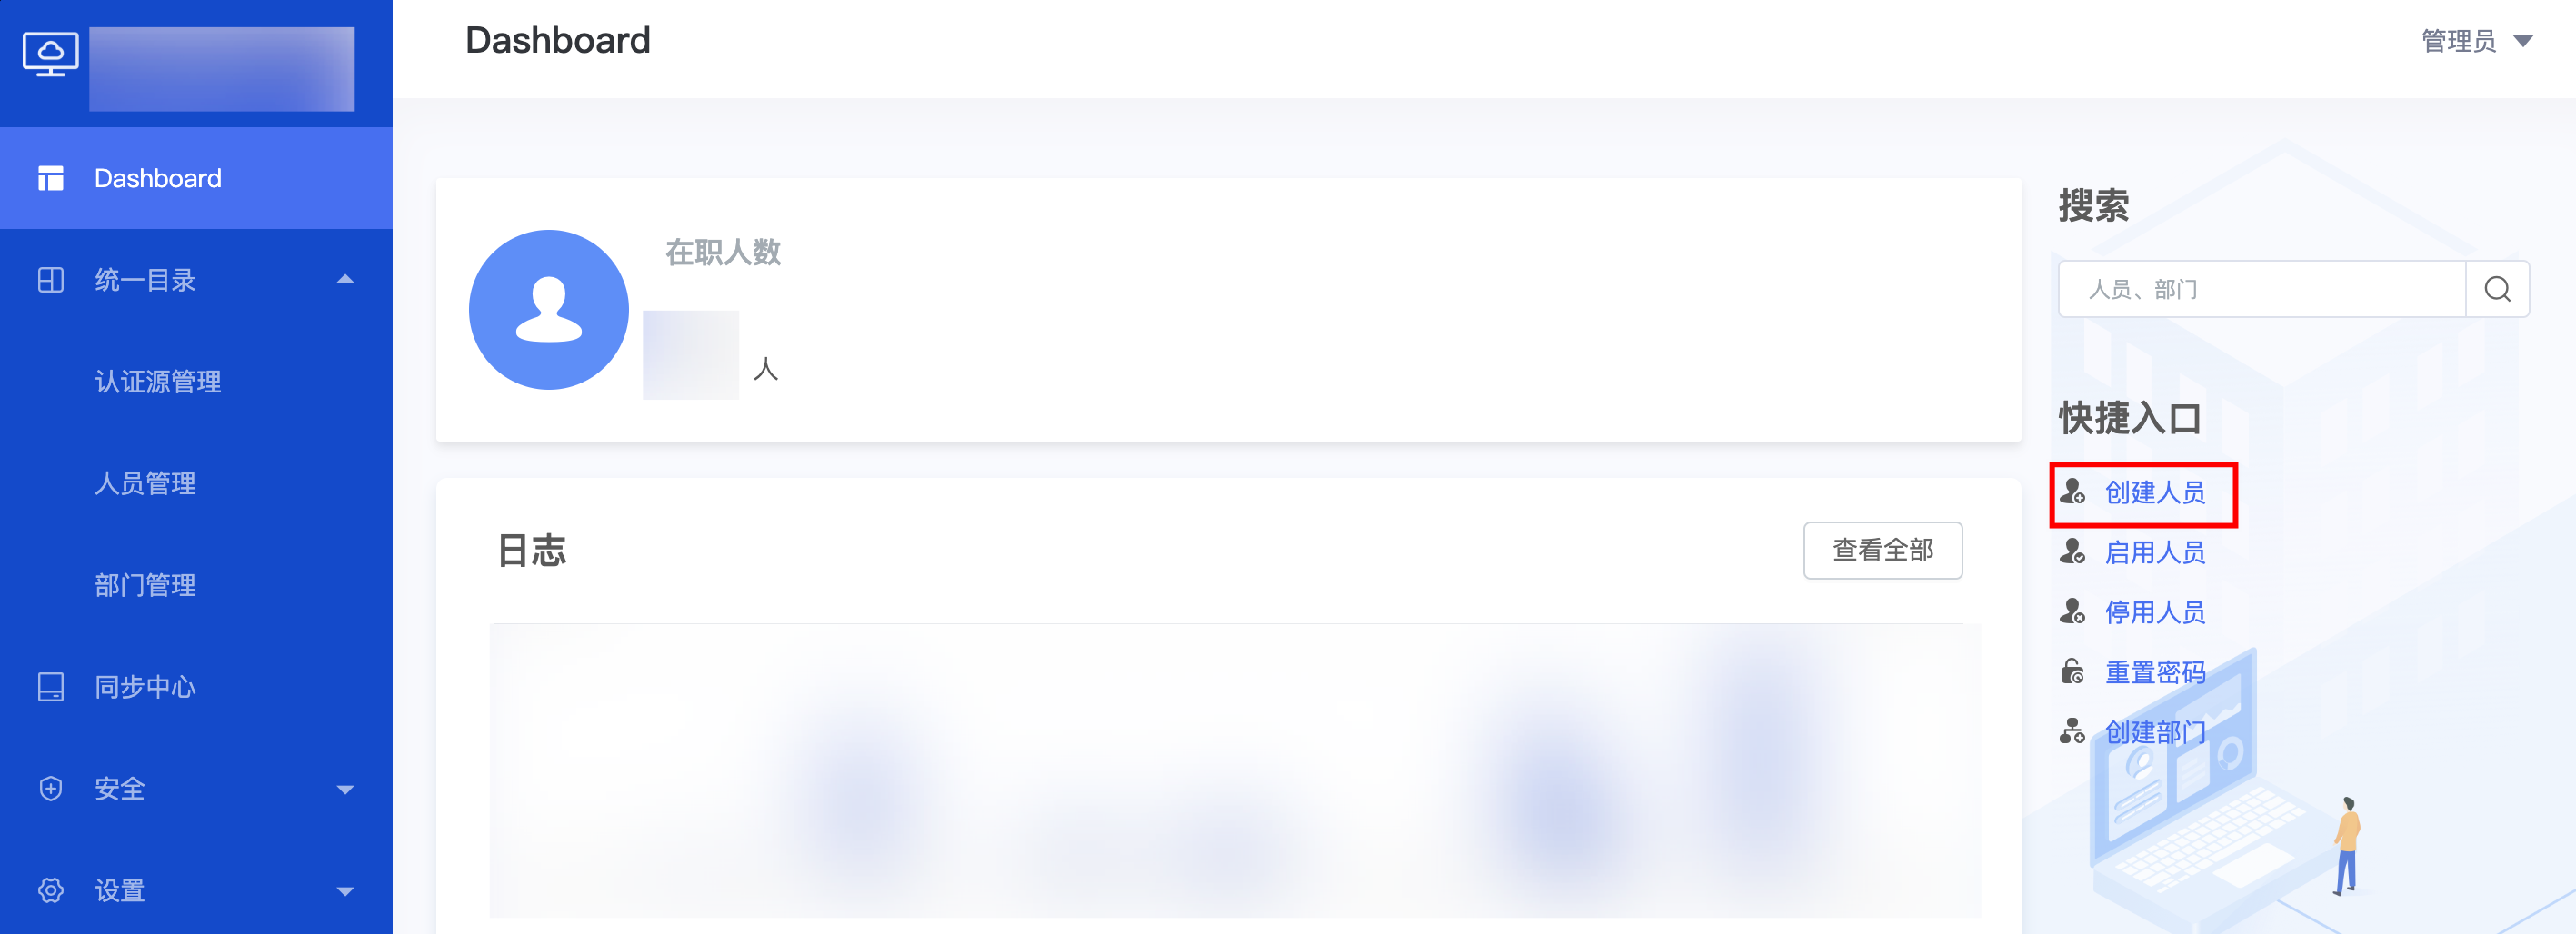
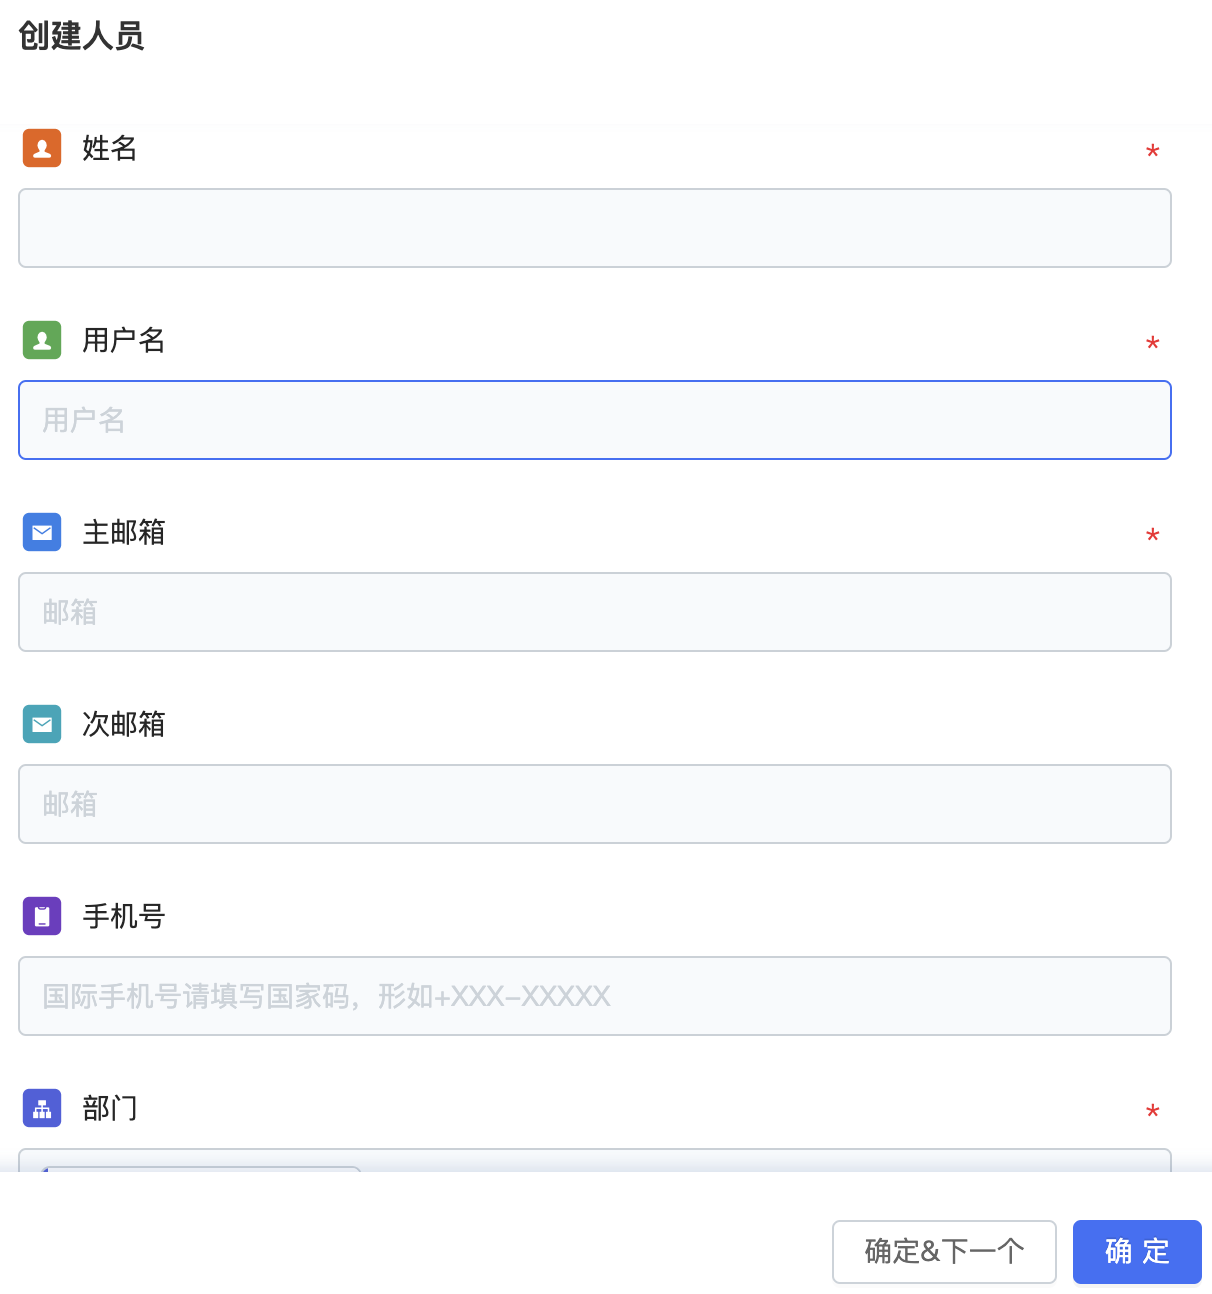
1. 在概览页中单击创建用户。
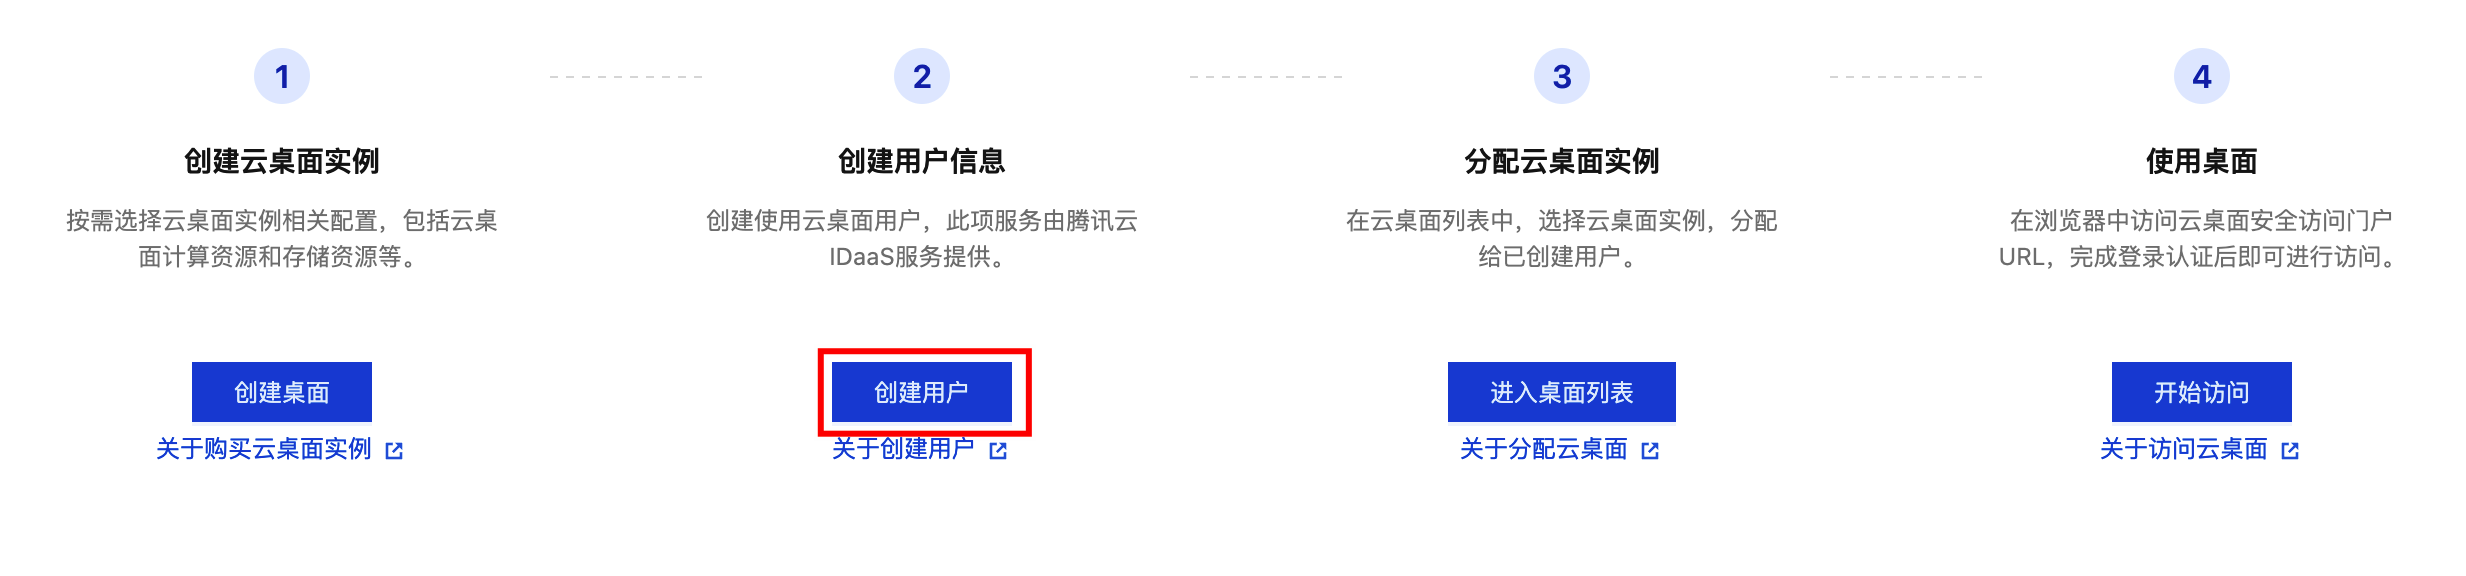
2. 然后单击创建人员并填写相关信息,创建需要被分配使用云桌面的终端用户。更详细的用户操作请访问 用户管理。
说明:
步骤3:分配云桌面实例
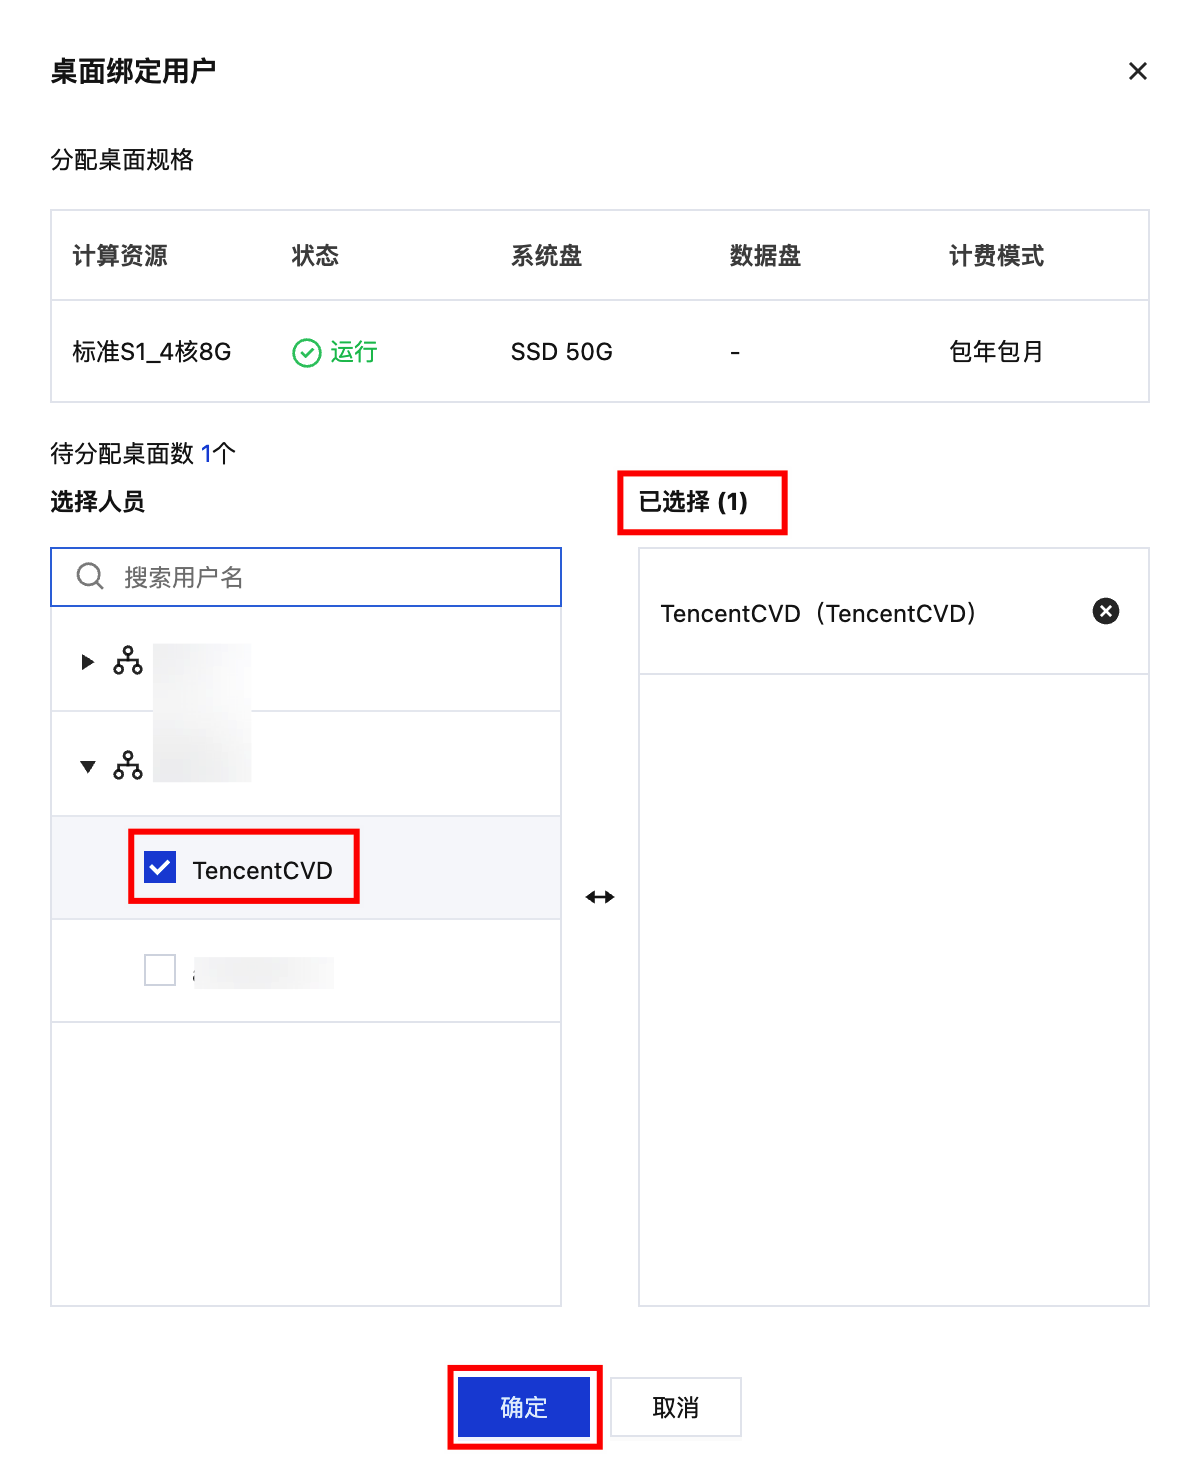
1. 打开 桌面列表,选择地区对应的待分配云桌面实例,单击绑定用户。

2. 进入“桌面绑定用户”,可以通过搜索用户名查找进行绑定用户,支持单选和批量添加。
终端用户访问云桌面
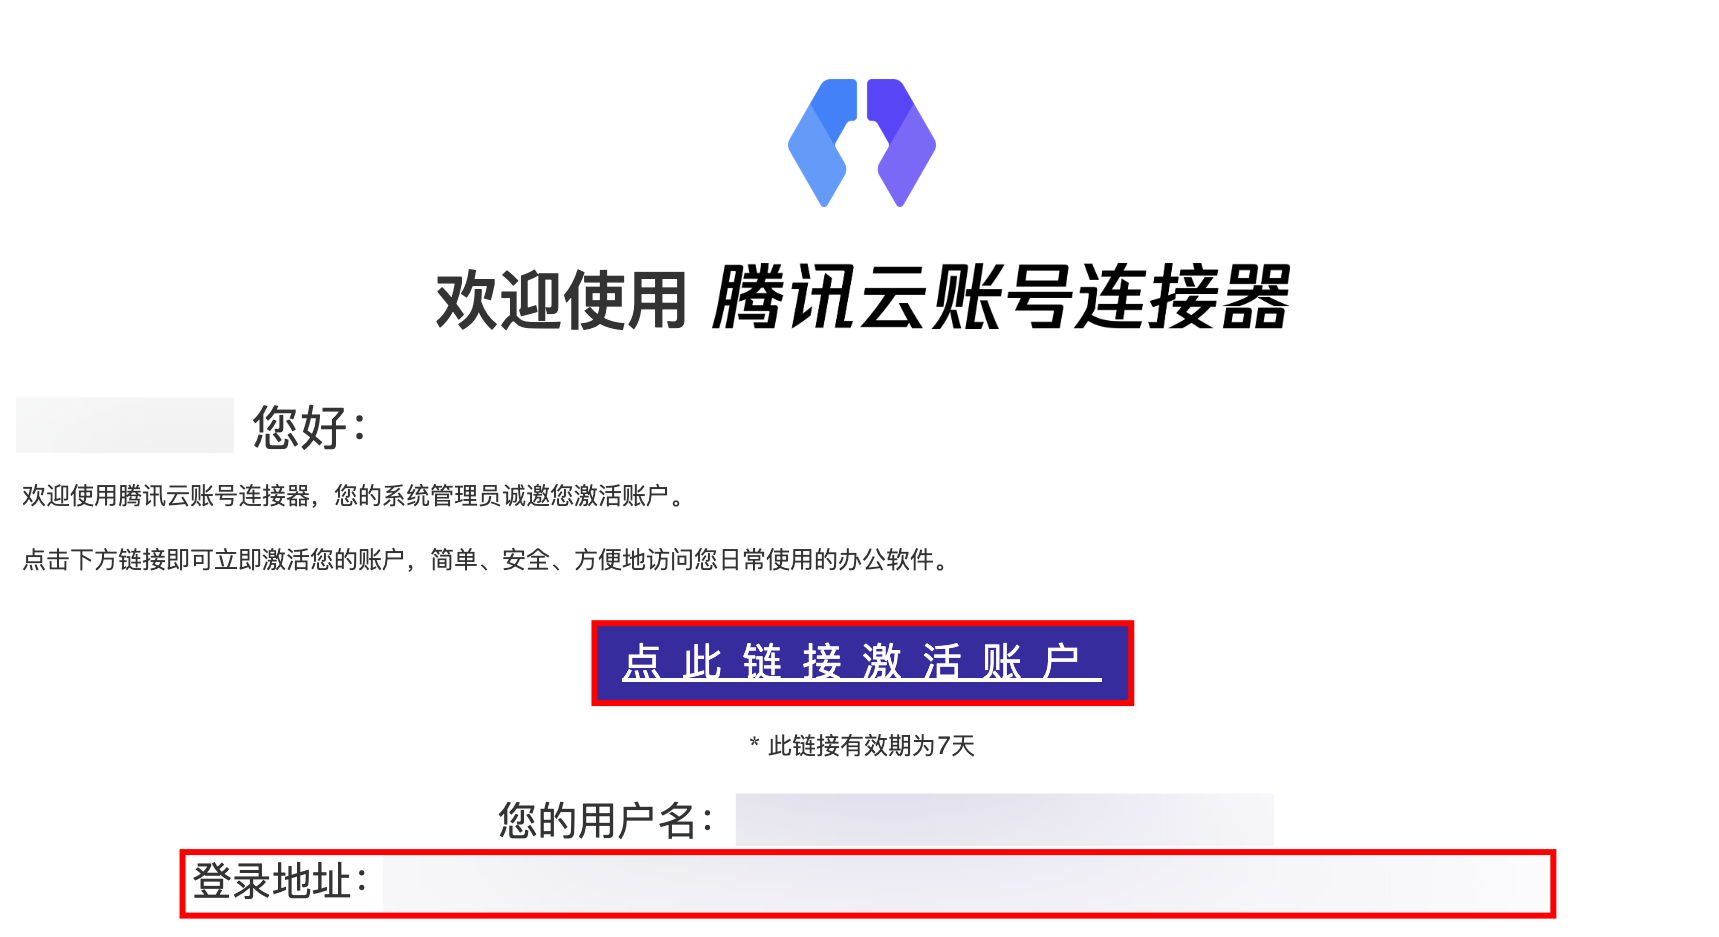
终端用户将收到一封激活邮件,根据邮件提示,完成终端用户账号激活。访问终端用户邮件中的登录地址,输入激活的账号并完成密码设置,即可访问终端用户绑定的云桌面资源。
未成功接收邮件的重试步骤如下:
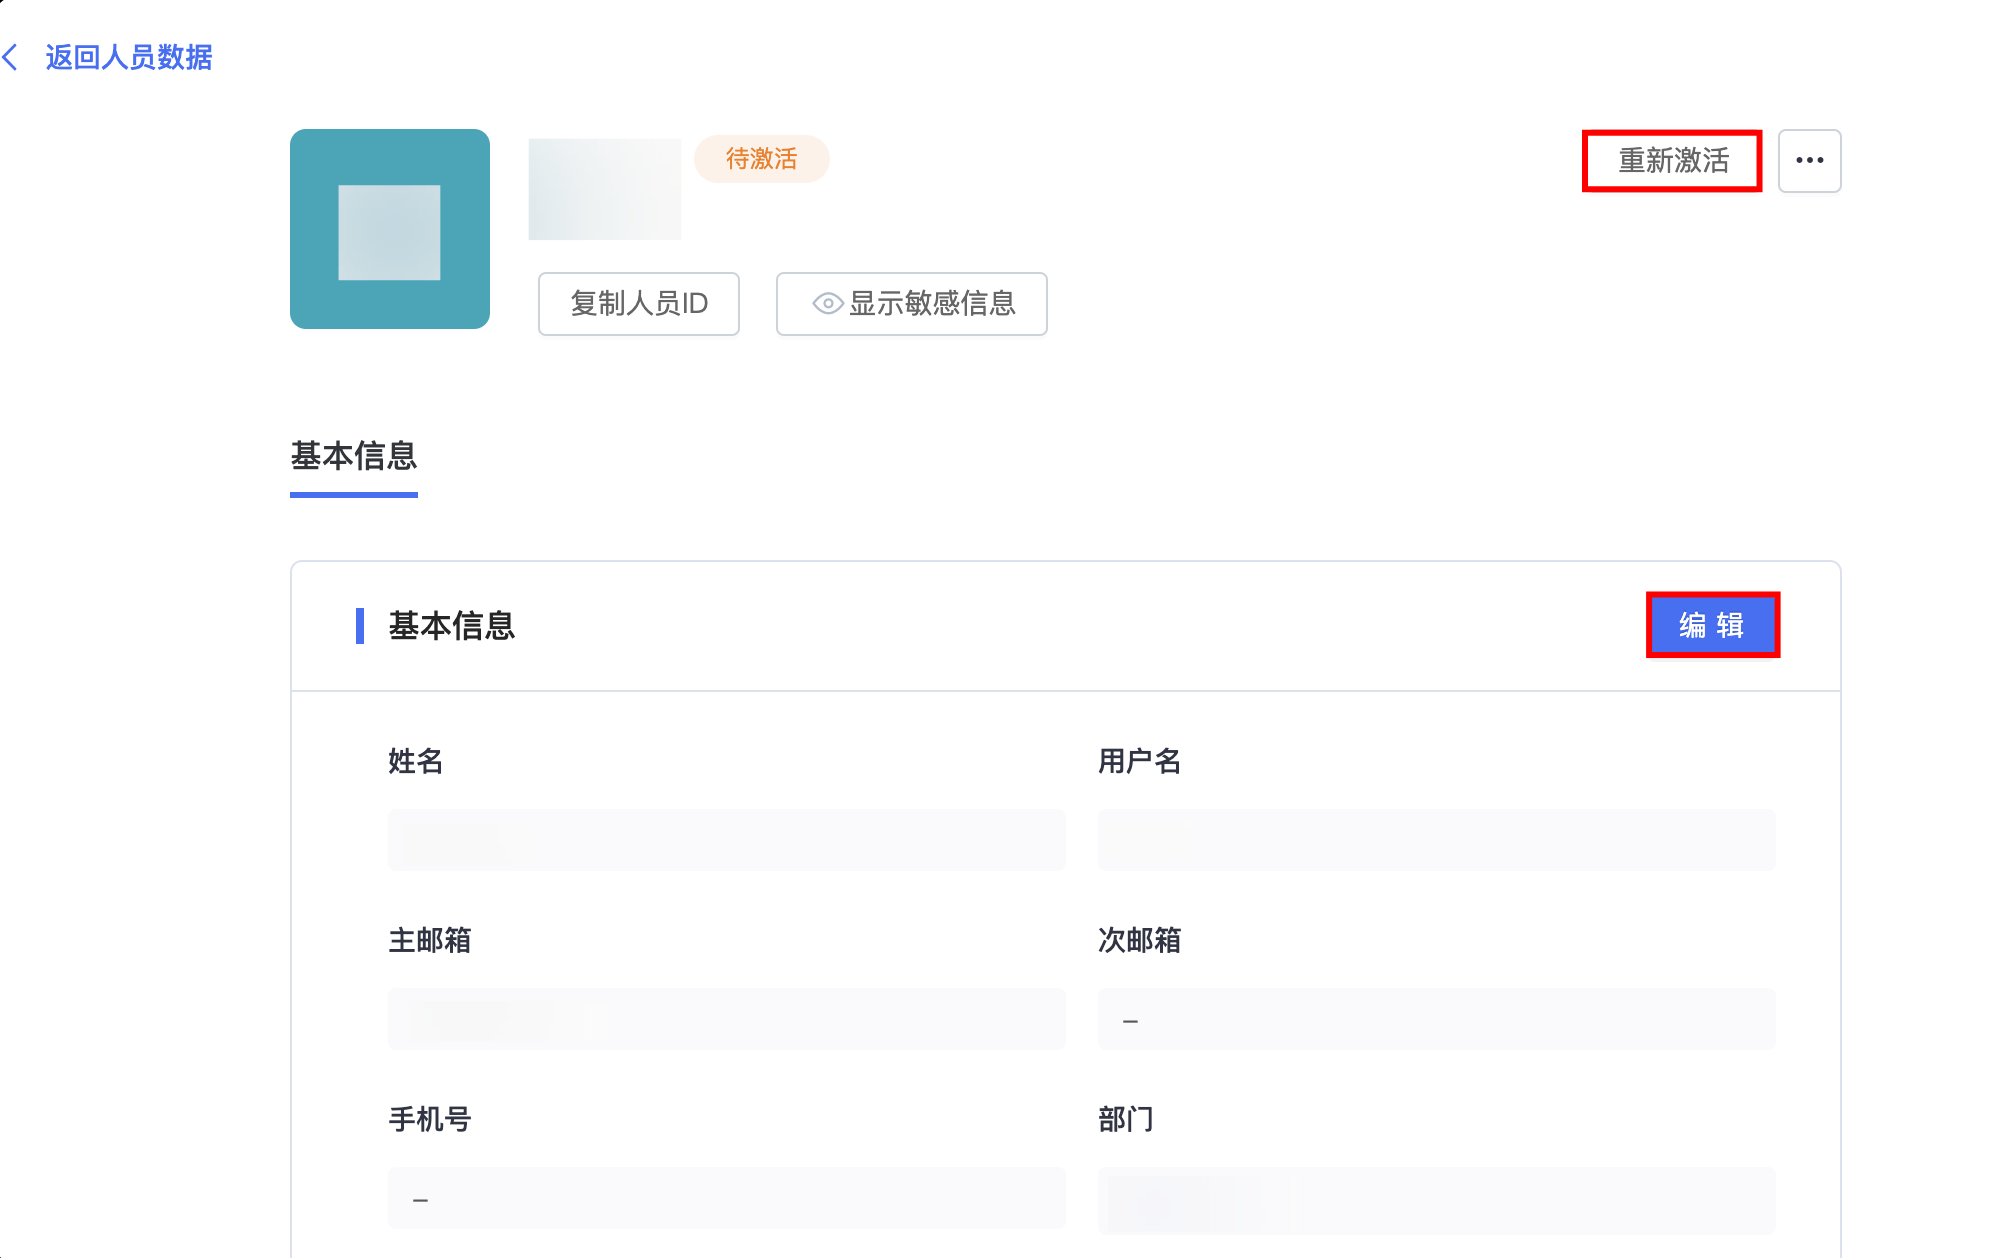
1.搜索未接收到激活邮件的用户名称。
2.单击重新激活再次发送激活邮件,提示未激活用户进行激活。若用户仍未收到激活邮件,可以检查邮箱是否填写正确,如需修改可通过编辑更改邮箱地址。
至此,您已掌握腾讯云桌面实例创建与访问全流程。
文档反馈