The NAT Firewall and the Inter-VPC Firewall are privately deployed, with their engines exclusively owned by tenants. Therefore, users need to manually update engines. The following is the upgrade operation guide.
Querying the Firewall Instances That Can Be Upgraded
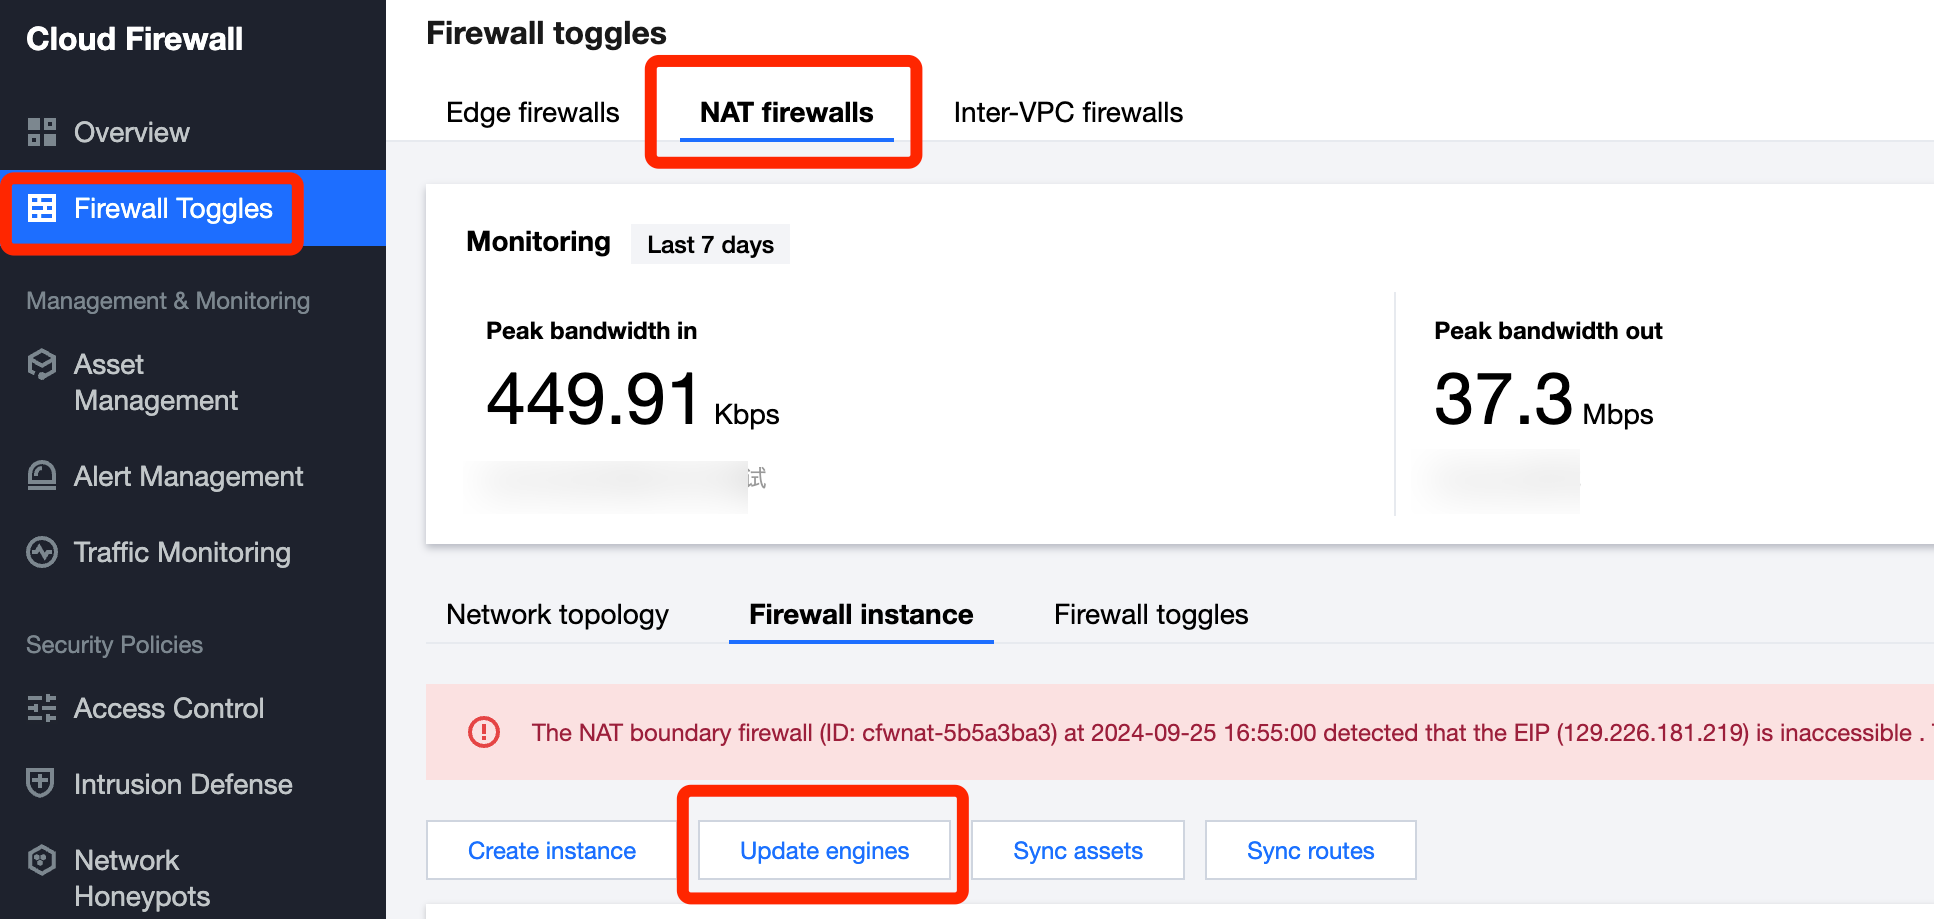
1. Log in to the CFW Console, and choose Firewall Toggles > NAT firewalls/Inter-VPC firewalls in the left sidebar. 2. On the firewall instance page, click Engine Update to check the latest version of the engine and the instances that can be upgraded.
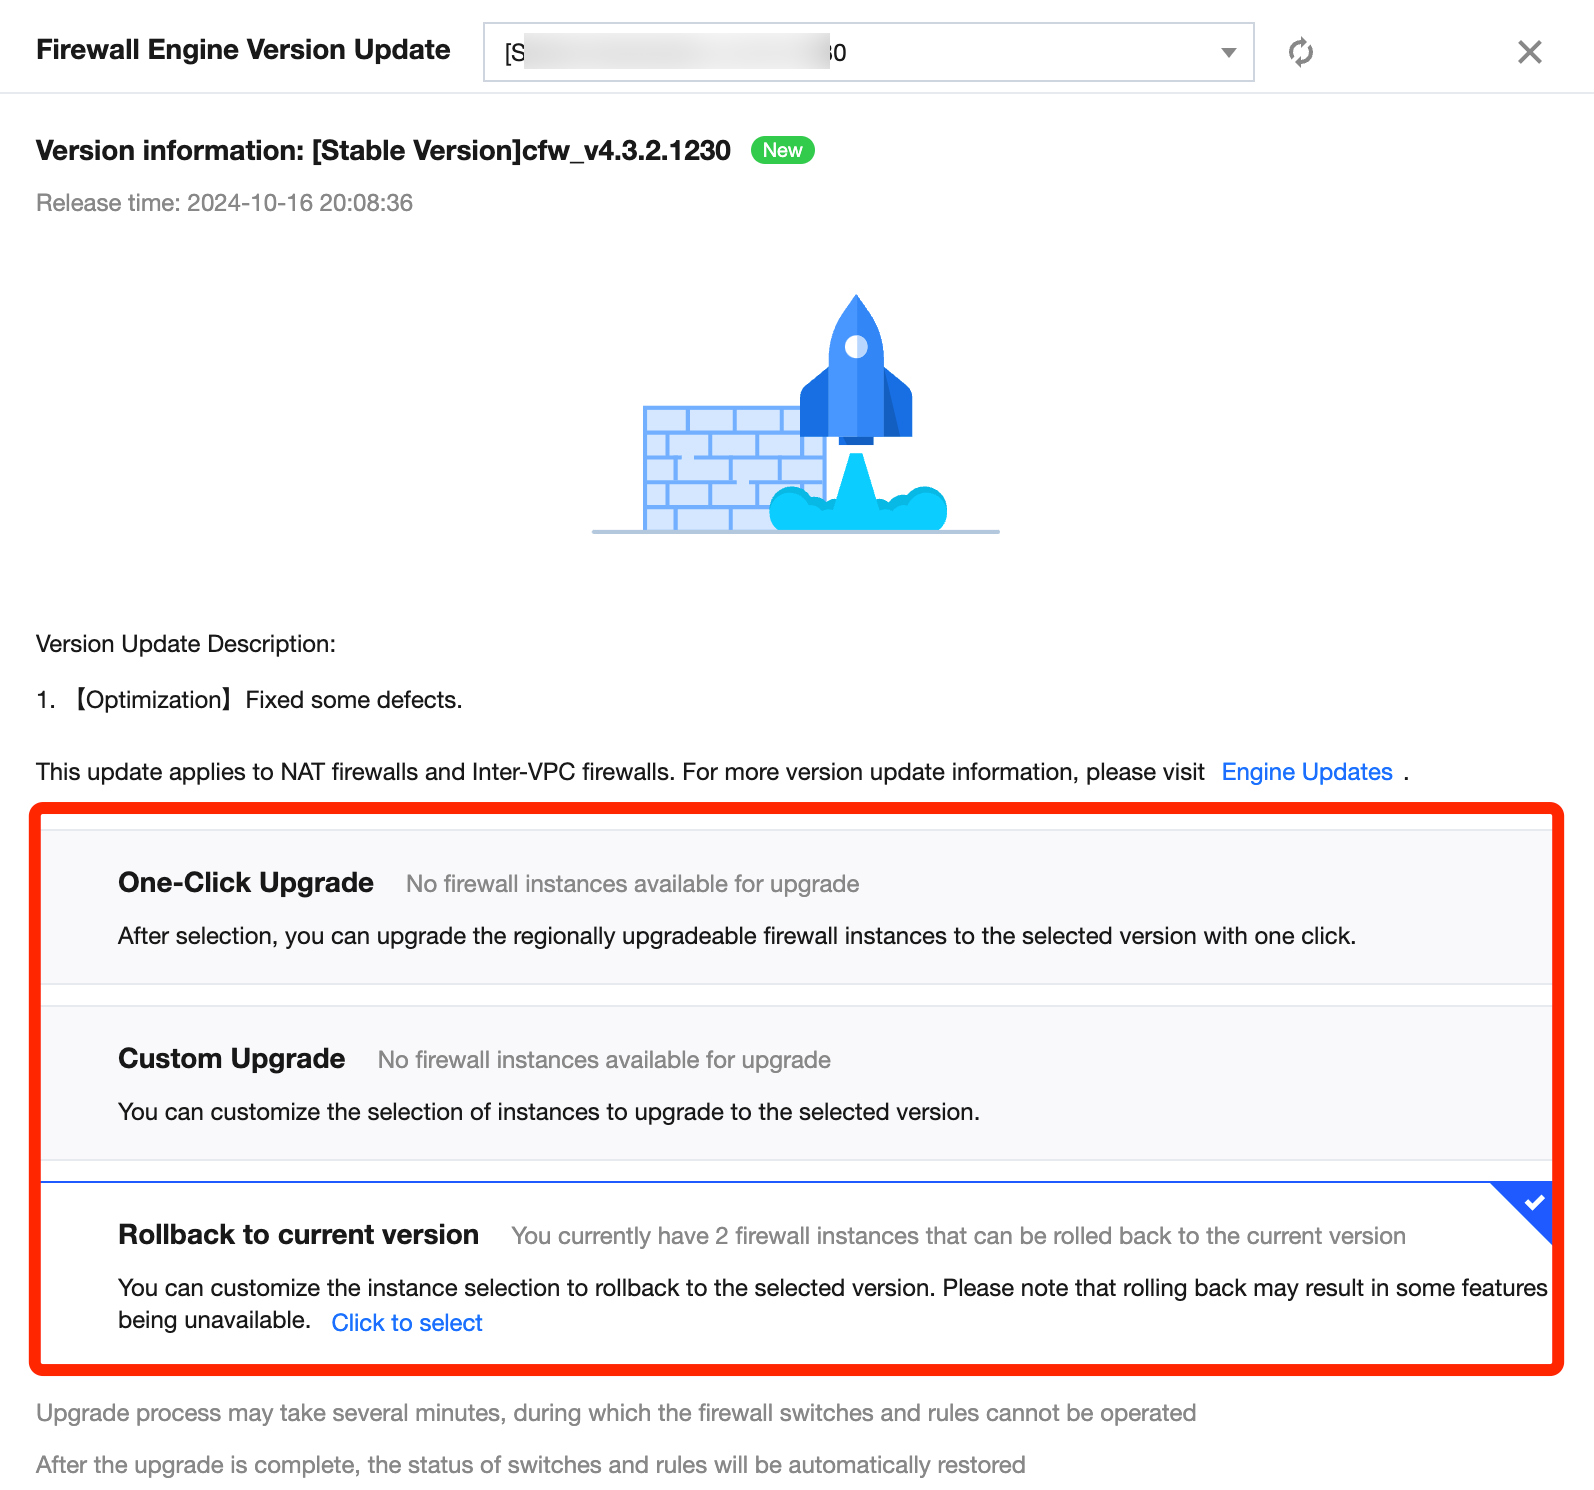
3. The latest stable version will be selected by default. If there are firewall instances that can be upgraded, the upgrade options below will become available.
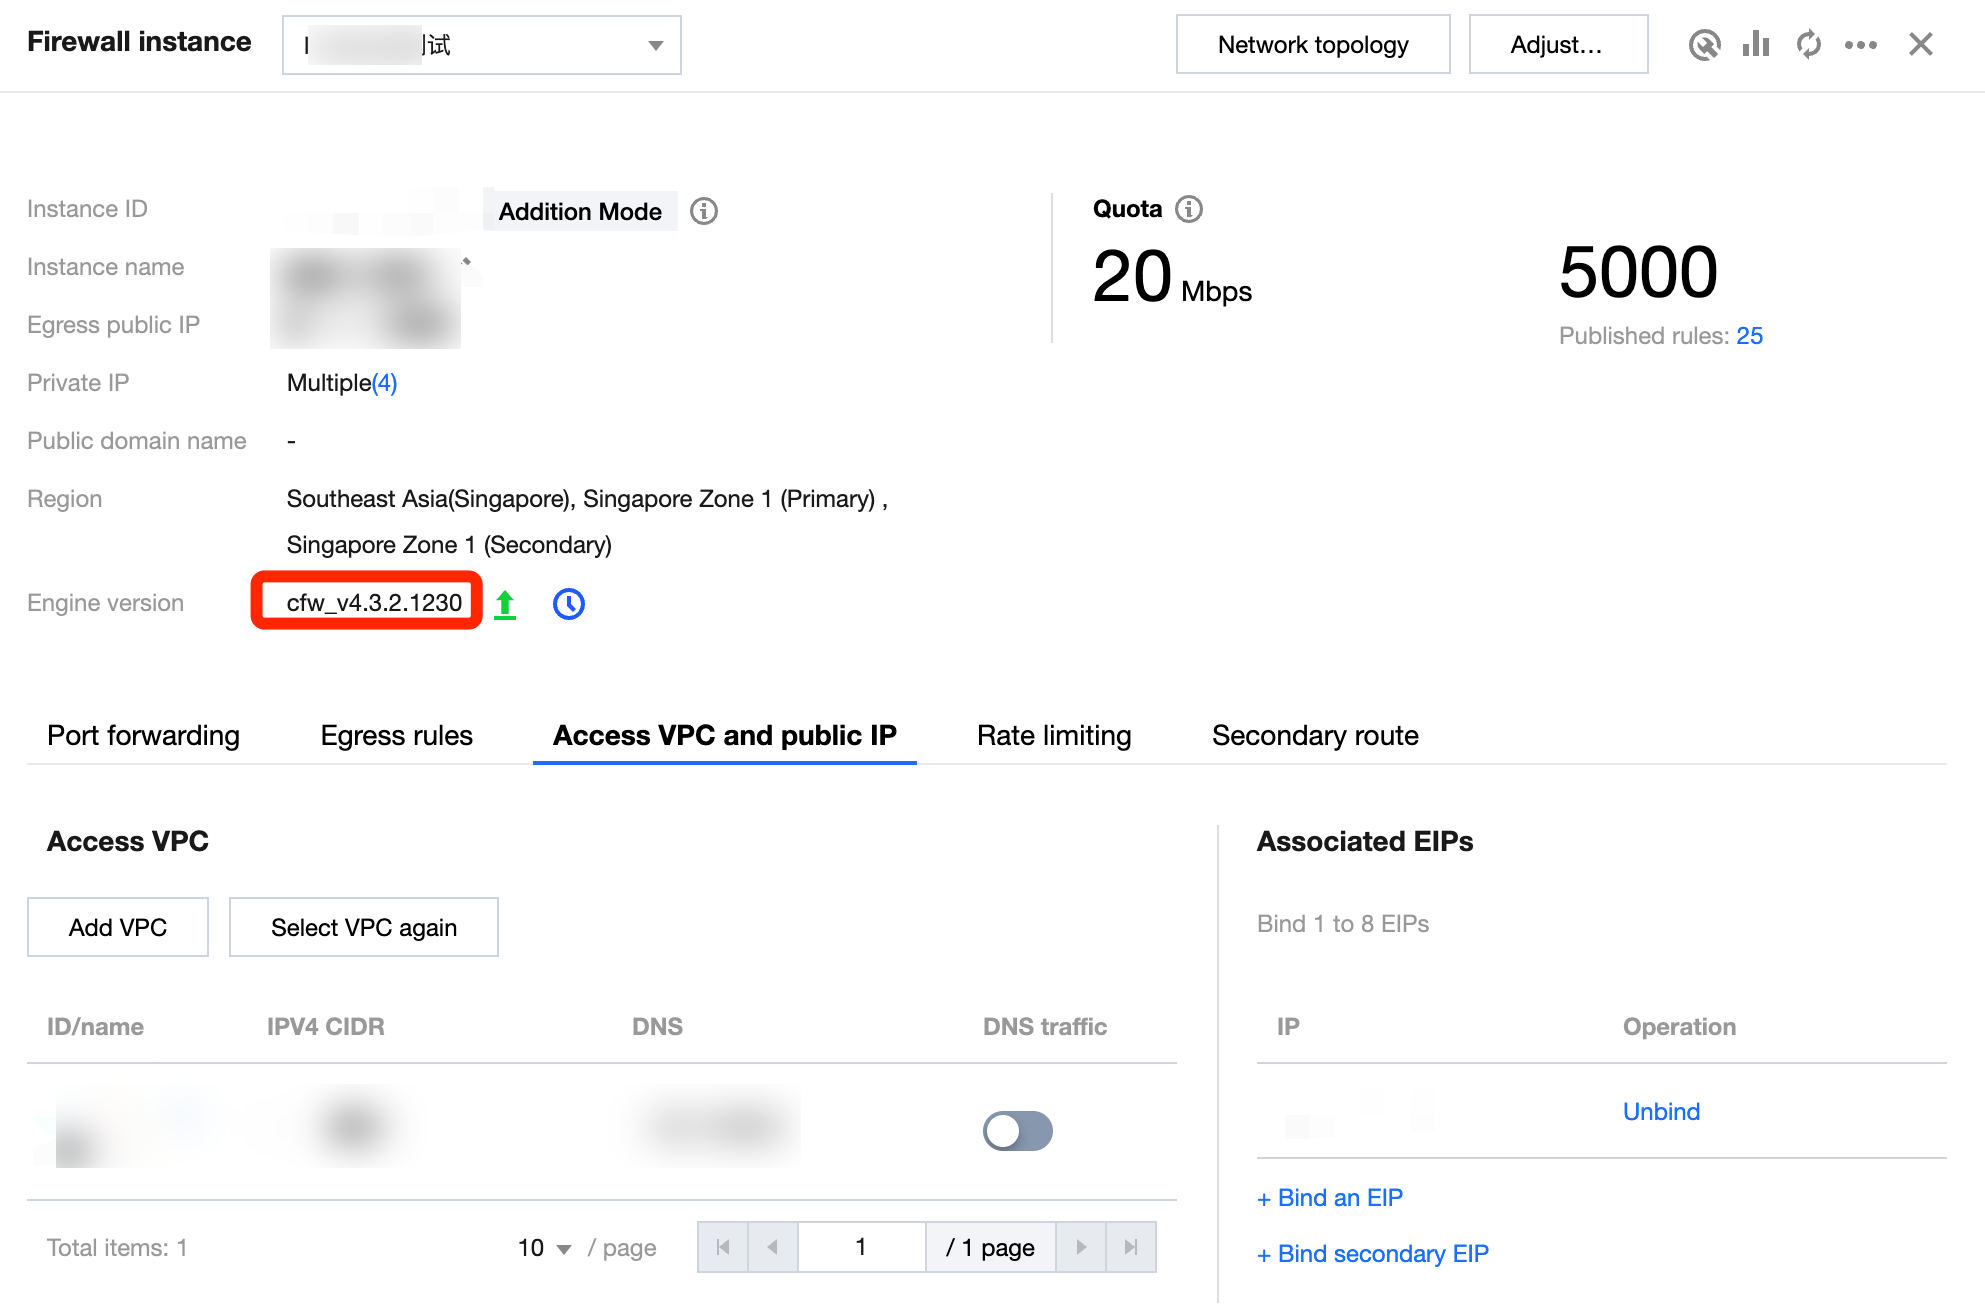
4. You can also check the specific instance's engine version and whether it can be upgraded.
Click Instance ID or Configuration of the target firewall to enter the firewall instance details page.
5. Compare the current engine version with the version list provided in Engine Release Notes to determine whether the upgrade is available. If the upgrade is available, a mark will appear on the right side of the engine version. Upgrading the Firewall Engine Version
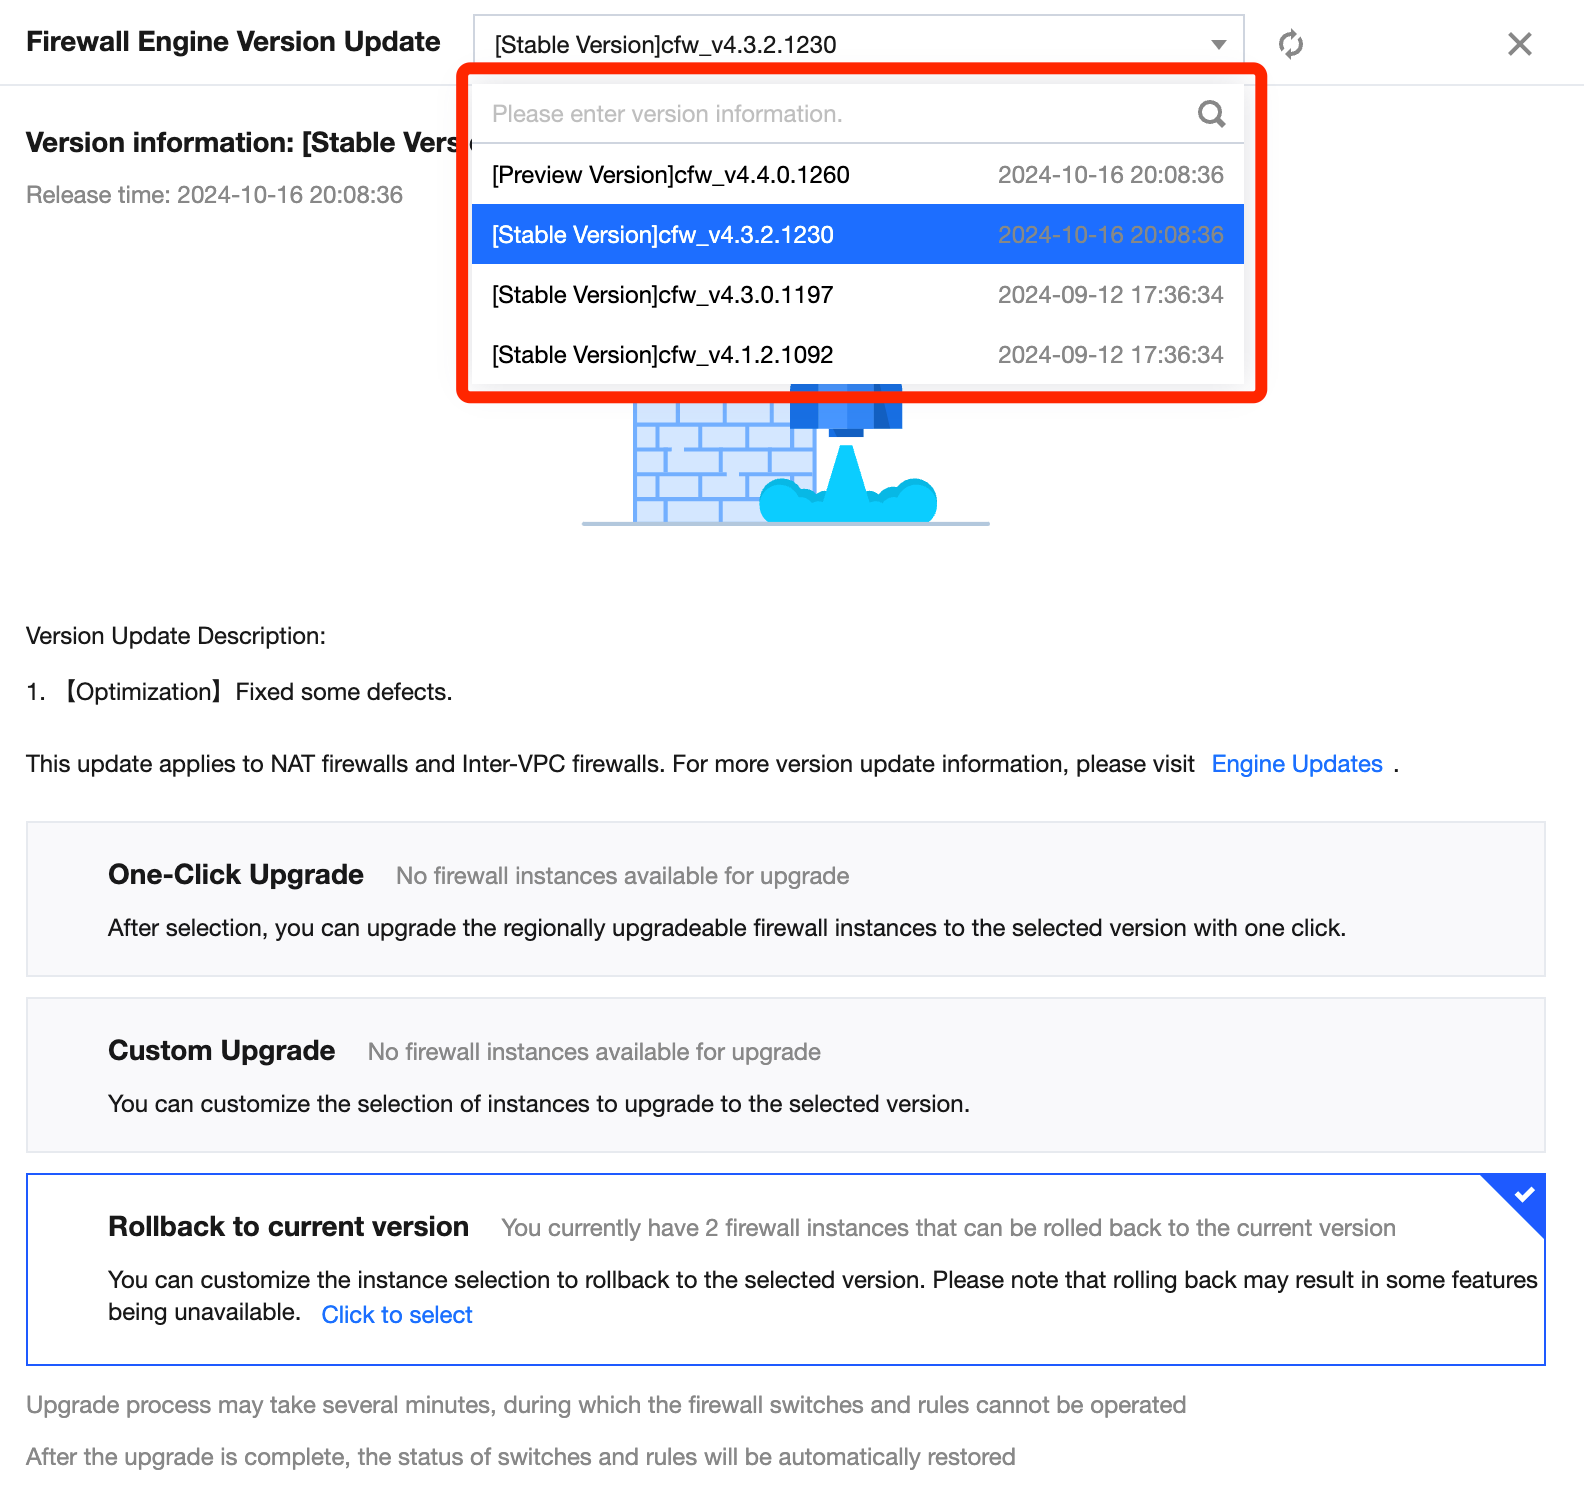
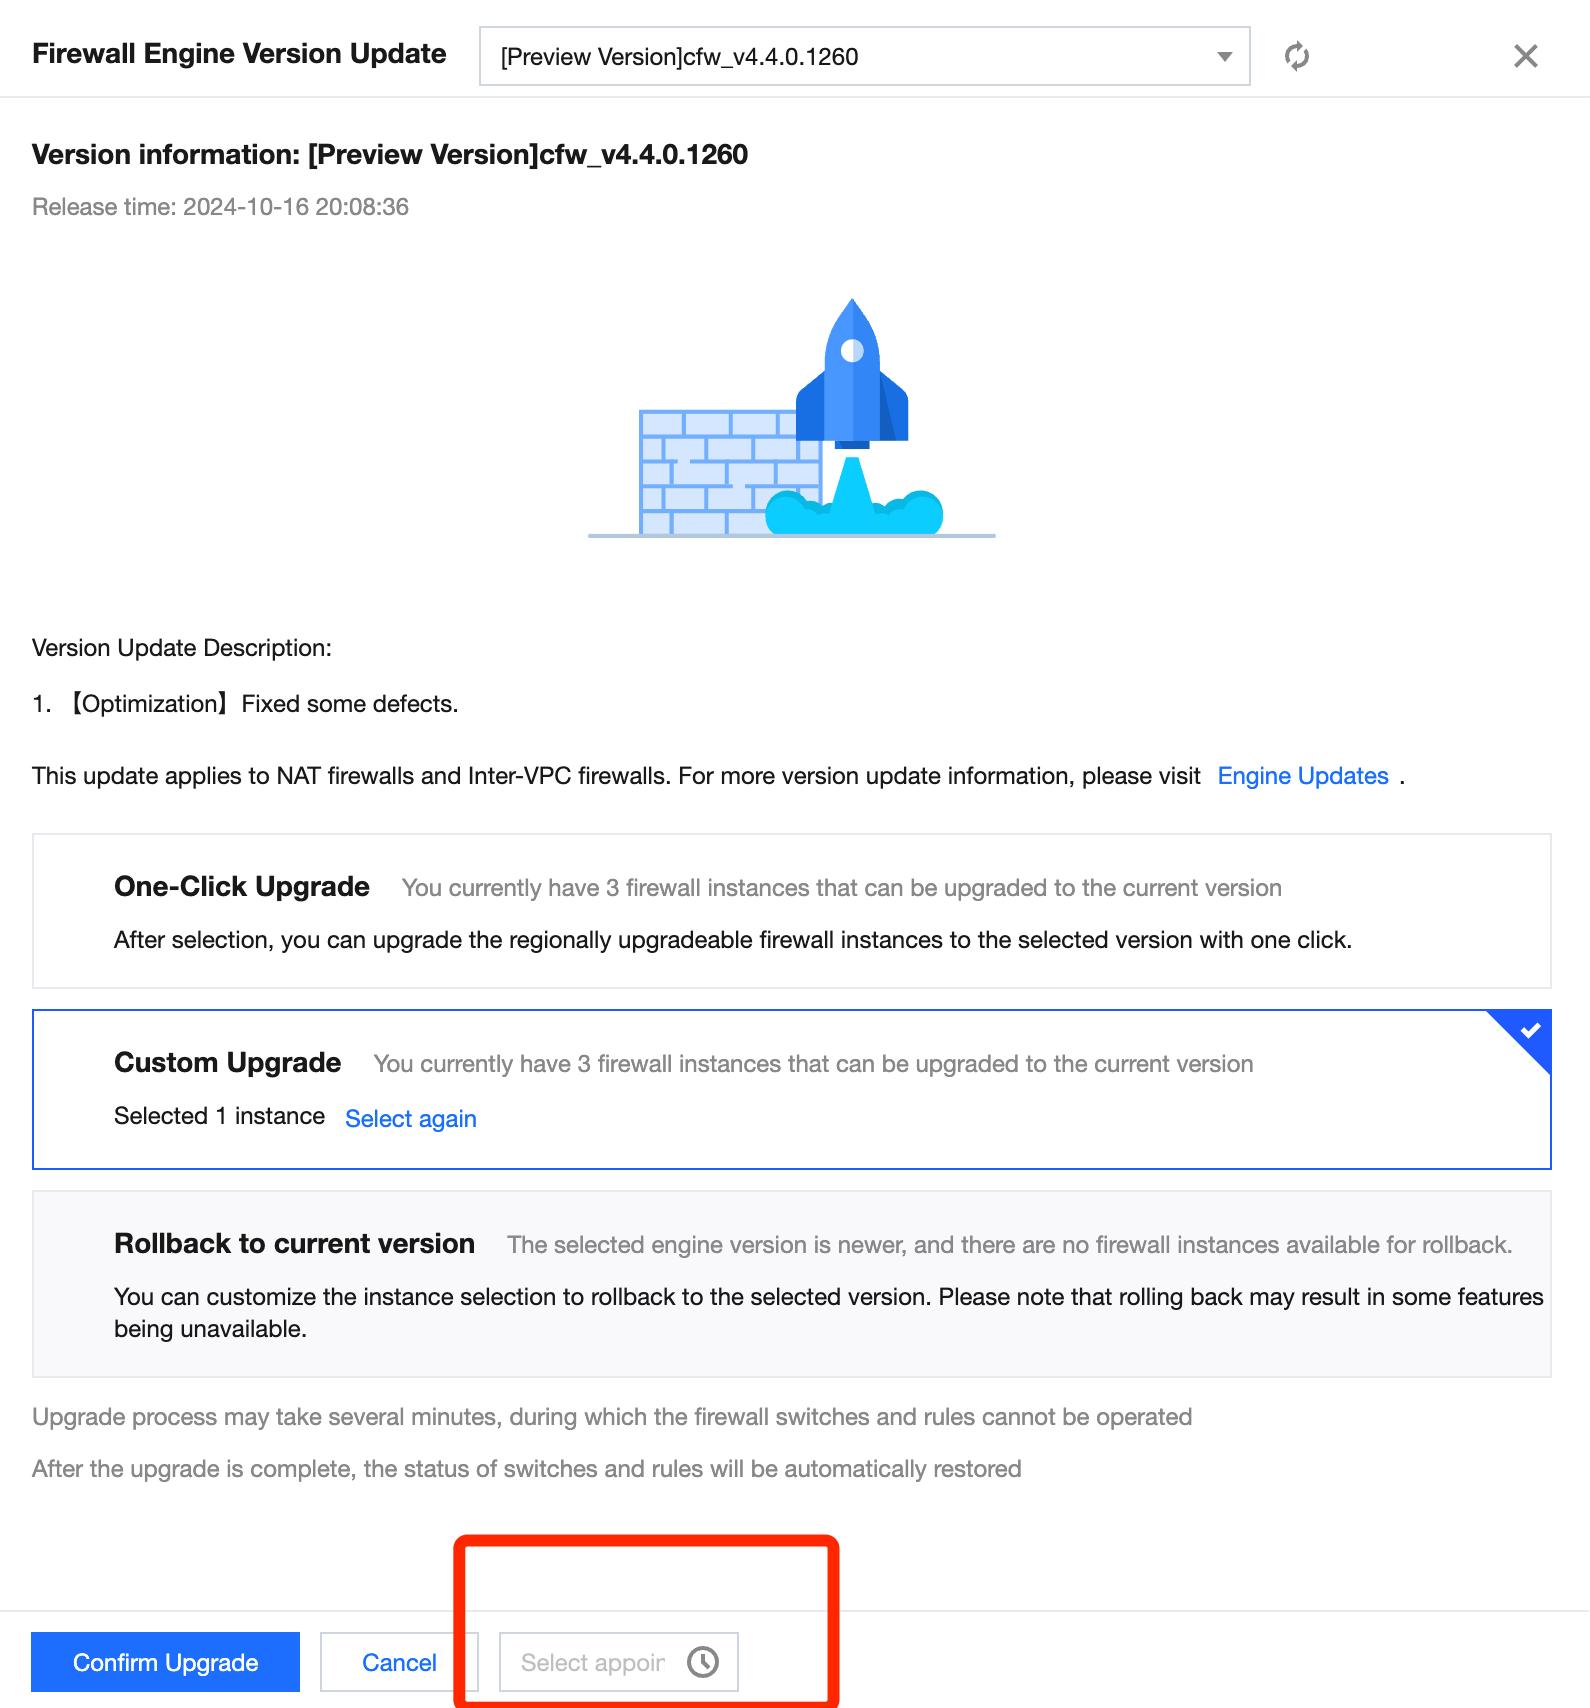
1. See the previous section to enter the engine upgrade page, and select the engine version you want to upgrade at the indicated location. Note:
The preview version is the latest engine version, which includes the latest features and bug fixes. The stable version has been verified for long-term stability in the production environment and generally lags behind the preview version by one major version.
We recommend that you promptly update the engine to the latest stable version. For details about the version, see Engine Release Notes. 2. Select the engine instances that need to be upgraded.
One-Click Upgrade: After you select this option, firewall engine instances of the current version in all regions will be automatically identified and upgraded to the selected version.
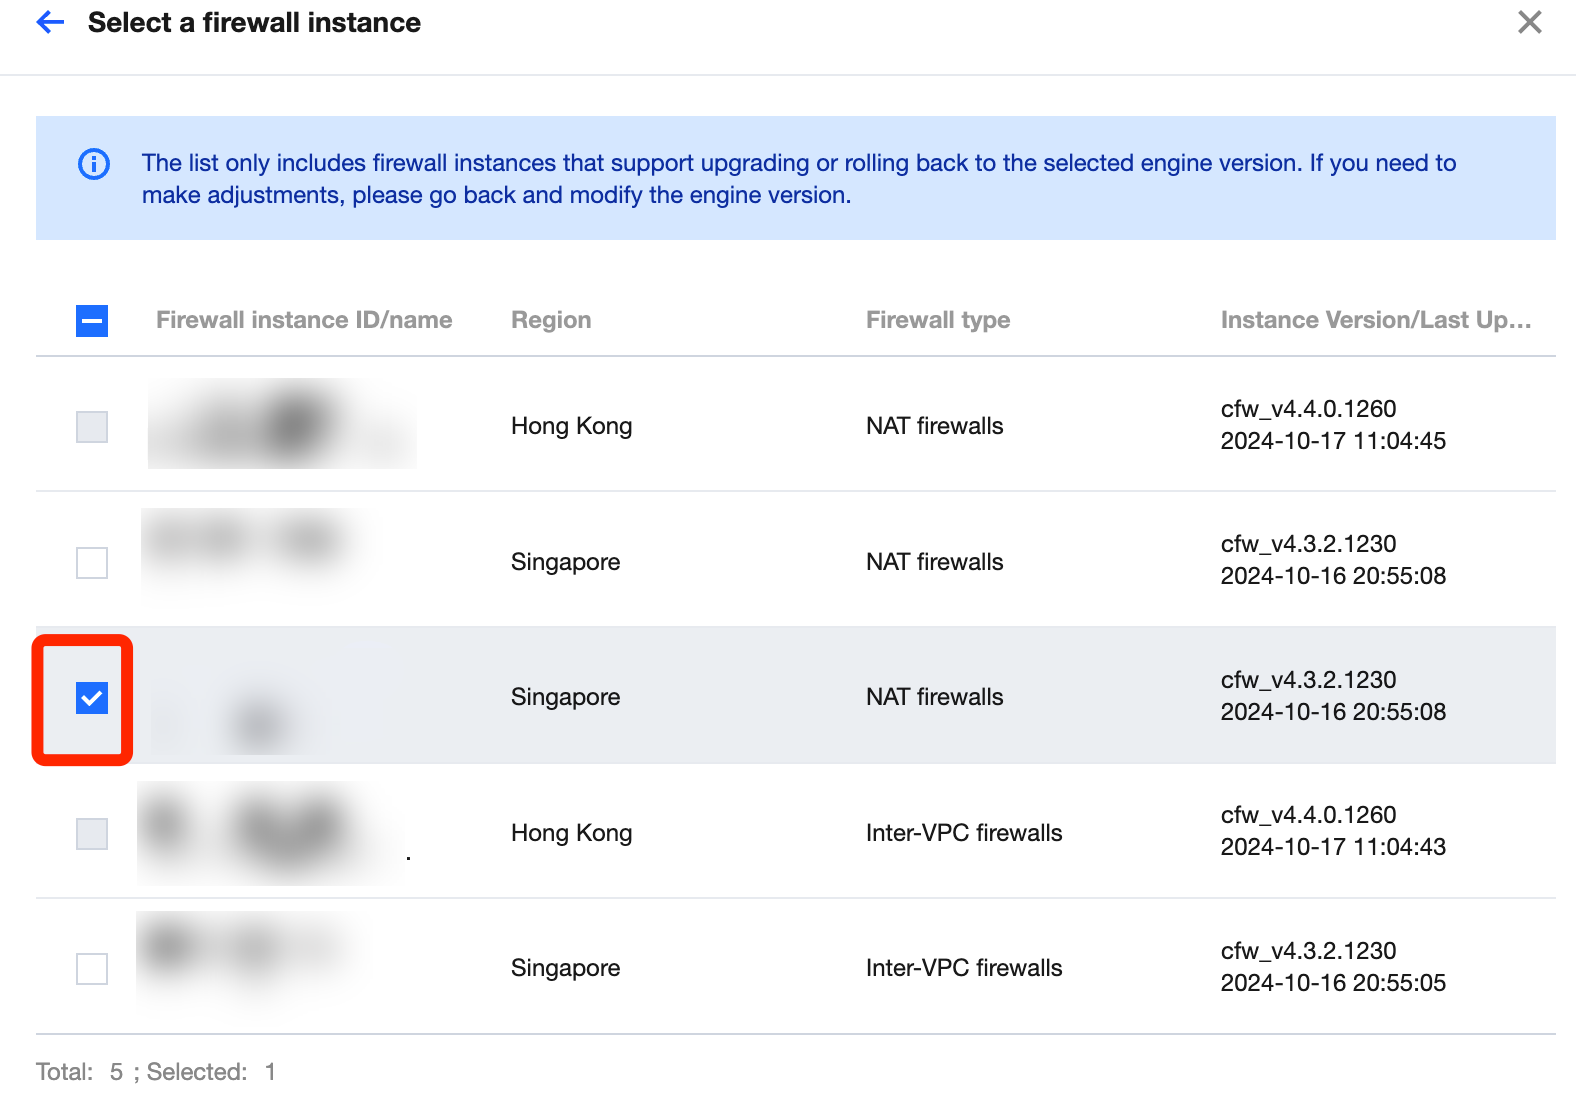
Custom upgrade: You can manually select instances you want to upgrade. Click Click to Select/Select Instance to enter the instance selection page.
3. On the instance selection page, select the instances you want to upgrade and click Select.
4. Click Confirm Upgrade to initiate the upgrade task.
Note:
The upgrade may take several minutes during which the firewall switch and rules cannot be configured. After the upgrade is completed, the status of the switch and rules will be automatically recovered.
The upgrade process will first upgrade the standby node, followed by the primary node. During this process, a primary/standby switchover will be triggered, which may cause slight network fluctuations, but service connections will not be interrupted. It is recommended to perform the upgrade during off-peak business hours.
Scheduling the Upgrade Time
1. After Steps 1 and 2 in the previous section are completed, click Select appoir at the indicated location.
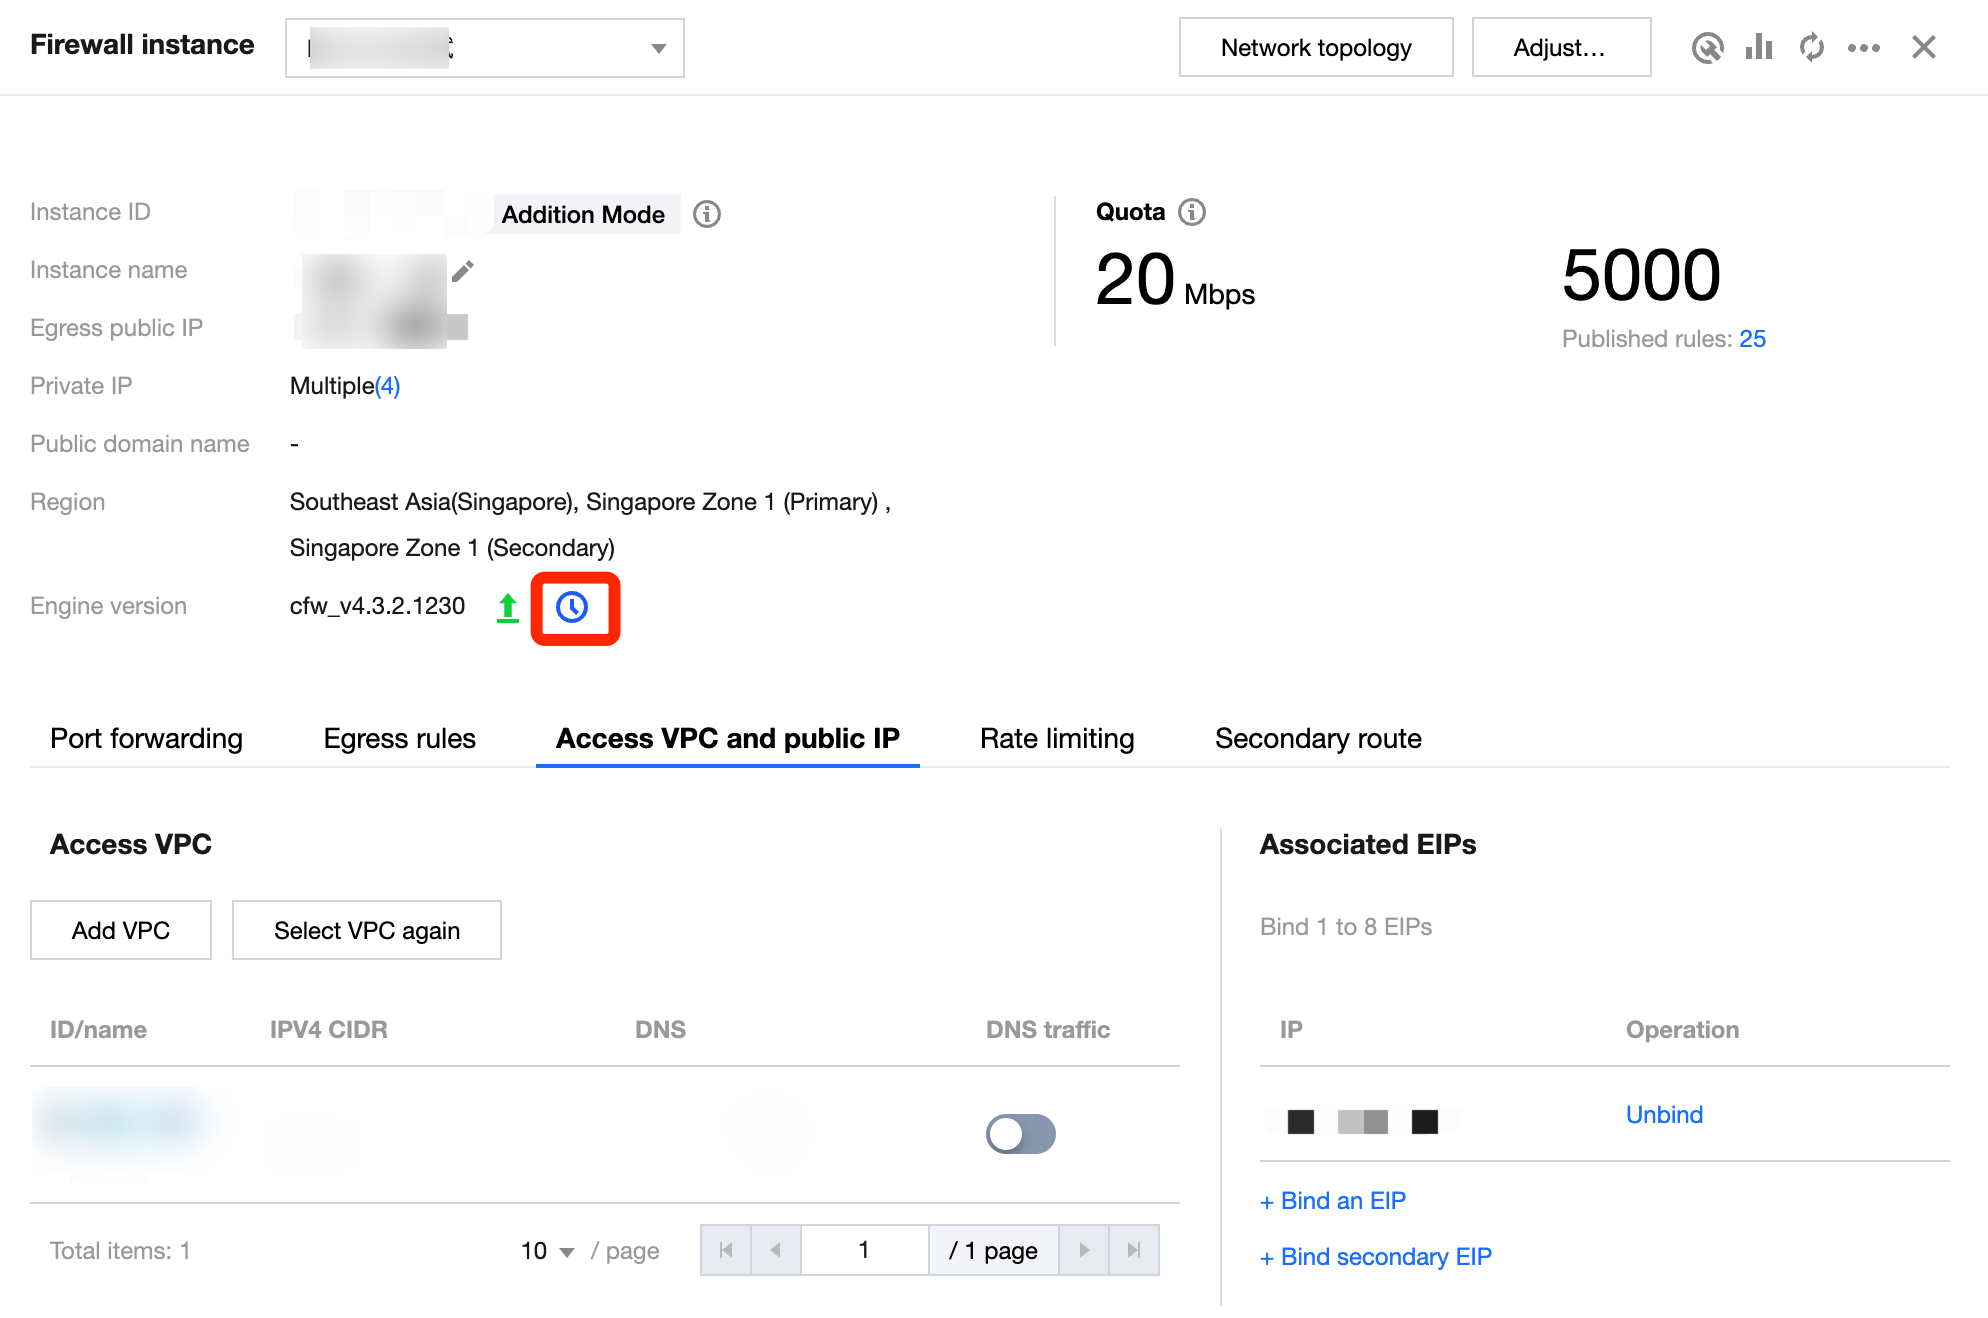
2. Confirm the upgrade task status.
Enter the corresponding firewall instance page, where you can view the scheduled upgrade task in the indicated engine version area. You can click Cancel appoir or re-execute the engine upgrade operation to cancel the schedule.