Web Protection
Introduction
Web Protection features a rule library with 500+ rules and an AI engine. It provides application layer protection for sites using the HTTP/HTTPS protocol.
Web/Bot protection actions
The web protection and bot protection features allow you to set actions based on your business scenarios. The actions available are as follows:
Block: Block the request, return a block page, and log the attack.
Observe: Allow the request, and log the attack.
Allow: Allow the request and do not log it as an attack.
Basic Web Protection
Provide protection rules developed by Tencent Cloud over the years, delivering very low false negative and false positive rates, and fast responses to 0day threats.
1. Log in to the EdgeOne console and choose Security > Web Protection in the left sidebar. 2. Select a site. Turn on/off the switch in the basic web protection module. If it’s off, all traffic is allowed. Configurations are not affected by the toggle status. 3. To configure and modify the module, click Set.
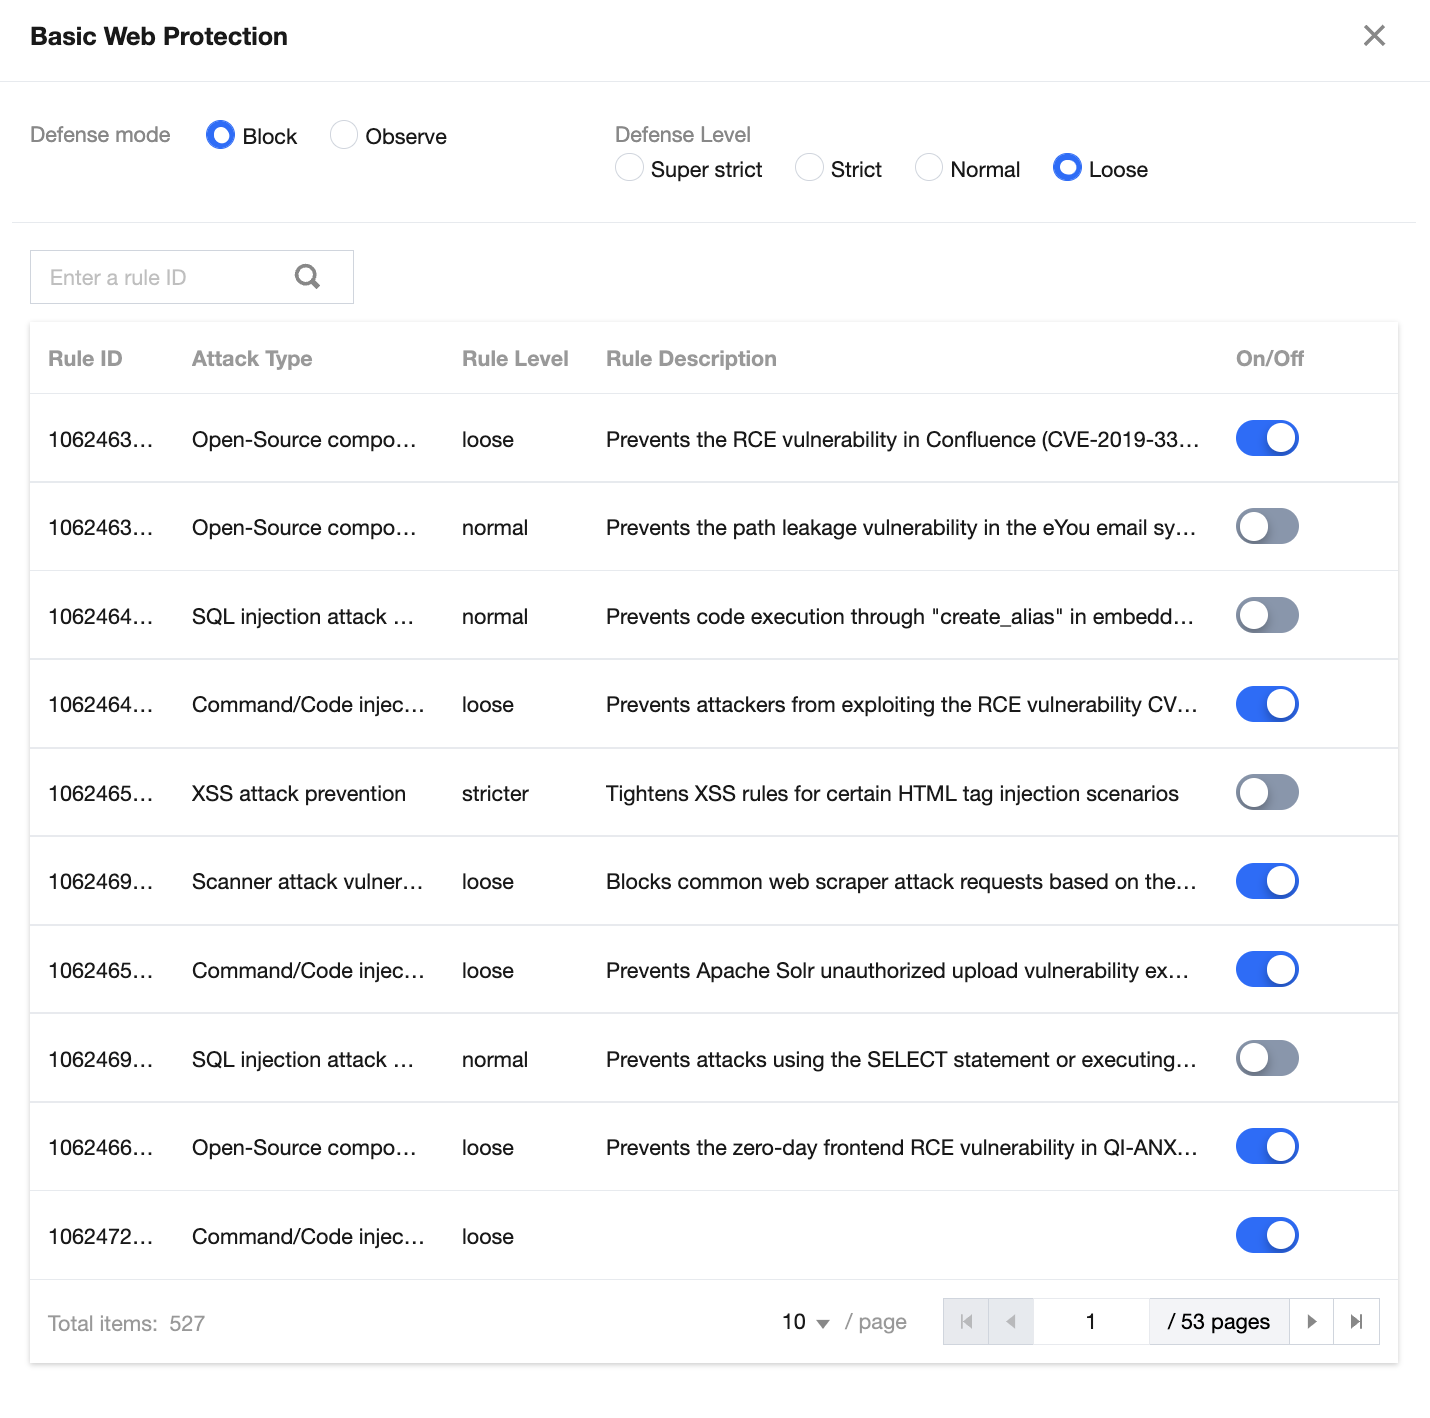
4. Manage the defense mode, defense level, and rule list as needed.
Parameter description:
Mode: Select Block or Observe.
Block(Default): Block and log the attack.
Observe: Allow the traffic and keep a log. It’s usually used to check whether there are false positives during policy evaluation. To protect your sites, switch it to Block after the evaluation.
Level: Options include Super strict, Strict, Moderate, and Loose. A stricter mode blocks all suspicious requests. The false positive rate is relatively higher. In a less strict mode, only highly suspicious attacks are blocked. This reduces the false positive rate, but also lowers the security level.
A rule list contains the following configuration items:
Rule ID: The unique identifier of a rule, which is used to track attack logs.
Attack type: Type of the attack.
Rule level: The defense level of a rule. You can batch enable/disable rules with the same defense level.
Rule description: Details of a rule
Toggle: Enable/disable a rule.
Custom Rule
You can create different custom rules according to you business requirement.
Adding a rule
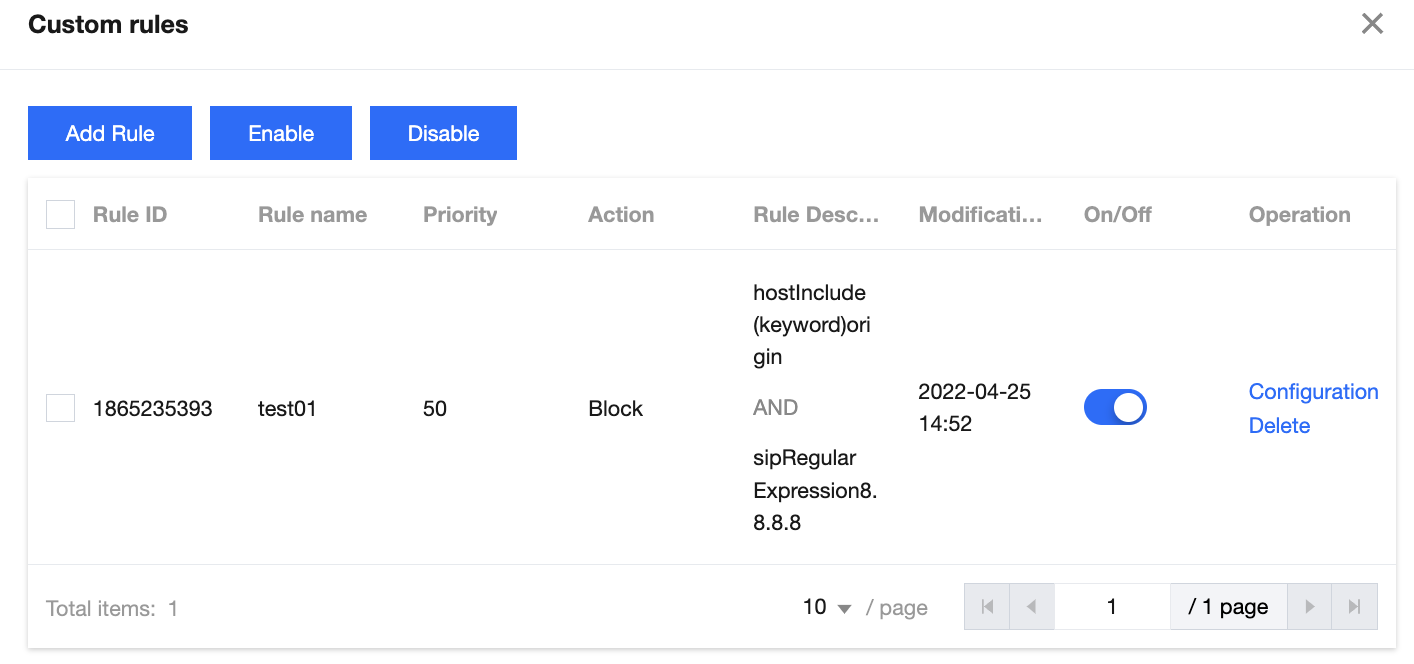
1. On the web protection page, select a site. Click Set in the custom rule module.
2. On the custom rule page, click Add rule. Set the rule name, matching method, action, and priority.
Parameter description:
Rule name: A unique rule name ([a-z], [A-Z], [0-9] and [_]). If it’s left empty, a random name is generated automatically.
Matching method: It consists of configuration items such as the protocol field (http/https) and the logical operator (include/equal to). Each rule can have up to 5 conditions, which are combined with "AND". Each field can only be configured in onr rule.
Action: Options include Allow, Block, and Observe.
Allow: Allow requests that hit the rule.
Block: Block requests that hit the rule, log them as attacks and return a block page.
Observe: Allow requests that hit the rule, and log them as attacks.
Priority: Execution order of a rule. Custom rules with higher priority (a larger priority value) take precedence over those with lower priority (a smaller priority value). For custom rules with the same priority, the later-added one will be executed first.
3. Click OK.
Enabling a rule
1. On the web protection page, select a site. Click Set in the custom rule module.
2. On the custom rule page, you can enable one or more rules.
To enable a single rule, toggle it on.
To enable multiple rules, select rules to enable, and click Enable at the top of the list.
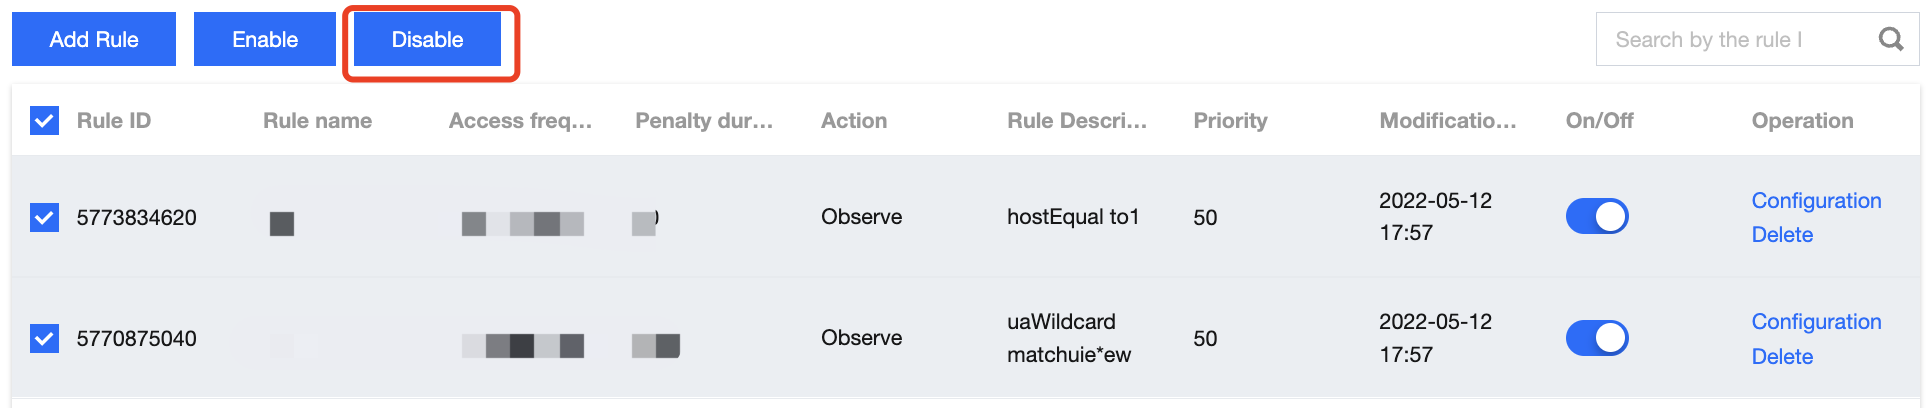
Disabling a rule
1. On the web protection page, select a site. Click Set in the custom rule module.
2. On the custom rule page, you can disable one or more rules.
To disable a single rule, toggle it off.
To disable multiple rules, select rules to enable, and click Disable at the top of the list.
Deleting a rule
1. On the web protection page, select a site. Click Set in the custom rule module.
2. On the custom rule page, select a rule you want to delete, and click Delete on the right.
3. In the pop-up window, click Delete.
Rate Limiting
This feature enables you to limit the frequency of a source IP accessing third-level domain names. If the access frequency is exceeded, the source IP will be blocked for a period of time.
Adding a rule
1. On the web protection page, select a site. Click Set in the rate limiting module.
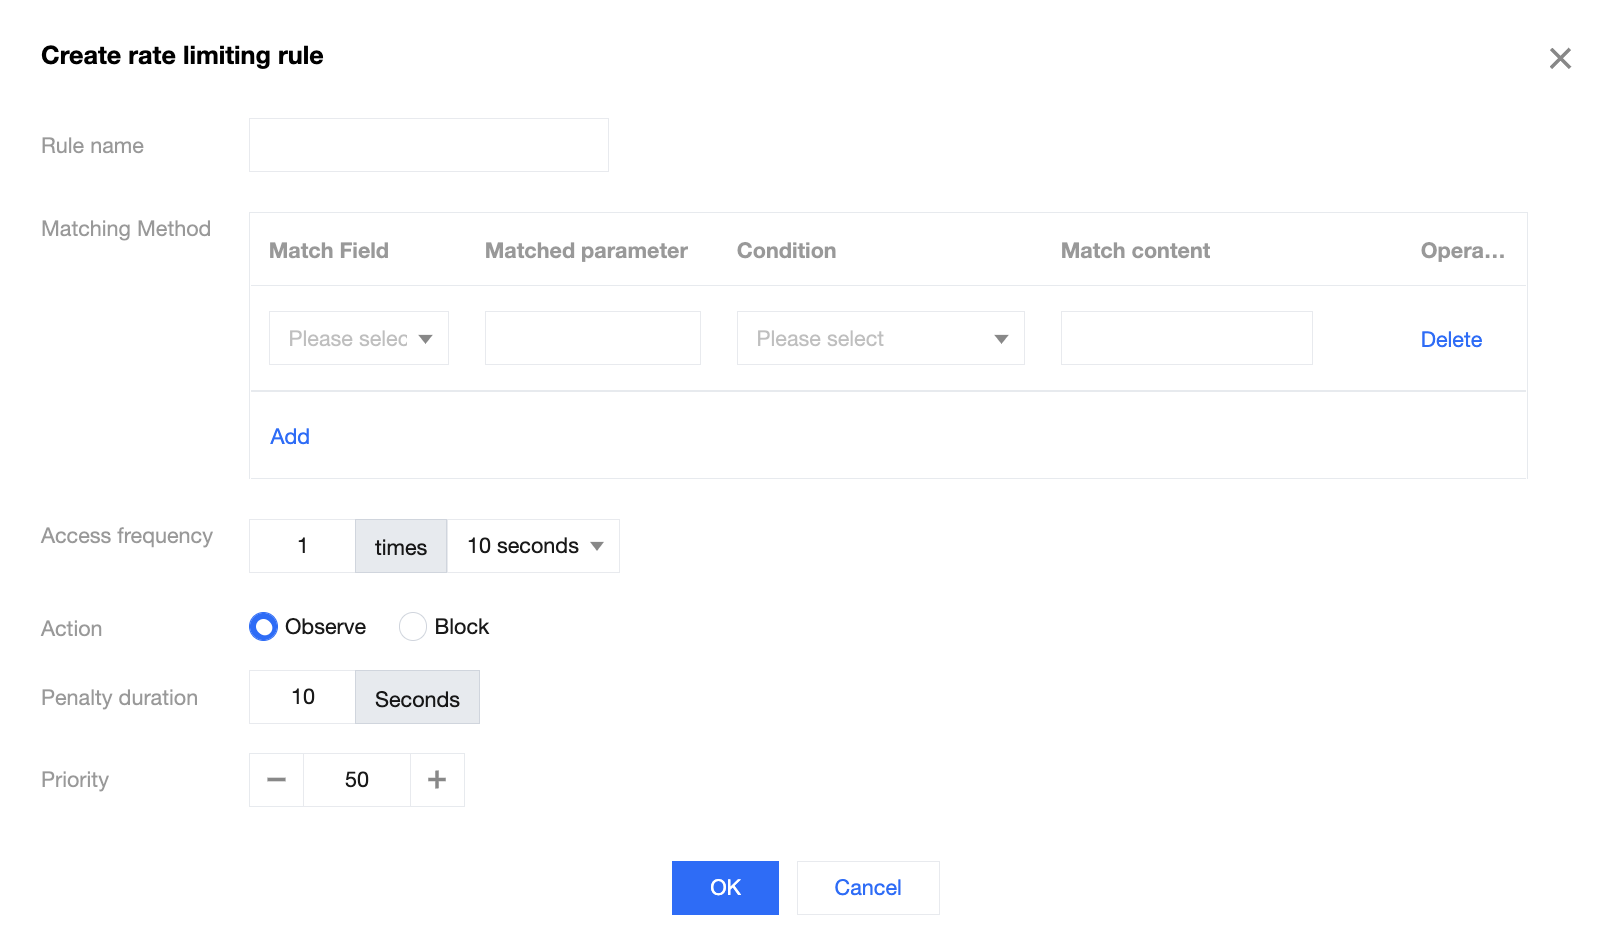
2. On the rate limiting page, click Add rule. Set the rule name, matching method, access frequency, action, penalty duration, and priority.
Parameter description:
Rule name: It consists of letters, digits, and underscores. A rule name will be generated automatically if this parameter is left empty. Note that a rule name must be unique.
Matching method: It consists of configuration items such as the protocol field (http/https) and the logical operator (include/equal to). Up to 5 conditions per rule are allowed, and the relation among conditions is "AND". Note that the same field can only be configured once in each rule.
Access frequency: The frequency of a source IP accessing the current third-level domain name.
Action: Options include Block and Observe.
Block: Block requests that hit the rule, log them as attacks and return a block page.
Observe: Allow requests that hit the rule, and log them as attacks.
Penalty duration: The validity of the action.
Priority: Execution order of a rule. Custom rules with higher priority (a larger priority value) take precedence over those with lower priority (a smaller priority value). For custom rules with the same priority, the later-added one will be executed first.
3. Click OK.
Enabling a rule
1. On the web protection page, select a site. Click Set in the rate limiting module.
2. On the rate limiting page, you can enable one or more rules.
To enable a single rule, turn on the switch on the right of the rule. To enable multiple rules, select rules to enable, and click Enable at the top of the list.
Disabling a rule
1. On the web protection page, select a site. Click Set in the rate limiting module.
2. On the rate limiting page, you can disable one or more rules.
To disable a single rule, turn off the switch on the right of the rule. Batch delete: Select rules to delete, and click Disable.
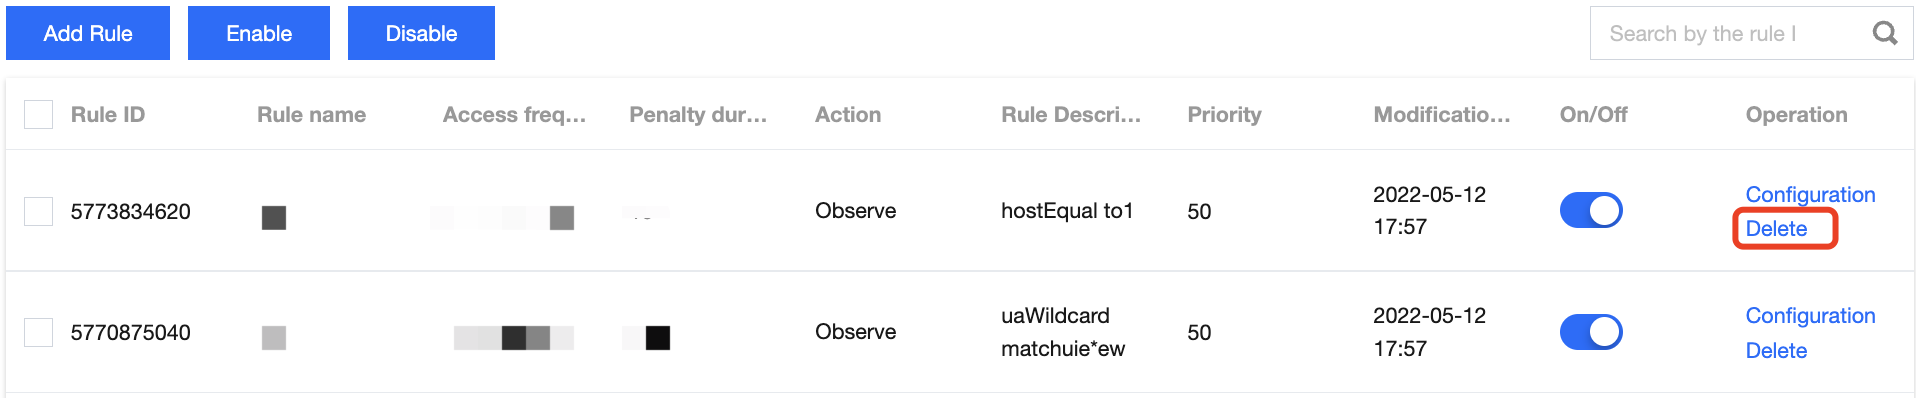
Deleting a rule
1. On the web protection page, select a site. Click Set in the rate limiting module.
2. On the rate limiting page, select a rule to delete, and click Delete on the right.
3. In the pop-up window, click Delete.